Manage applications and environments
After you onboard an API, you can rename the application, manage its environments, adjust environment-level parameter values, and control who can access it. This page covers those application-level tasks.
Update the application name
-
Click the application name dropdown.
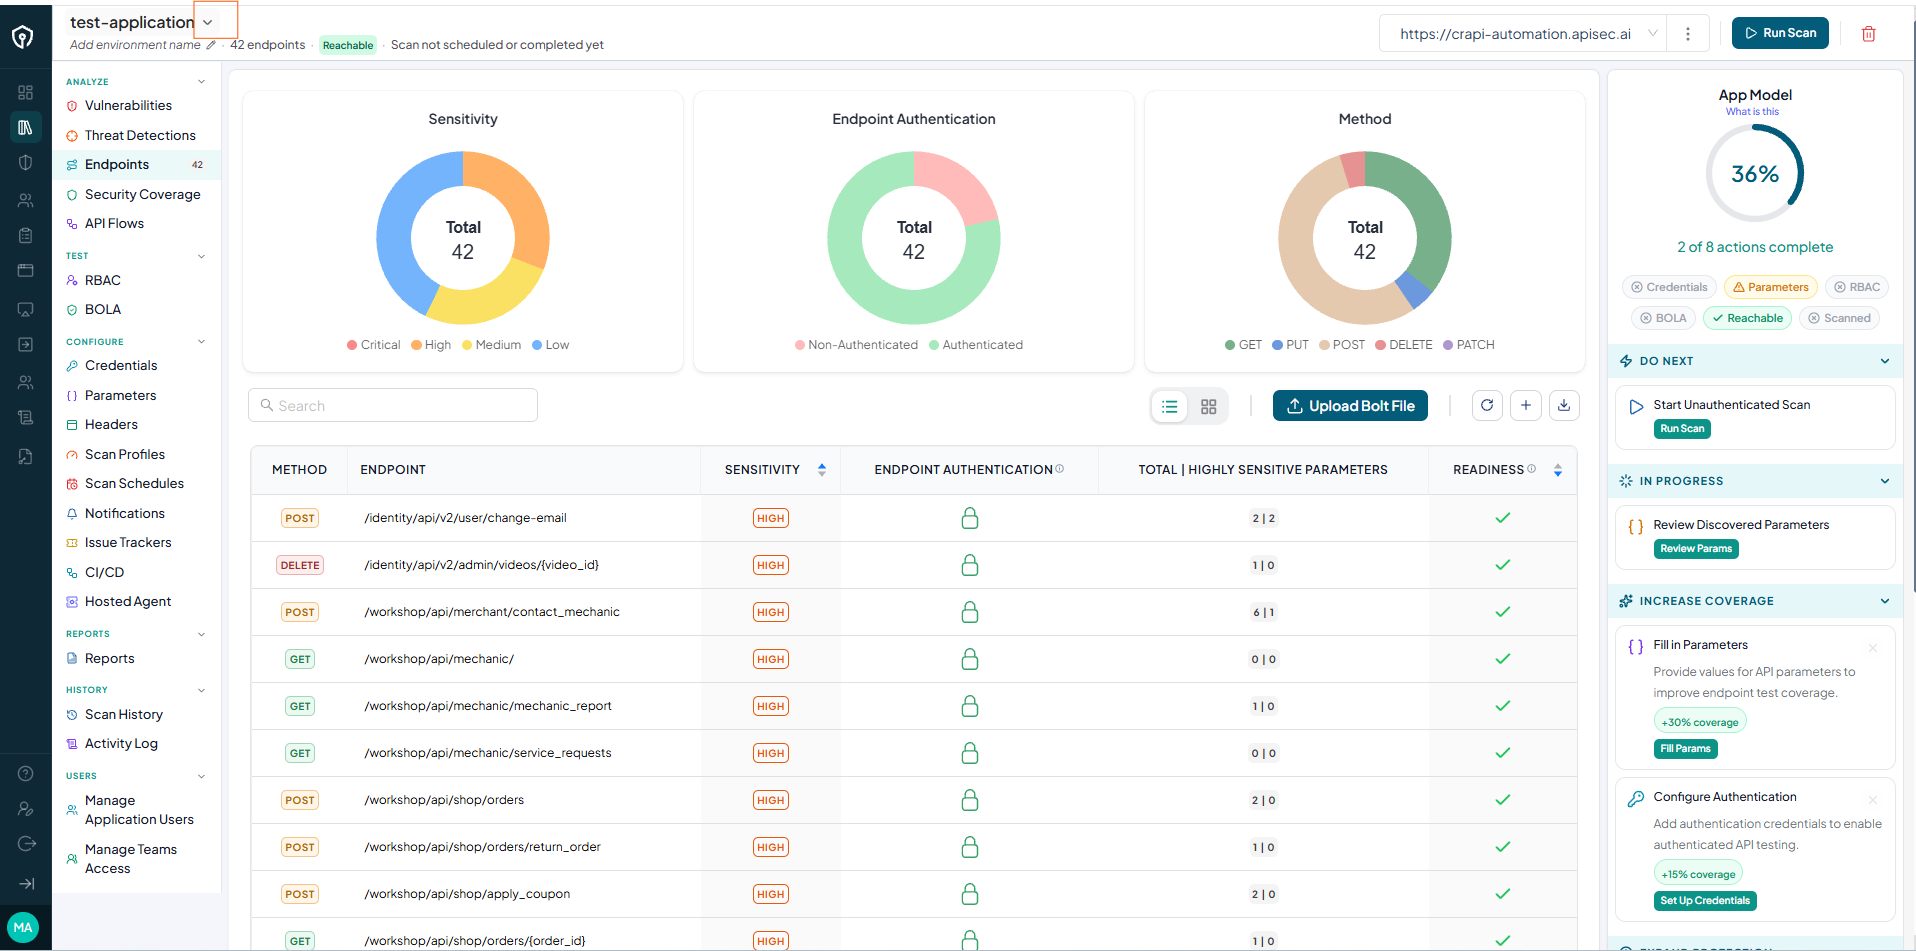
-
Select Edit Application Name.
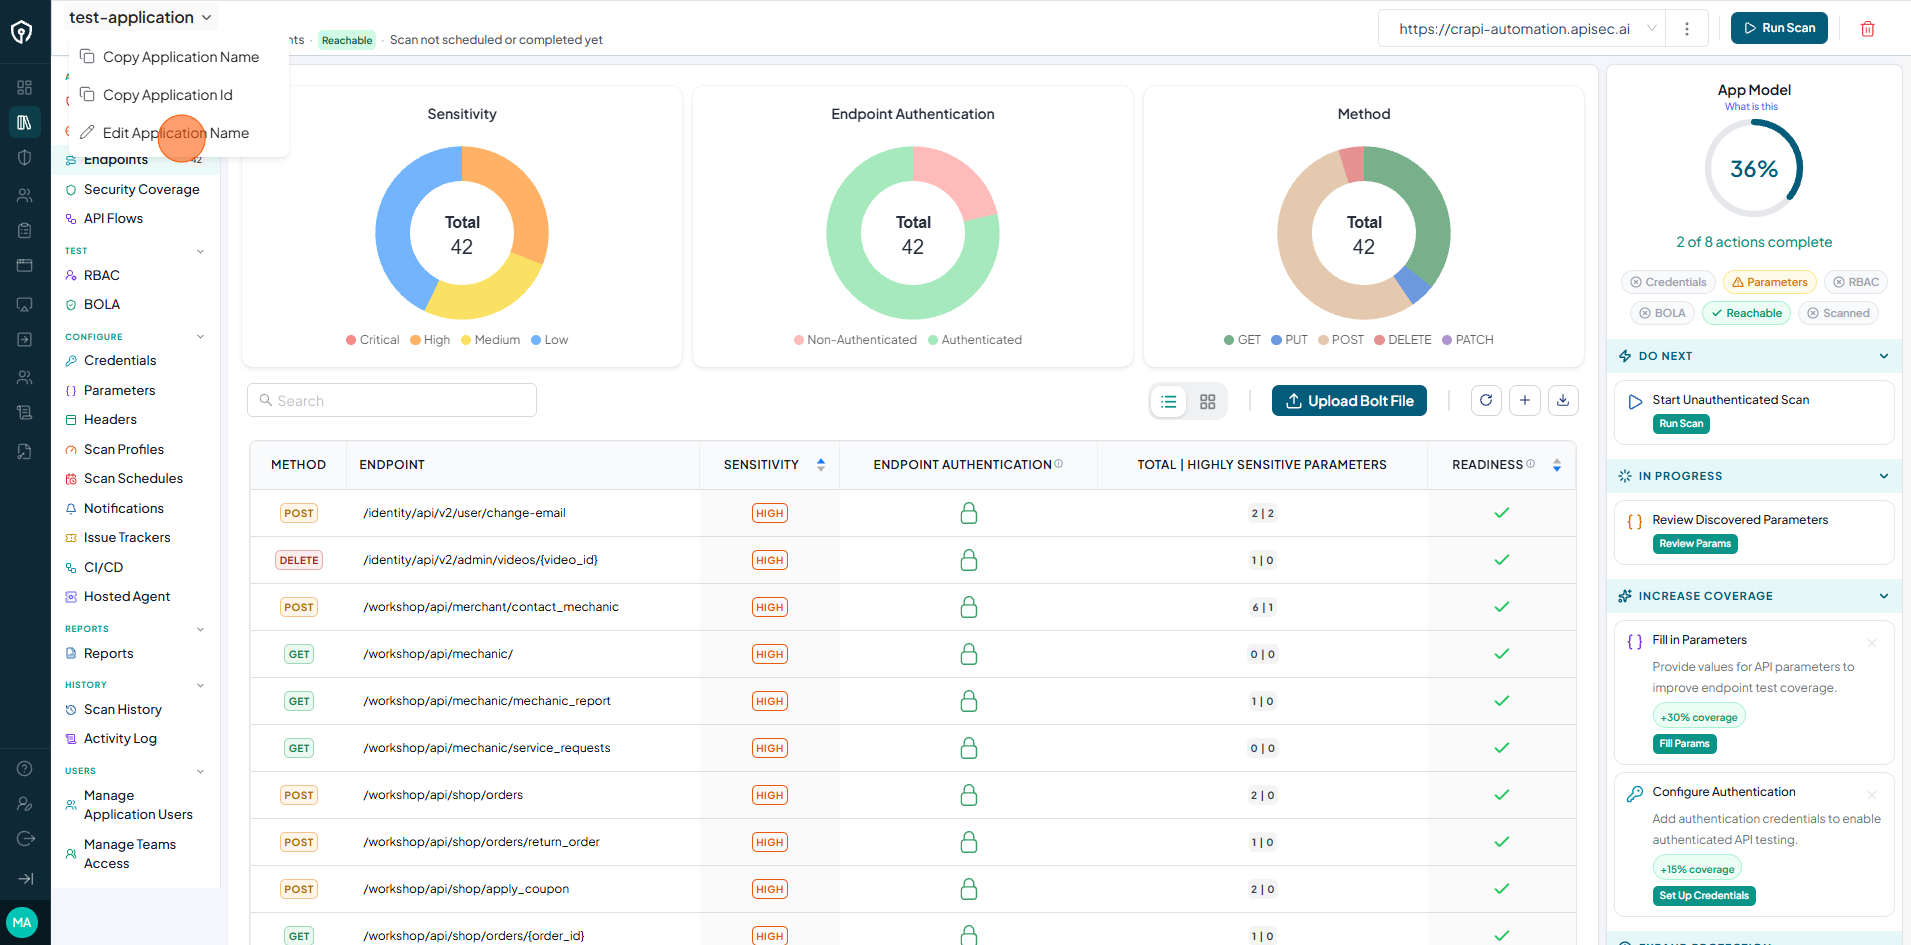
-
Update the application name and click Save.
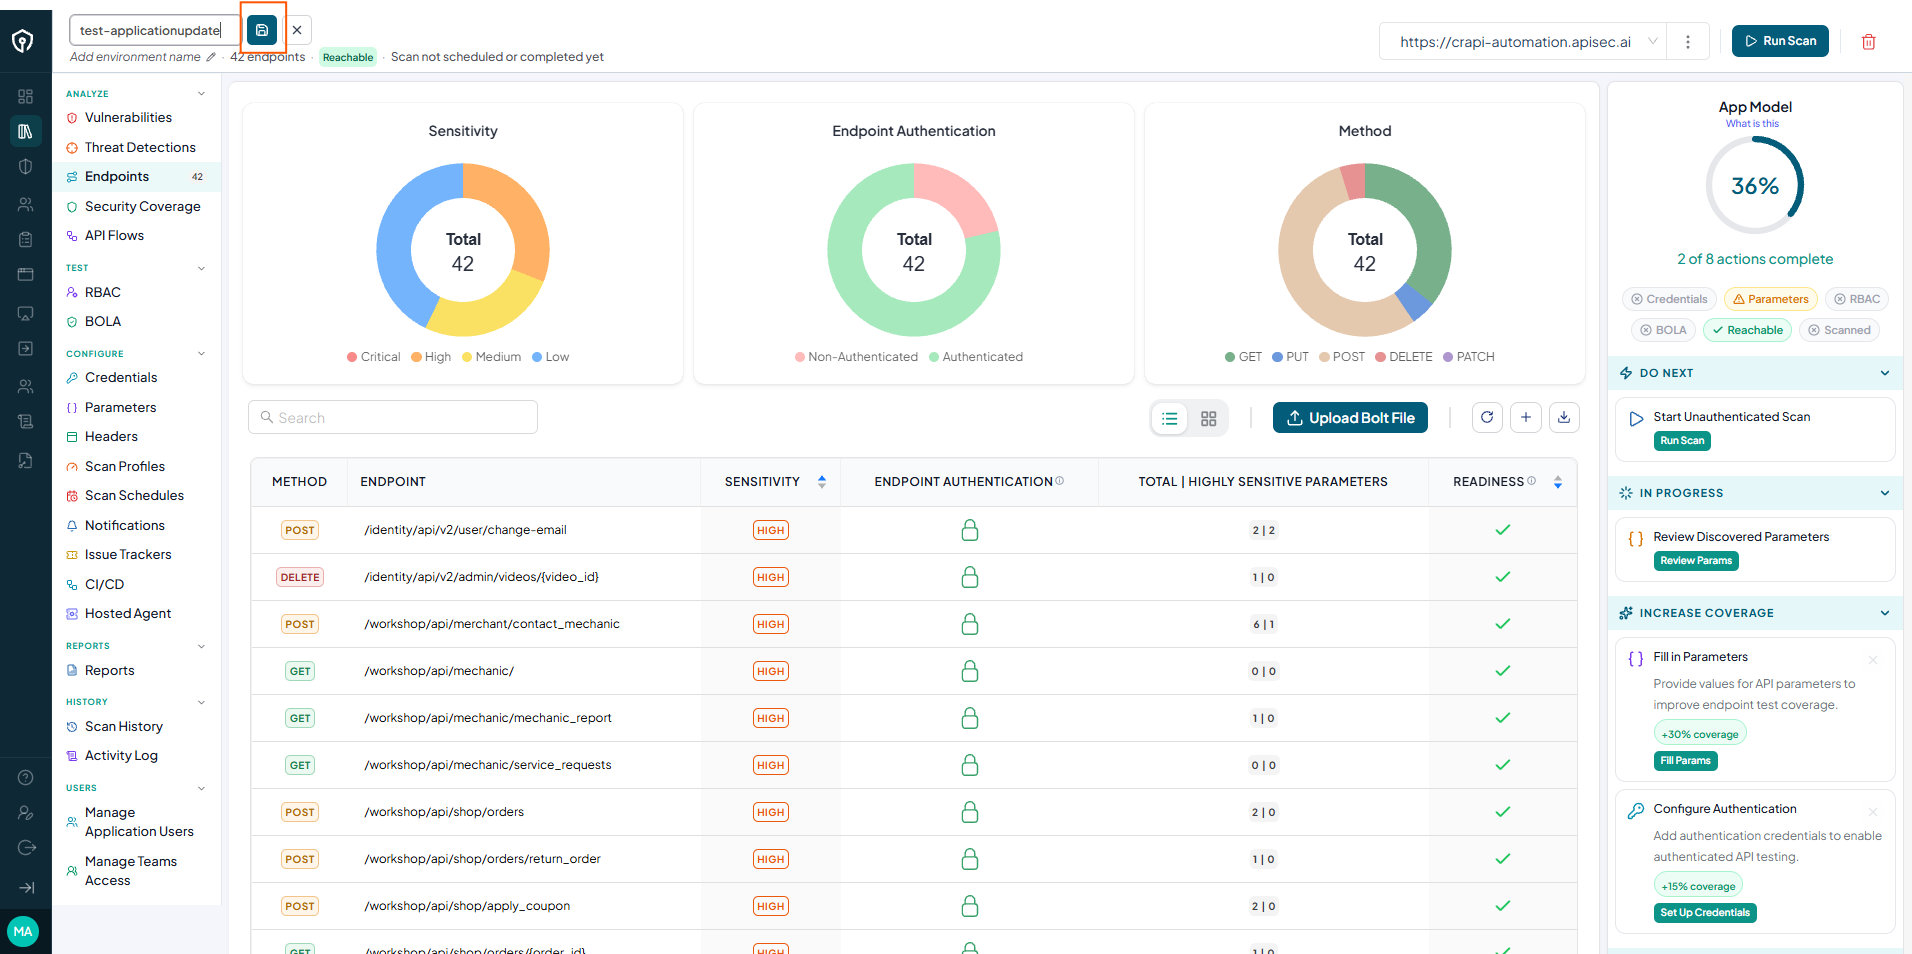
-
Verify that the updated application name is displayed.
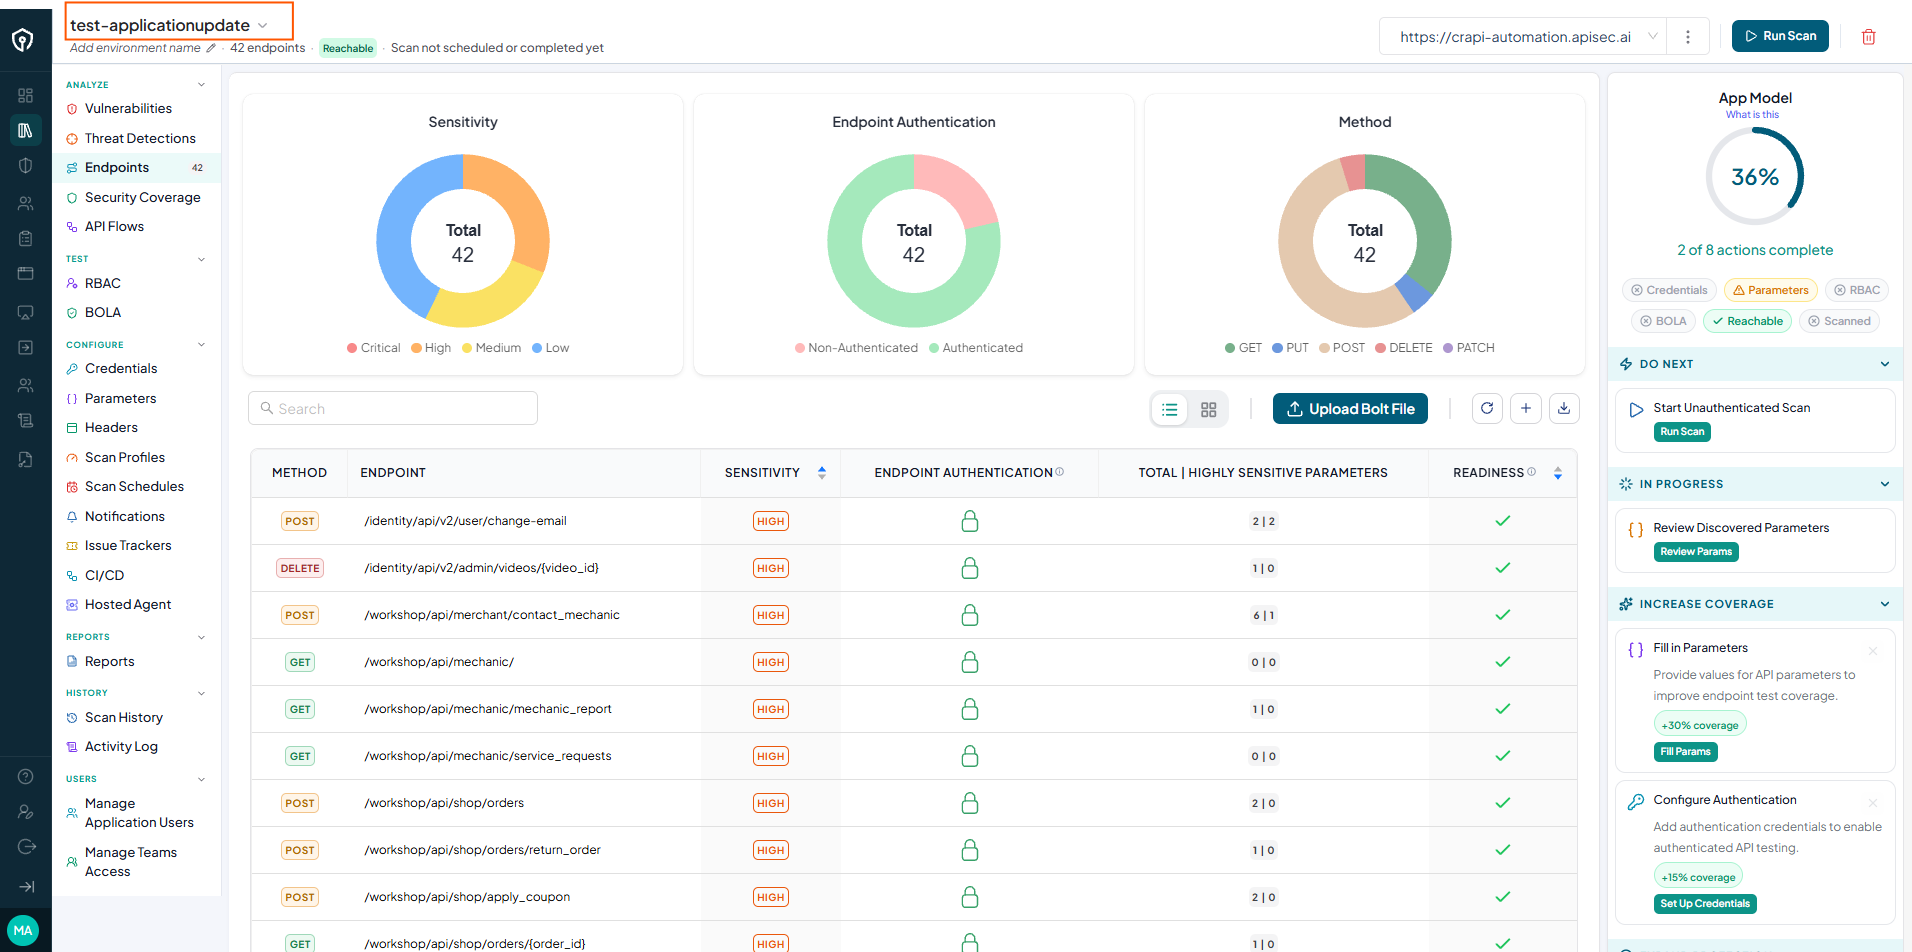
Users with View permissions cannot update a shared application name.
Add or update an environment name
-
Click the pencil icon next to Add environment name to edit and update it.
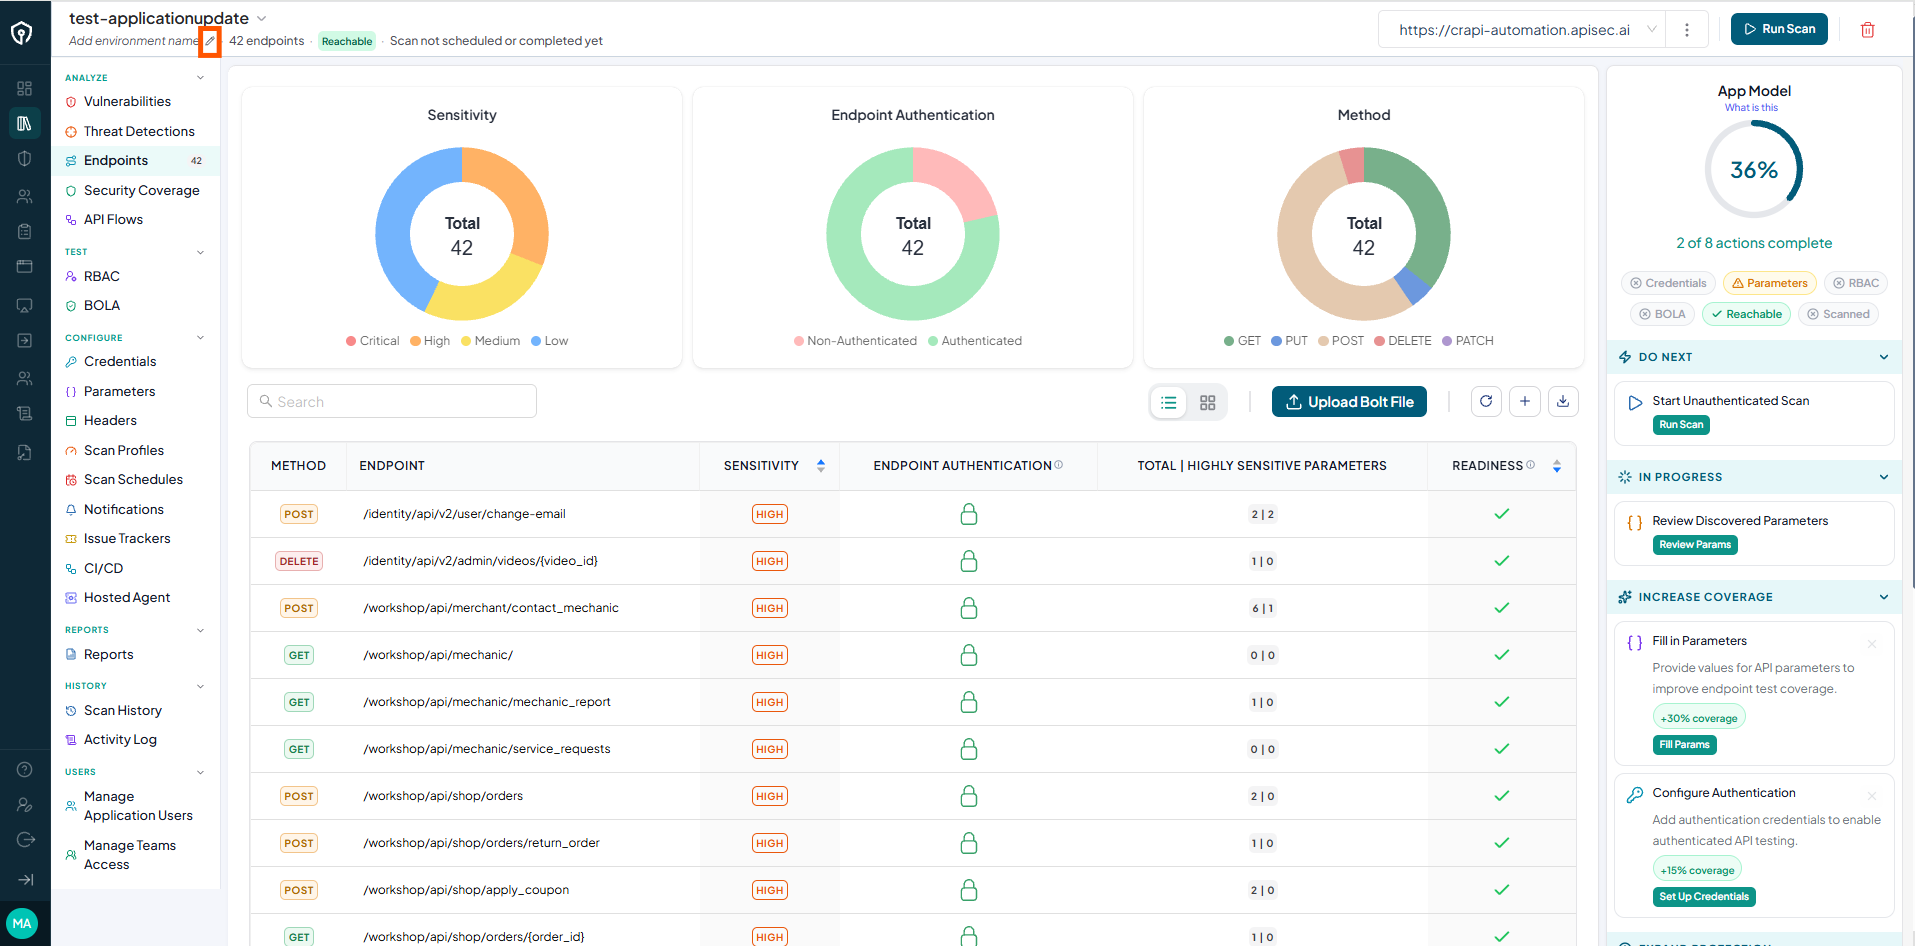
Users with View permissions cannot add or update the environment name in a shared application.
Edit an environment URL
-
Click the options menu (three dots).
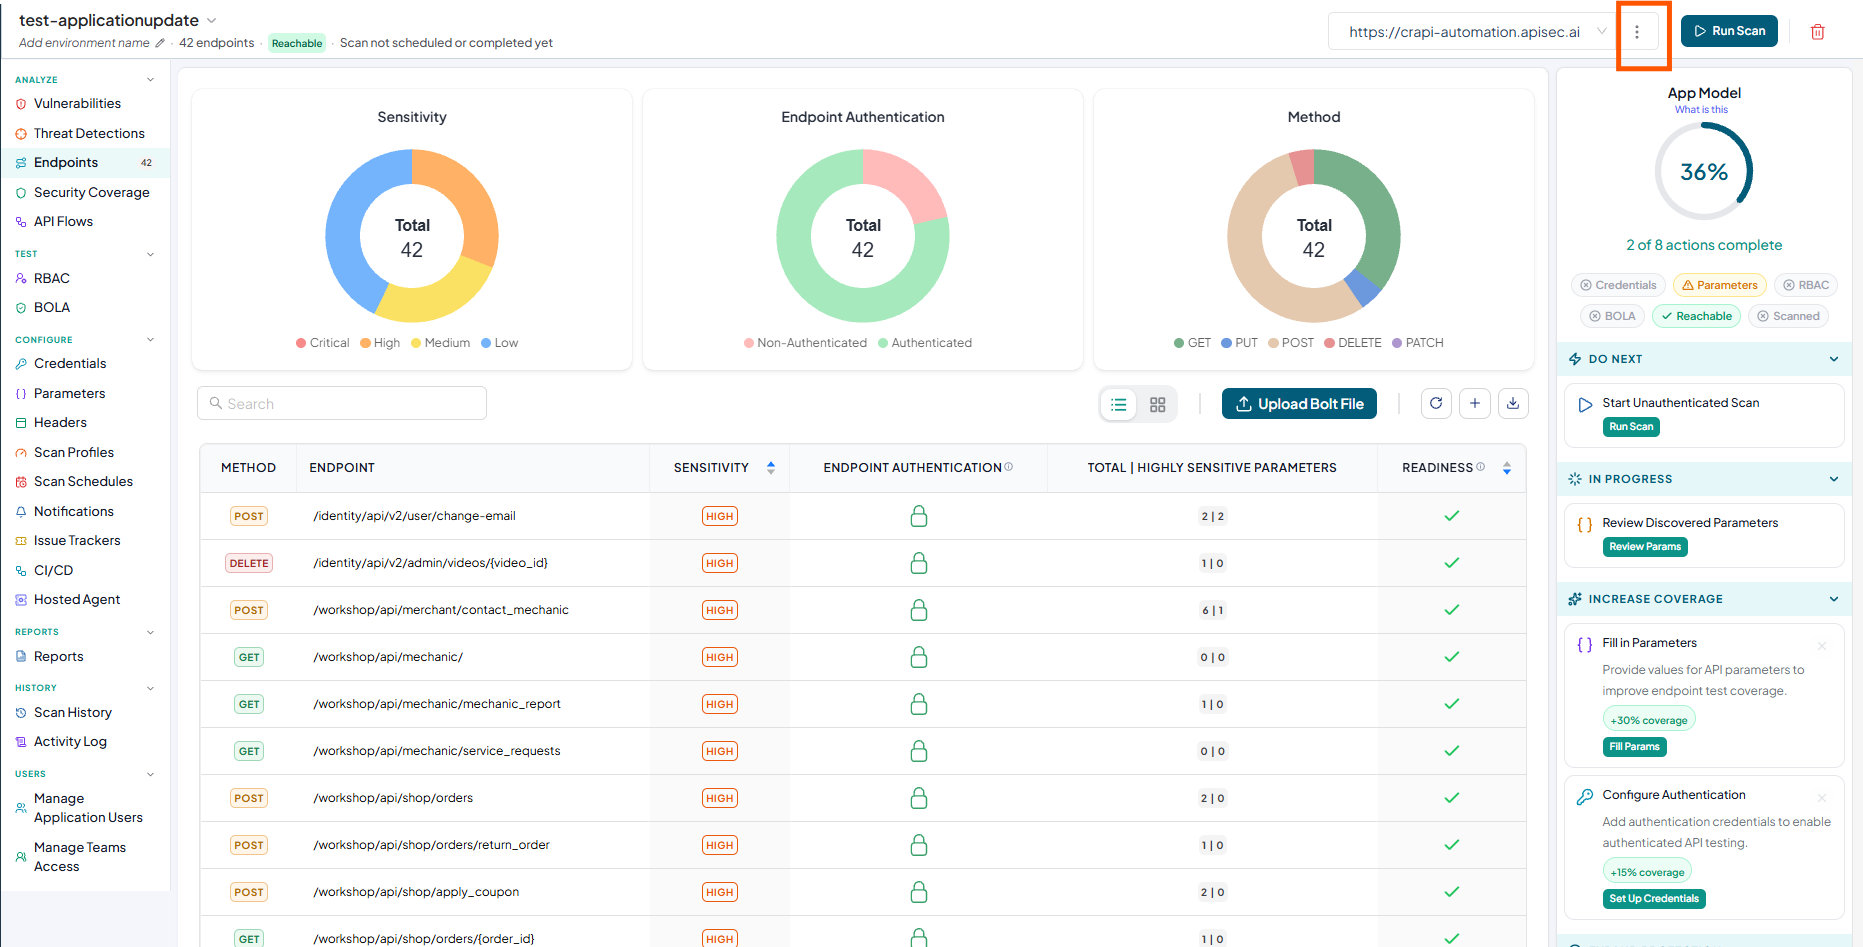
-
Select Edit Environment.
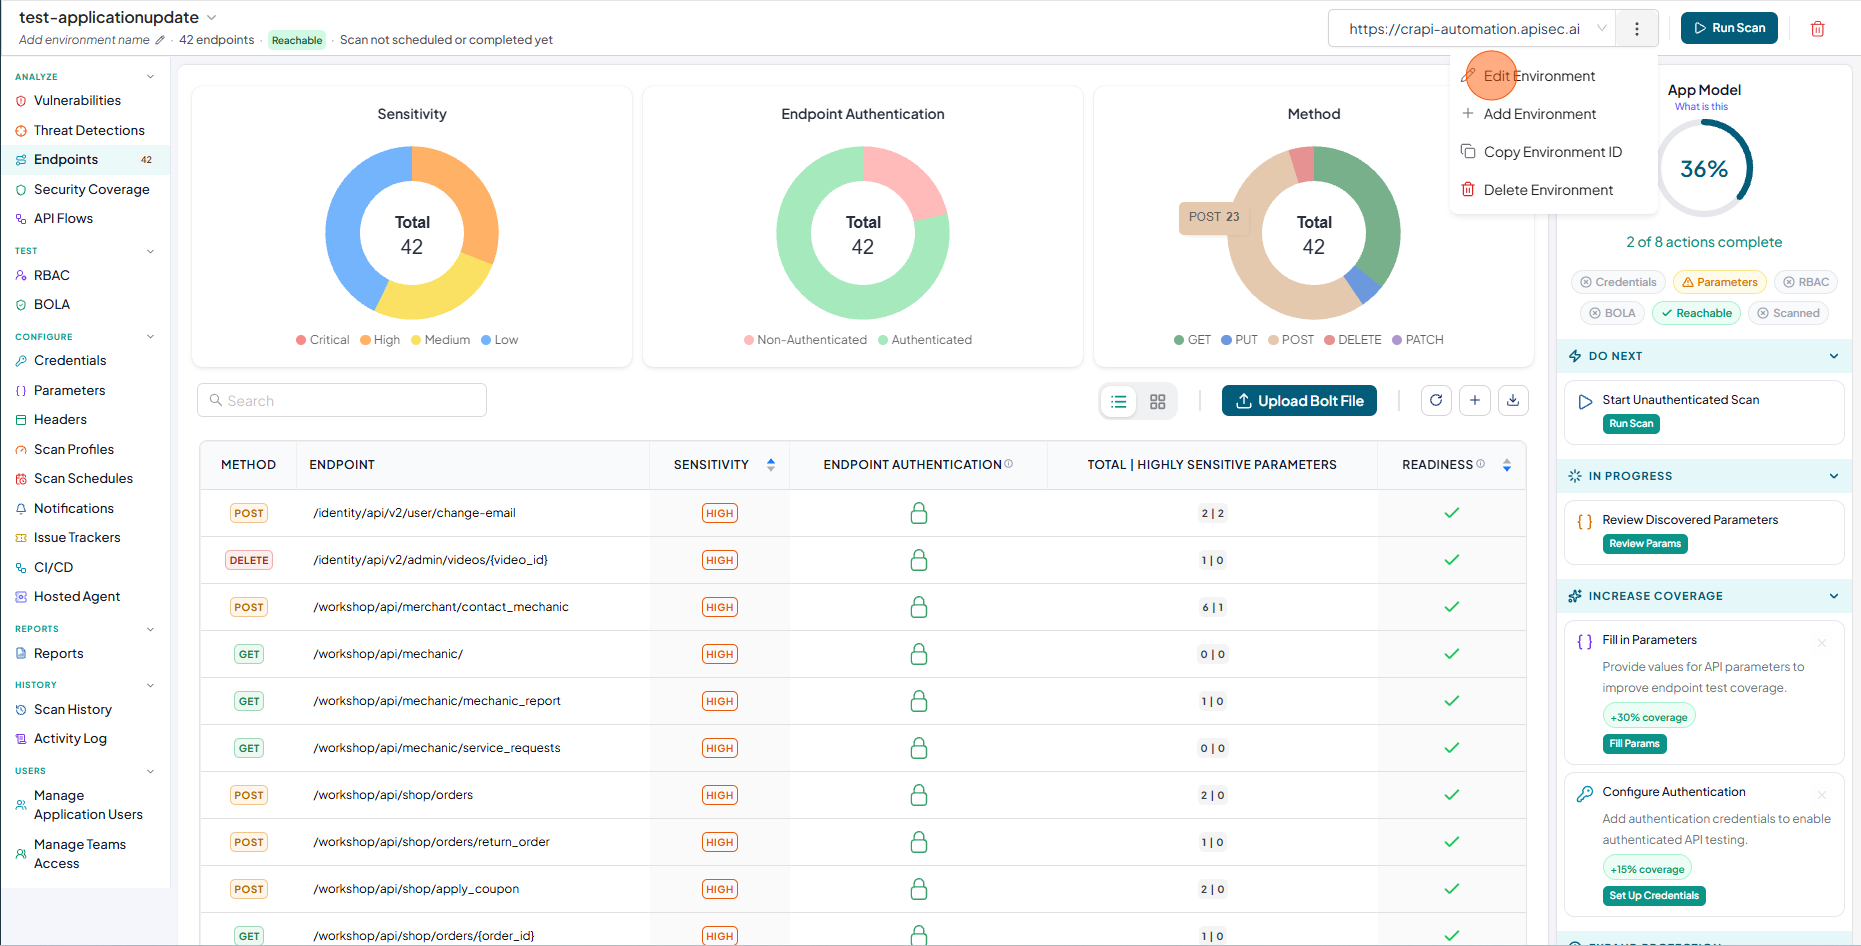
-
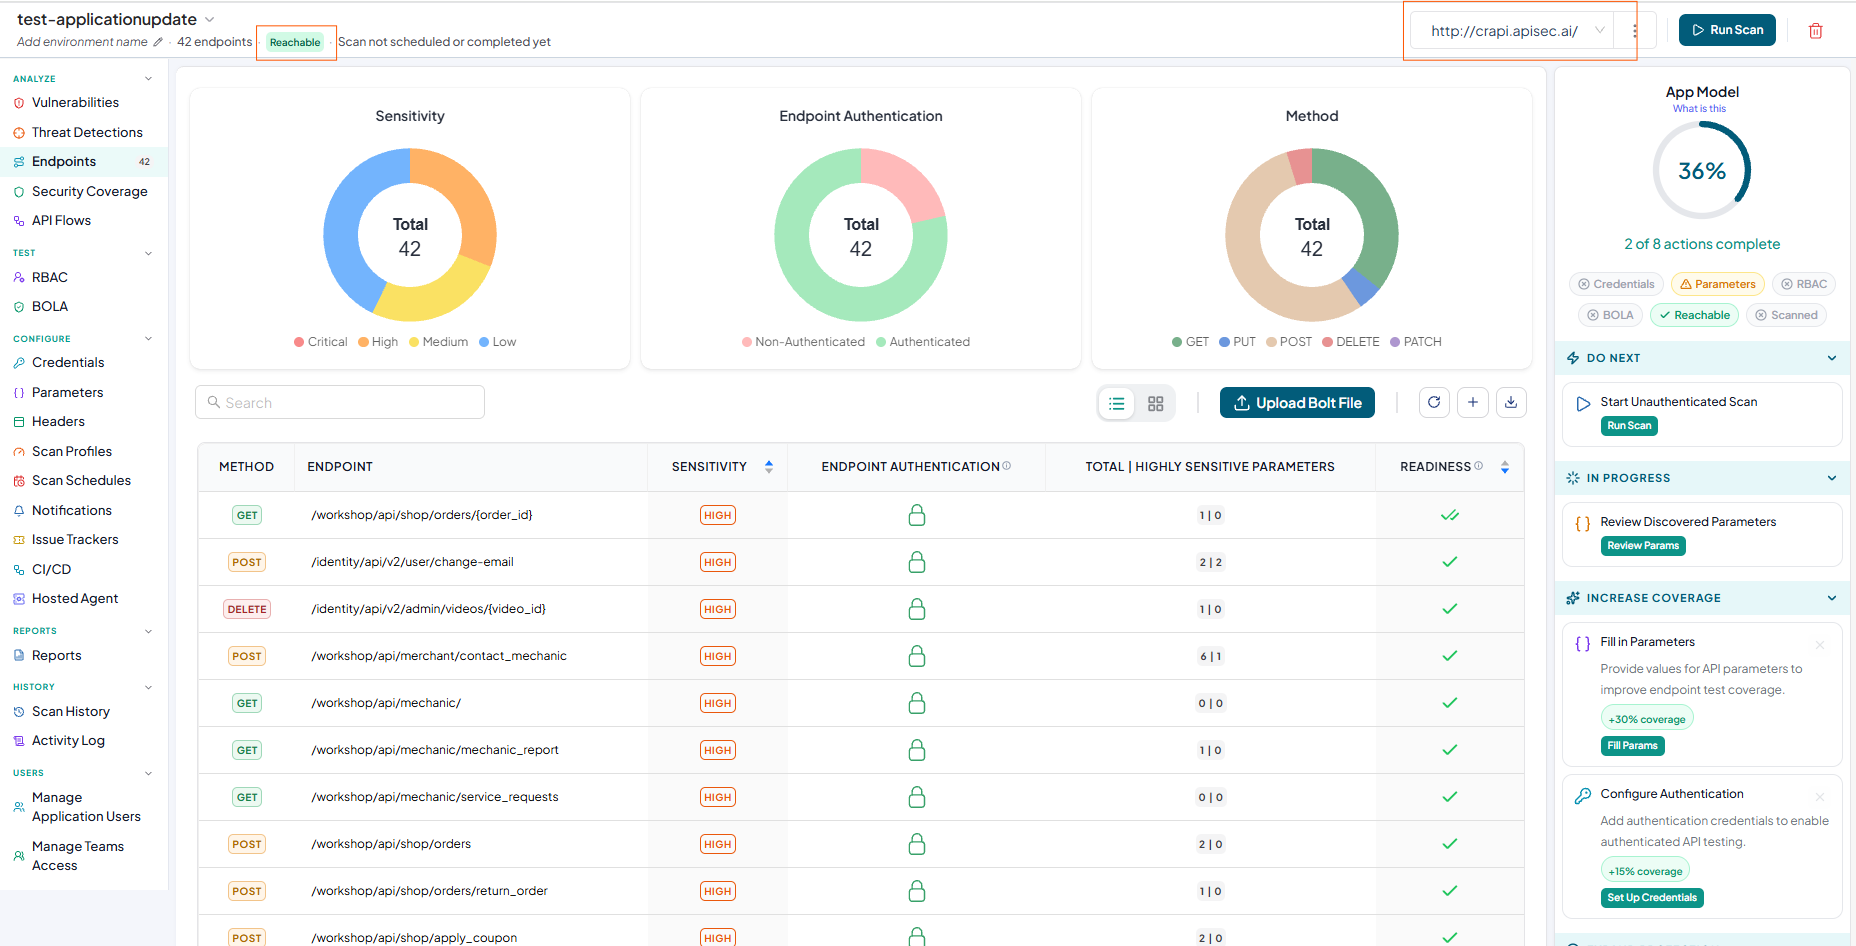
Update the environment URL and click Test Reachability.
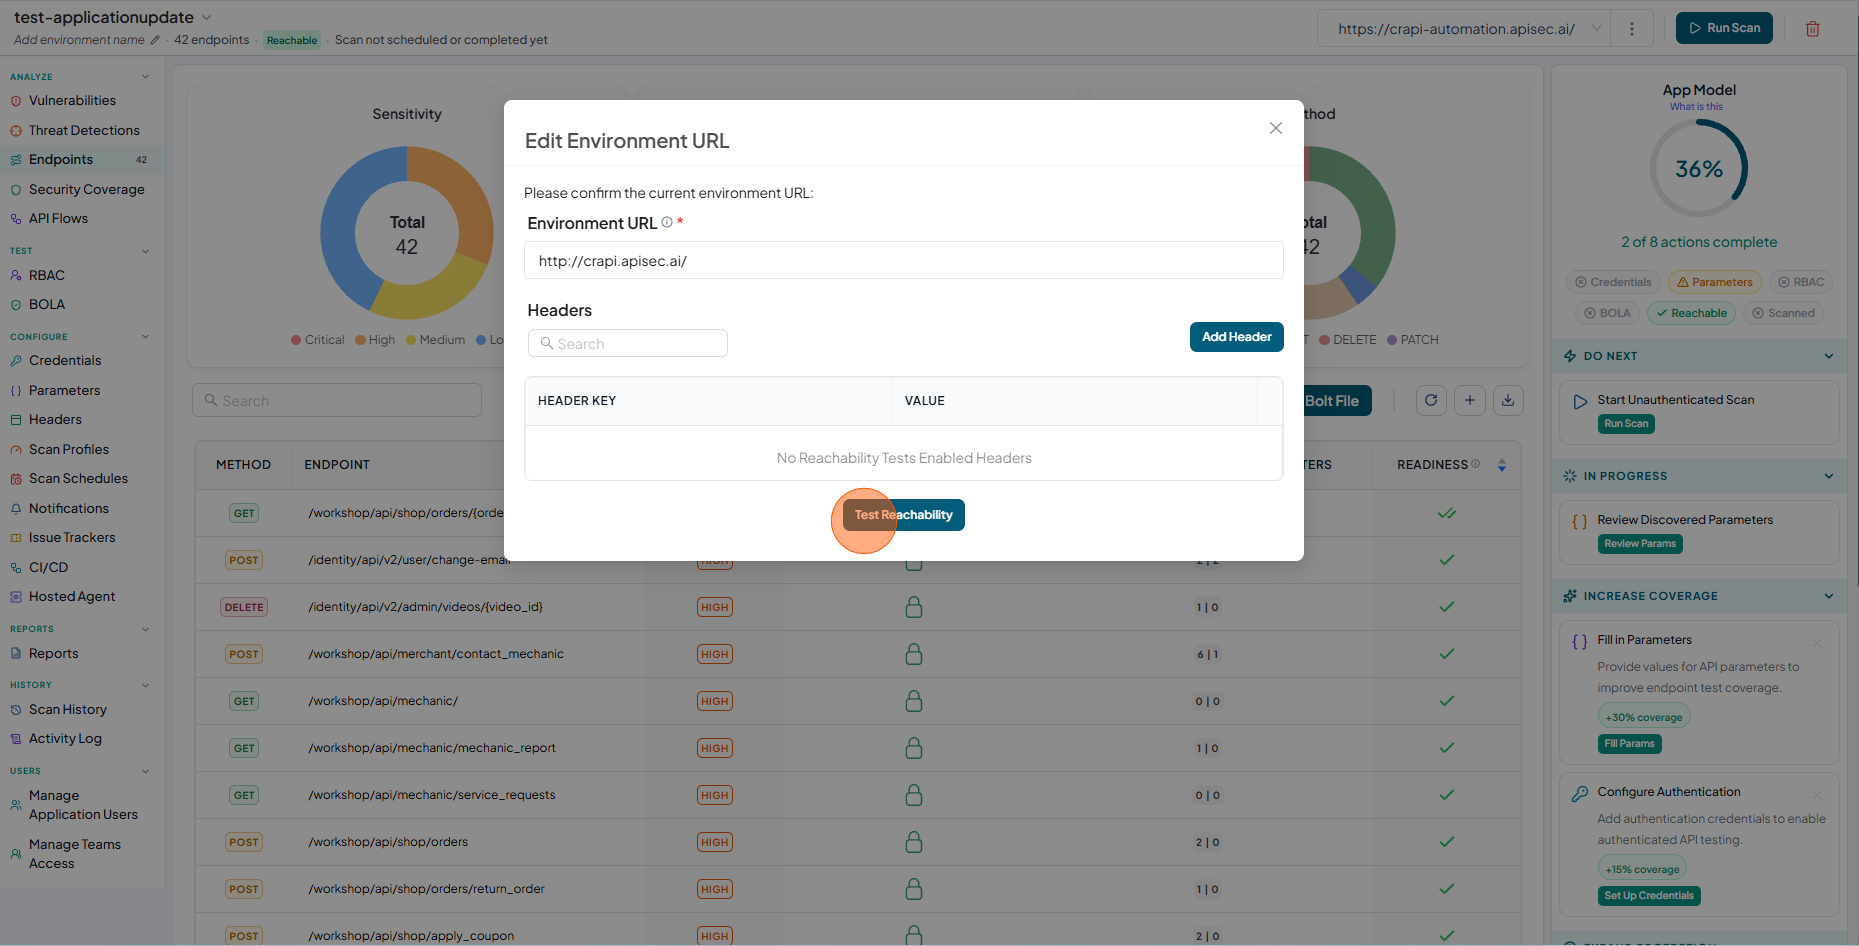
-
After the reachability test, the updated environment URL appears with its reachability status.
Users with View permissions cannot edit an environment URL in a shared application.
Add an environment URL
-
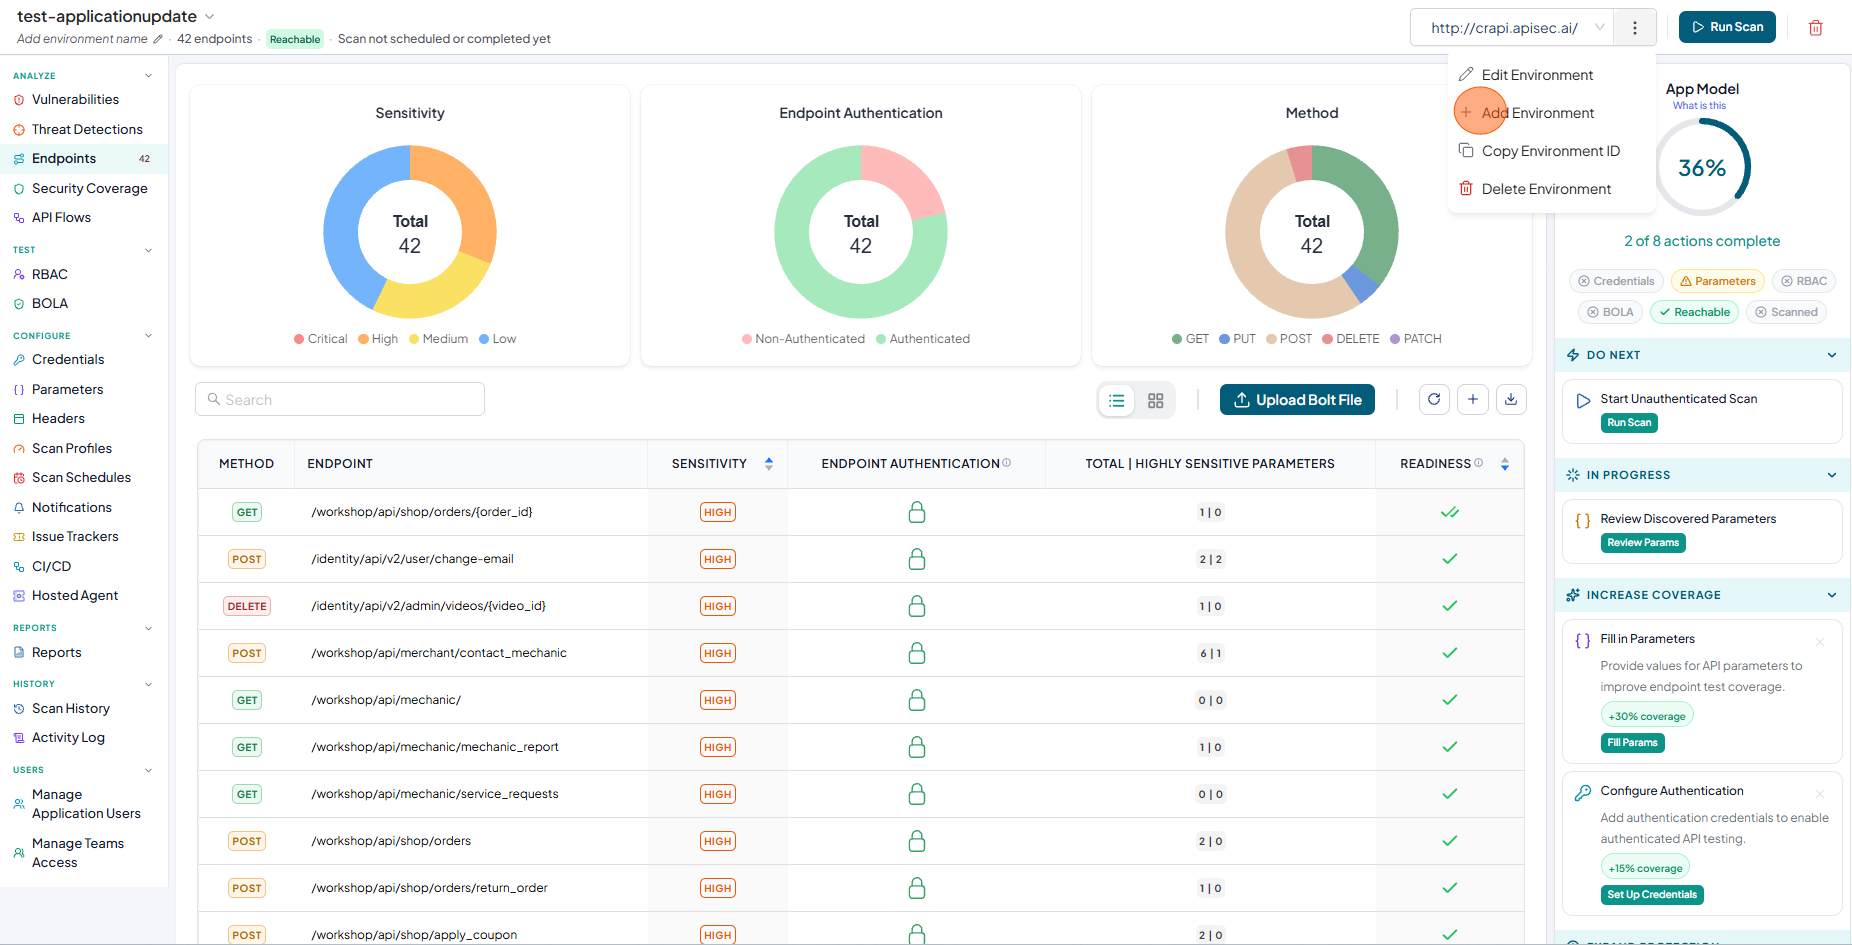
Click the options menu (three dots).
-
Select Add Environment.
-
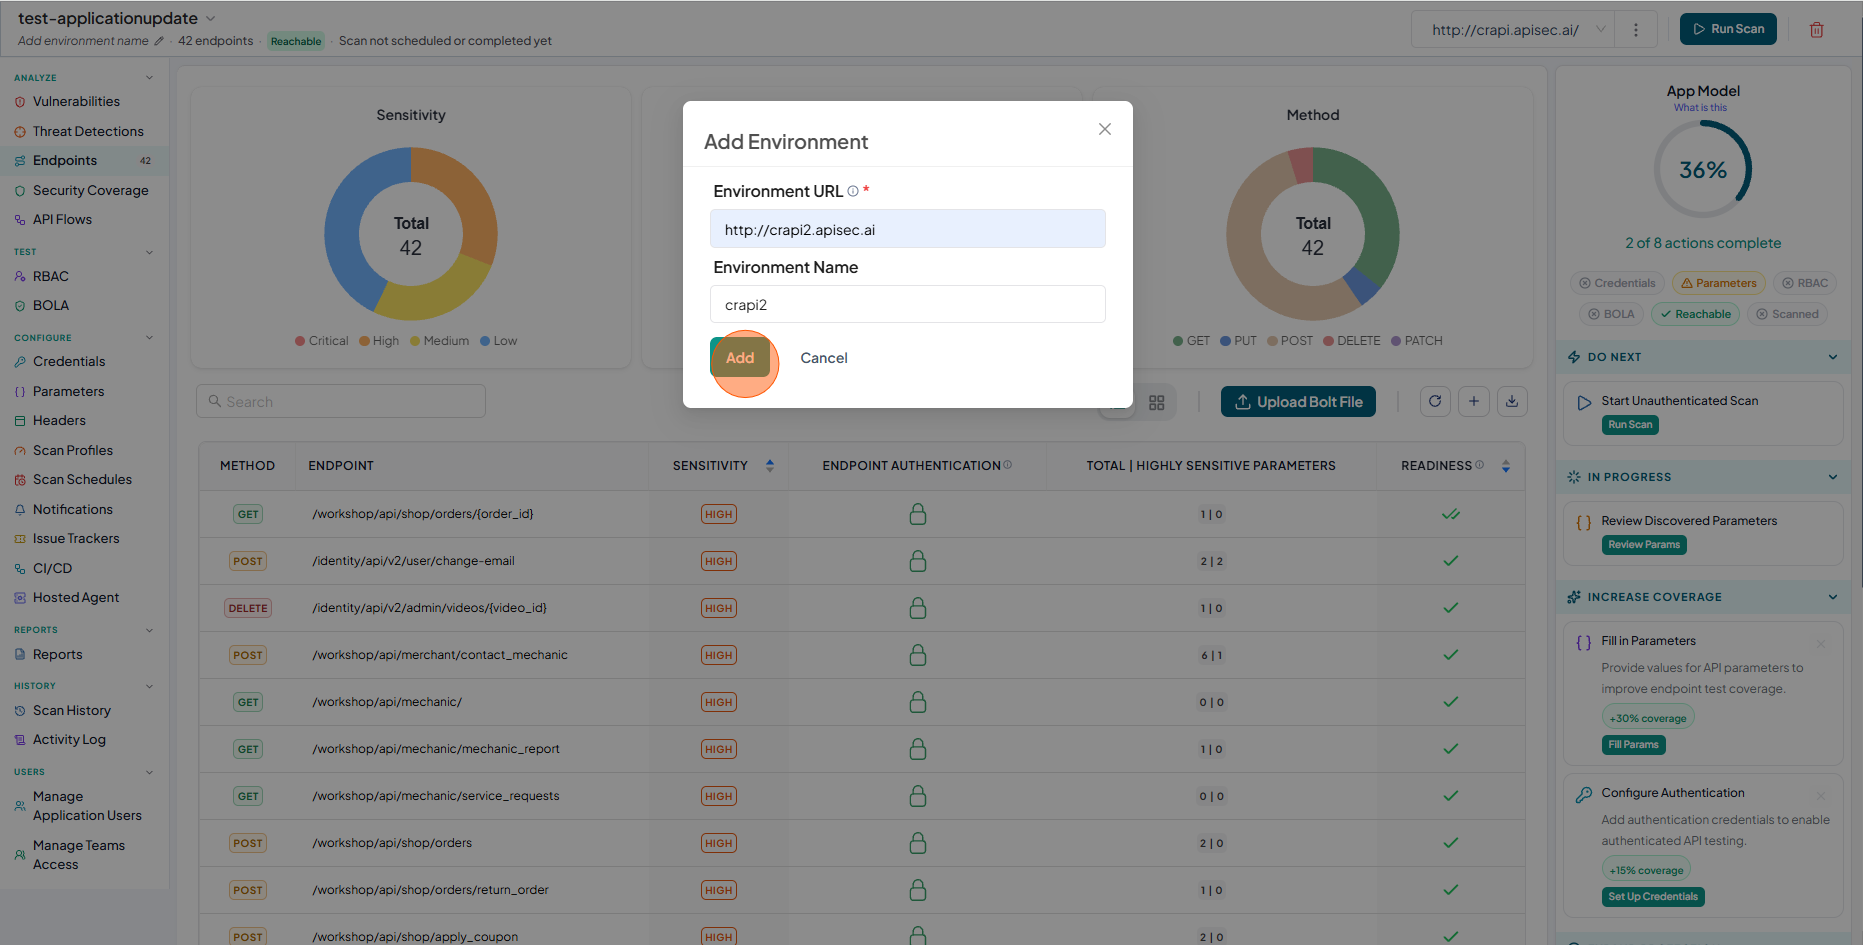
Add the new environment URL and environment name (optional), then click Add.
-
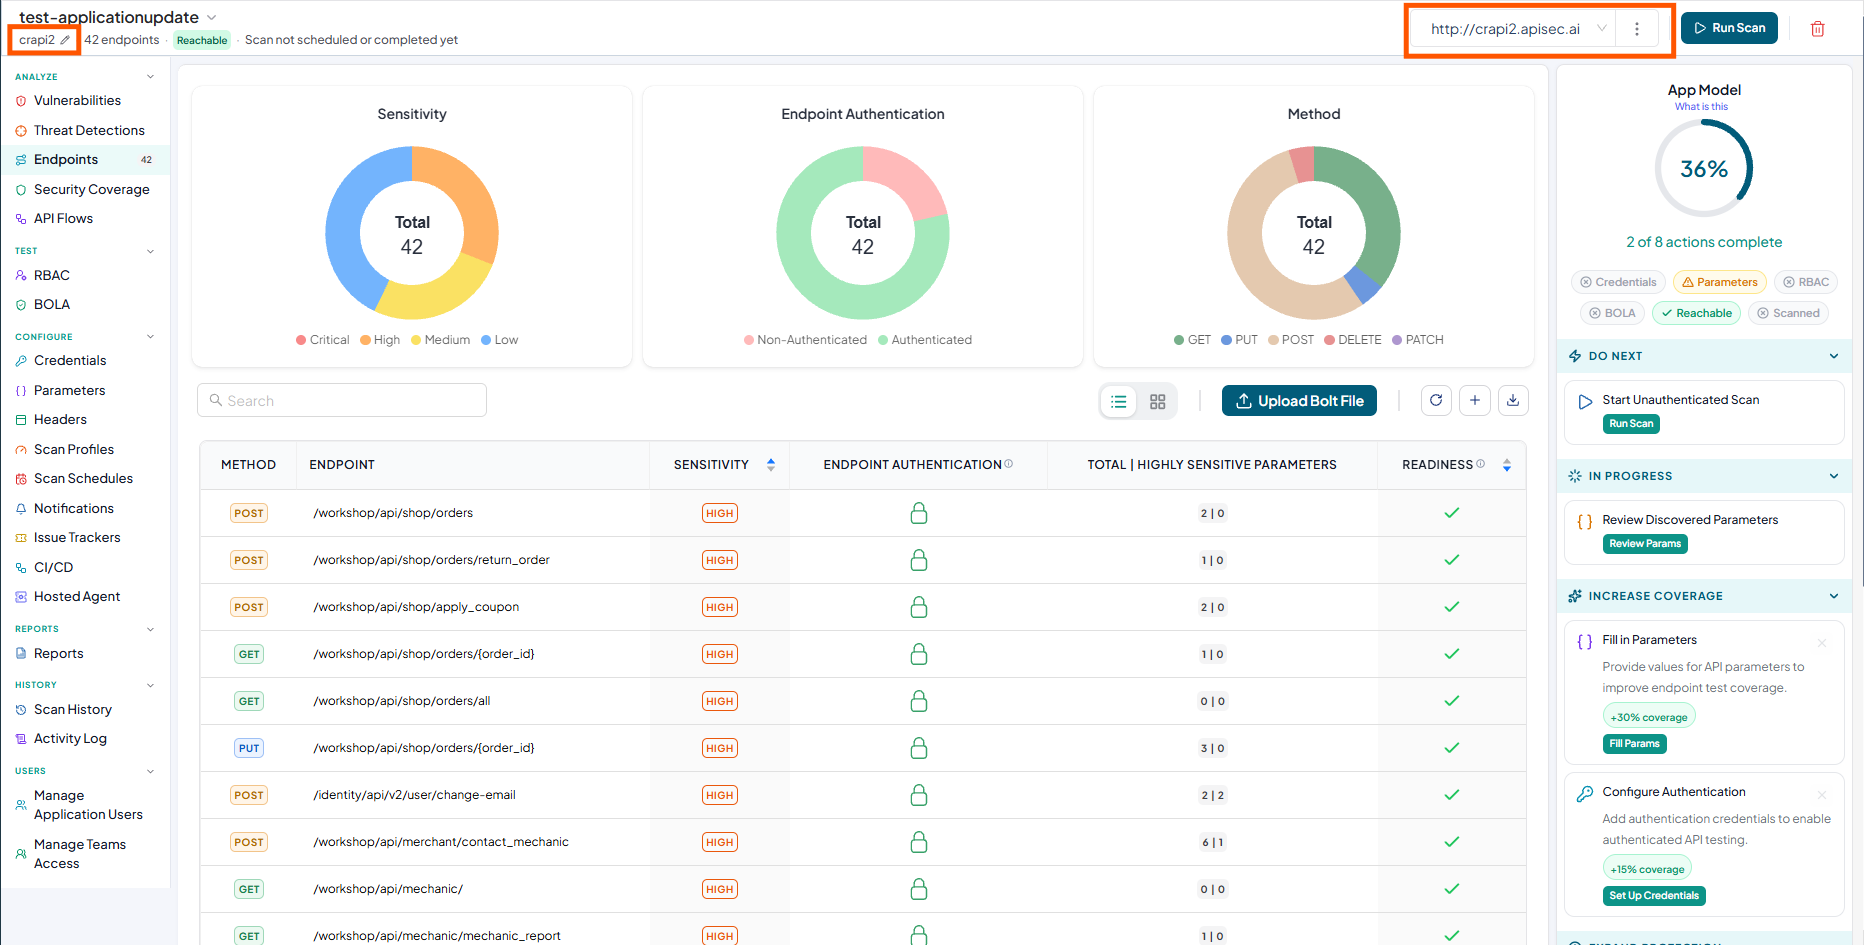
The newly added environment URL appears with its reachability status.
Users with View permissions cannot add an environment URL in a shared application.
Delete an environment
-
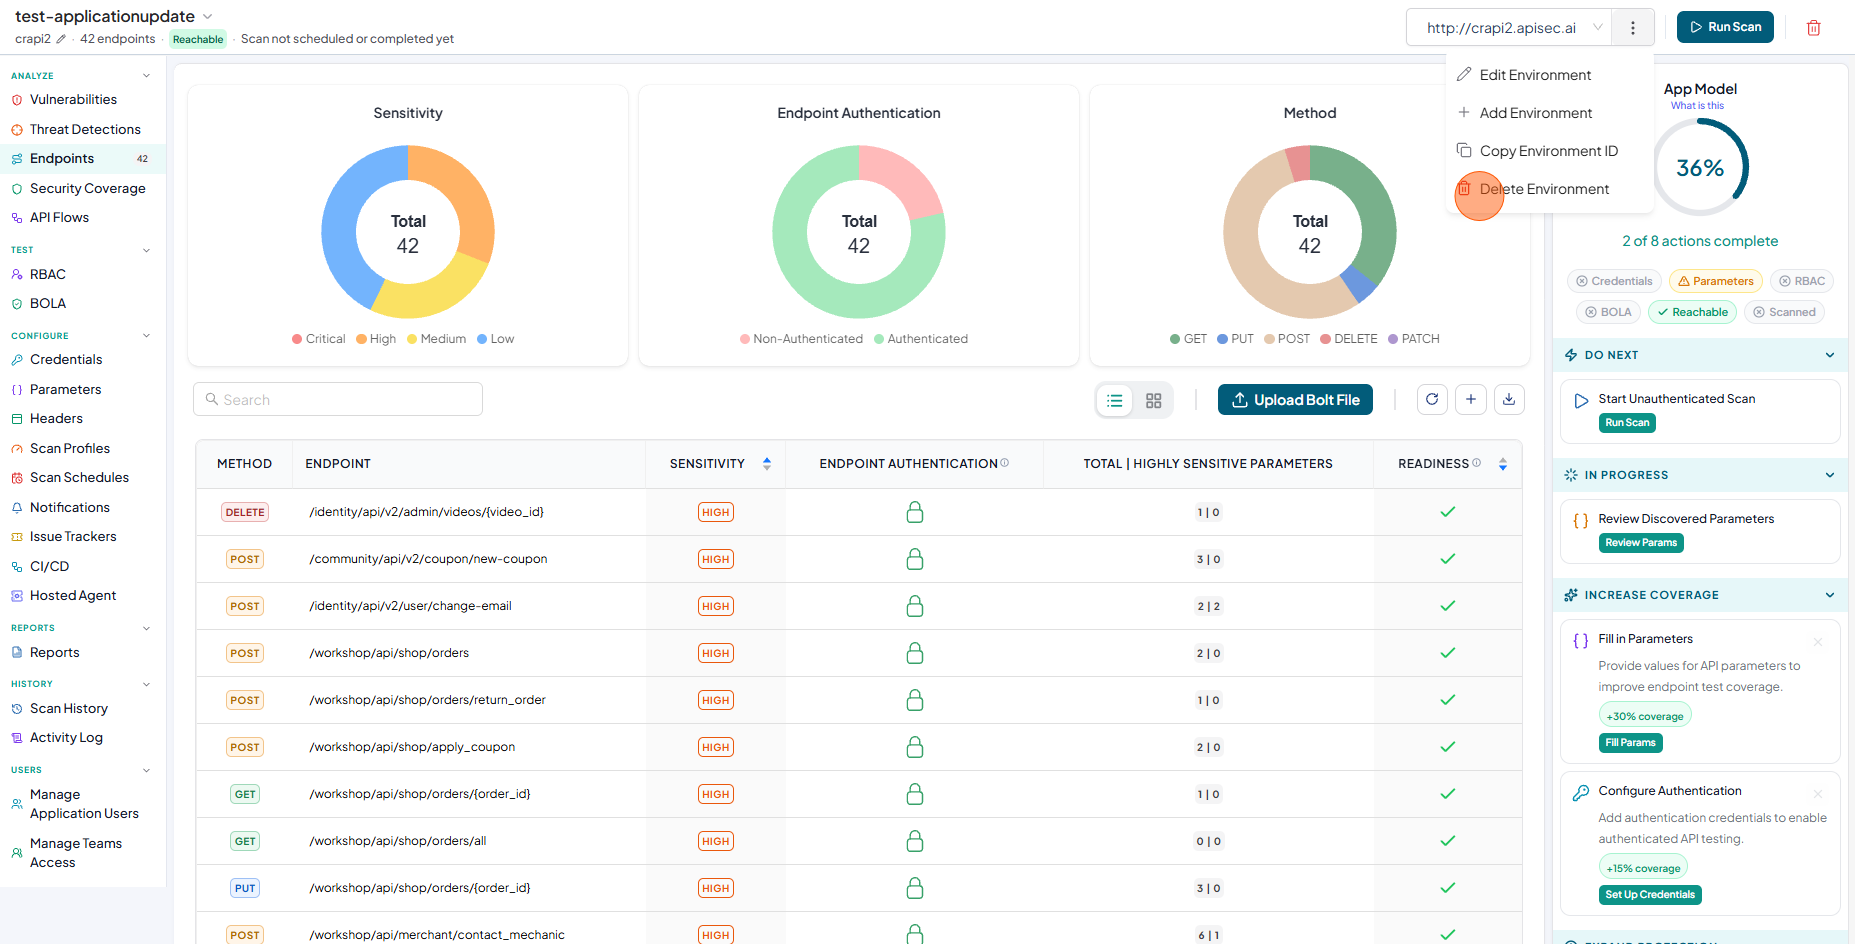
Click the options menu (three dots).
-
Select Delete Environment.
-
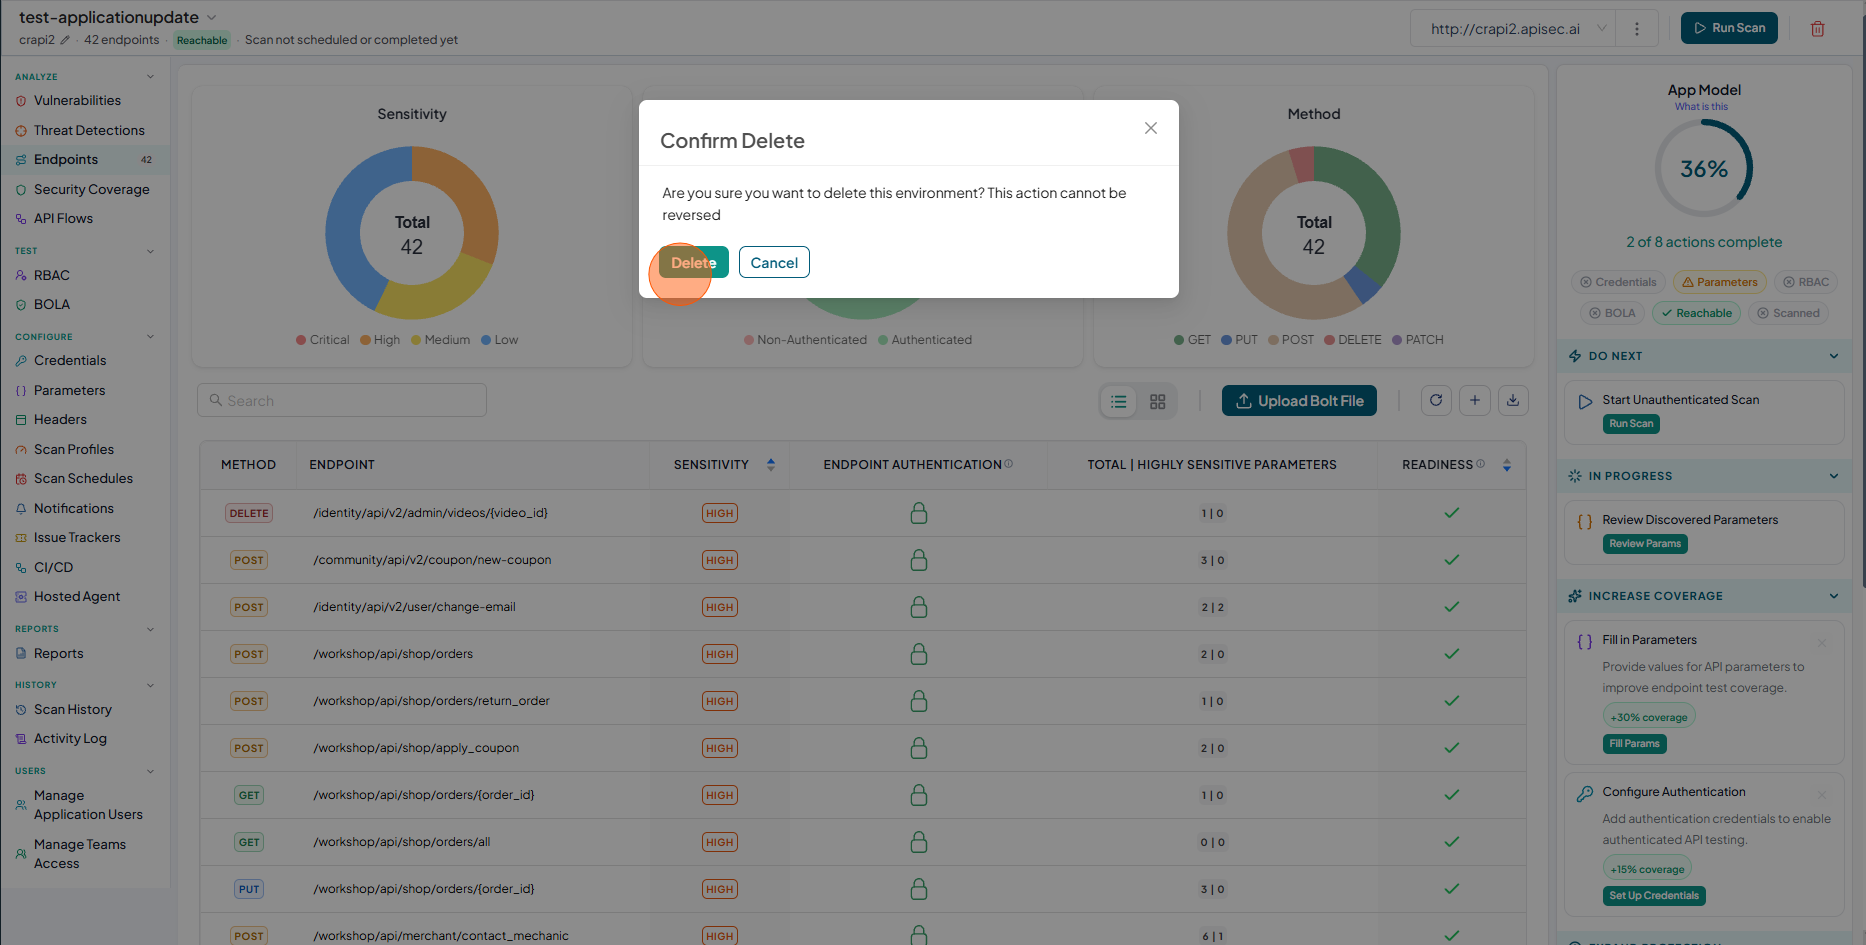
Click Delete to confirm.
Users with View permissions cannot delete an environment in a shared application.
Configure environment-level parameters
To update parameter values for the application at the environment level:
-
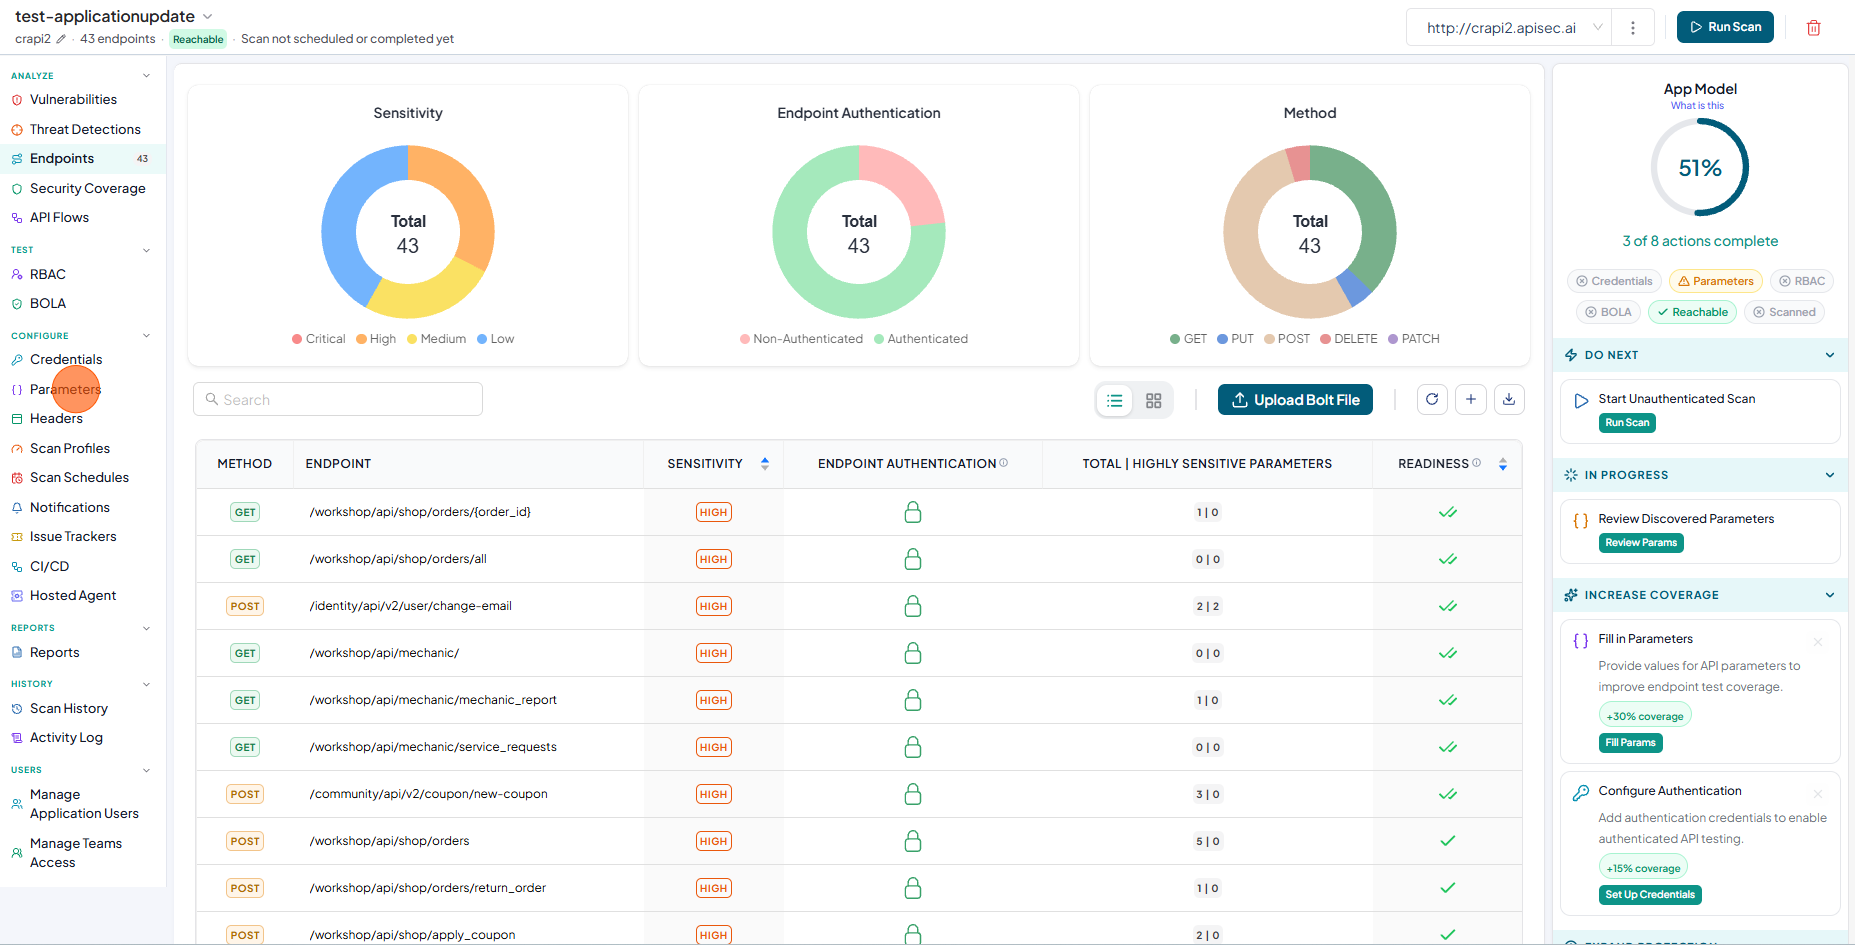
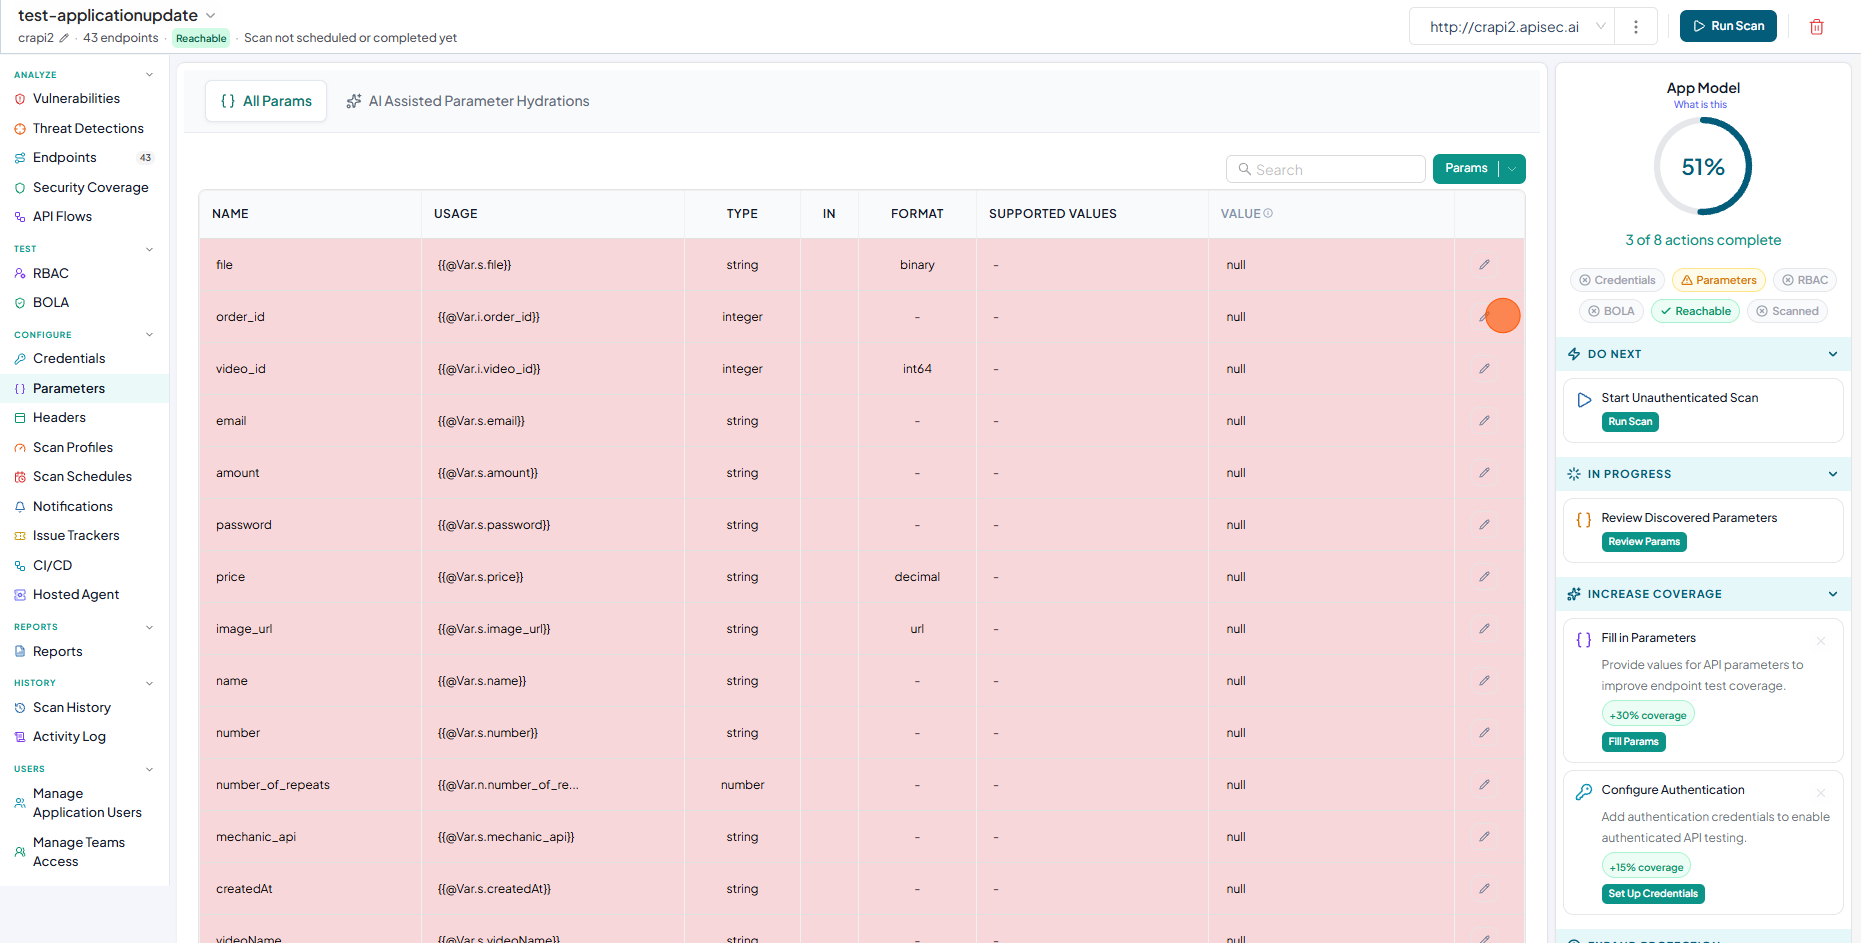
Click Parameters from the sidebar.
-
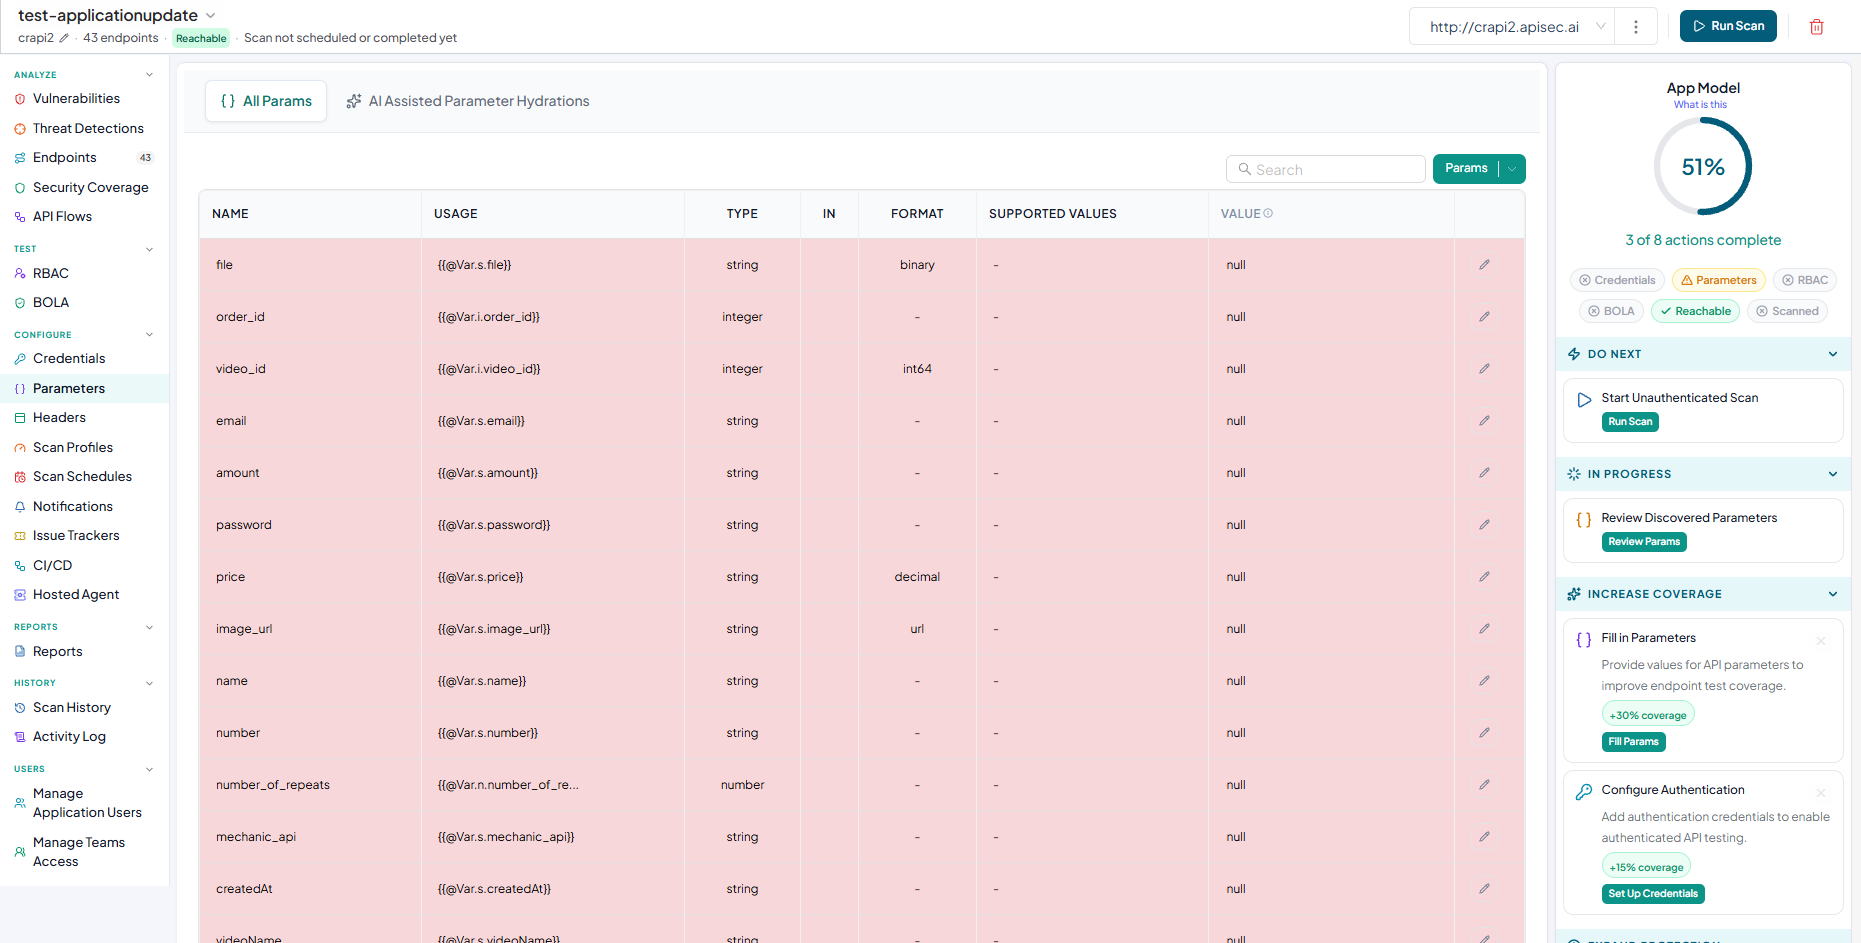
Review the parameters for the selected environment.
-
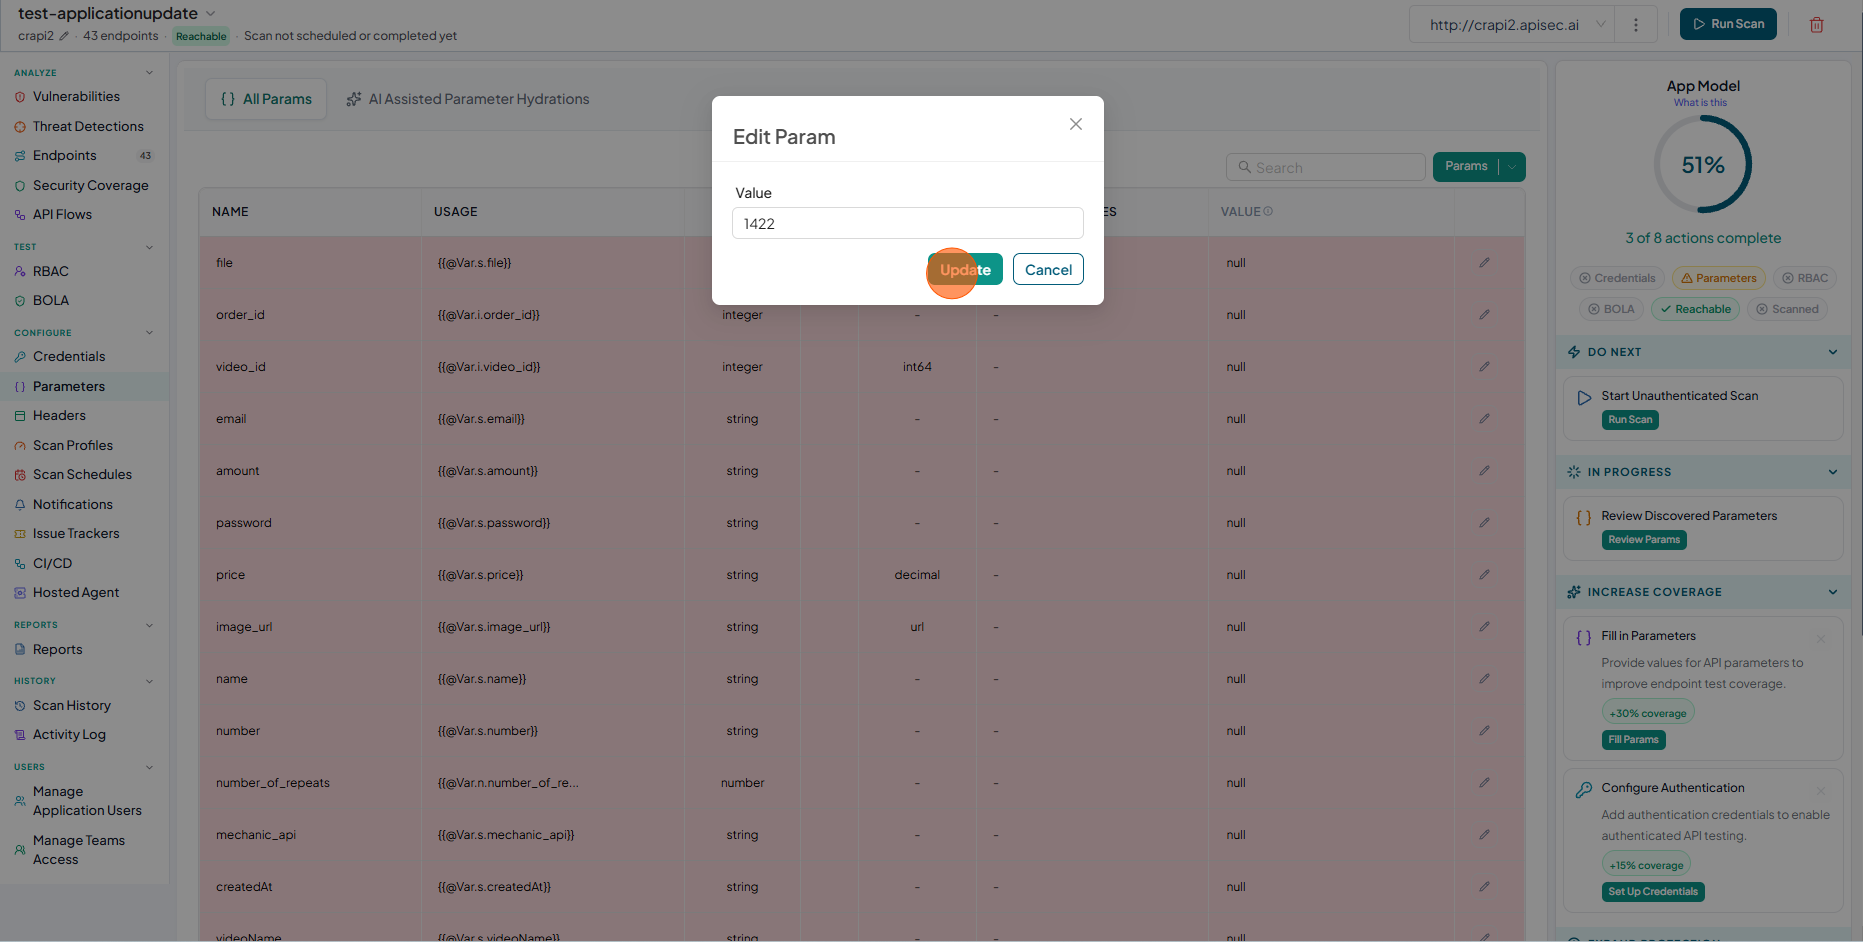
To change a parameter value, click the pencil icon.
-
Change the value and click Update.
Bulk upload and download parameter values
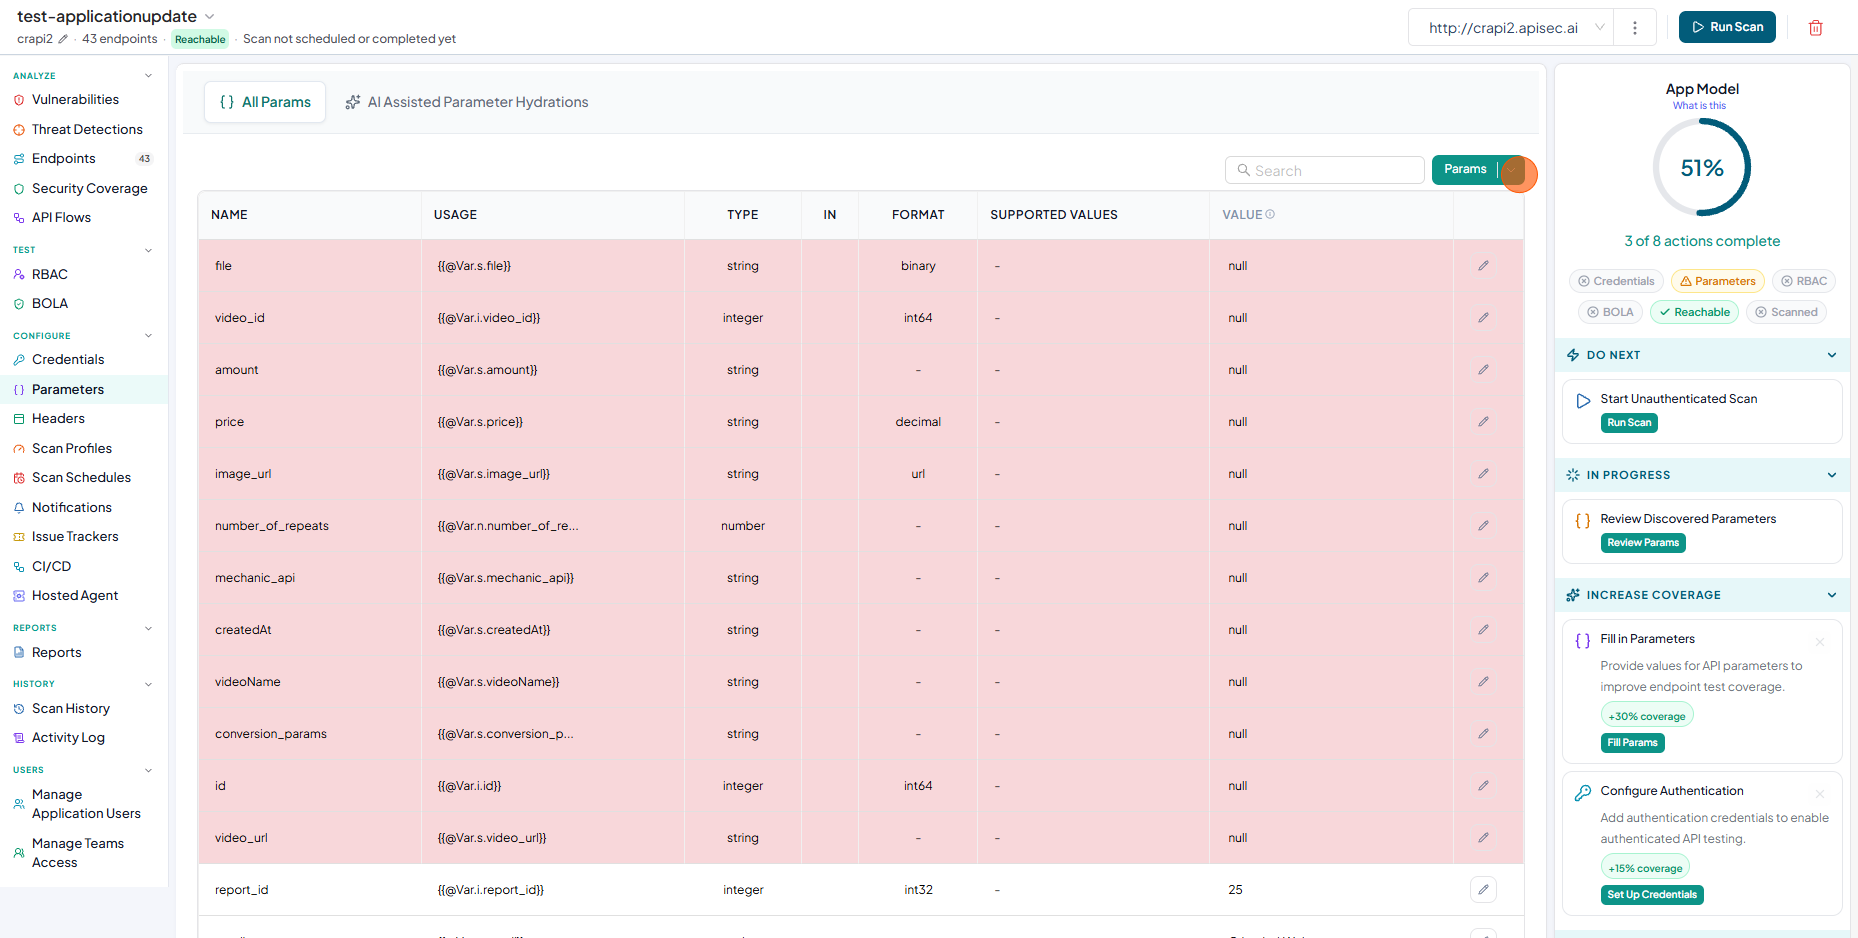
The Params option lets you bulk upload and download environment-level parameter values.
To bulk upload environment-level parameters:
-
Click Params.
-
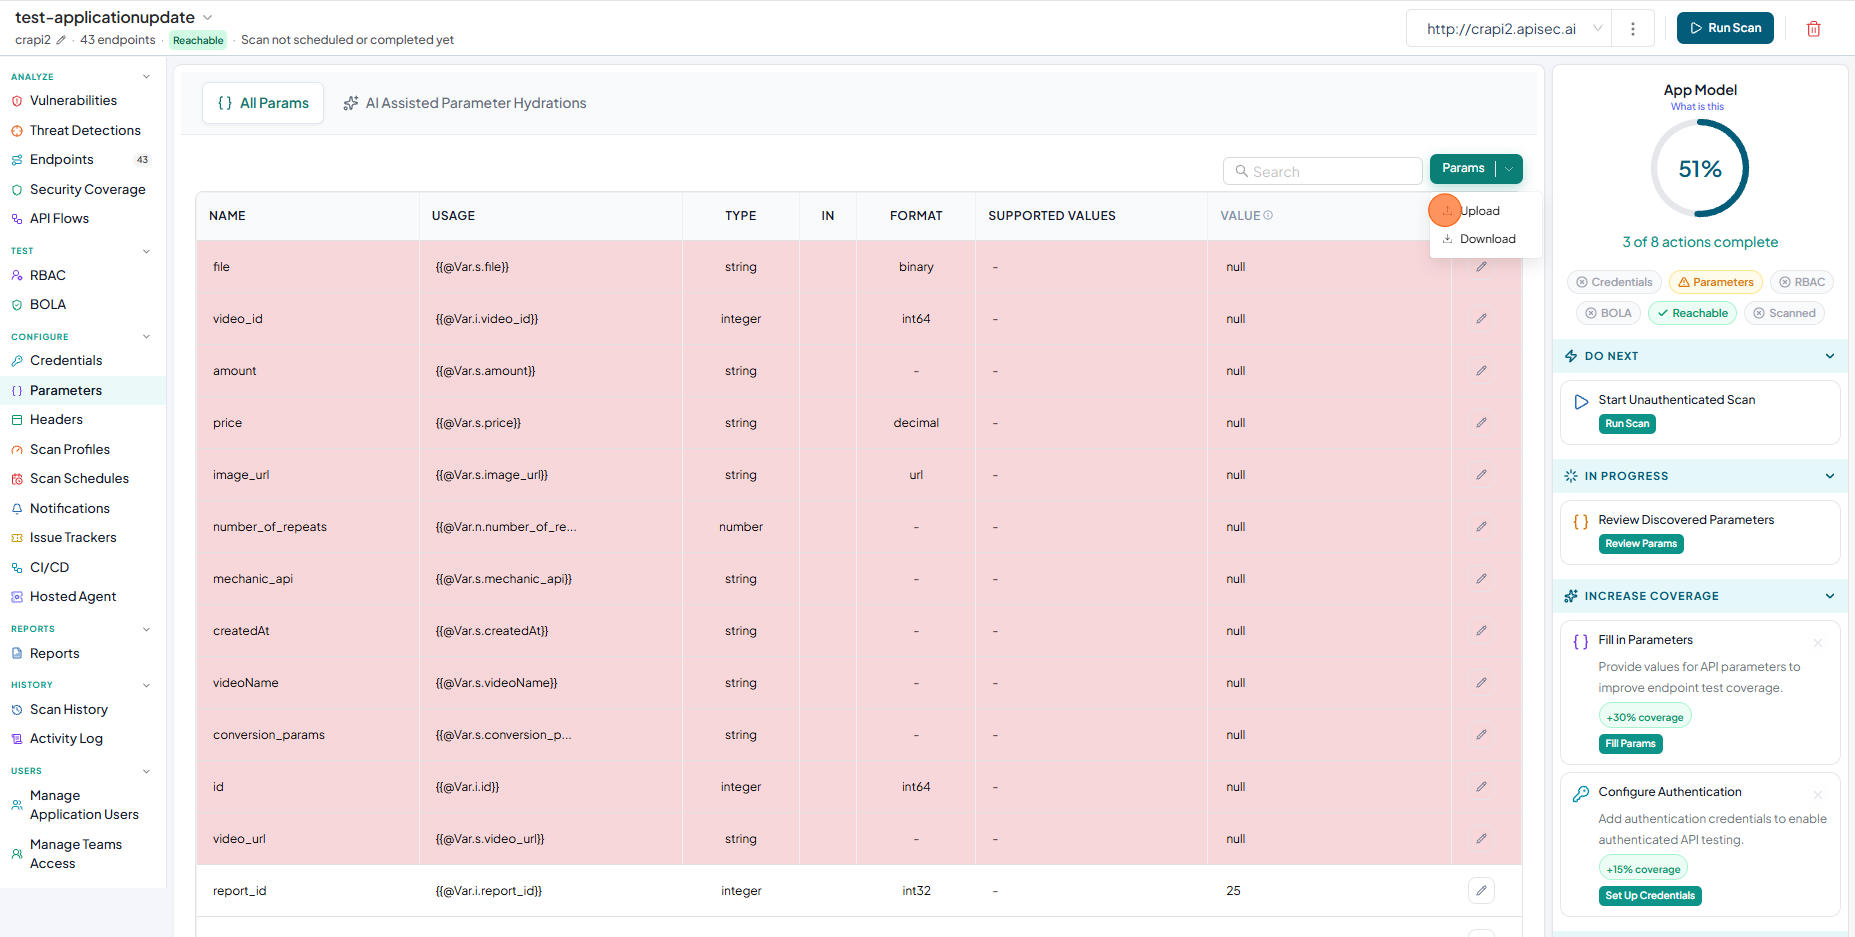
Select Upload.
-
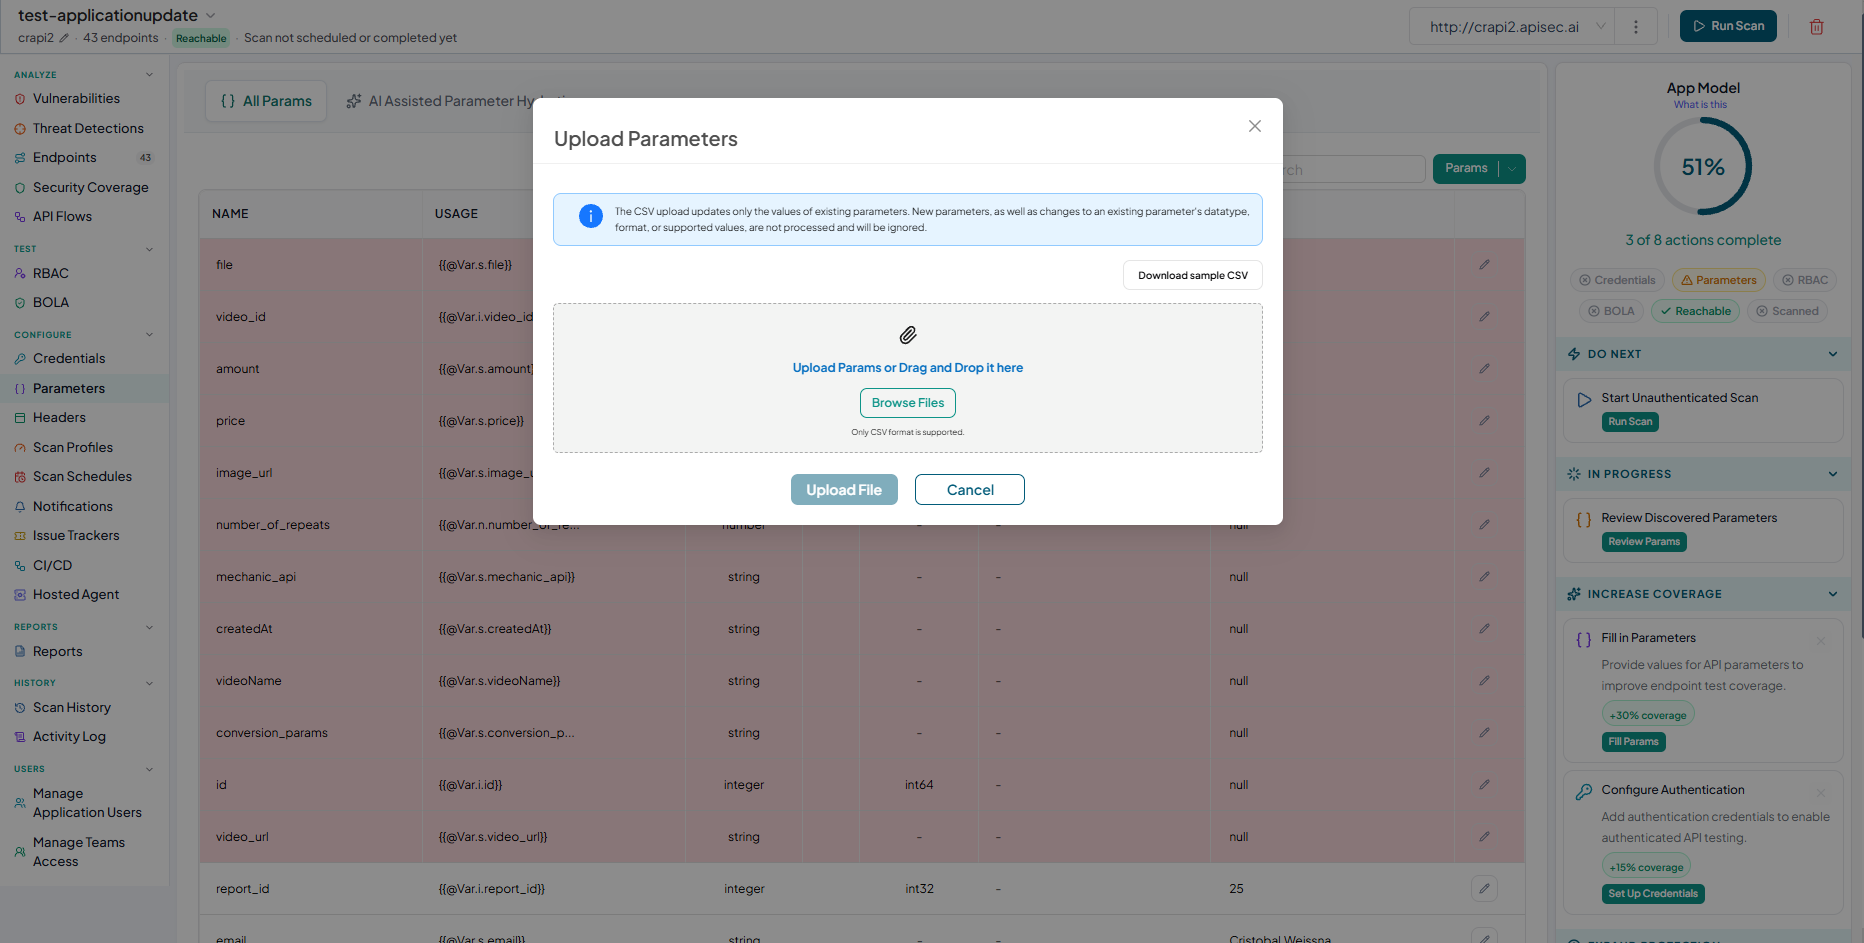
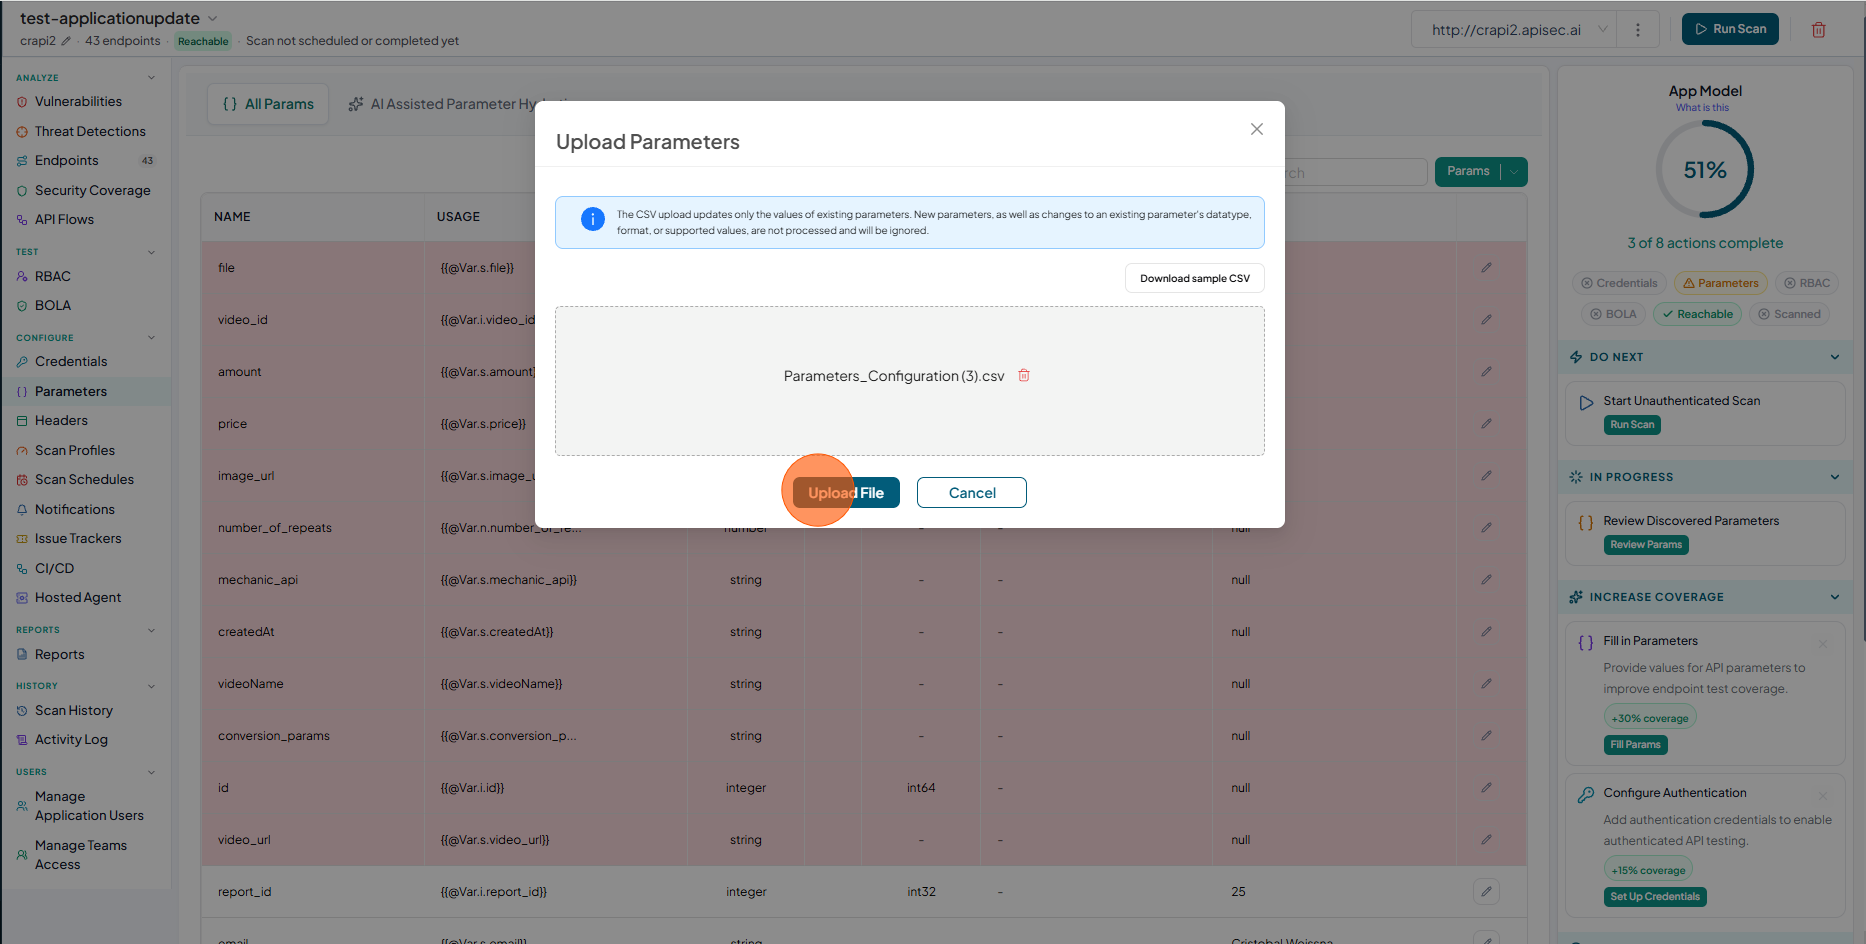
In the Upload Parameters window, add the file and click Upload File.
-
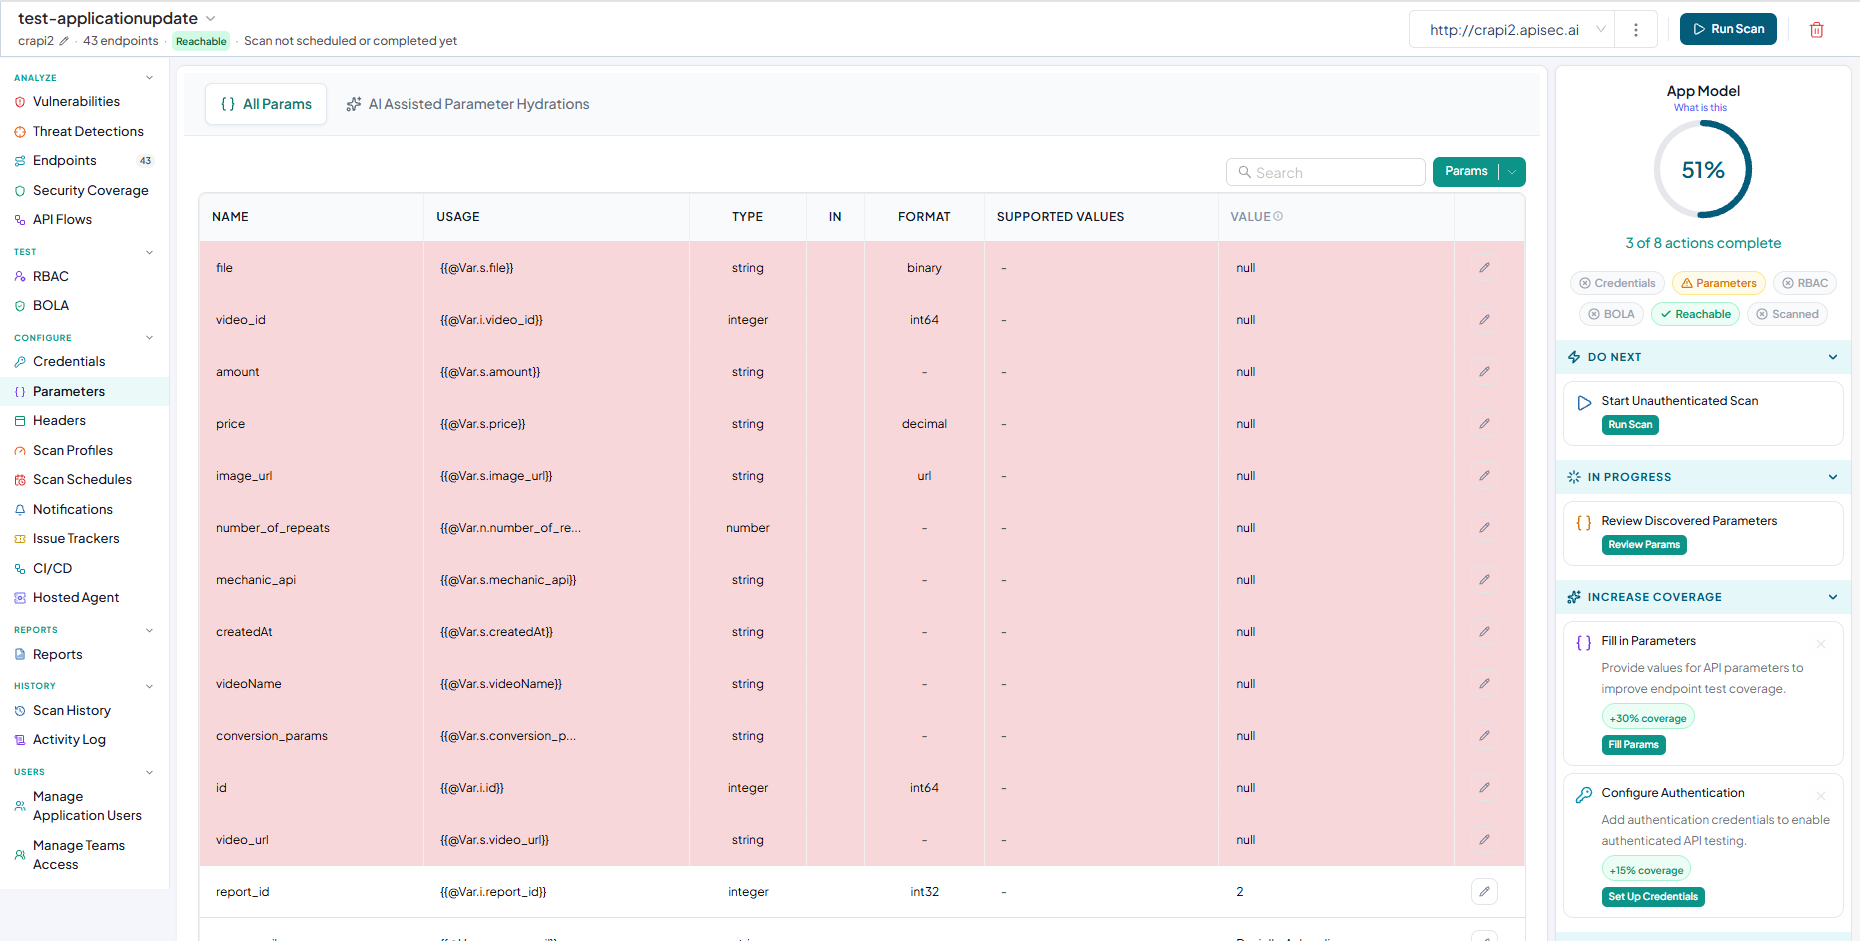
Check the updated parameter values.
To download existing environment-level parameter values:
Downloading preserves the parameter configuration before you reload a spec — useful when you choose not to retain parameters during a spec reload.
-
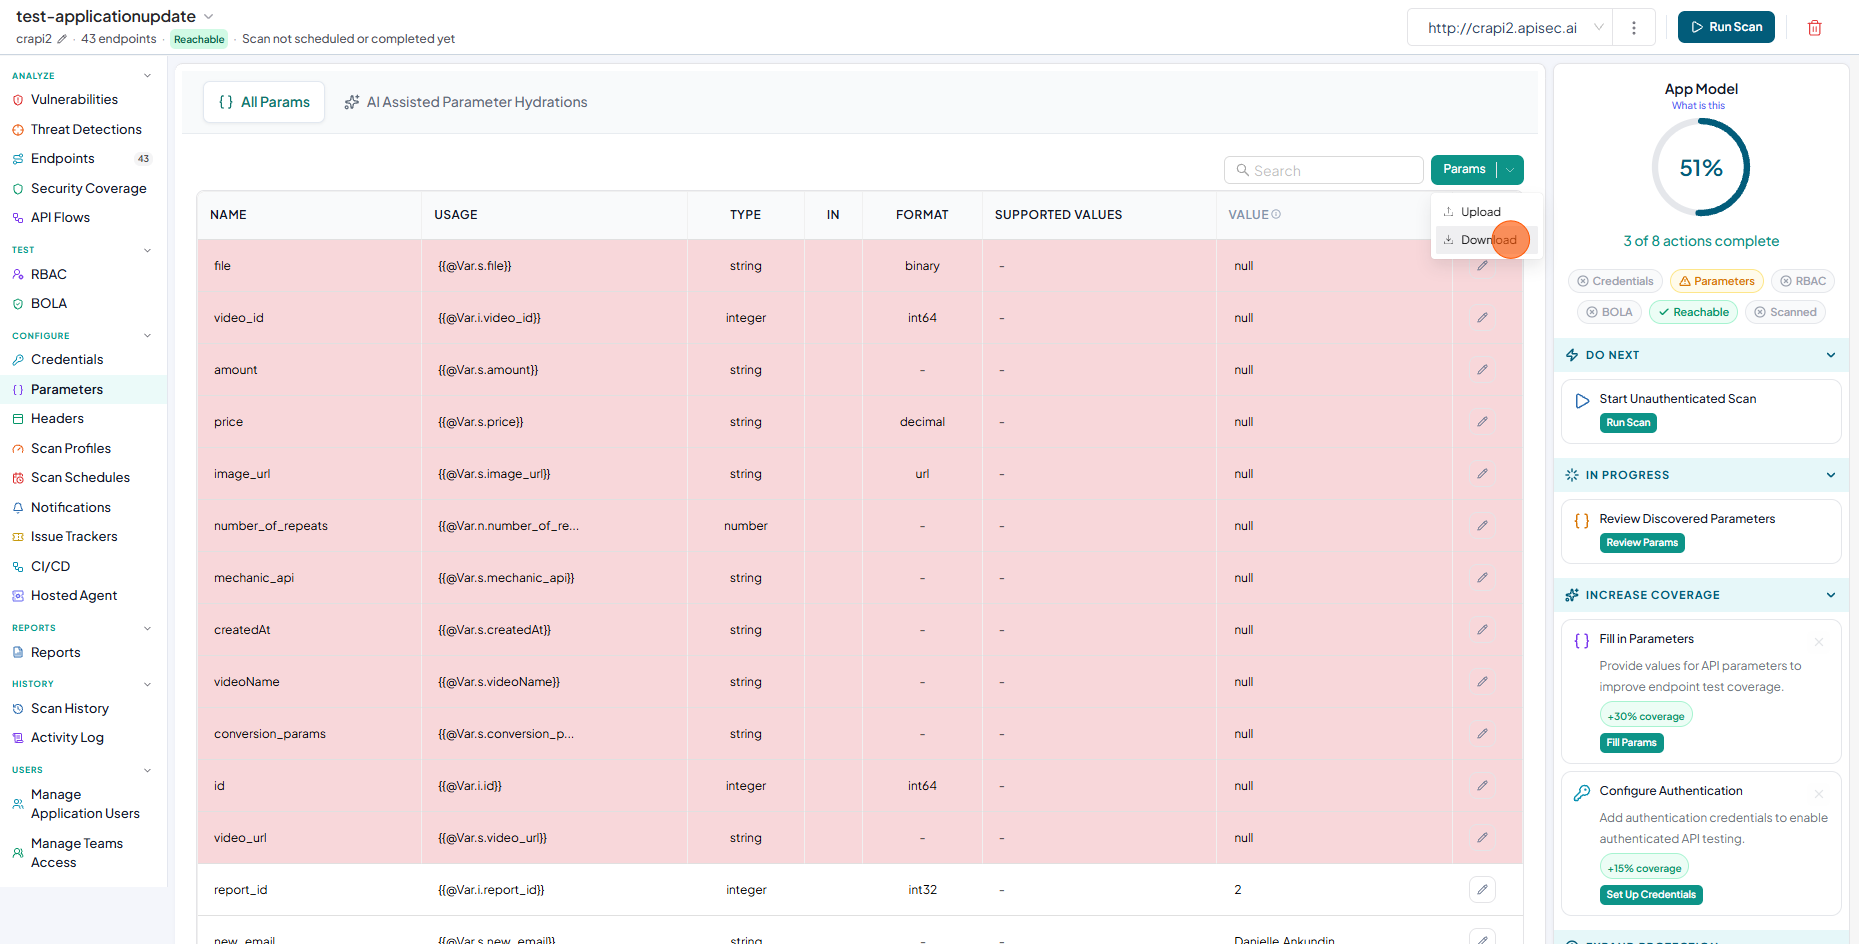
Click Params.
-
Select Download.
Users with View permissions cannot change parameter configuration in a shared application.
Manage application users
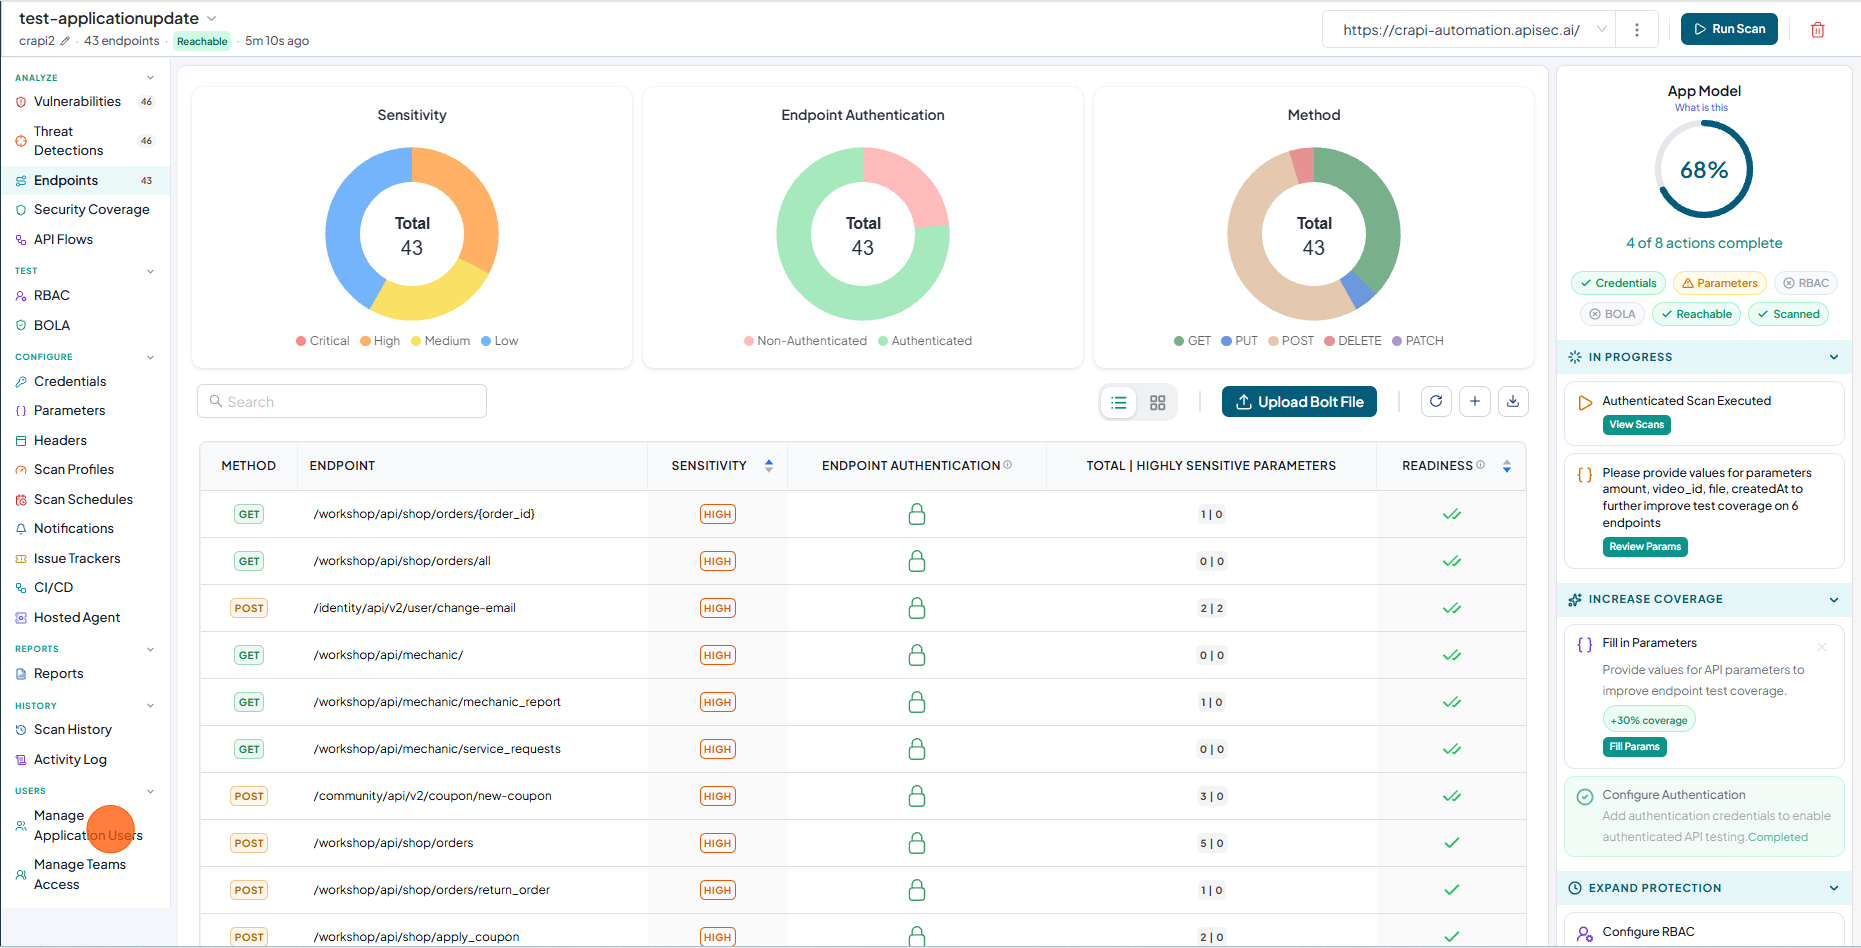
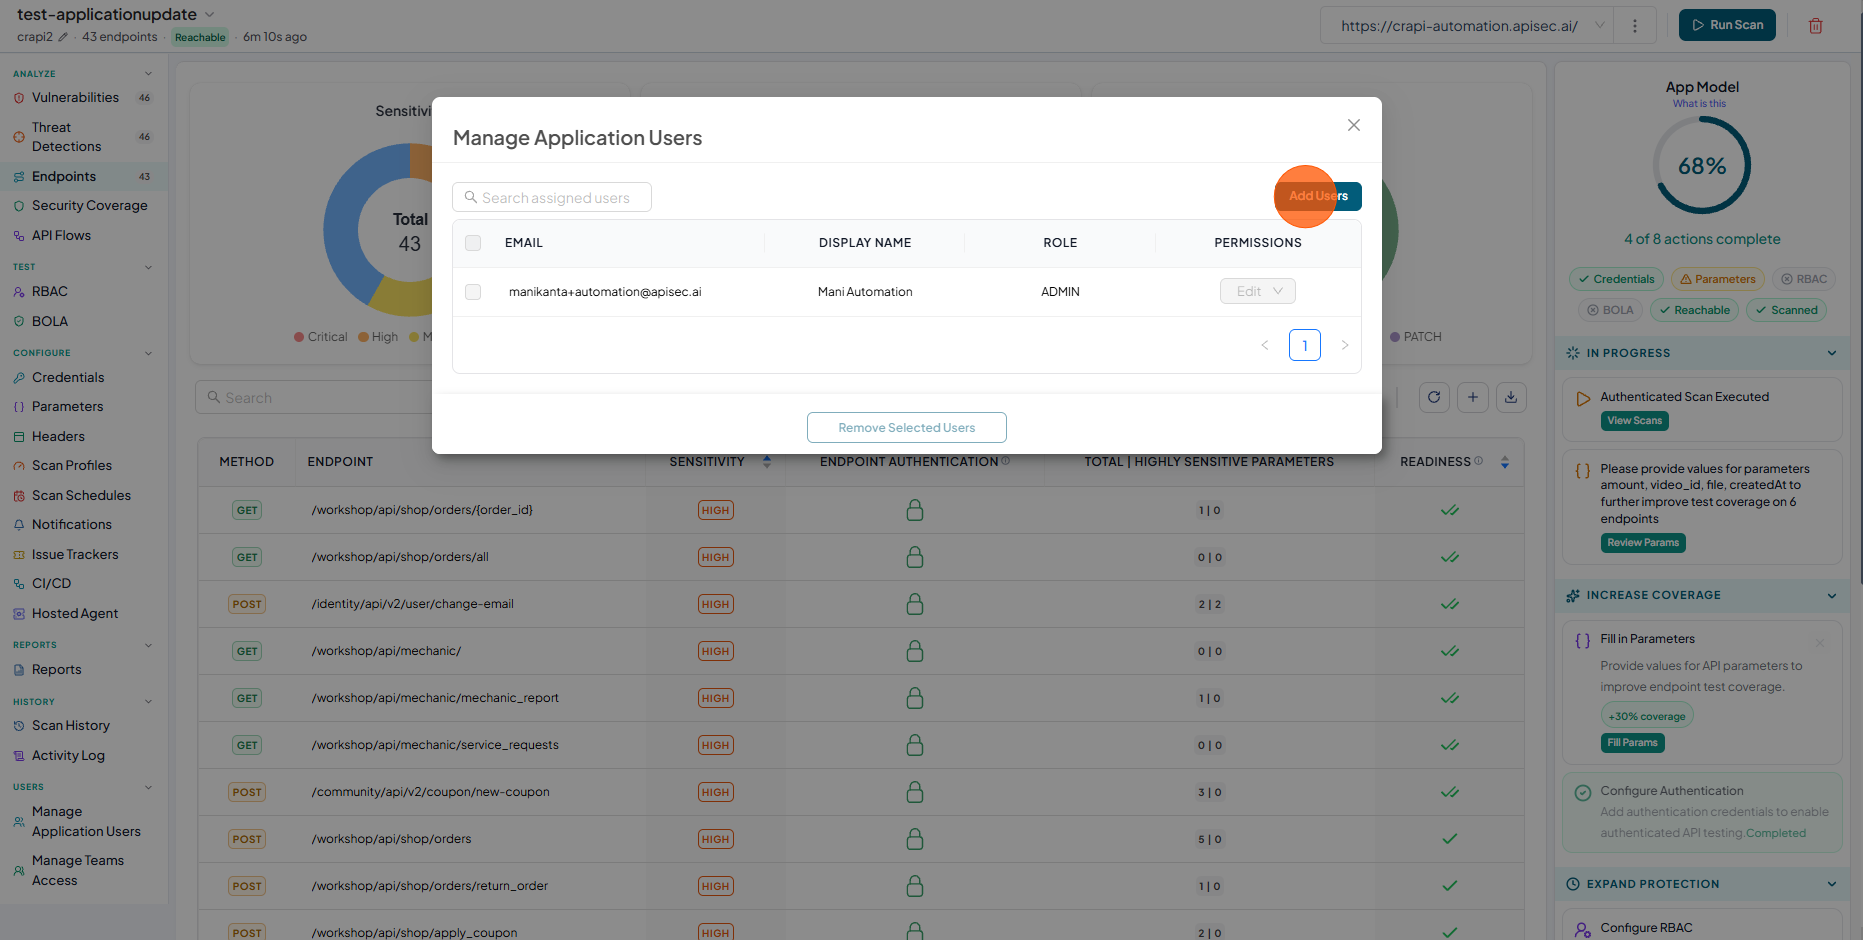
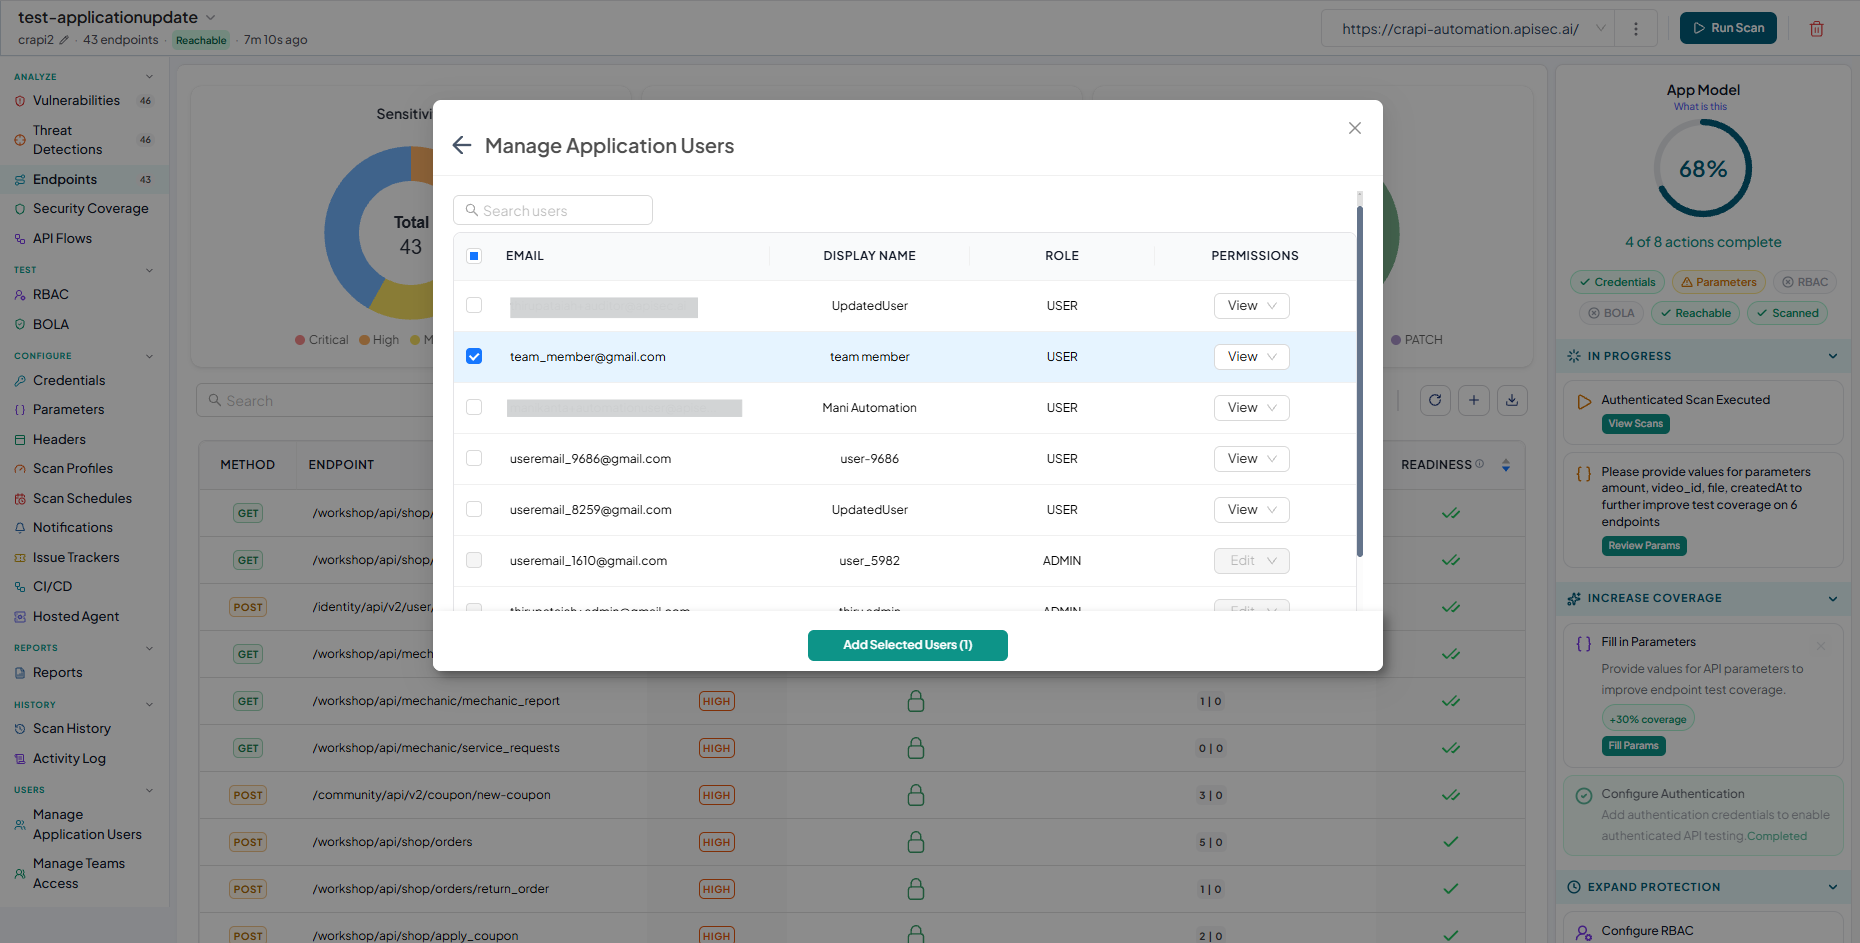
Add users to the application by email address, assign access permissions, and remove users when needed.
-
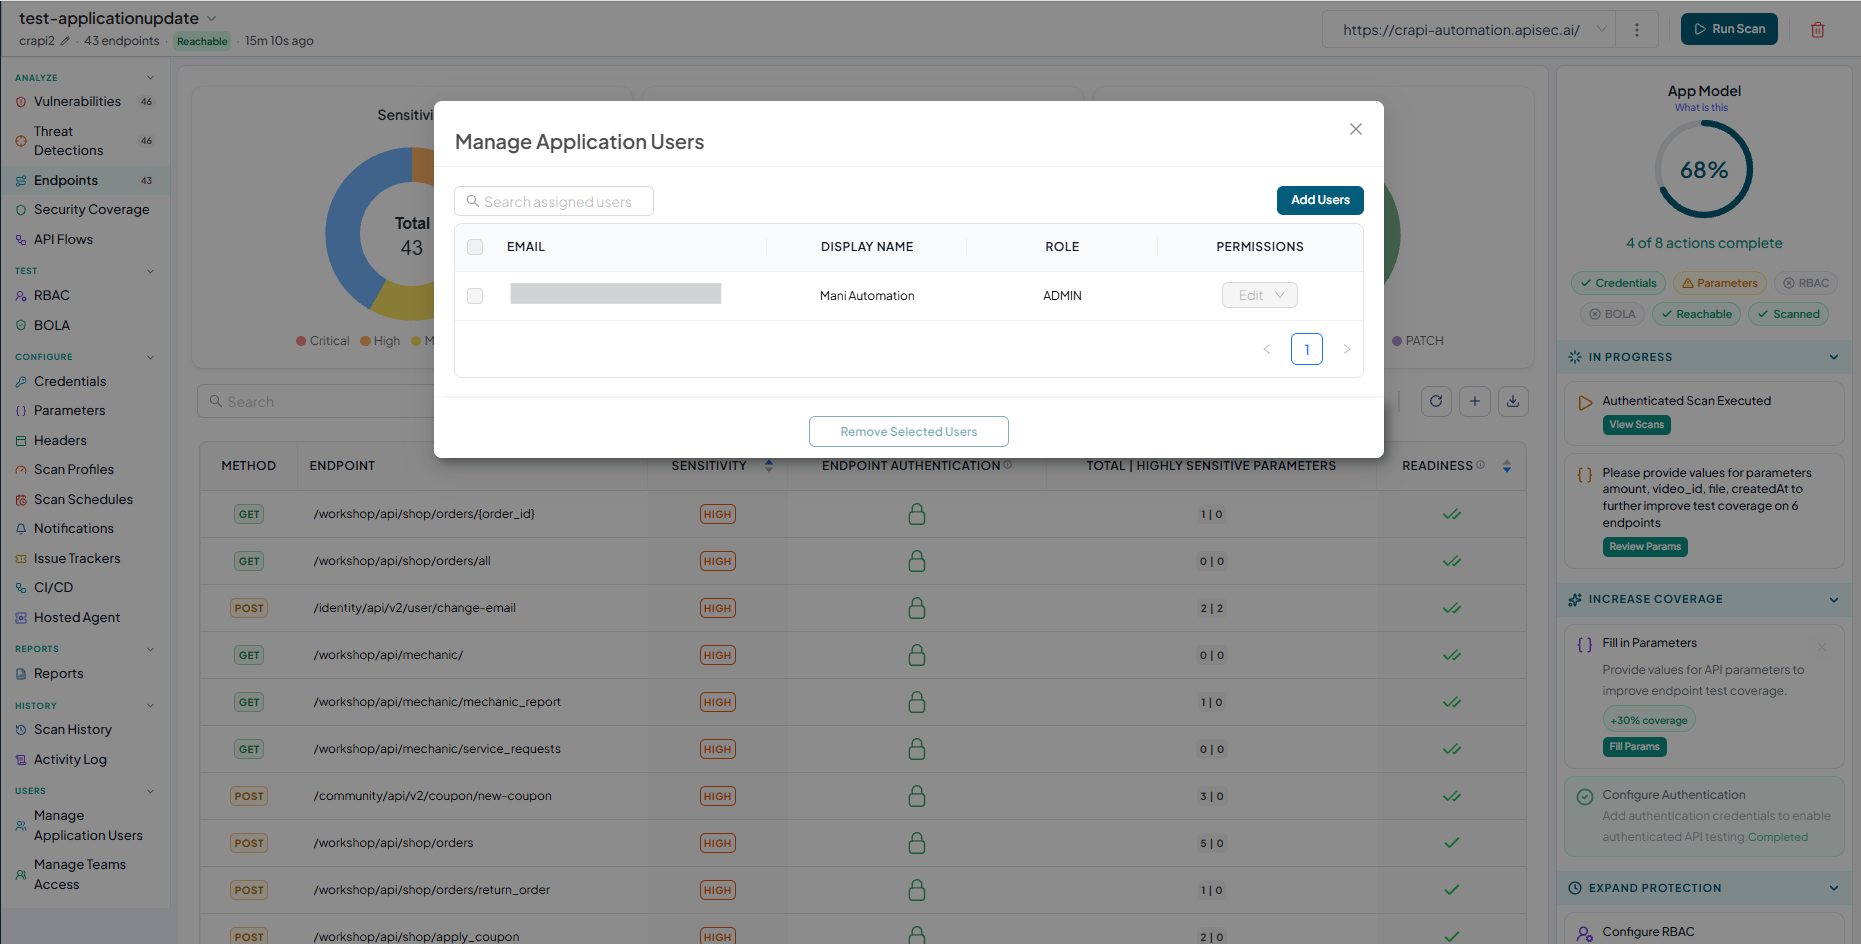
Click Manage Application Users from the sidebar.
-
Click Add Users.
-
Select the users.
-
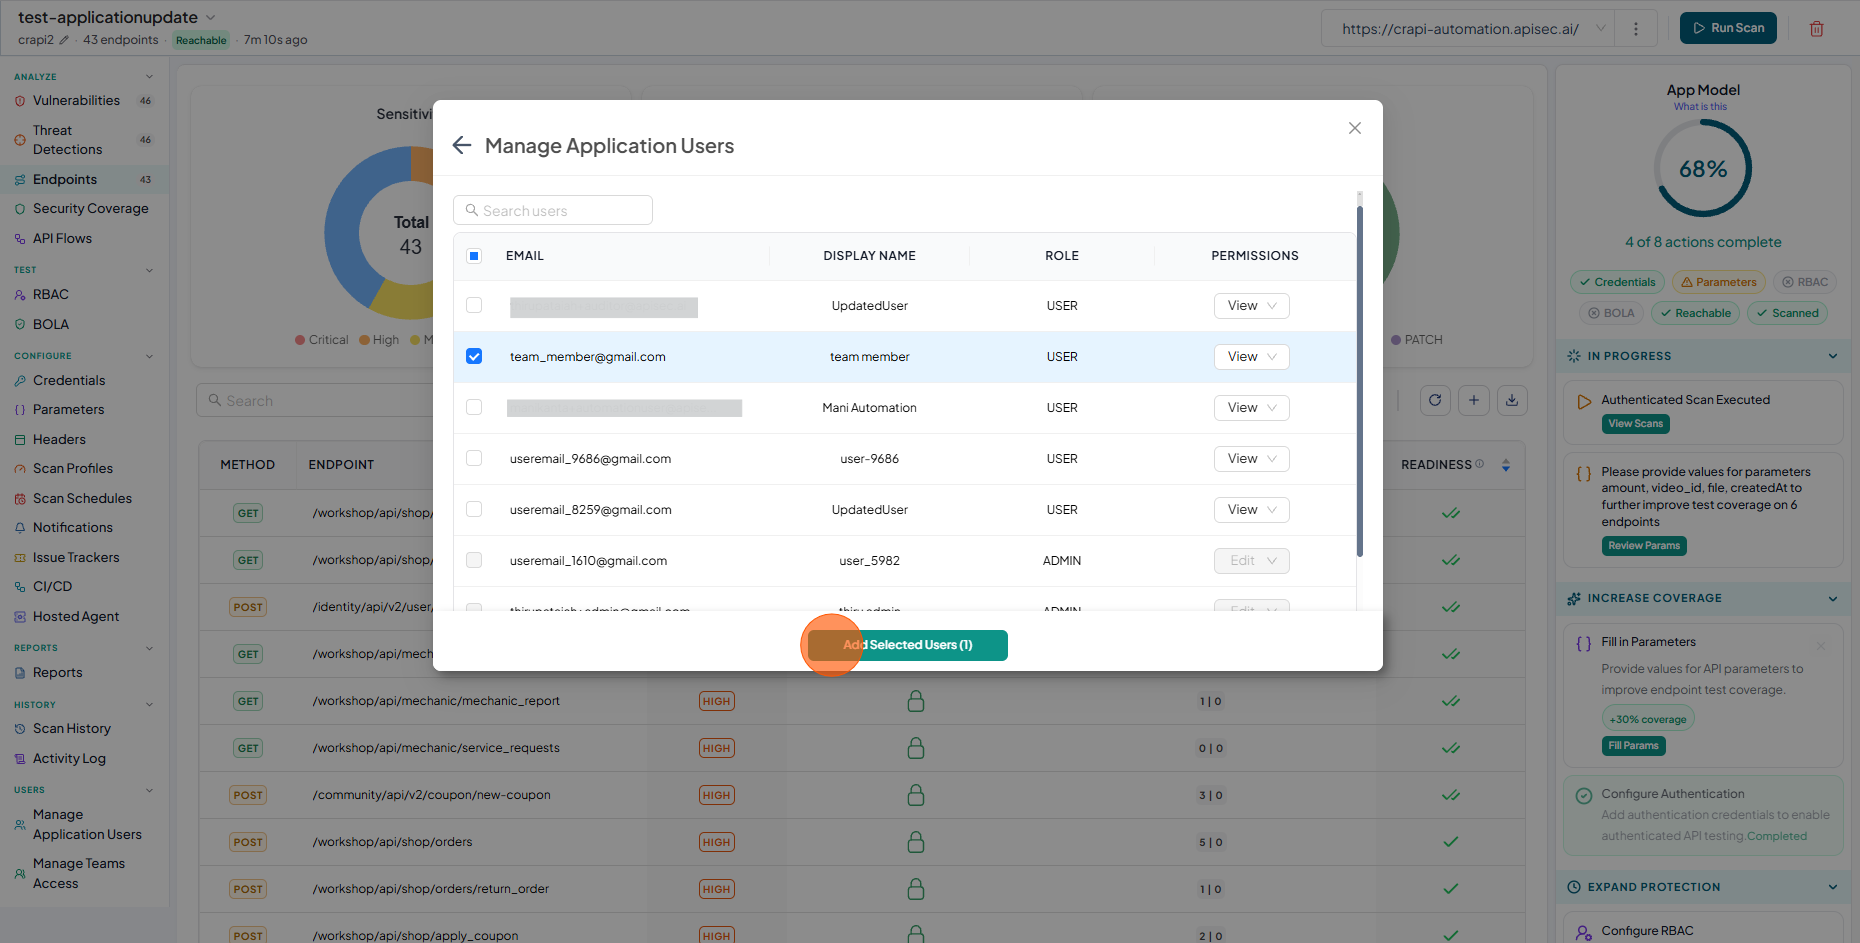
Click Add Selected Users.
-
Review the newly added users.
Remove users from the application
-
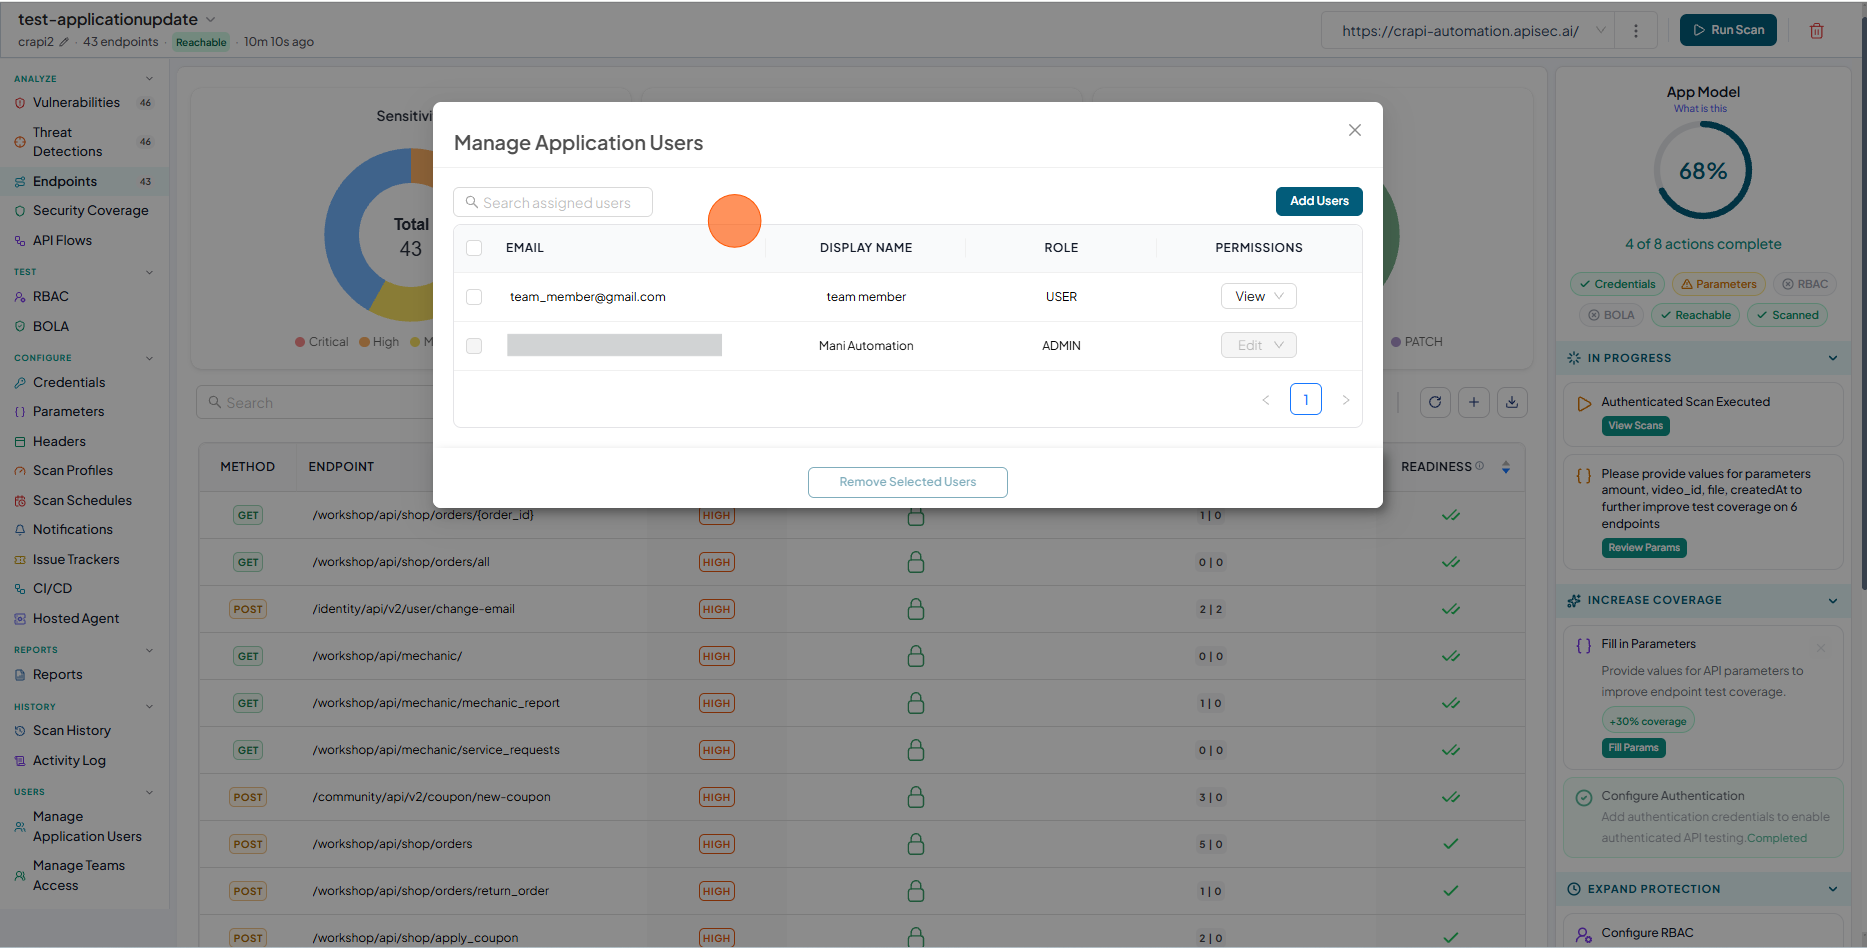
Select Manage Application Users from the sidebar.
-
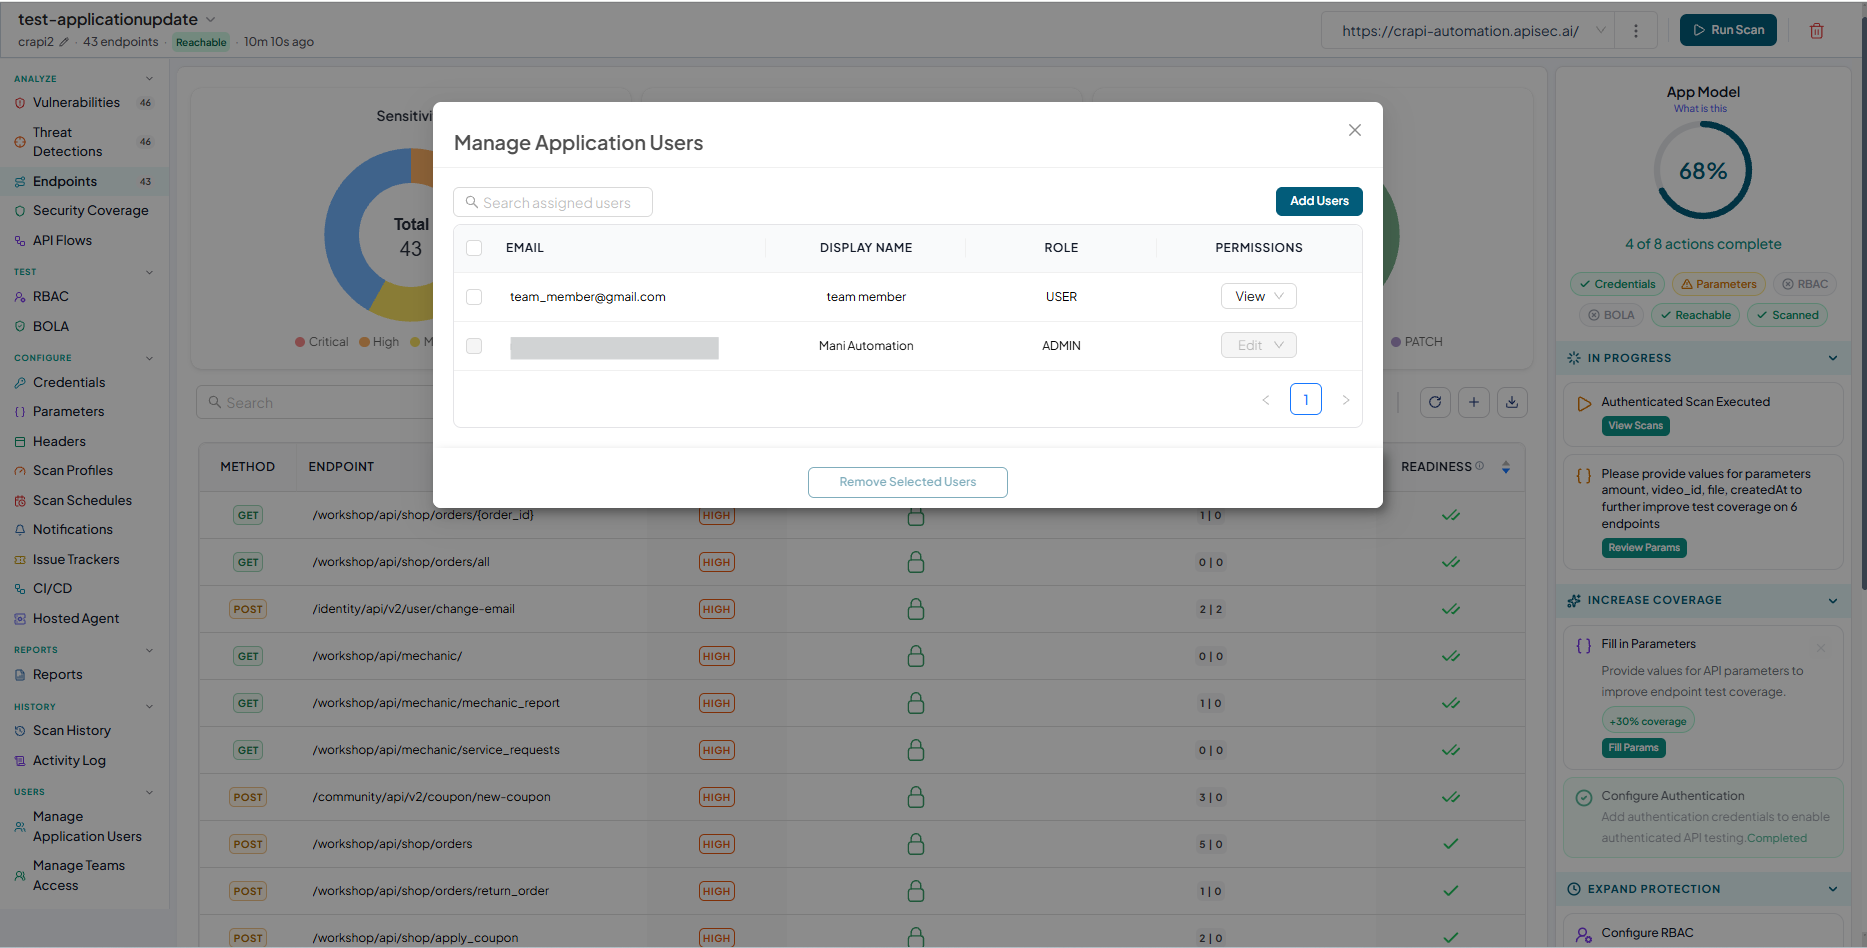
Check the users who have access to the application.
-
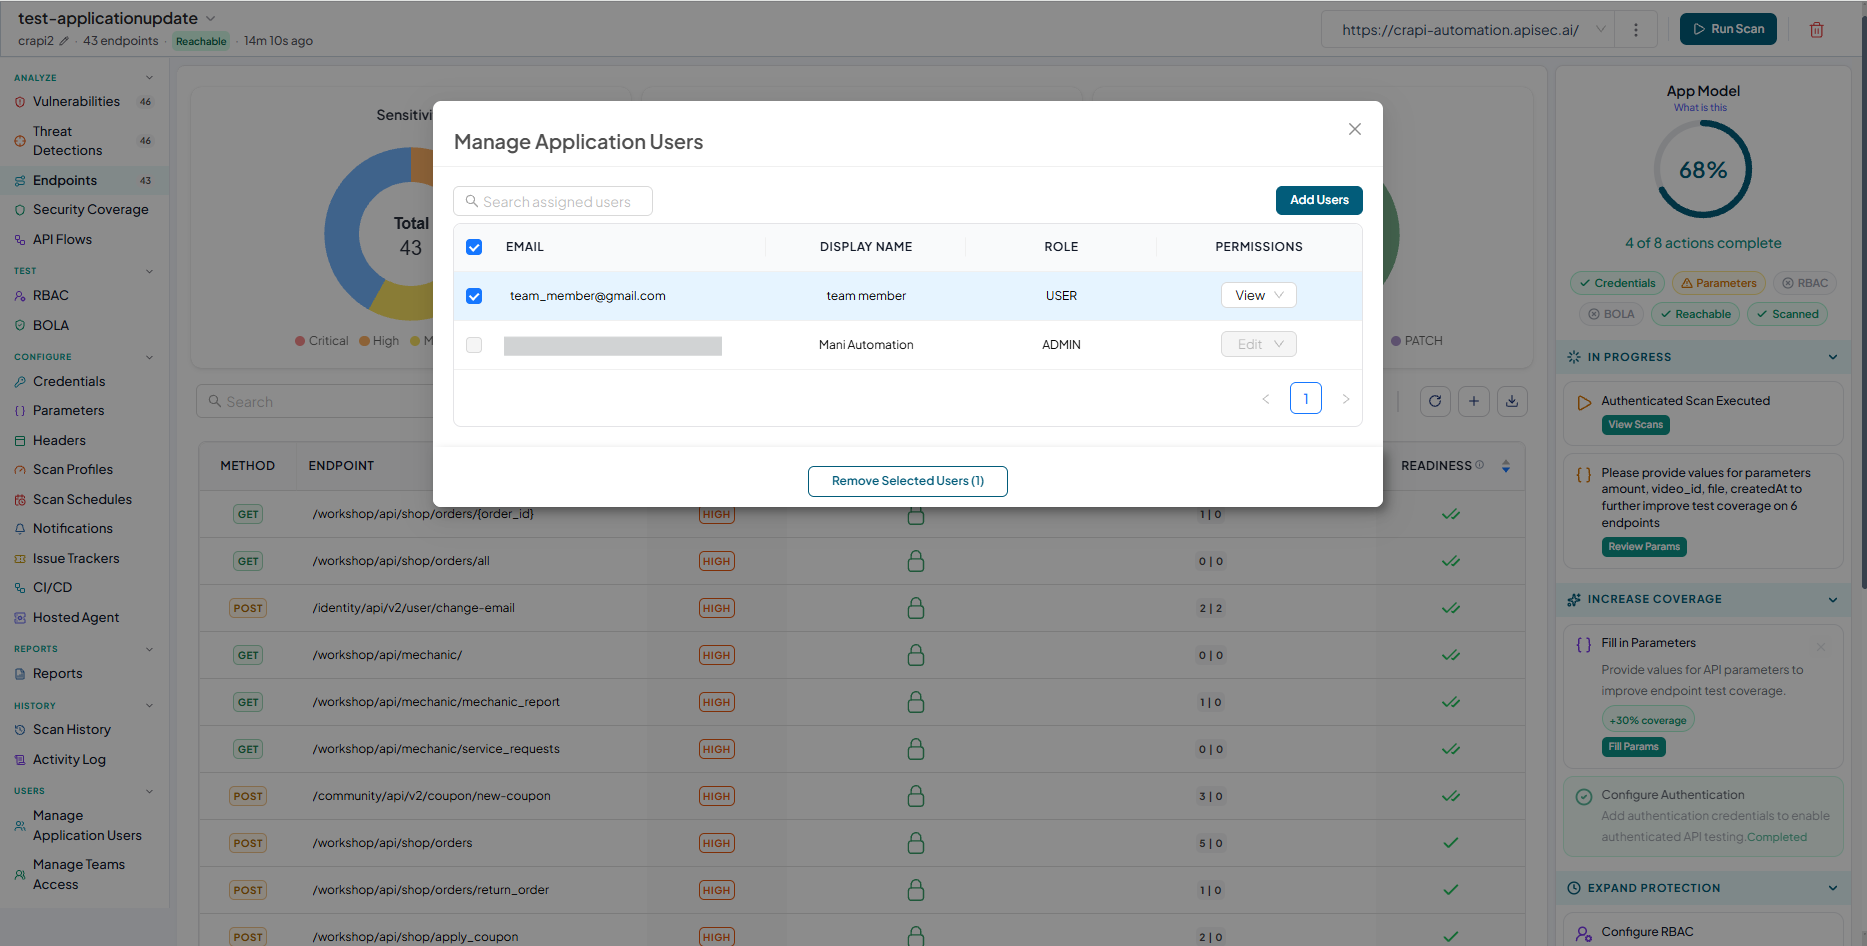
Select the user.
-
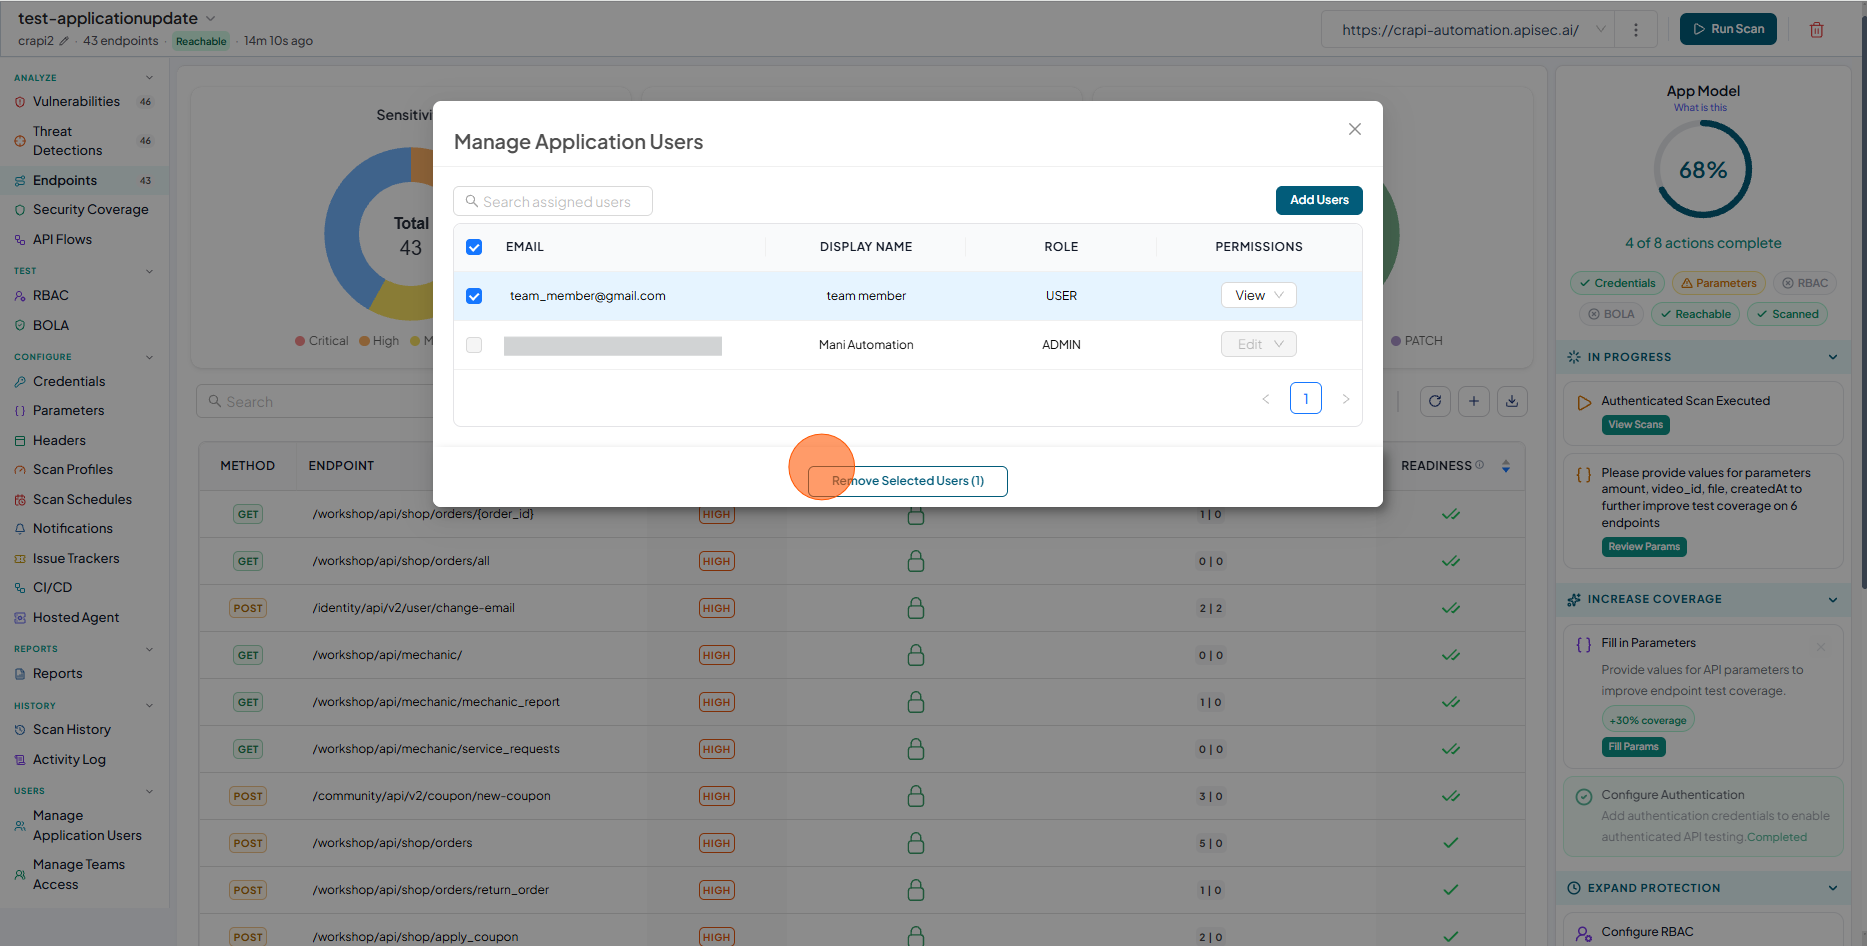
Click Remove Selected Users.
-
Review the users list.
Users with View permissions cannot share a shared application.
Manage team access
As the admin or owner of the application, you can share the application with a specific team. Team members can then access the application and perform activities based on their permissions. You can also remove a team's access.
-
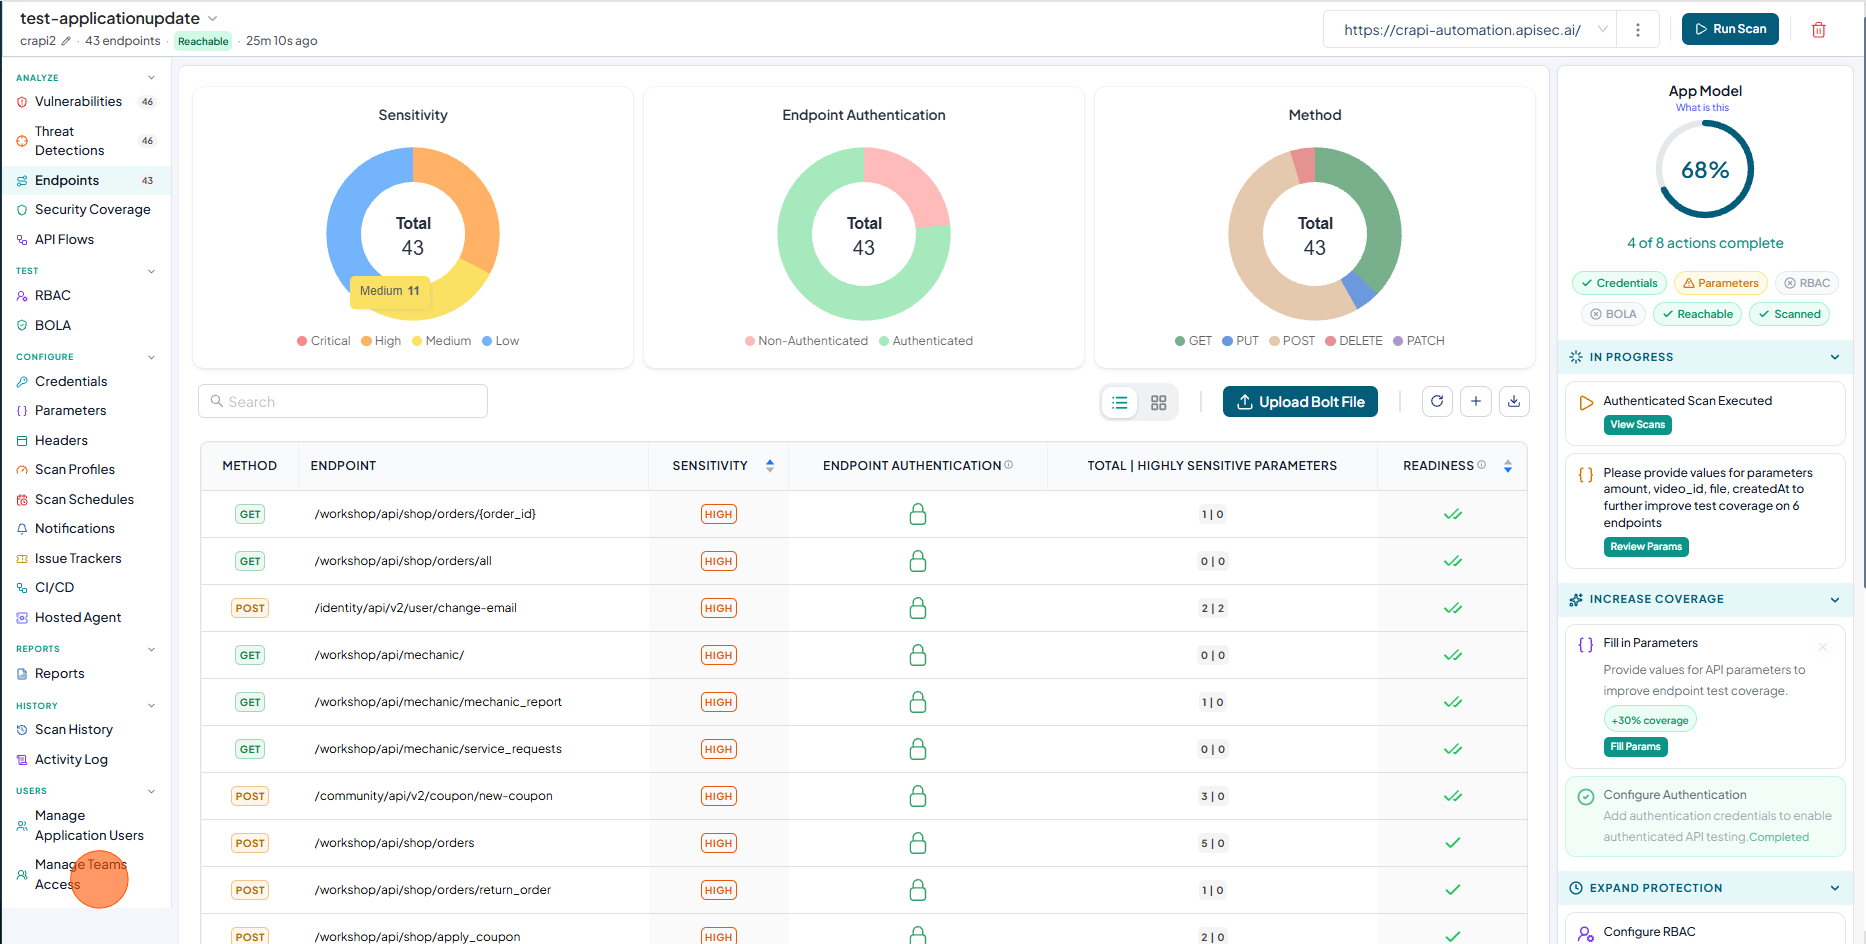
From the sidebar, select Manage Teams Access.
-
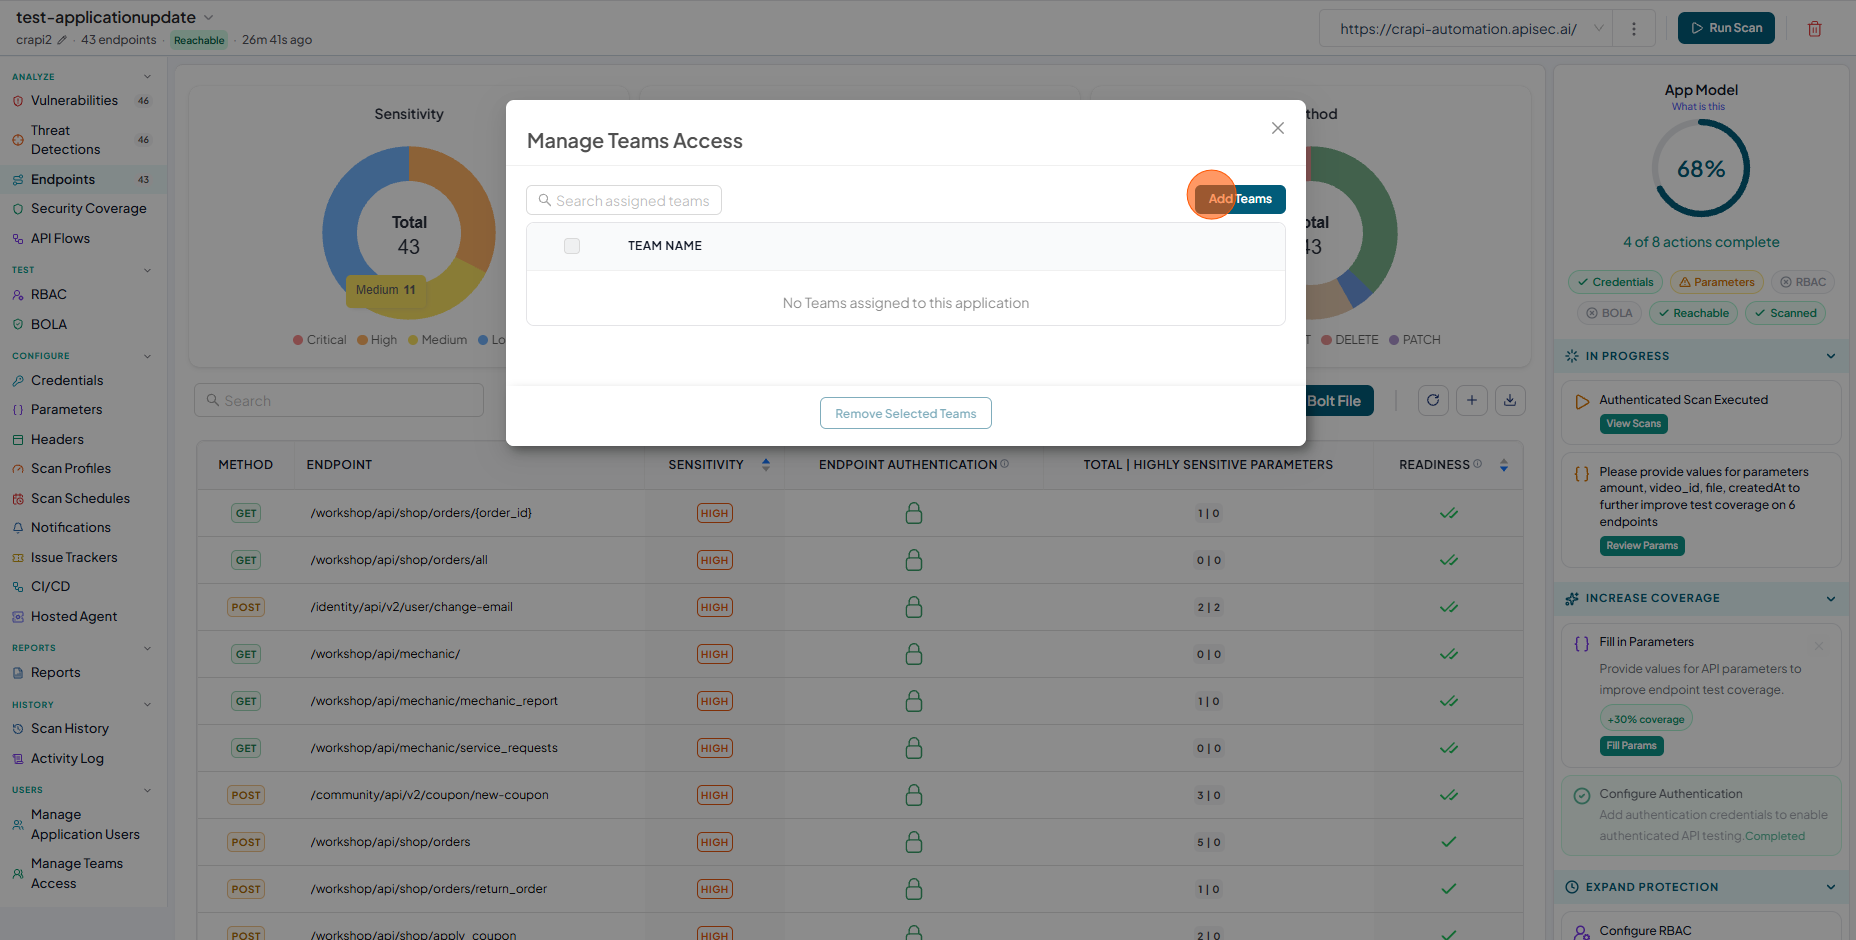
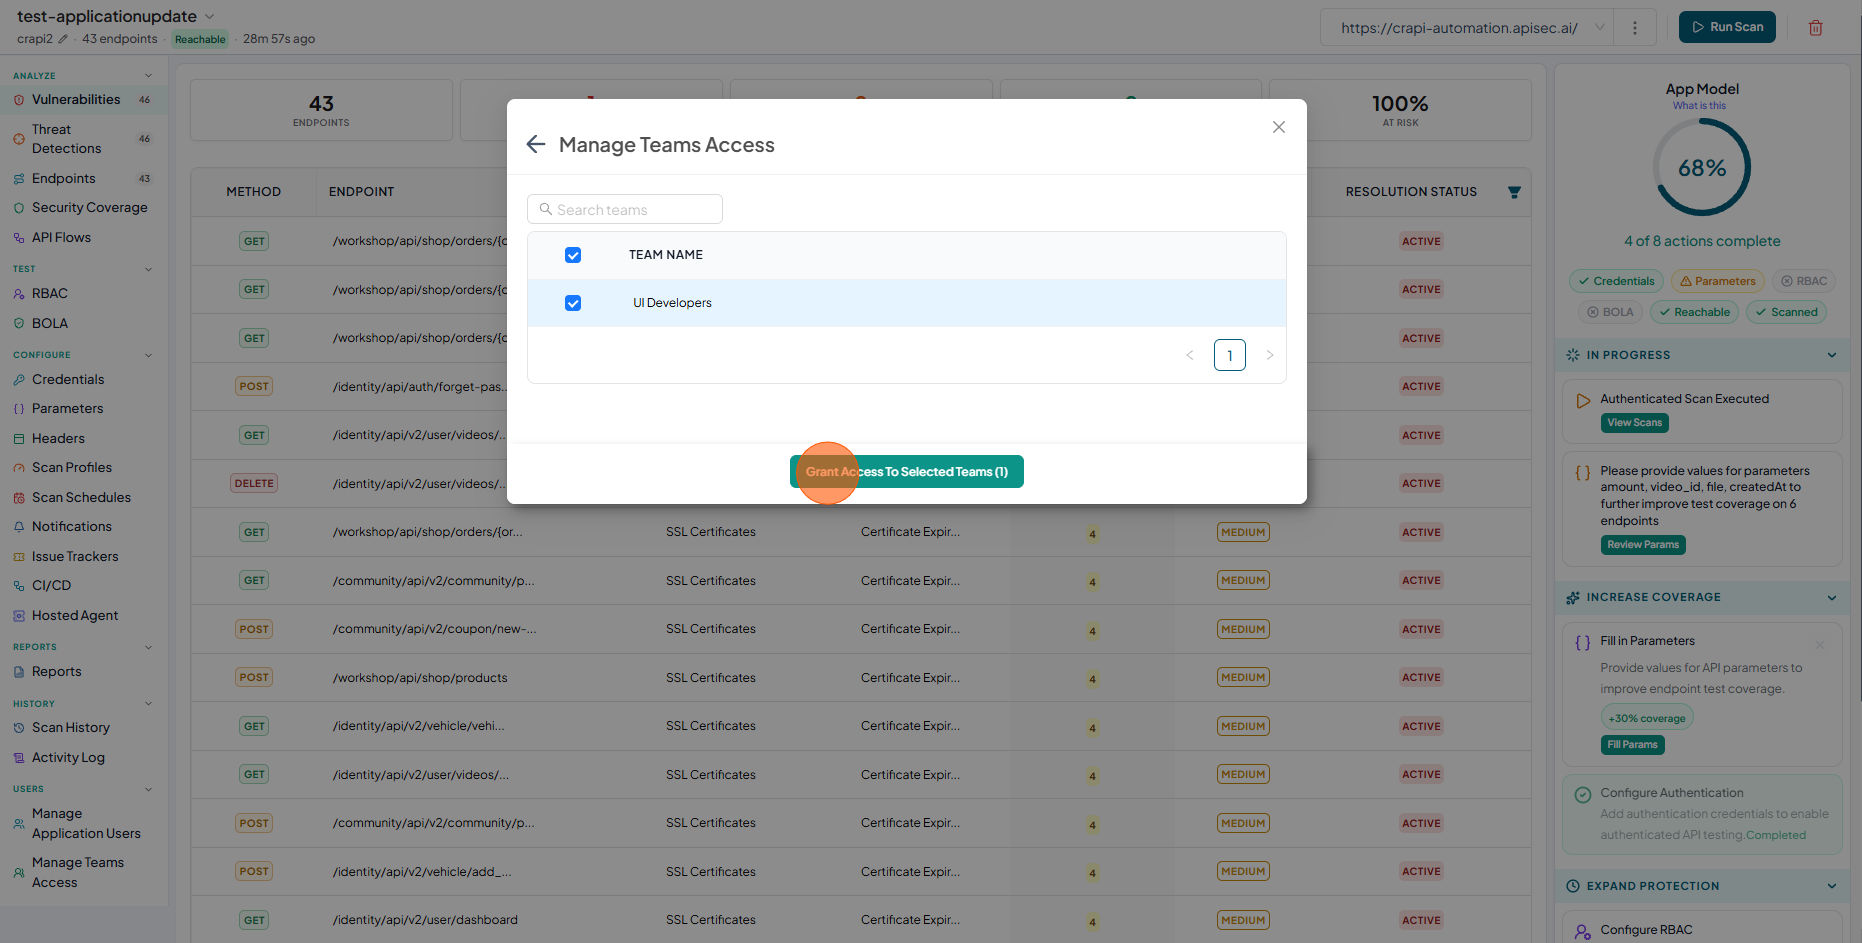
Click Add Teams.
-
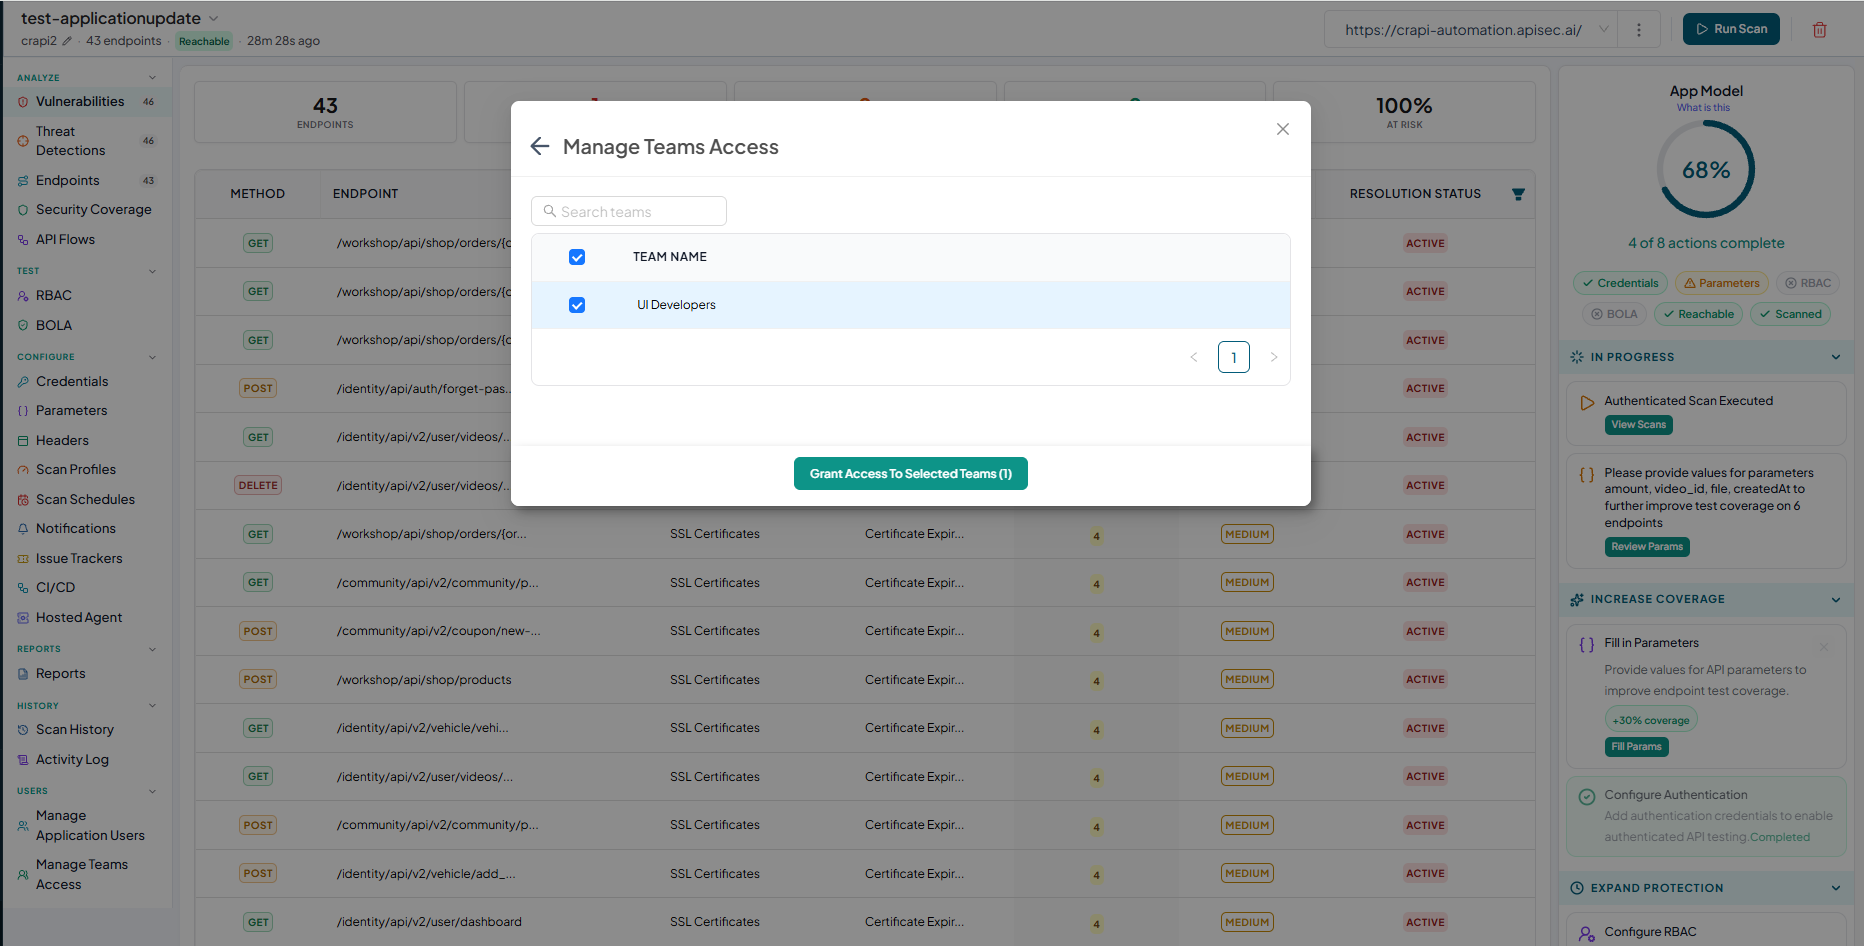
Select the team.
-
Click Grant Access To Selected Teams.
-
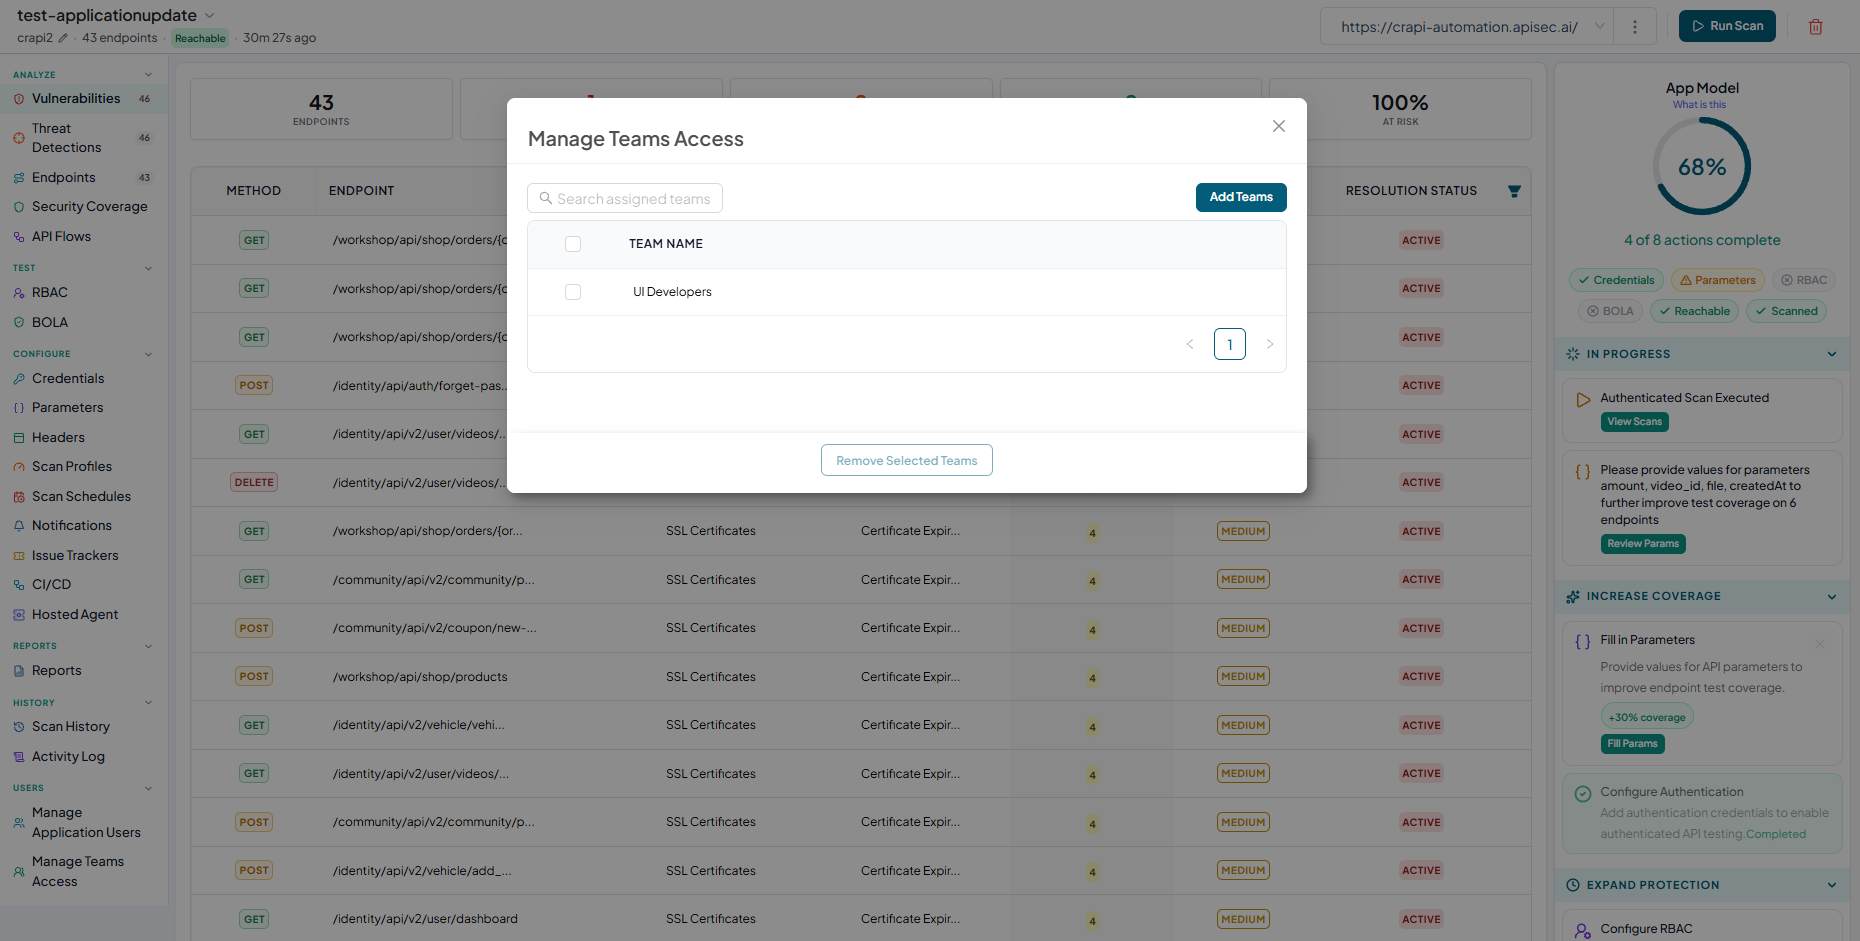
The team is added to the application.
Remove team access
-
From the sidebar, select Manage Teams Access.
-
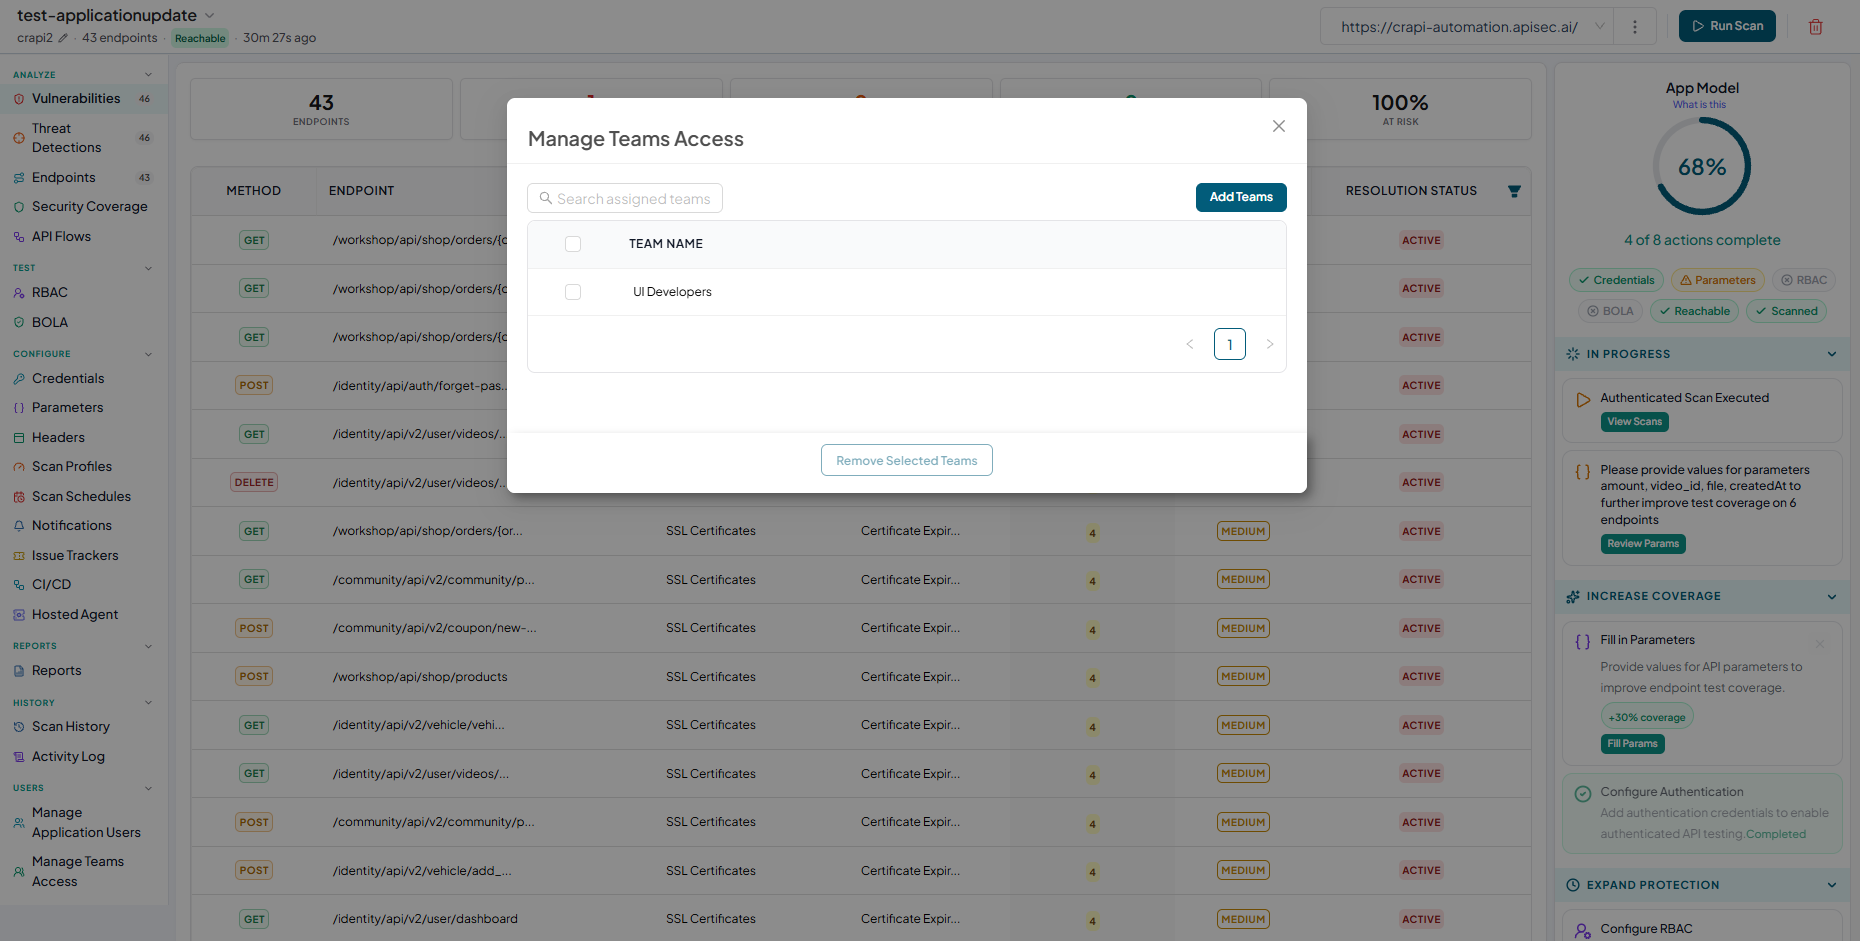
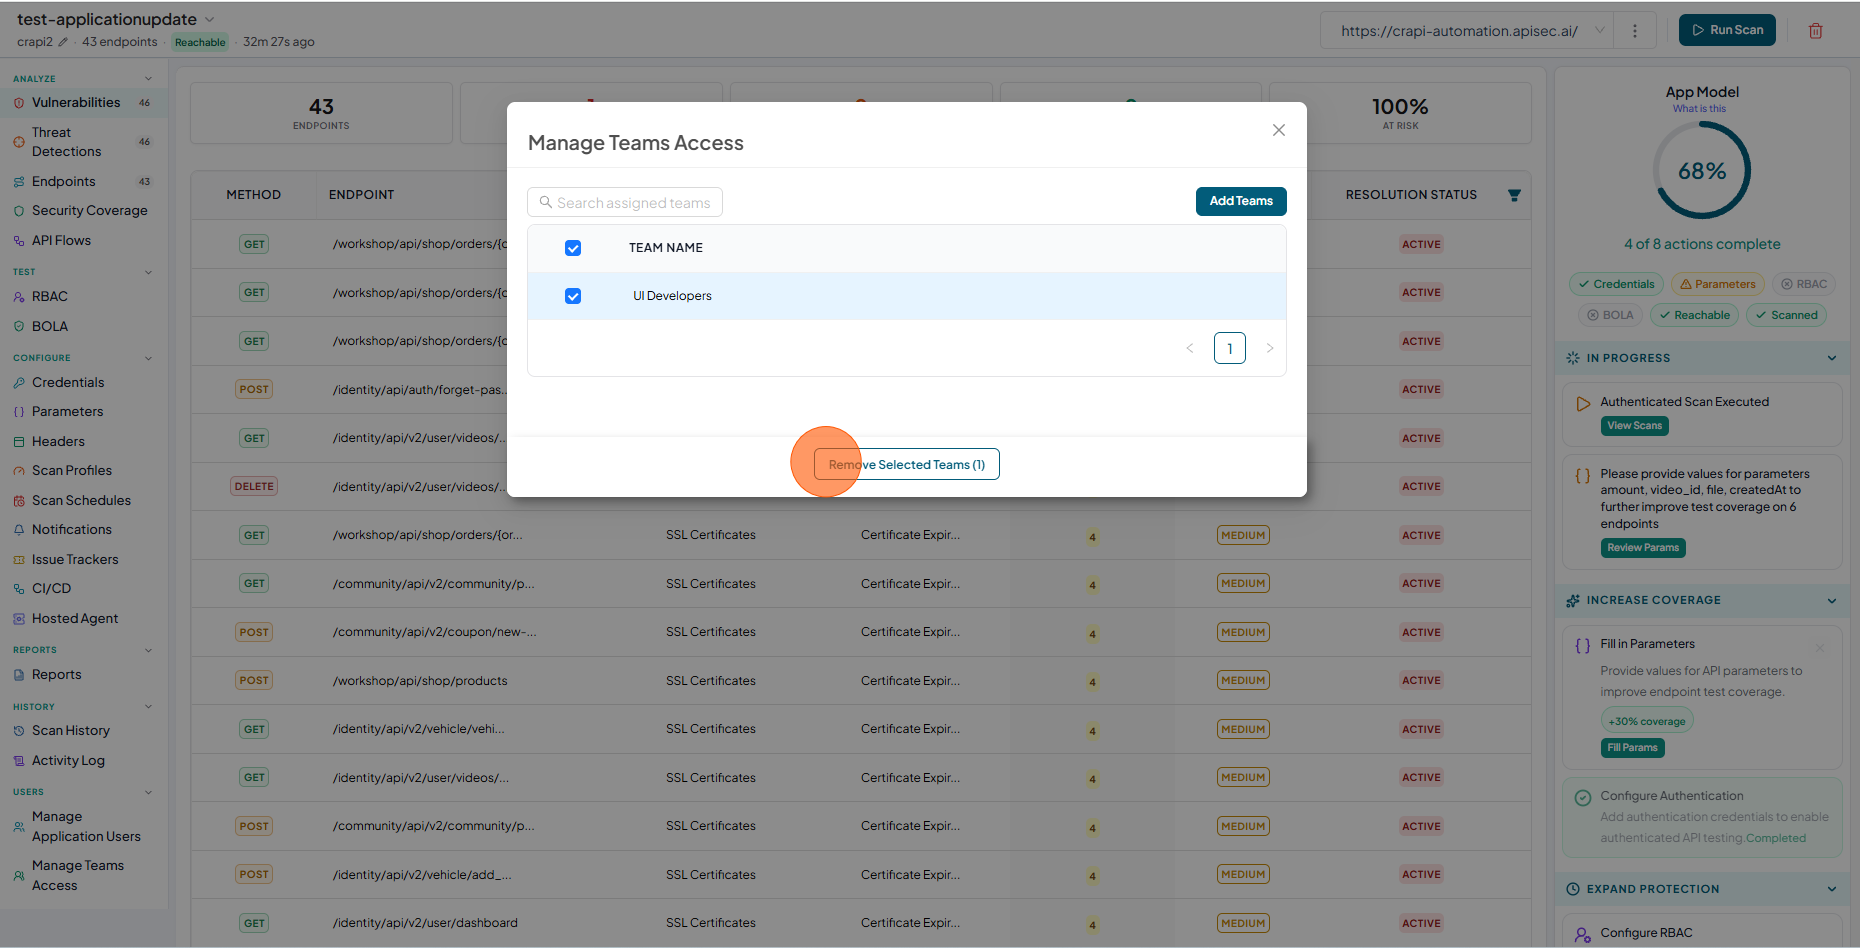
Check the teams that have access to the application.
-
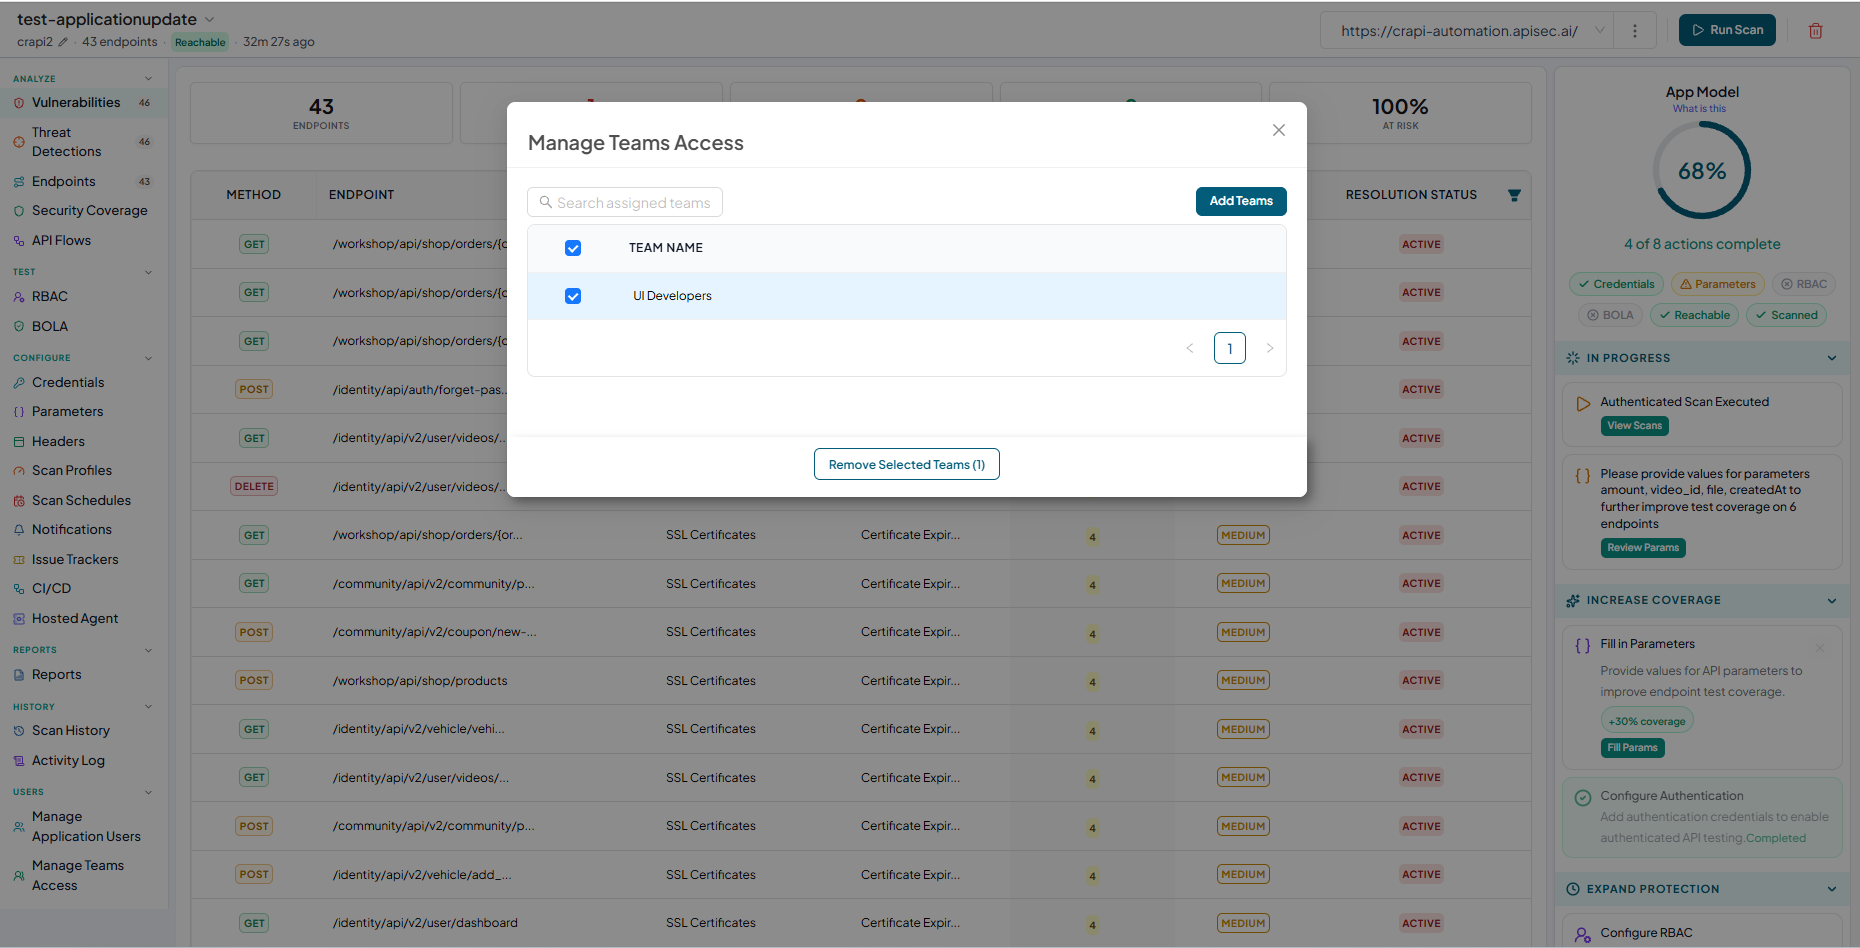
Select the team.
-
Click Remove Selected Teams.
-
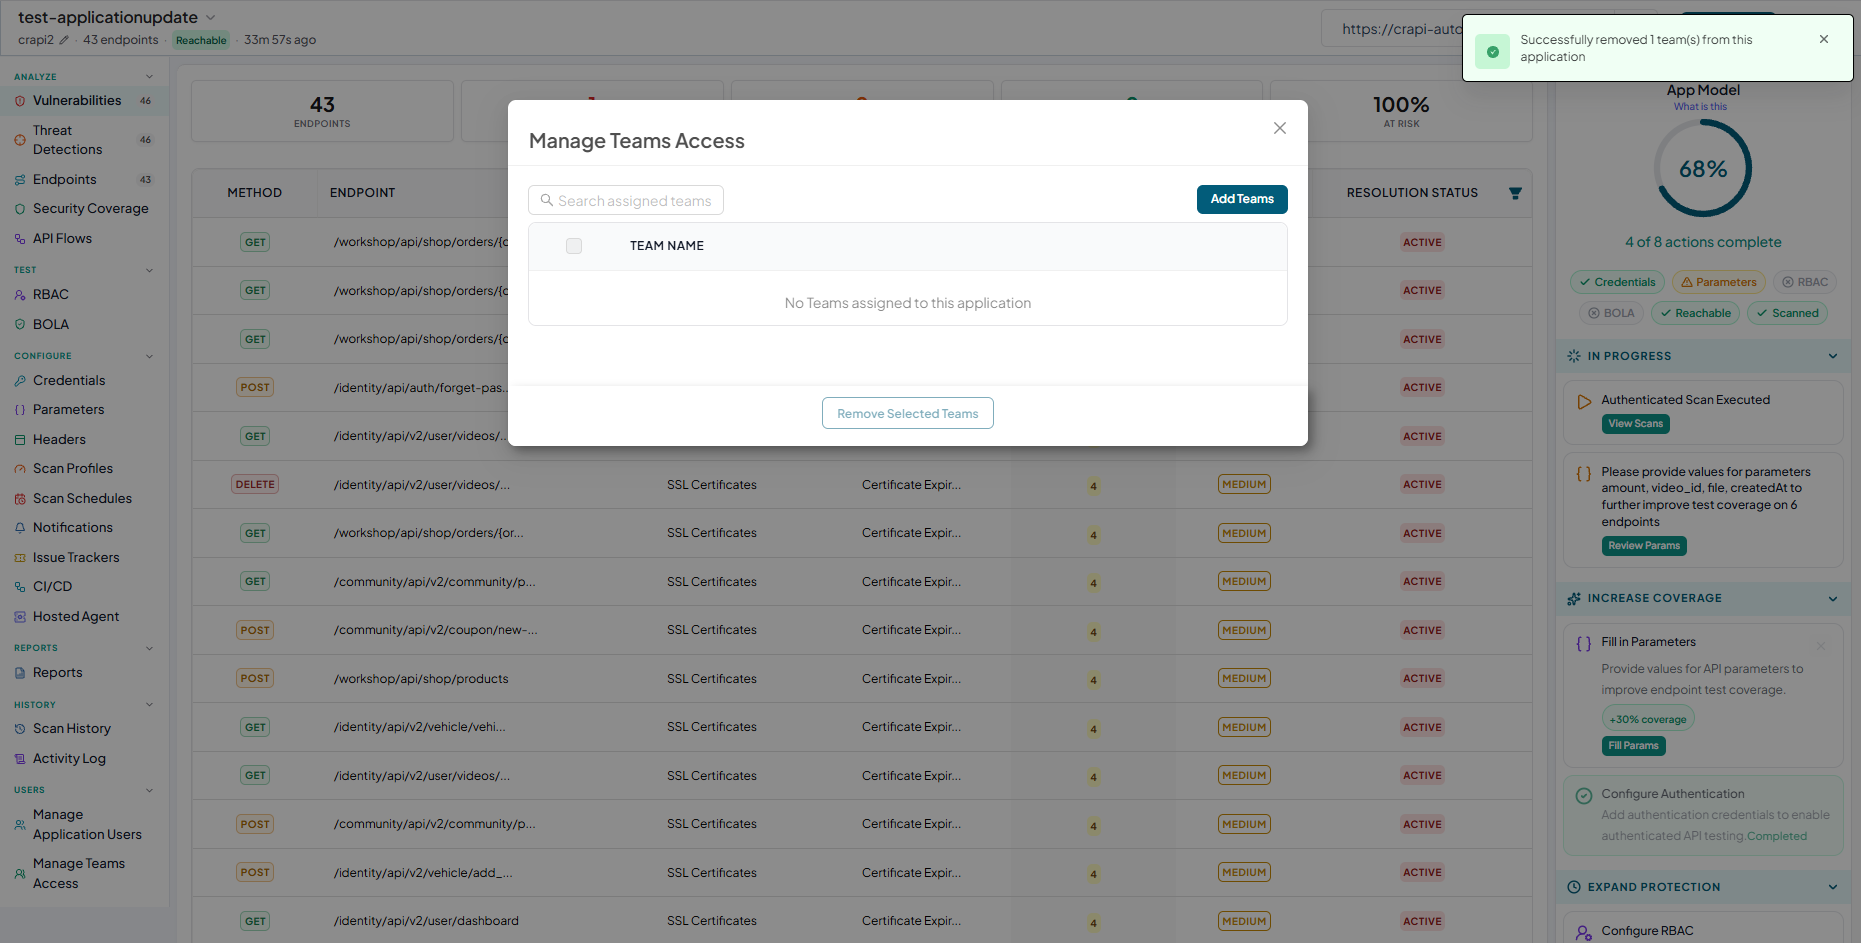
The team is removed from the application.
Related
- Manage endpoints — configure parameters, headers, and request bodies, and add endpoints.
- Delete an application — remove an application you no longer need.