Application and API onboarding
Overview
API onboarding is a crucial step in managing and securing your API ecosystem. Using OpenAPI specifications, you can efficiently onboard applications while ensuring consistency, documentation, and security compliance. This section provides guidance on how to onboard applications and APIs using OpenAPI specs, making the process structured and repeatable.
What You'll Learn
- How to onboard an application using an OpenAPI spec
- Steps to ensure API specifications are properly defined
- Best practices for integrating API security during onboarding
Getting Started with API Onboarding
Understanding OpenAPI Specifications
An OpenAPI Specification (OAS) provides a standardized format to describe your API, enabling:
- Automated API documentation
- Consistent API definitions across teams
- Simplified integration with security and testing tools
Validate your OpenAPI spec using tools like Swagger Editor to catch errors before onboarding.
If your API already has an OpenAPI spec (.json or .yaml), you can use it for a streamlined onboarding process.
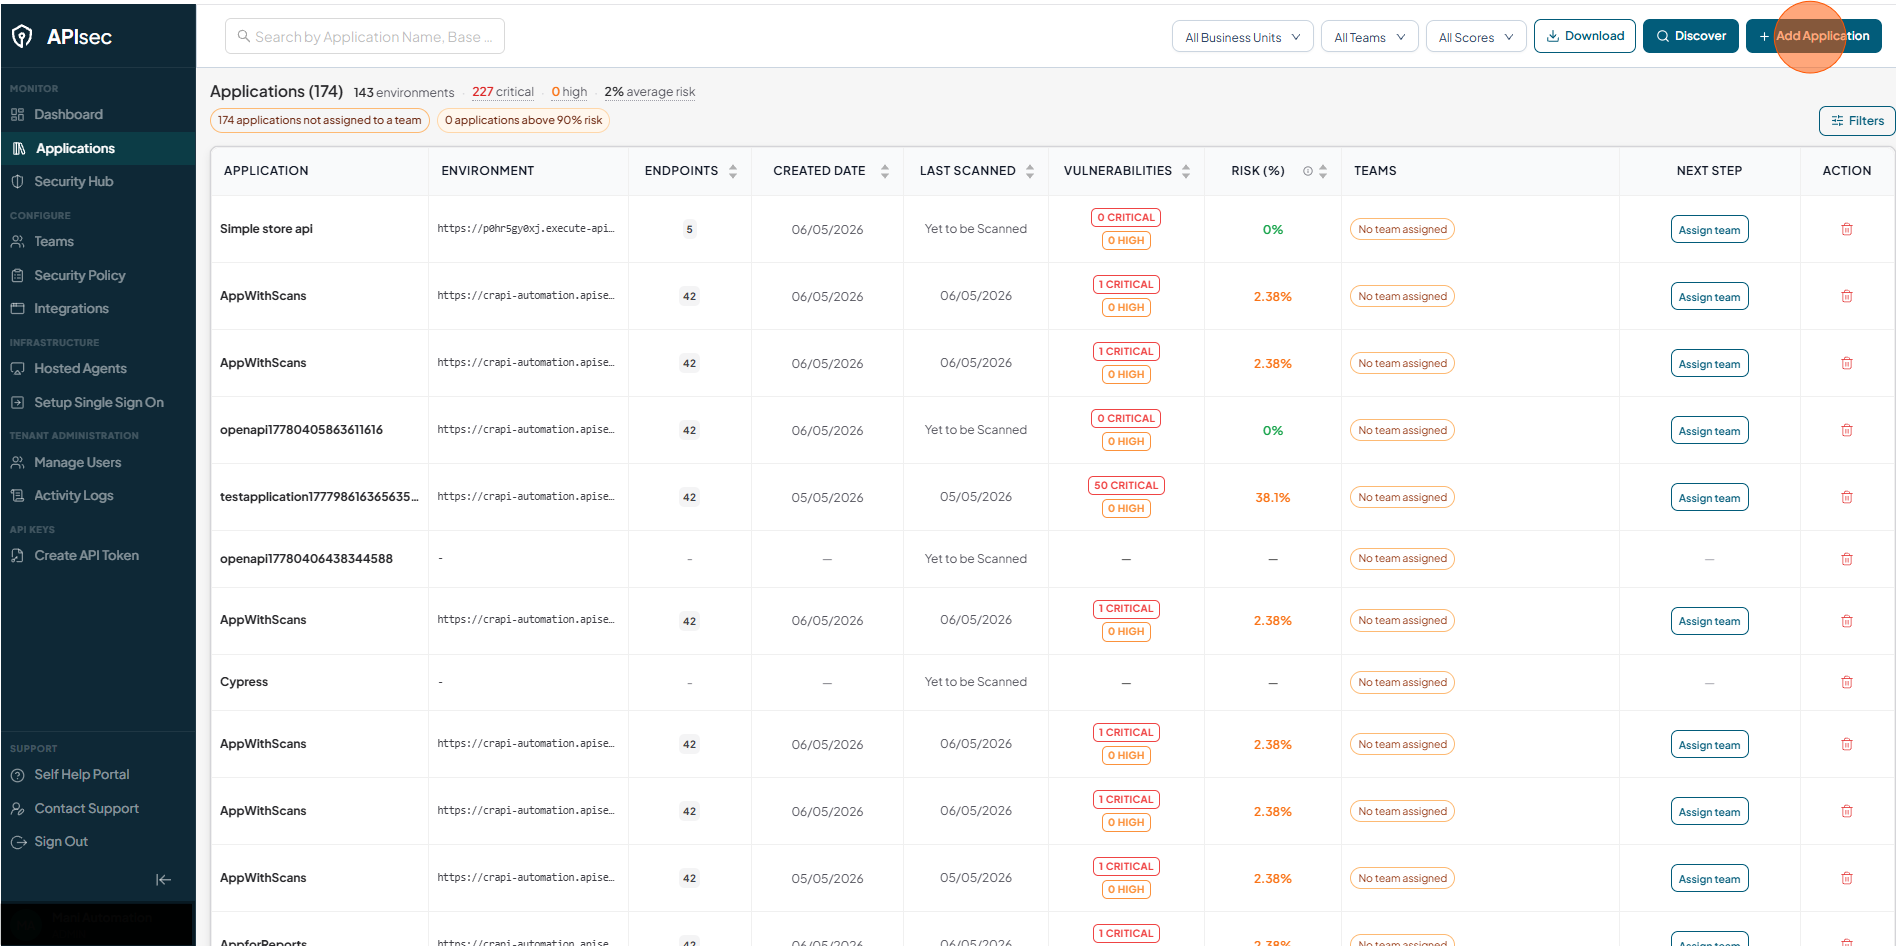
Access the API Onboarding Section
- Navigate to the API Management dashboard.
- Click Add Application to begin onboarding.
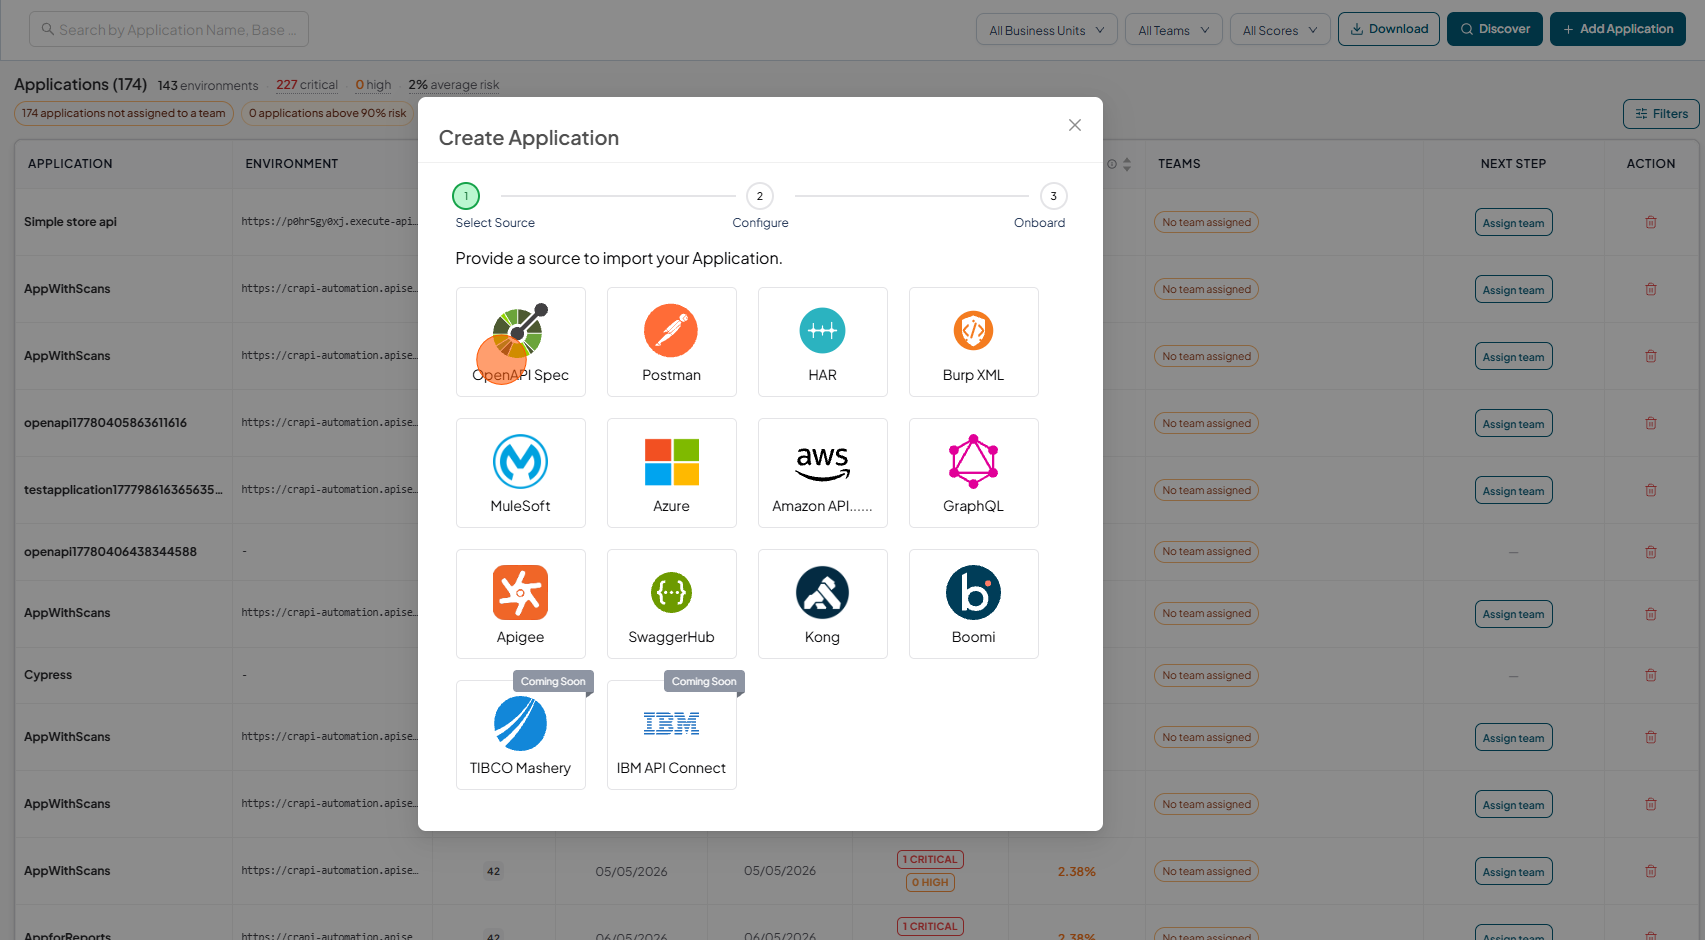
Select the OpenAPI Specification Method
-
Choose OpenAPI Spec.
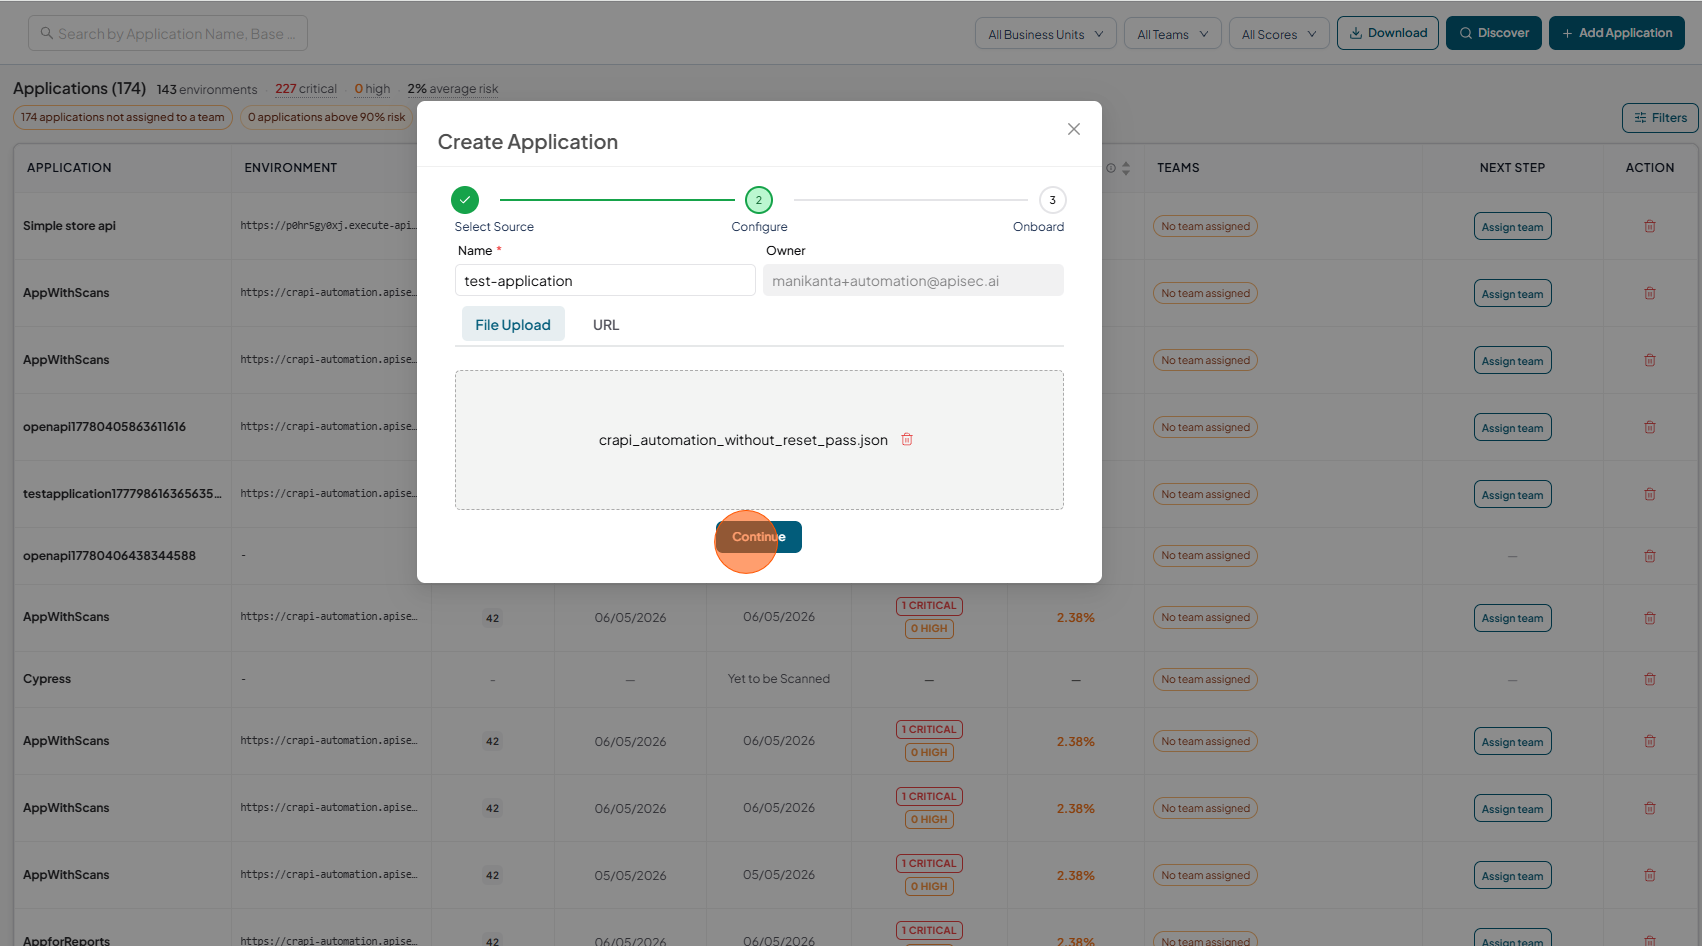
Enter Application Details
-
Provide an application name.
-
Click on "Browse Files" and Upload the API’s OpenAPI file
-
After uploadint the document, click on the "Continue" button.
Review and Confirm
-
Validate the Environment URL and click on "Onboard" button.

Complete the Onboarding Process
-
Once onboarding is complete, you can view the application.
Once your API is onboarded, you can:
- Test API security to identify vulnerabilities
- Enable monitoring to track API usage and performance
- Integrate with API gateways for traffic management and security enforcement
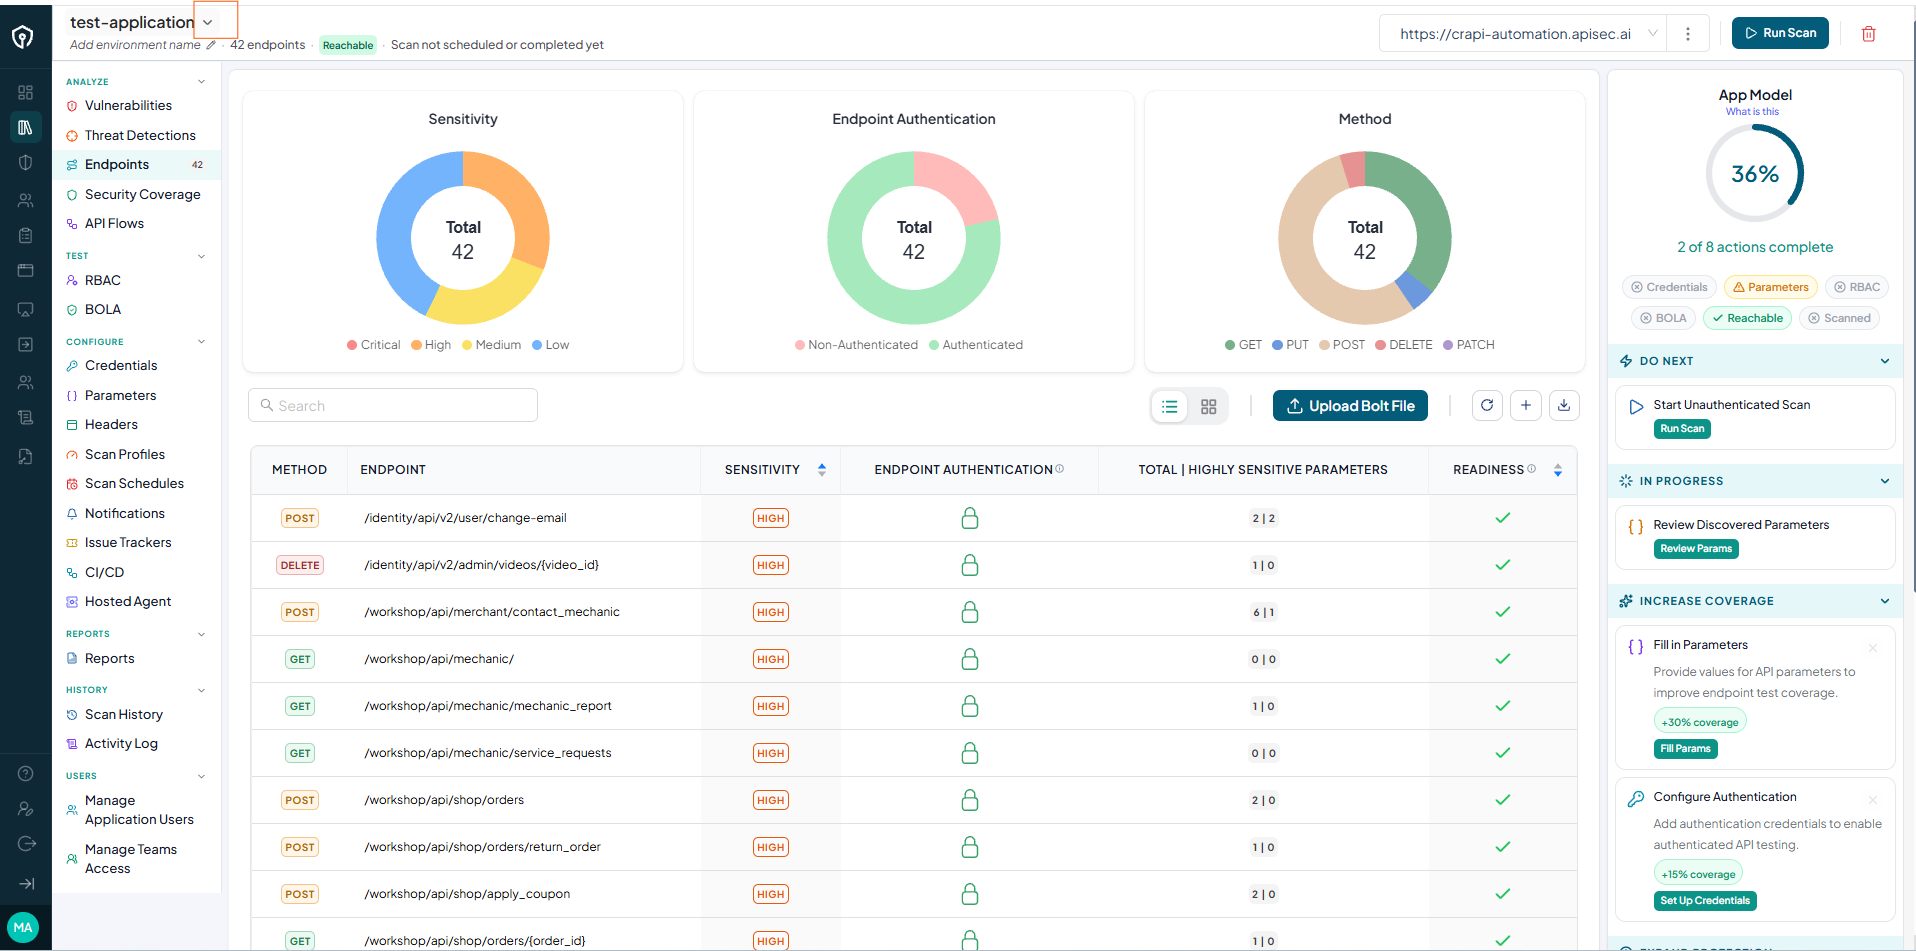
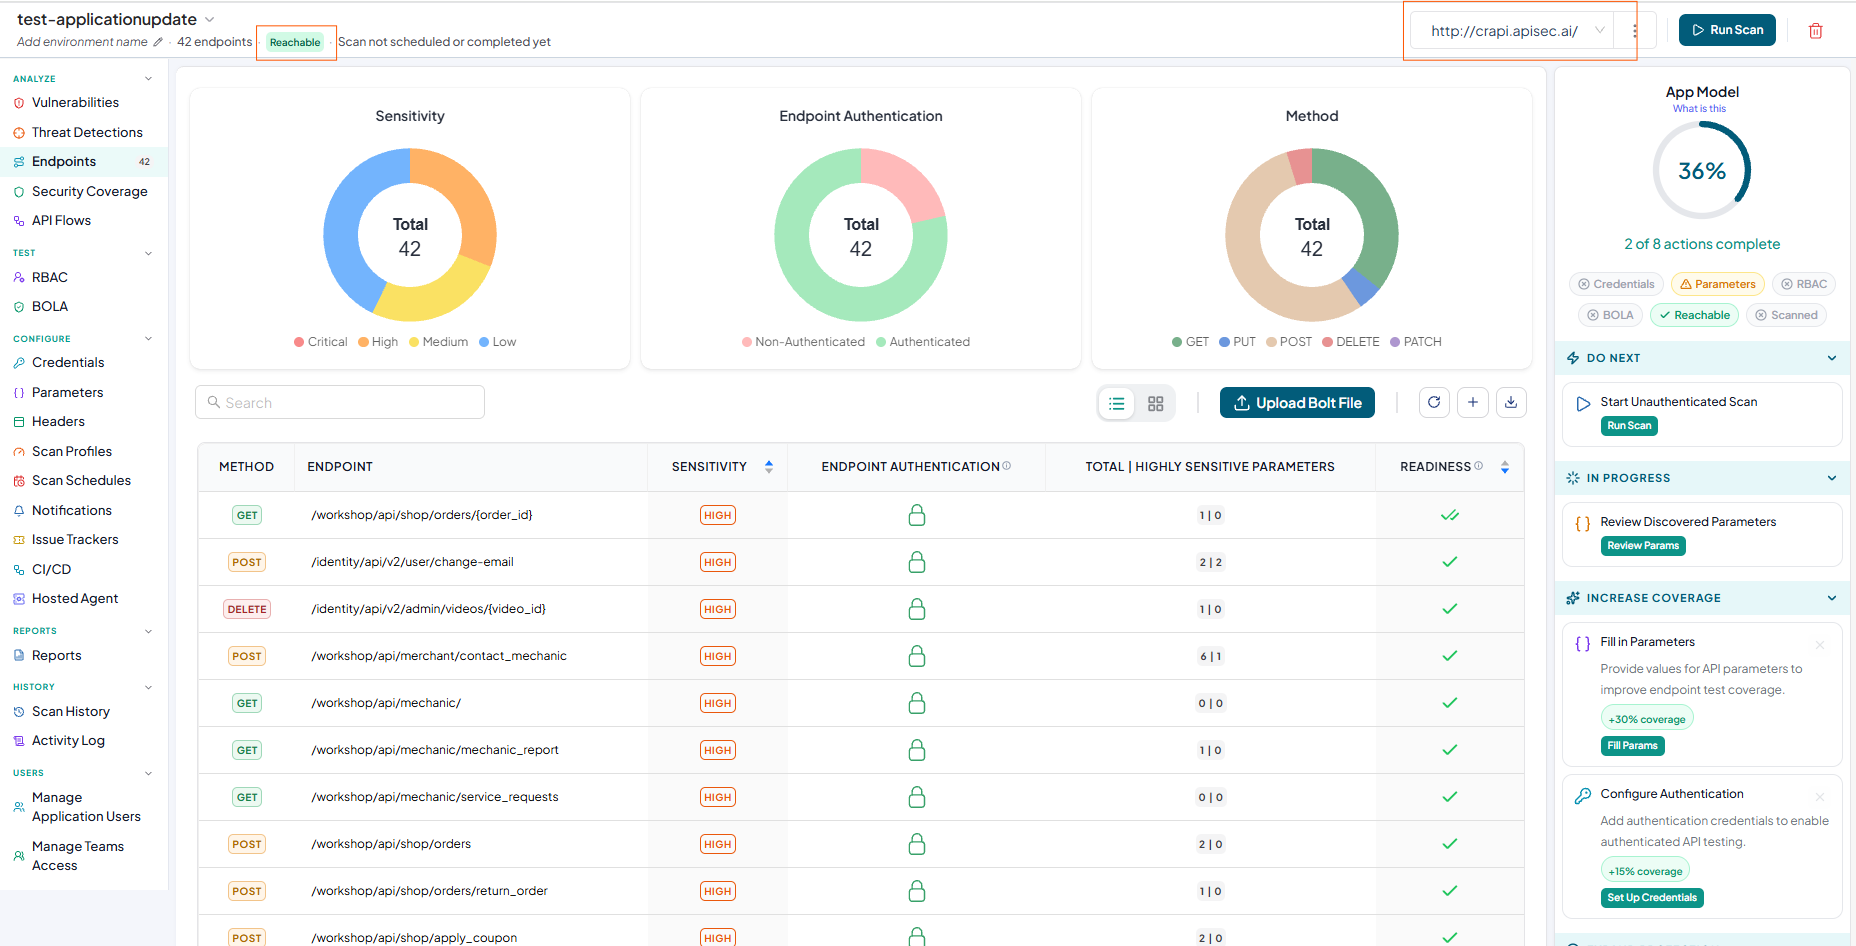
In application details page, you can find the application name, reachability status, scan status, and the Environment URL of your application"
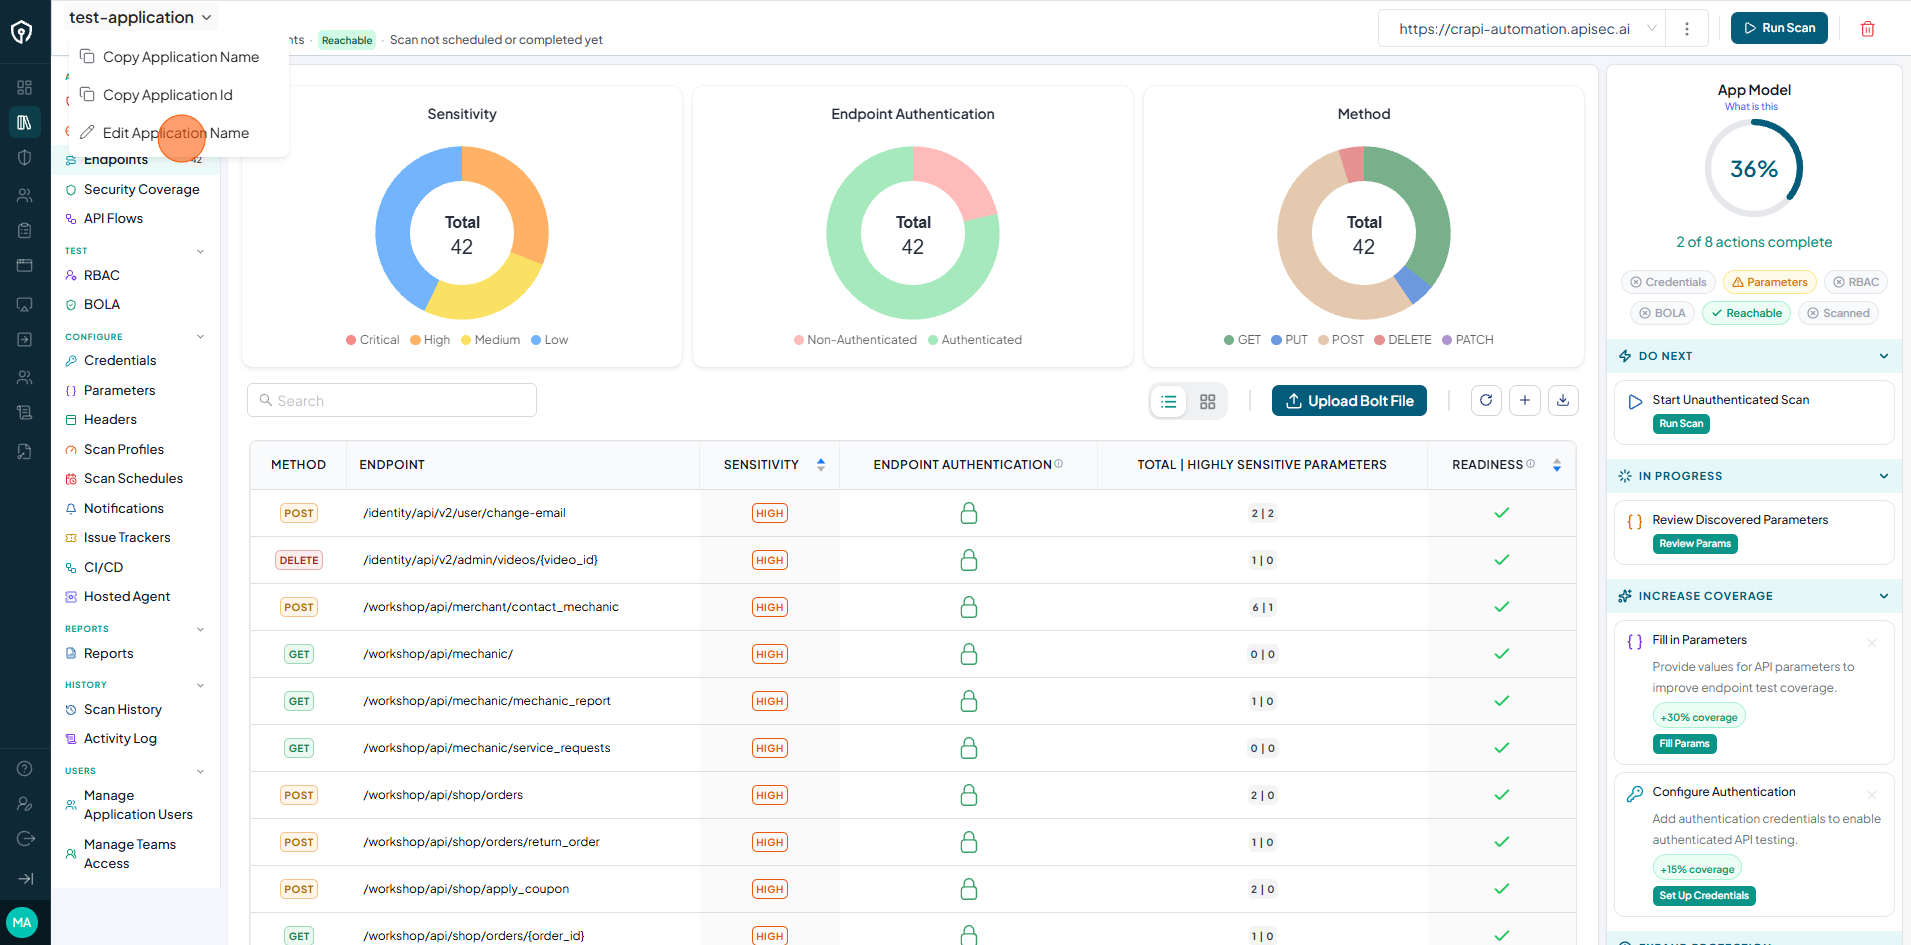
Update Application Name
-
Click the application name dropdown
-
Select Edit Application Name
-
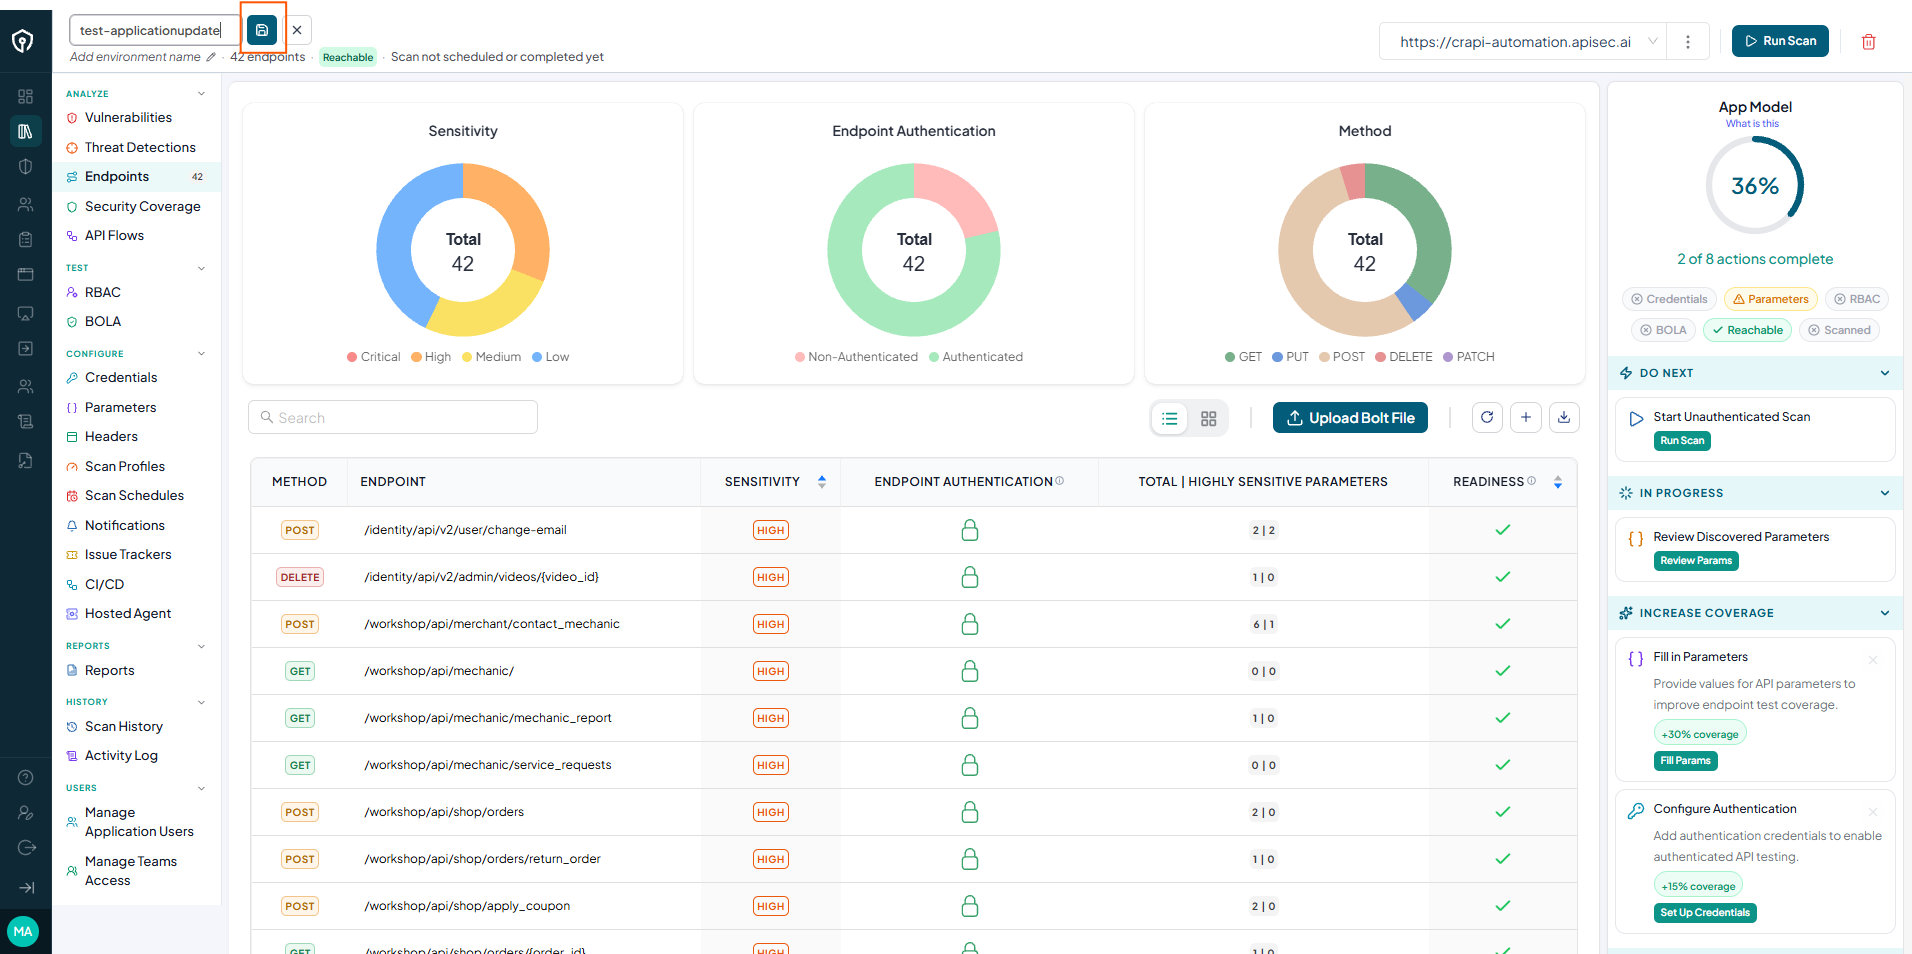
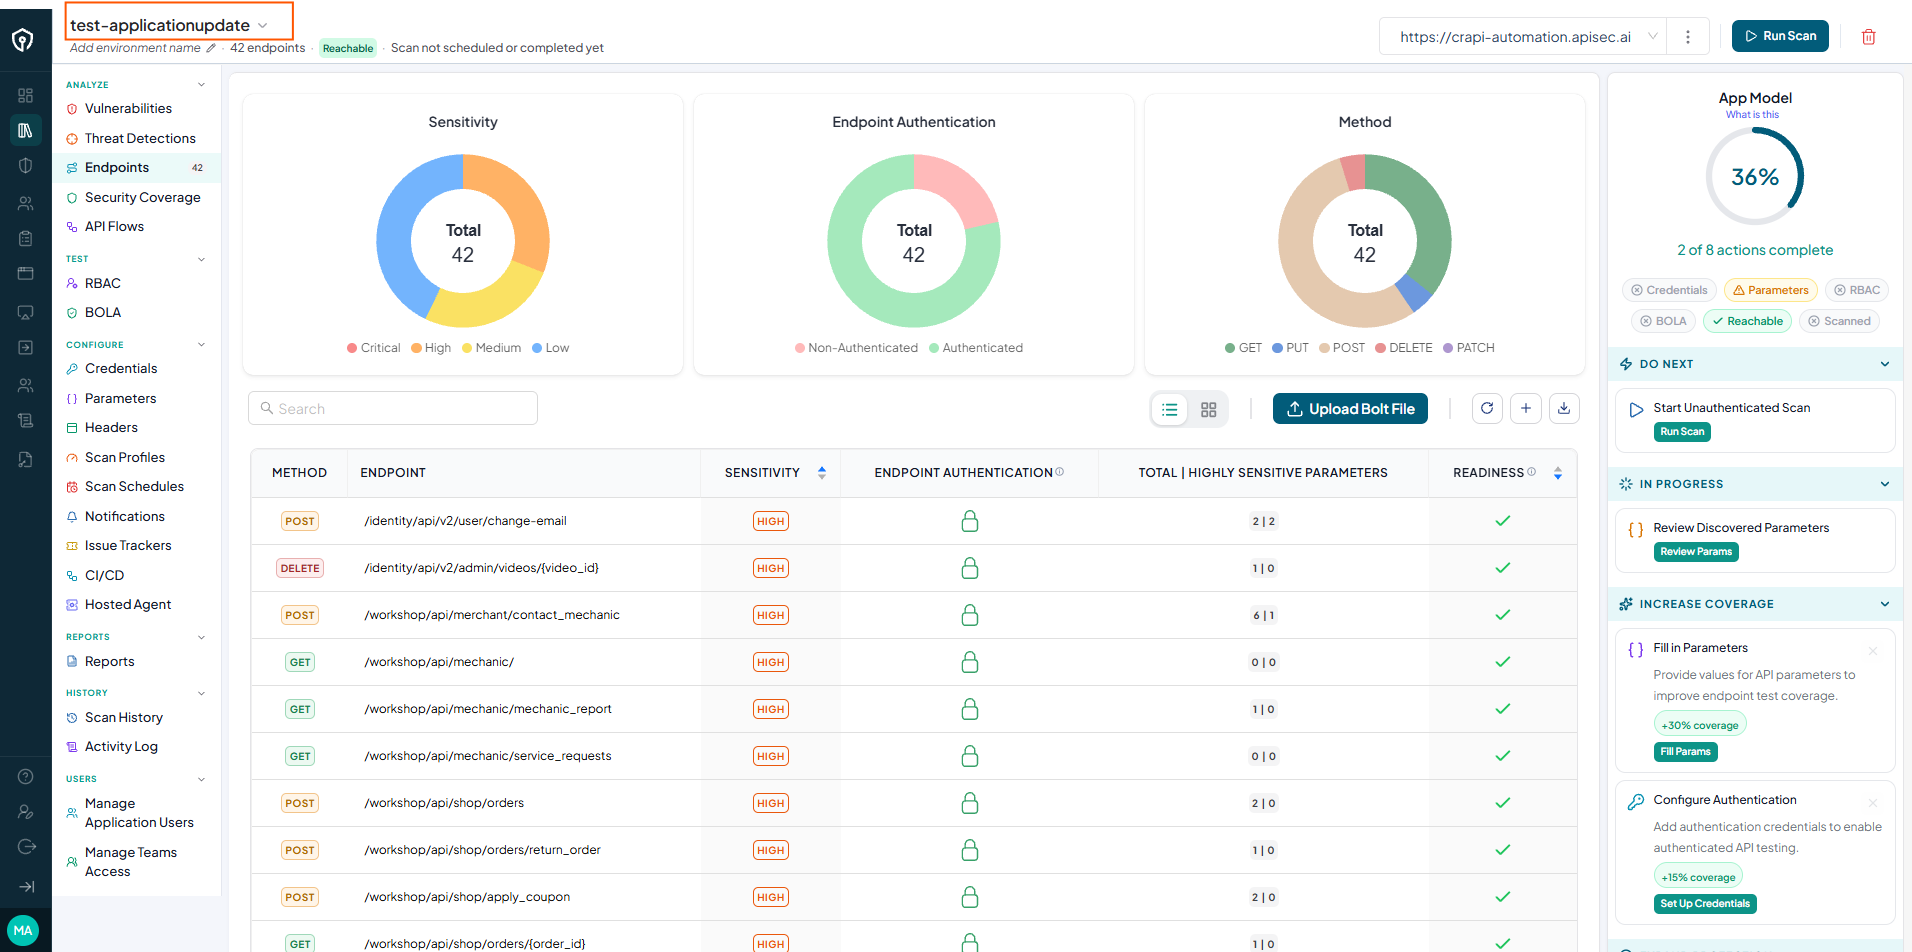
Update the application name and click Save
-
Verify that the updated application name is displayed.
Users with View permissions cannot update shared application name
Add/update environment name
-
Click the Pencil icon next to Add environment name to edit and update it.
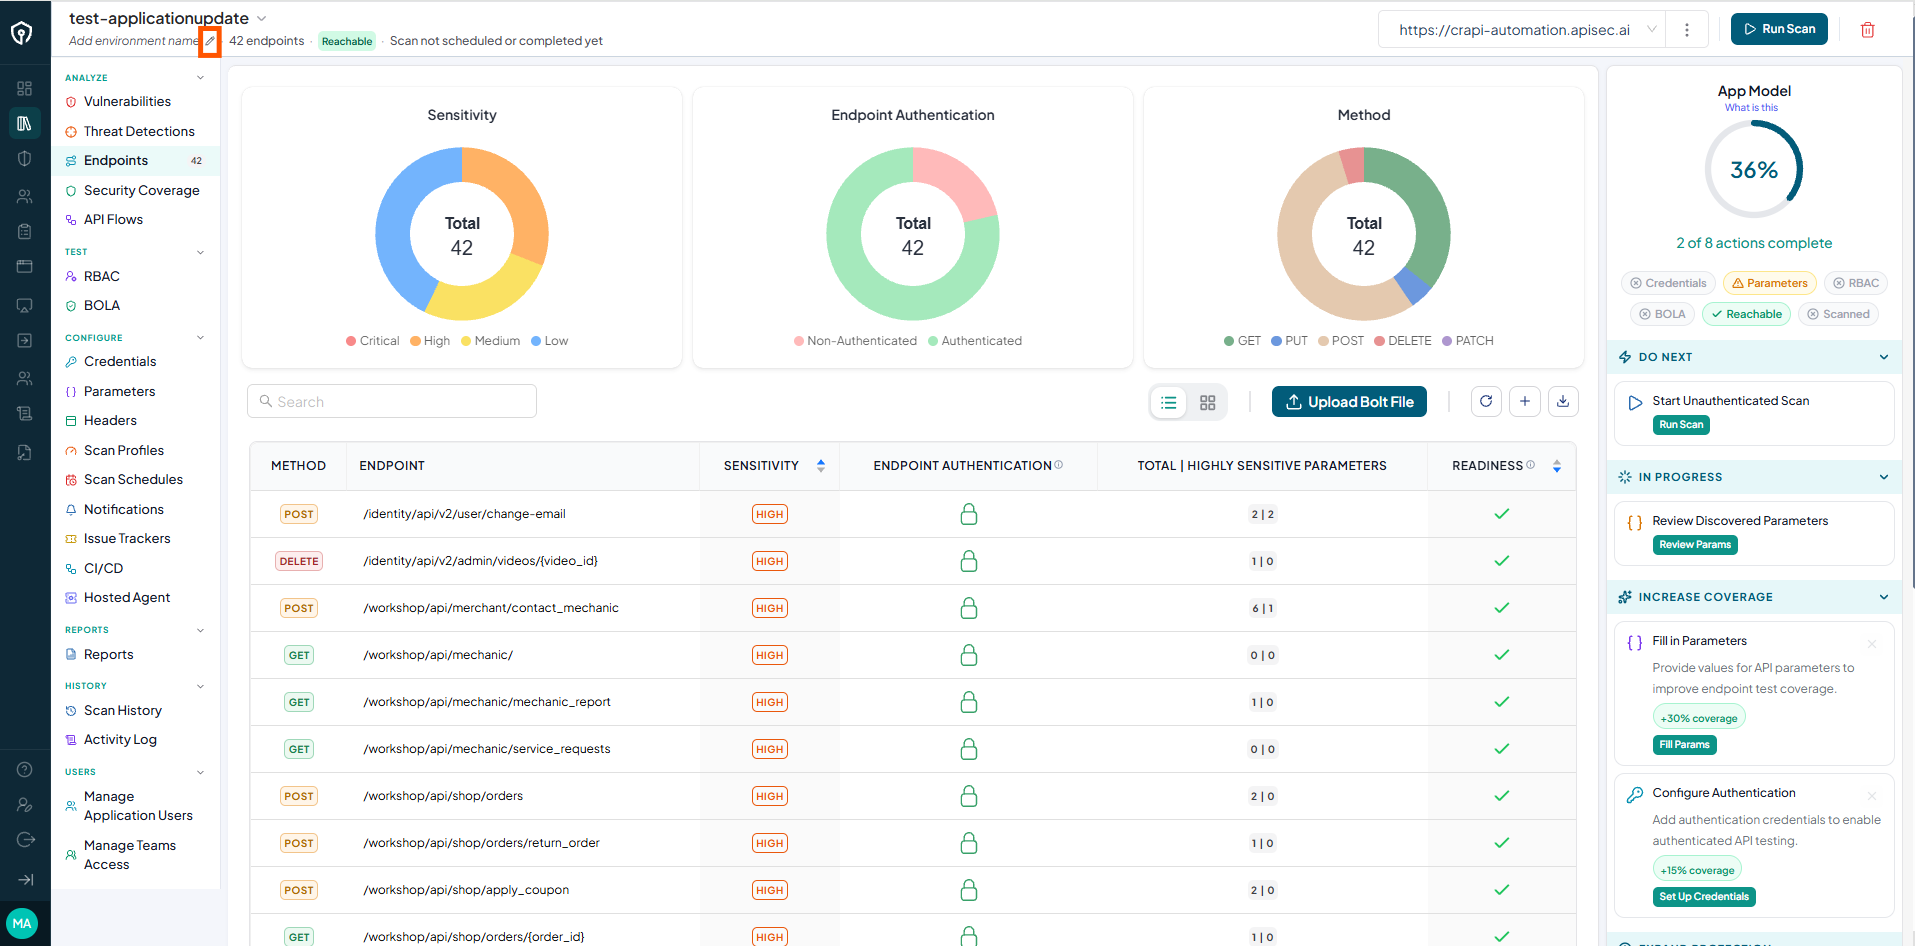
Users with View permissions cannot add/update environment name in shared application
Edit environment URL
-
Click the options menu (three dots).

-
Select Edit Environment
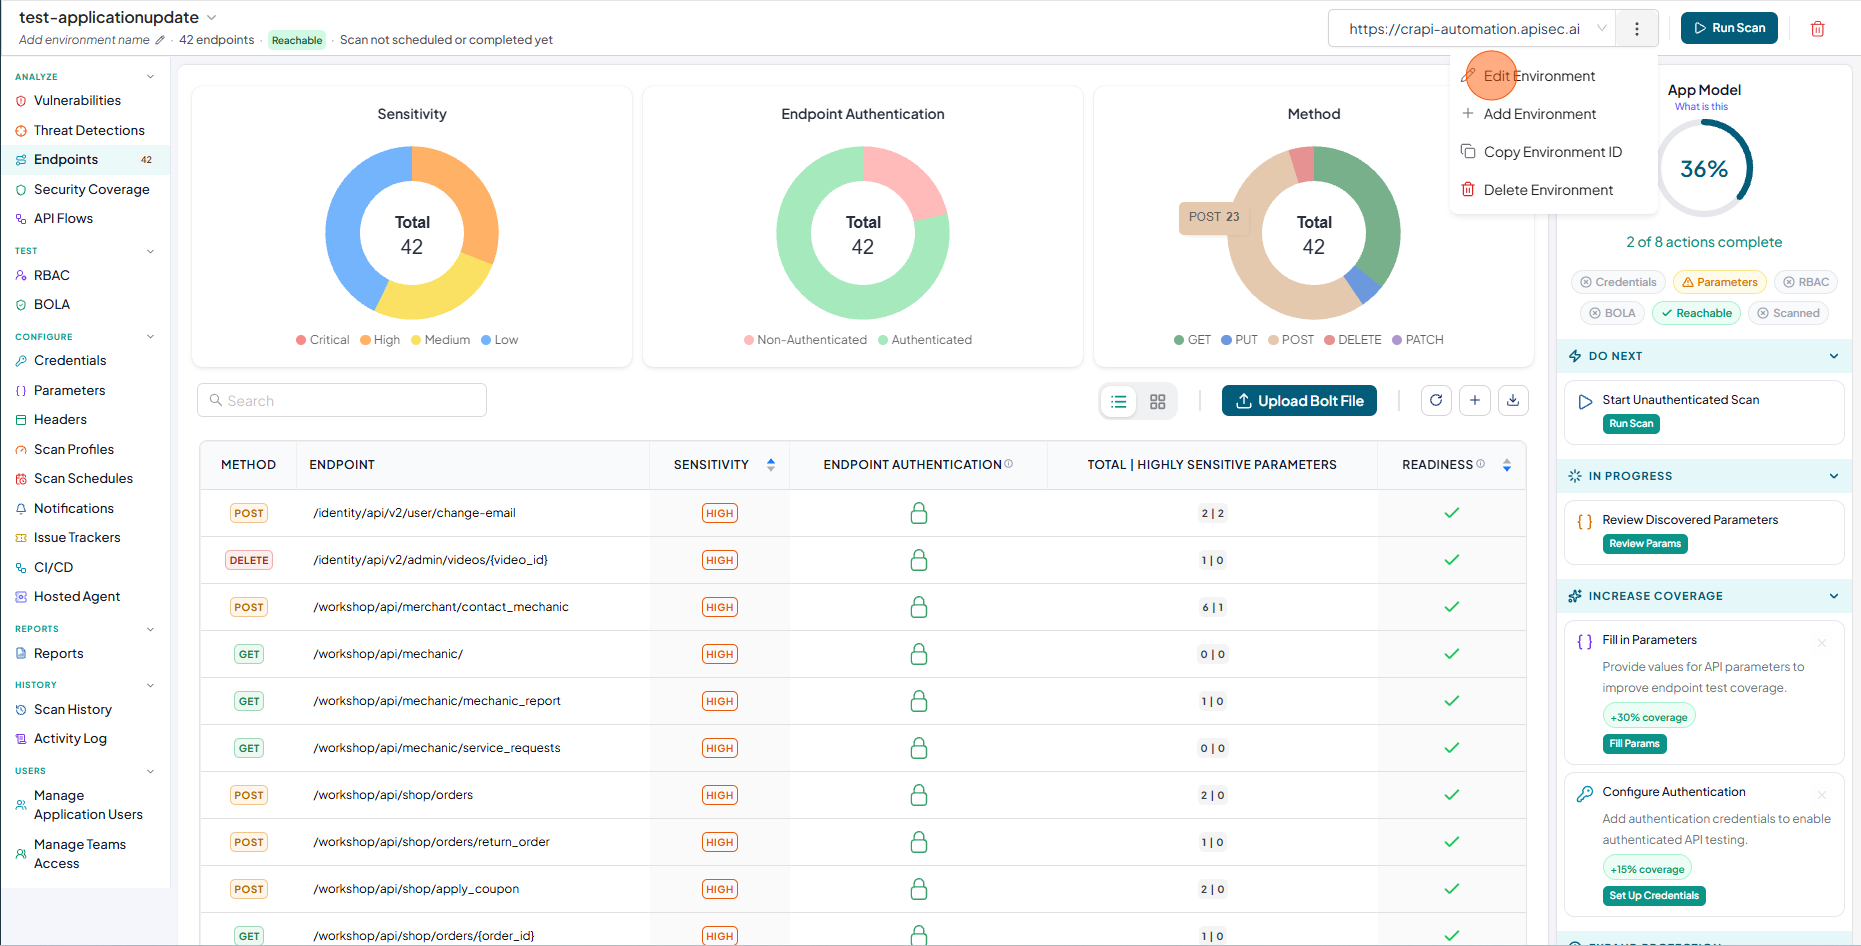
-
Update the environment URL and Click Test Reachability
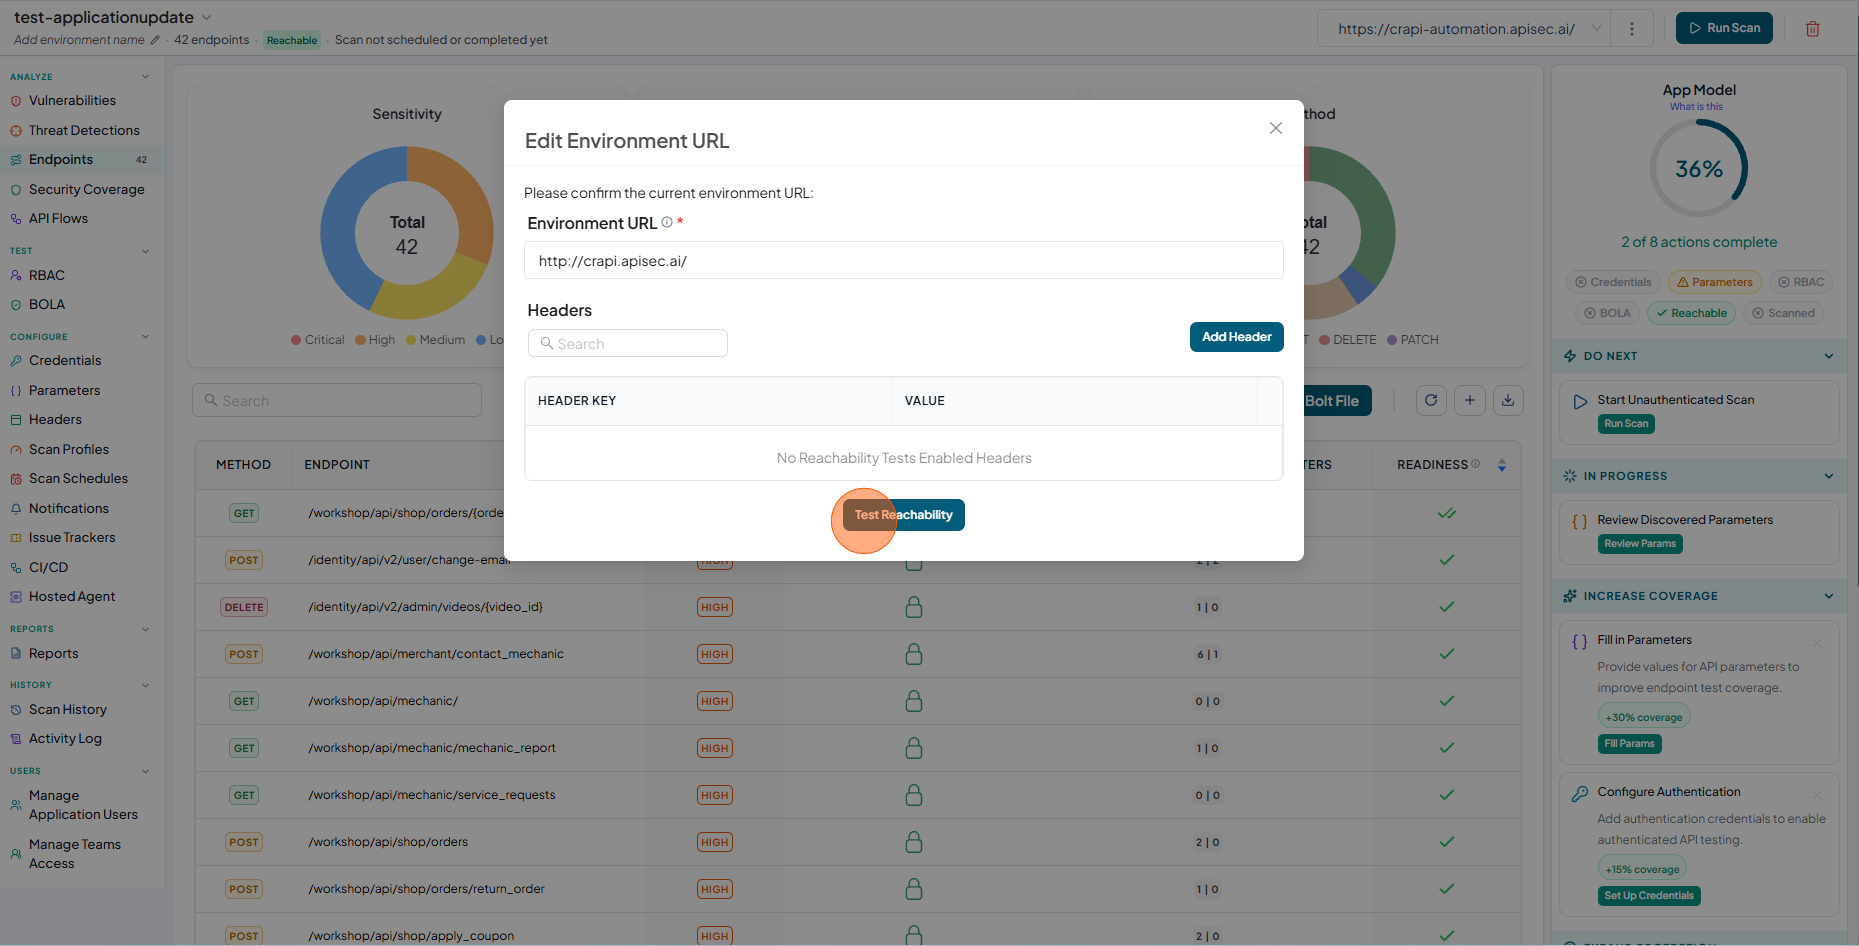
-
After reachability test, you can observe the environment URL changes in the screen along with the reachability status.
Users with View permissions cannot Edit environment URL in shared application
Adding environment URL
-
Click the options menu (three dots).
-
Select Add Environment

-
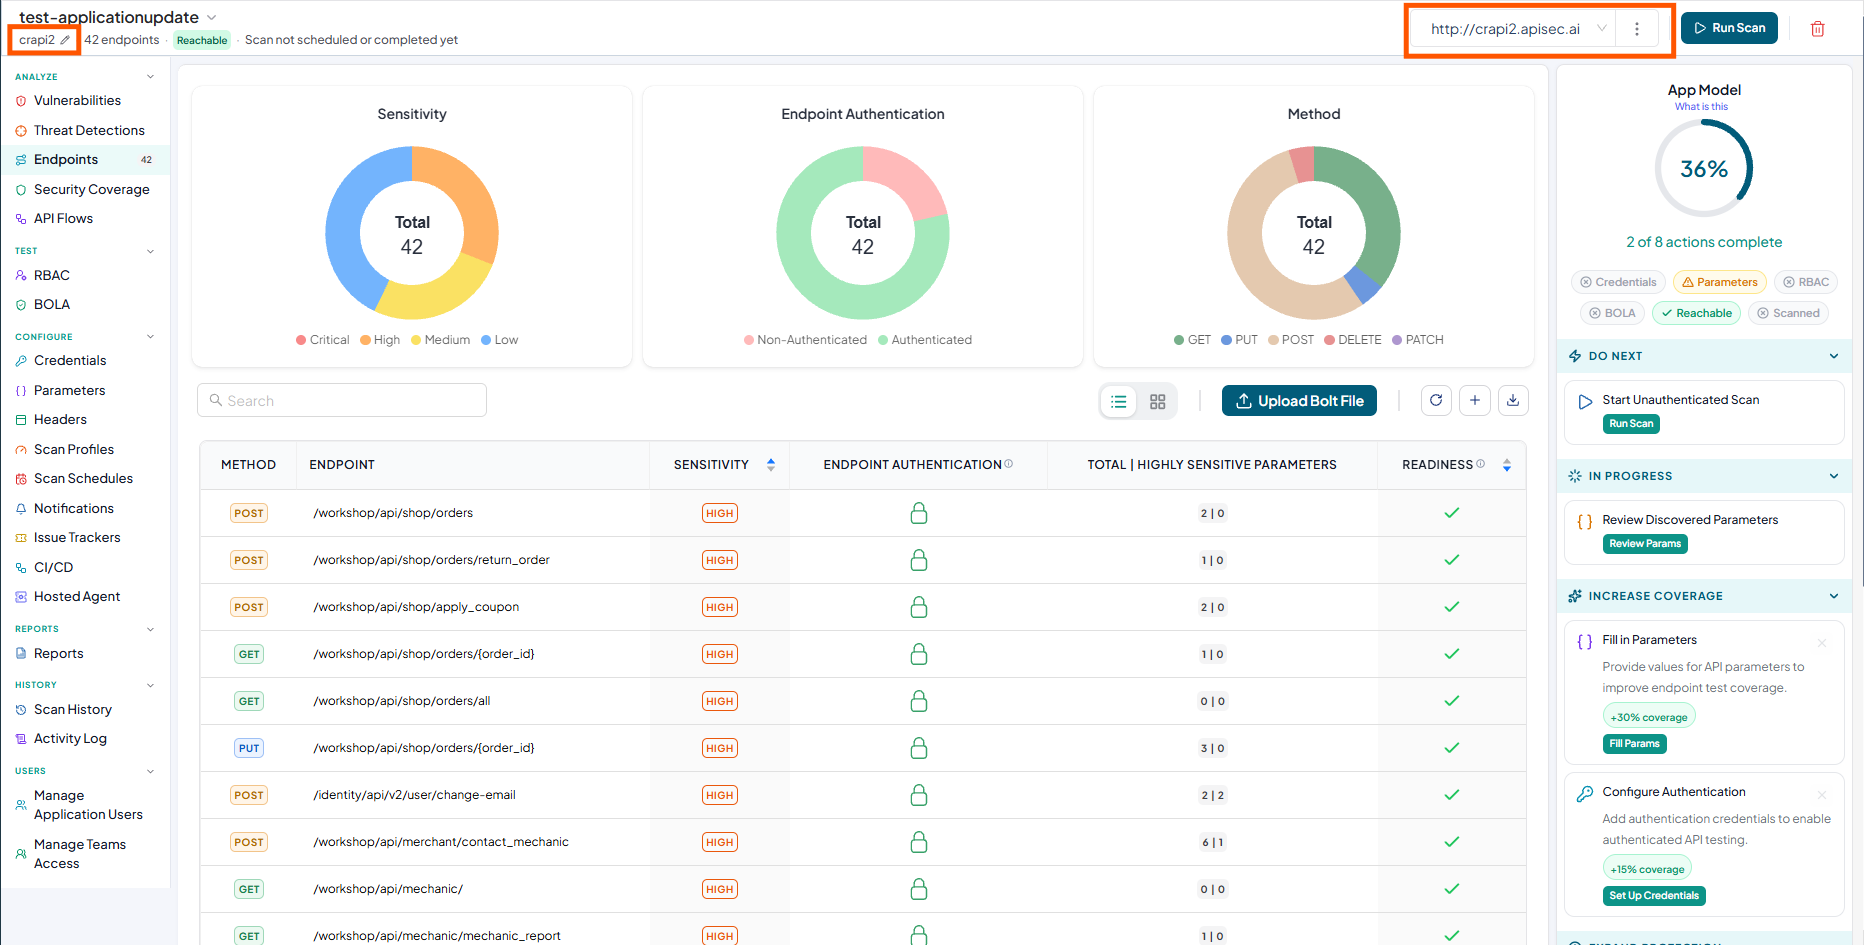
Add the new environment URL and environment name (optional) and Click Add
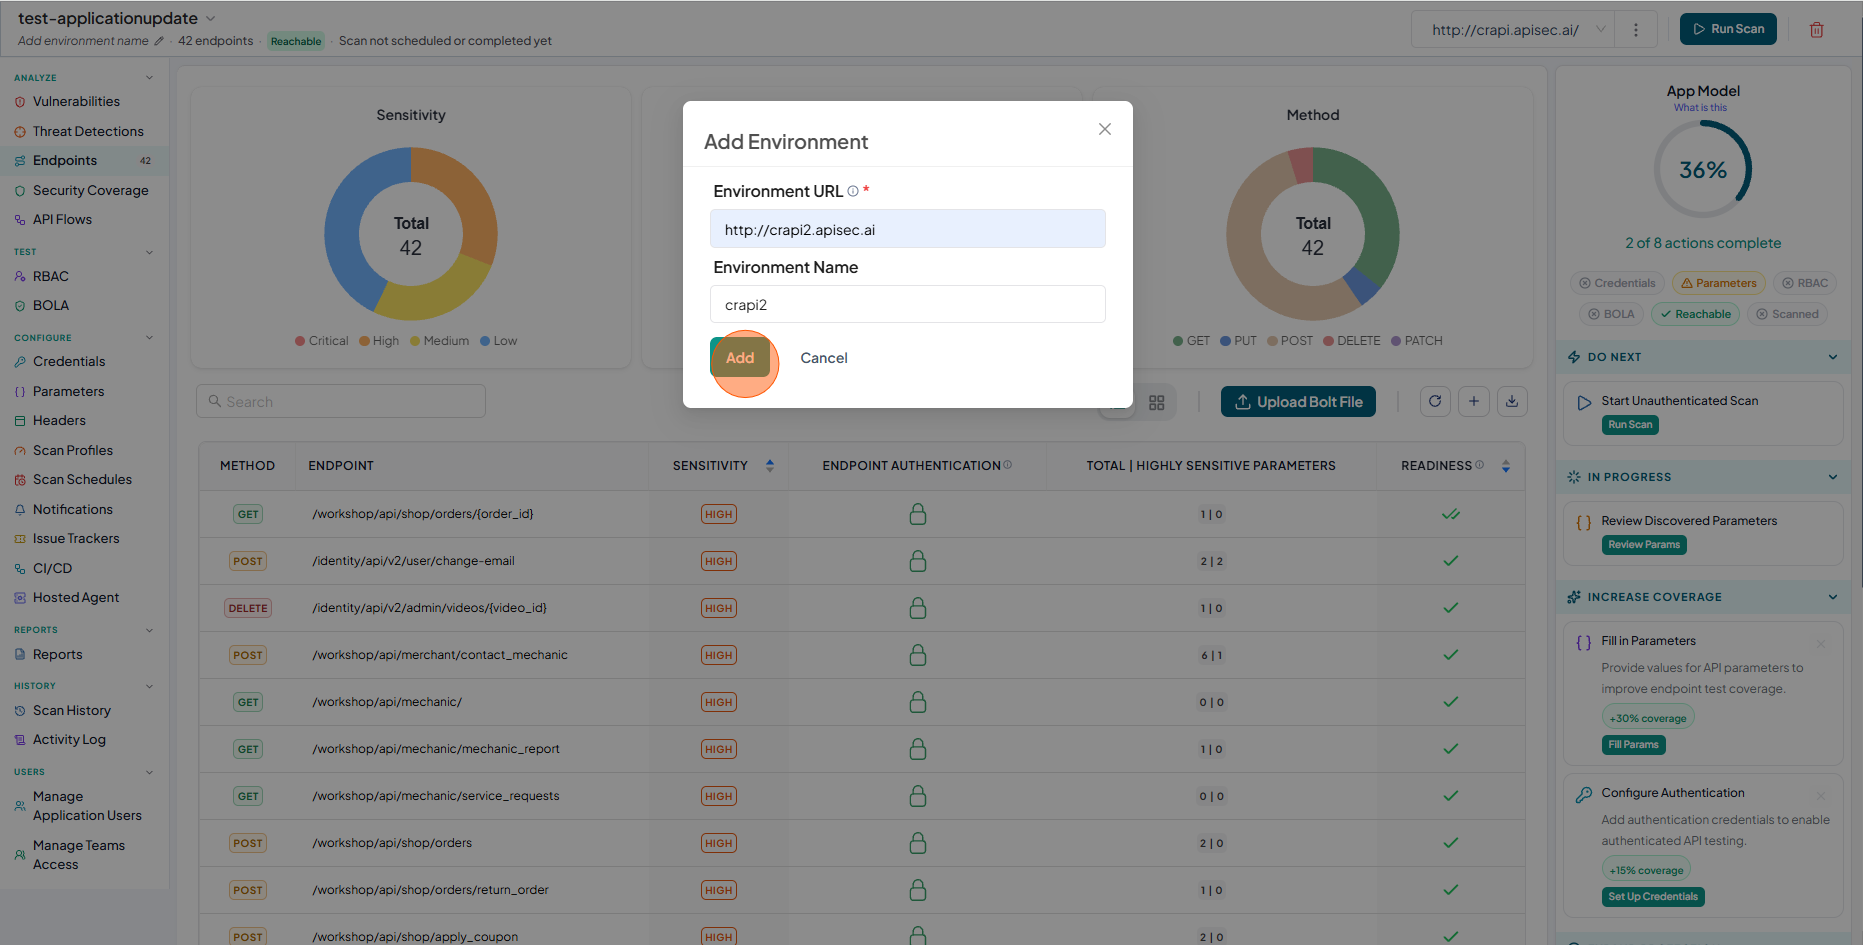
-
After that you can observe the newly added environment url in the screen along with its reachability status.
 note
noteUsers with View permissions cannot add environment URL in shared application
Delete environment
-
Click the options menu (three dots).
-
Select Delete Environment

-
Click Delete to confirm
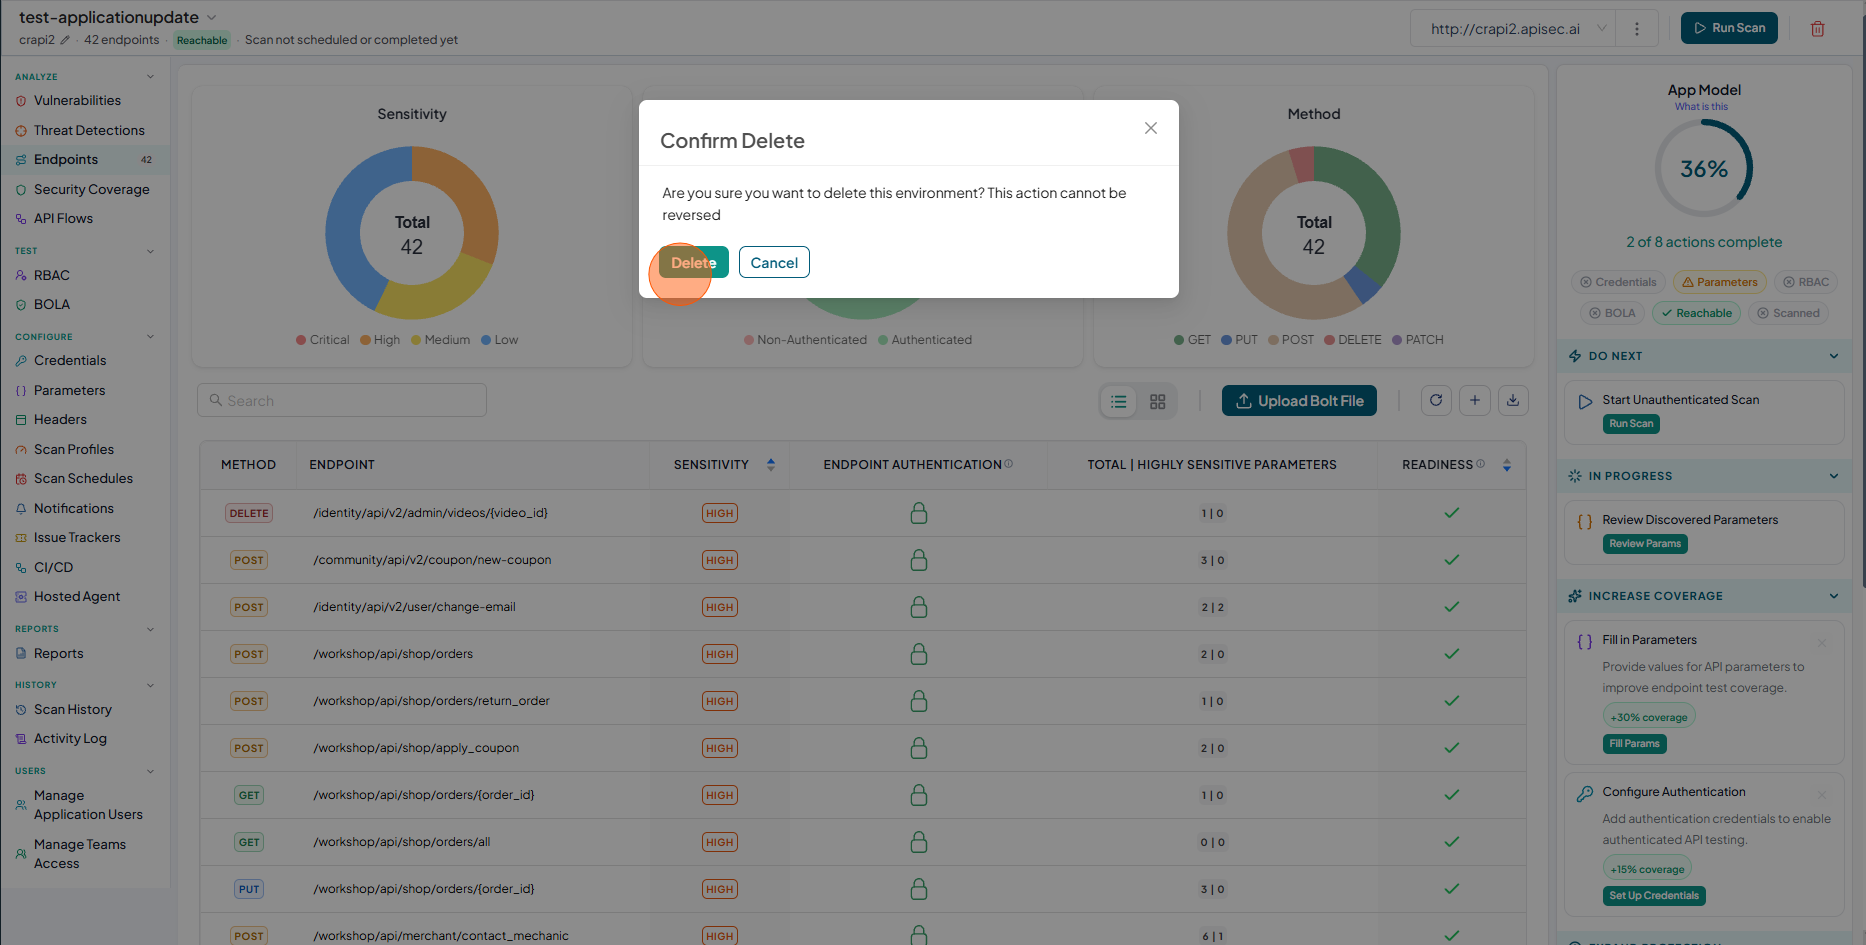
Users with View permissions cannot delete environment in shared application
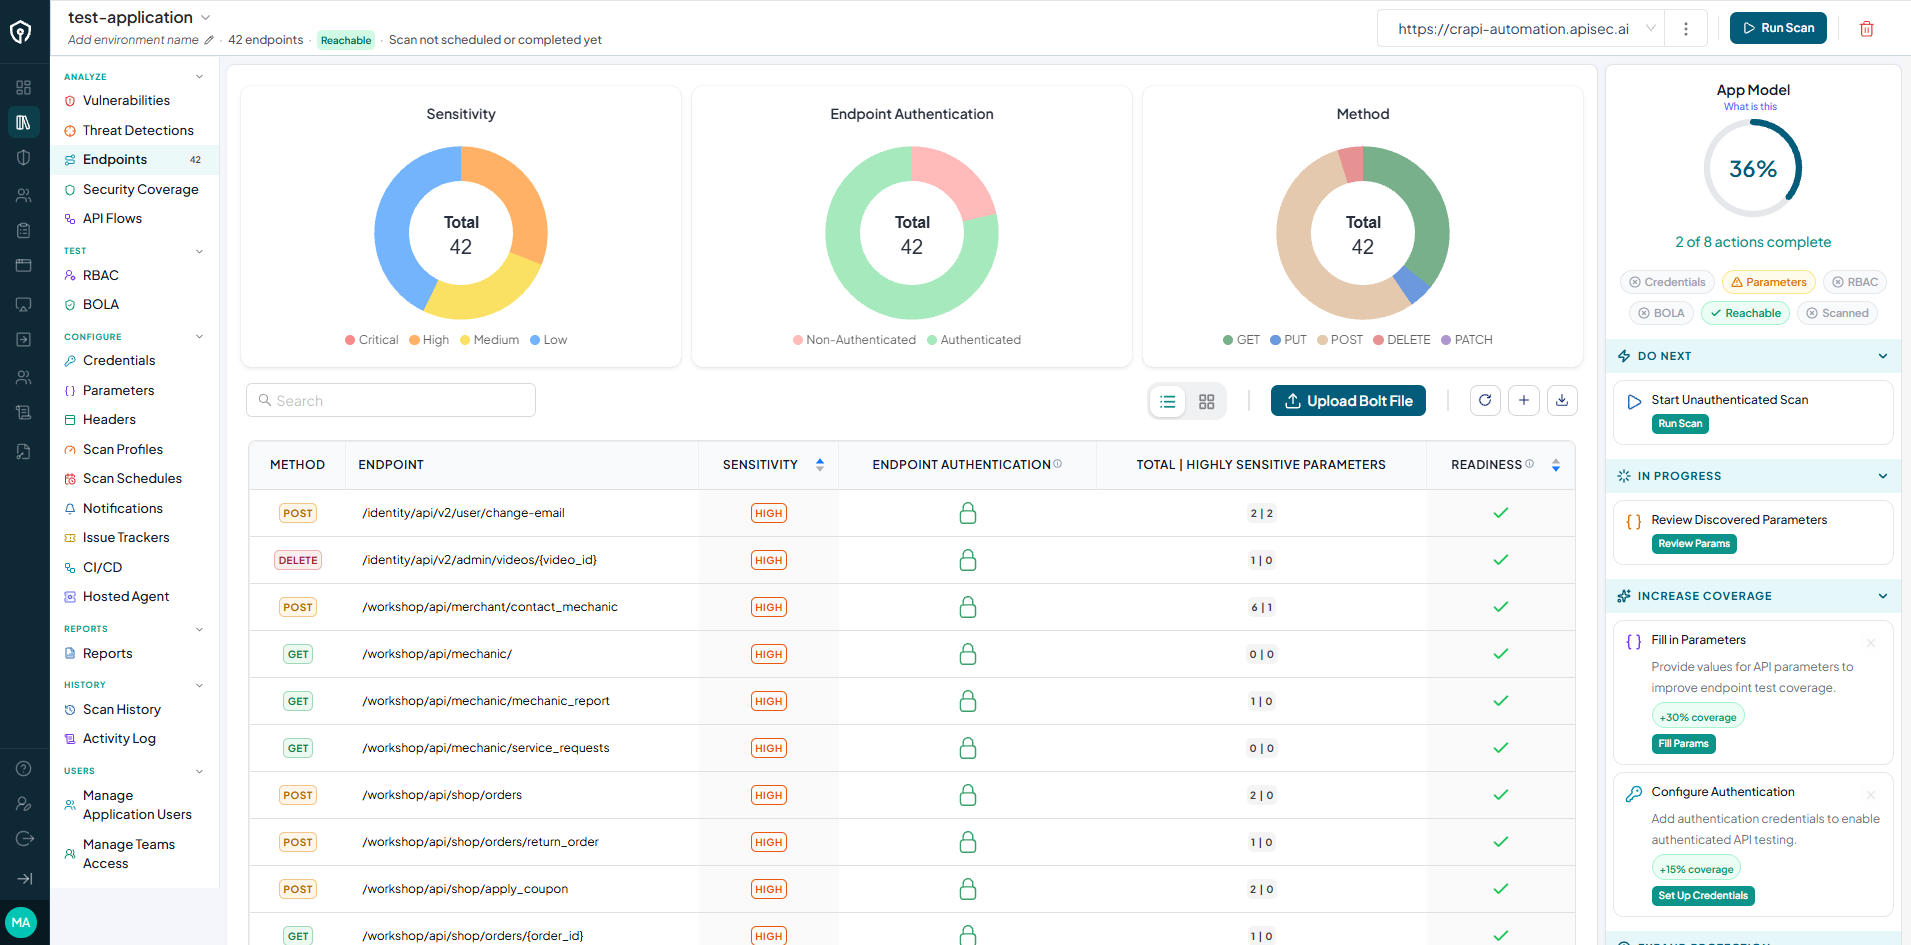
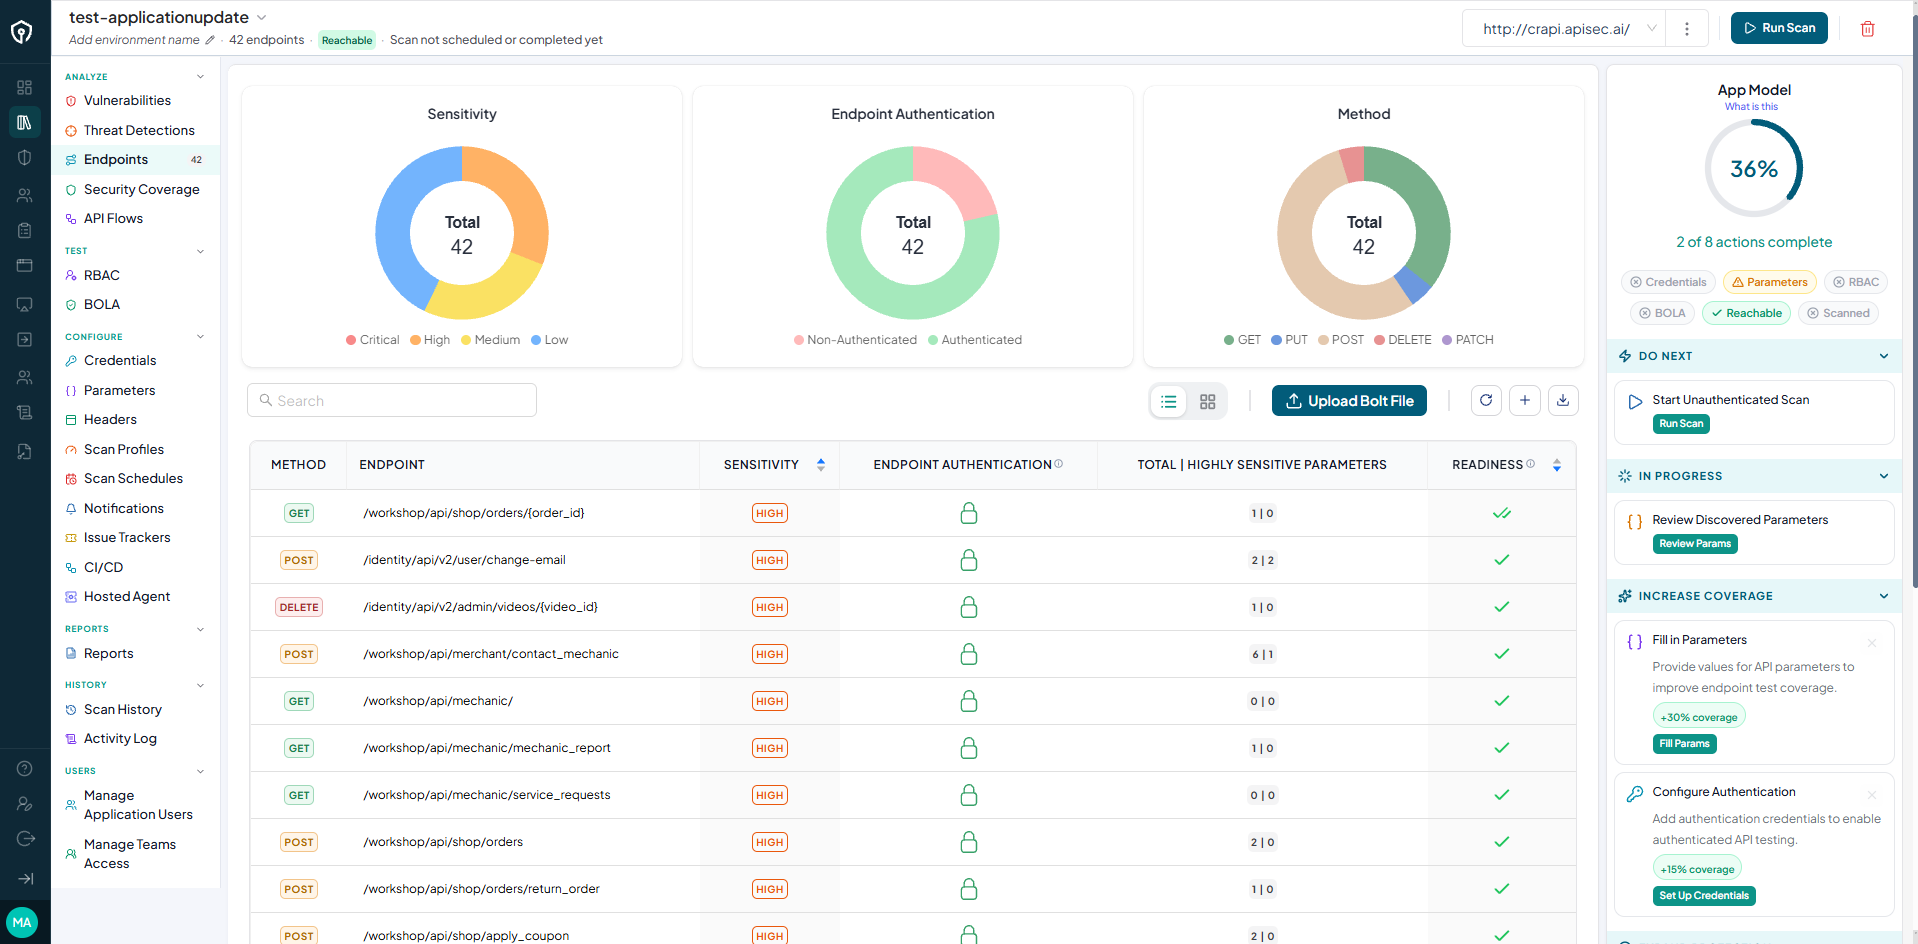
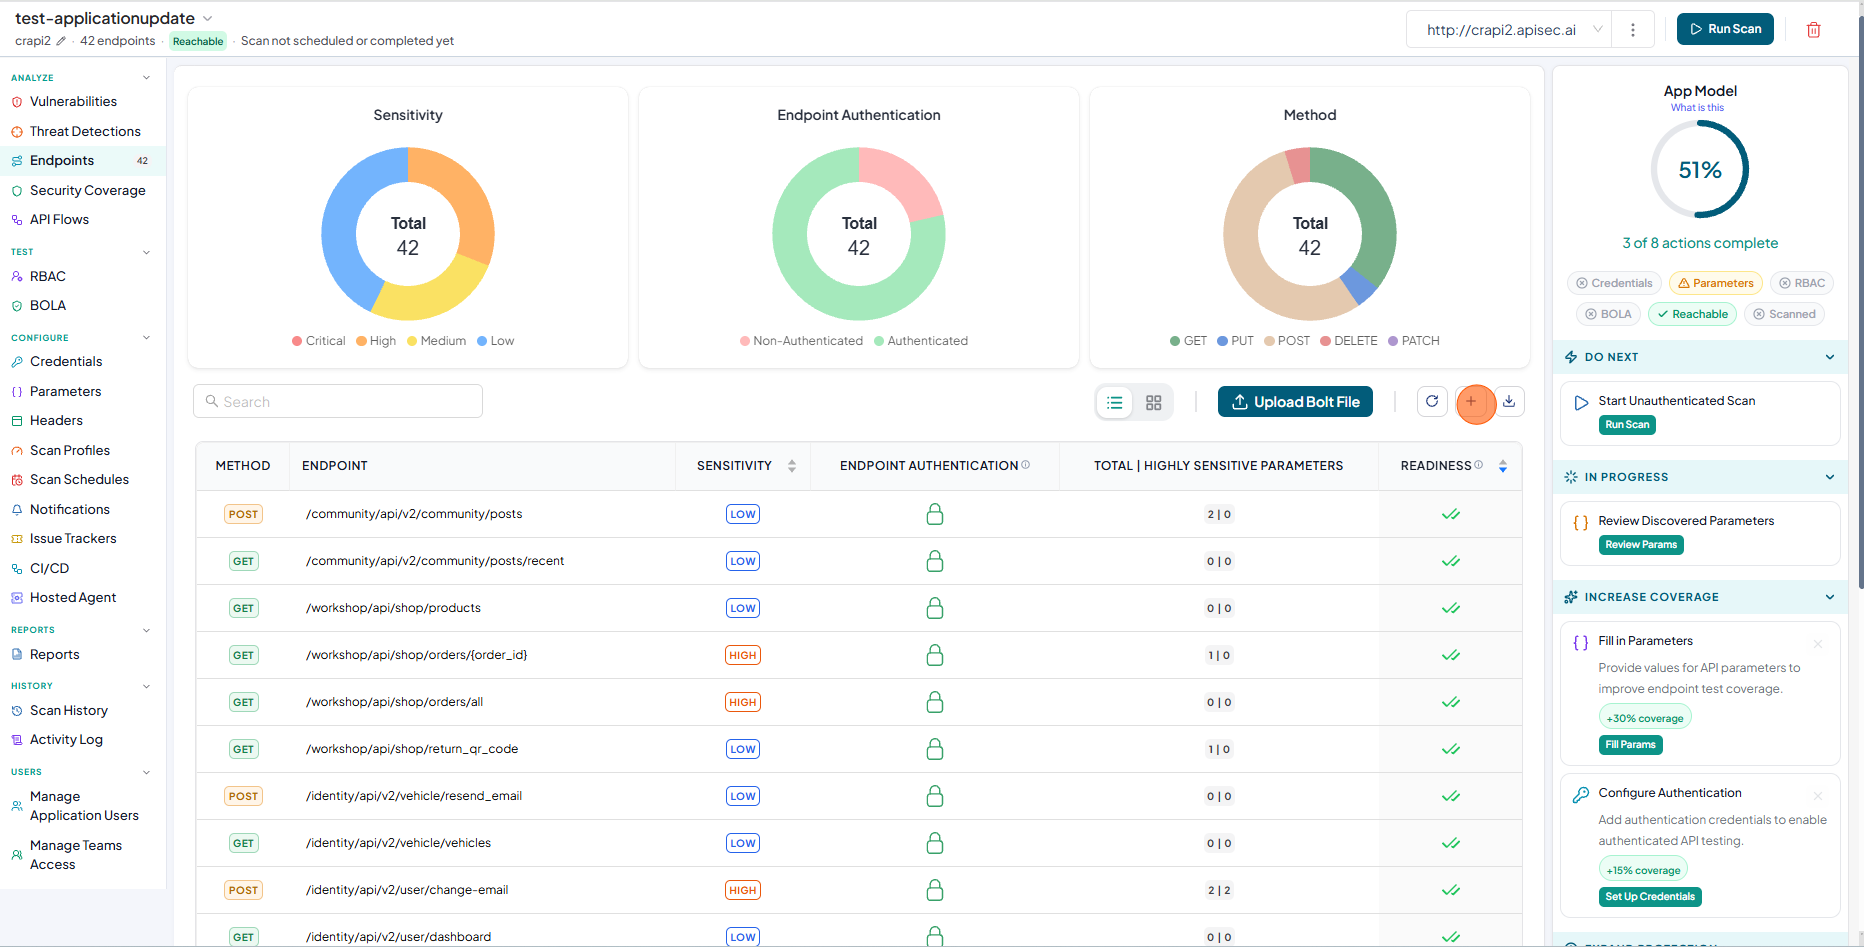
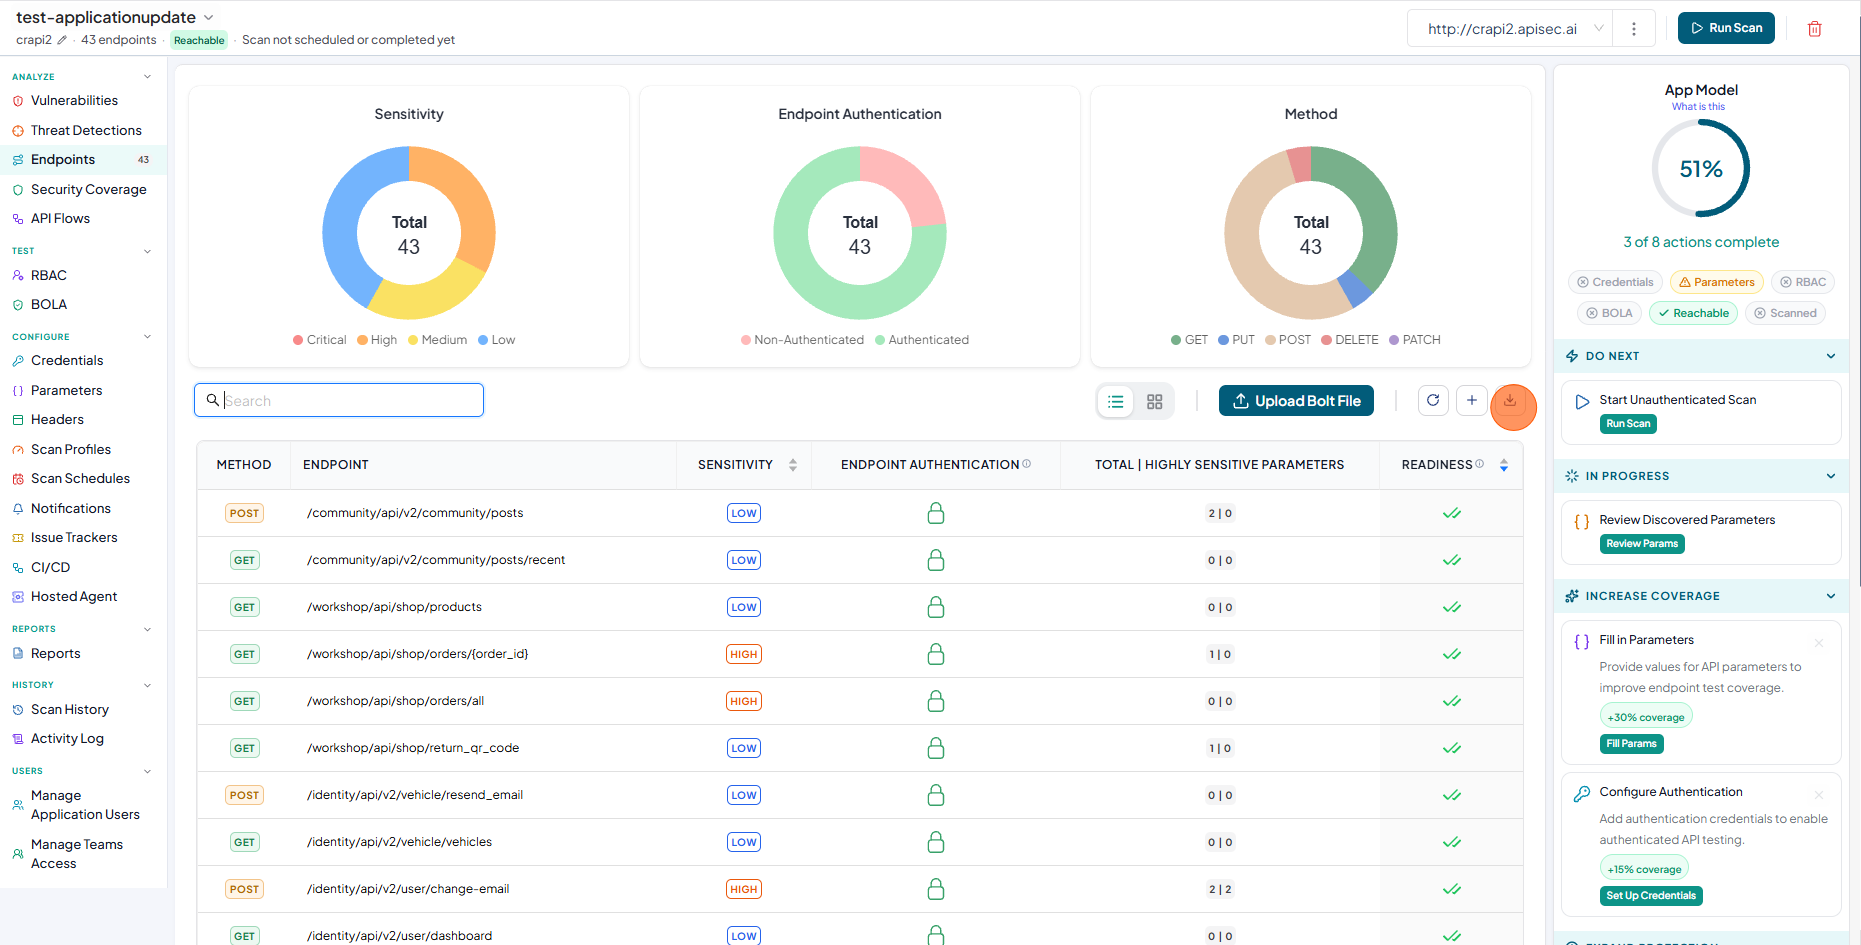
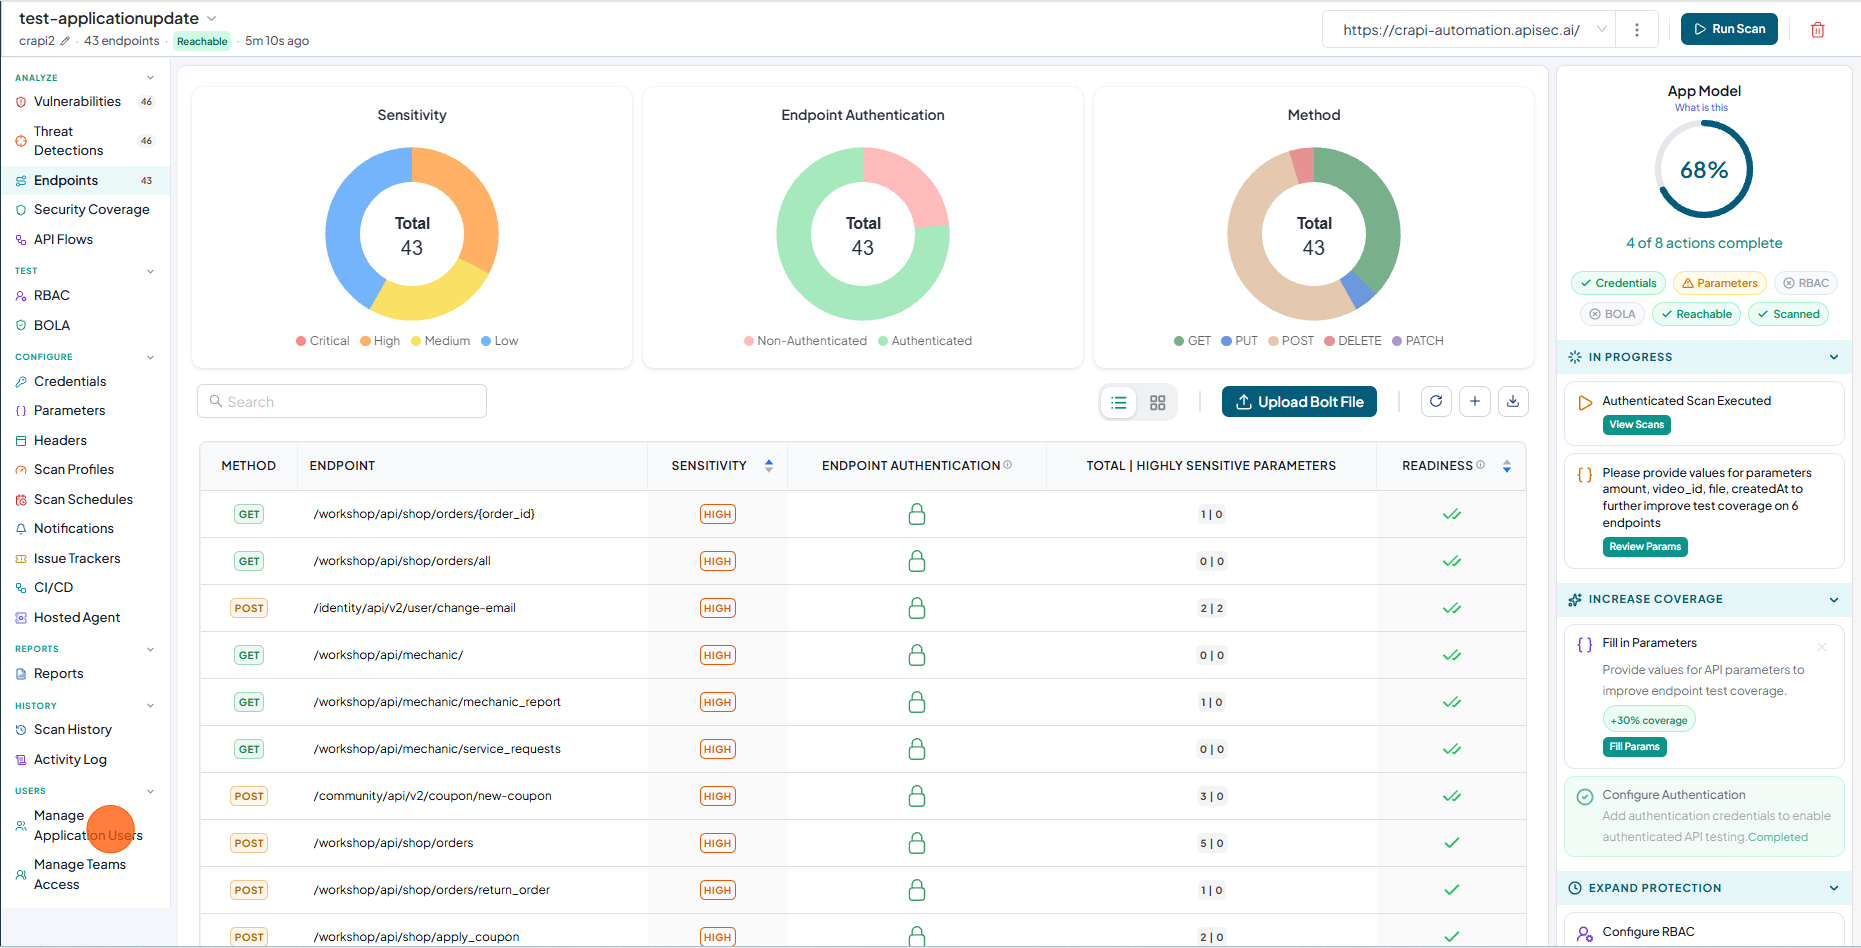
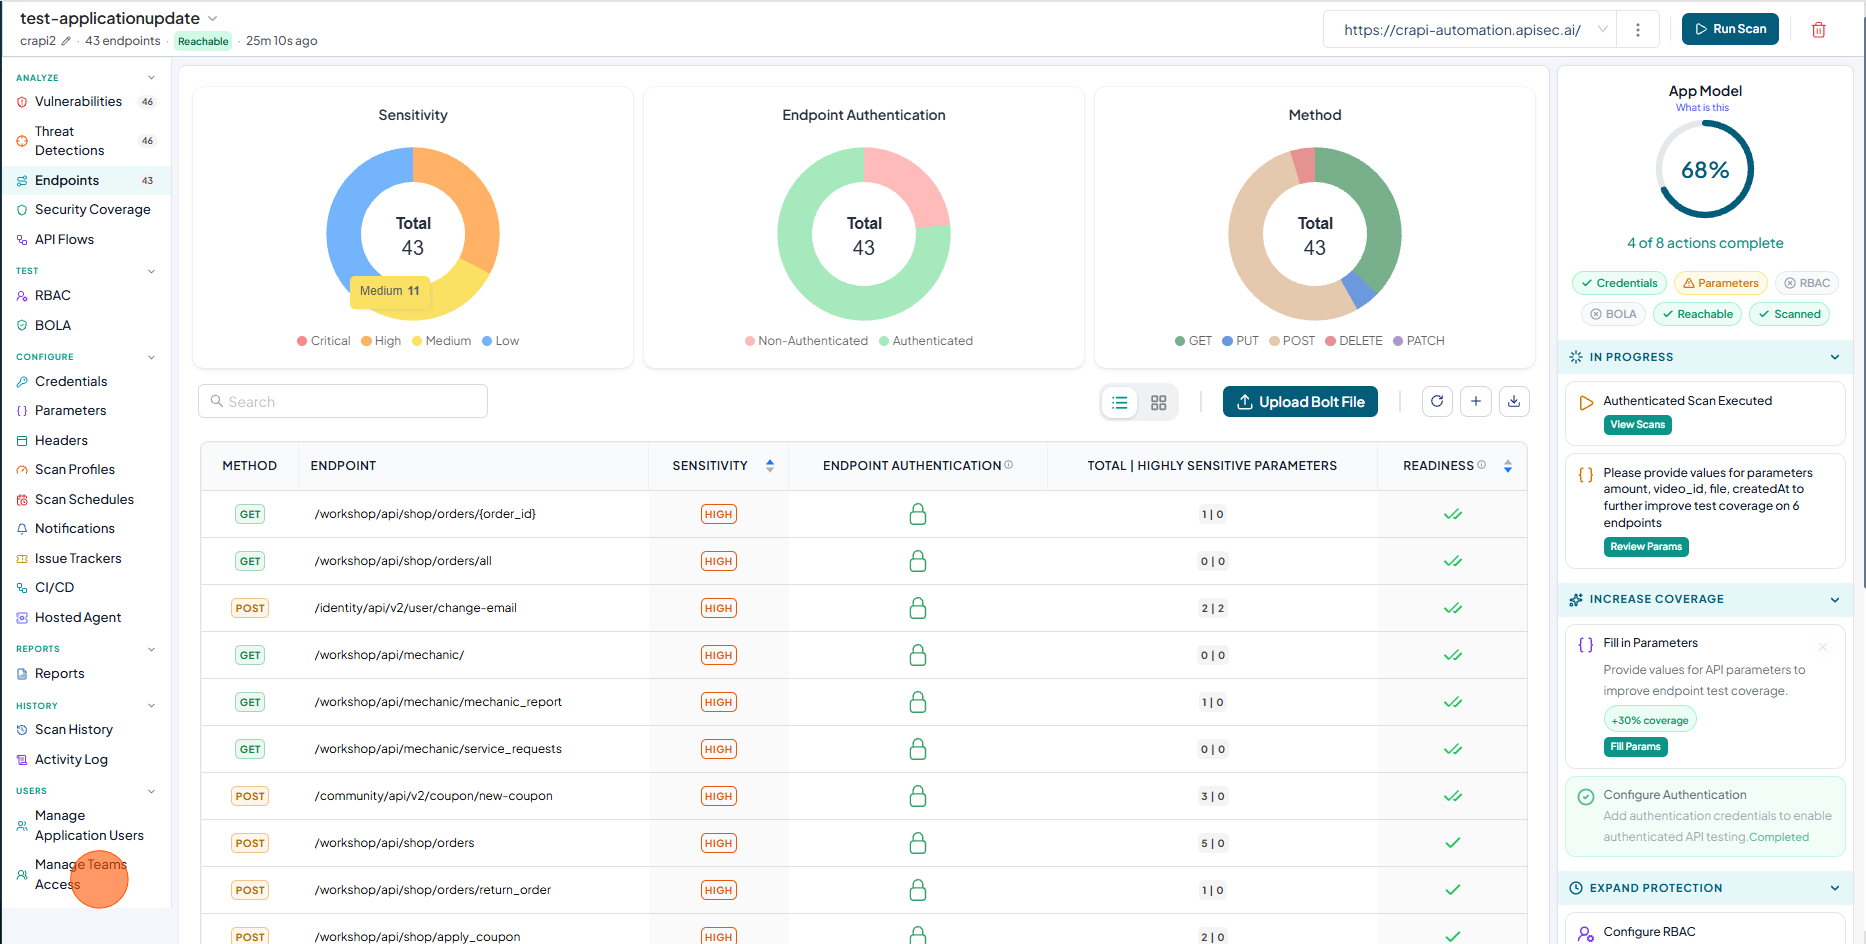
Endpoints
The Endpoints tab, helps you explore the full composition of your application, giving you clarity on every API endpoint in use. Instantly identify where sensitive data is being handled, monitor authentication coverage, and detect unauthenticated or high-risk endpoints.
With interactive dashboards and detailed endpoint reports, you can:
-
Classify APIs by sensitivity level (Critical, High, Medium, Low)
-
Track authentication status across all endpoints
-
Verify the endpoint’s configuration readiness for security testing.
-
Analyze API methods (GET, POST, PUT, DELETE, PATCH) at a glance
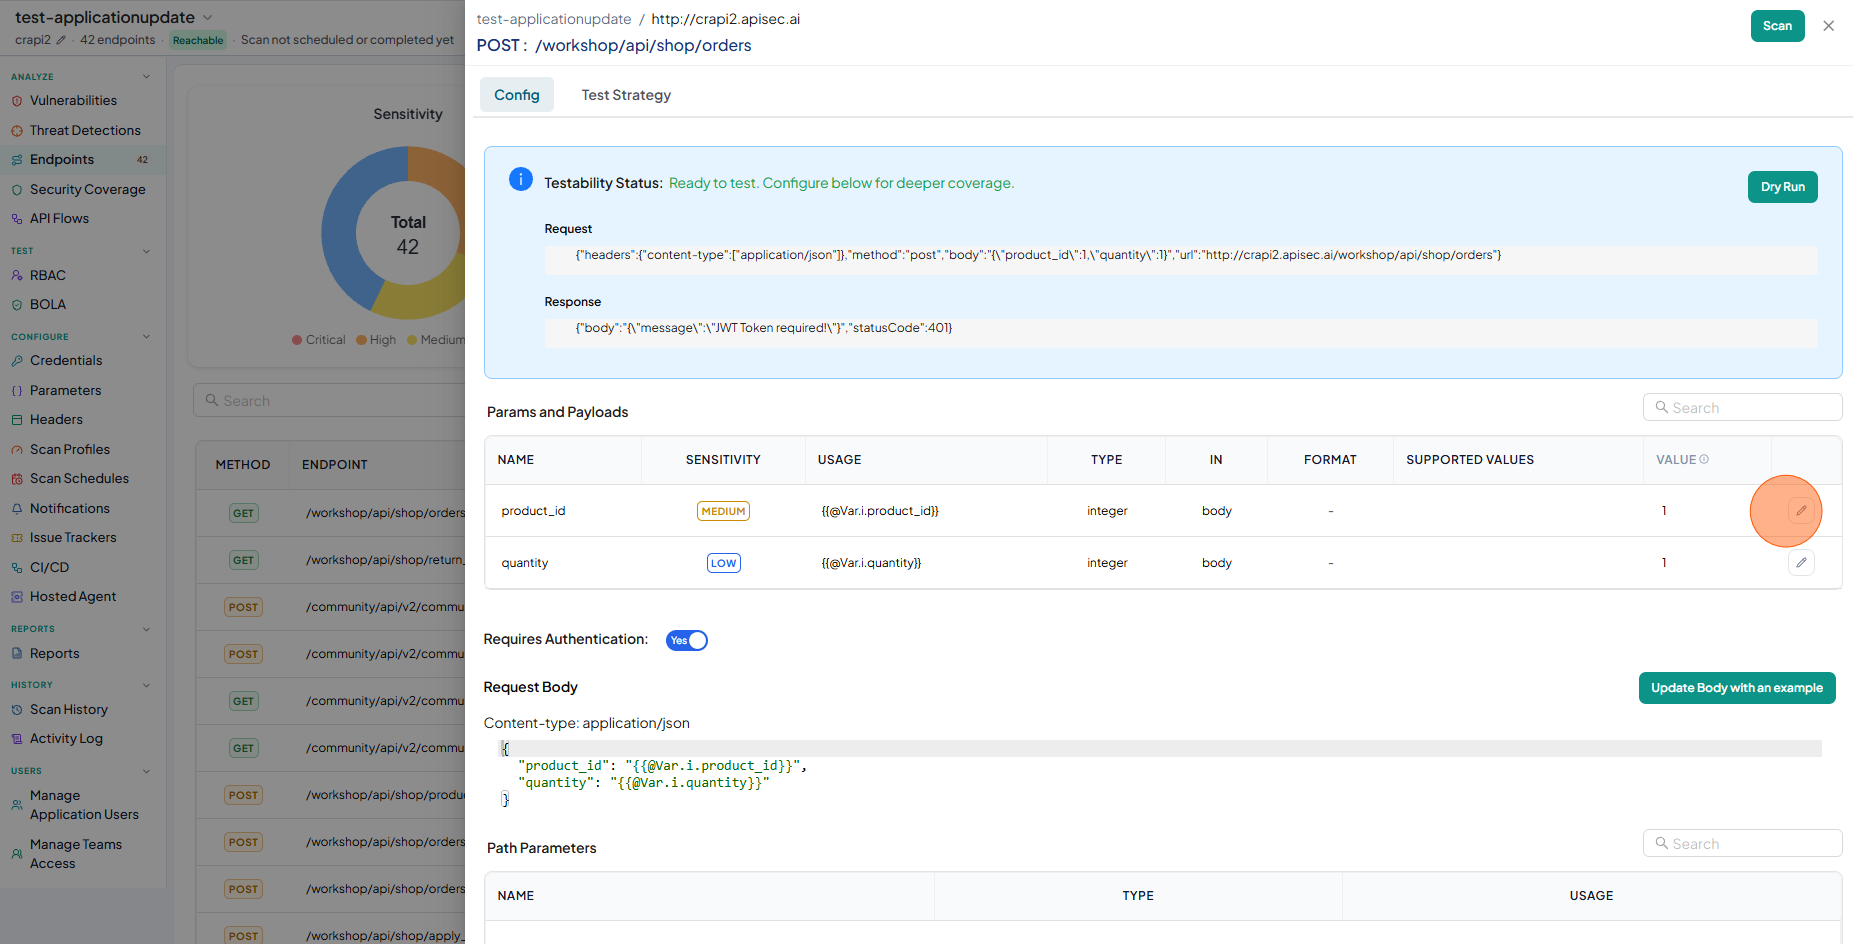
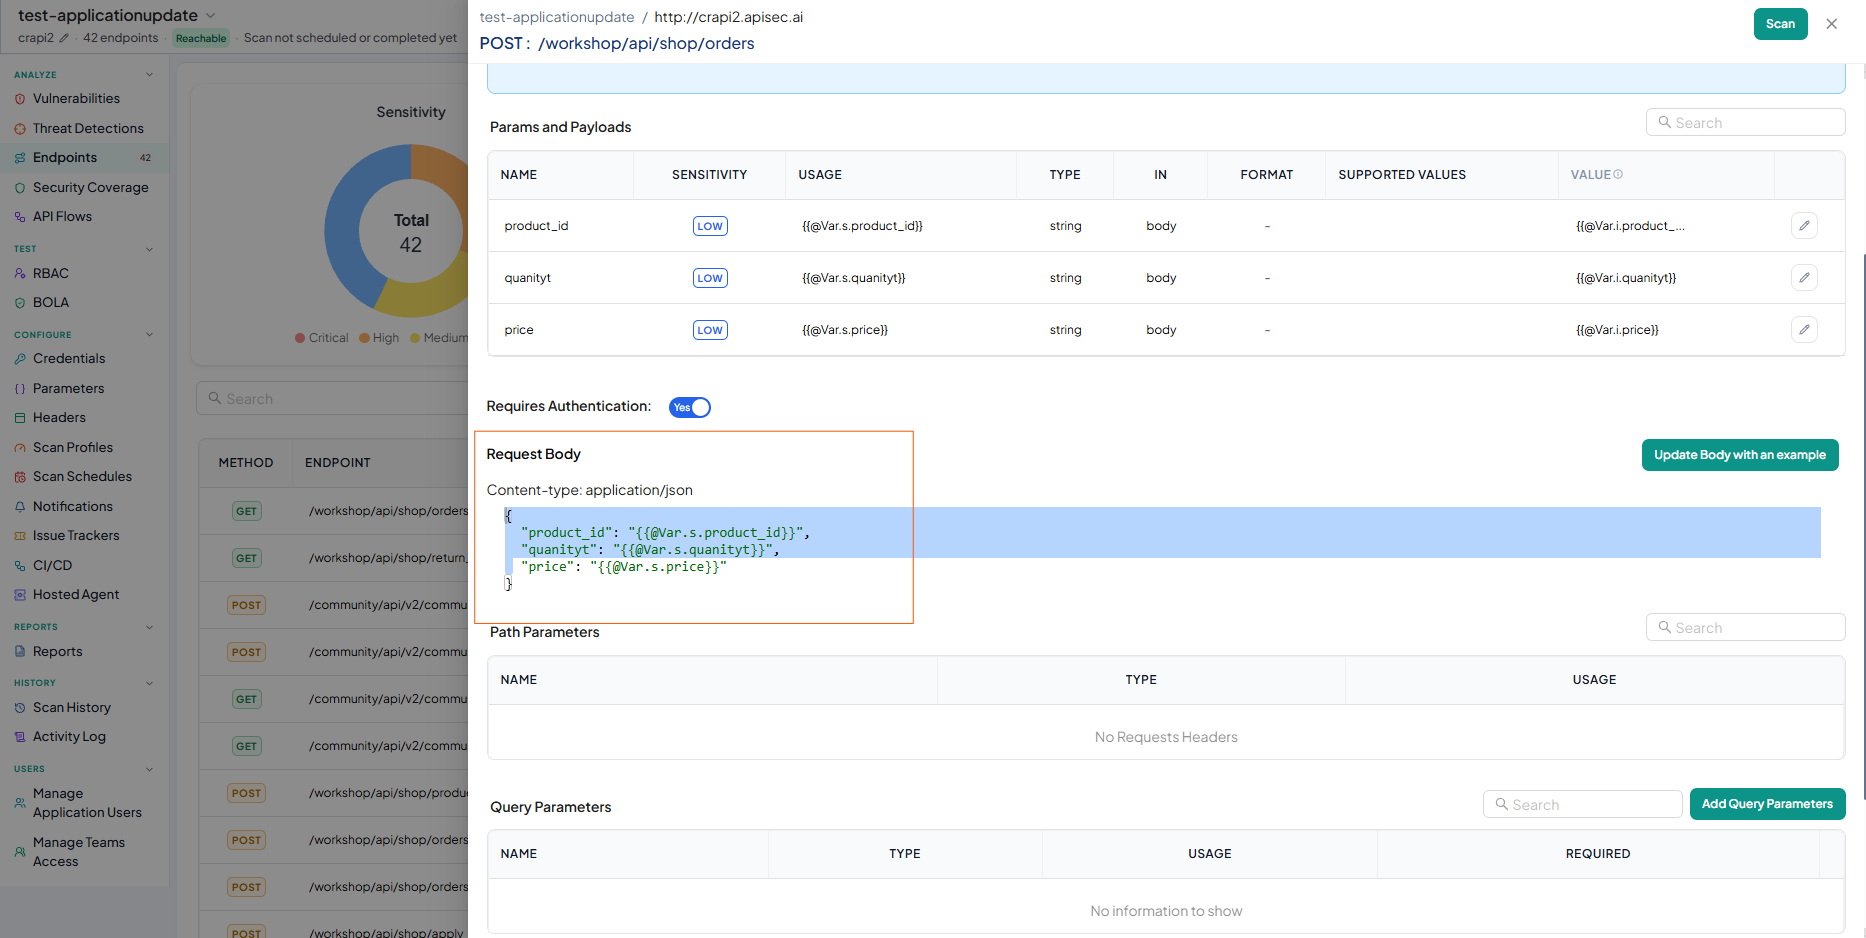
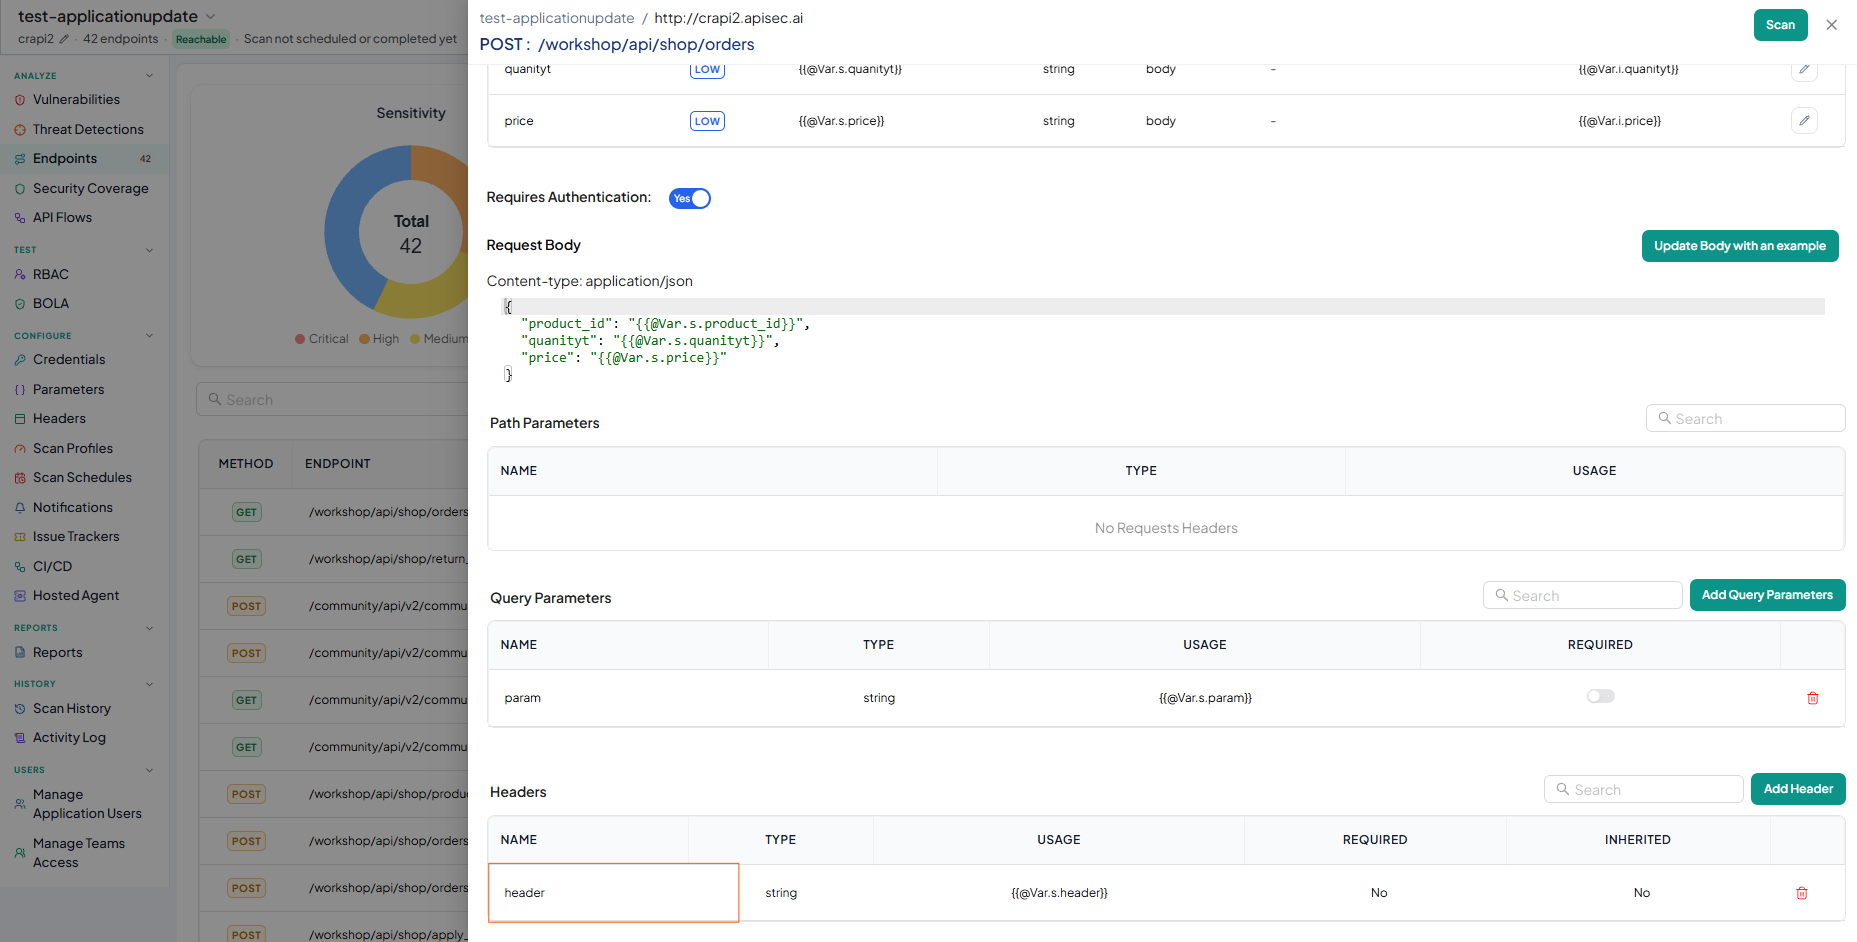
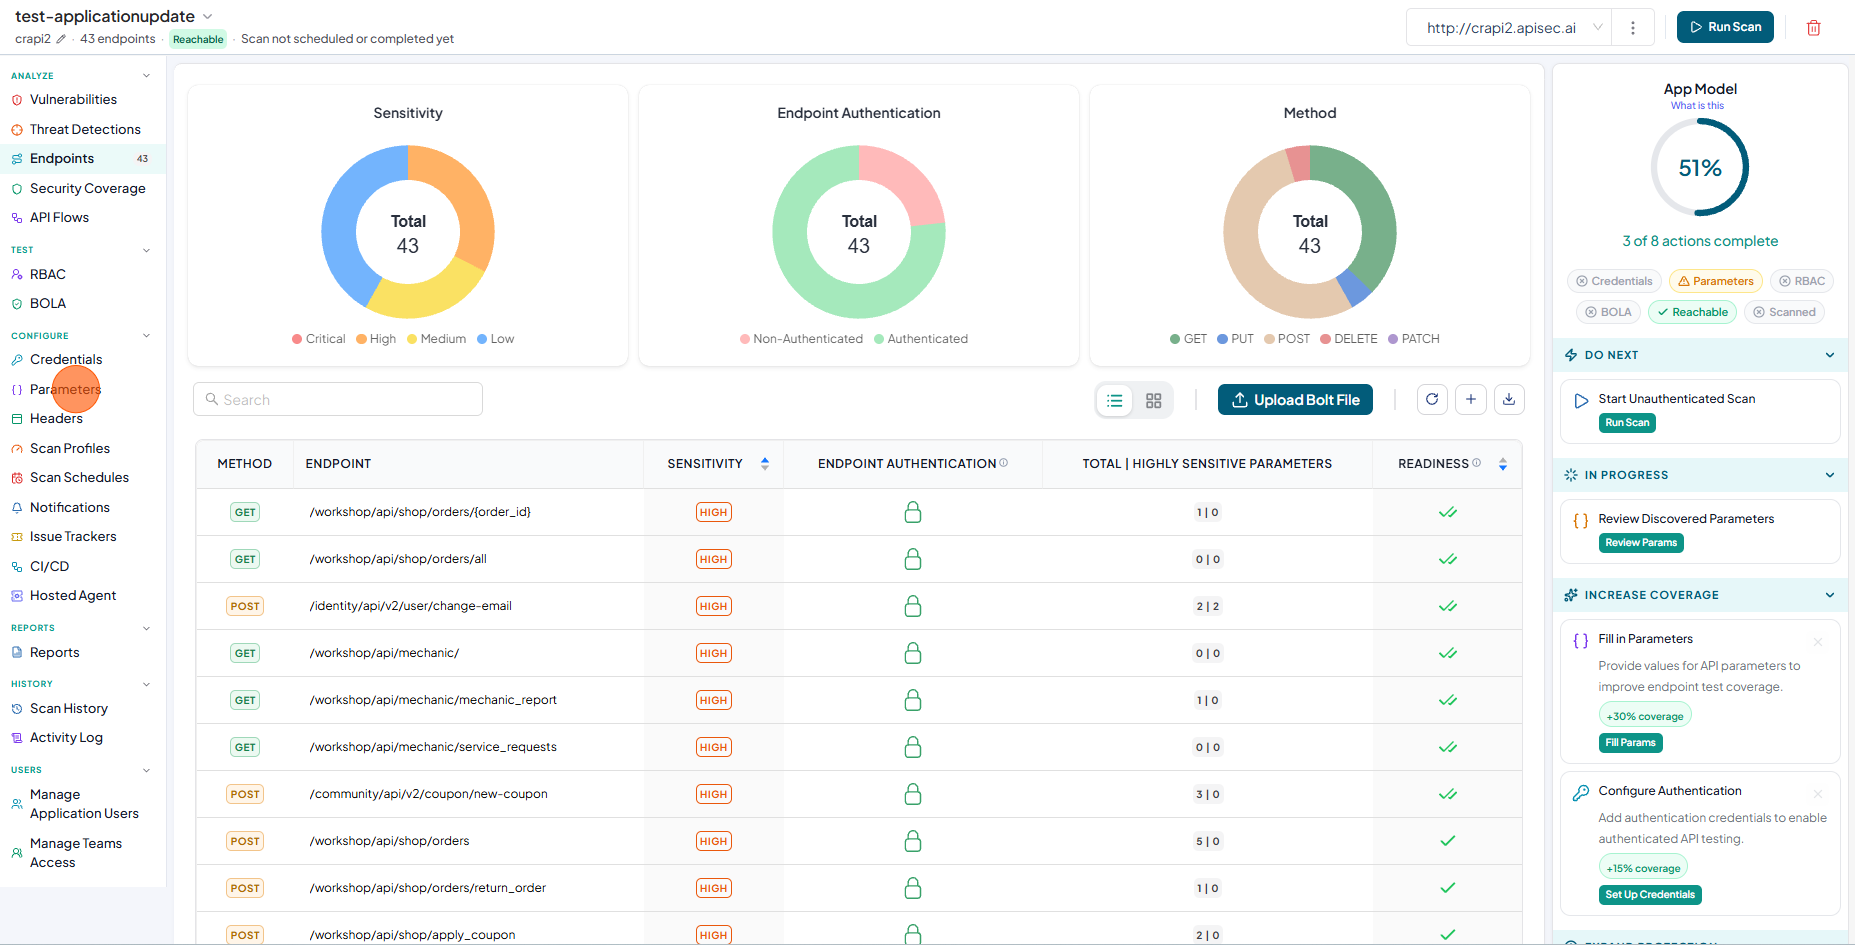
Endpoint Parameter Configration
To change or customize request parameters, headers, query parameters for any endpoint
-
Click on the seleted Endpoint

-
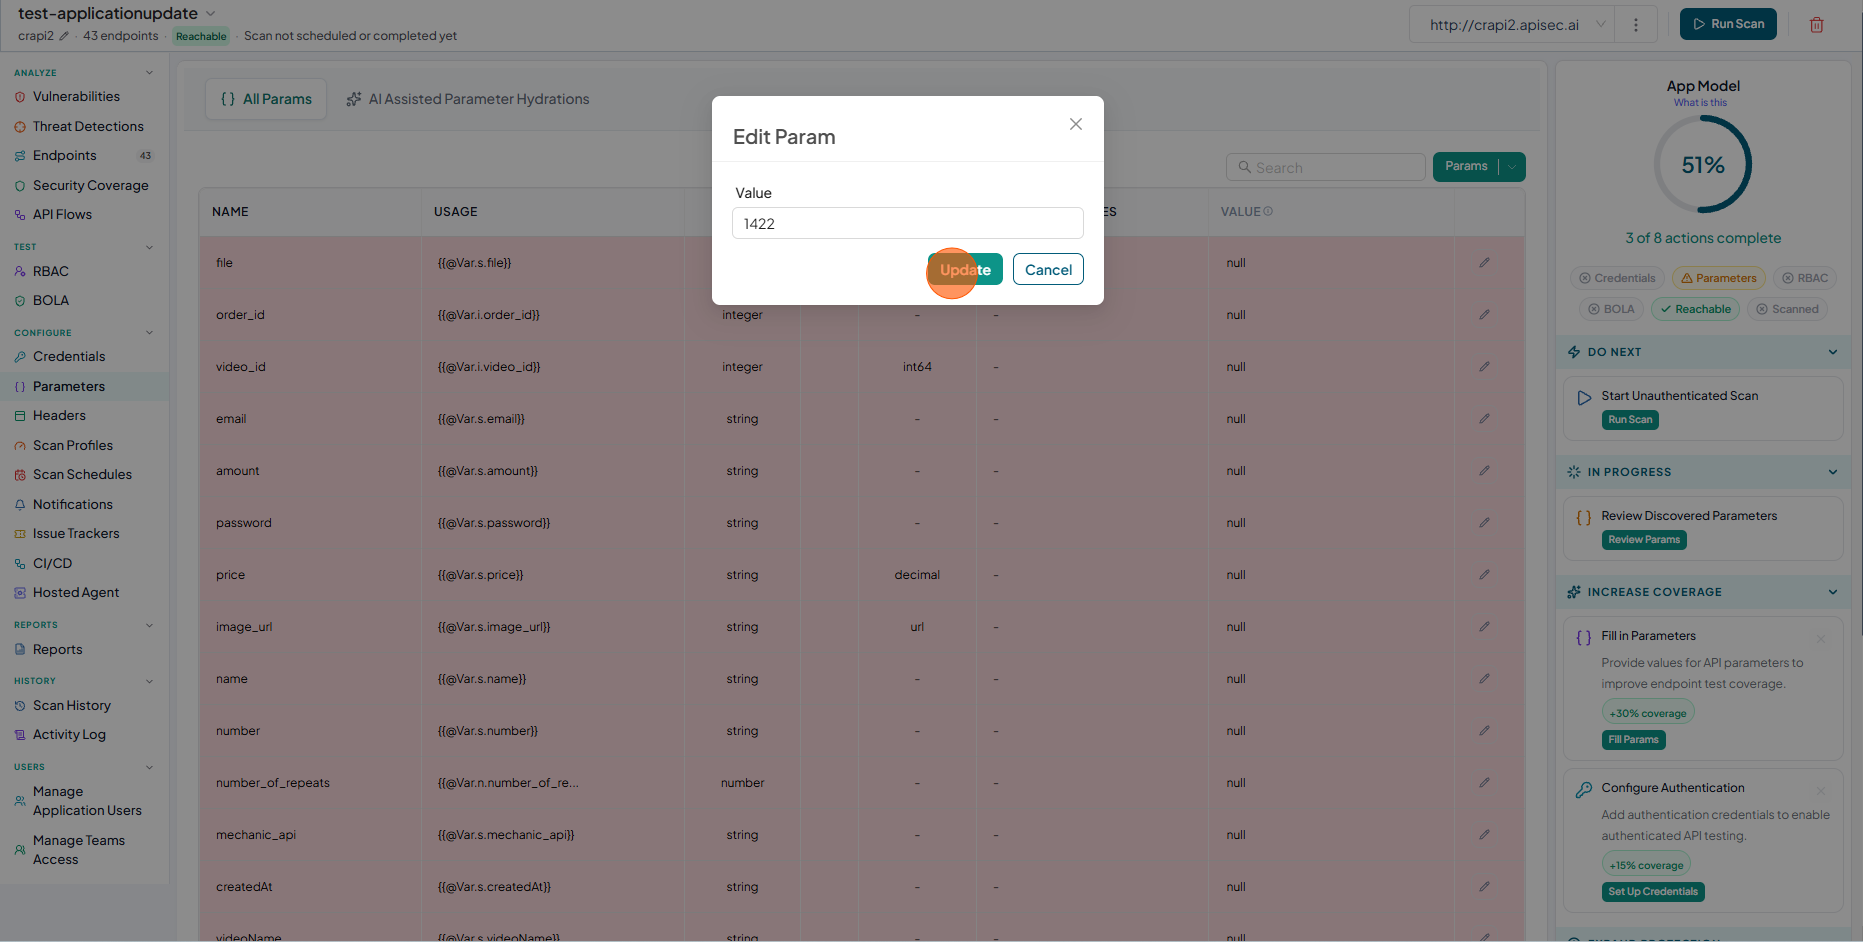
To change Parameter configuration, click Pencil icon adjacent to the parameter.
-
Enter the details and click Update
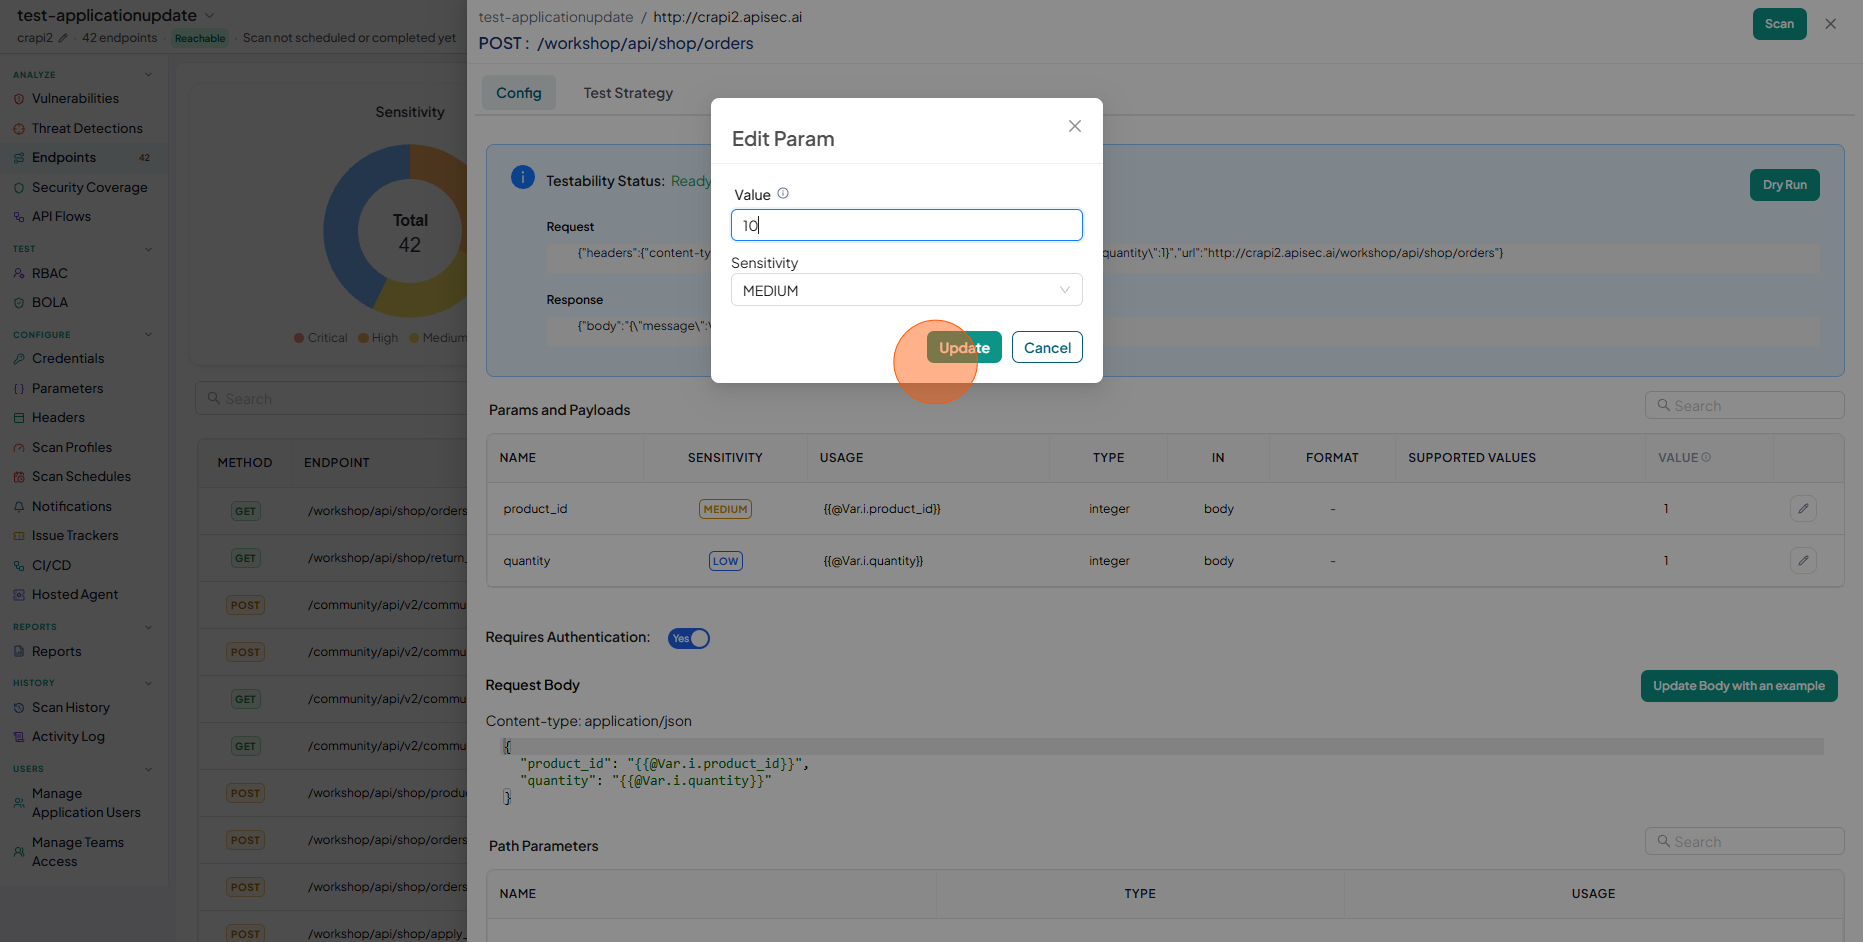
noteuser role with View permissions can not change parameter configuration in shared application.
-
To change Request body, click Update Body with an example.
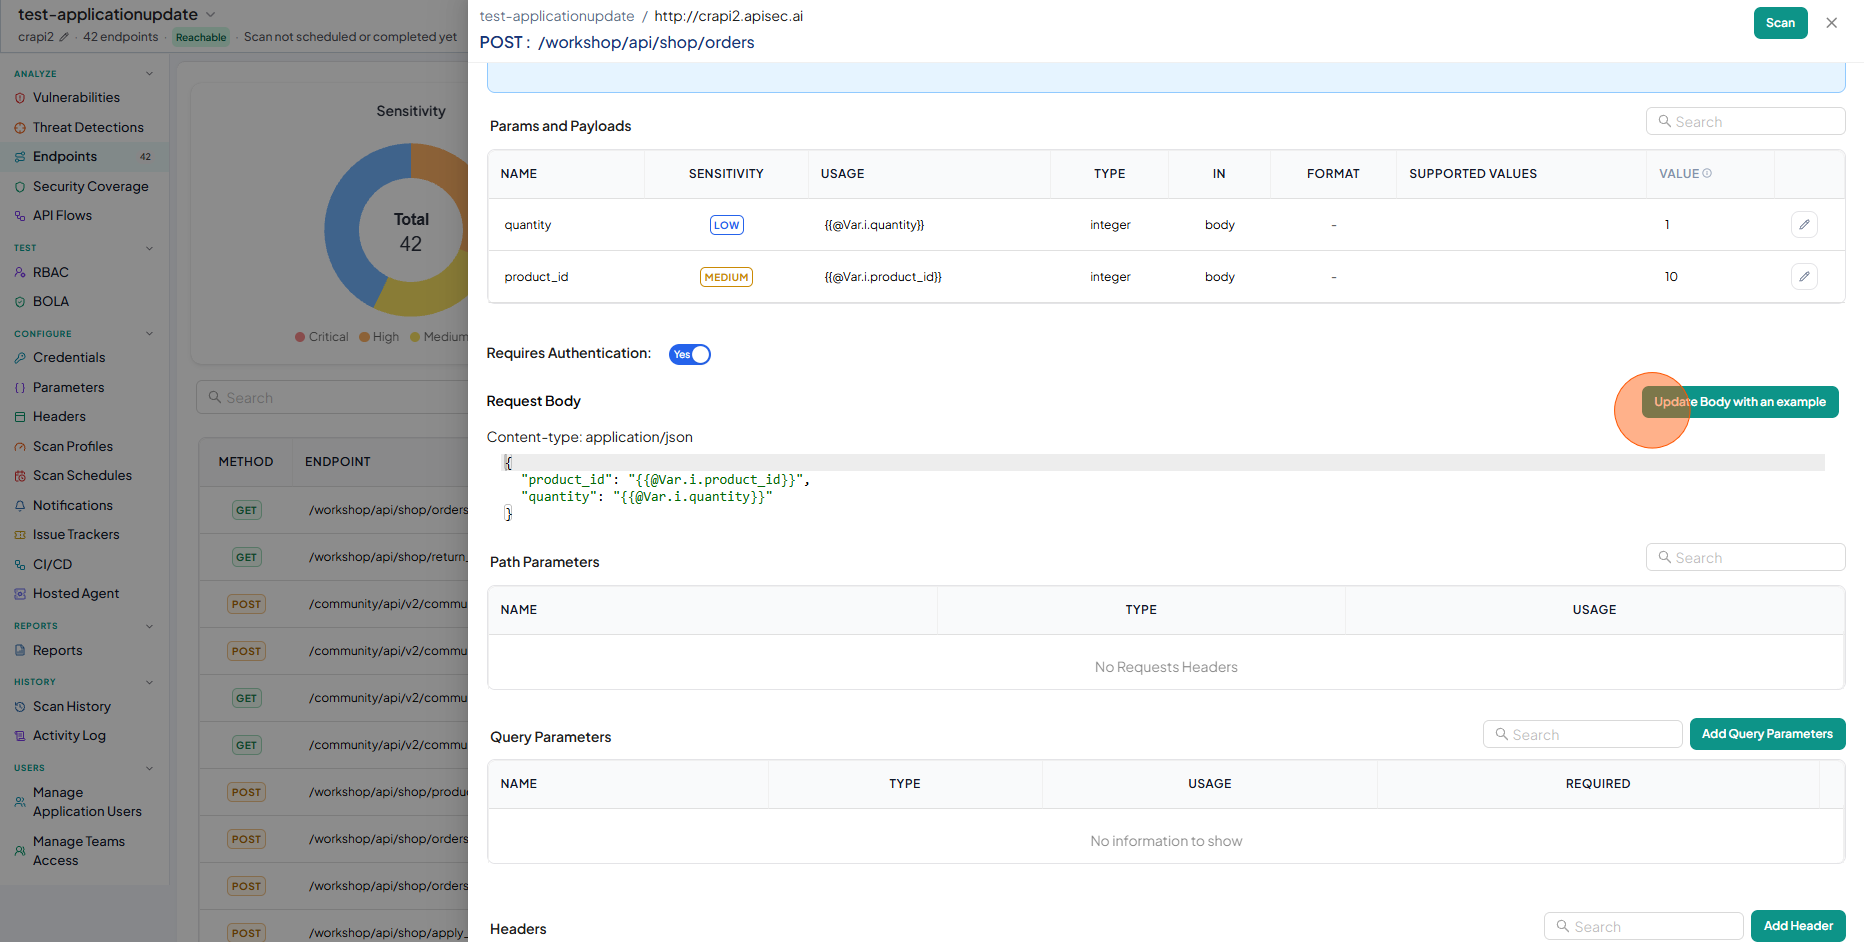
-
Enter the sample data and Click Update
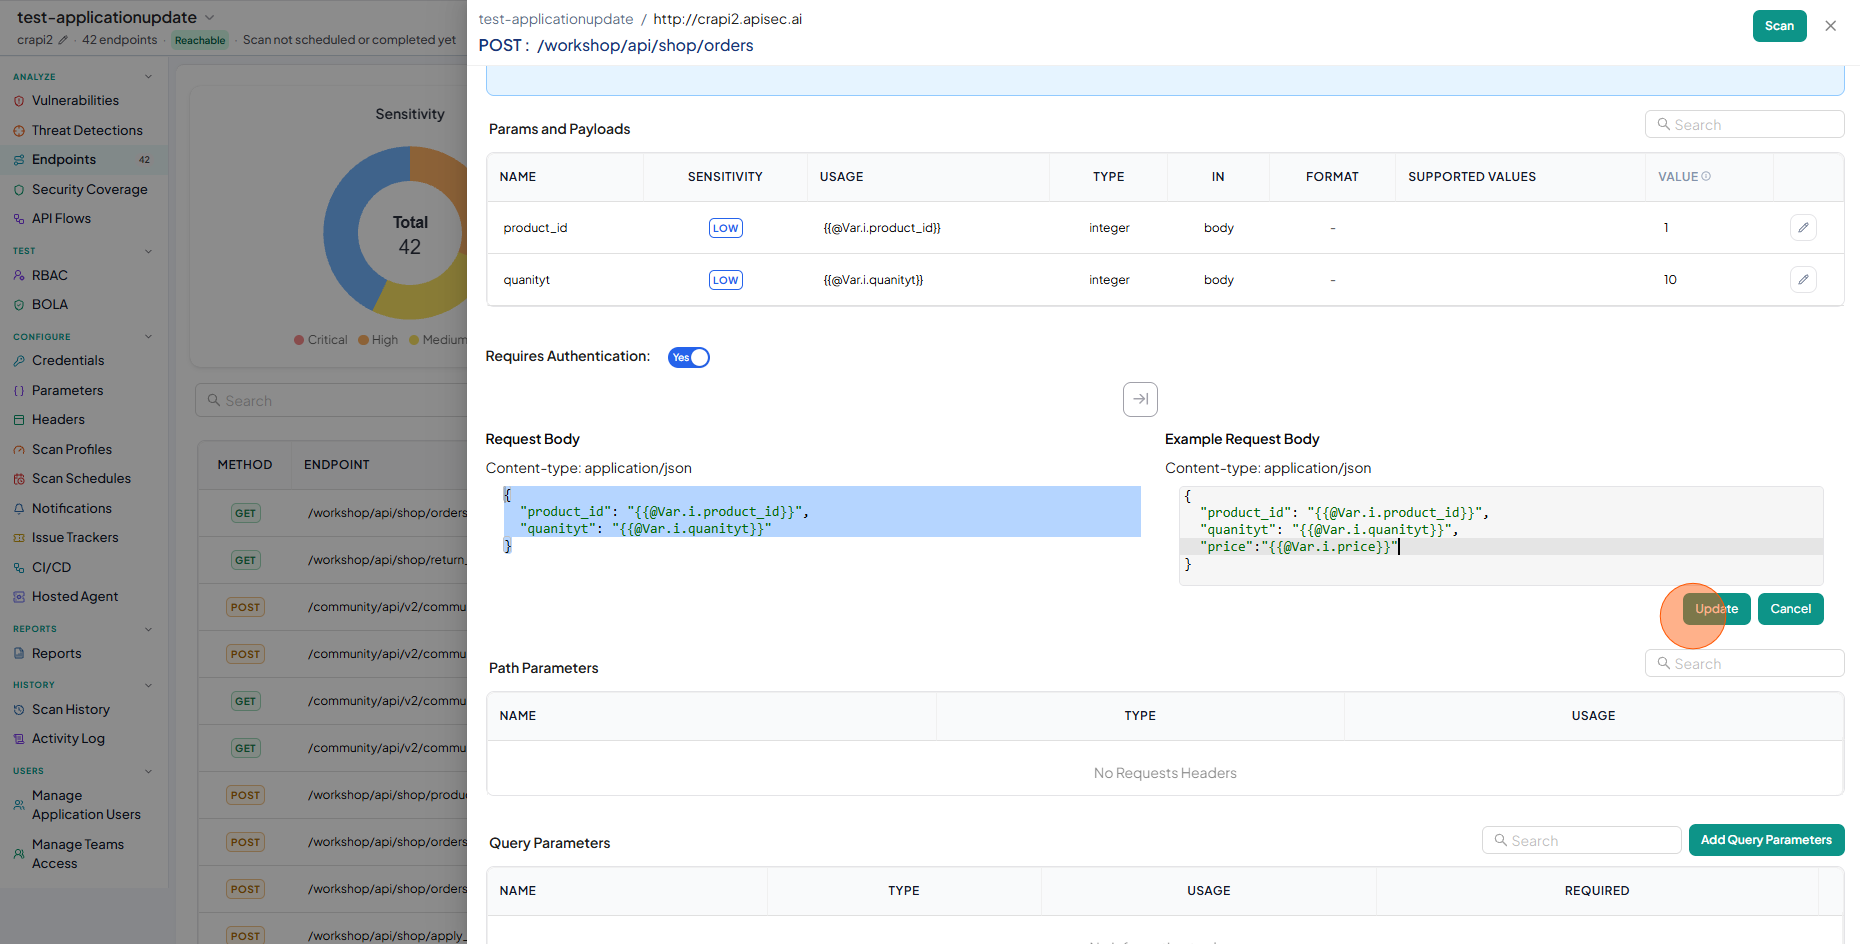
-
Check updated request body
noteuser role with View permissions can not change request body in shared application.
- To Add Query Parameter, click Add Query Parameters.
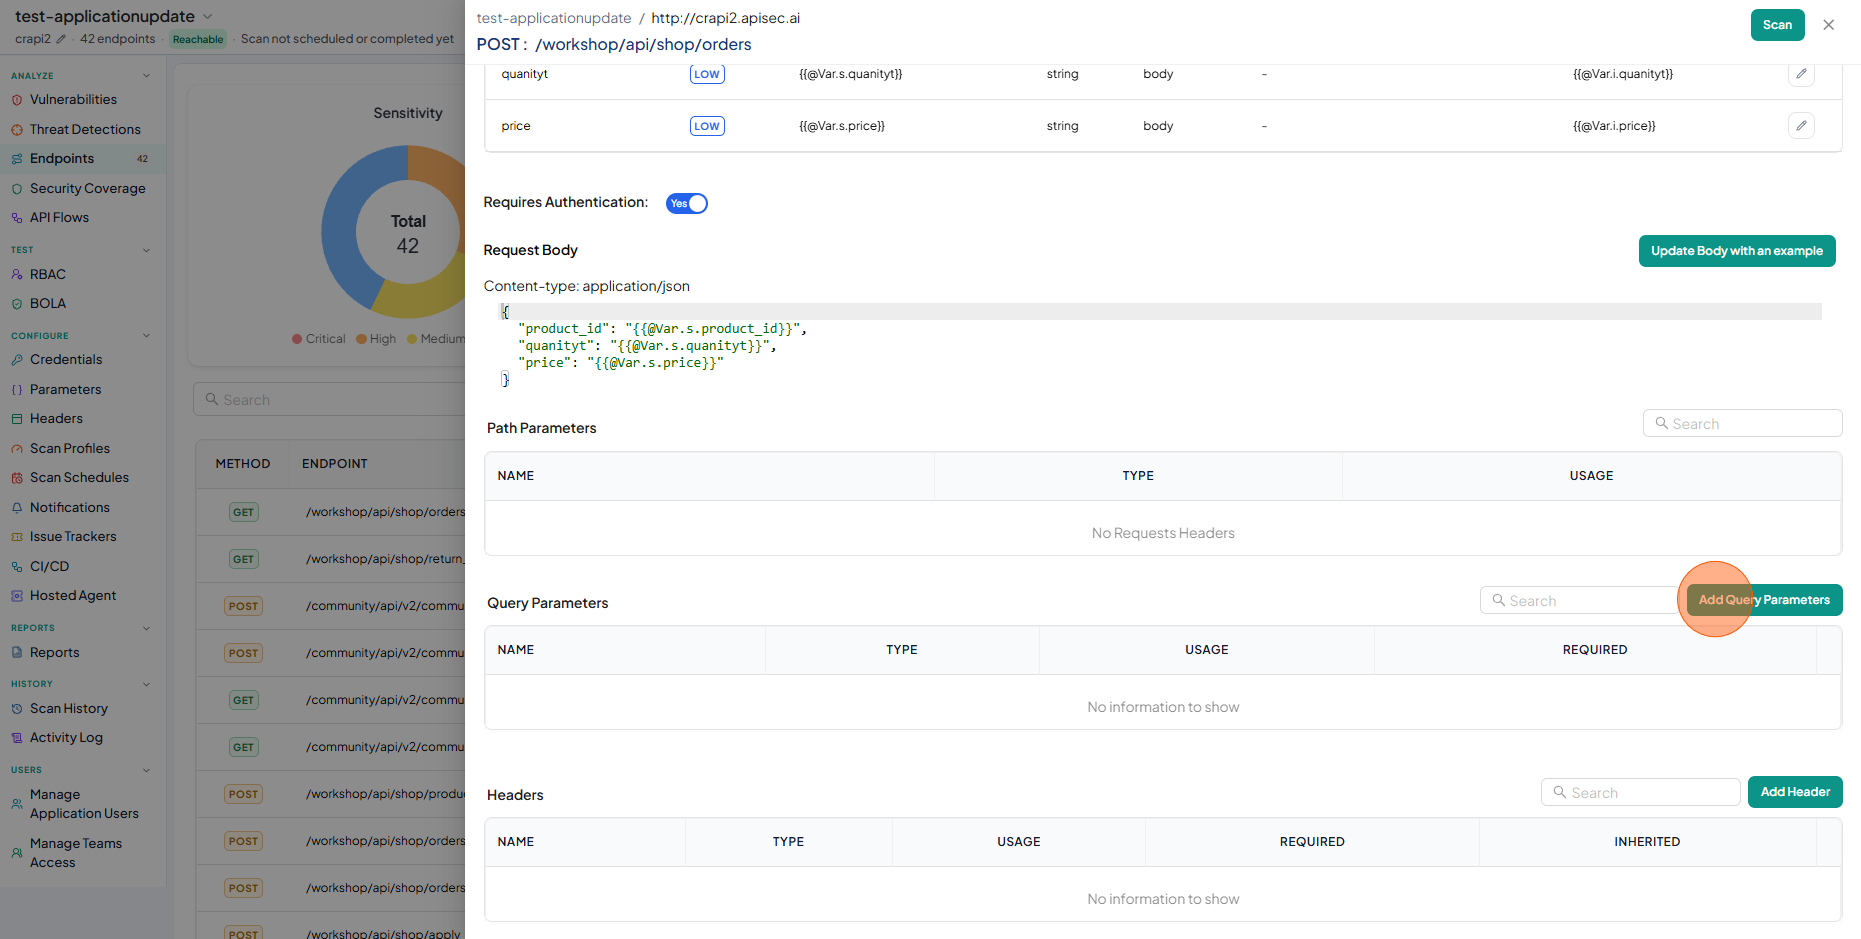
-
Enter the data:
- Name – The key of the query parameter (e.g., status, userId).
- Value – The assigned value for the parameter.
- Sensitivity – Classifies the parameter based on data sensitivity (Critical, High, Medium, Low).
- Type – Defines the data type of the parameter (string, number, boolean, etc.).
- Format – Specifies the expected format (e.g., email, UUID, date-time).
- Required – Indicates whether this parameter is mandatory for the request.
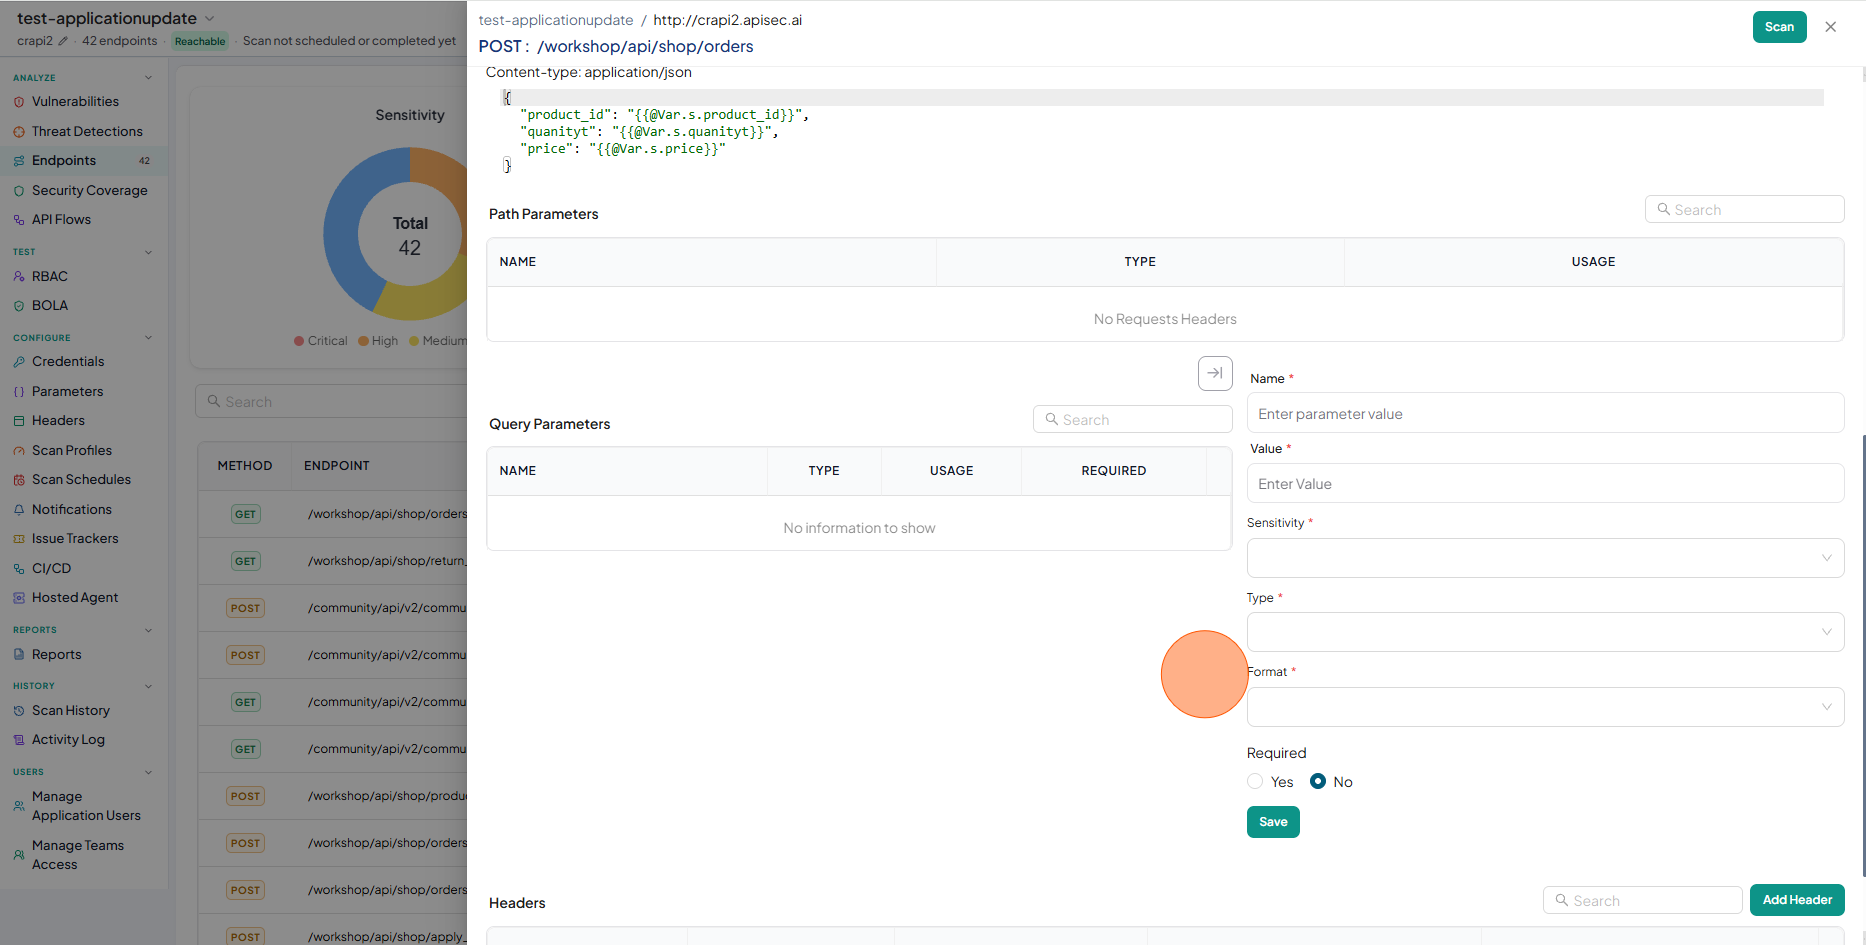
-
Click Save
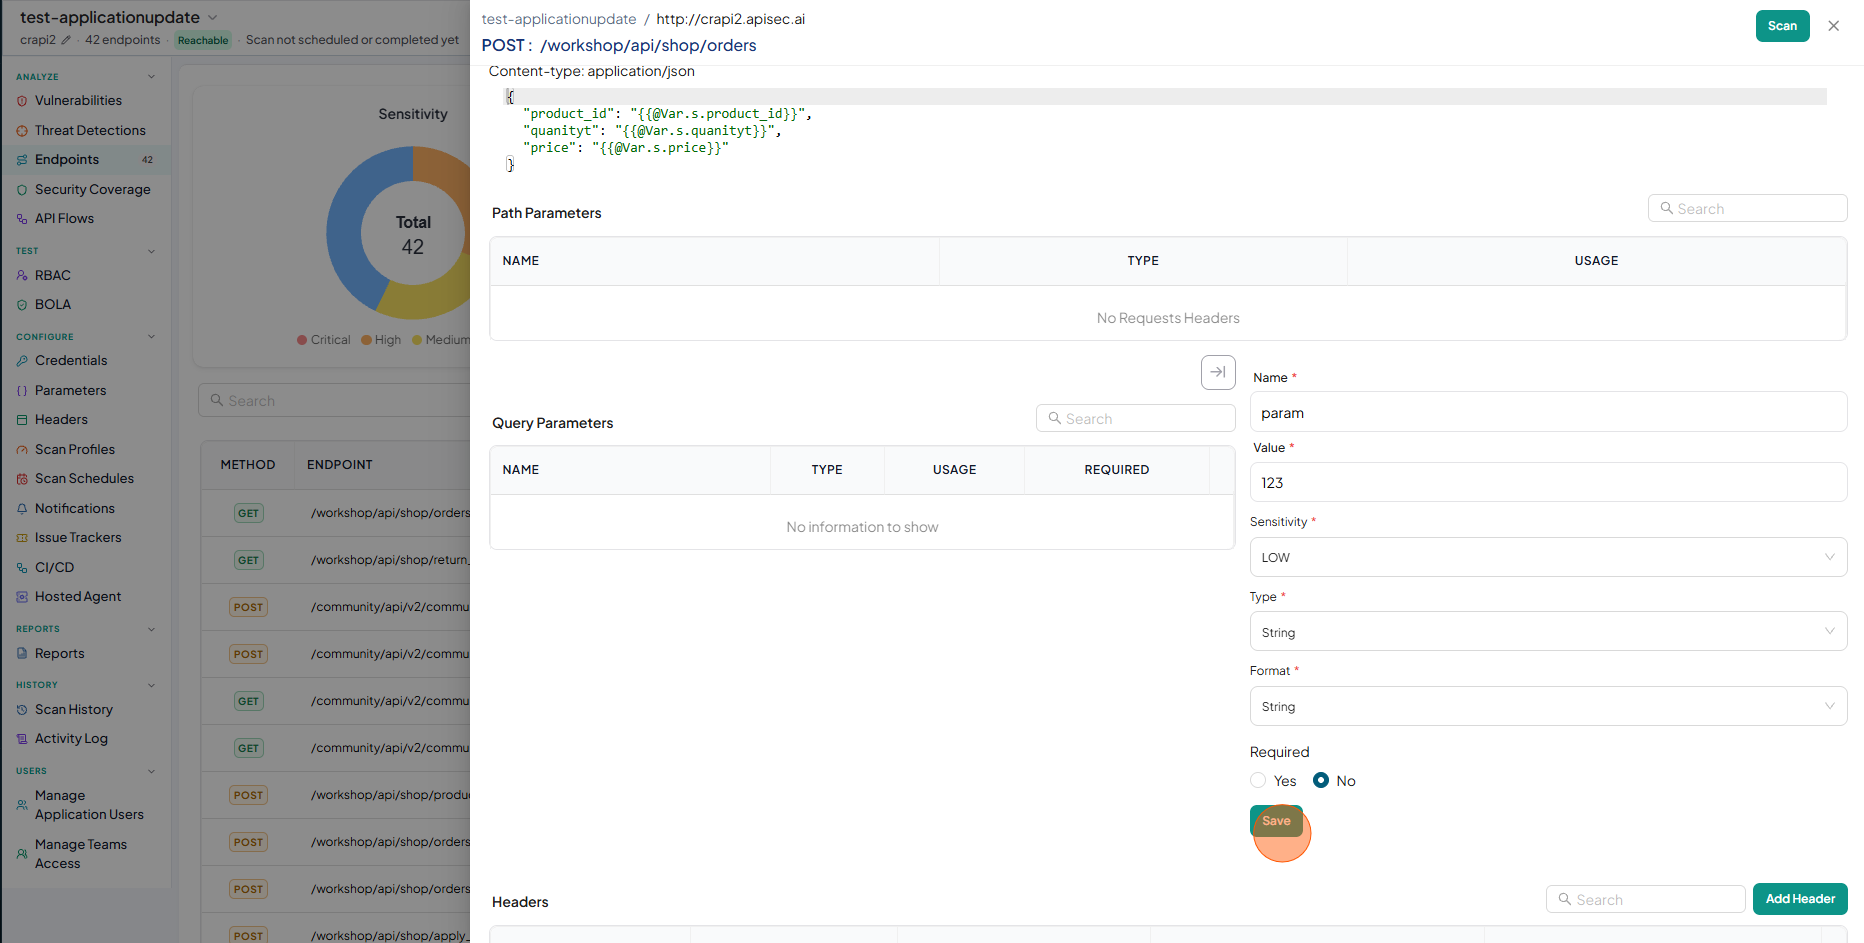
-
Check newly added Parameter
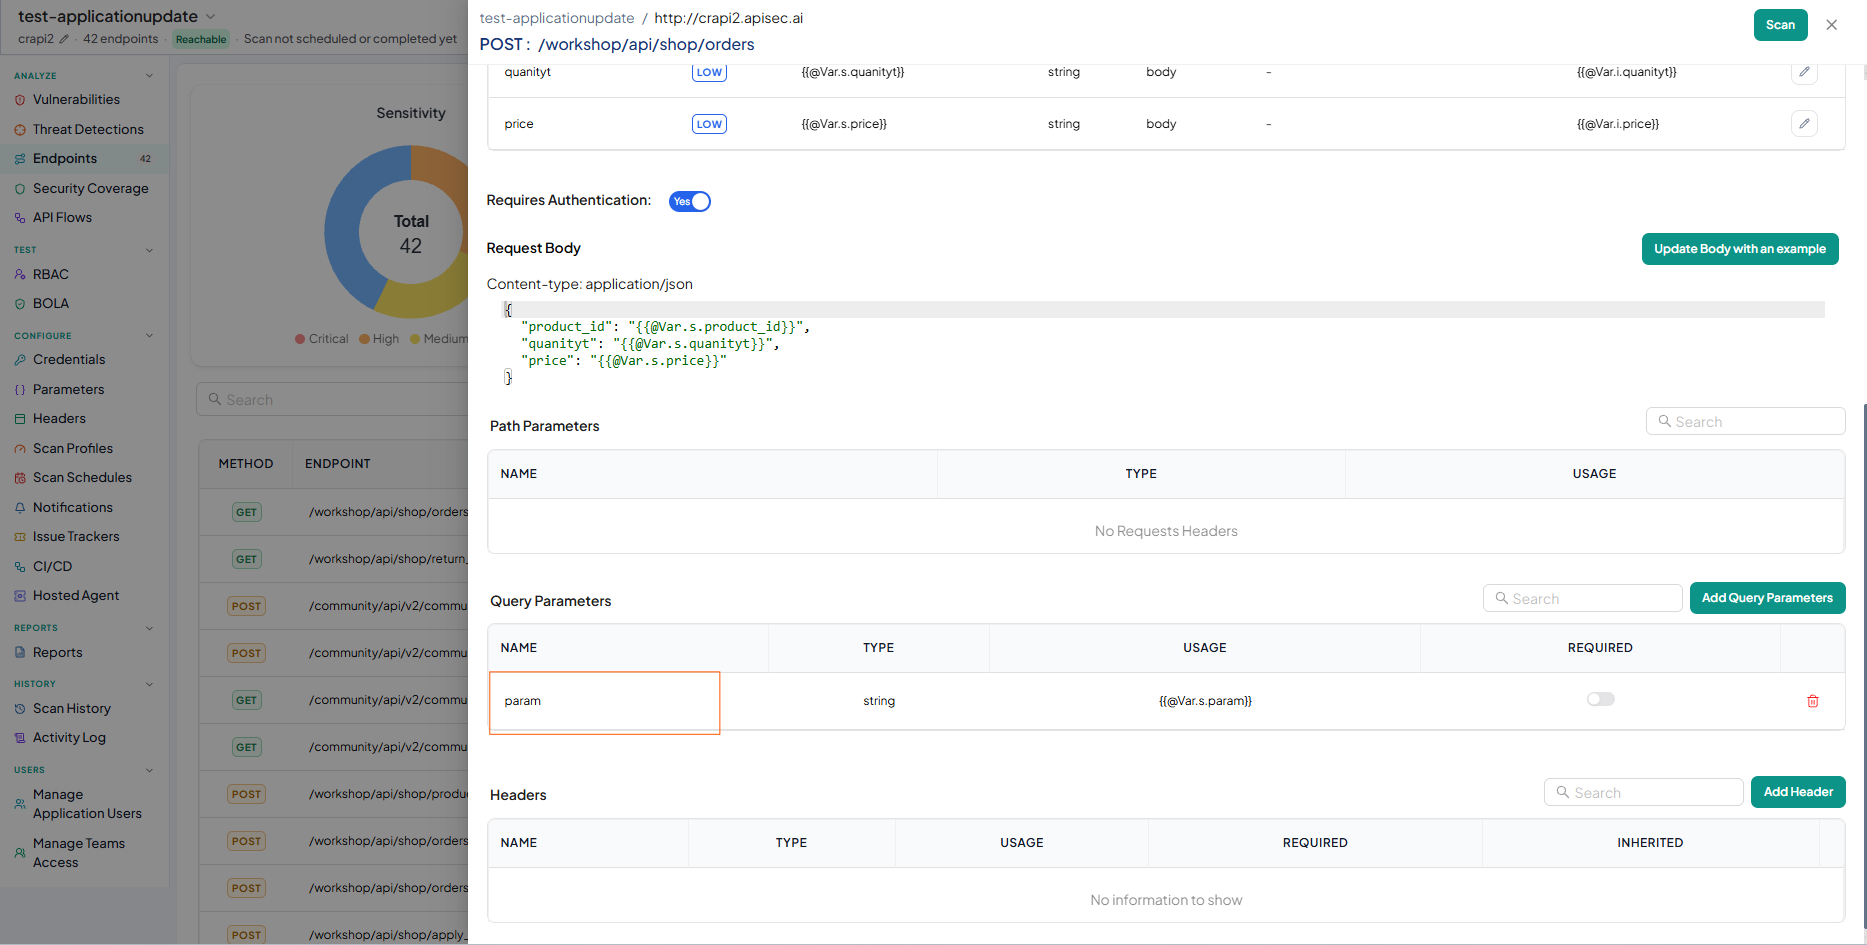
noteuser role with View permissions can not add,edit and delete query parameter in shared application.
-
To Add Header, click Add Header.
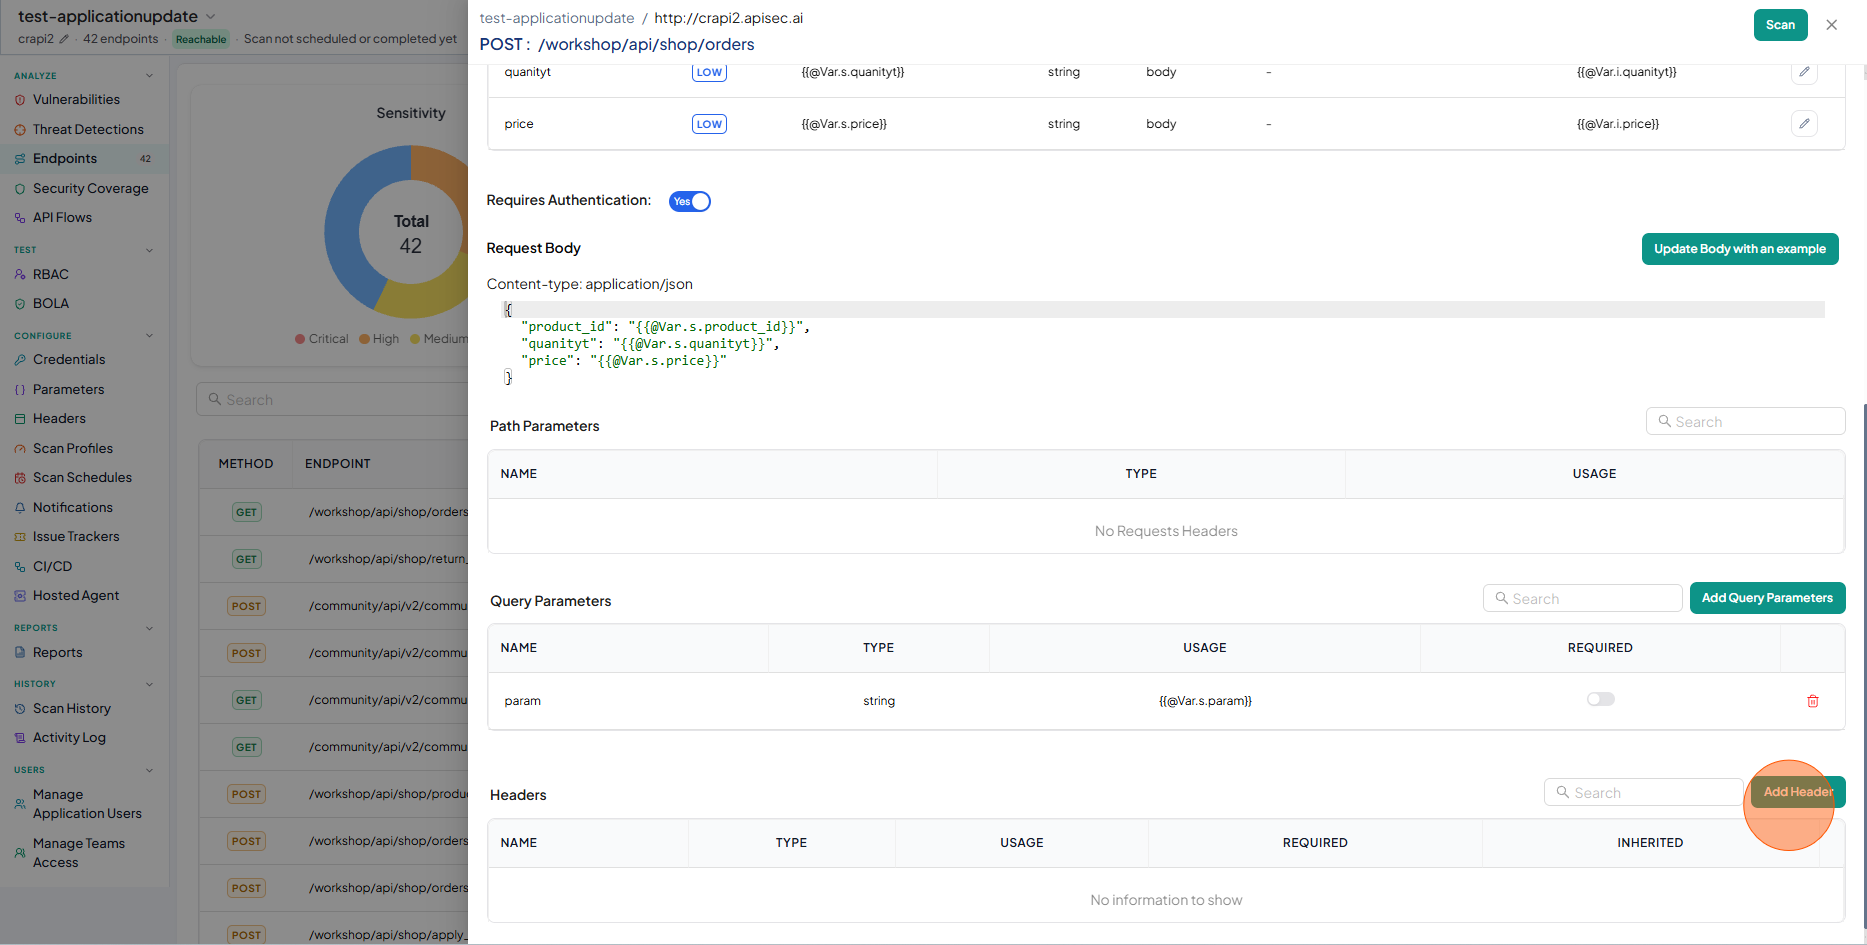
-
Enter the data:
- Name – The header key.
- Value – The value assigned to the header.
- Sensitivity – Classifies the header based on data sensitivity (Critical, High, Medium, Low).
- Required – Indicates whether this header must be included in the request..
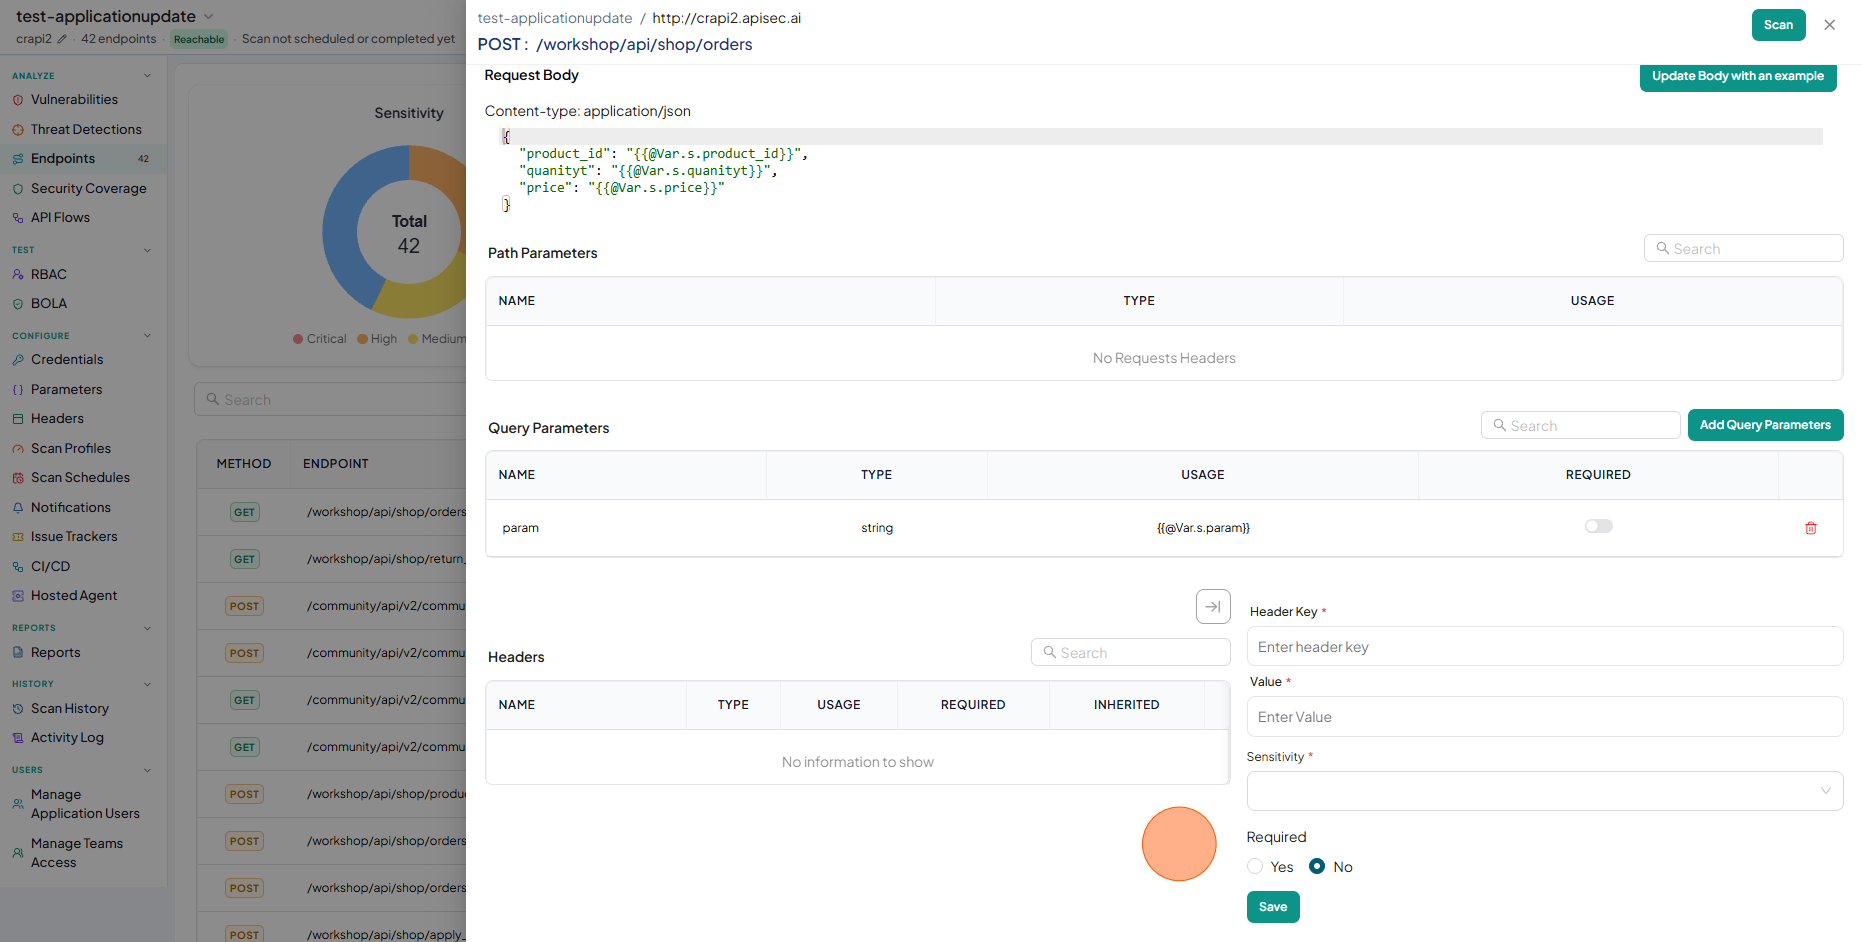
-
Click Save
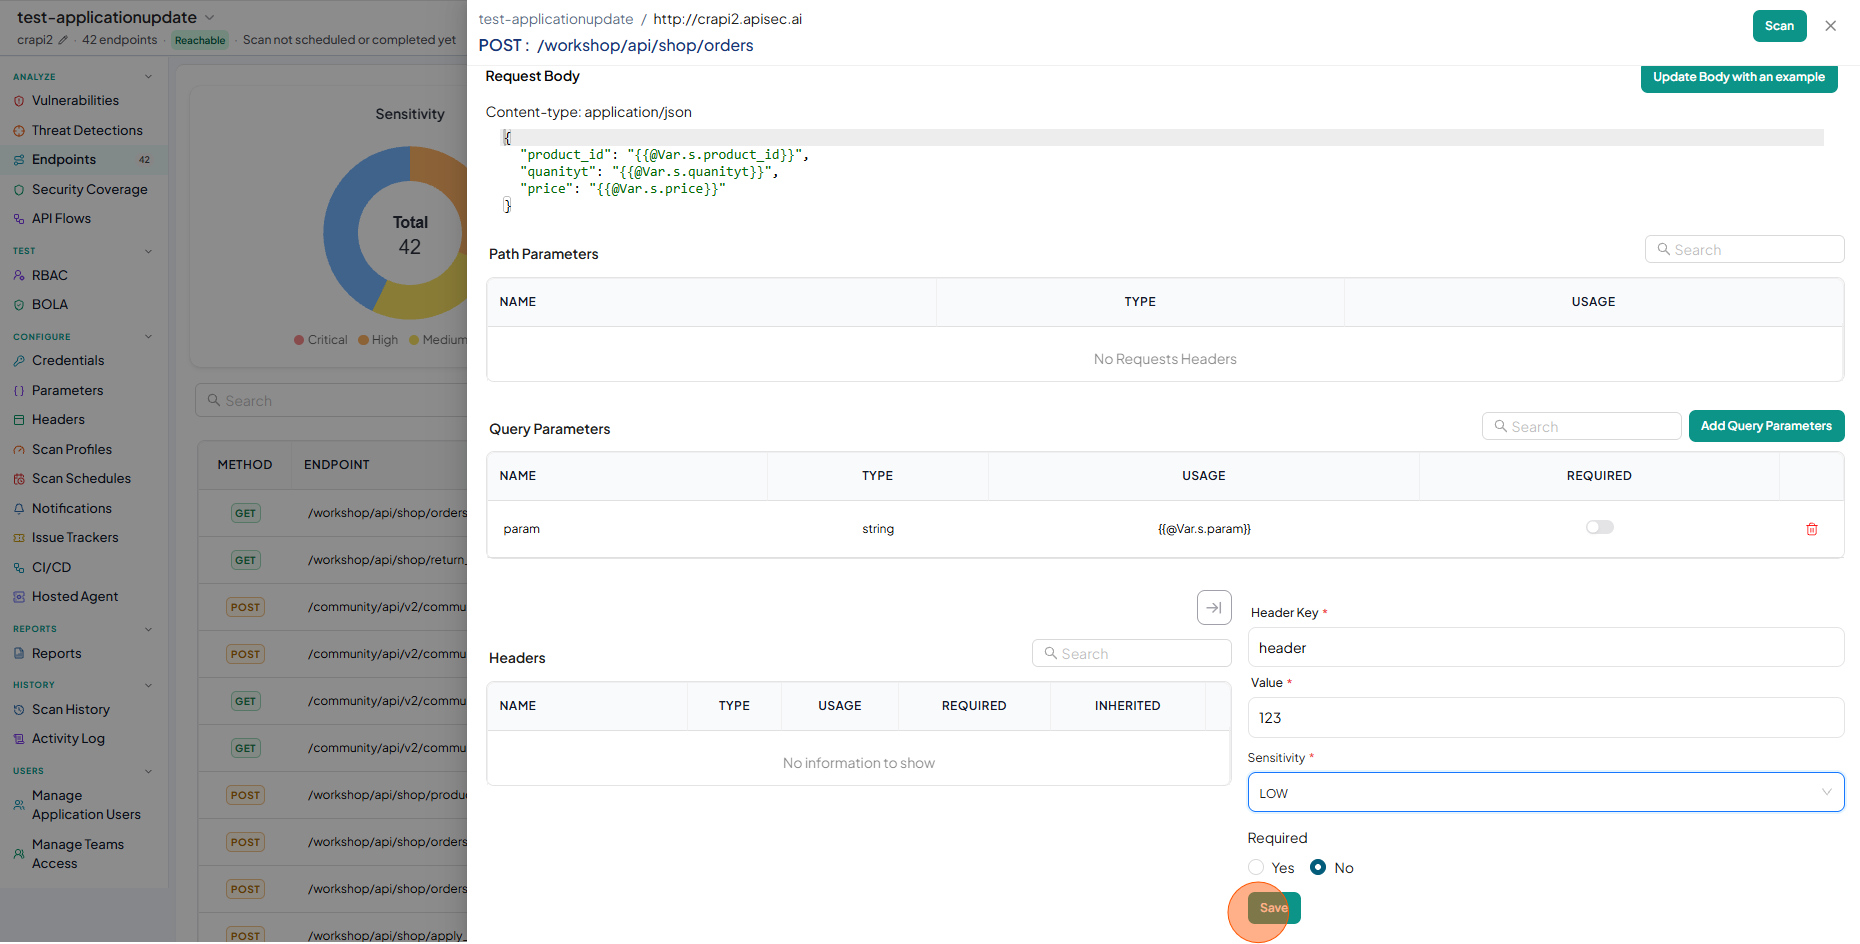
-
Check newly added header
noteuser role with View permissions can not add, edit and delete header in shared application.
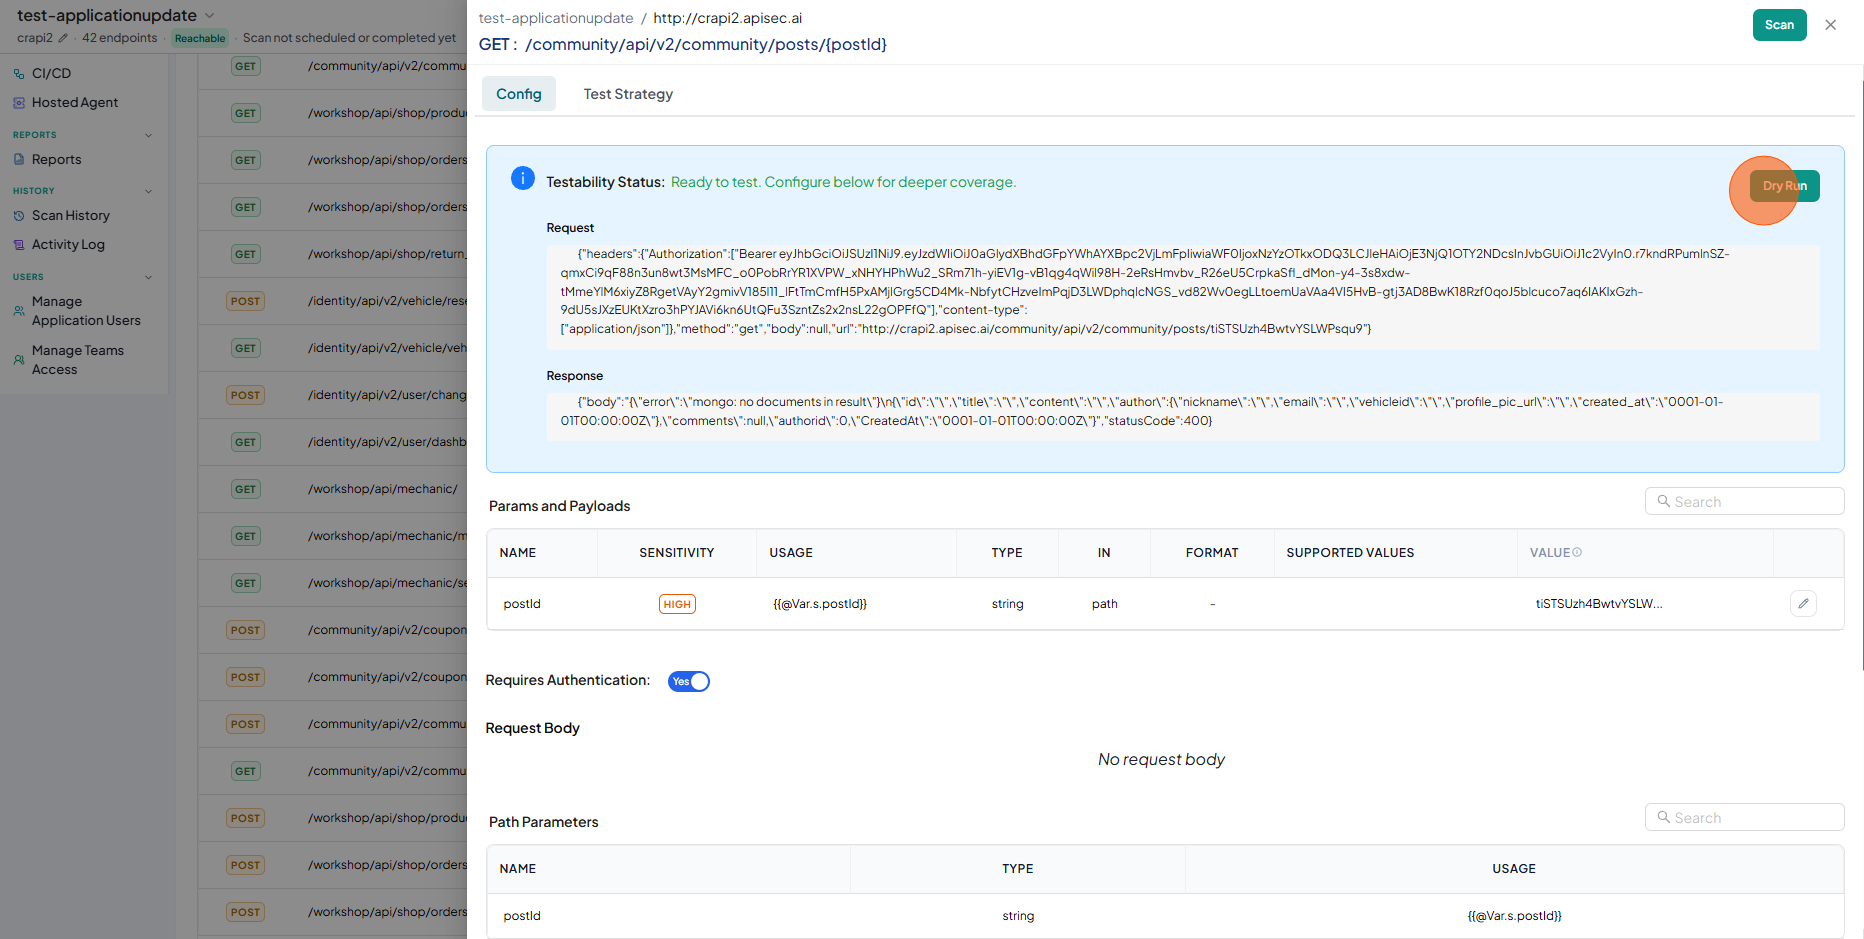
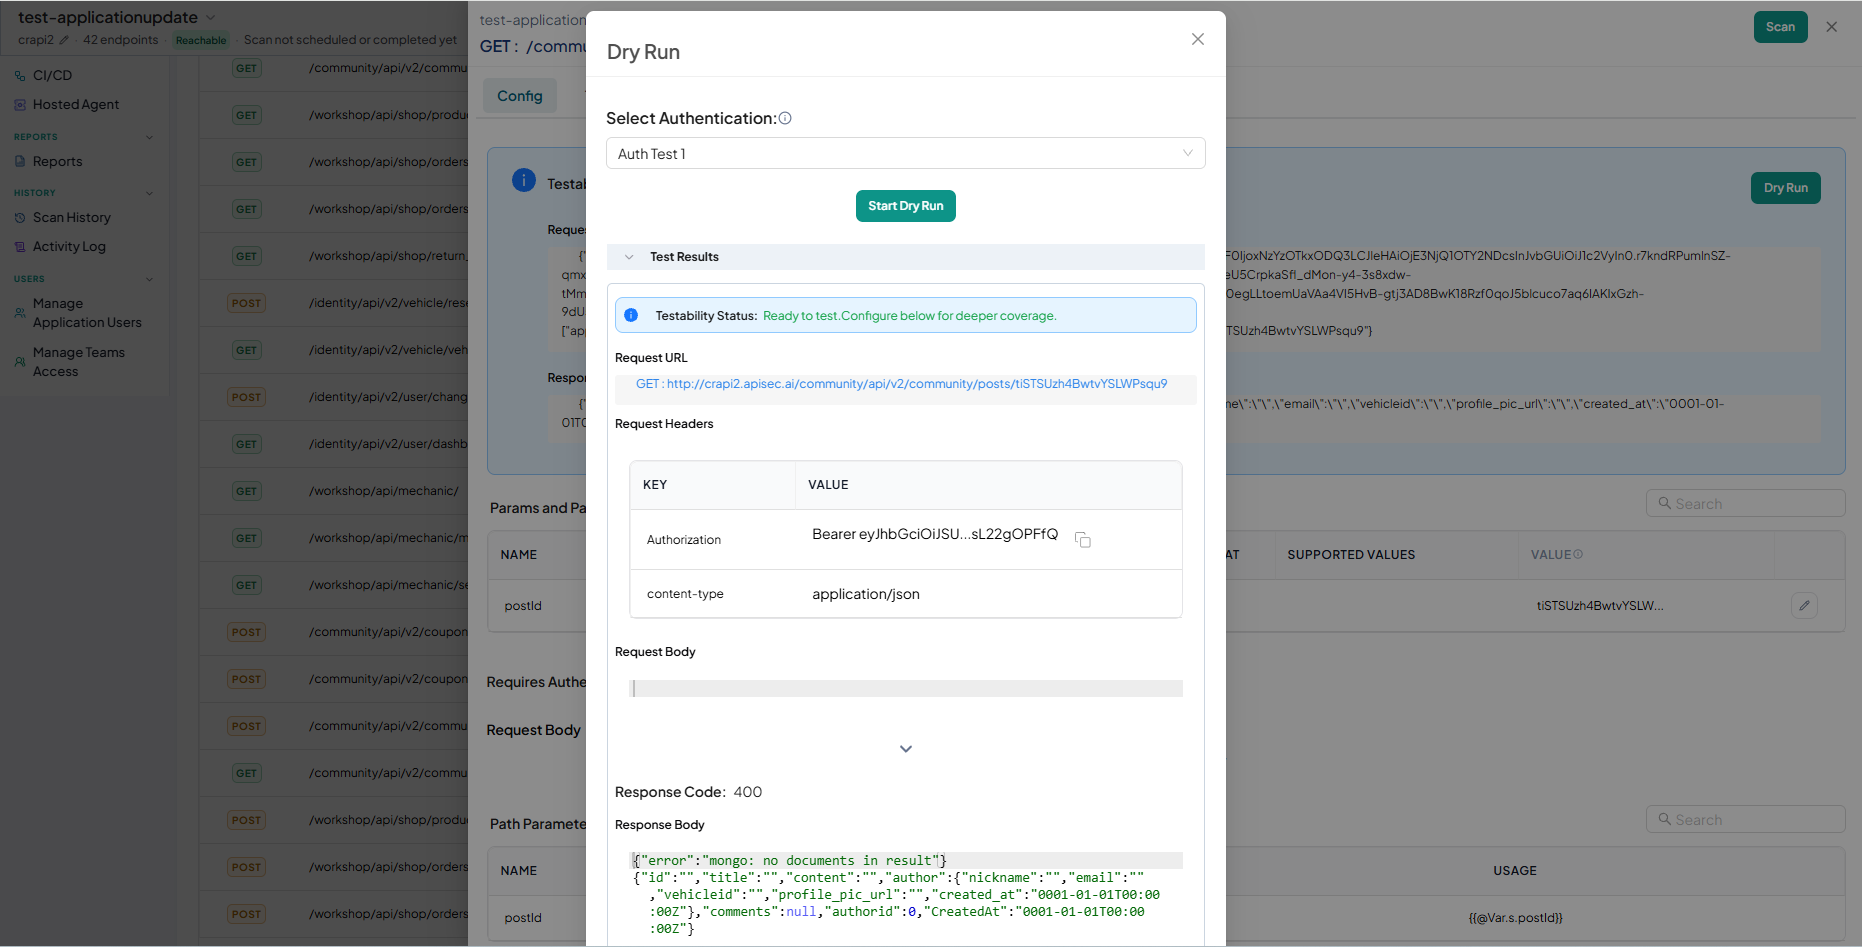
Dry Run
The Dry Run feature validates an API endpoint’s readiness before running a full security scan. Instead of immediately executing deep security tests, a Dry Run sends a lightweight request using the configured method, headers, parameters, and body, and then displays the actual request and response returned by the API.
This helps customers understand how well each endpoint is prepared for security coverage and provides a path to progressively improve it.
To execute Dry run for the endpoint
- Click Dry run
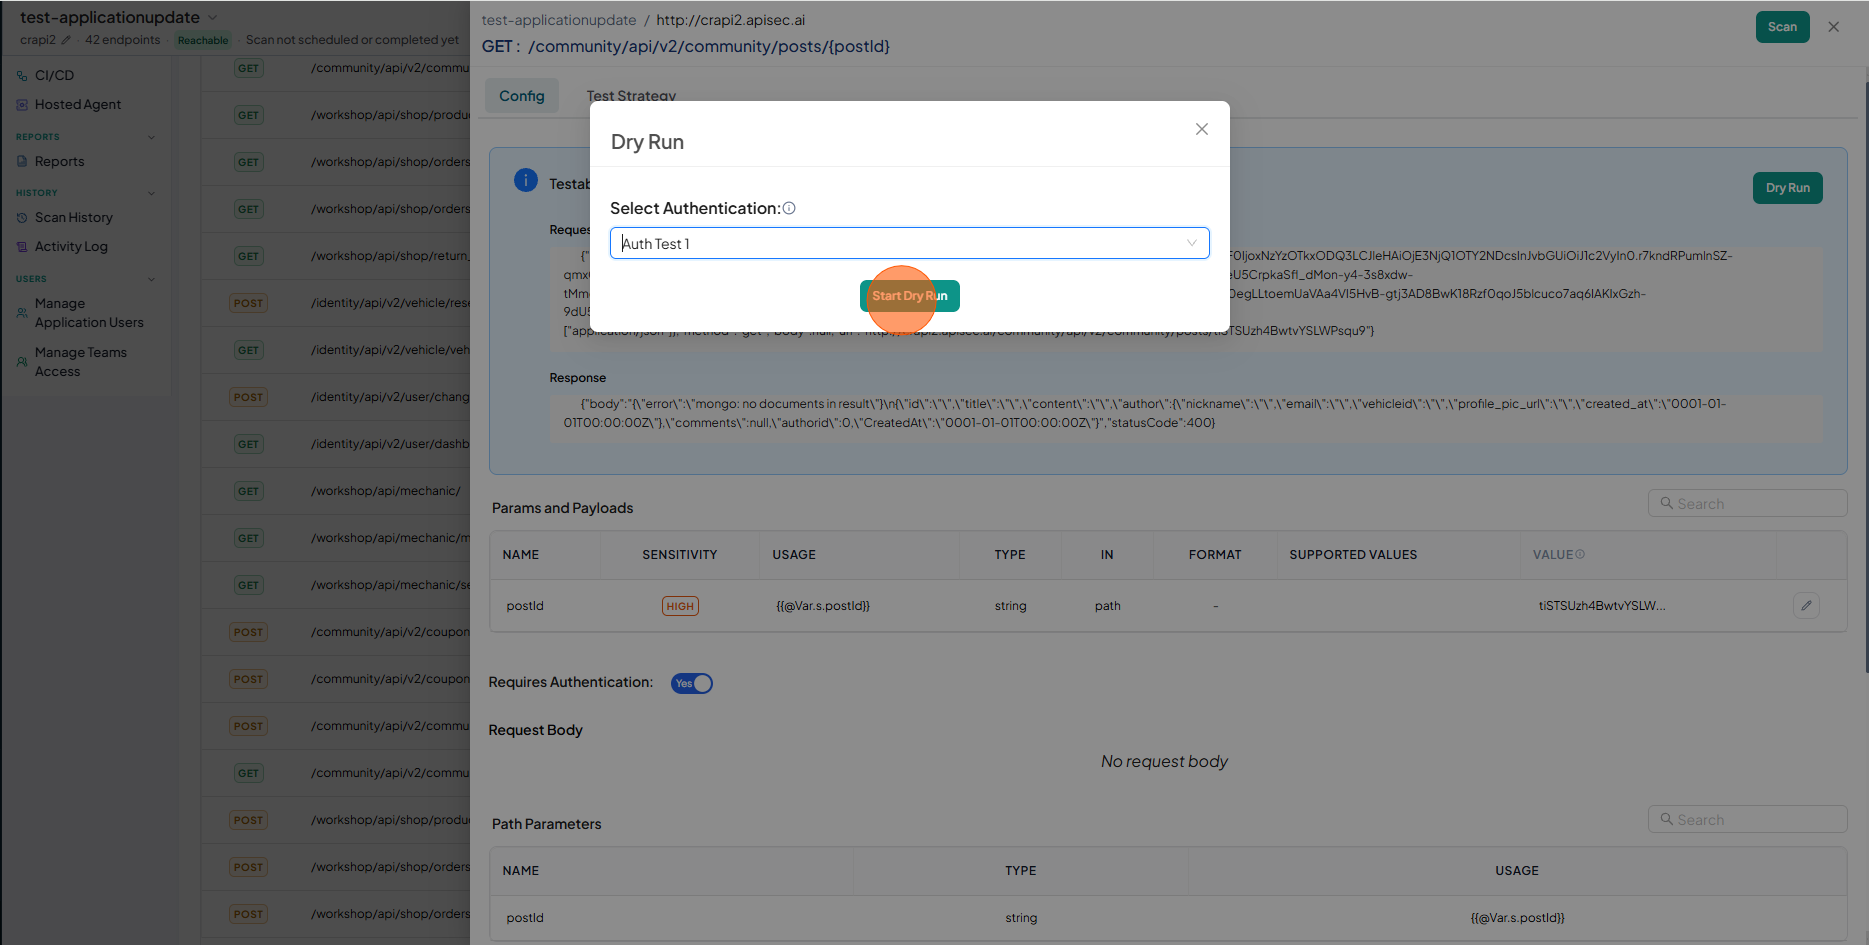
- Select Authentication
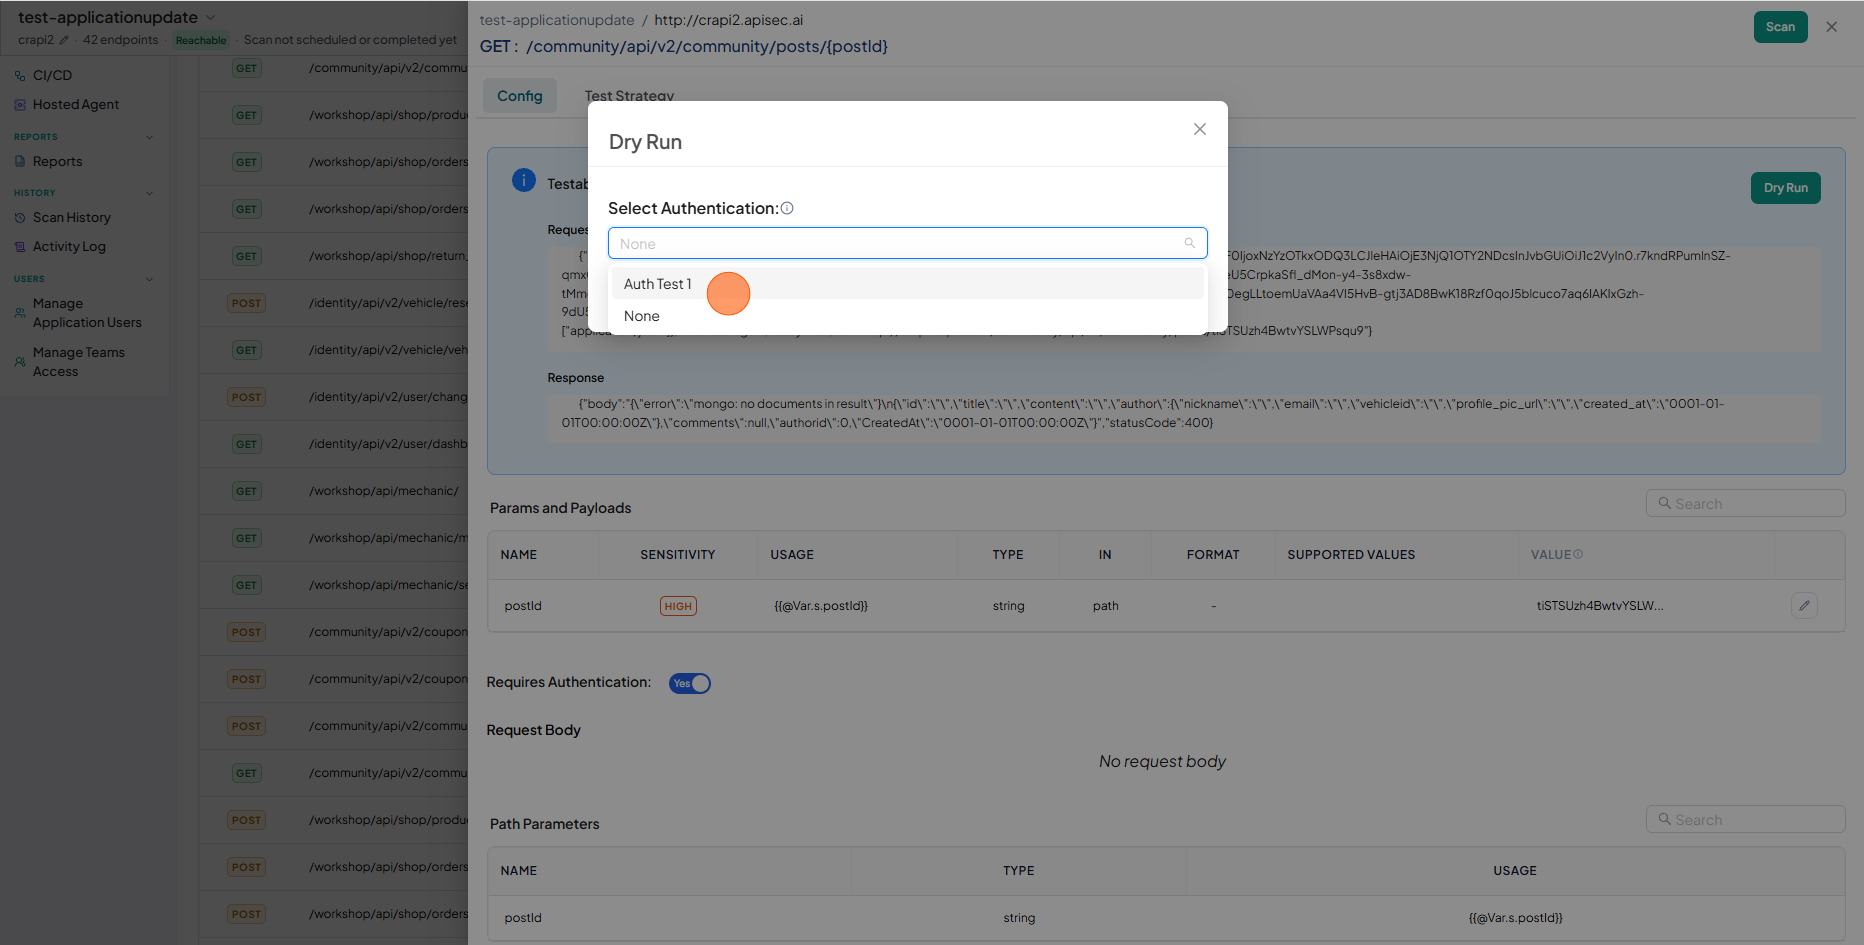
- Click Start Dry Run
- Review the Dry Run Results. The Test Results panel displays the full request and response details returned by the API, helping you verify the endpoint’s readiness and configuration before running a full security scan.
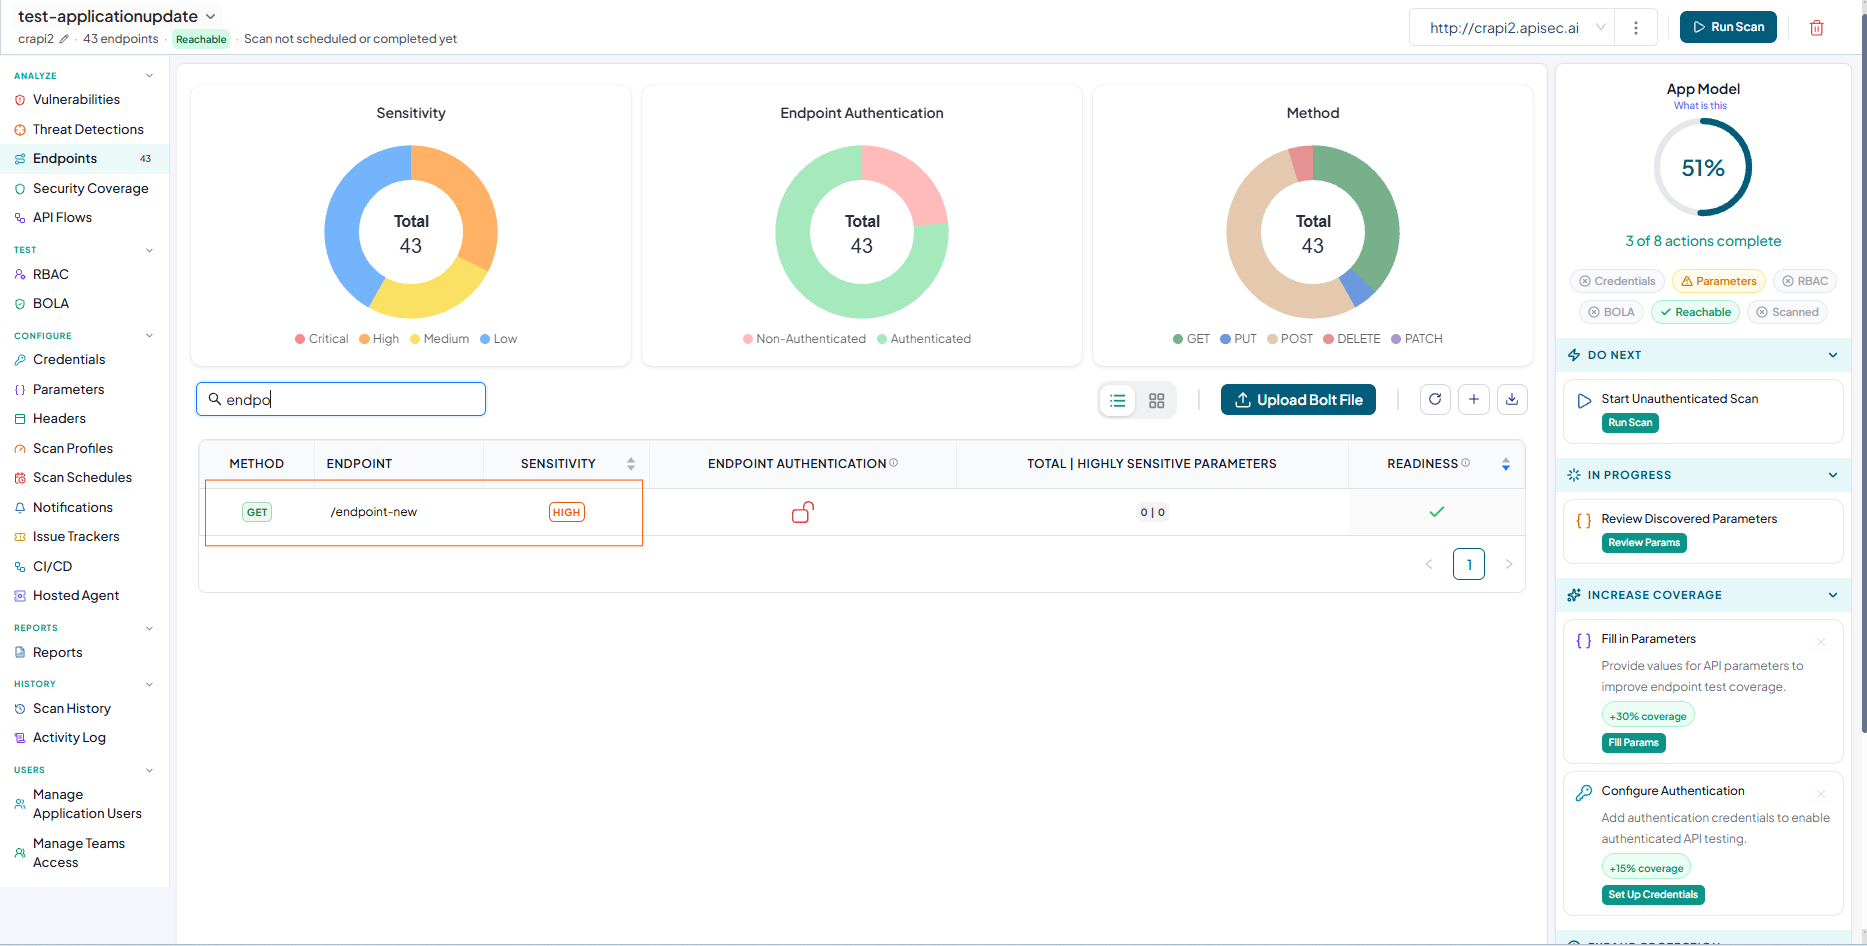
Add Endpoint
The Add Endpoint allows you to manually register new API endpoints for an existing application. This is useful when certain endpoints are not automatically discovered or need to be explicitly defined for monitoring.
-
Click Add Endpoint
-
Select HTTP Method
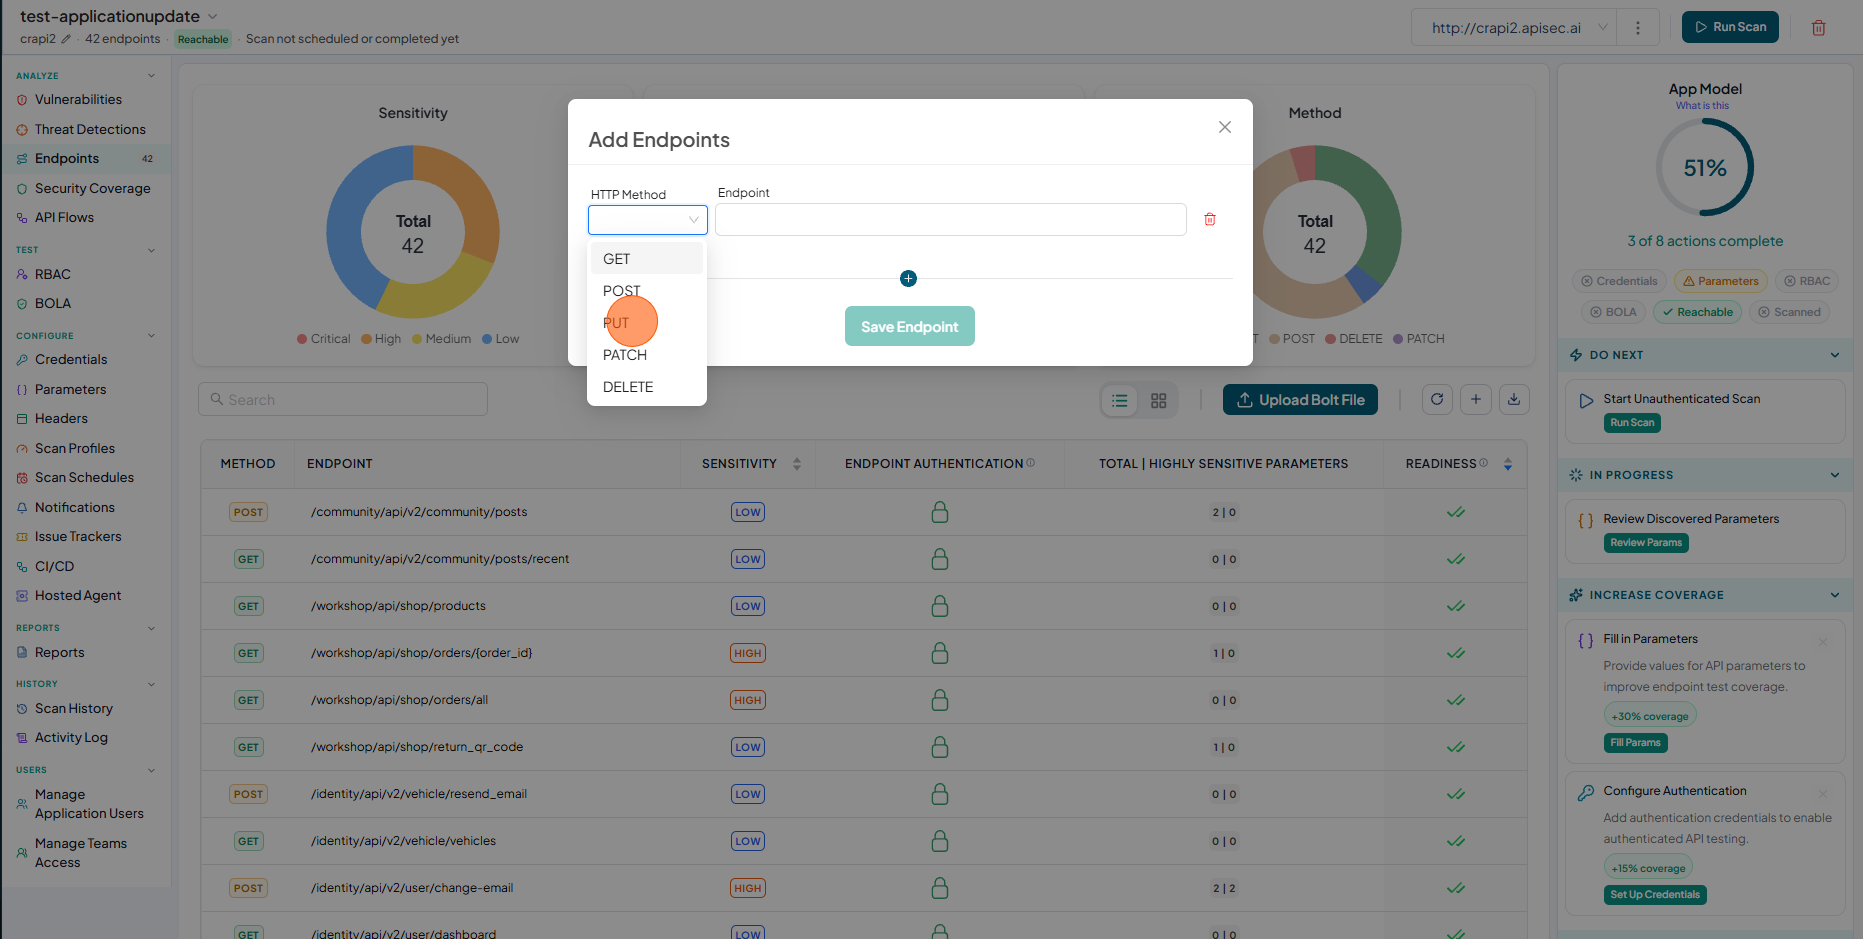
-
Enter Endpoint and Click Save Endpoint
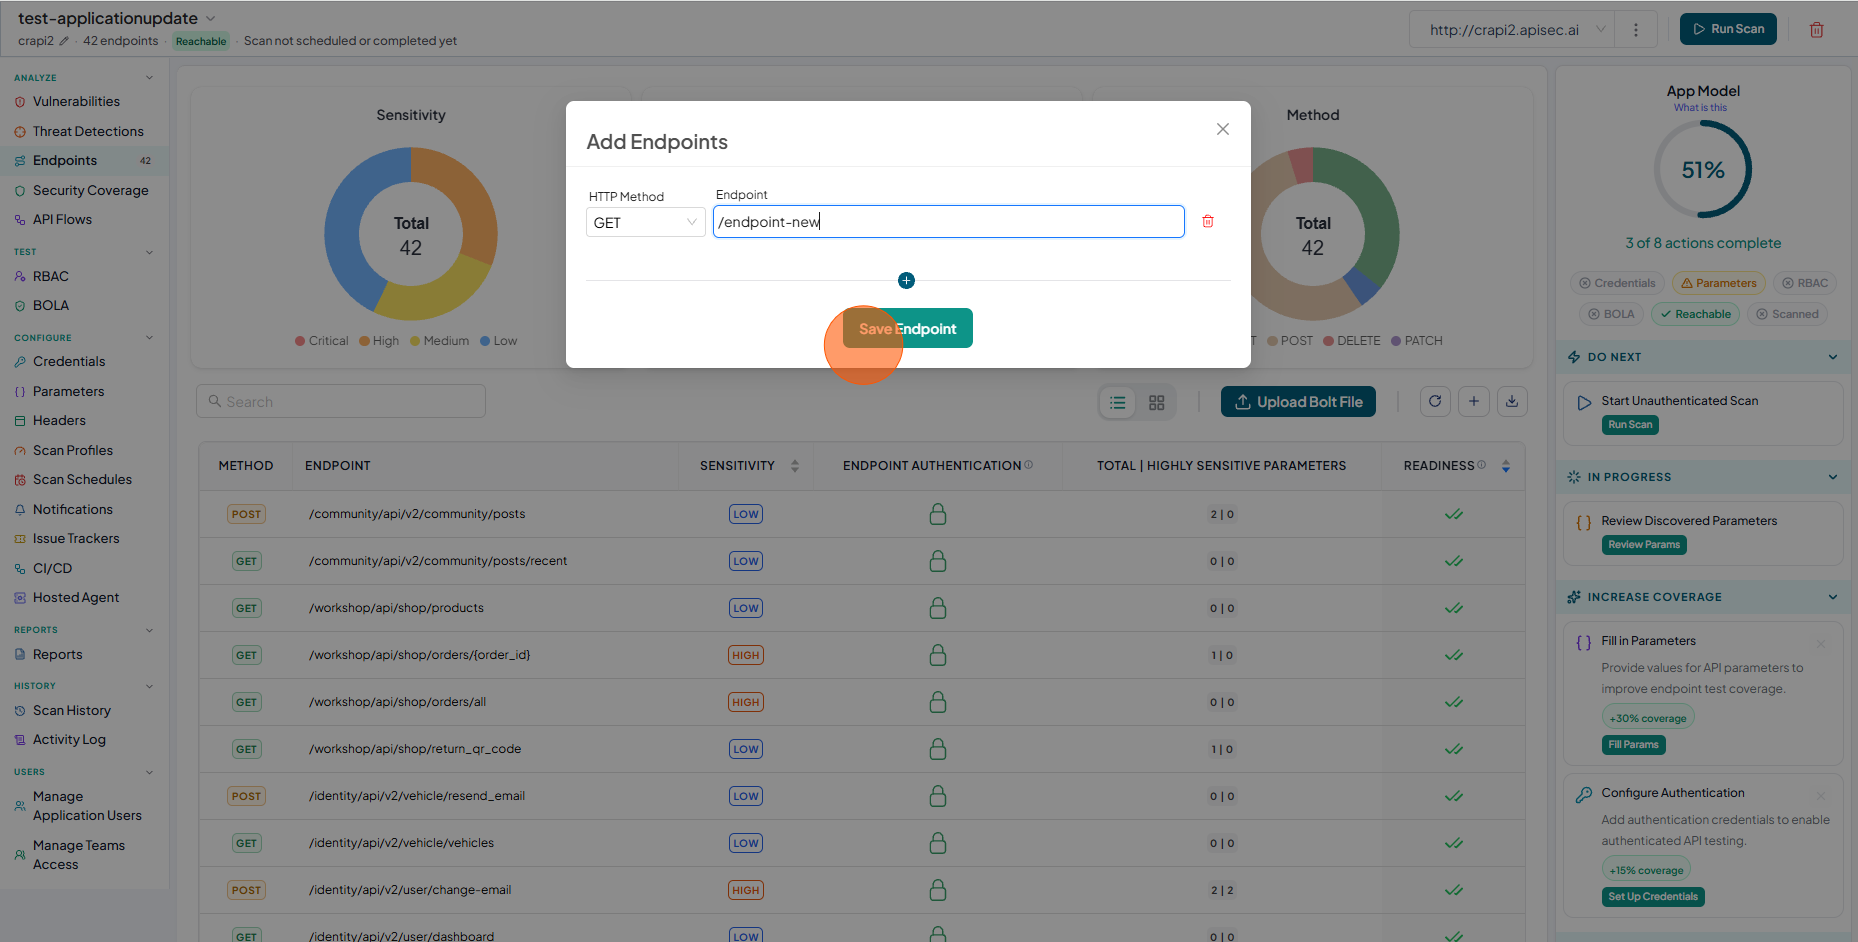
-
Verify the newly added endpoint
noteuser role with View permissions can not add endpoints in shared application.
-
Download OAS
Download OAS allows you to download the OpenAPI Specification (OAS) for any application directly from the platform. It allows quick access to the exact specification used during onboarding.
How it works
-
Applications onboarded with an OAS will provide the original specification for download.
-
Applications onboarded using a Postman Collection are automatically converted to an OAS during onboarding, and this converted version is available for download.
-
If an application's OAS has been reloaded multiple times, the system will always provide the latest version currently associated with the application.
-
Click Download OAS
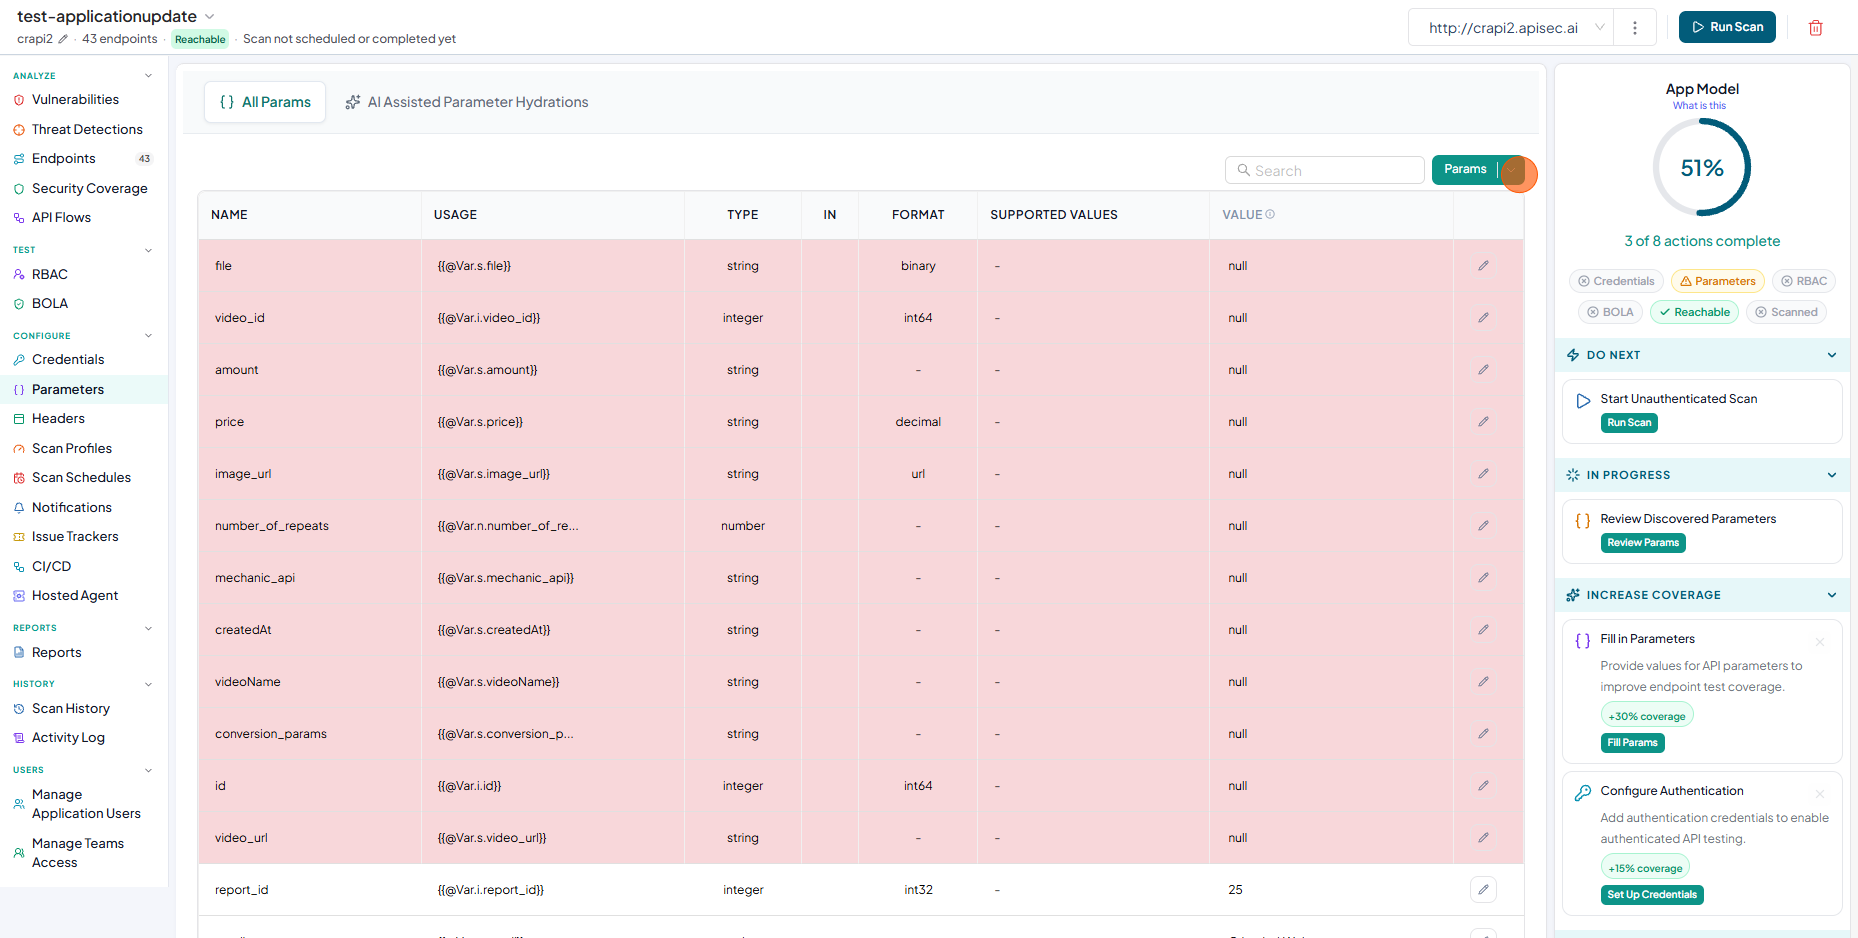
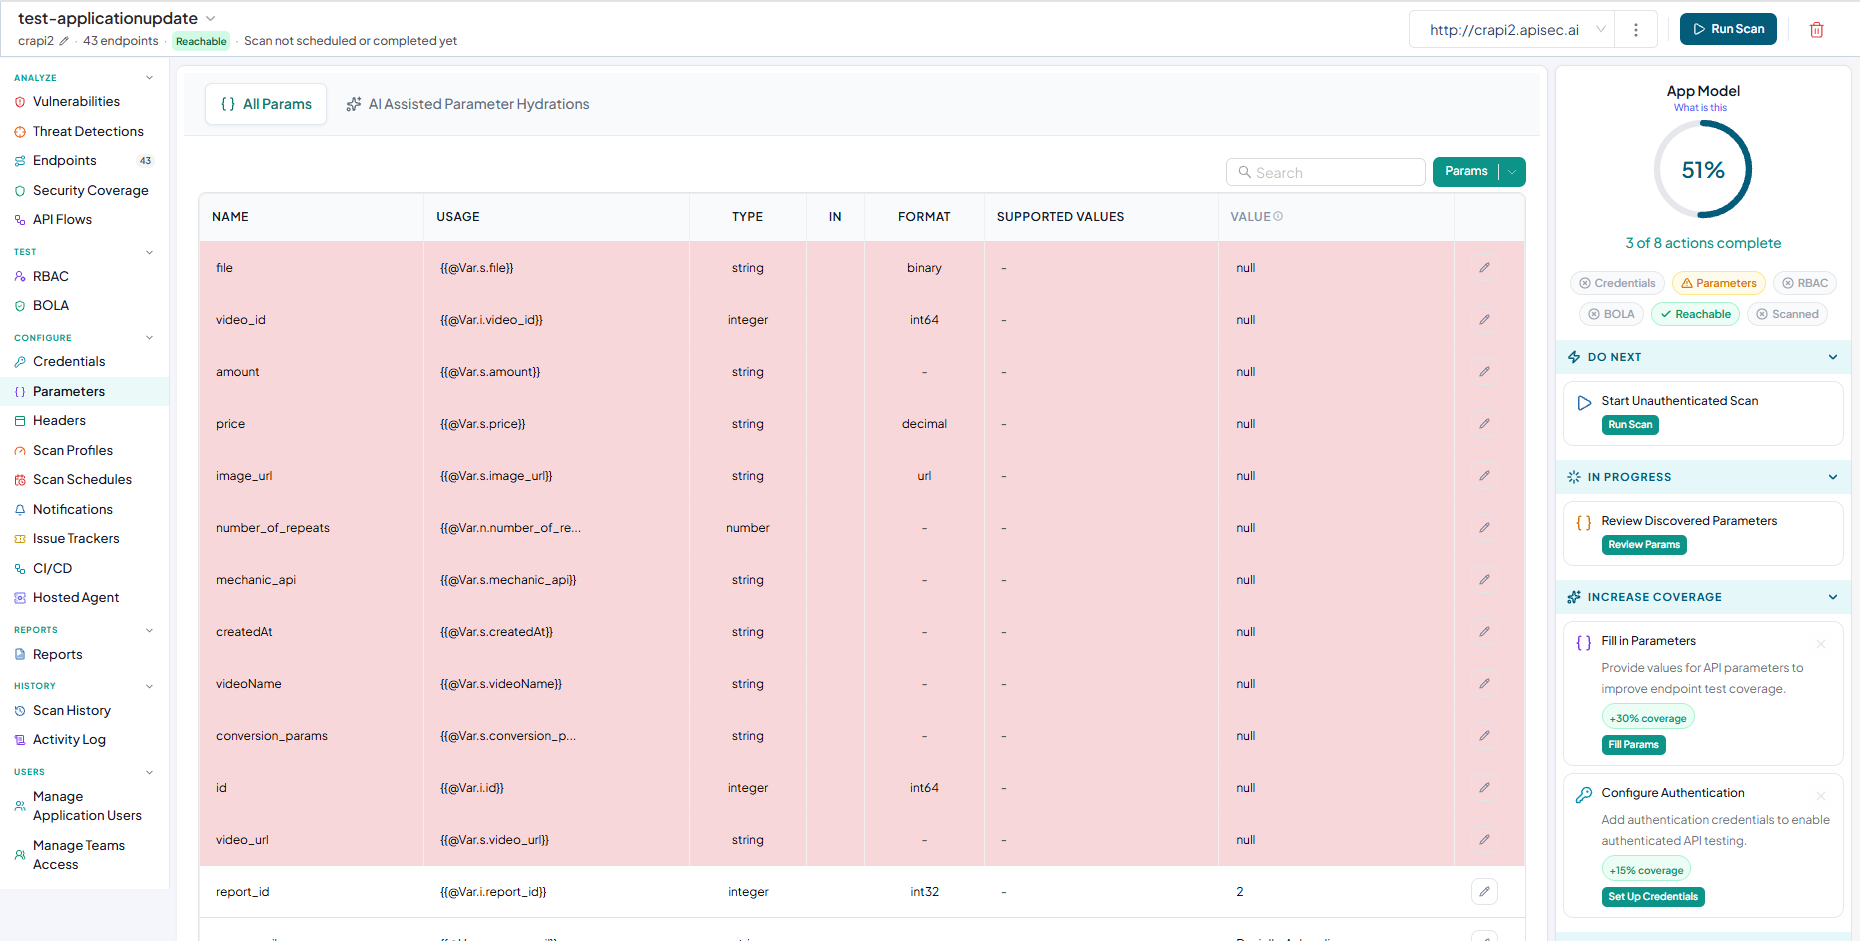
Environment level Parameter configuration
To update parameter values for the application at the environment level
- Click on Parameters from side bar
- It displays all parameters related to the selected environment.

- To change Parameter value, click the Pencil icon.
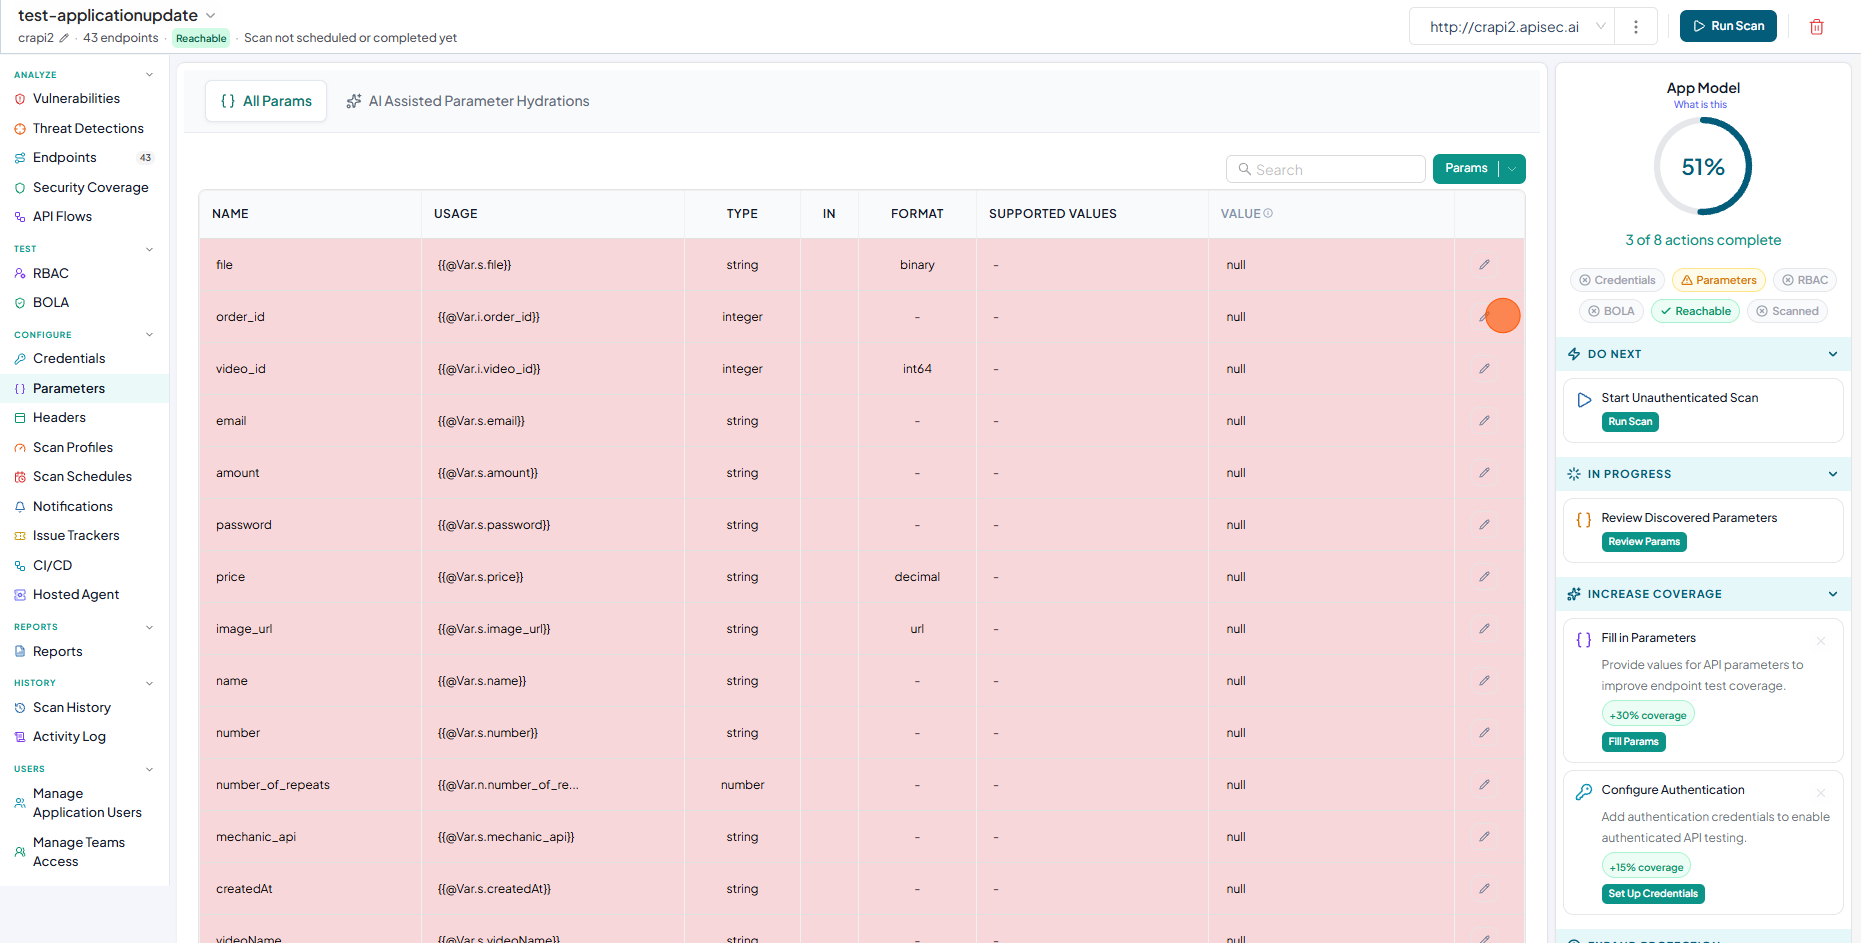
- Change the value and click Update
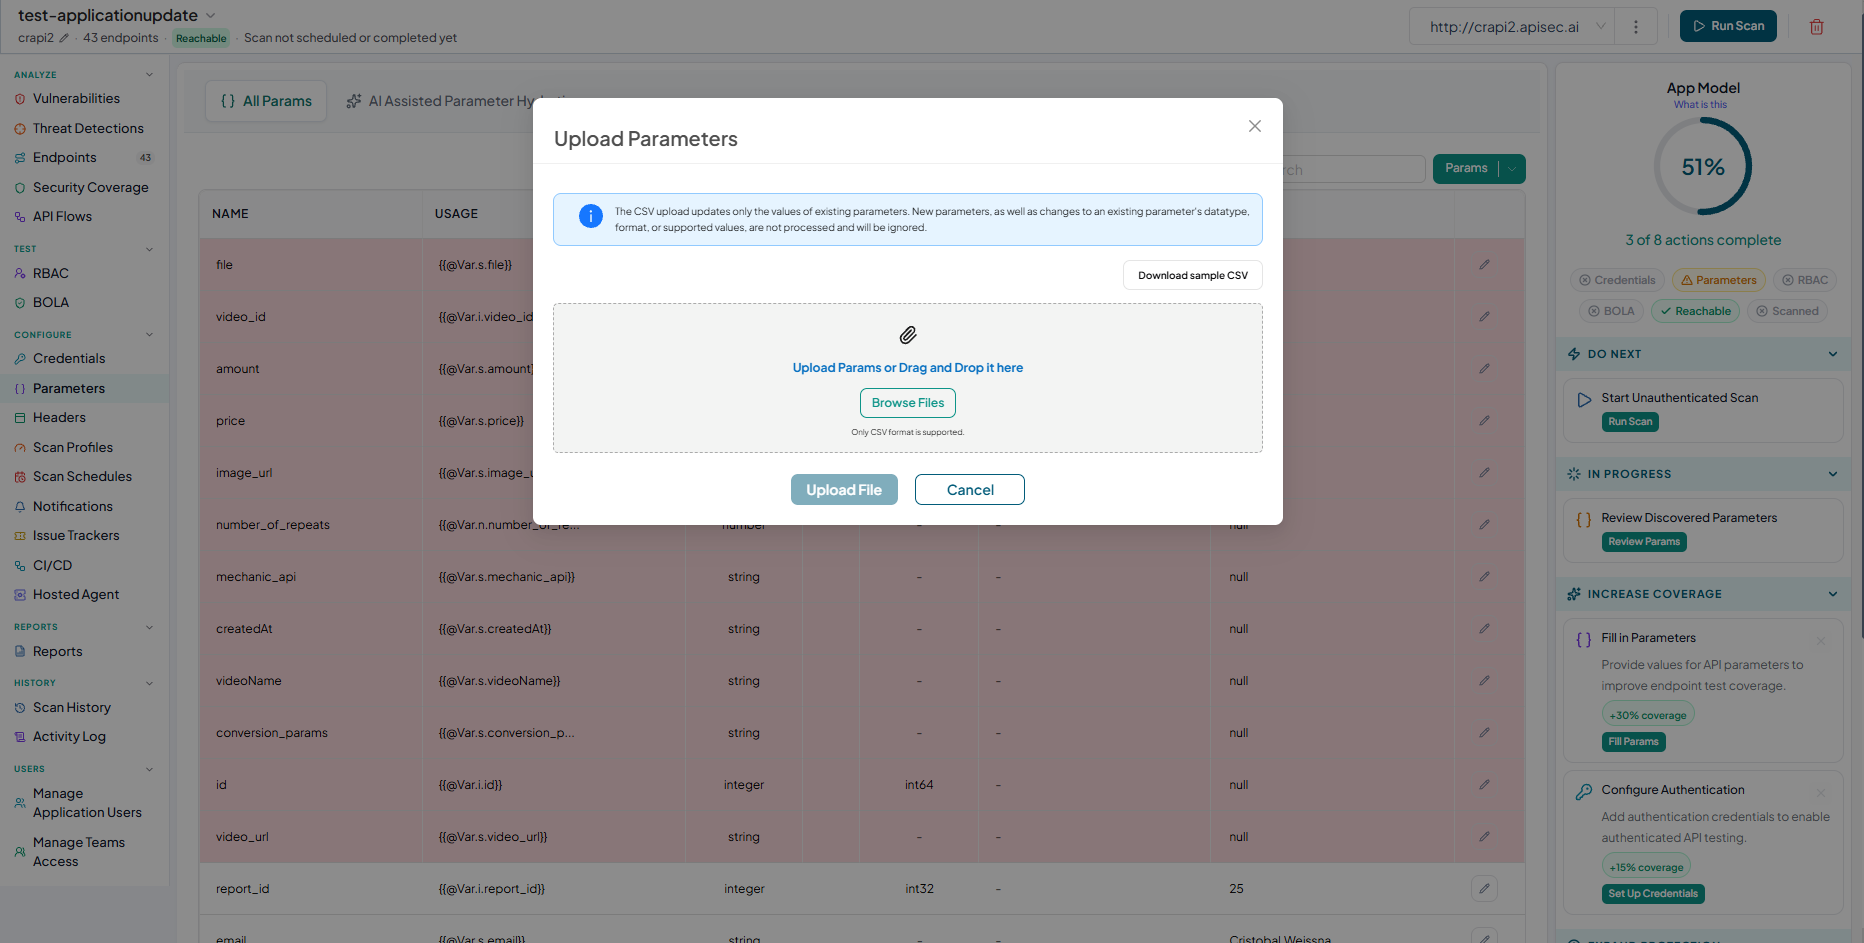
Bulk Upload & Download of Instance-Level Parameter Values
The Params option allows you bulk Upload & Download of Instance-Level Parameter Values.
-
Bulk upload environment-level parameters
-
Click Params
-
Select Upload

-
In the Upload Parameters window Add the file and Click Upload File
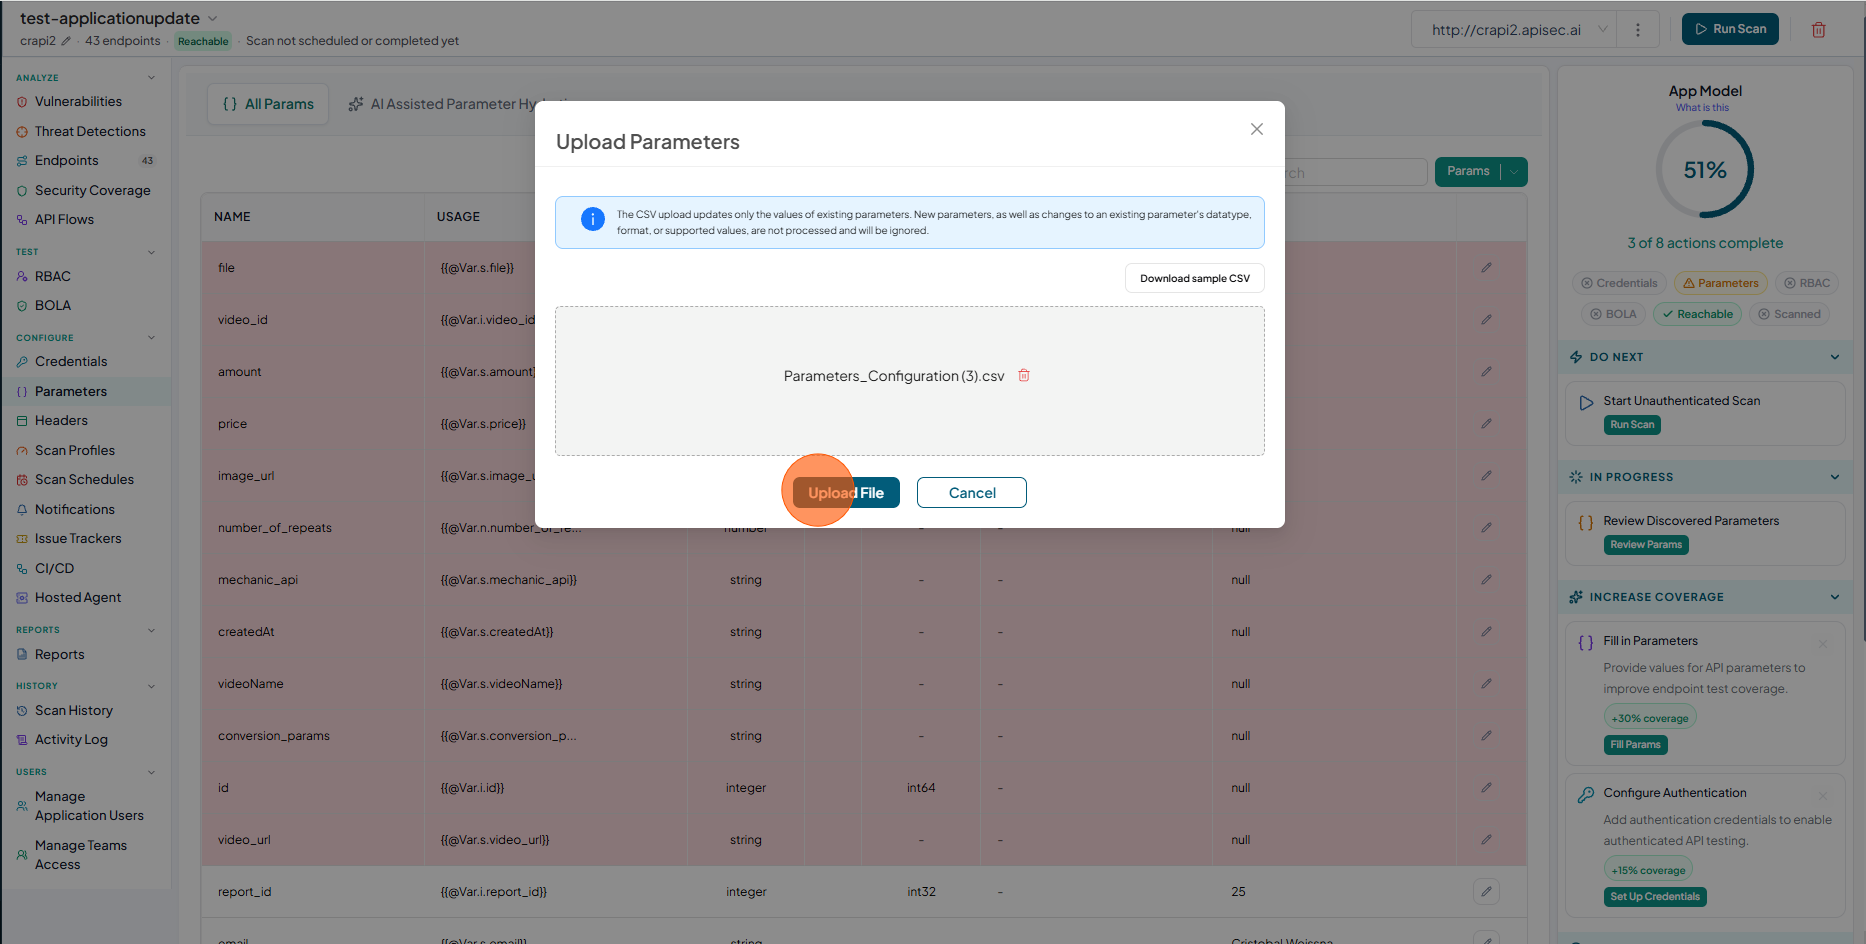
-
Check the Updated parameter values
-
-
Download existing environment-level parameter values
It helps you preserve the parameter configuration before reloading a spec — particularly useful when choosing not to retain parameters during a spec reload.
-
Click Params
-
Select Download
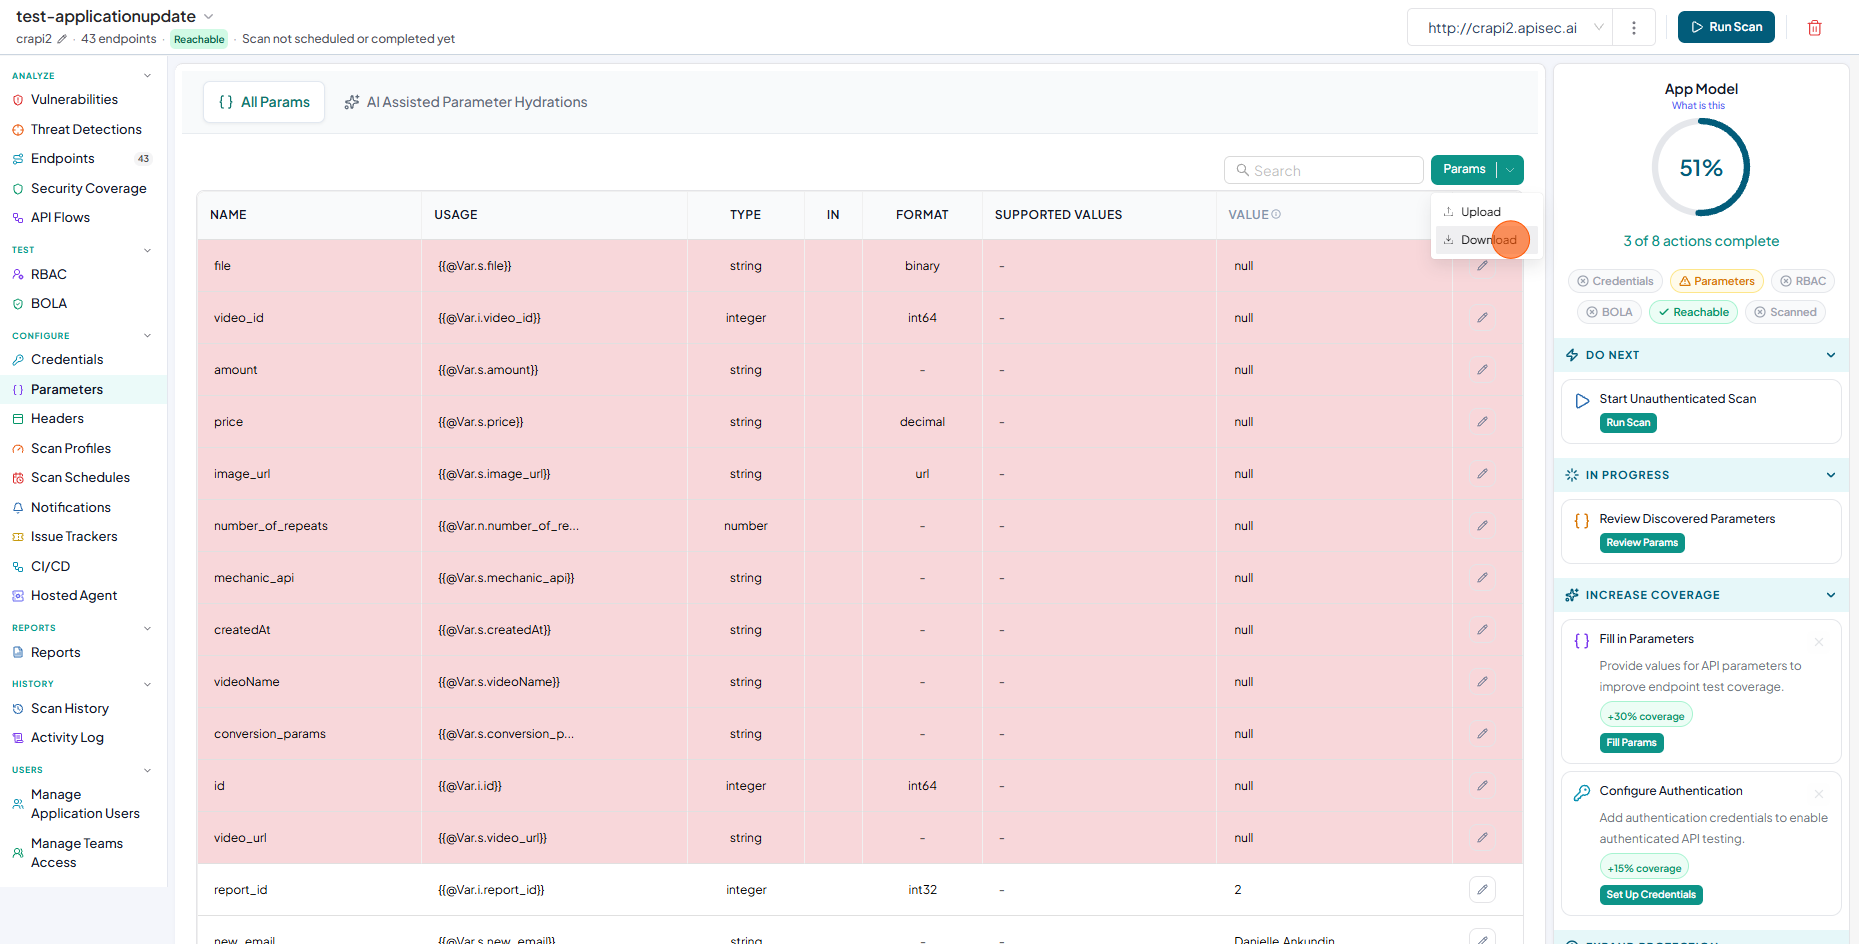
-
user role with View permissions can not change parameter configuration in shared application.
Security-coverage
Security Coverage provides a complete view of the tests safeguarding your APIs.
When you register an application, our platform automatically generates a custom suite of security tests aligned with the latest OWASP API Security Top 10 standards.
With Security Coverage, you can:
-
View the full suite of generated tests for your application
-
Understand the attack vectors your APIs are protected against
-
Track categories such as Authorization, Authentication, and Token Security
-
Detect risks like Broken Object Level Authorization (BOLA), Broken Authentication, Tampered Tokens ... and so on

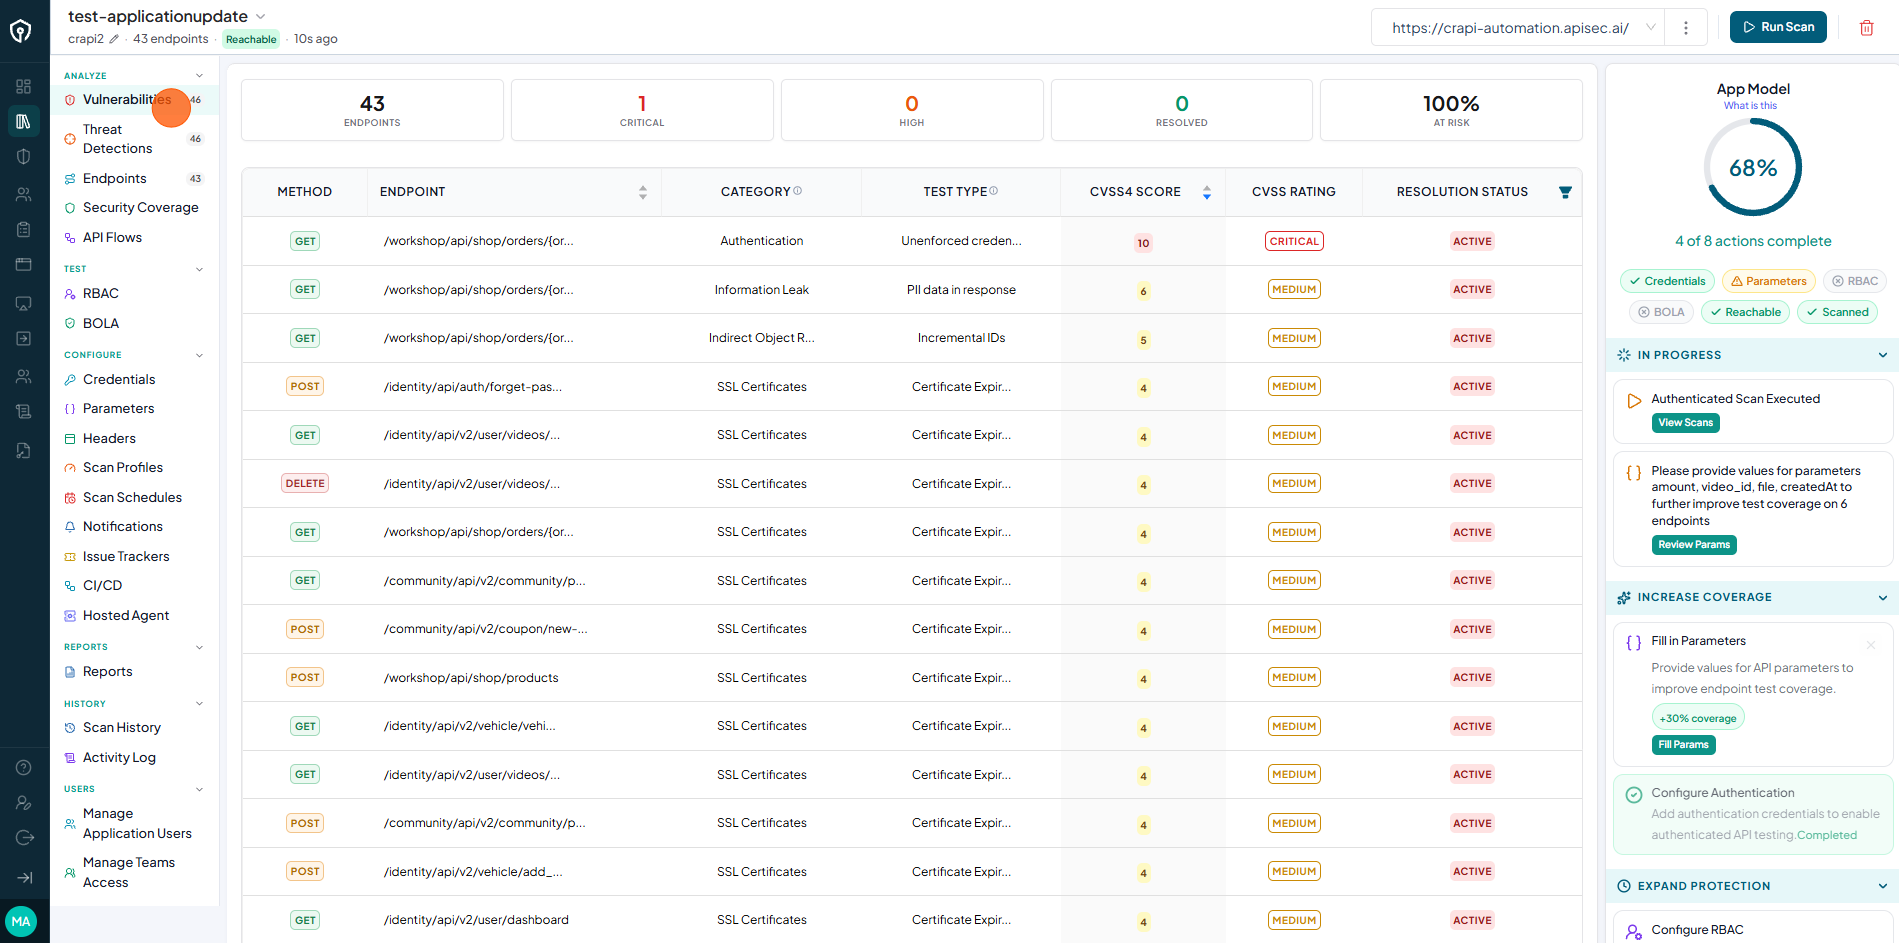
Vulnerabilities
After scanning endpoints, in Vulnerabilities tab you can find the detected security risks with detailed evidence and remediation steps to help you fix issues faster.
When scans detect potential security risks, our platform automatically generates detailed Vulnerability reports. Each entry includes:
-
Specific details of the vulnerability
-
Evidence of detection for validation
-
Remediation steps to guide quick fixes
With clear severity levels, CVSS scores, and resolution status, you can prioritize and address issues efficiently
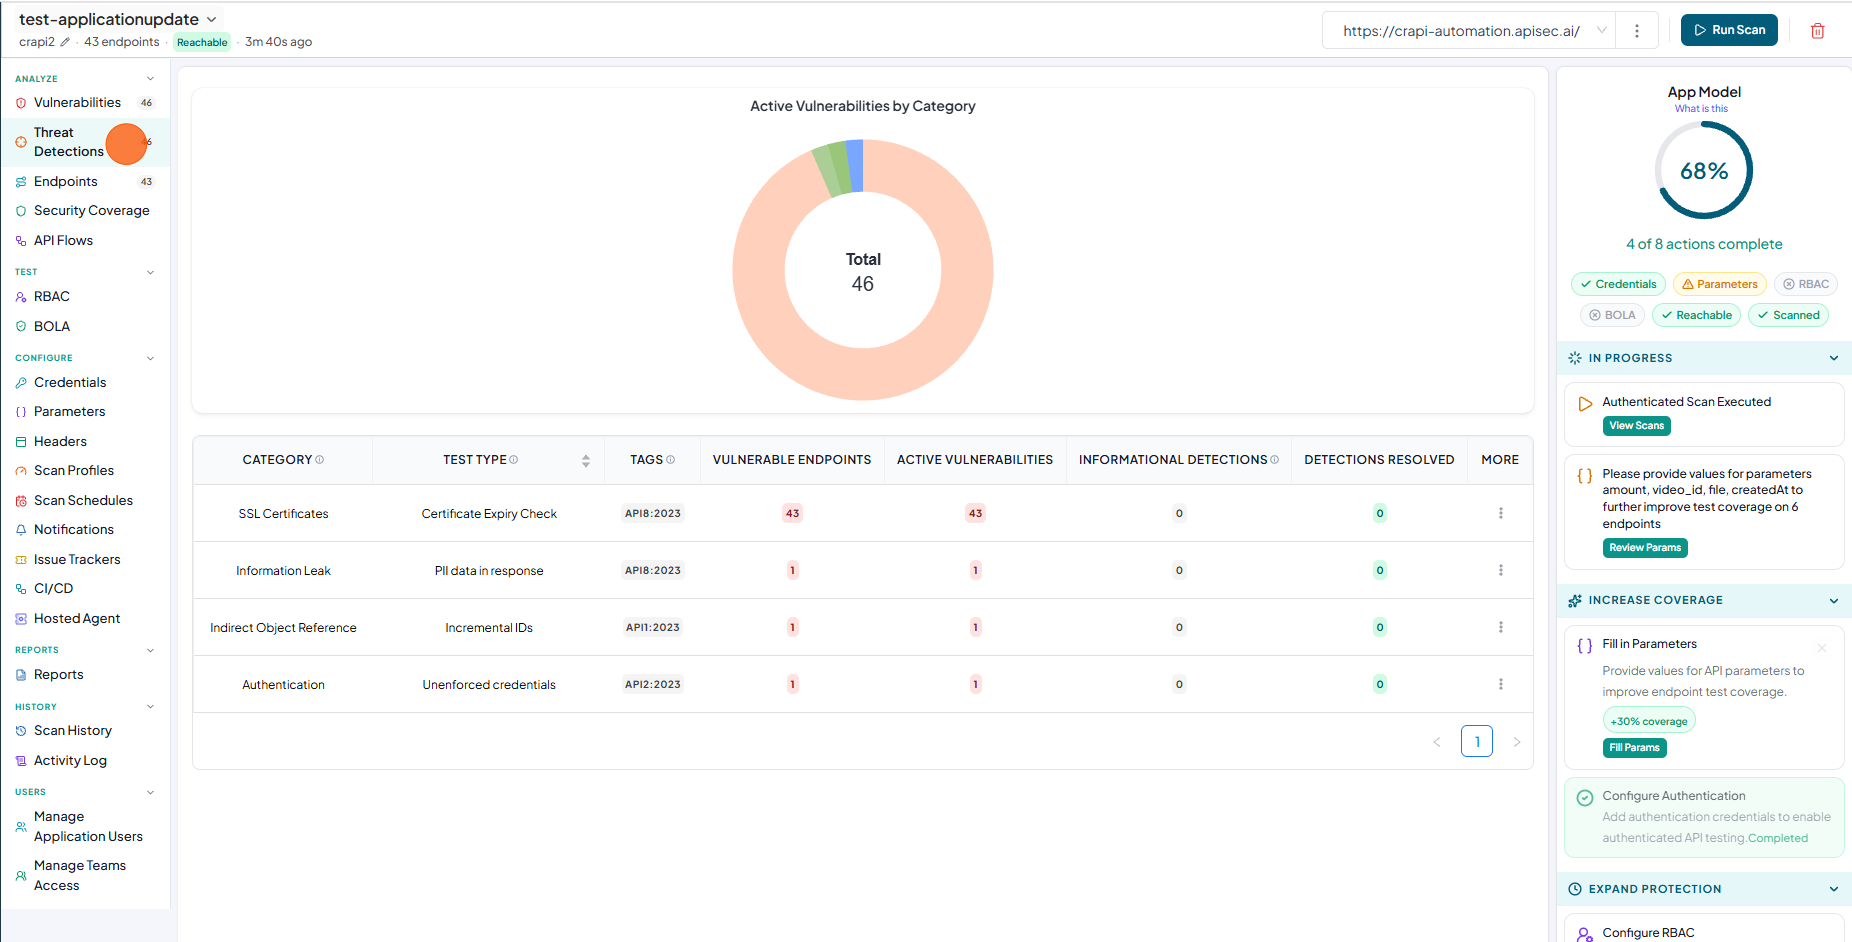
Threat Detection
Threat Detections show vulnerability types across your APIs and highlight endpoints affected by the same threats.
-
Identify vulnerability types present in your APIs
-
See which endpoints share the same vulnerability patterns
-
Understand how threats propagate across your application
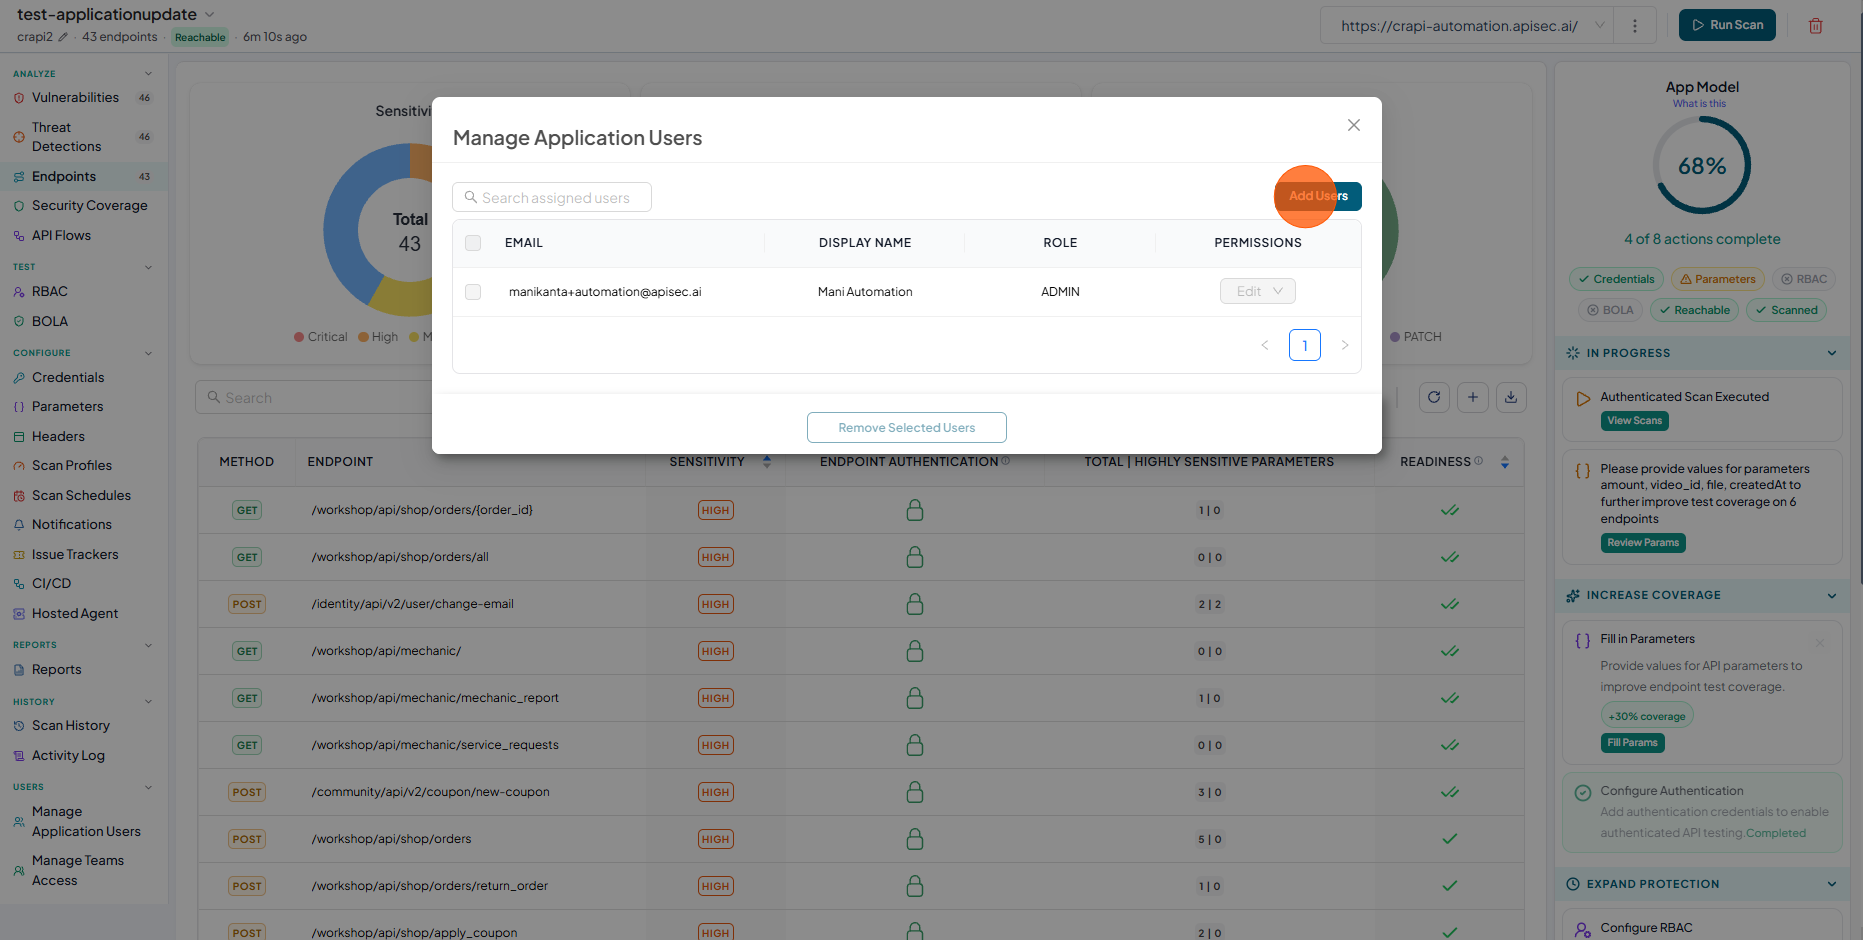
Manage Application Users
This option allows you to add users to the application using their email addresses, assign appropriate access permissions, and remove users when needed.
-
Click on Manage Application Users from sidebar
-
Click Add Users
-
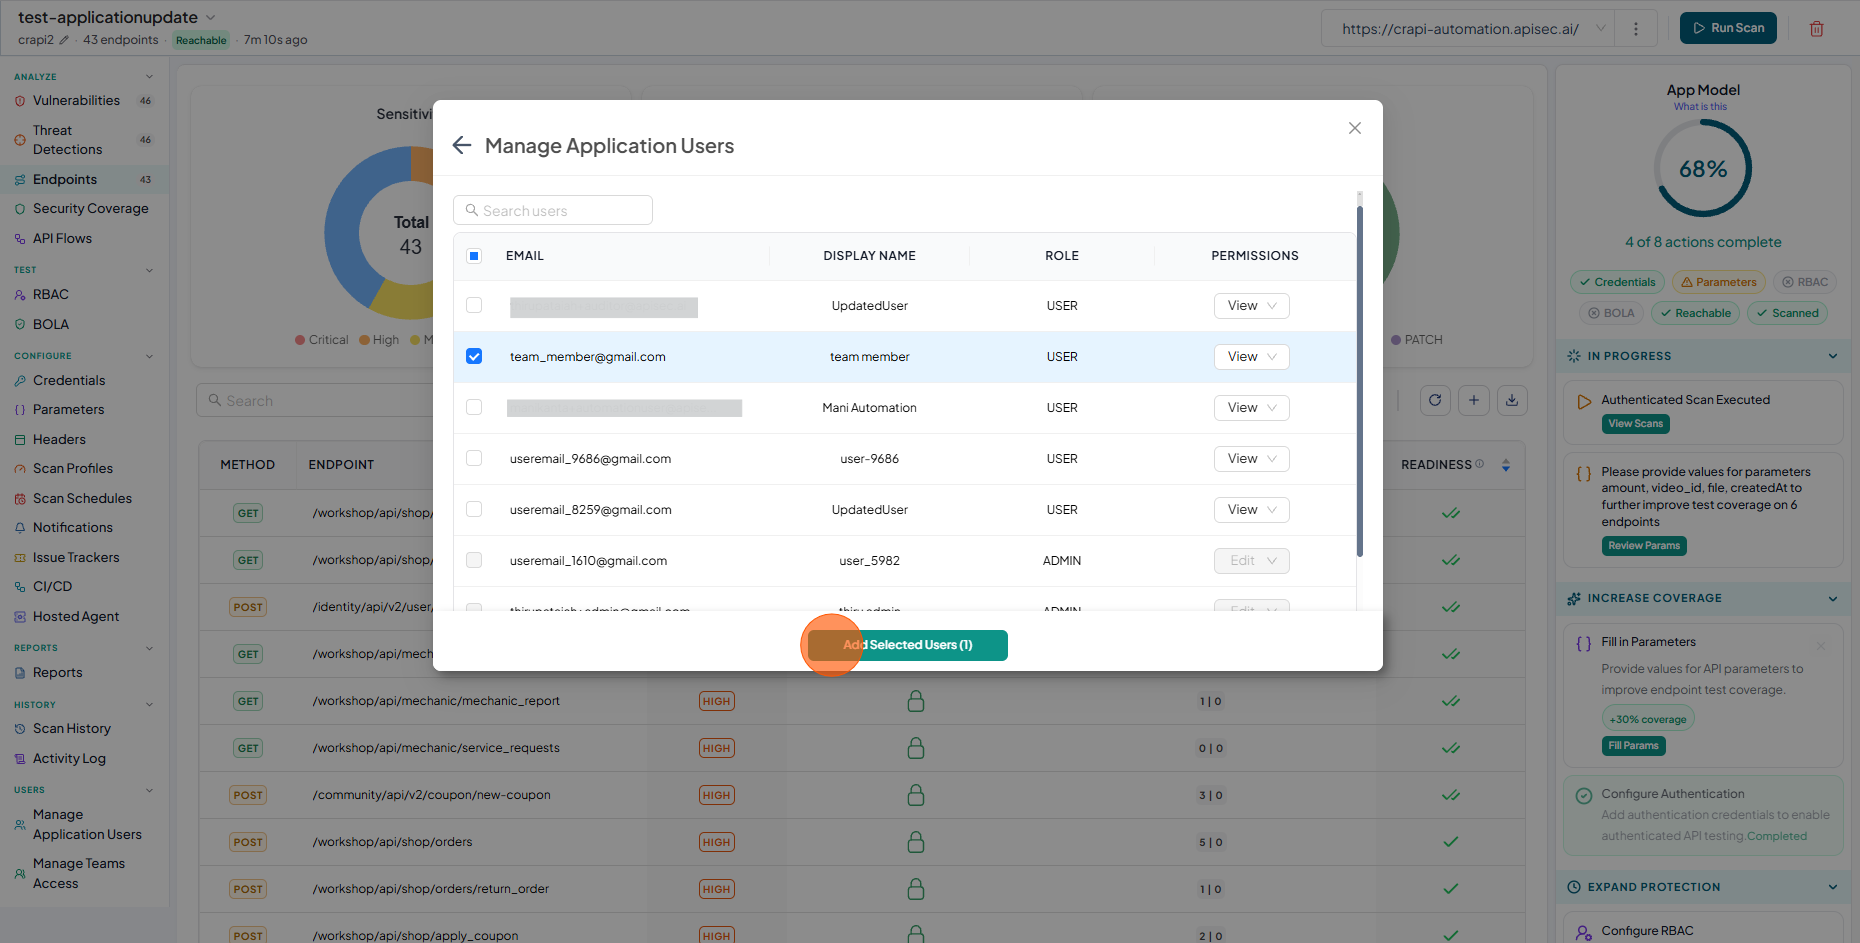
Select the users

-
Click Add Selected Users
-
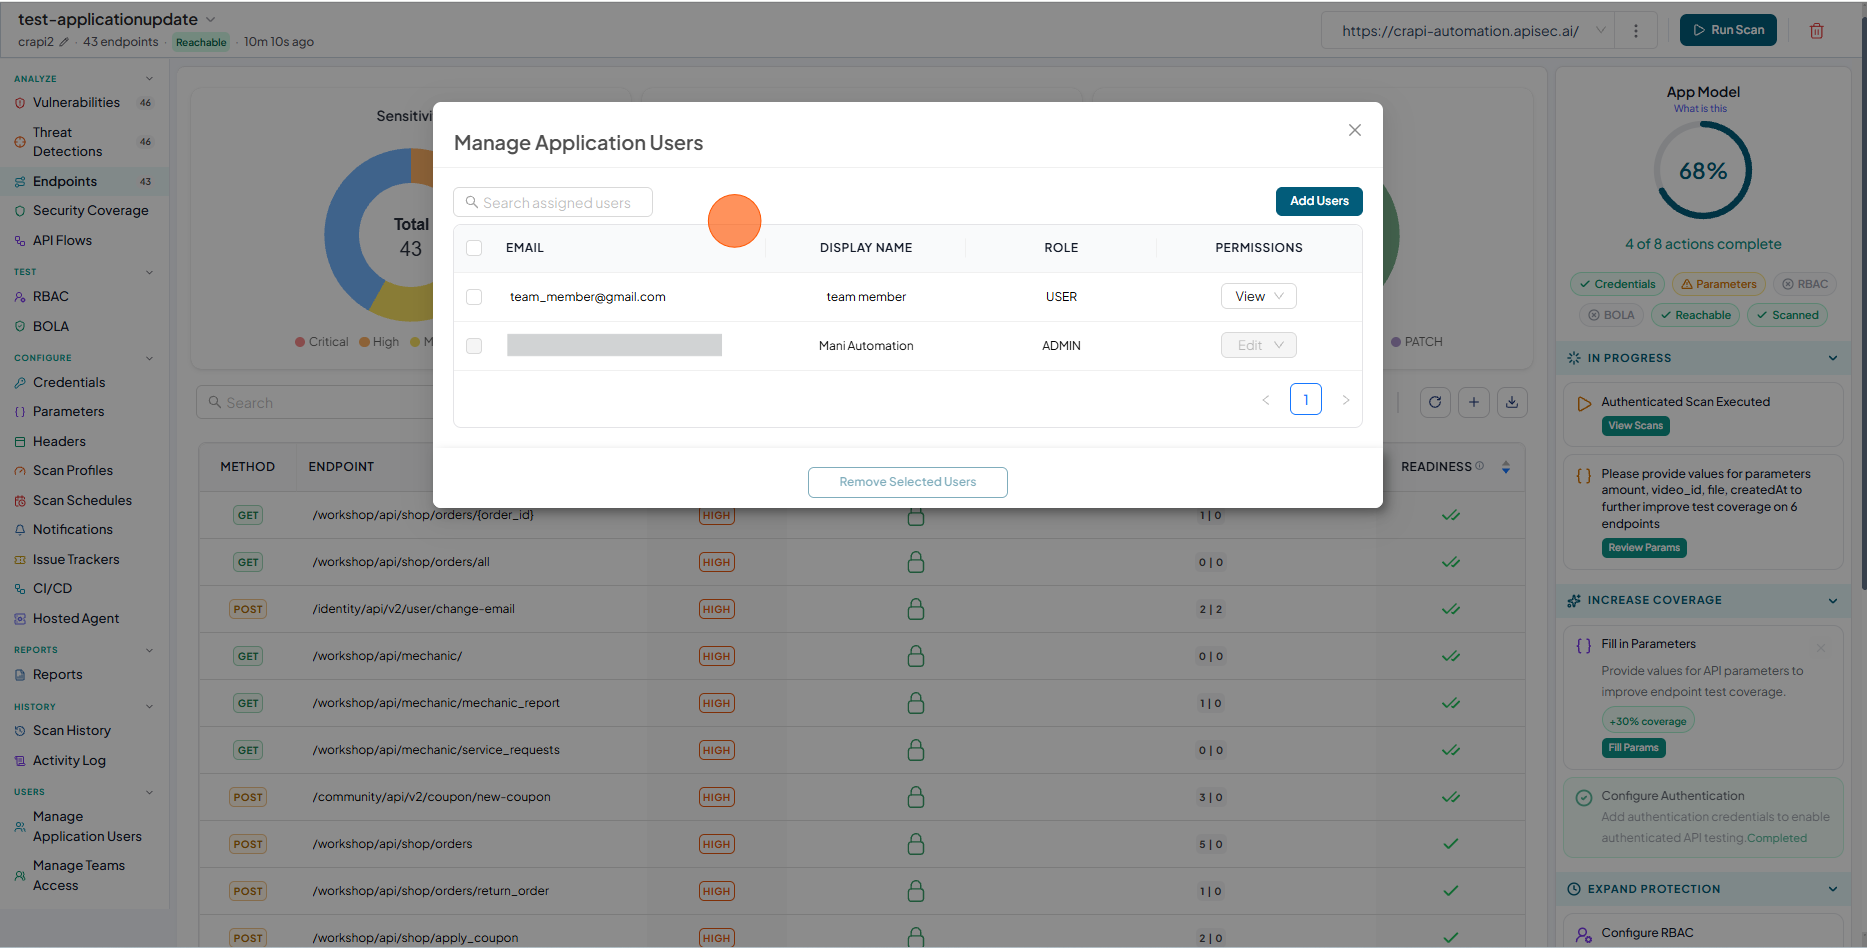
Review newly added users
Remove users from the application
-
Select Manage Application Users from sidebar
-
Check the users who have access to the application
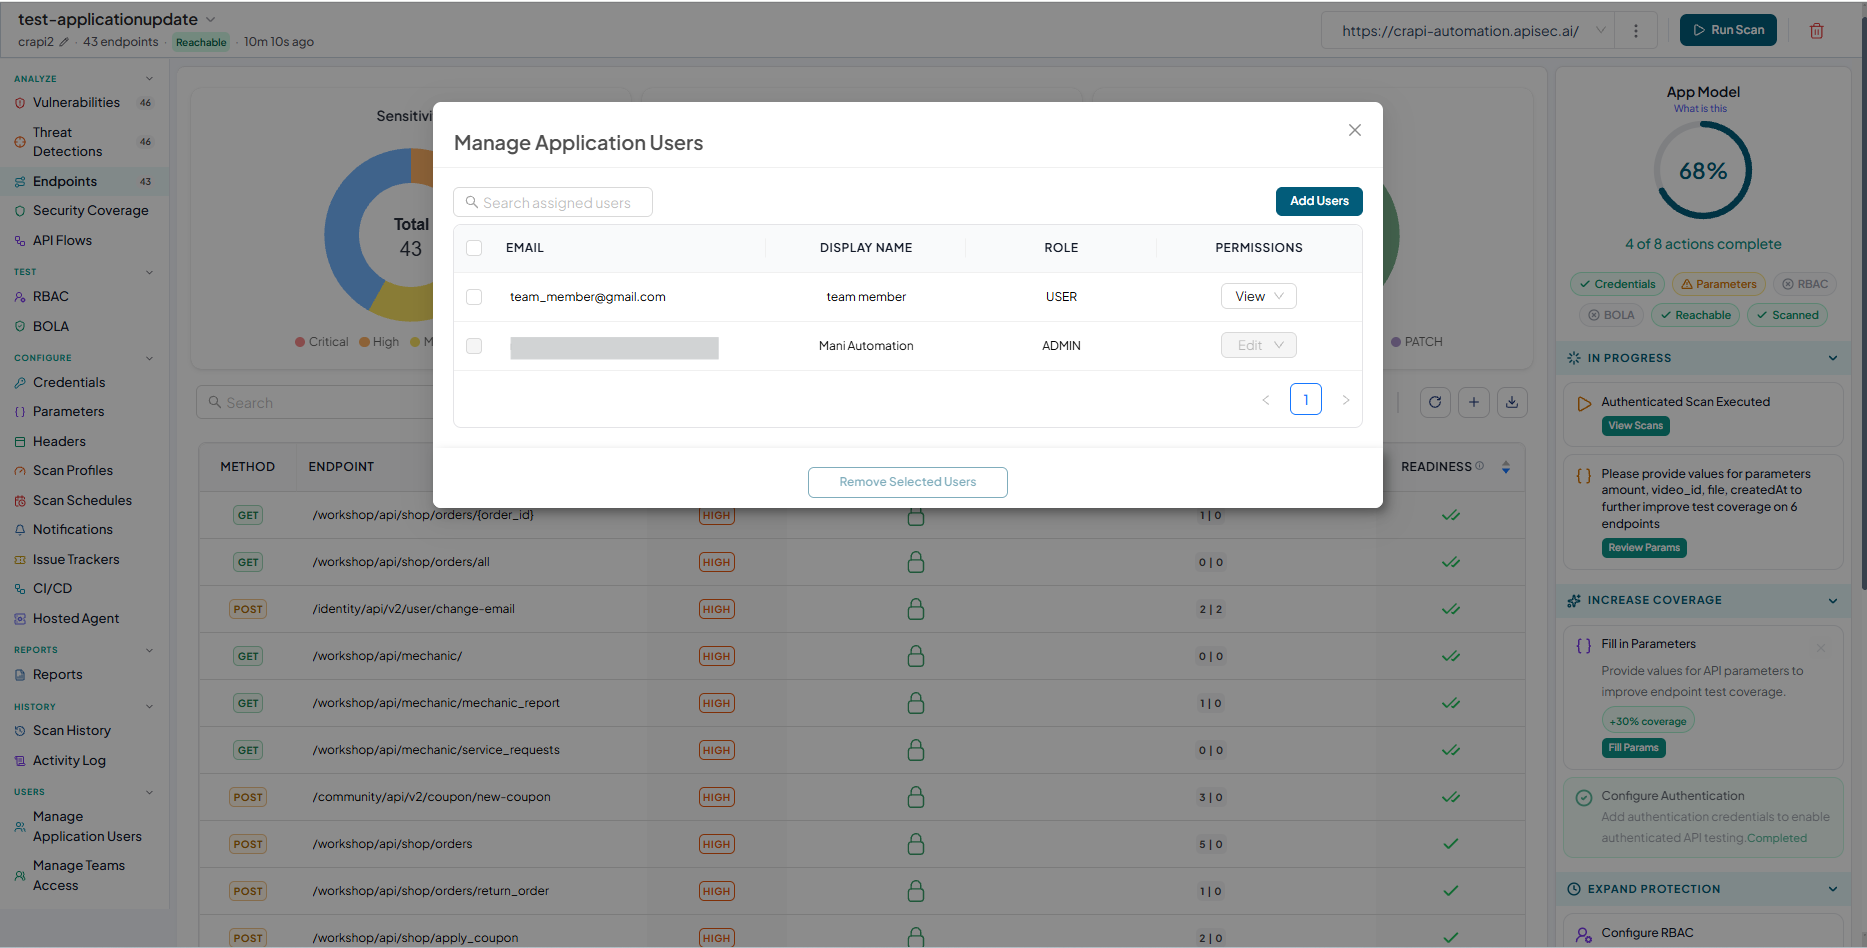
-
Select the user
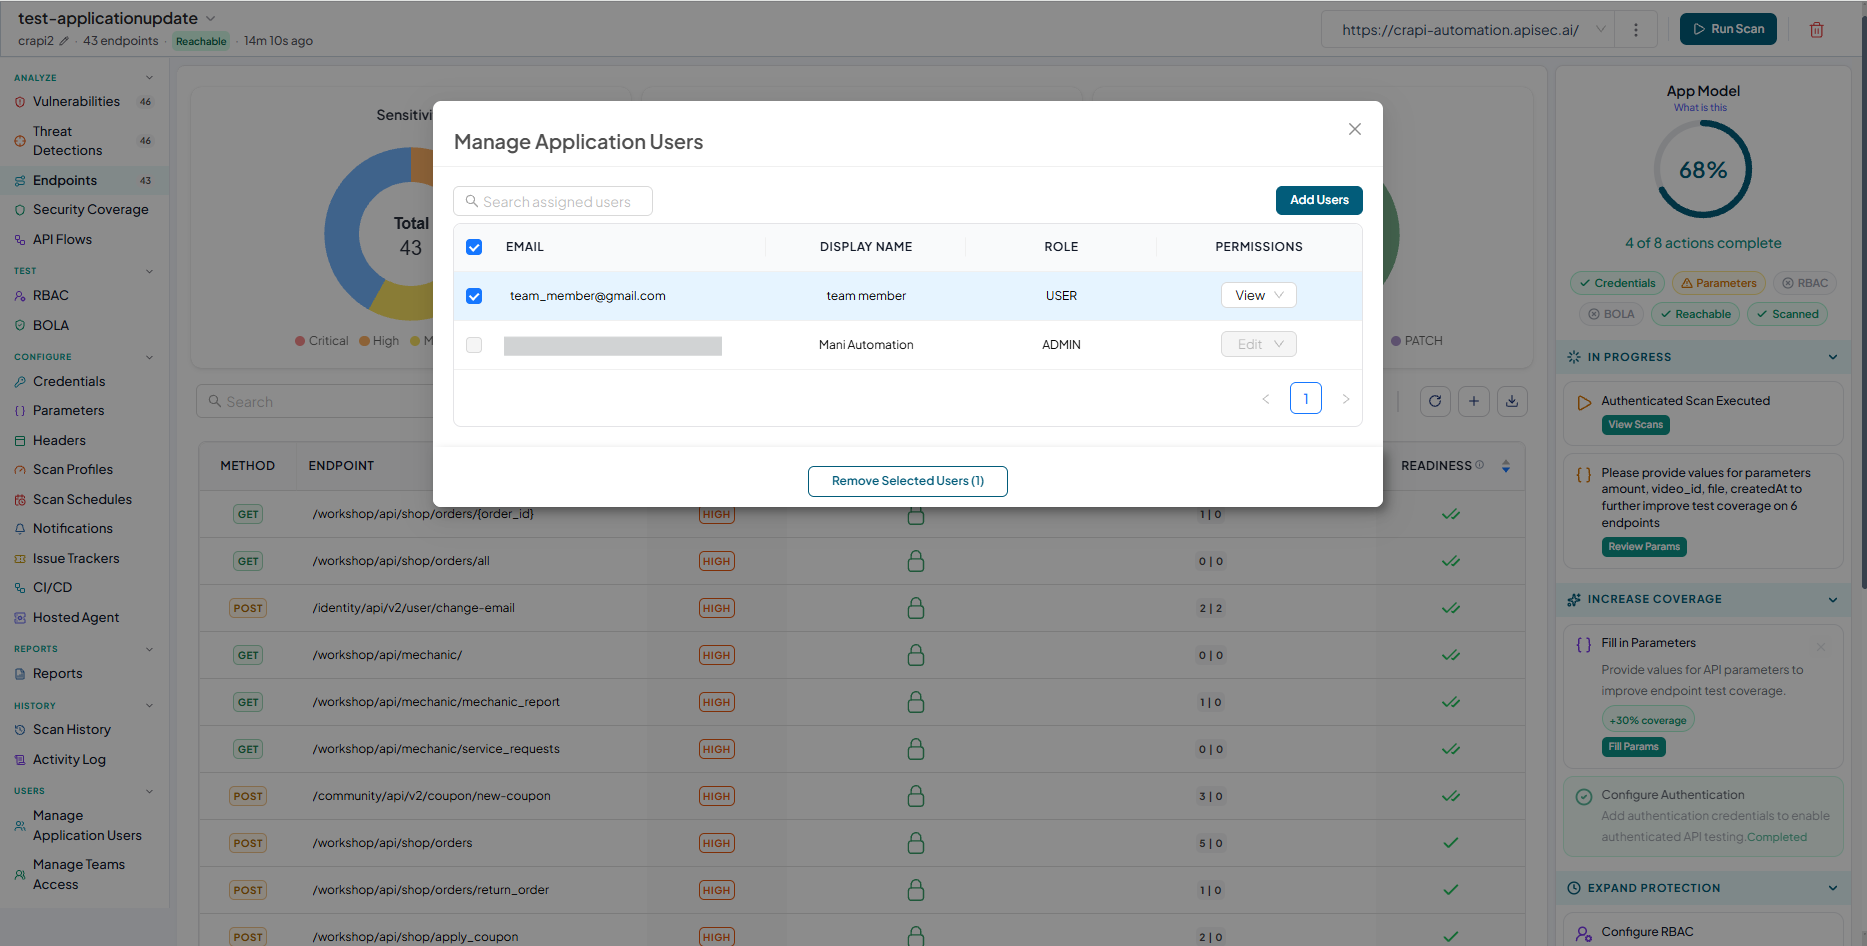
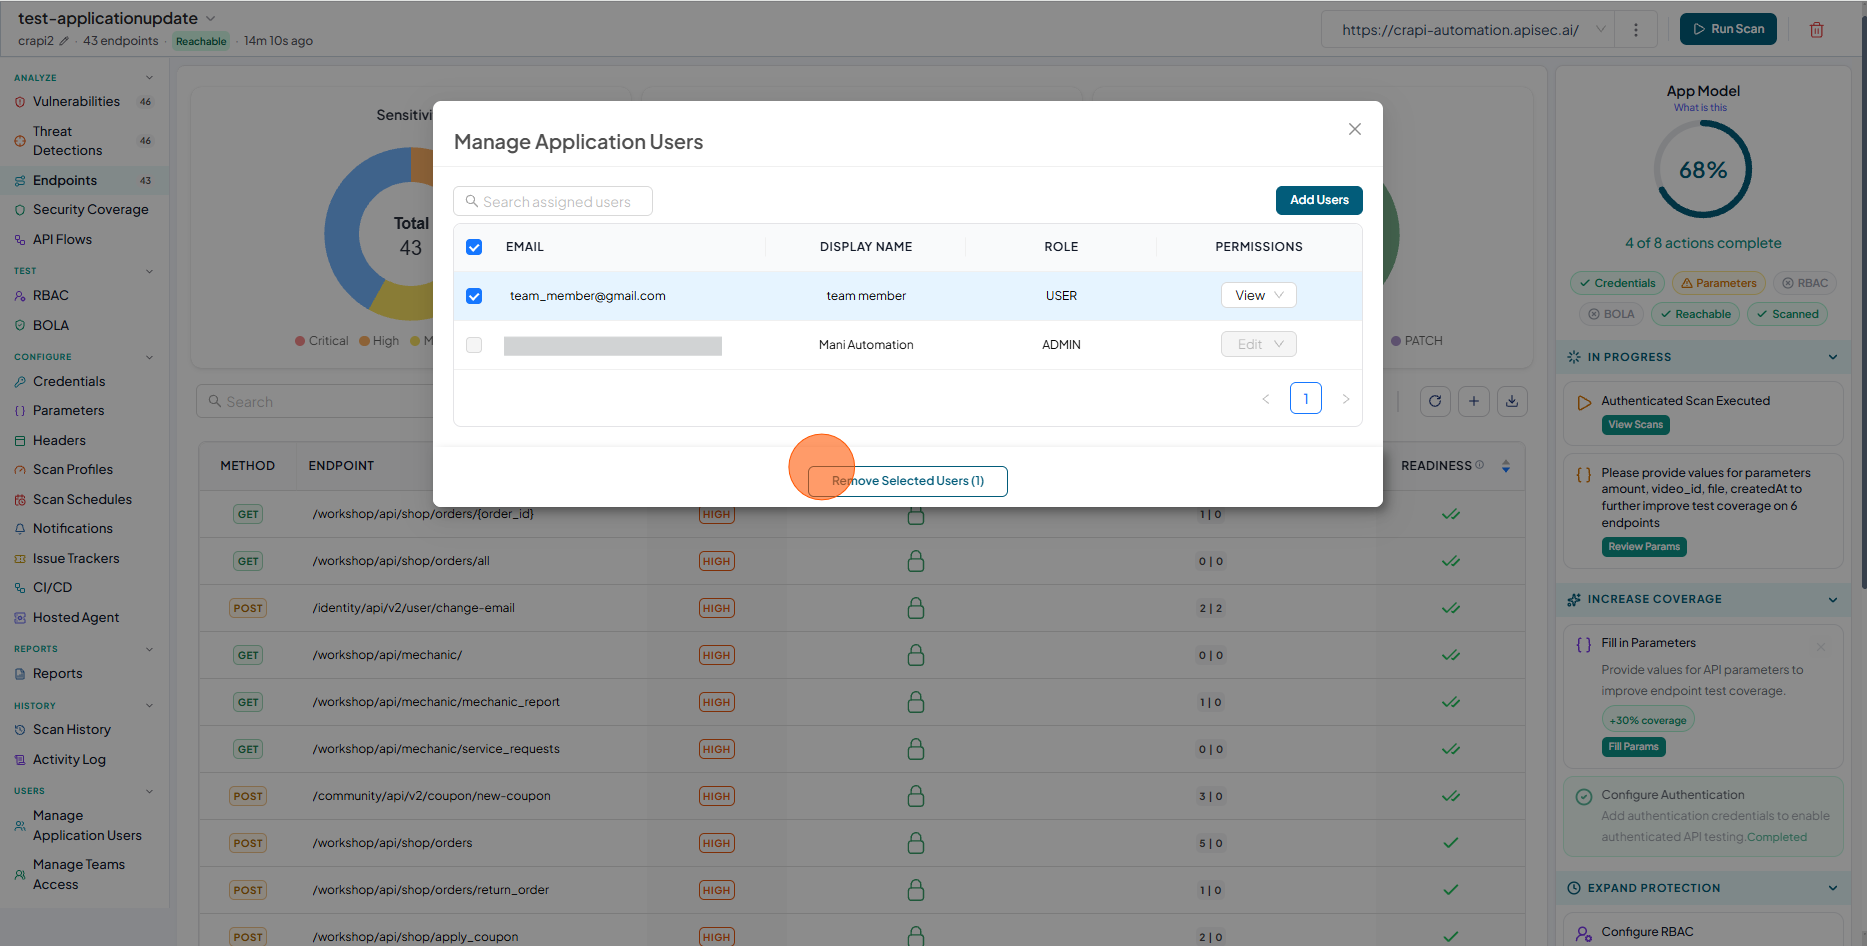
-
Click Remove Selected Users
-
Review the users list.
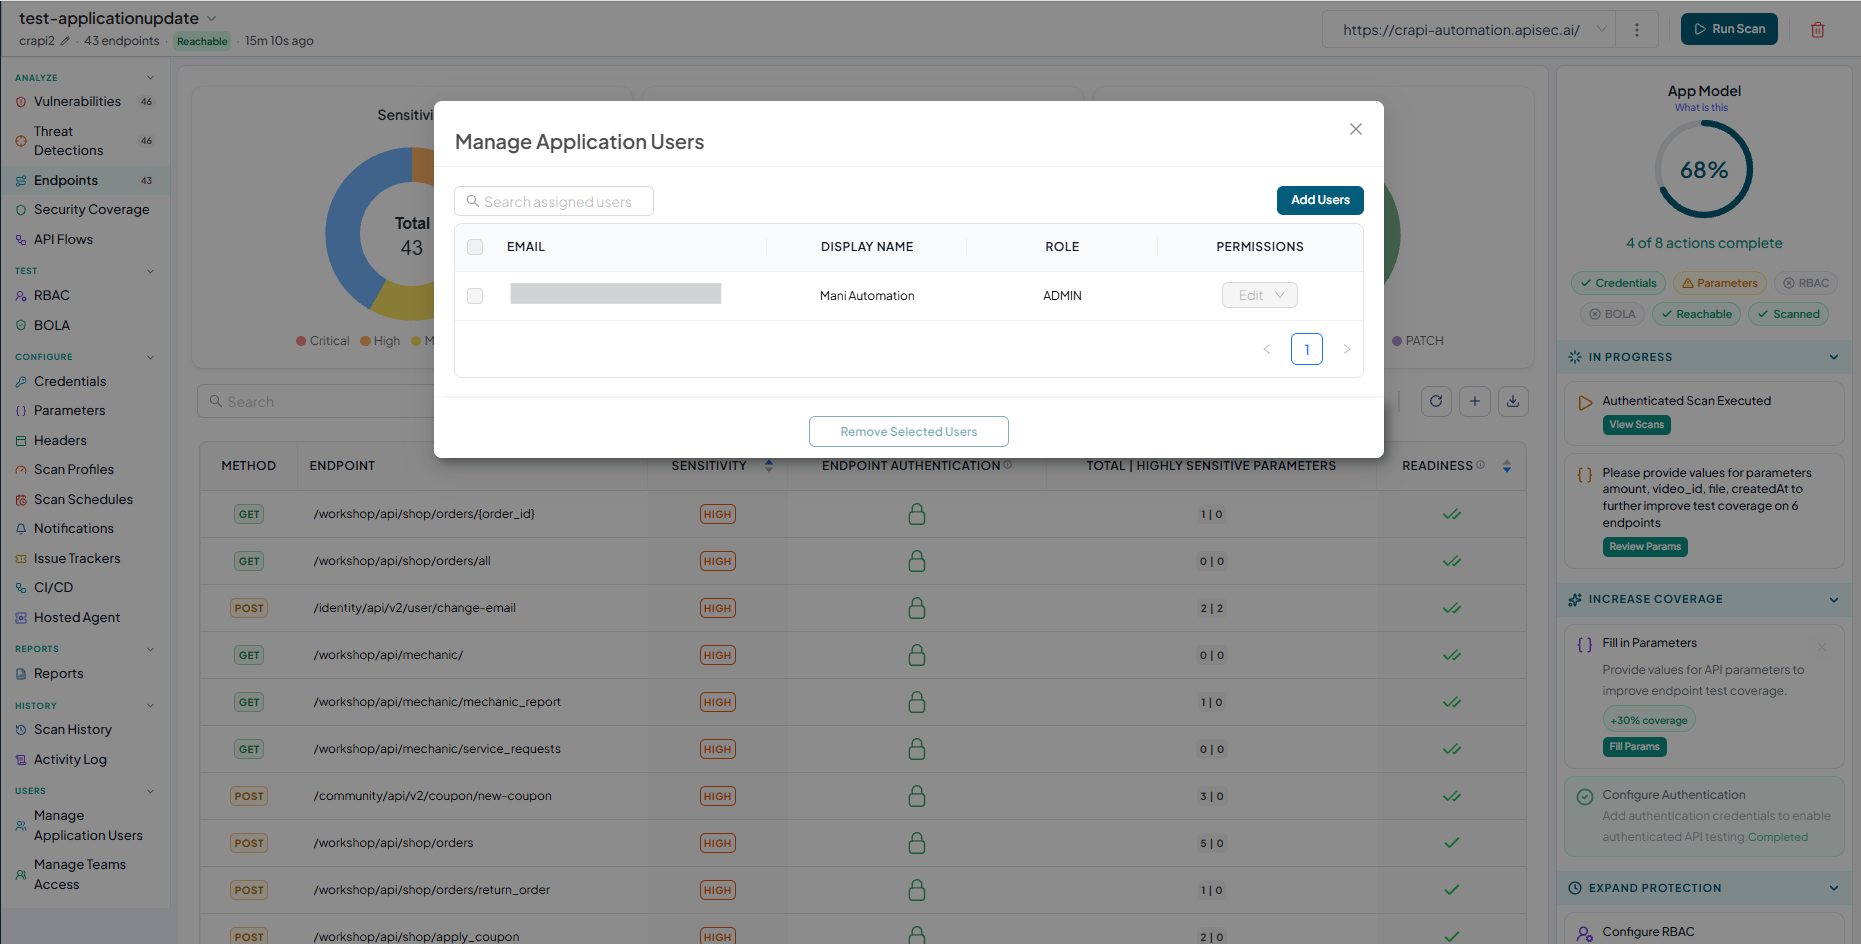
-
- Users with View permissions cannot share a shared application.
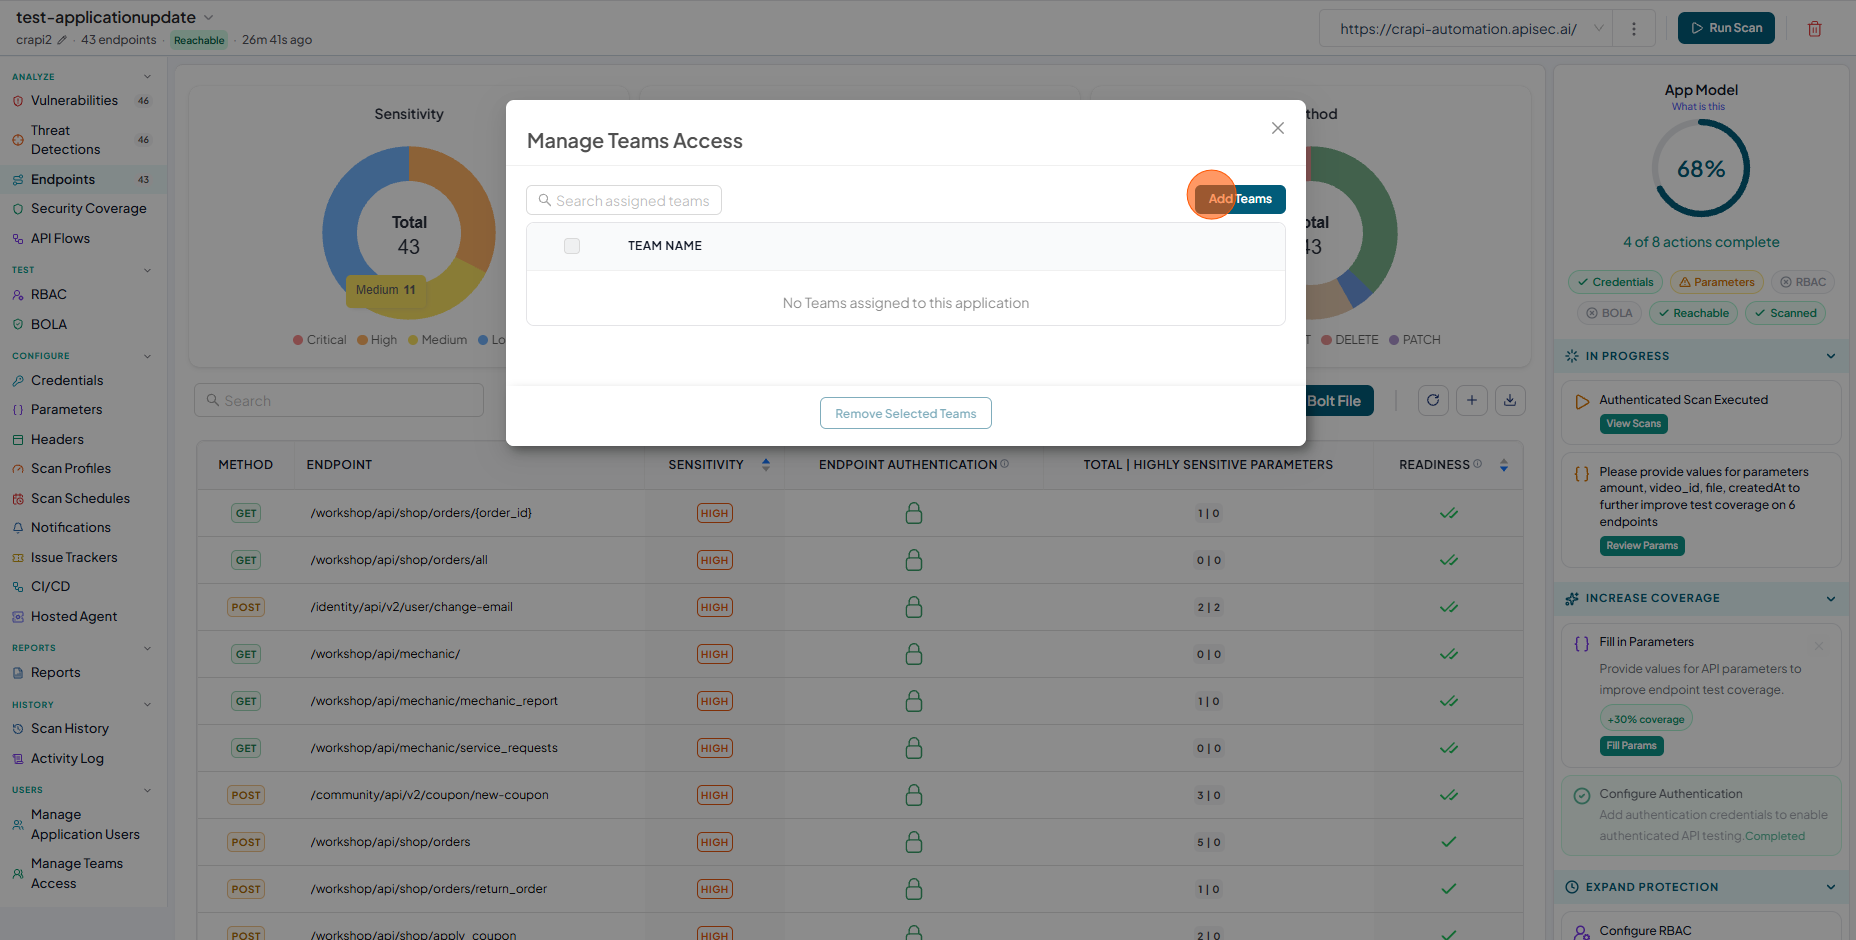
Manage Teams Access
As the admin or owner of the application, you can use this option to share the application with a specific team. Team members will then be able to access the application and perform activities based on their permission. You can also remove permissions for the selected team.
-
From the sidebar, select Manage Teams Access
-
Click Add Teams
-
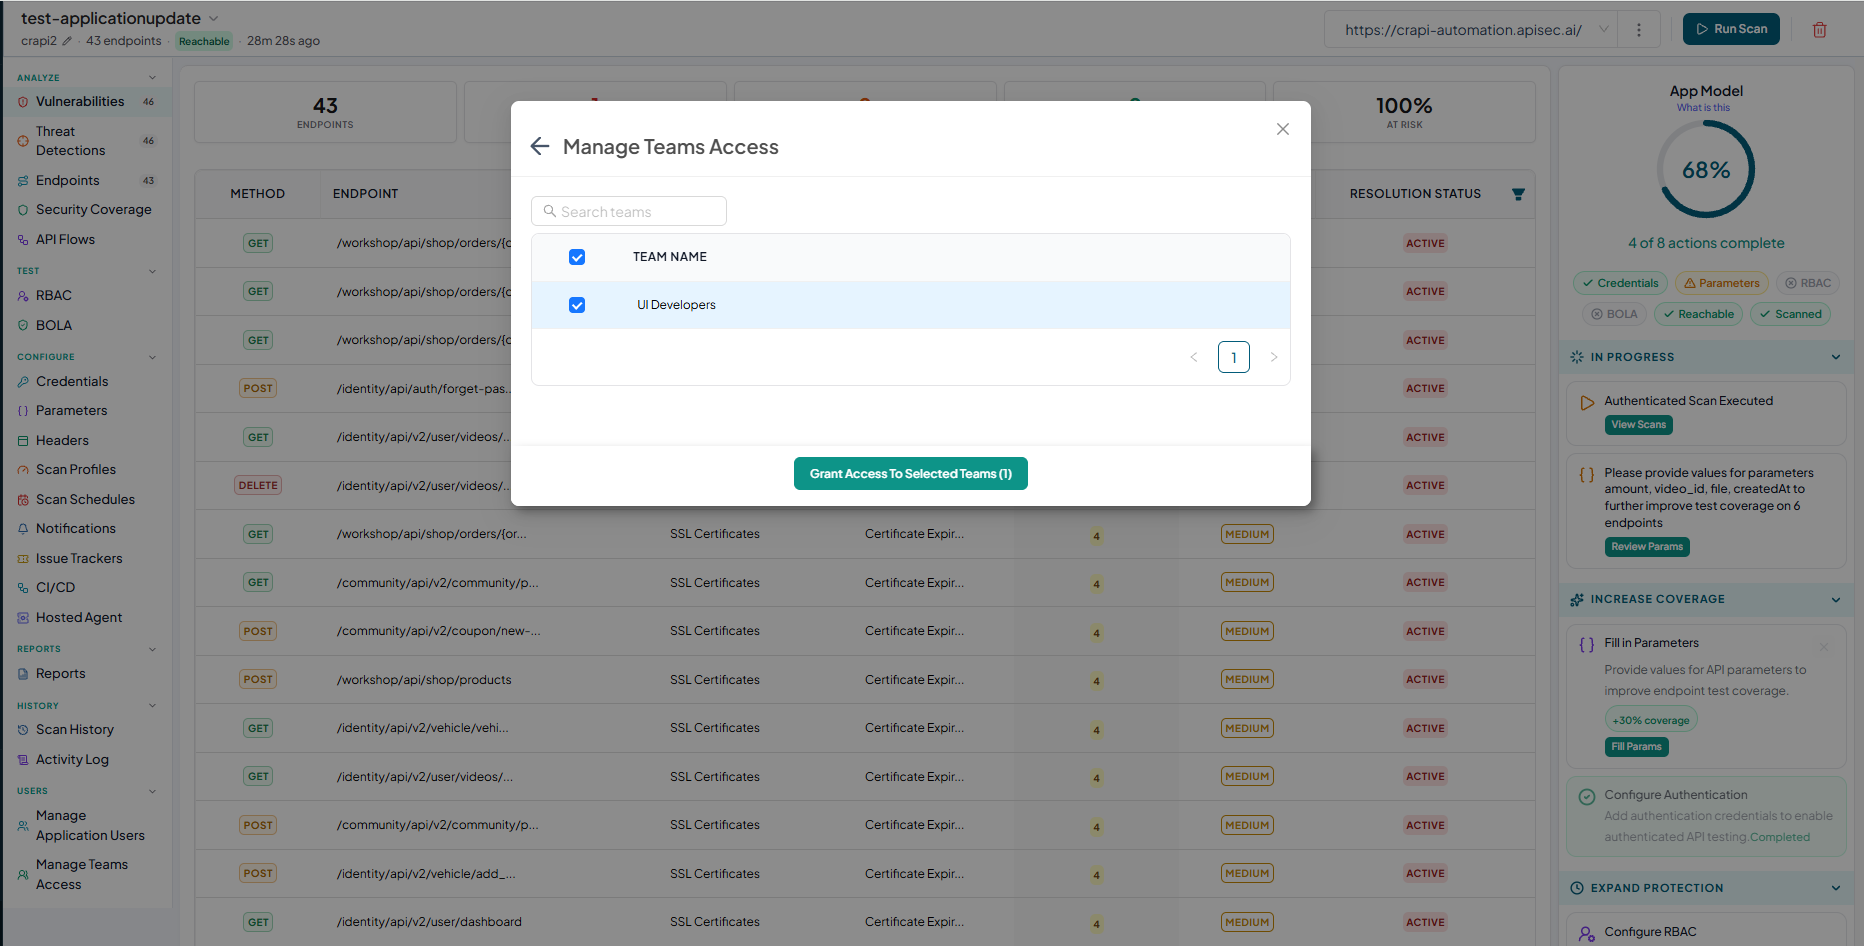
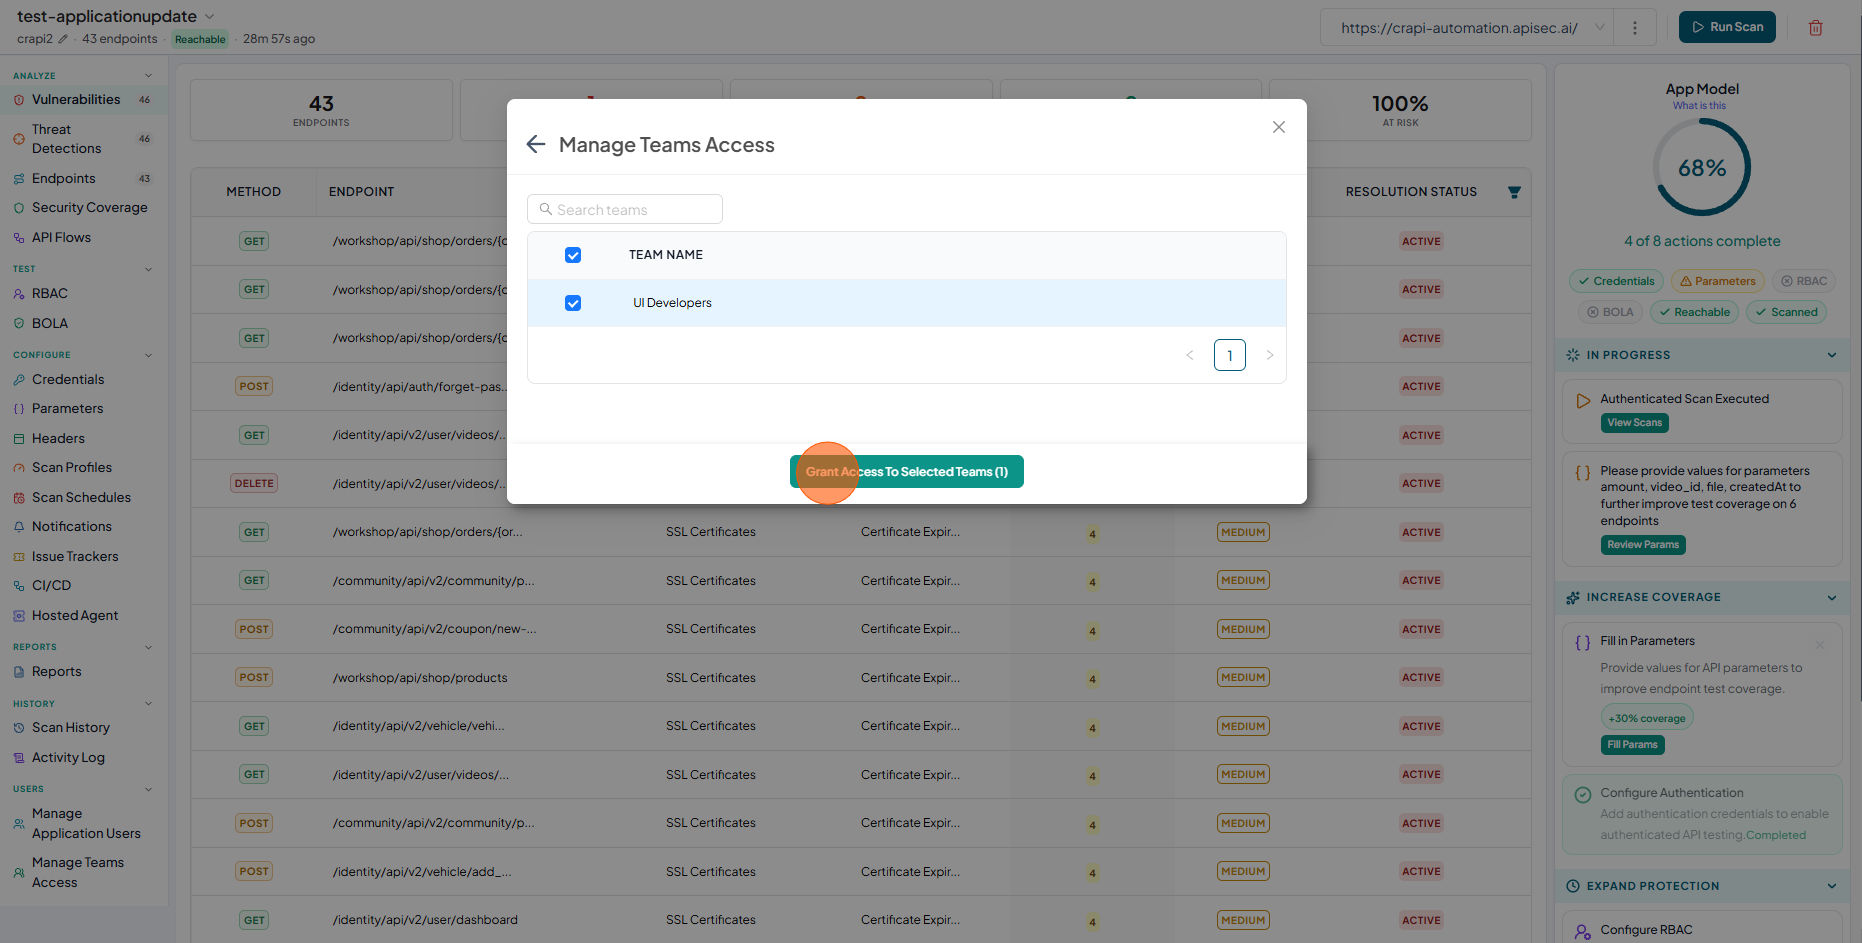
Select the team.
-
Click Grant Access To Selected Teams.
-
Team added to the application successfully.
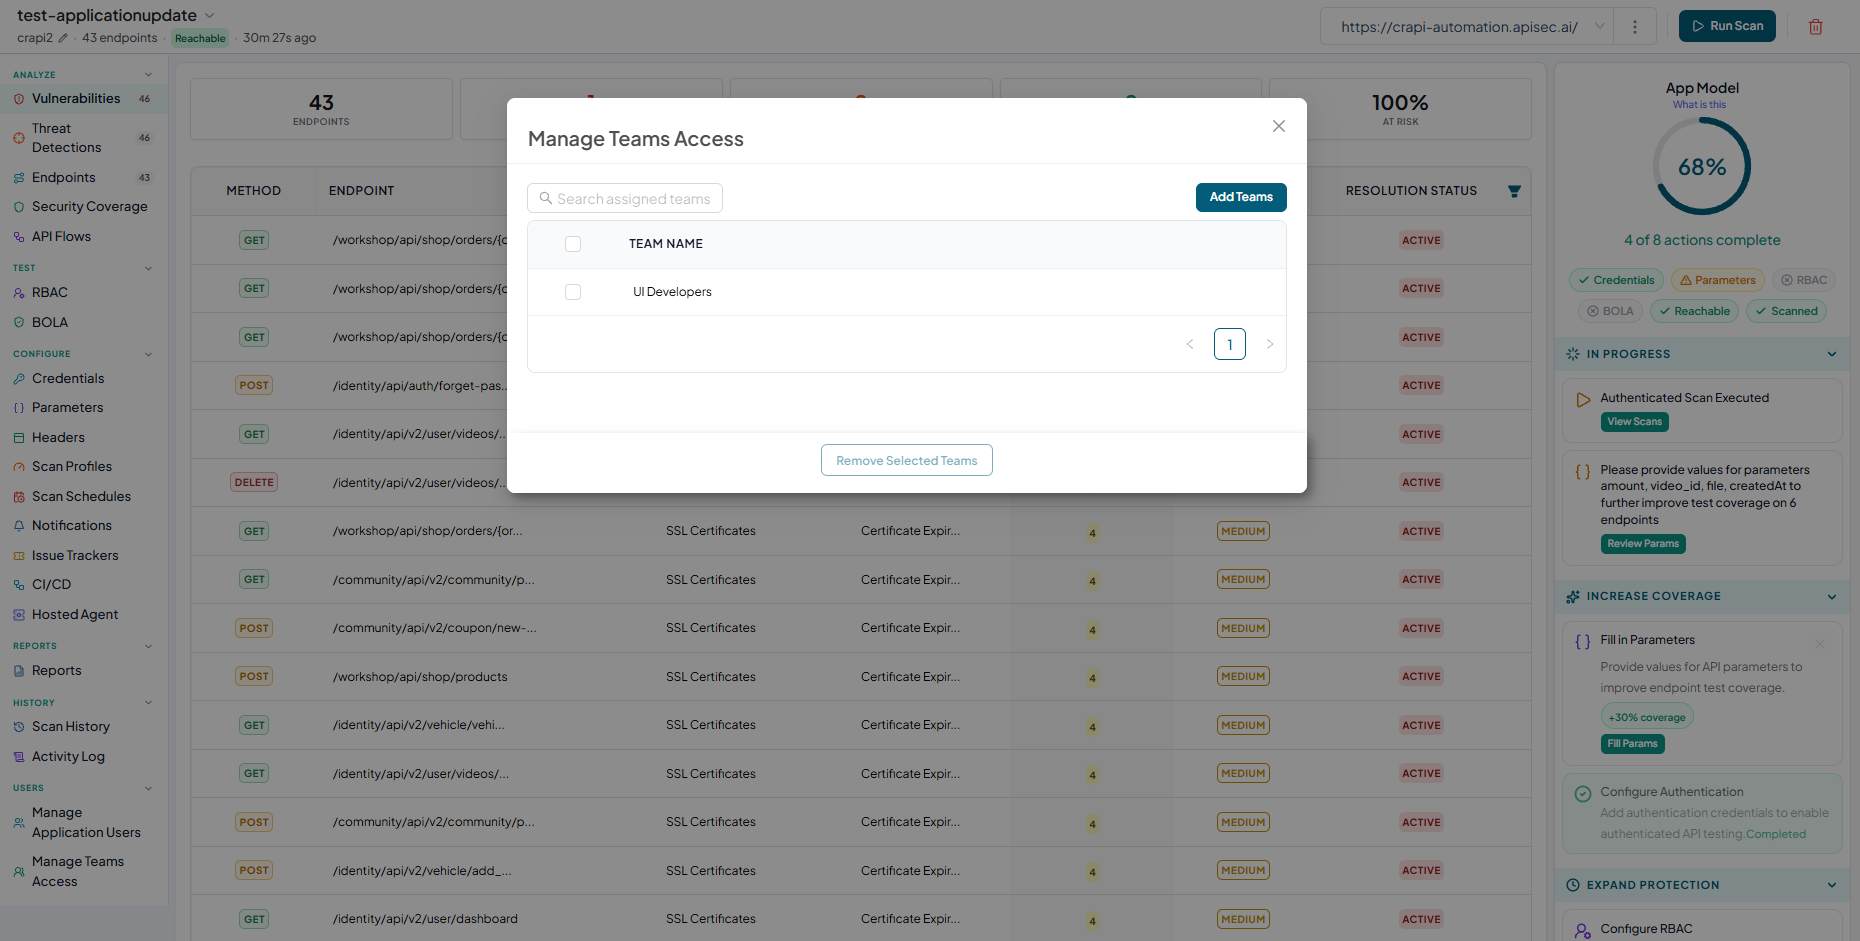
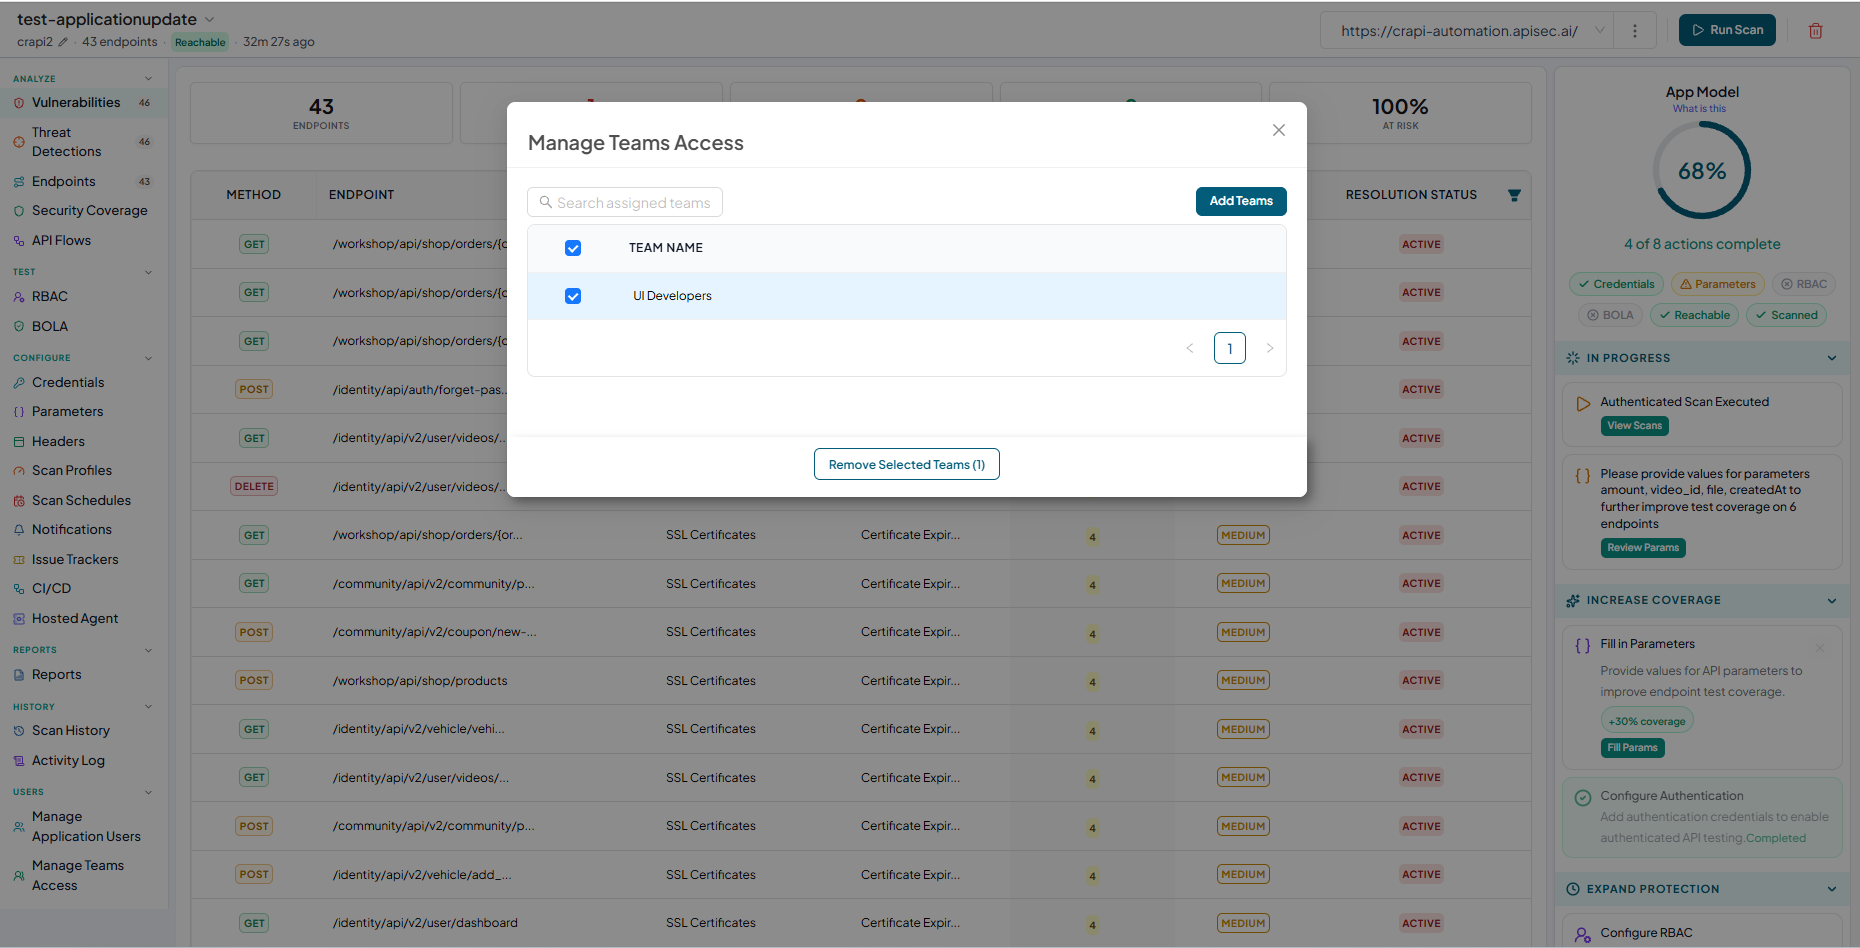
Removing Teams Access
-
From the sidebar, select Manage Teams Access
-
Check the teams that have access to the application

-
Select the team.
-
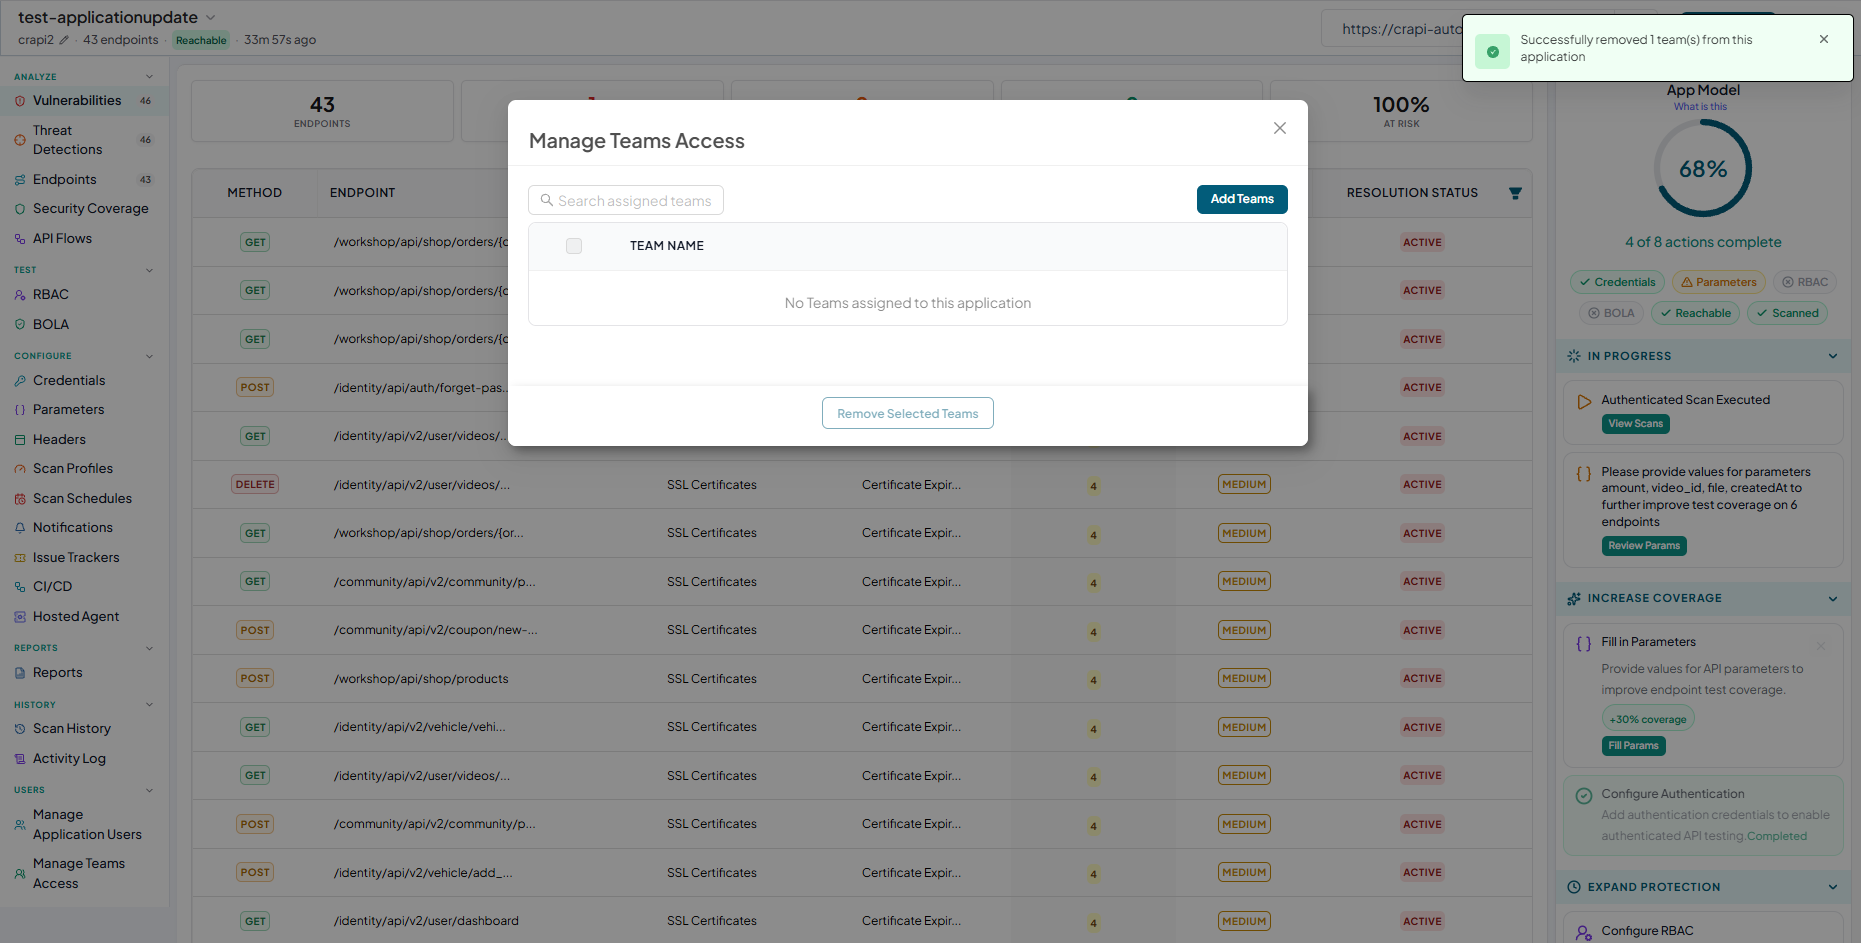
Click Remove Selected Teams.

-
Successfully removed the team from this application.
Delete Application
- Click the "Delete" icon in the top menu bar to remove the application.
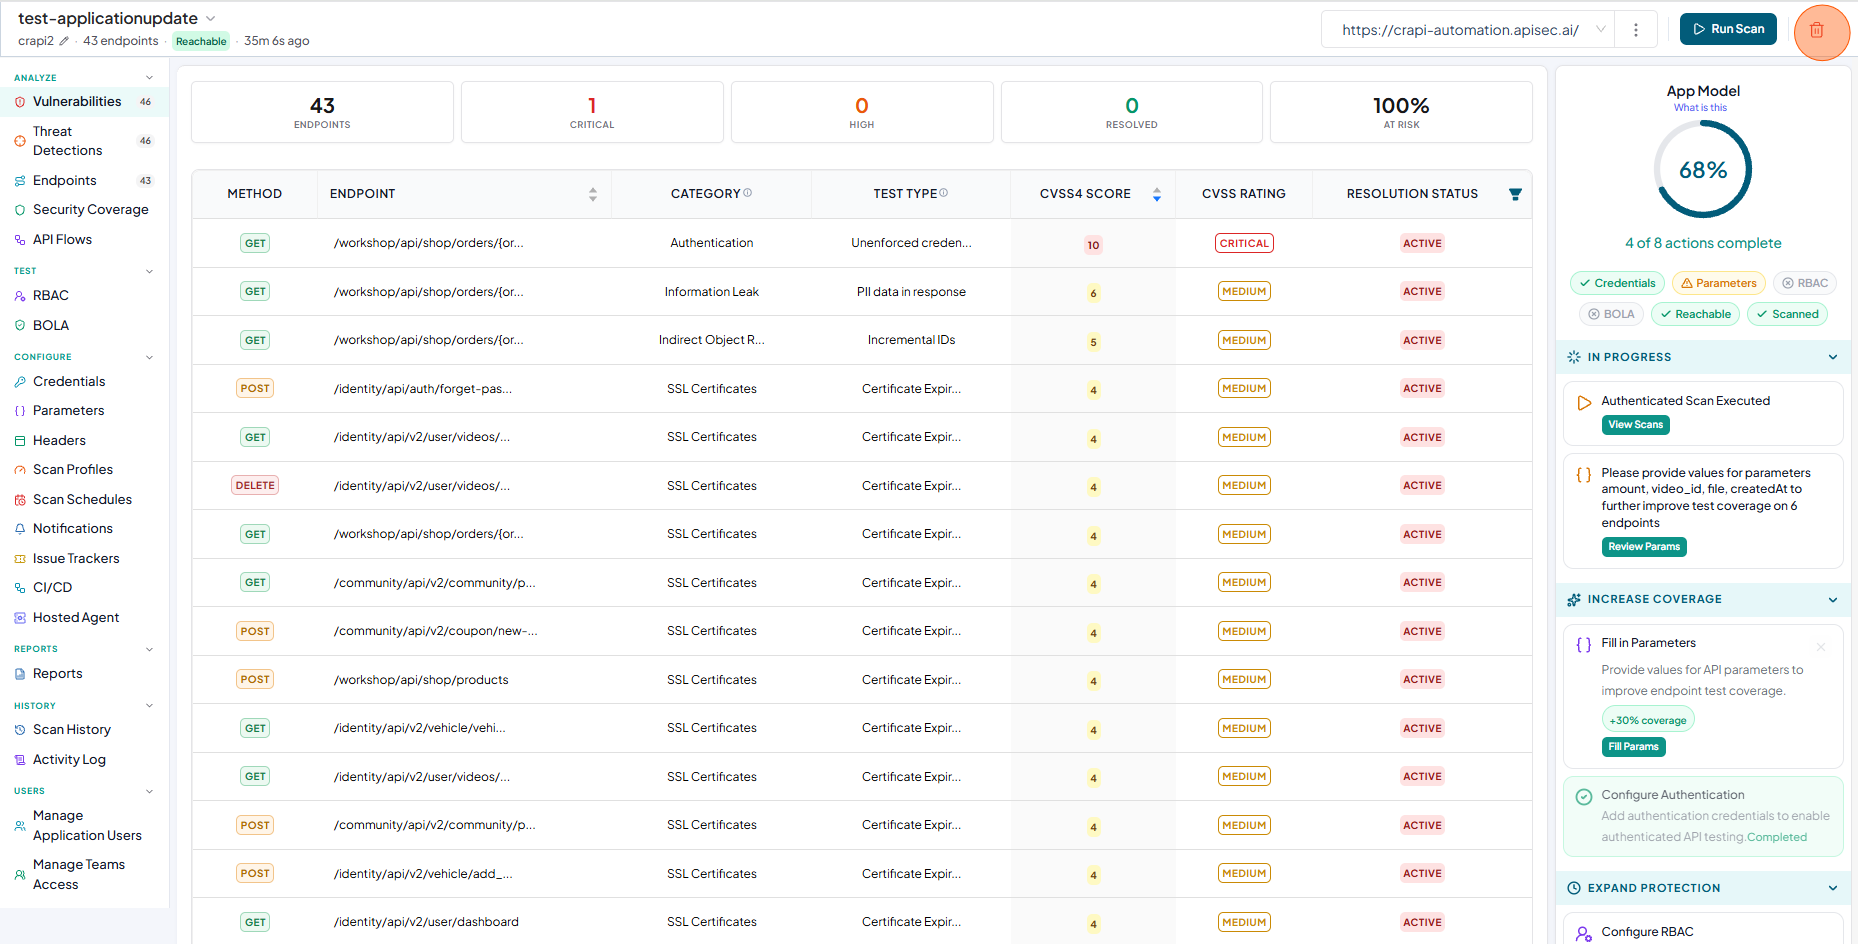
Users with View permissions cannot delete shared application
After onboarding, ensure the API is secured by enabling authentication mechanisms such as OAuth or API keys.
For a step-by-step guide, check out:
- How to Onboard an Application Using OpenAPI Spec
- By following these structured steps, you can efficiently onboard APIs while maintaining high standards of security and documentation.