schedule-scans
Schedule Scans
Overview:
The Schedule Scans feature allows you to automate scans at regular intervals without manual effort. You can choose to run scans daily, weekly, or monthly by specifying the time, day of the week, and day of the month. Once scheduled, the scans will run automatically using the selected authentication, scan profile, and hosted agent, ensuring continuous and consistent security coverage.
Add Schedule Scan
-
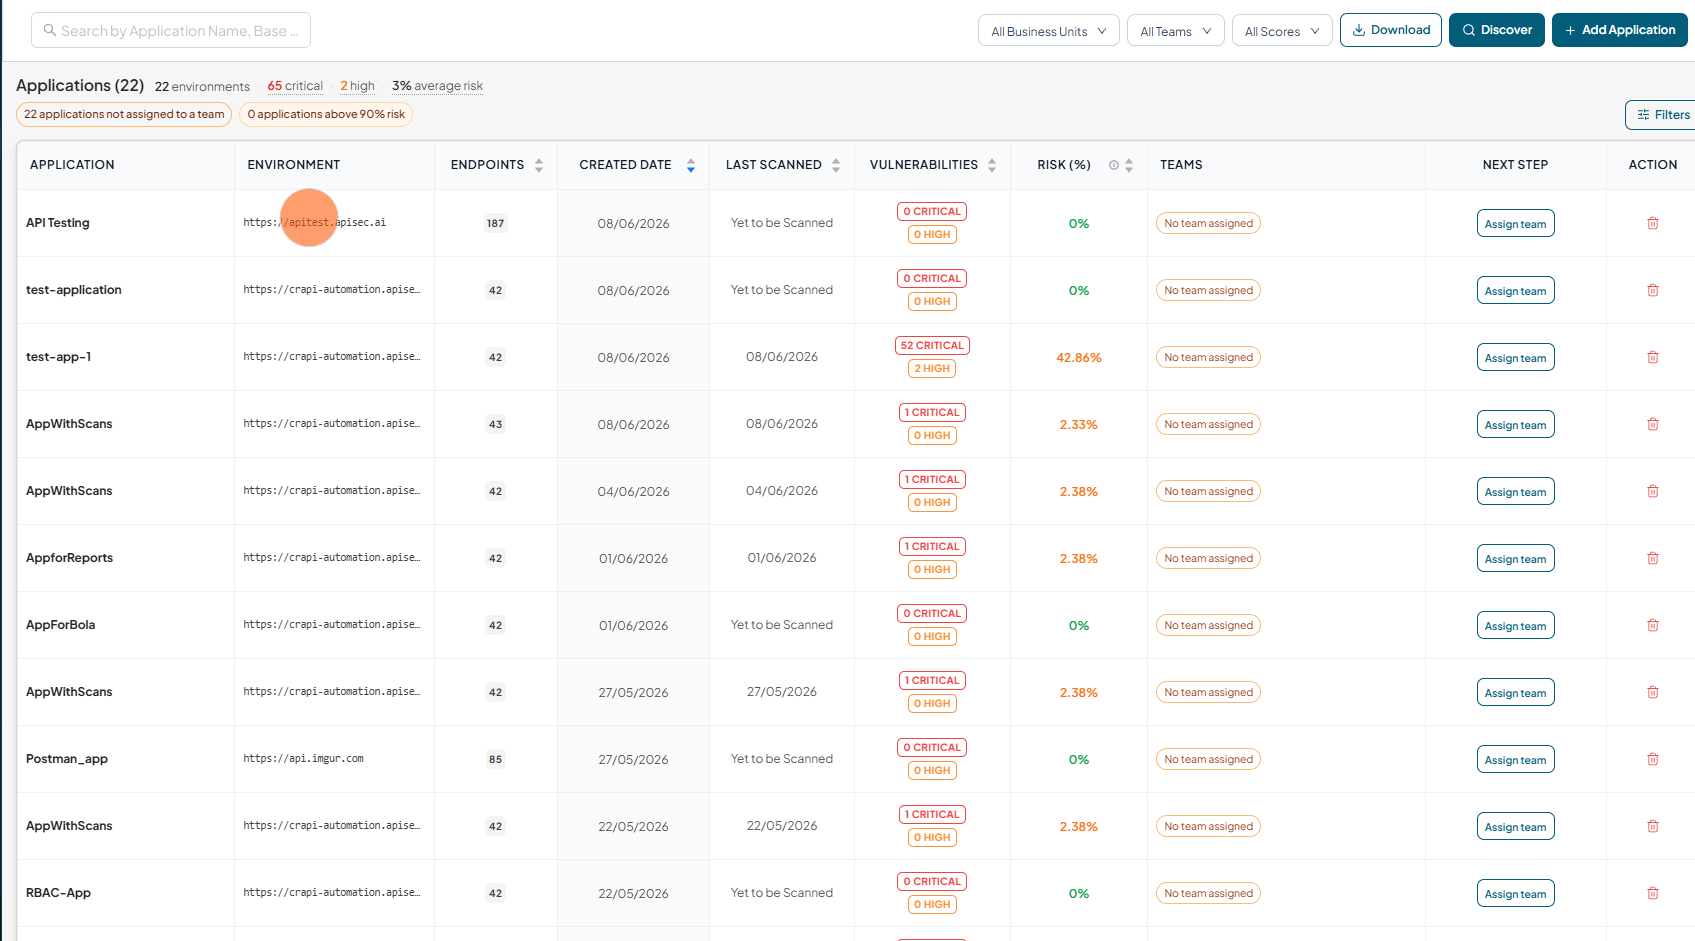
Open your browser and visit: https://<your-tenant>.apisecapps.com
-
Click the required application.
-
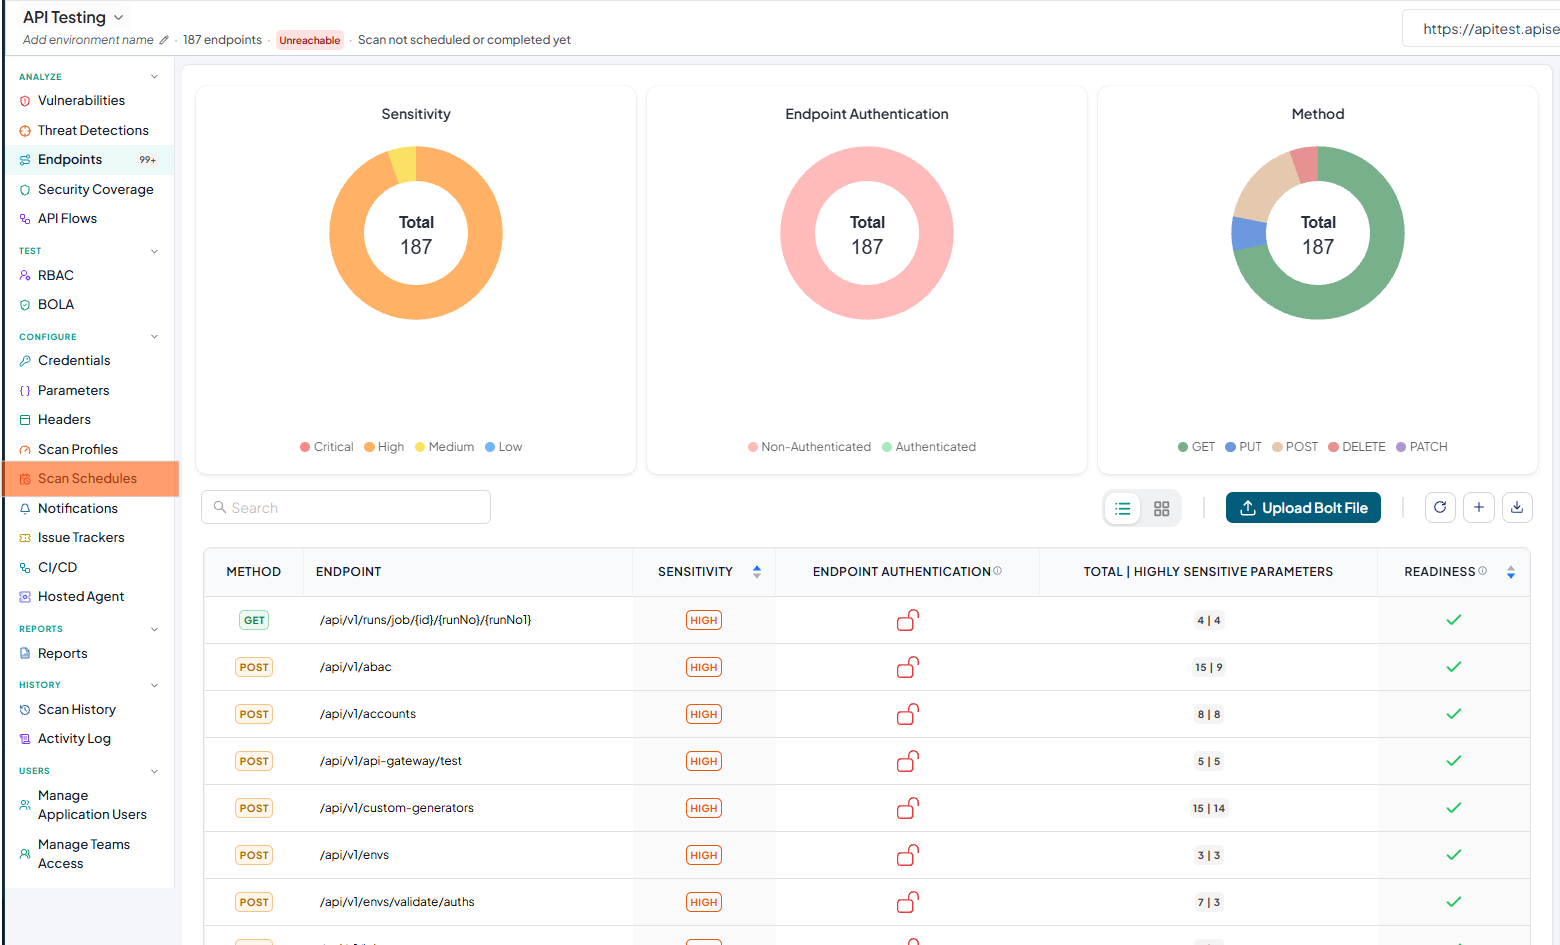
Click on the Scan Schedules from left navigation
-
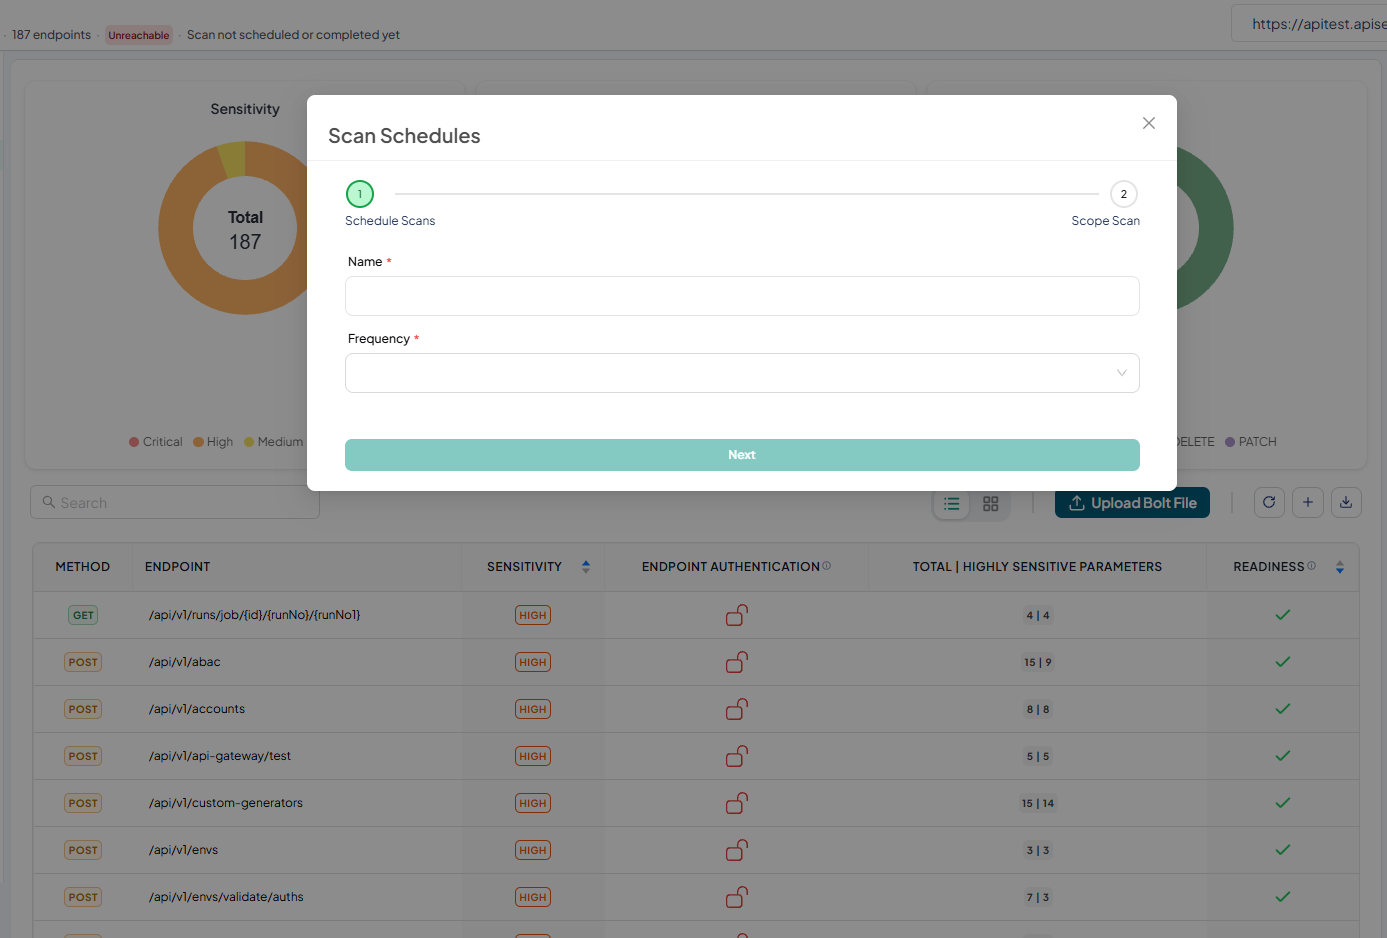
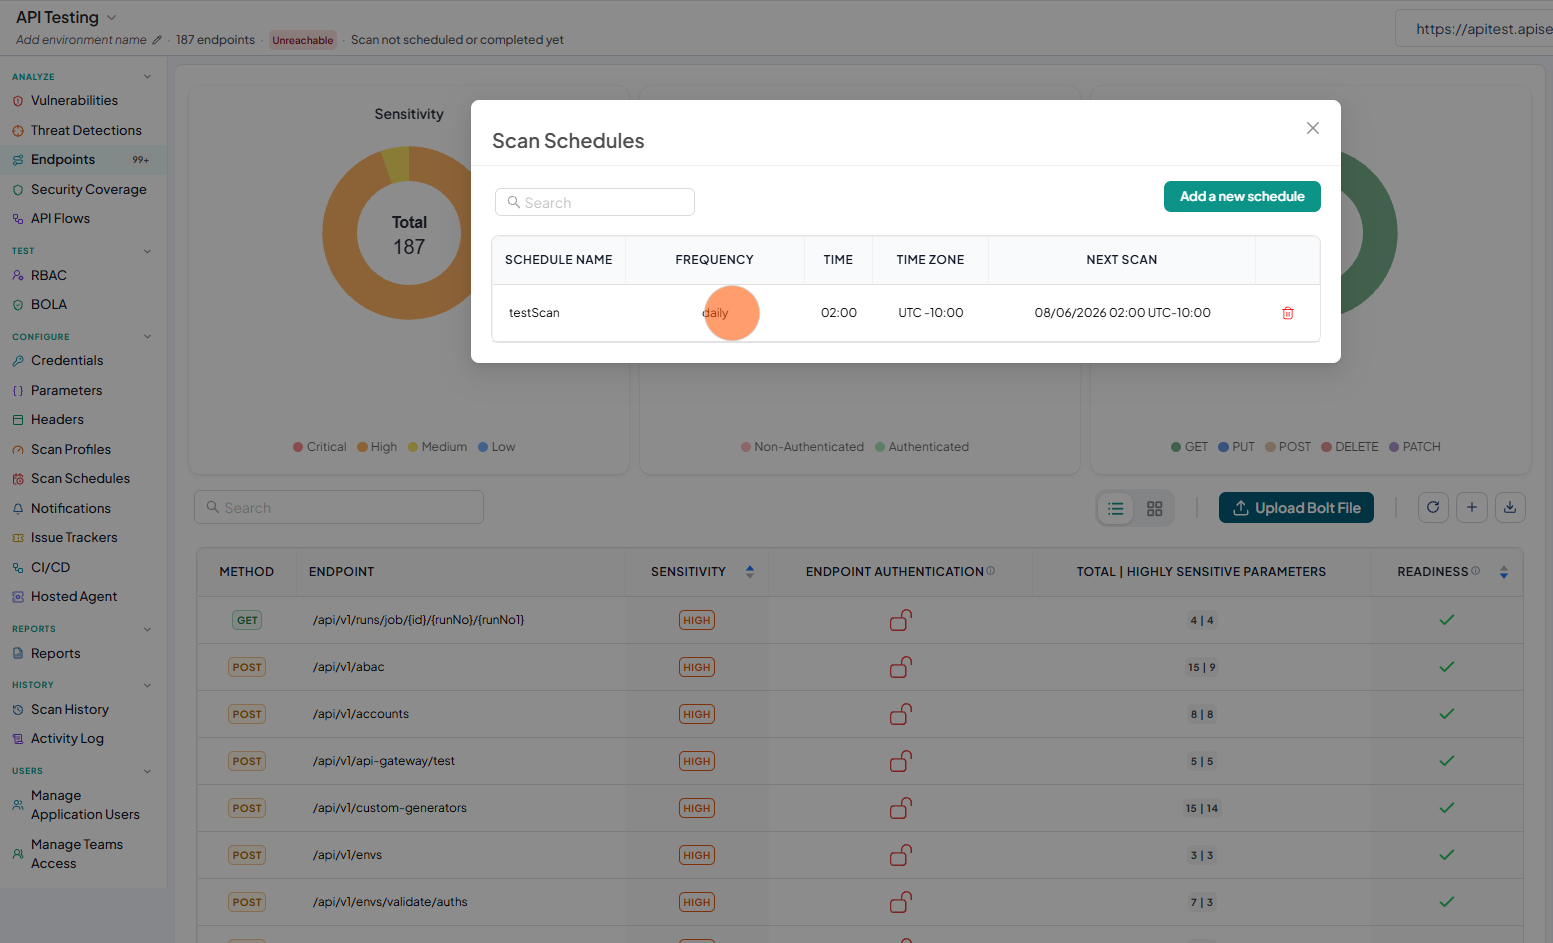
Now you will see the Scan Schedule pop-up.
-
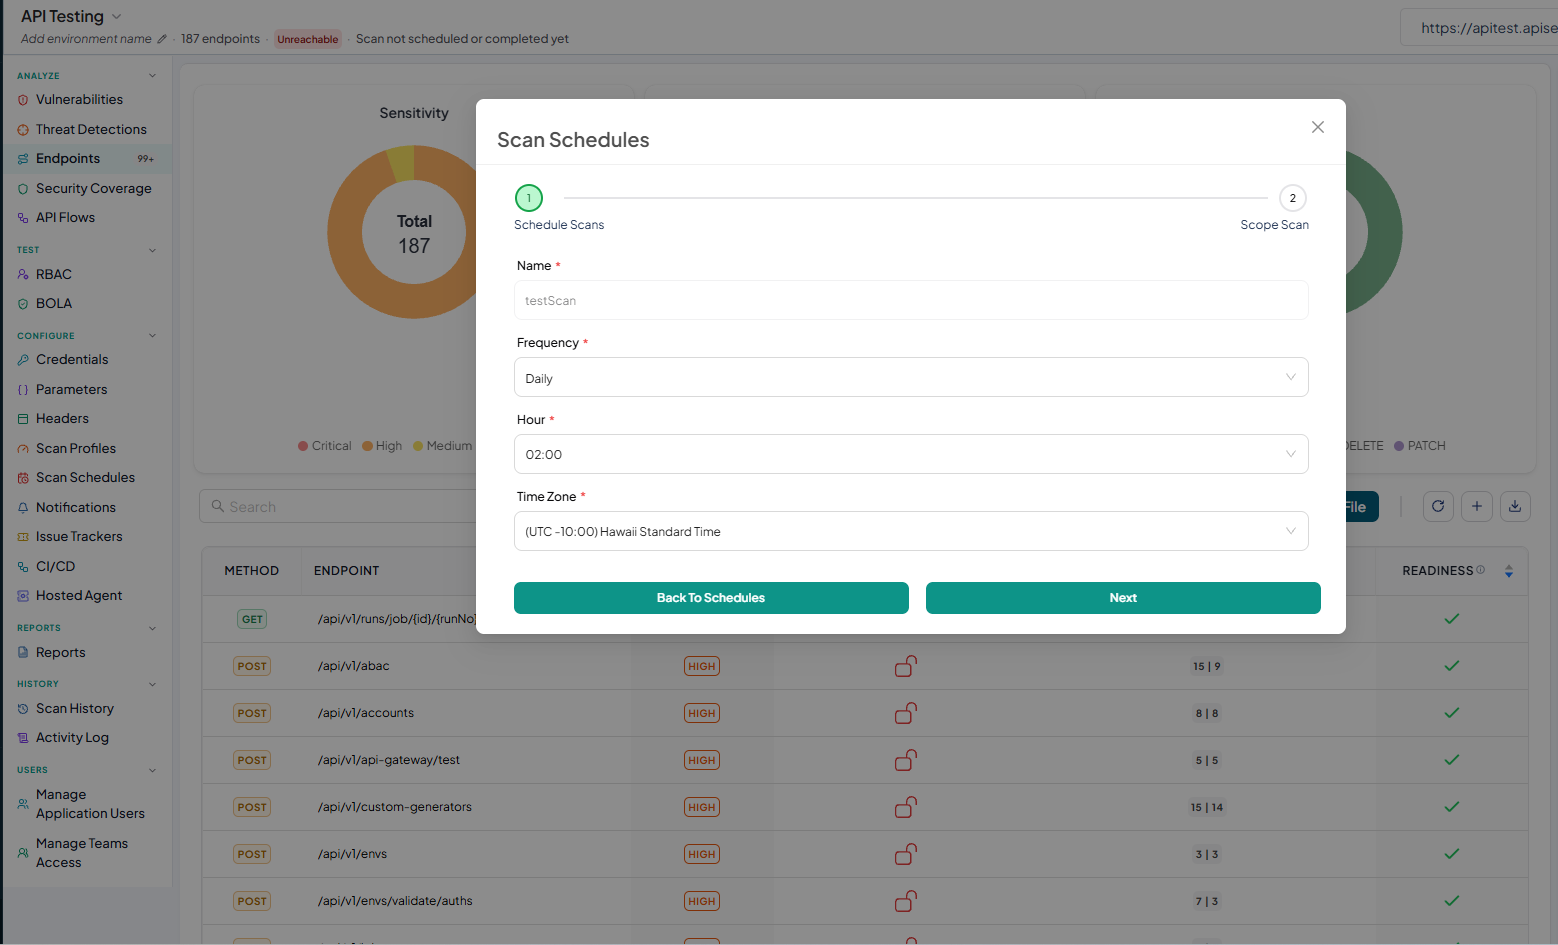
Now type name and click on the Frequency option. Here you can find Daily, Weekly and Monthly options.
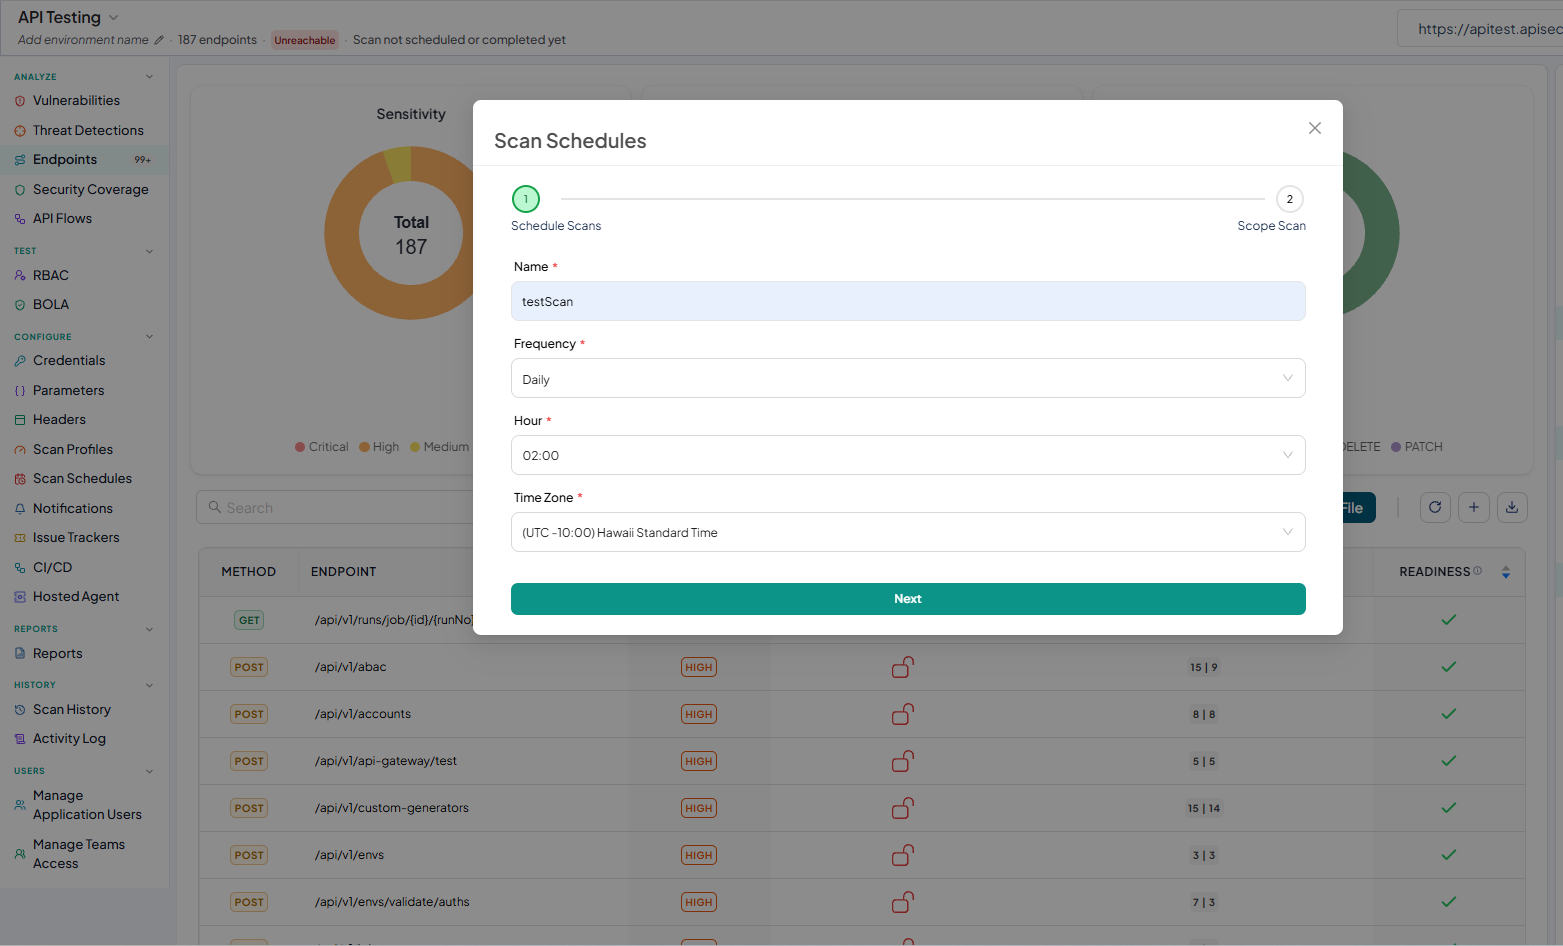
- If you select Daily then you have to fill the Hour and Time Zone.
- If you select Weekly then you have to fill the Day of the Week, Hour and Time Zone.
- If you select Monthly then you have to fill the Day of the Month, Hour and Time Zone.

-
Here selected Daily. Fill the Hour and Time Zone. And click on the Next button
-
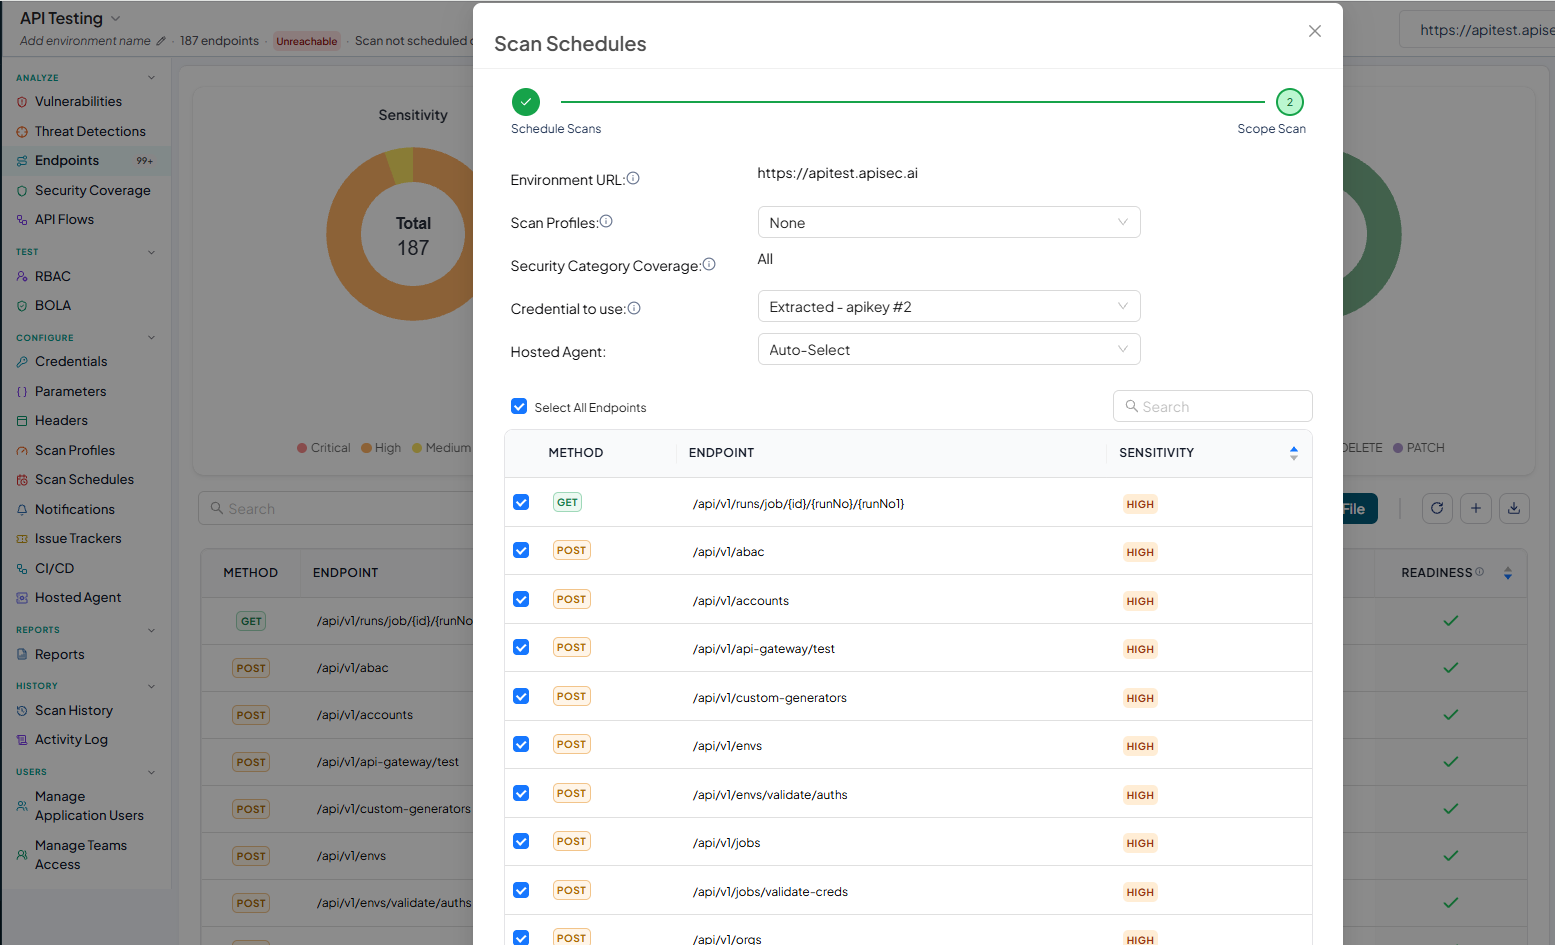
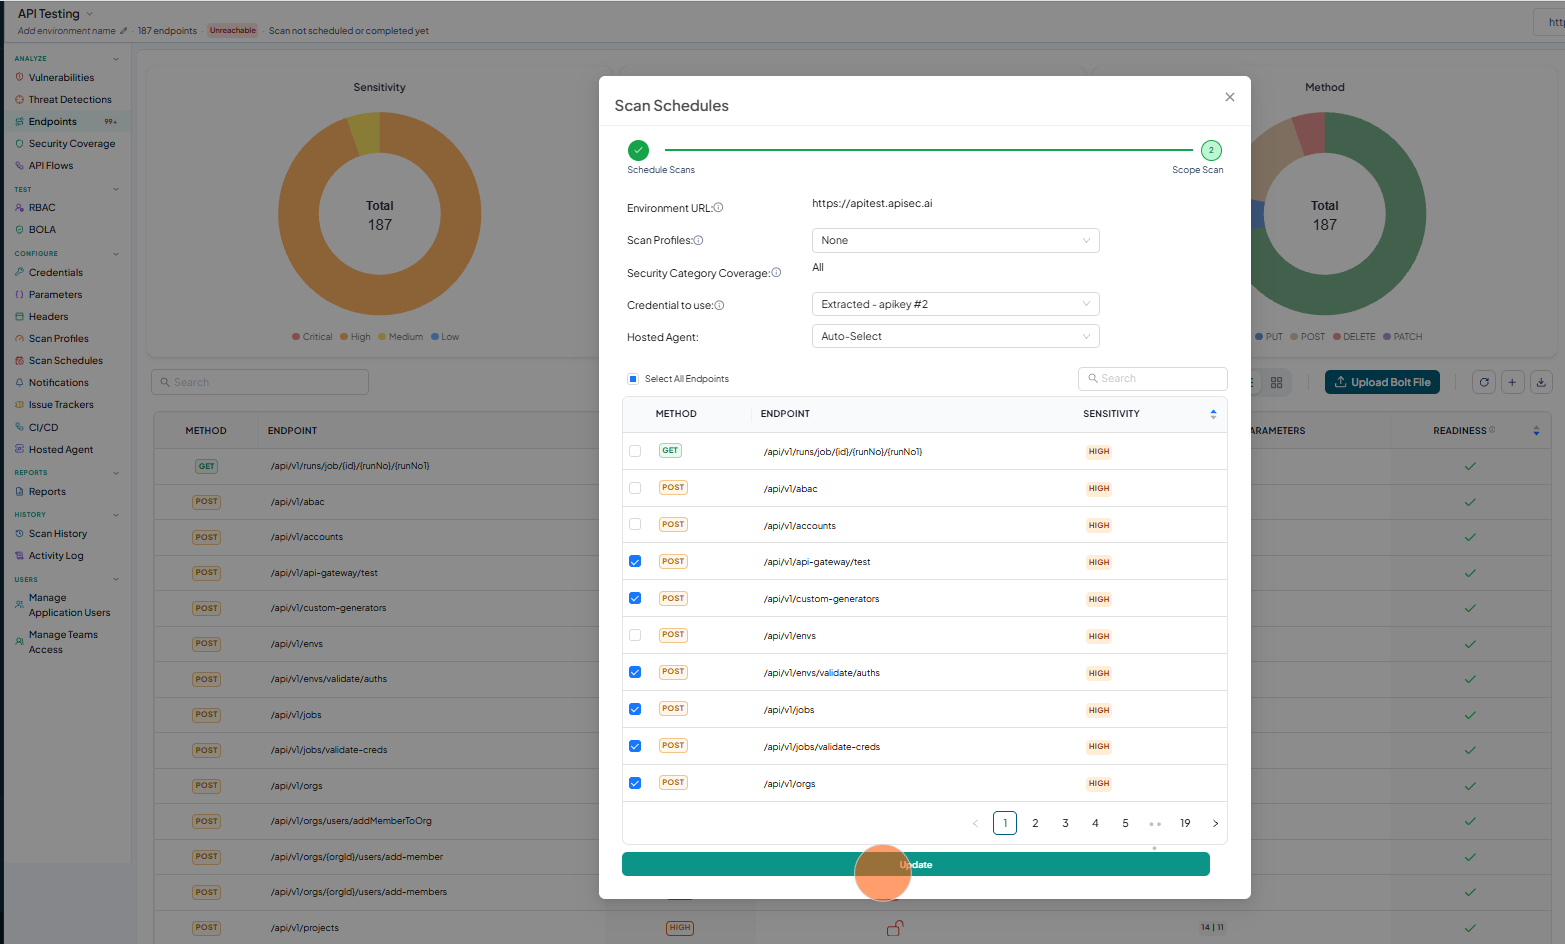
Now you will see the next screen with various options to scope the scan.
-
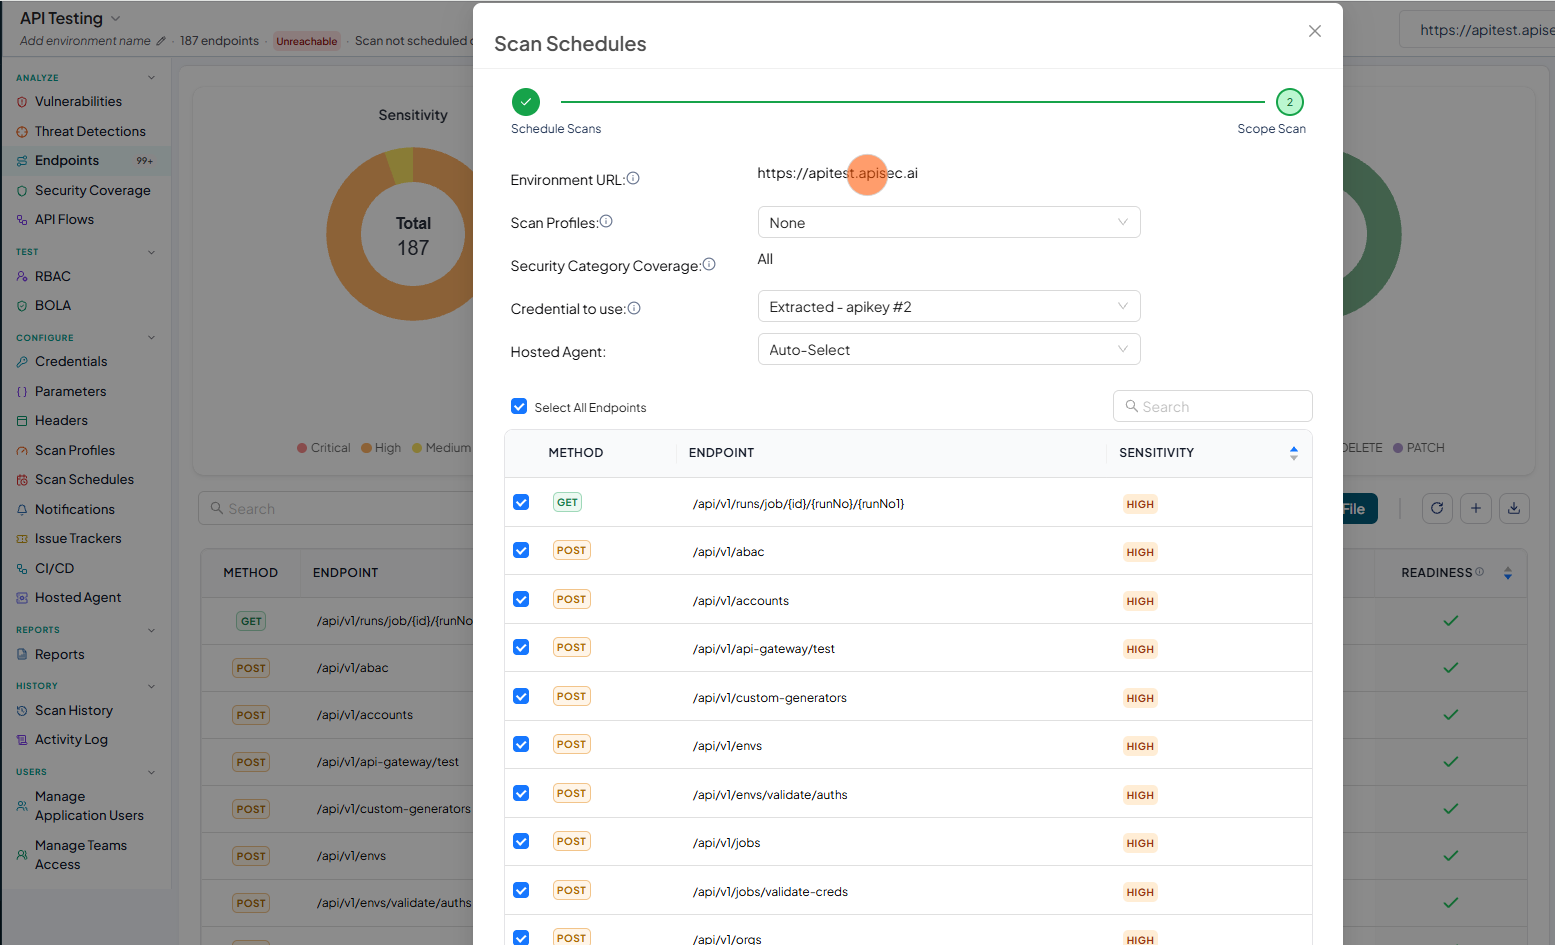
Here in the screen, you can find the Environment URL.
-
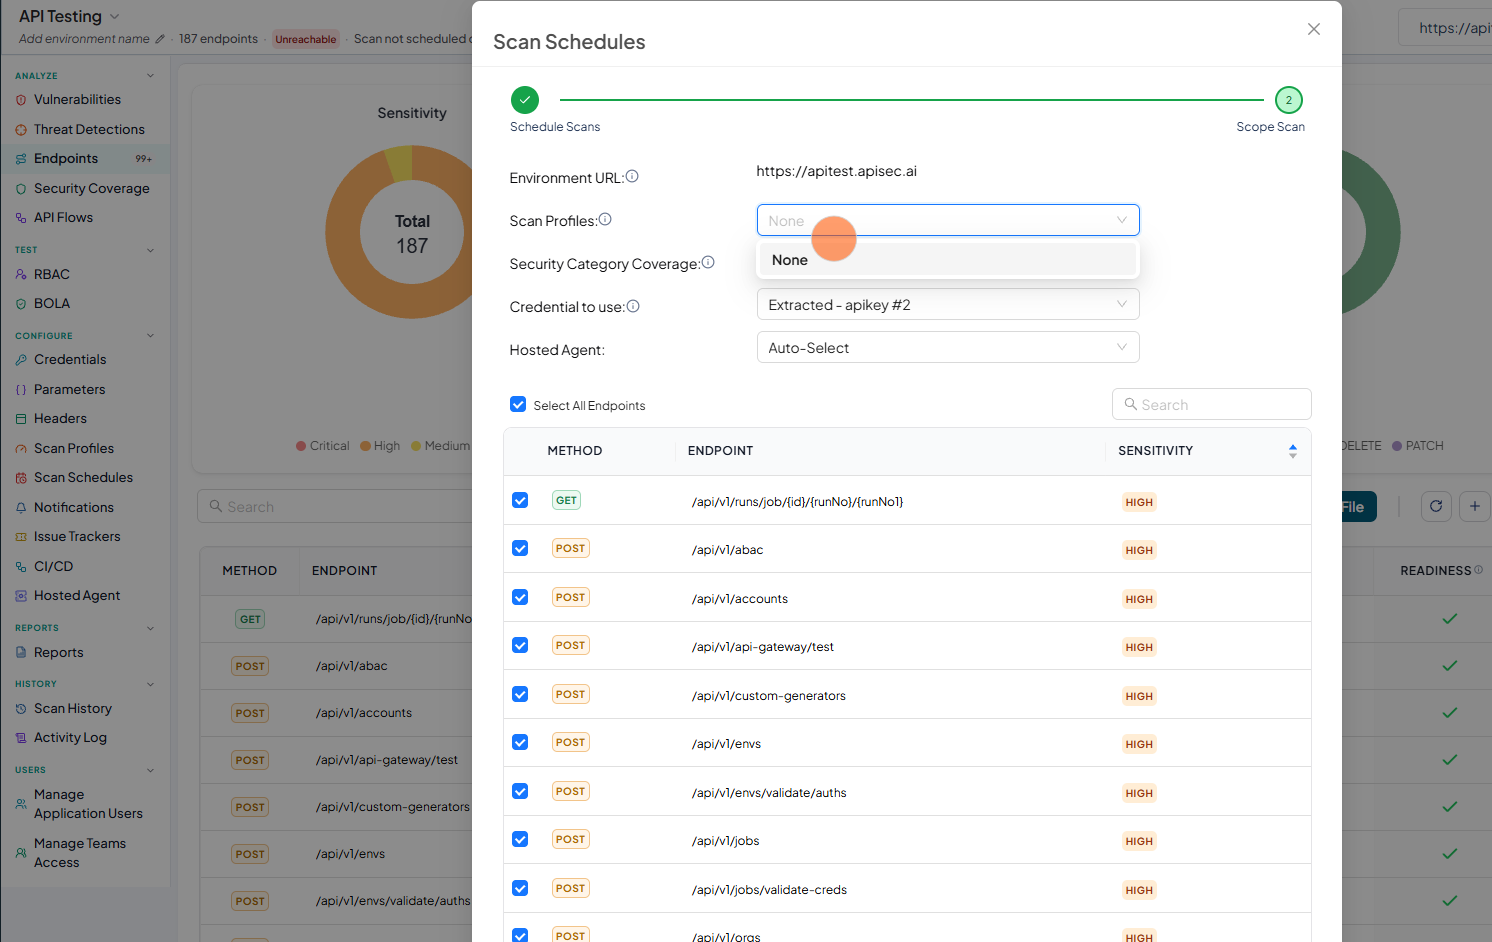
Scan Profiles will help us in choosing the desired Scan profile created earlier.
-
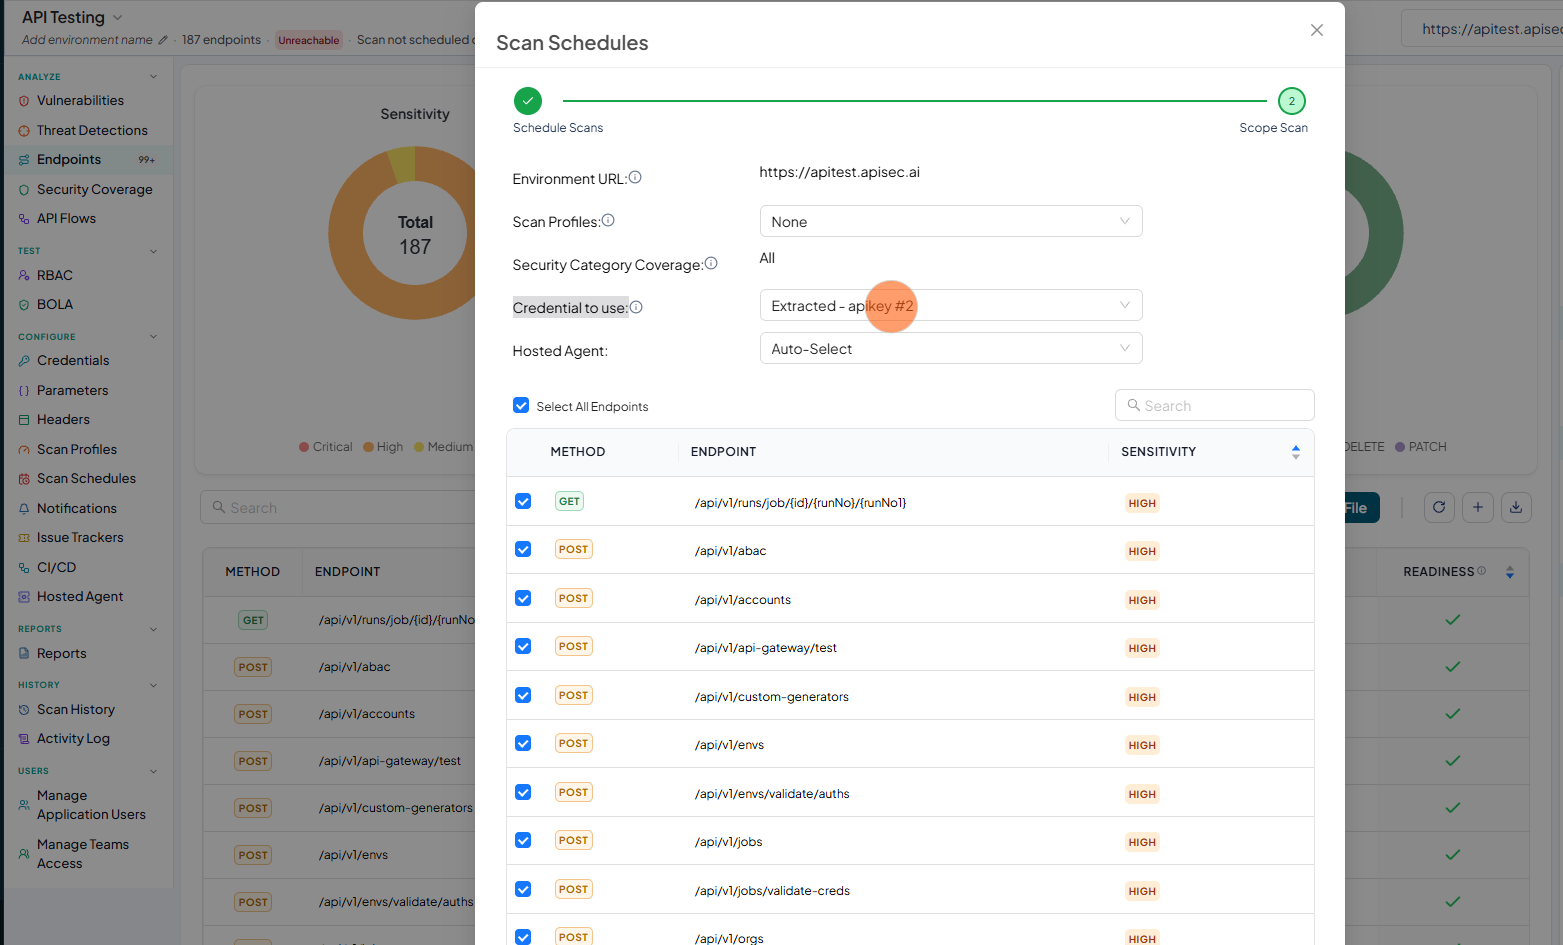
Credential to use will help us in choosing desired authentication from the list of authentications.
-
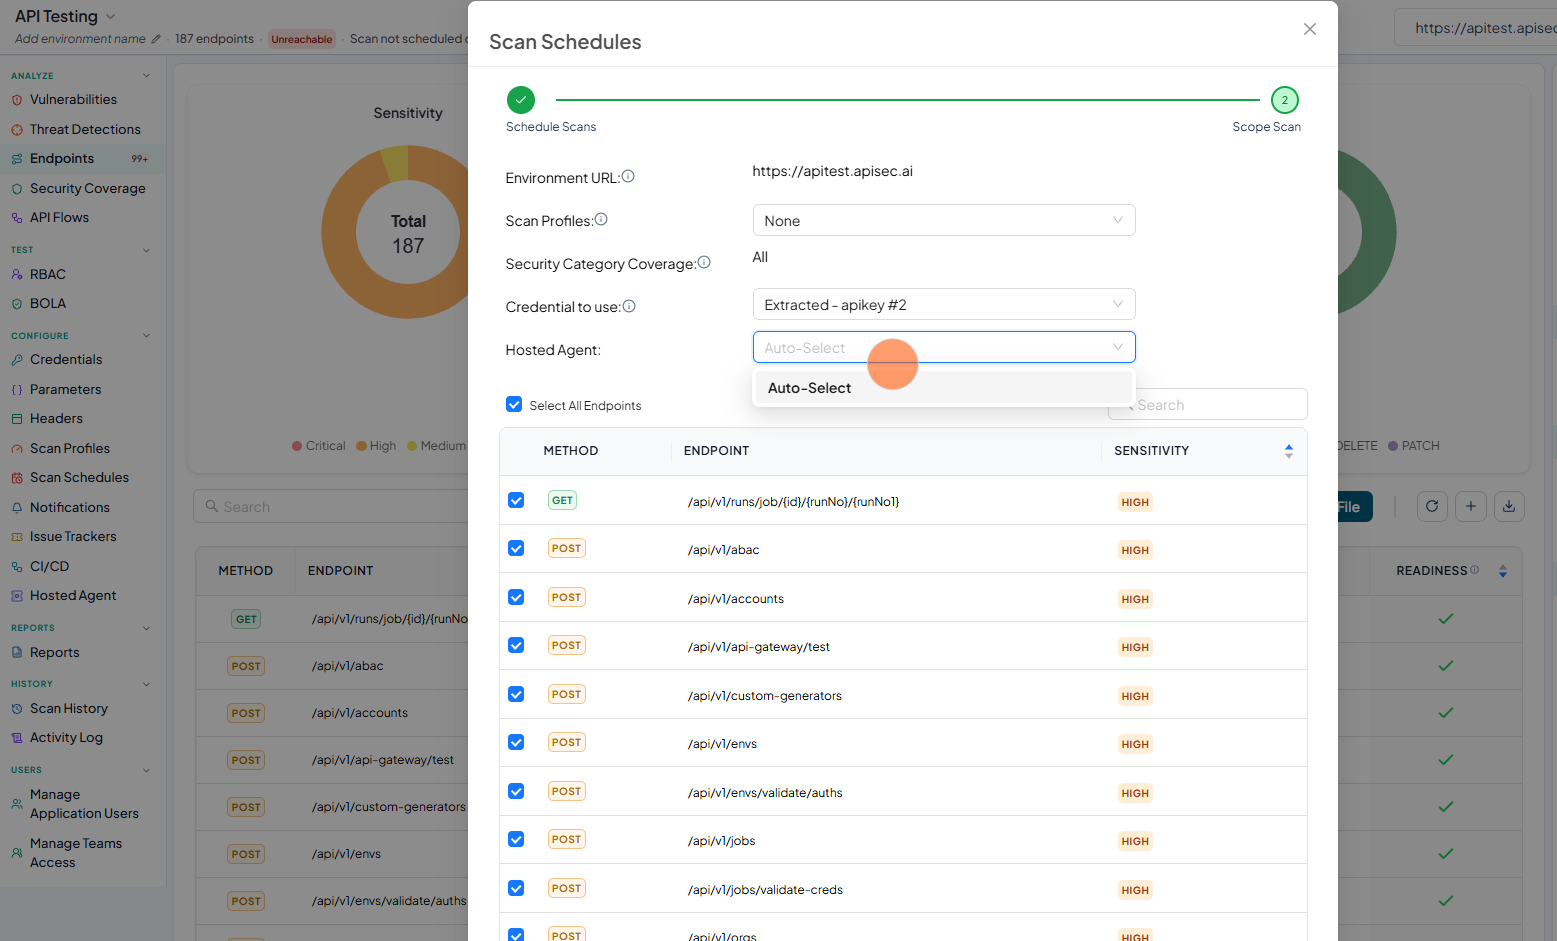
Hosted Agent will let us choose the agent to run our scan.
-
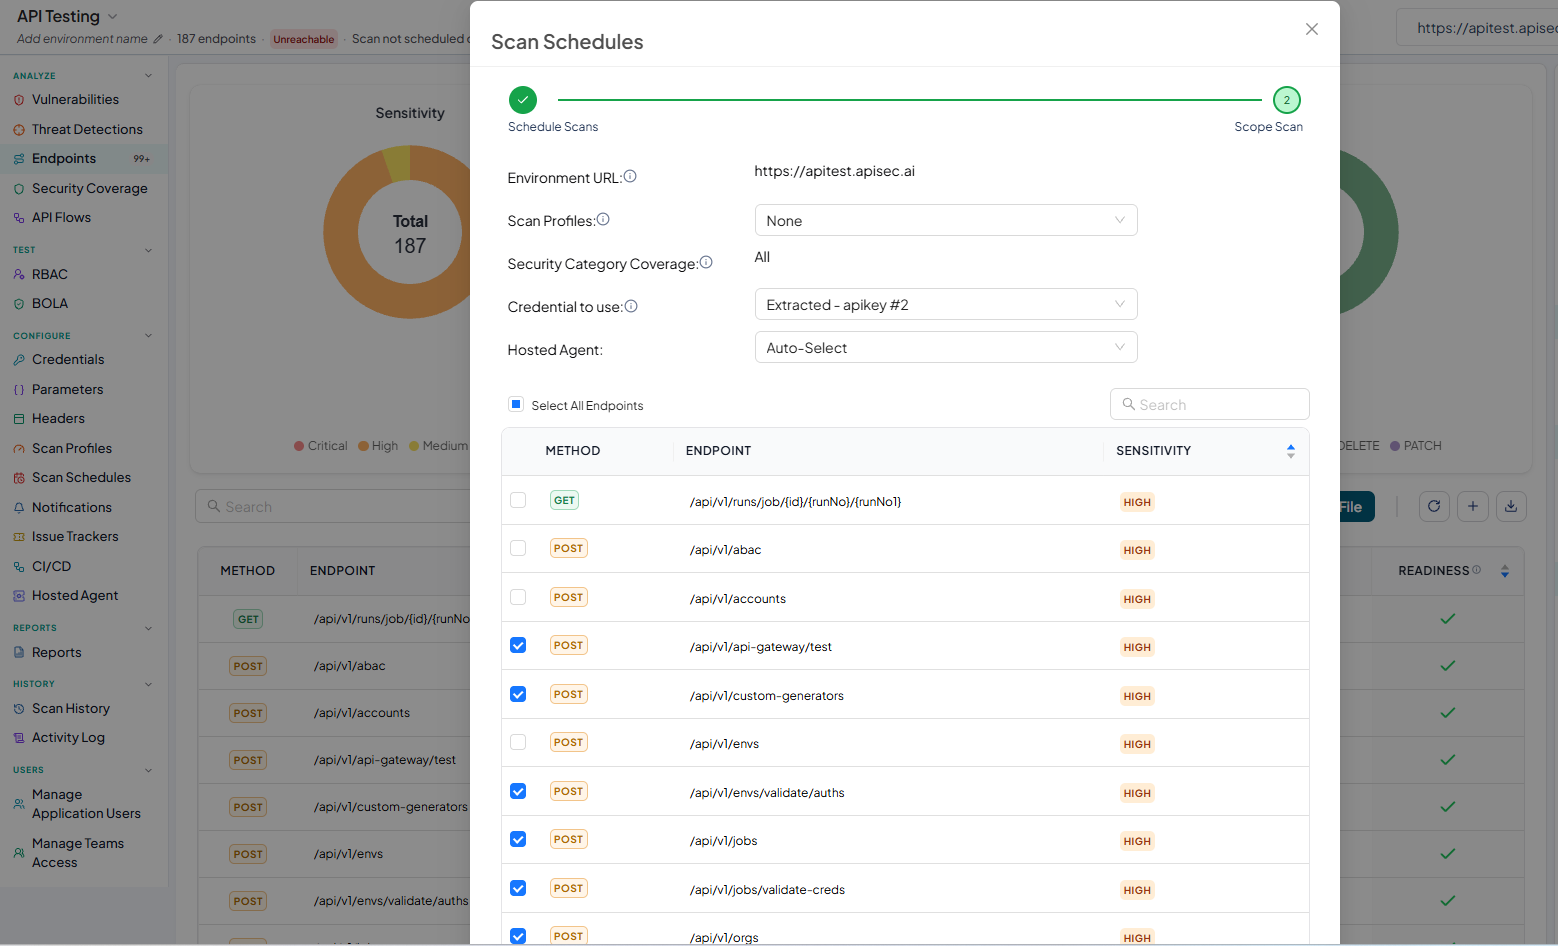
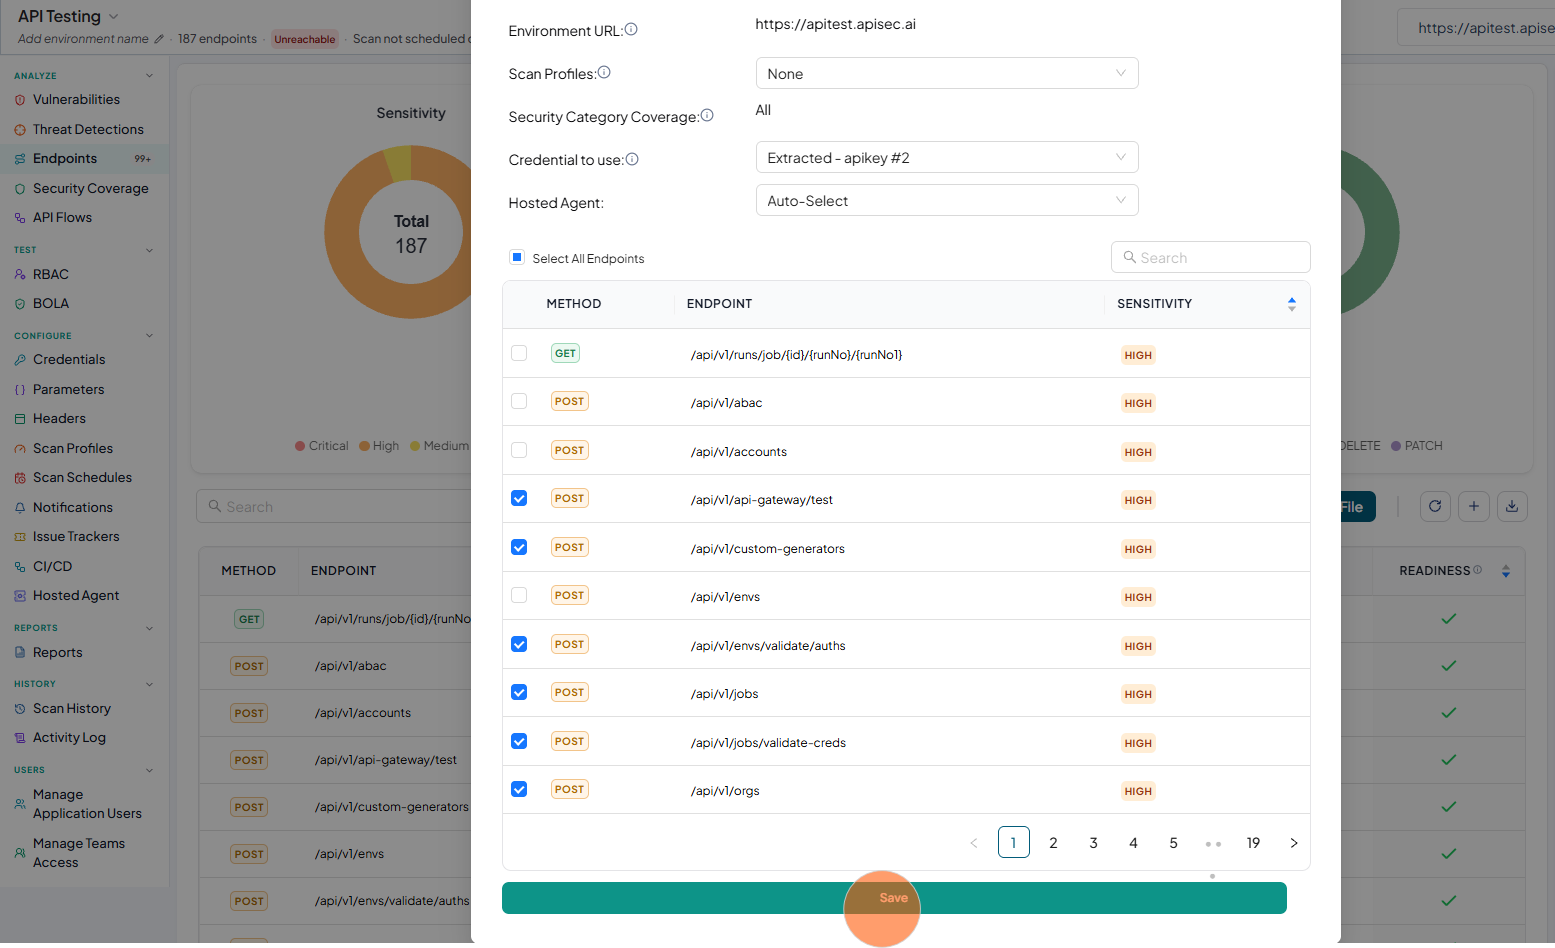
From the list of endpoints, you can select either all endpoints or specific ones to include in the scans.
-
After endpoints selection, Click on the Save button
-
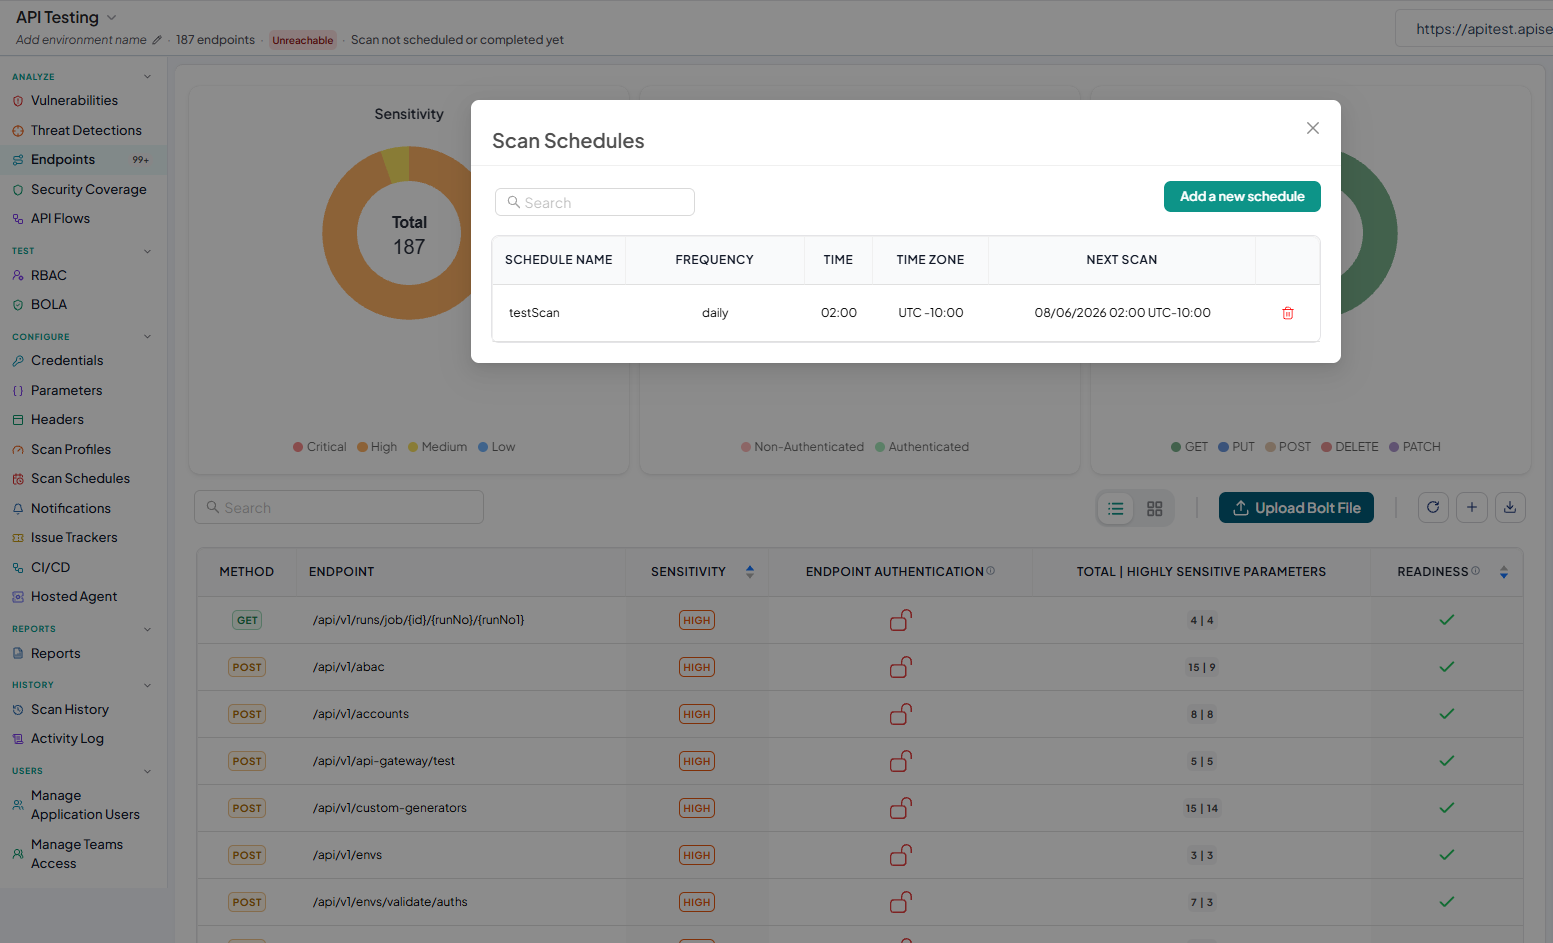
Now you will see the list of Scan Schedules.
Users with View permissions cannot add scan schedule in shared application
Edit Scan Schedule
-
Open your browser and visit: https://<your-tenant>.apisecapps.com
-
Click the required application.
-
Click on the Scan Schedules from left navigation
-
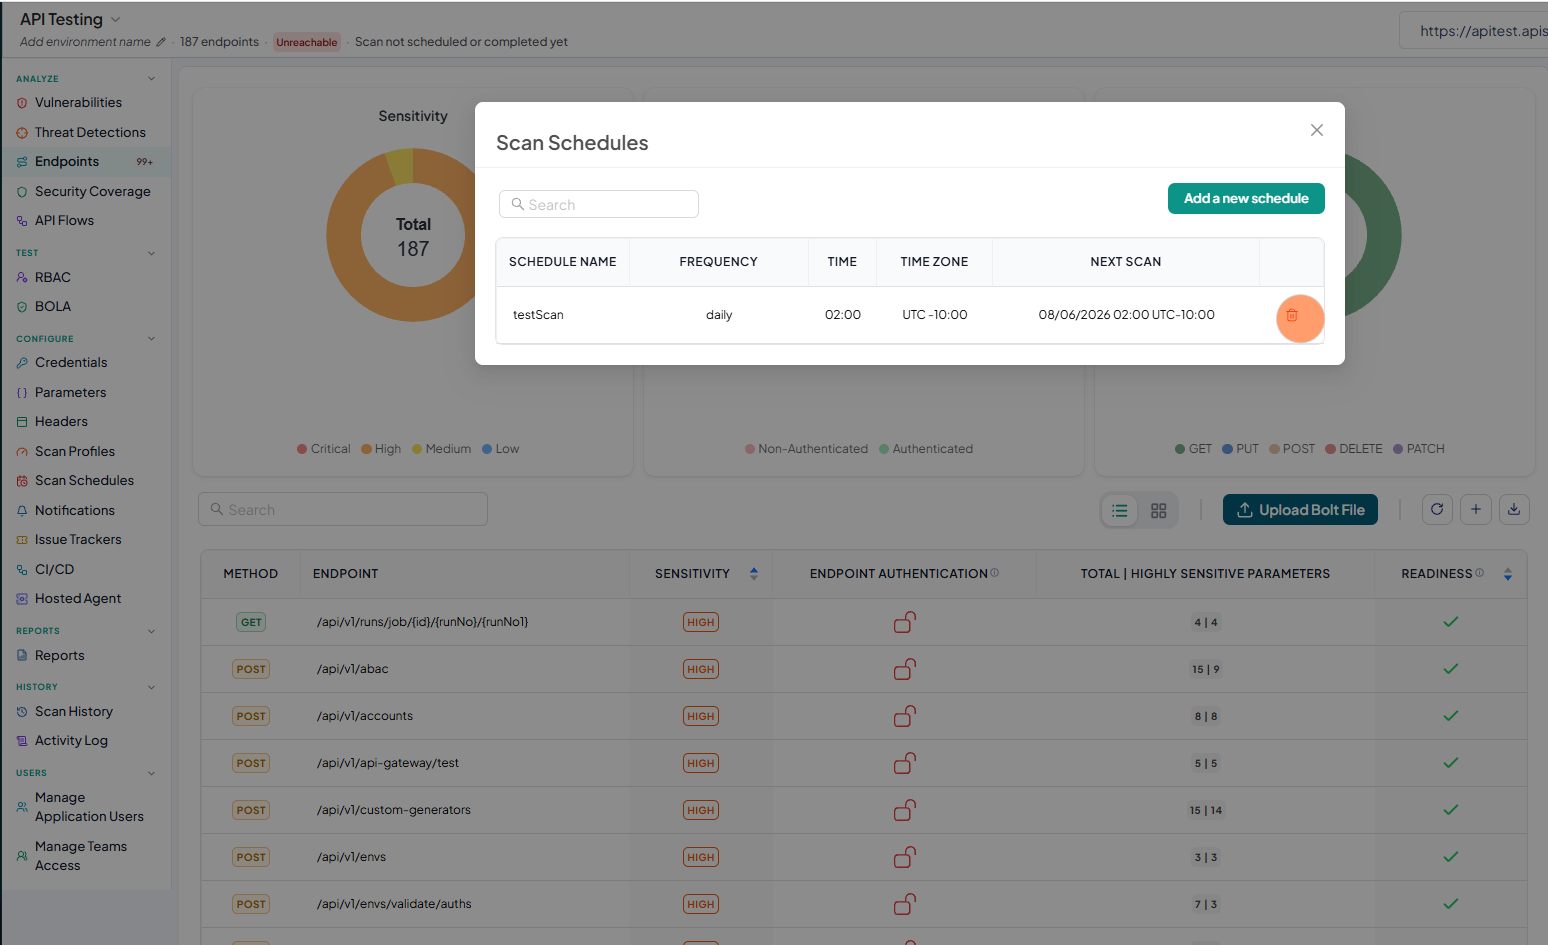
Now you will see a list of Scan Schedules.
-
Click the desired scan schedule from the list to edit.
-
Now you will see the Schedule scan initial screen. Here you can update the required fields and click on Next
-
Now you will see the Schedule scan options. Here you can update the required fields and click on Update
Users with View permissions cannot edit scan schedule in shared application
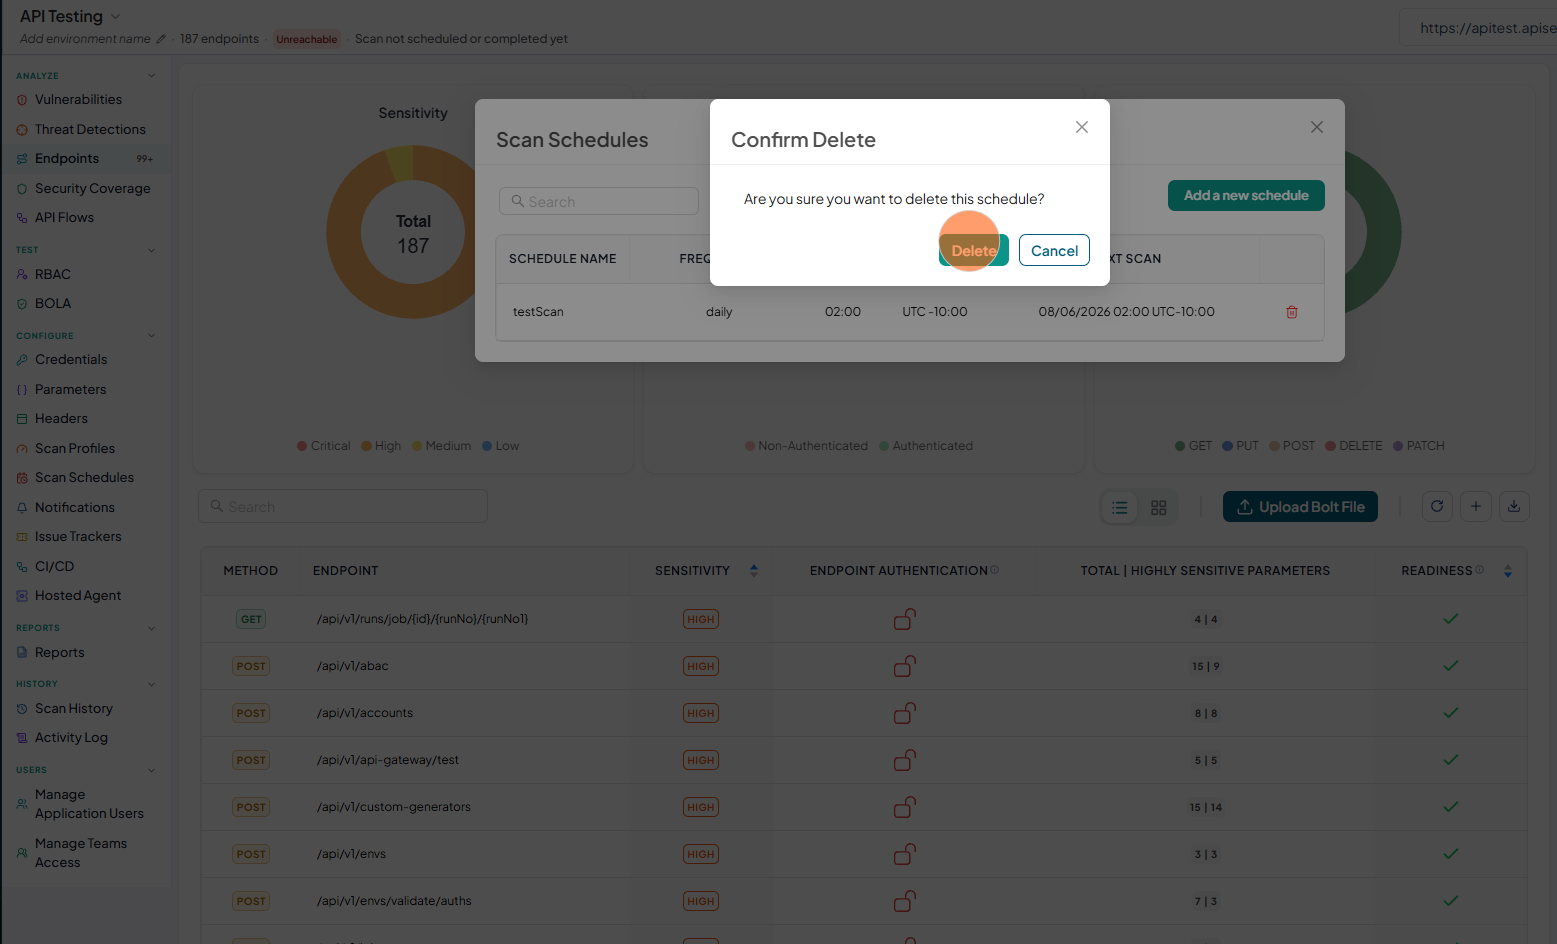
Delete Scan Schedule
-
Open your browser and visit: https://<your-tenant>.apisecapps.com
-
Click the required application.
-
Click on the Scan Schedules from left navigation
-
Now you will see a list of Scan Schedules.
-
From the list, click the Delete icon corresponding to the scheduled scan to delete it.
-
Click Delete to confirm
 note
noteUsers with View permissions cannot delete scan schedule in shared application