How configure RBAC for Application Roles
Visit Application
-
Open your browser and visit: https://<your-tenant>.apisecapps.com
-
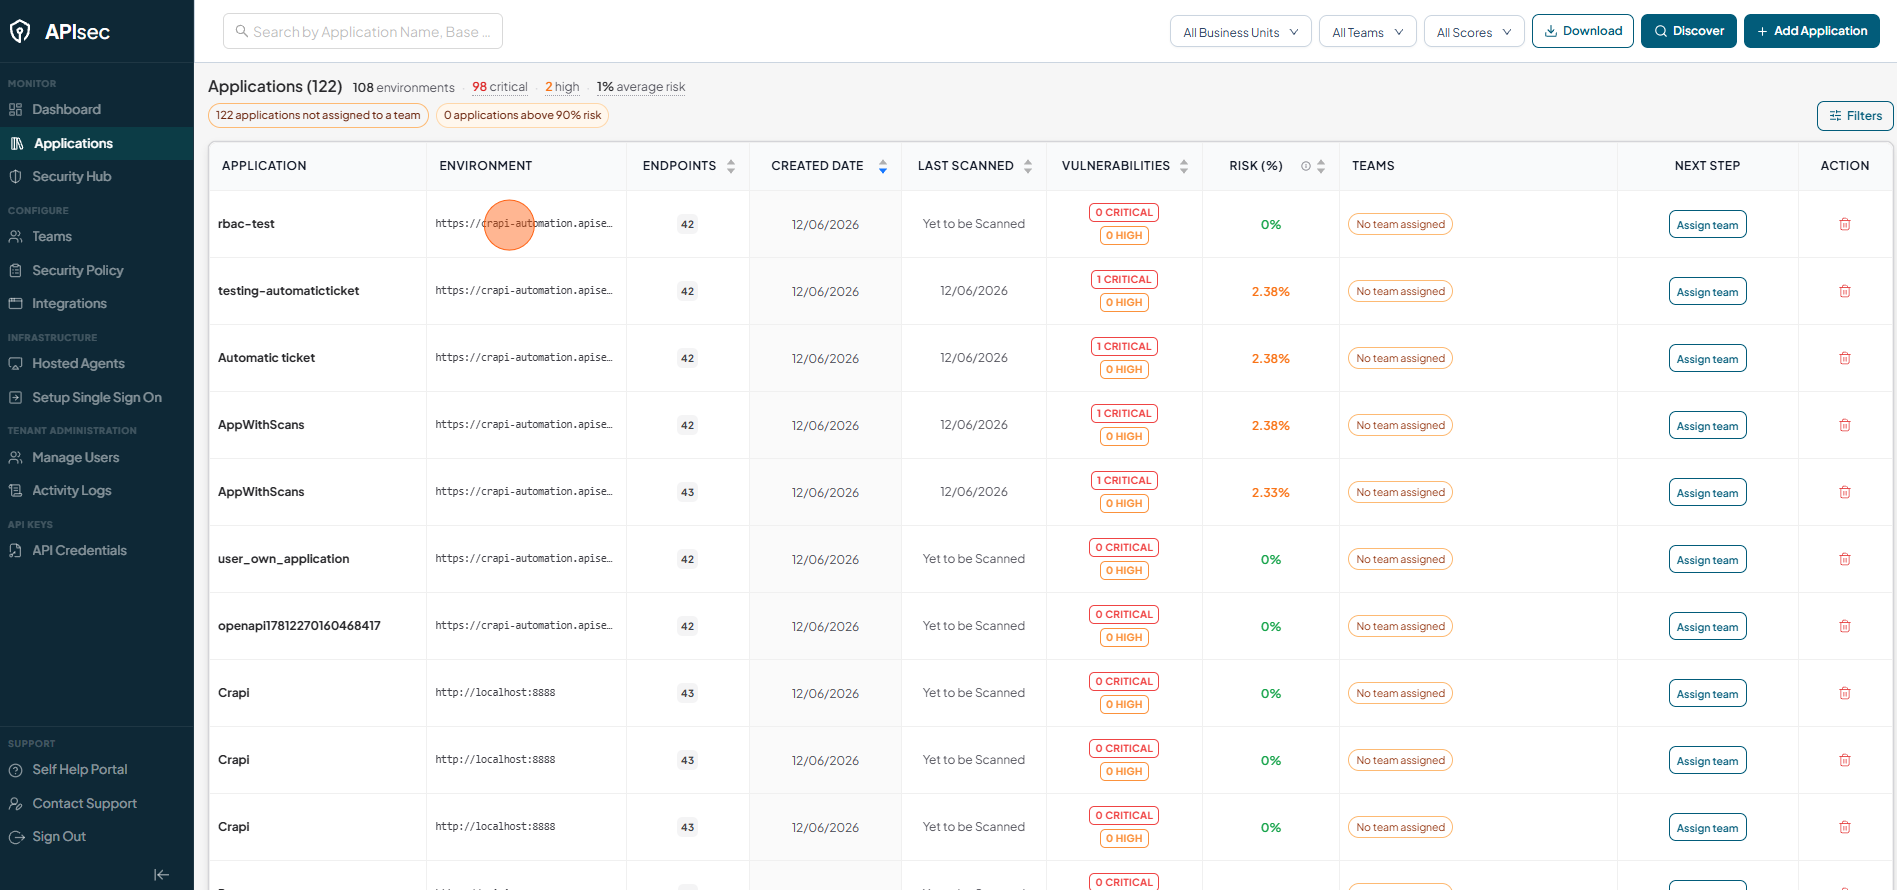
Click on Application
-
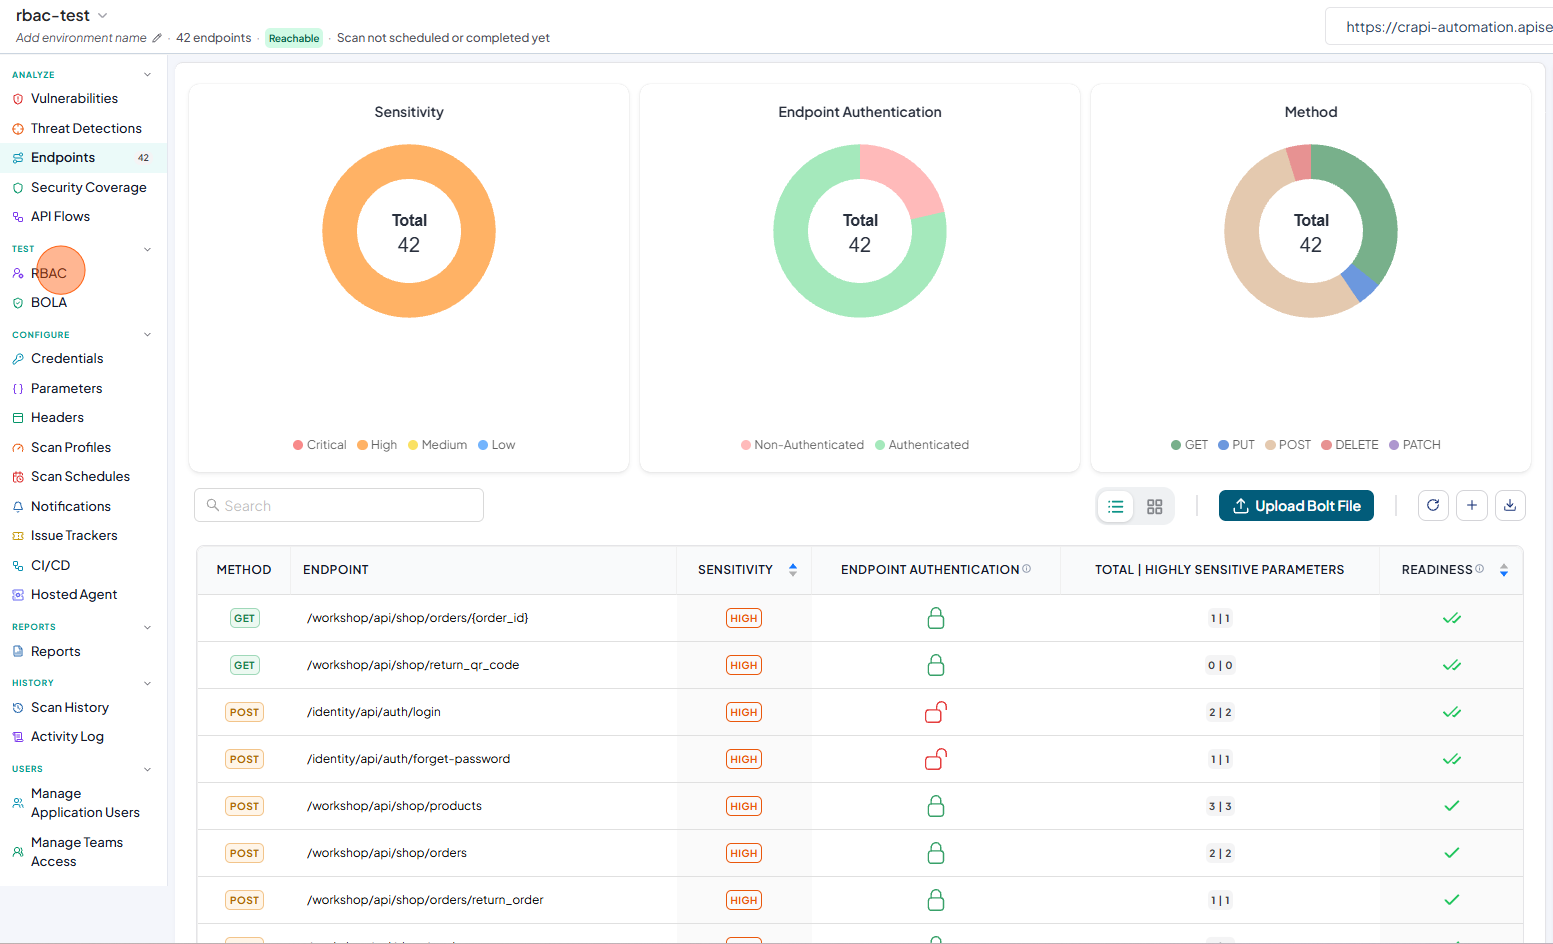
On the Application details page click RBAC from left navigation
Configure RBAC
-
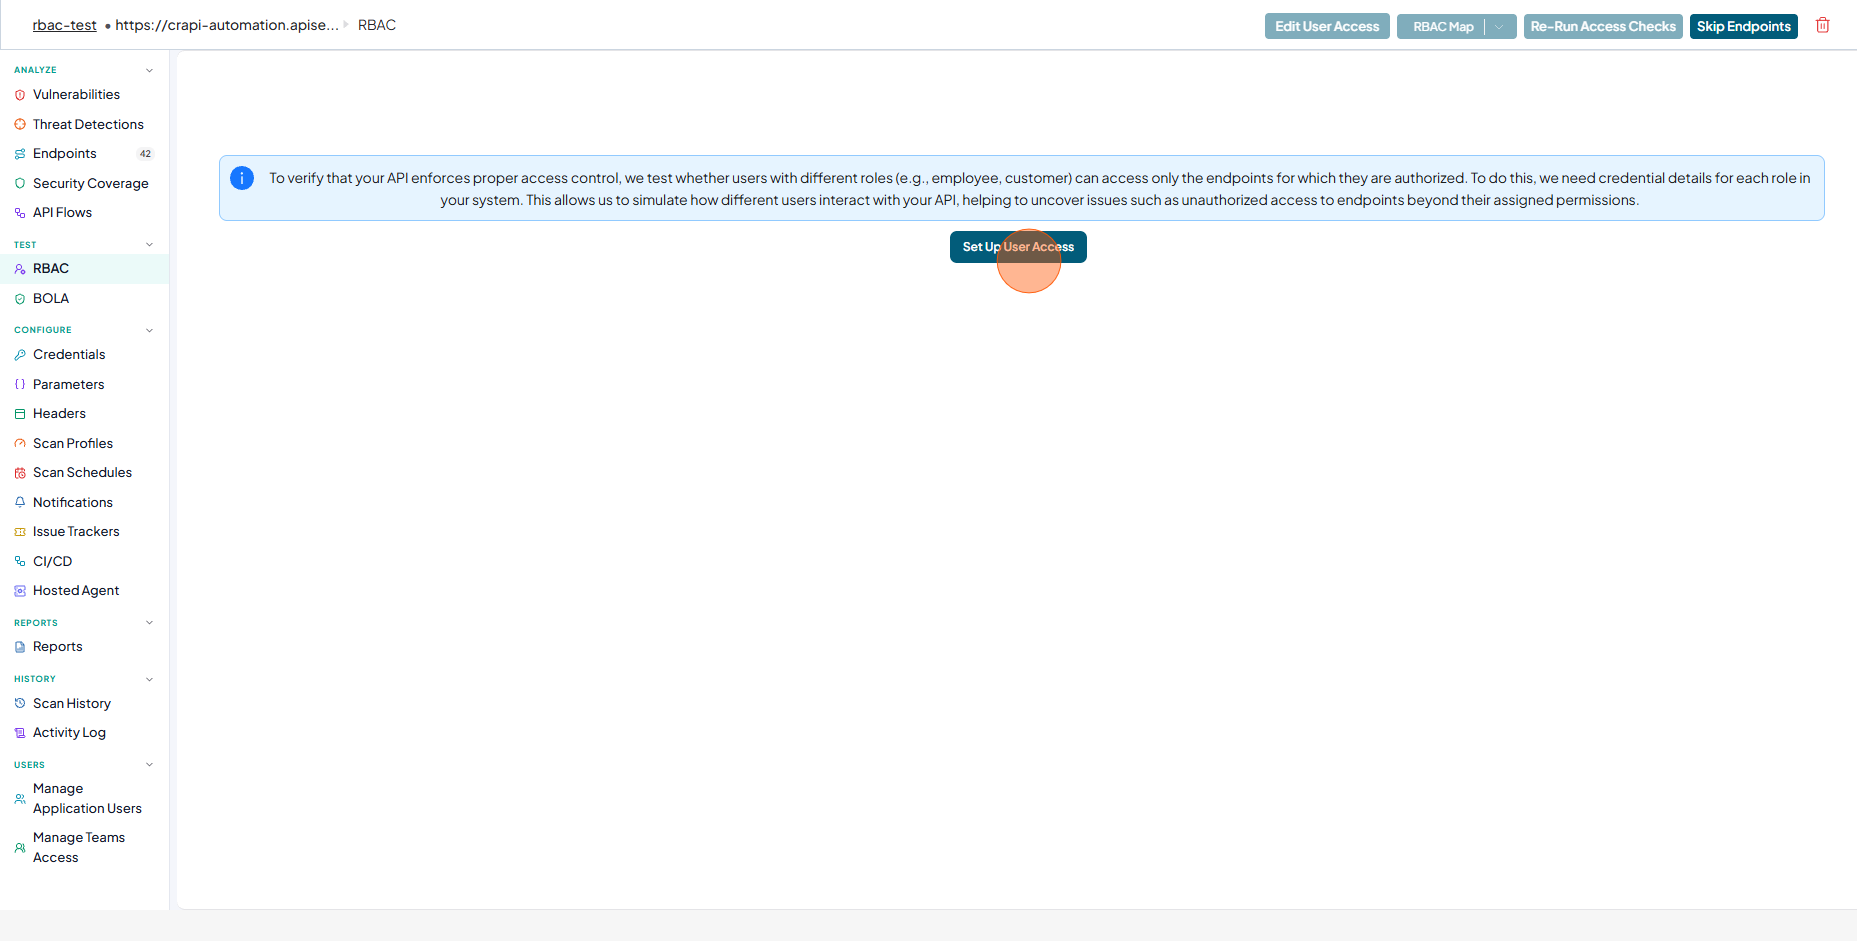
Click the Set Up User Access
-
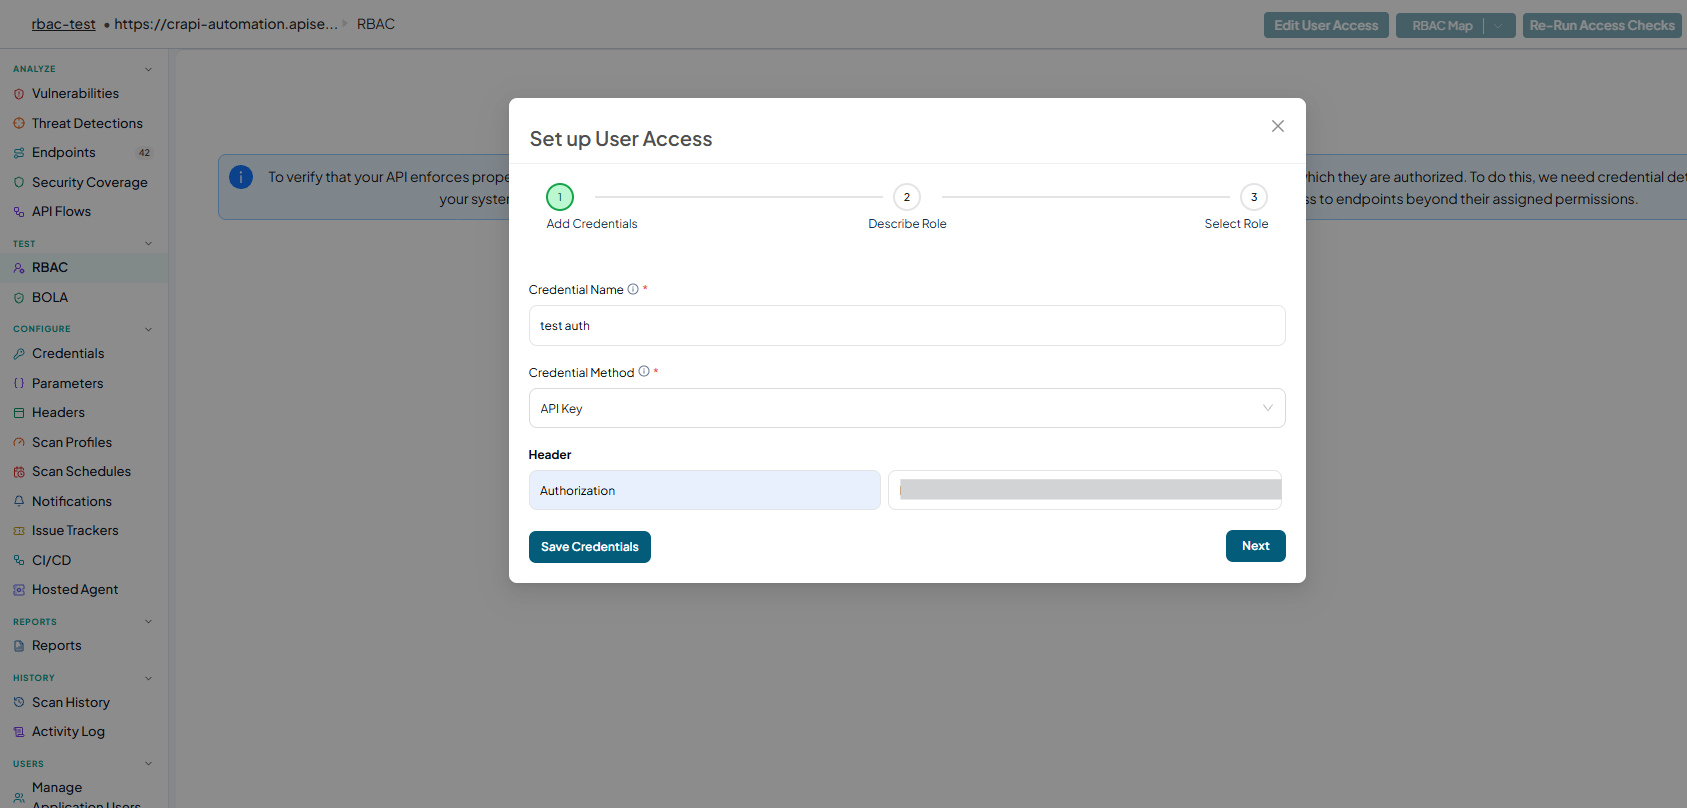
Enter the Credential Name and select Credential Method and enter the required values
-
click Save Credentials to create an authentication

-
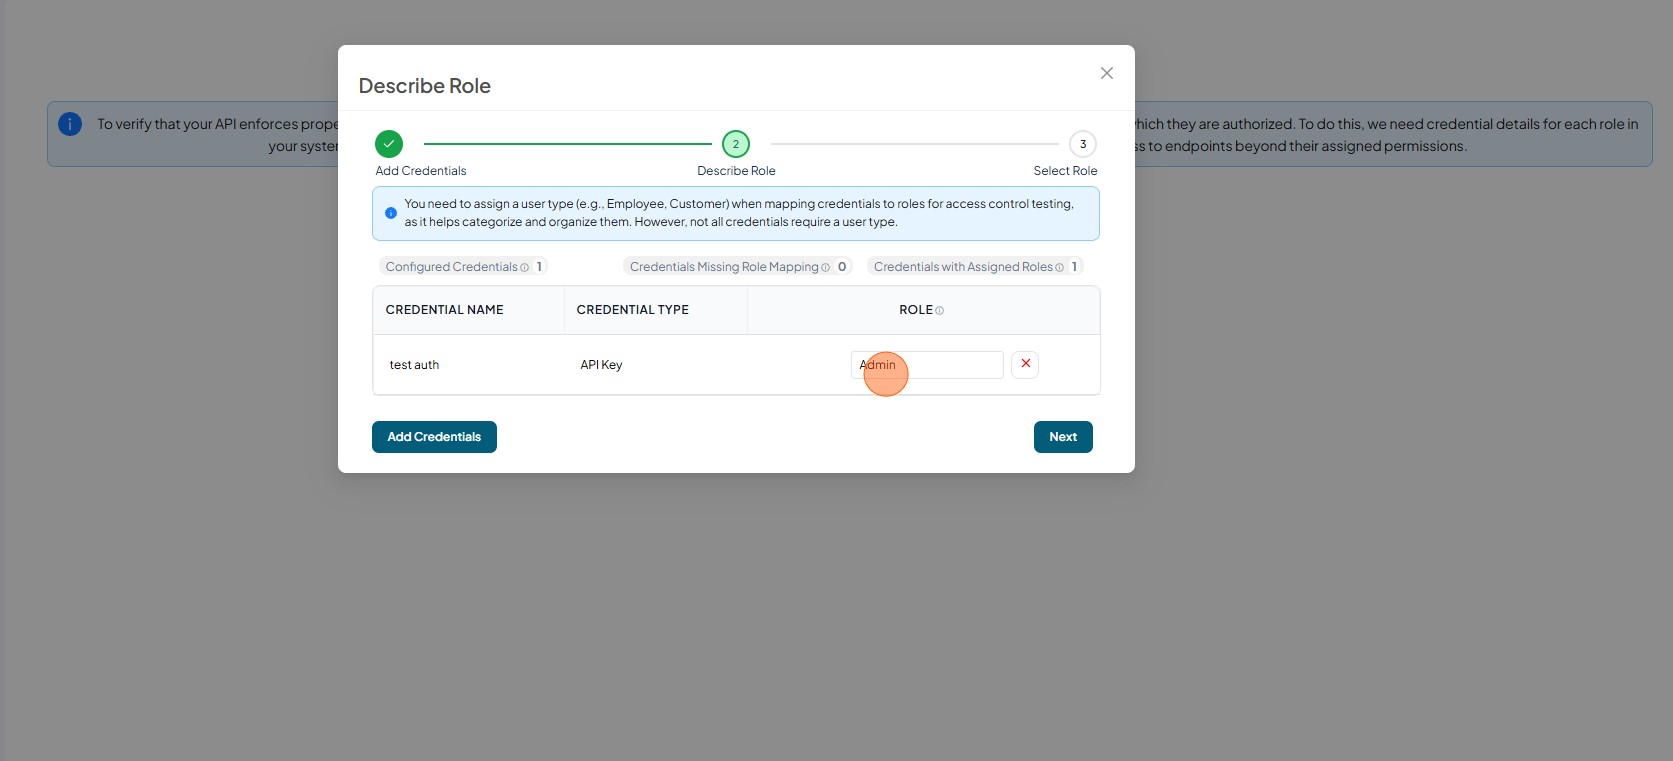
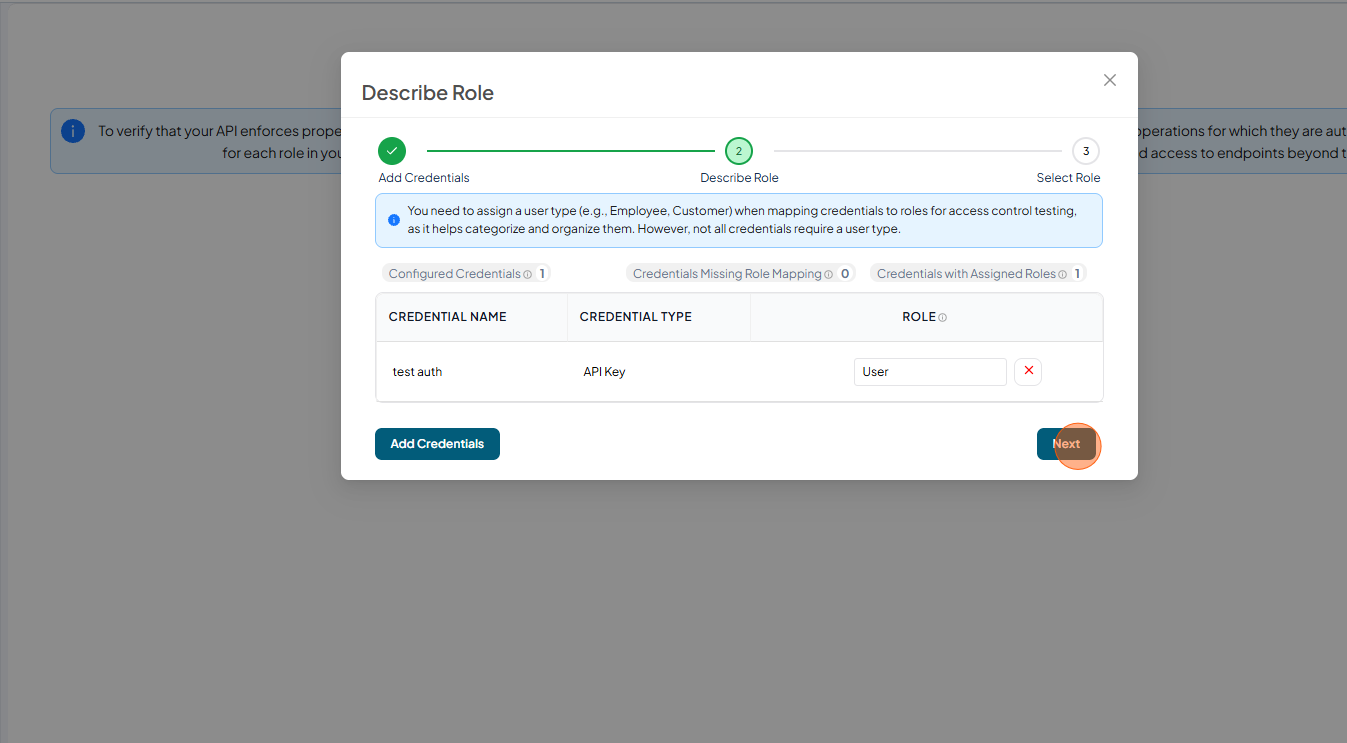
You will be prompted to enter a "Role Name" for the authentication that you have just created. Enter the role name and click next to go to the next step.
-
Click Next

-
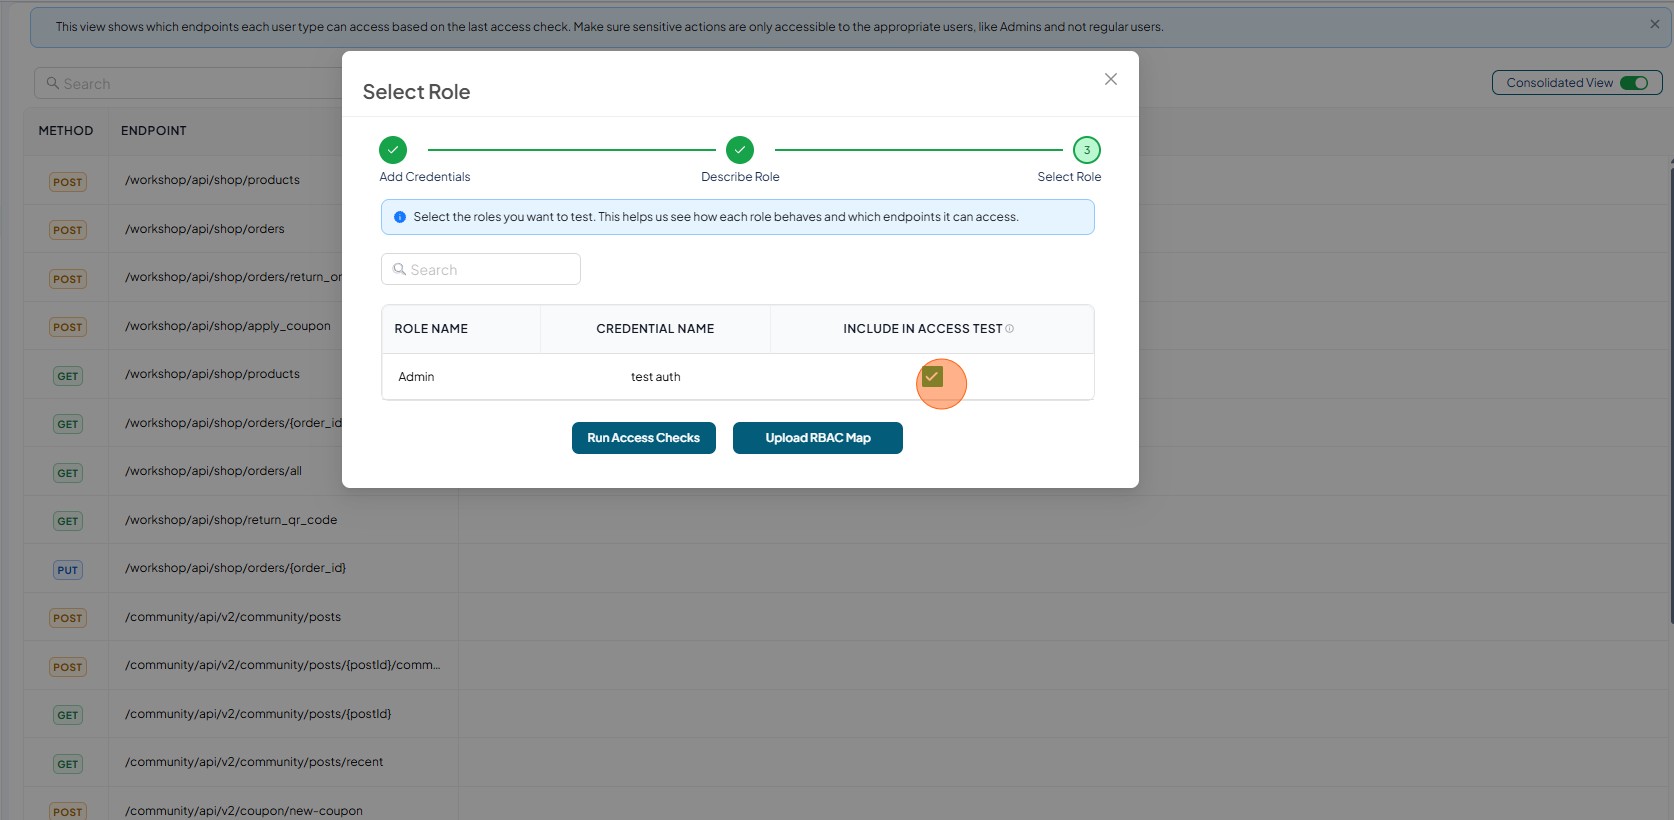
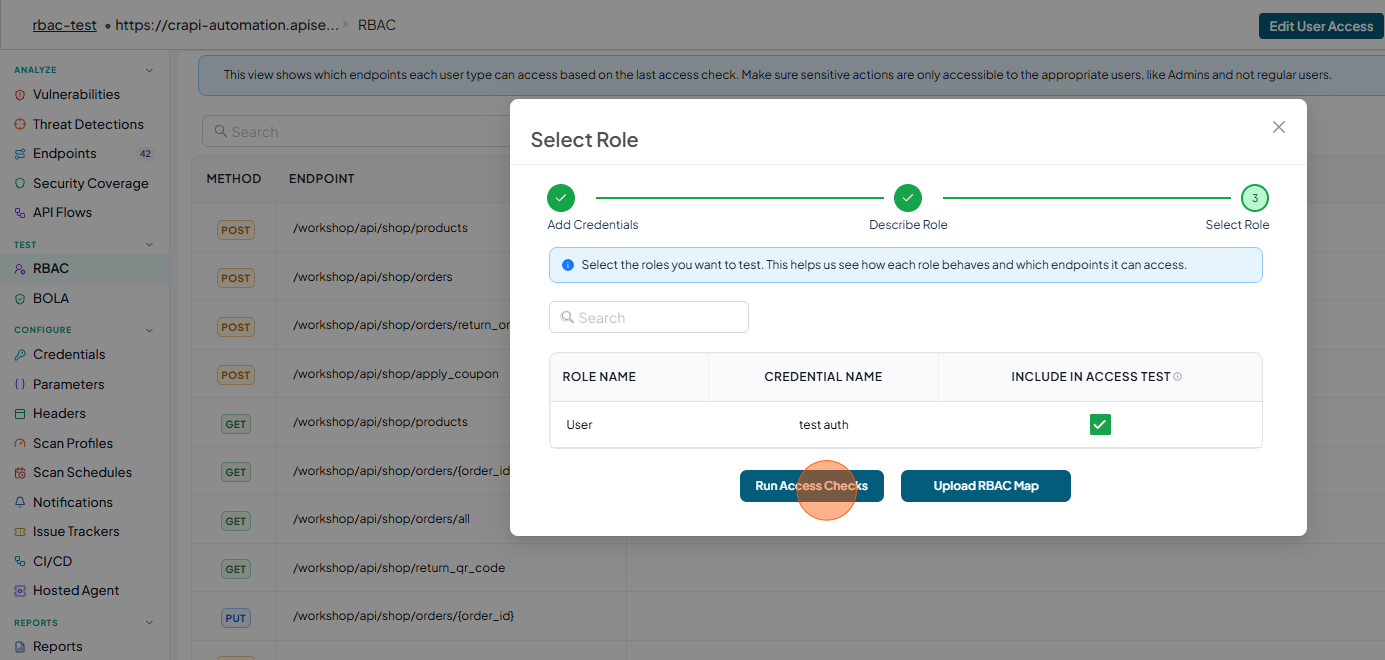
Select the role by checking the checkbox for the corresponding role under the Include In Access Test column
-
Click the Run Access Checks to discover permissions for the selected role

-
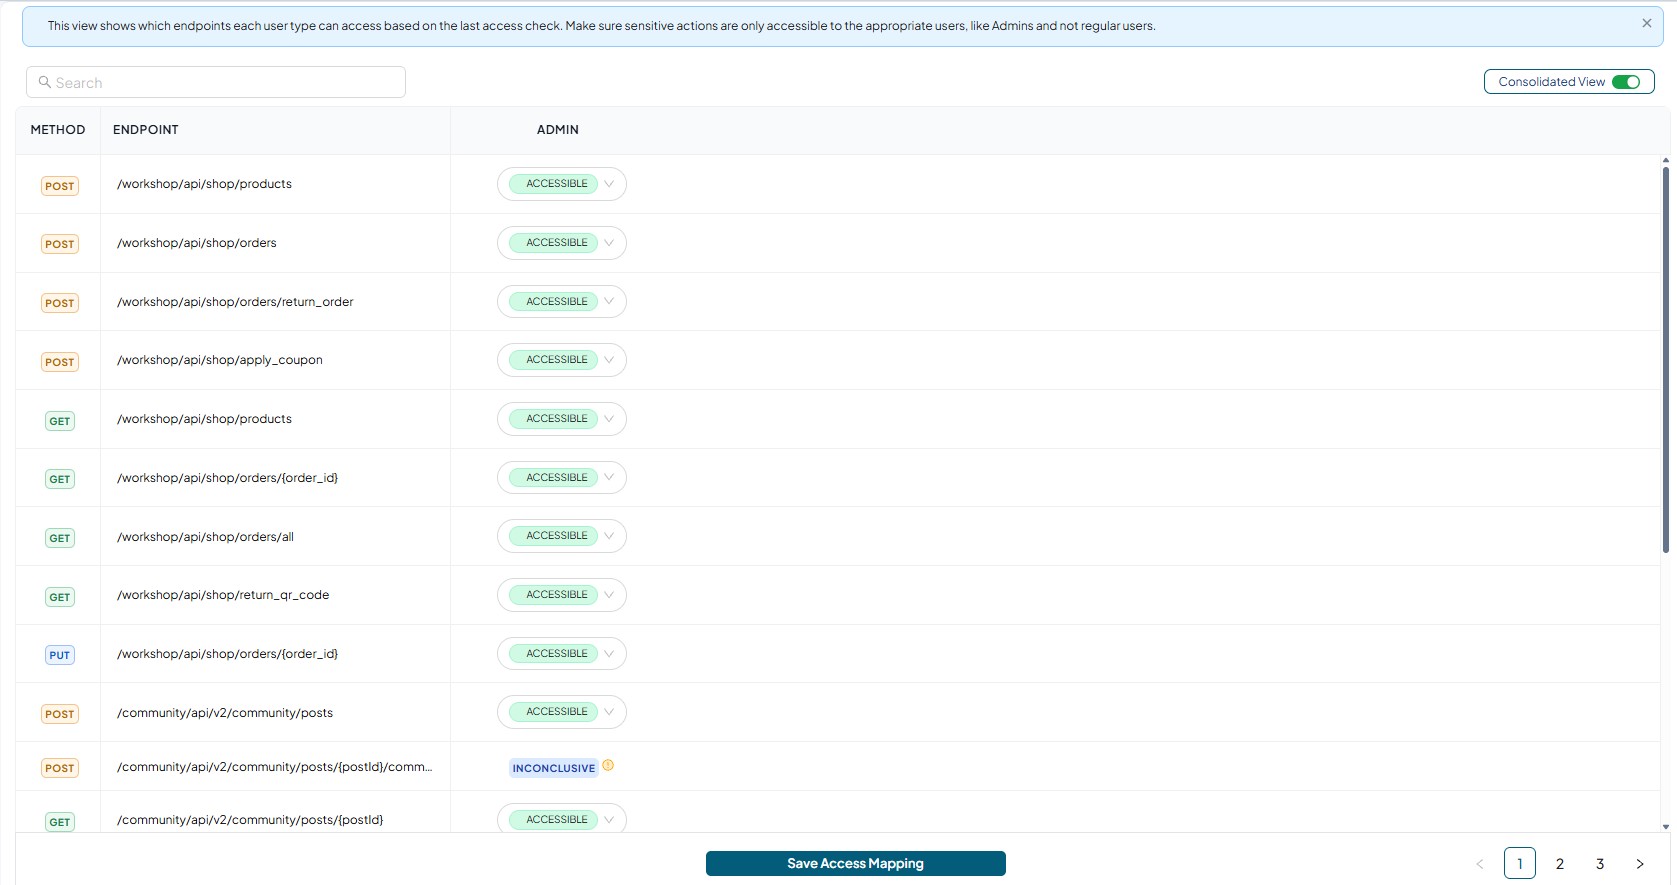
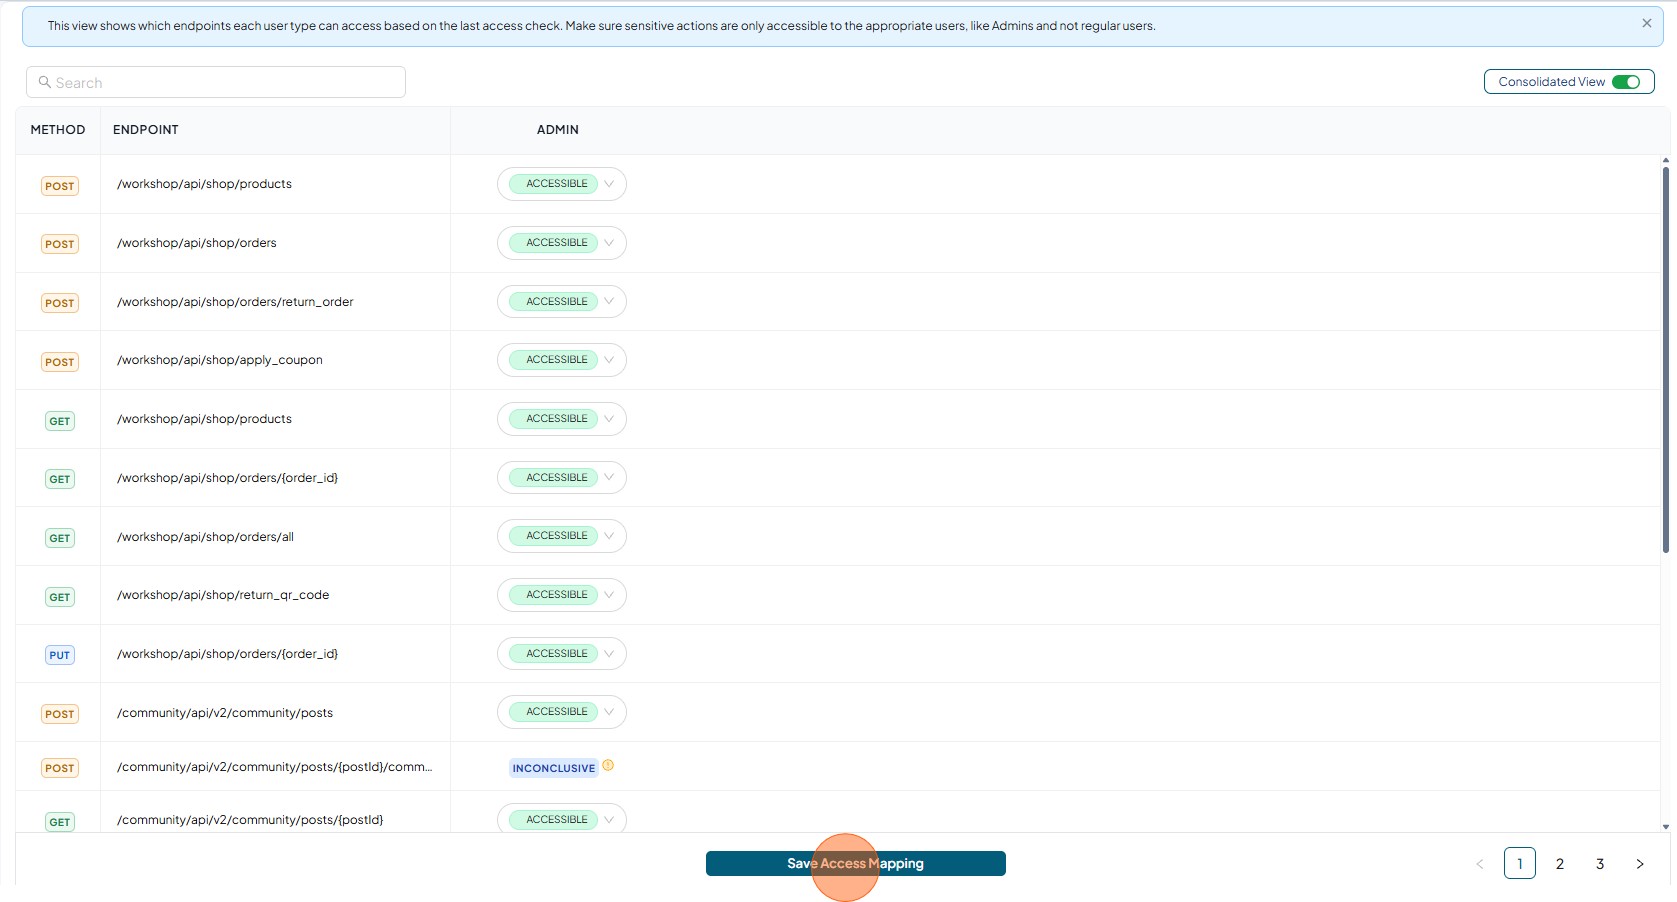
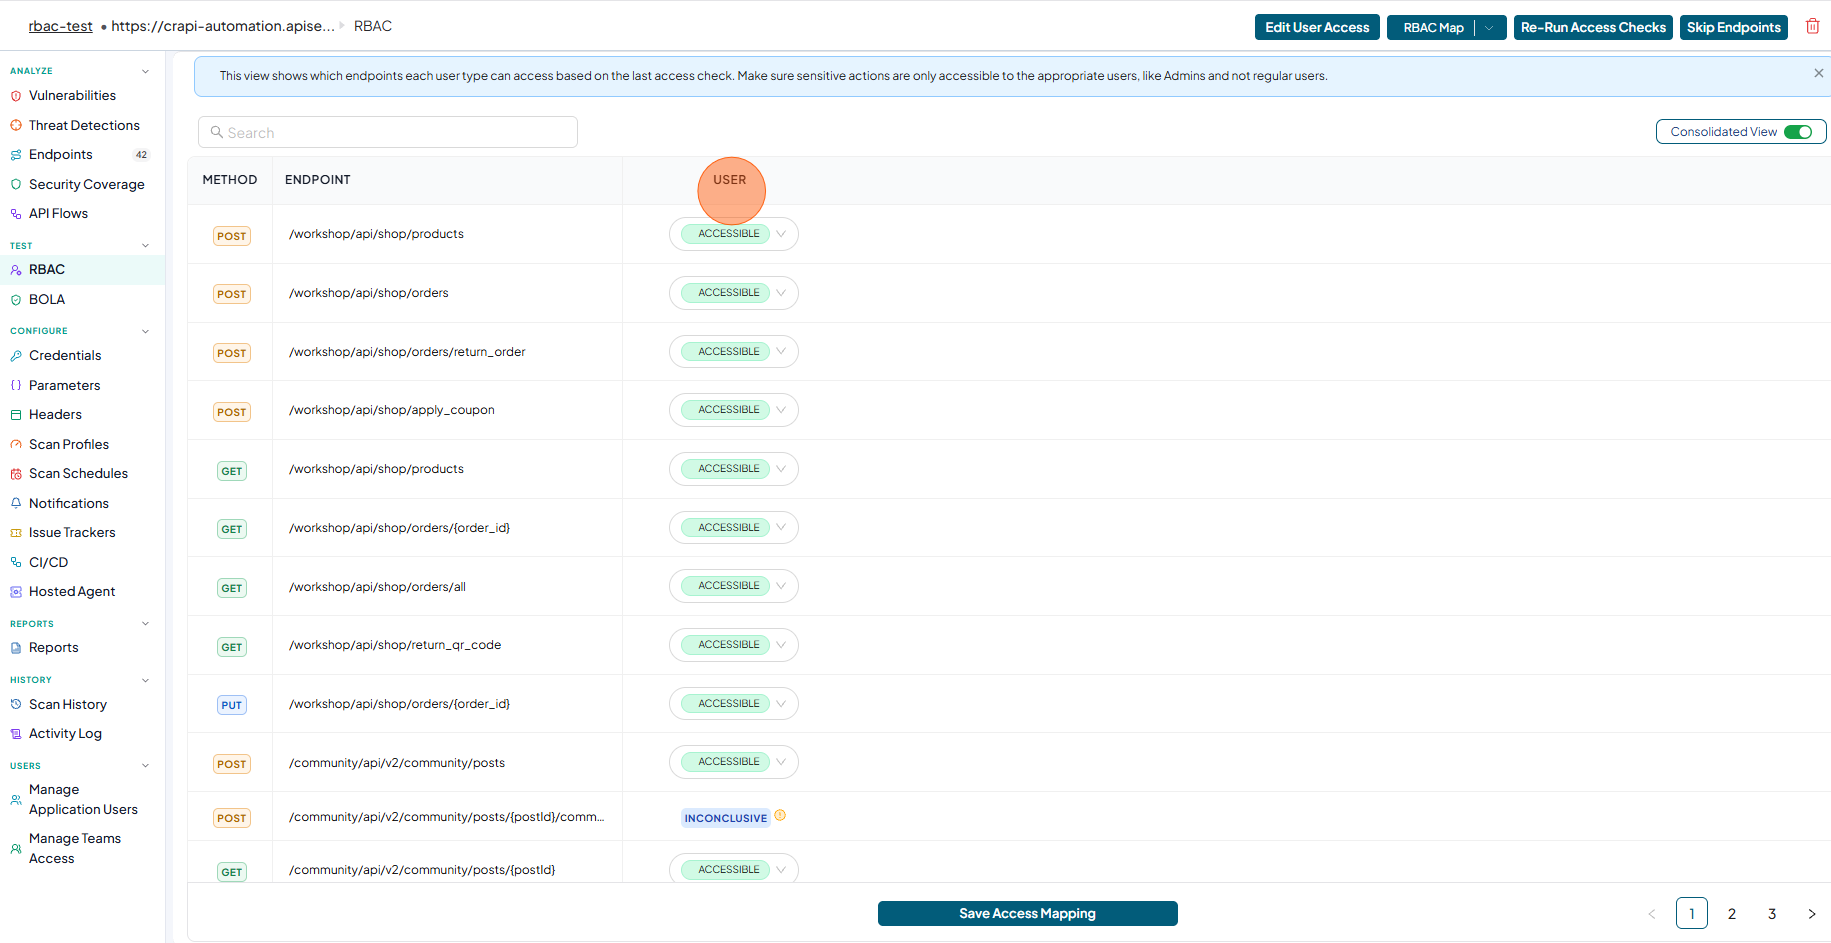
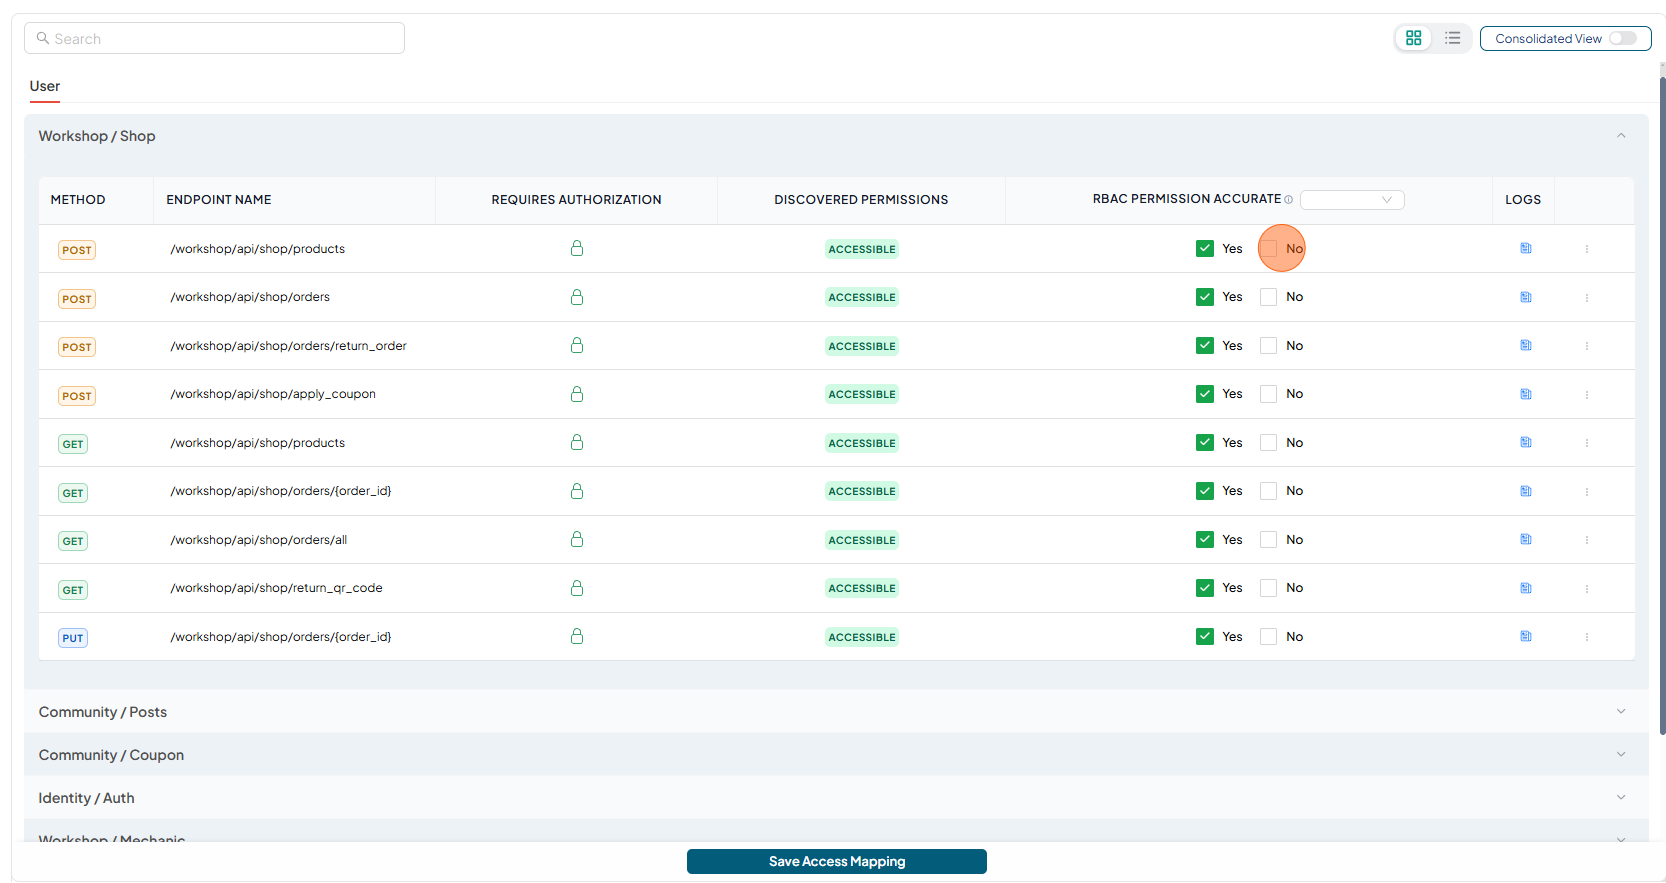
Review the discovered permissions, make changes where necessary
-
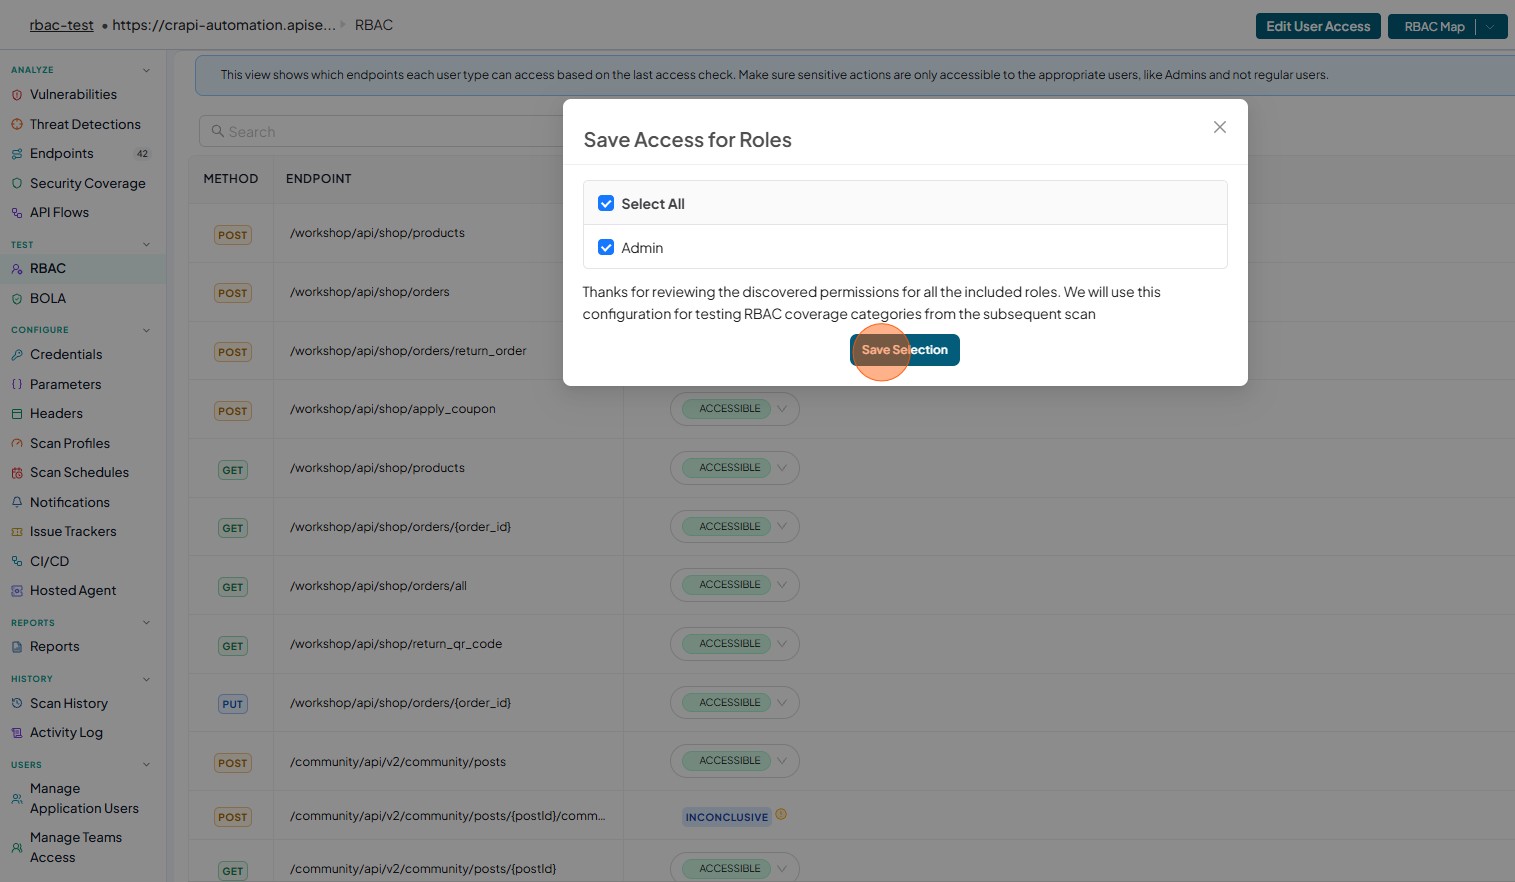
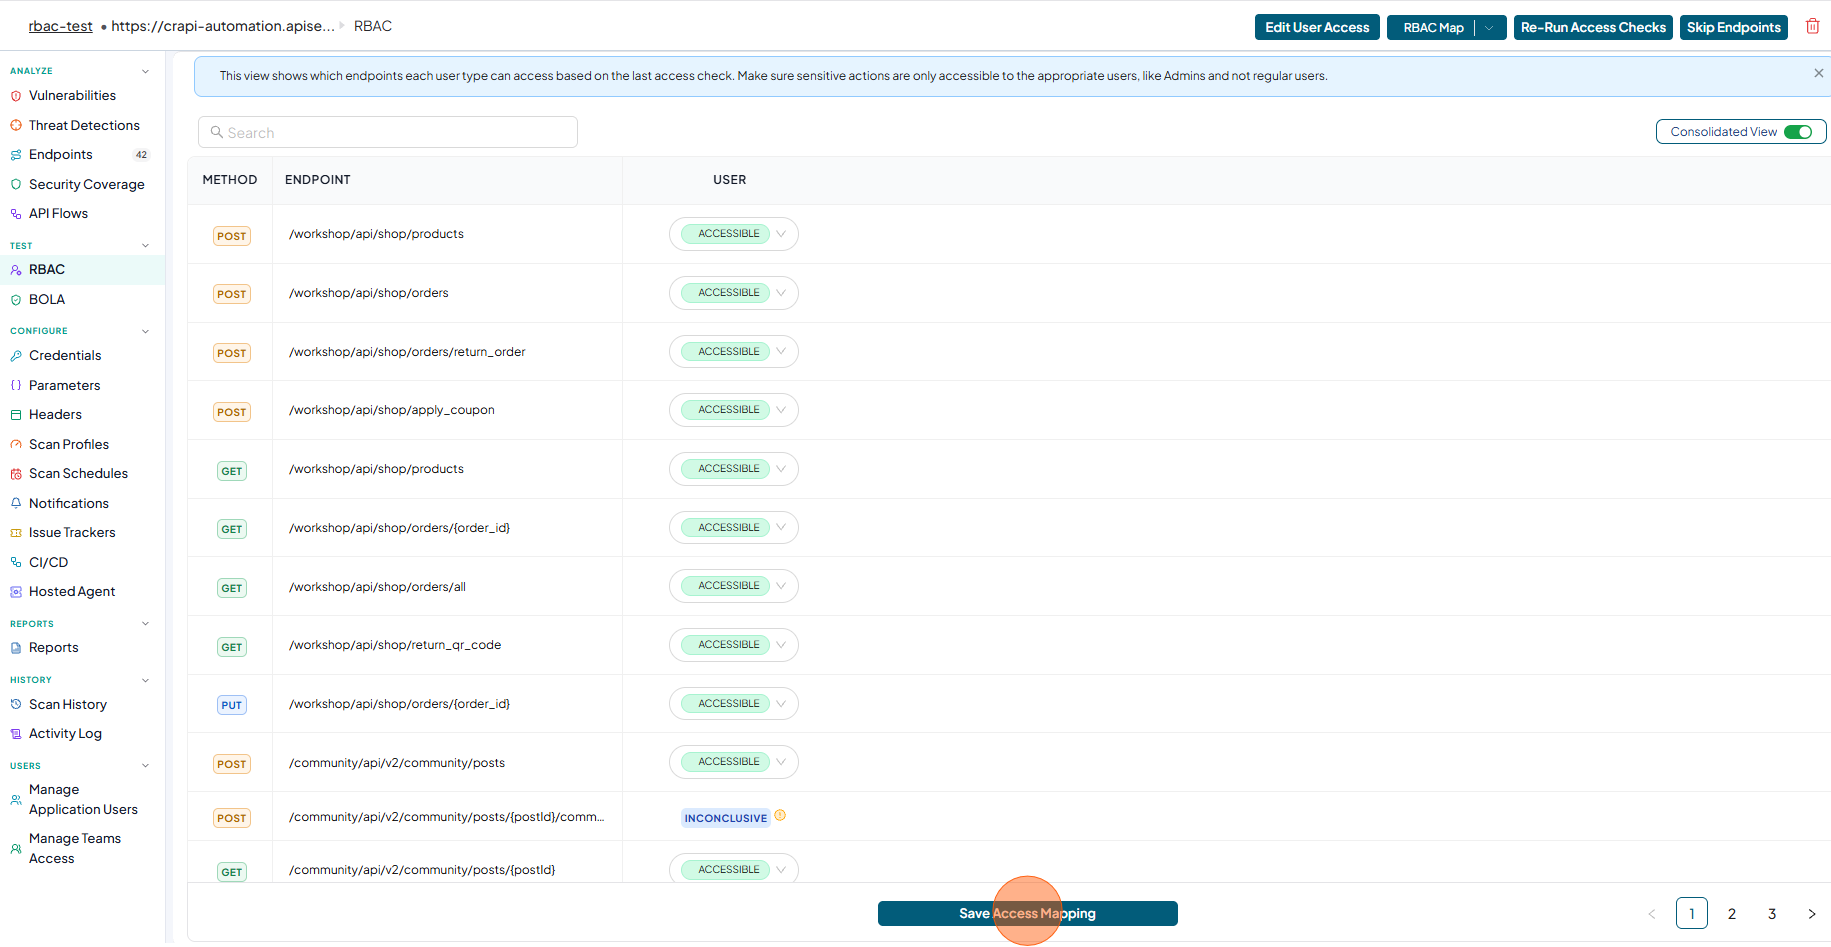
Click the Save Access Mapping button to confirm that the configuration be included for testing RBAC coverage categories from the subsequent scan
-
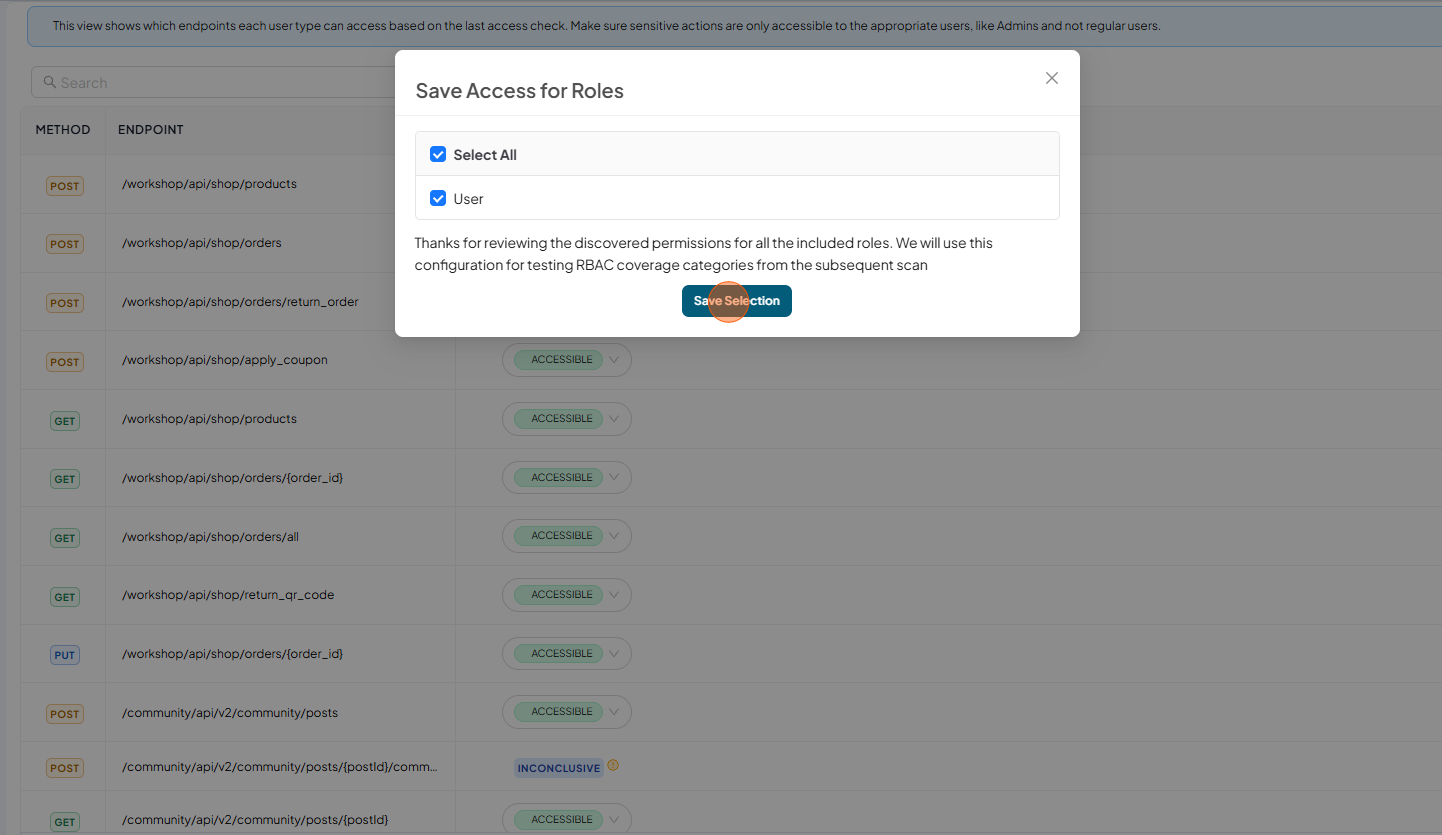
Select the Role and Click Save Selection
-
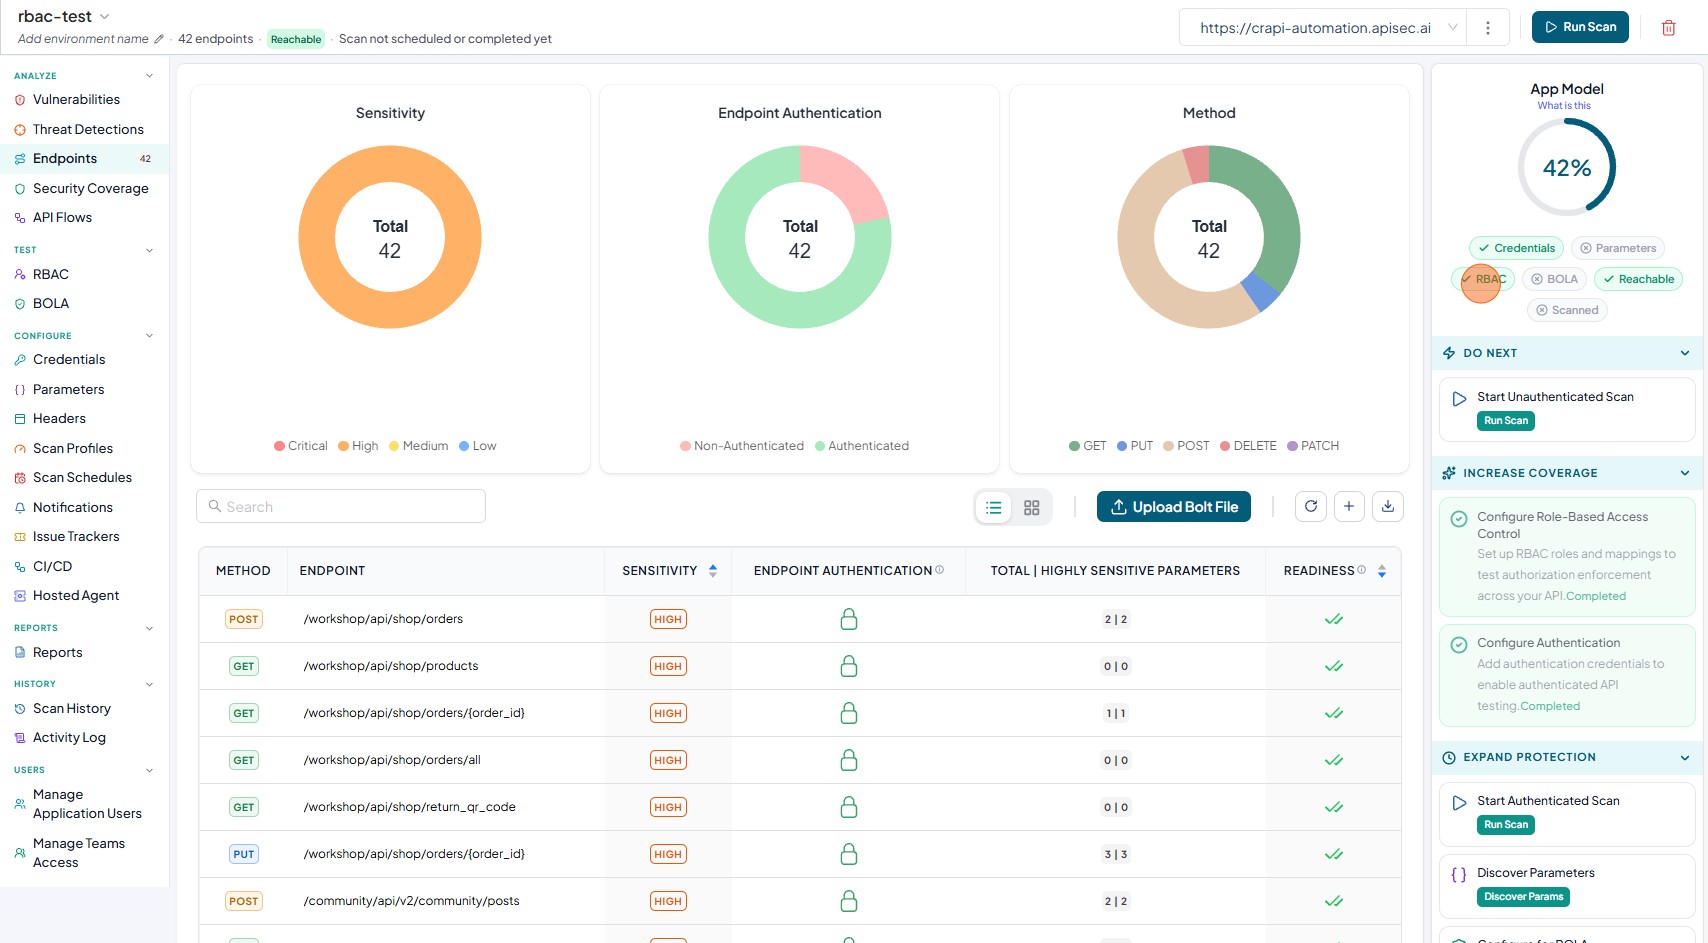
Confirm that the RBAC pill is displayed in green in the App Model section, indicating that RBAC has been successfully configured.
Edit User Access
The Edit User Access allows to modify the roles assigned to an existing credentials within the RBAC (Role-Based Access Control) and check the access permissions for the updated role.
-
Open your browser and visit: https://<your-tenant>.apisecapps.com
-
Click on Application
-
On the Application details page click RBAC from left navigation
-
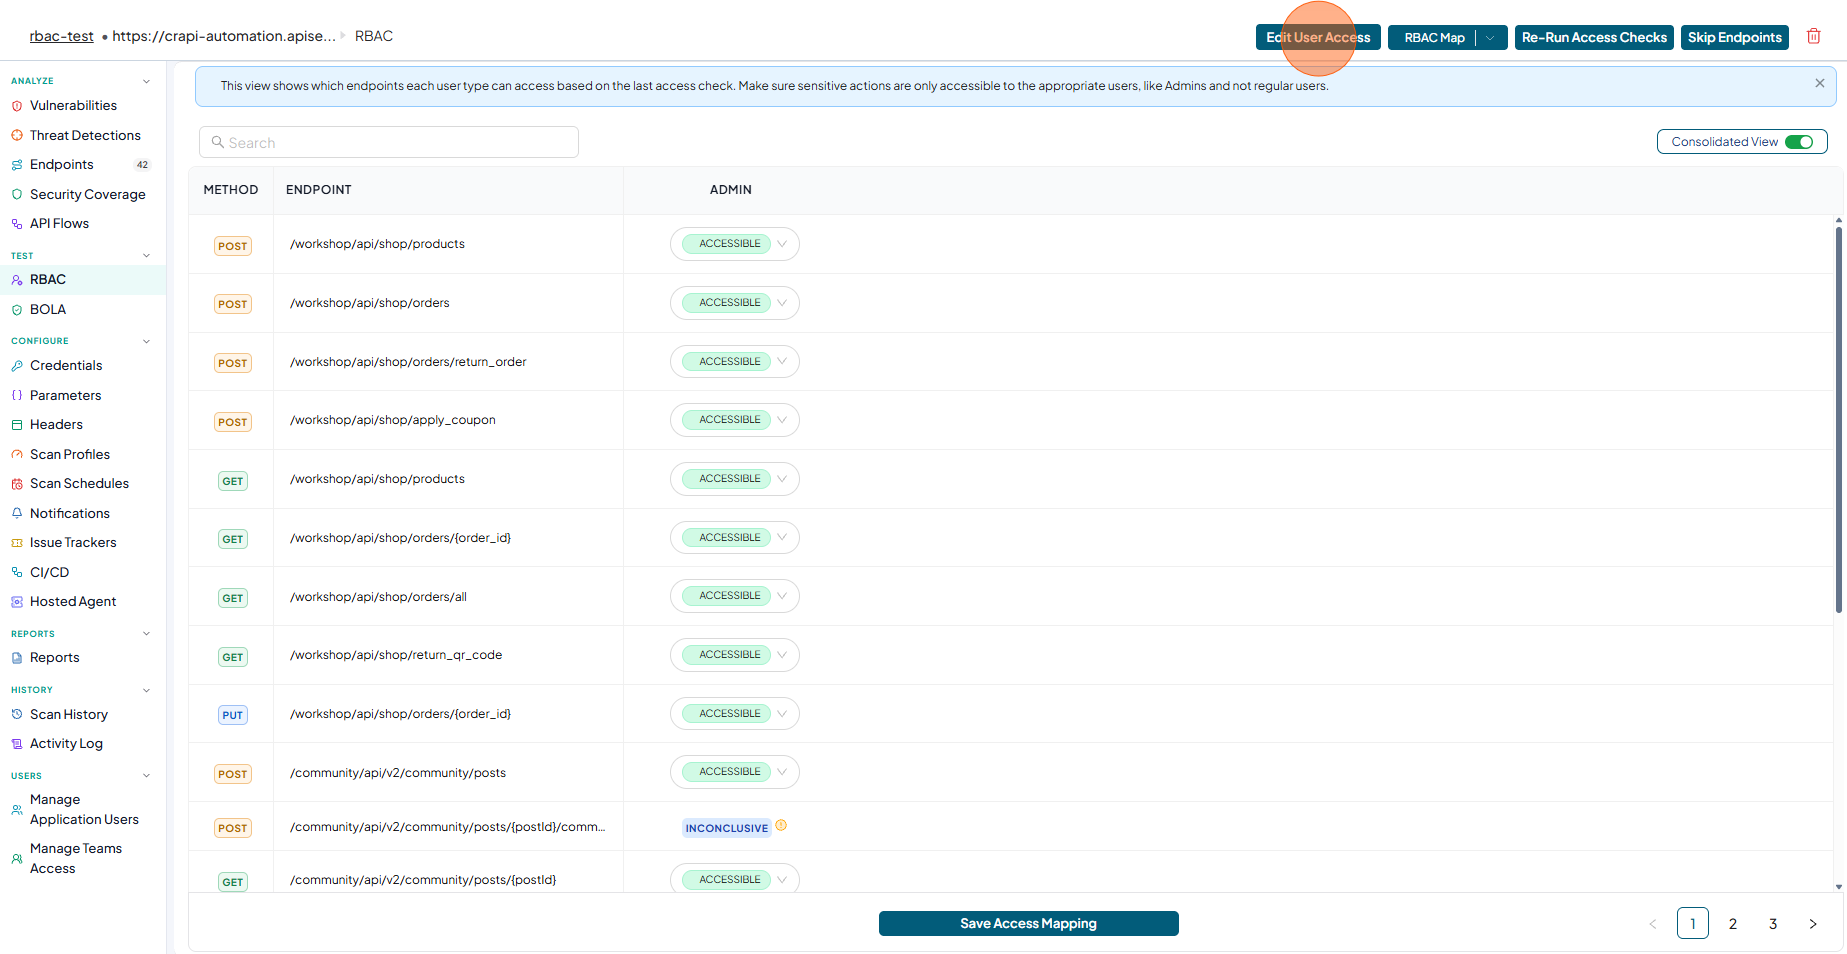
Click Edit User Access
-
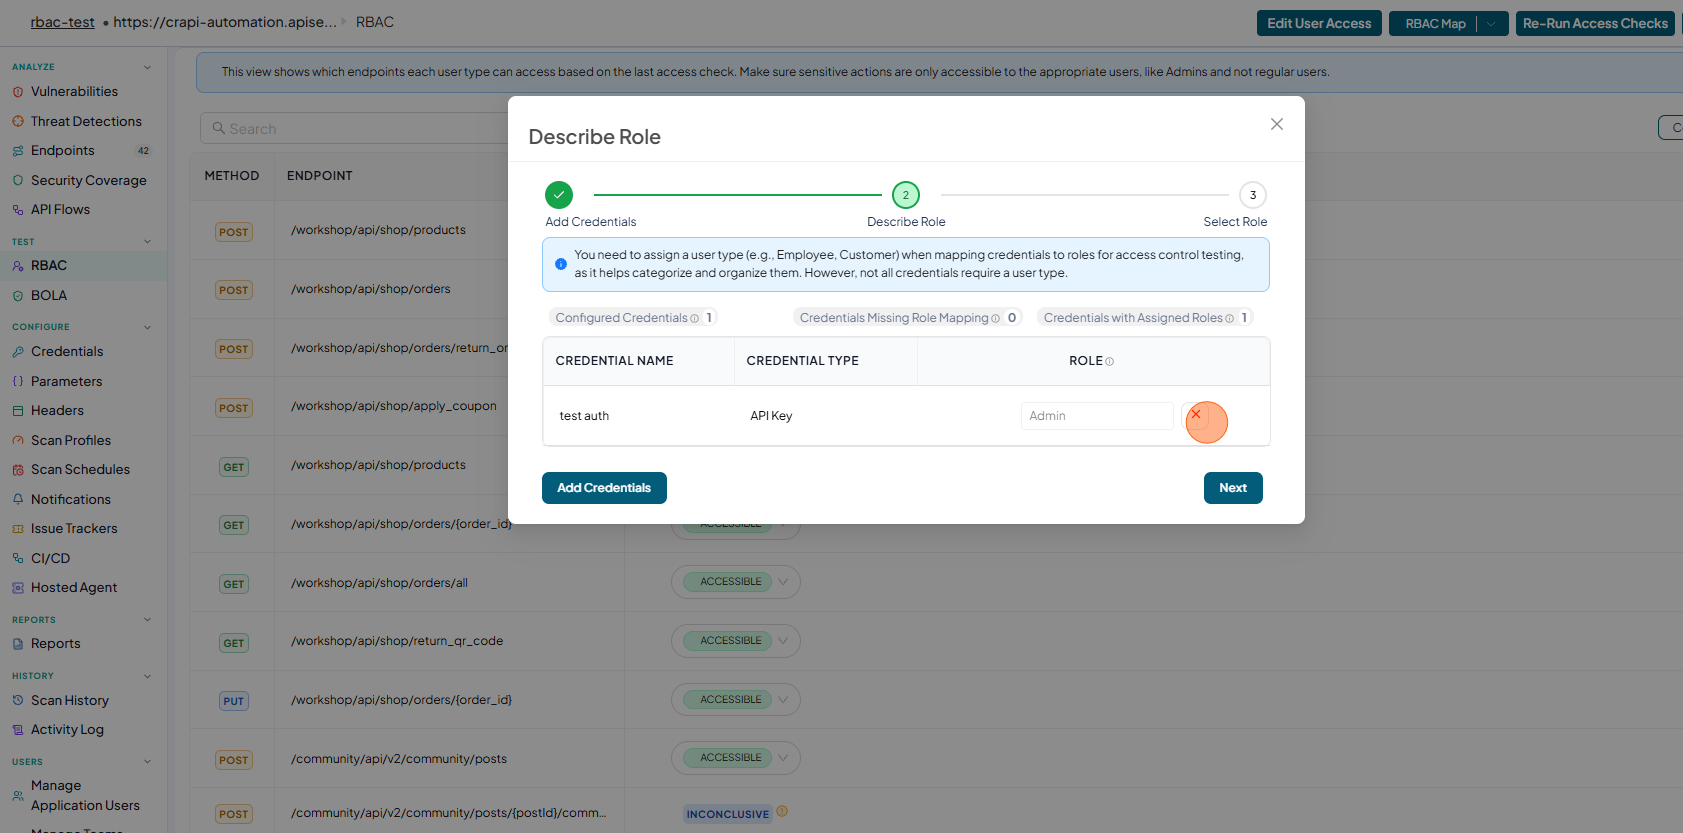
You can add new roles, delete existing roles, or update user roles. To update an existing user role, first delete the current User Role,
-
Update User role and Click Next
-
Click on Include in Access Test check box and Click Run Access Checks
-
Check updated User Role
-
Click Save Access Maapping
-
Select Role and Click Save Selection
Re-Run Access Checks
The Re-Run Access Checks allows to re test the selected role access permissons
-
Open your browser and visit: https://<your-tenant>.apisecapps.com
-
Click on Application
-
On the Application details page click RBAC from left navigation
-
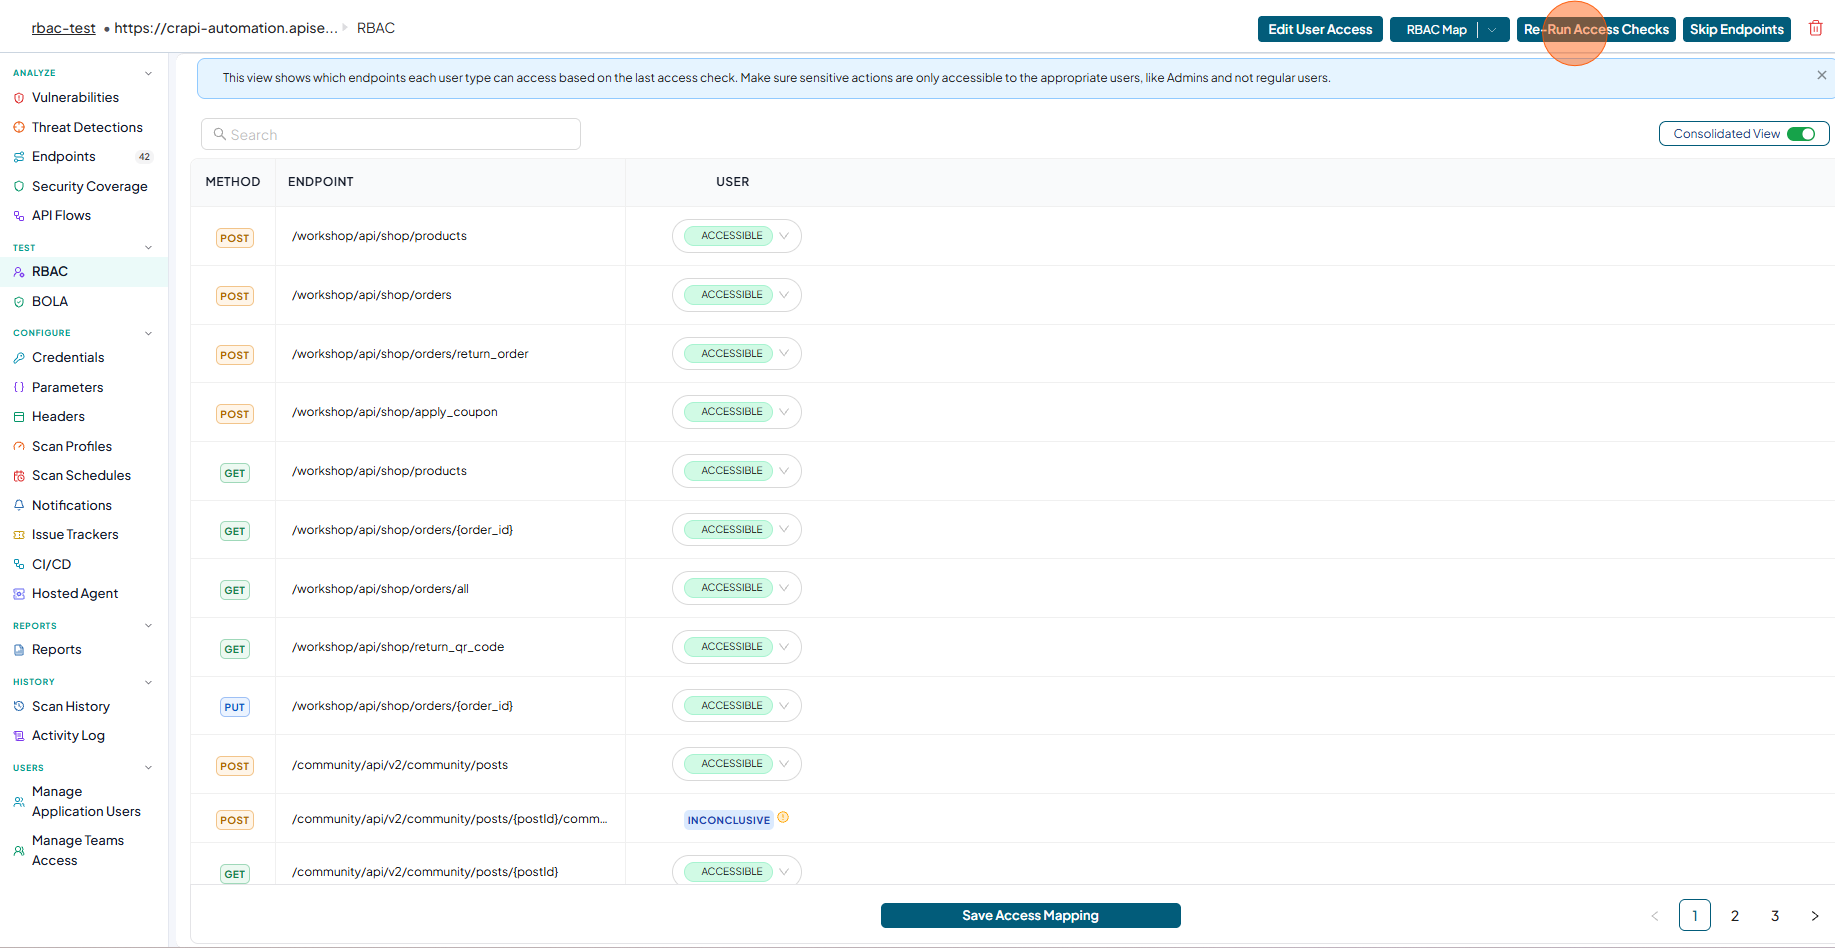
Click Re-Run Access Checks
-
Re check the permissions for the Selected user role.
Re-Test Permissions
The Re-Test permissions allows you to re test the selected endpoint
-
Open your browser and visit: https://<your-tenant>.apisecapps.com
-
Click on Application
-
On the Application details page click RBAC from left navigation
-
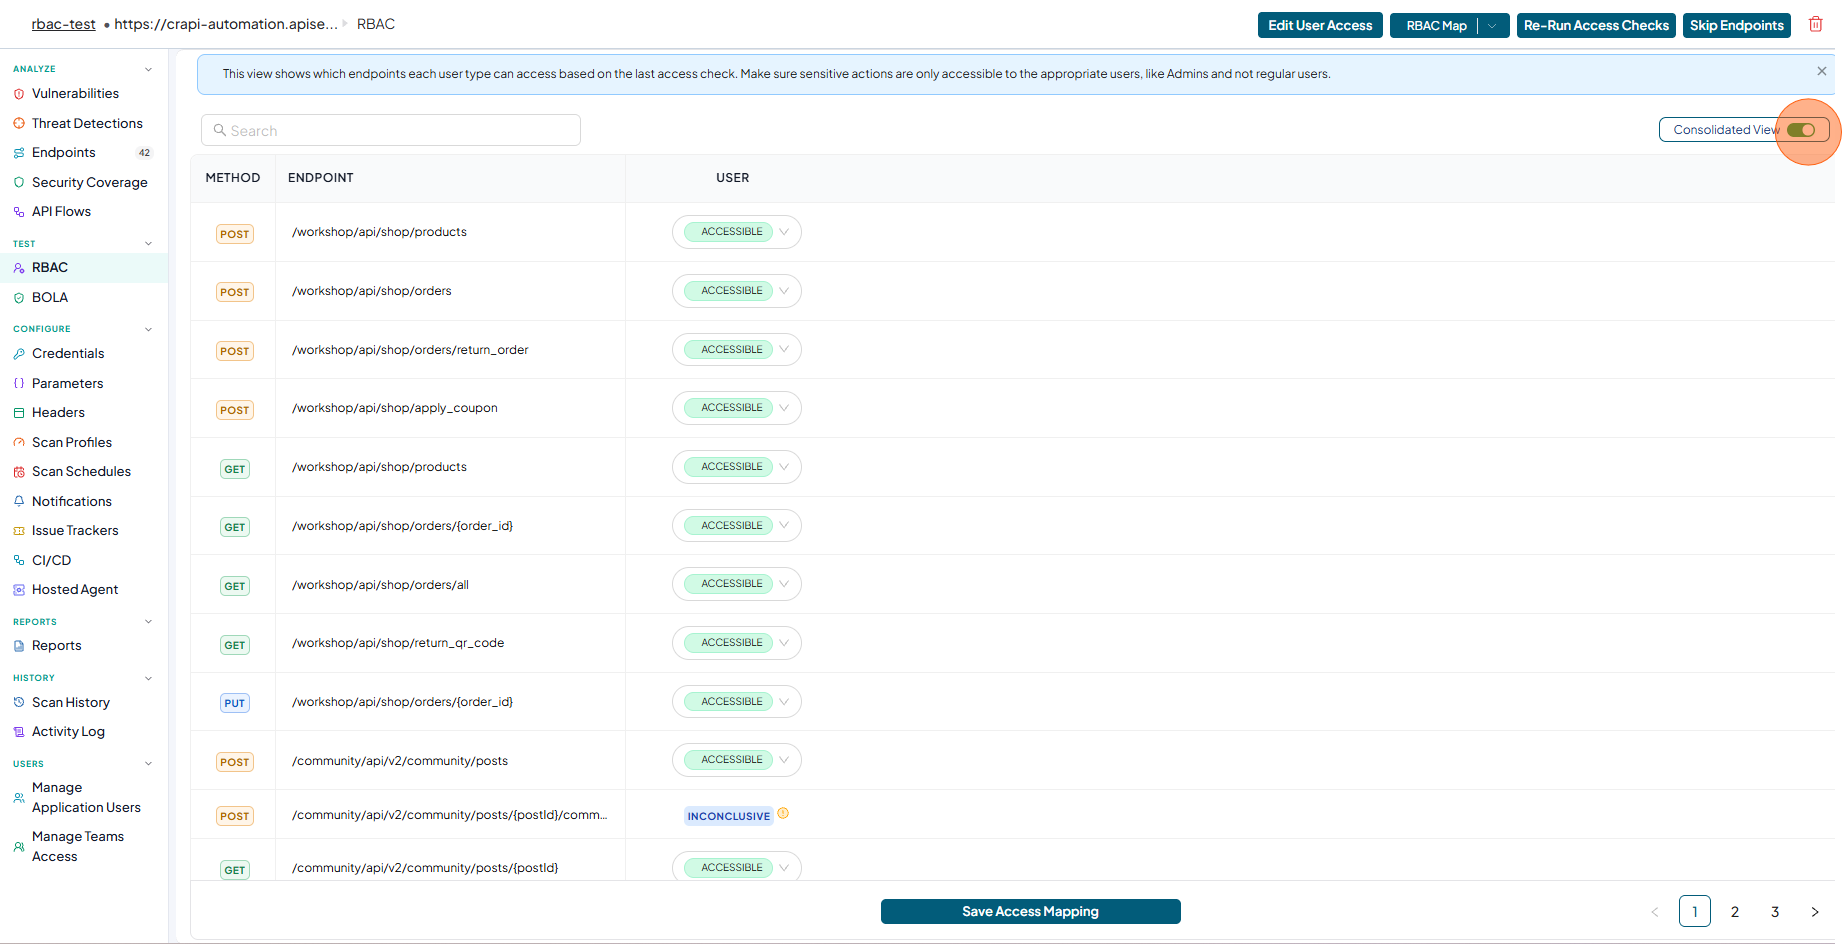
Disable the consolidated view
-
Click on options of the endpoint and select Retest Permissions to perform re testing the permissions for the selected endpoint.
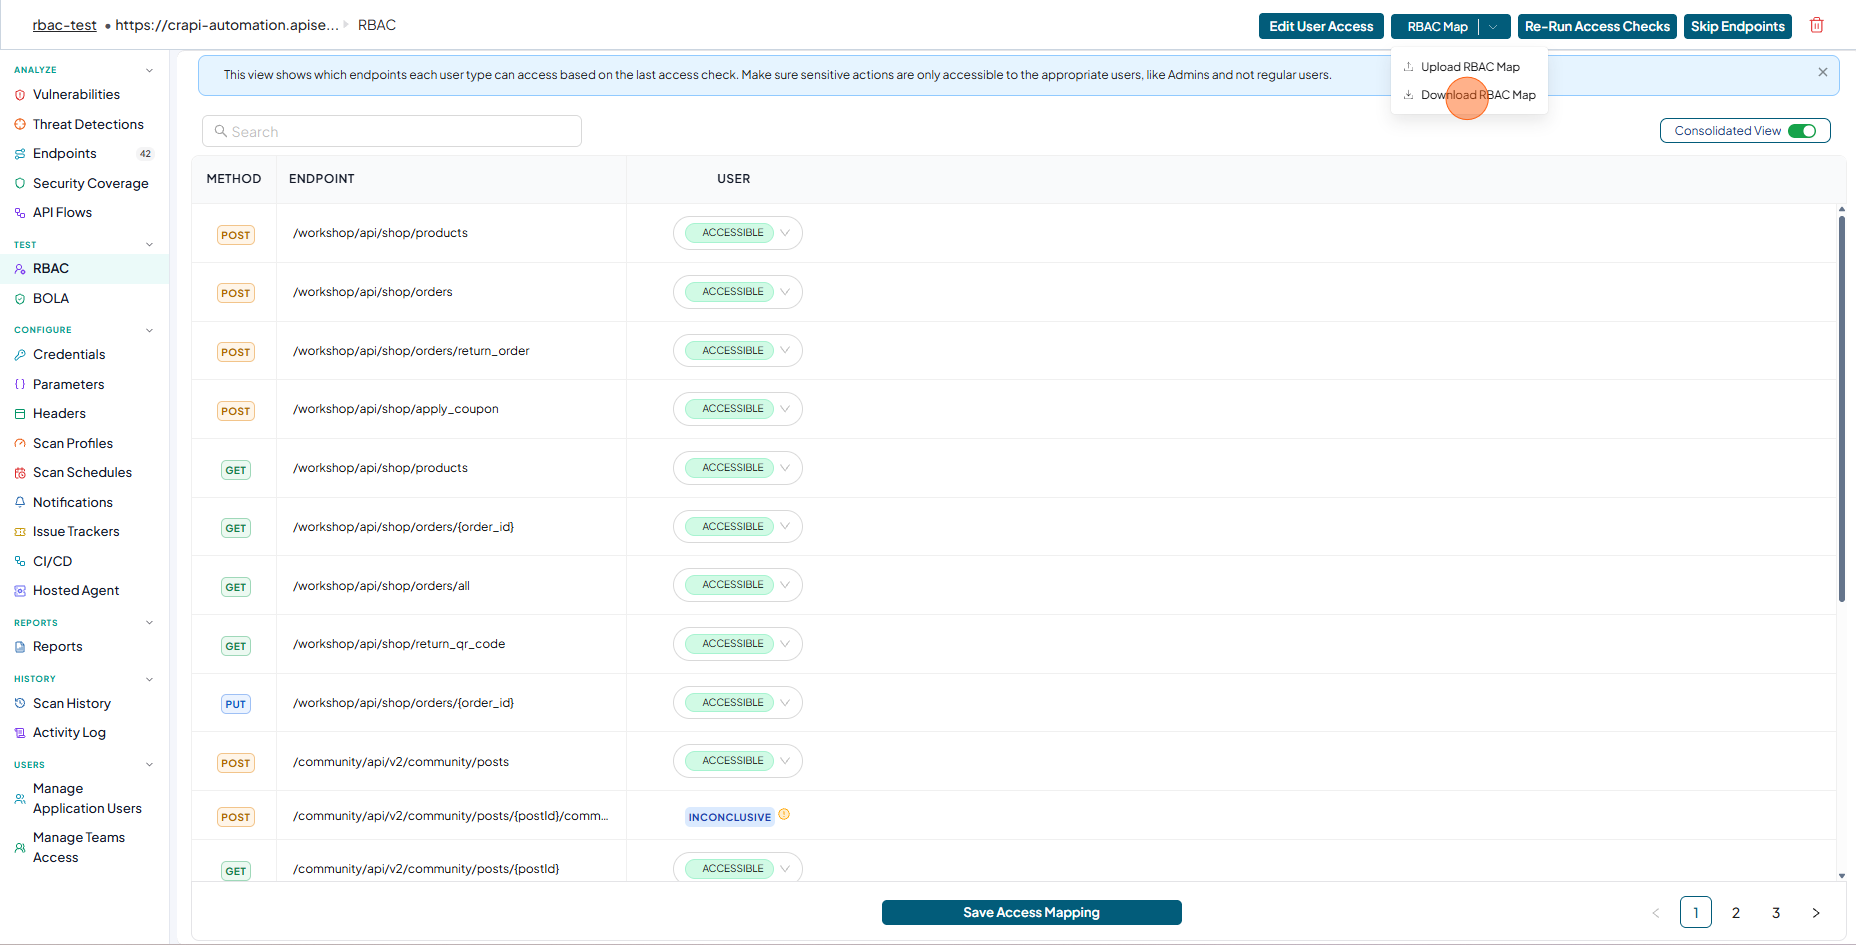
RBAC Map
The RBAC (Role-Based Access Control) Map helps you quickly verify which API endpoints are accessible for a selected role or roles.
-
Download RBAC Map
-
Open your browser and visit: https://<your-tenant>.apisecapps.com
-
Click on Application
-
On the Application details page click RBAC from left navigation
-
Click RBAC Map → Download RBAC Map. You can edit and update this CSV file and upload it to quickly verify role-based access permissions.
-
-
Upload RBAC Map
-
Open your browser and visit: https://<your-tenant>.apisecapps.com
-
Click on Application
-
On the Application details page click RBAC from left navigation
-
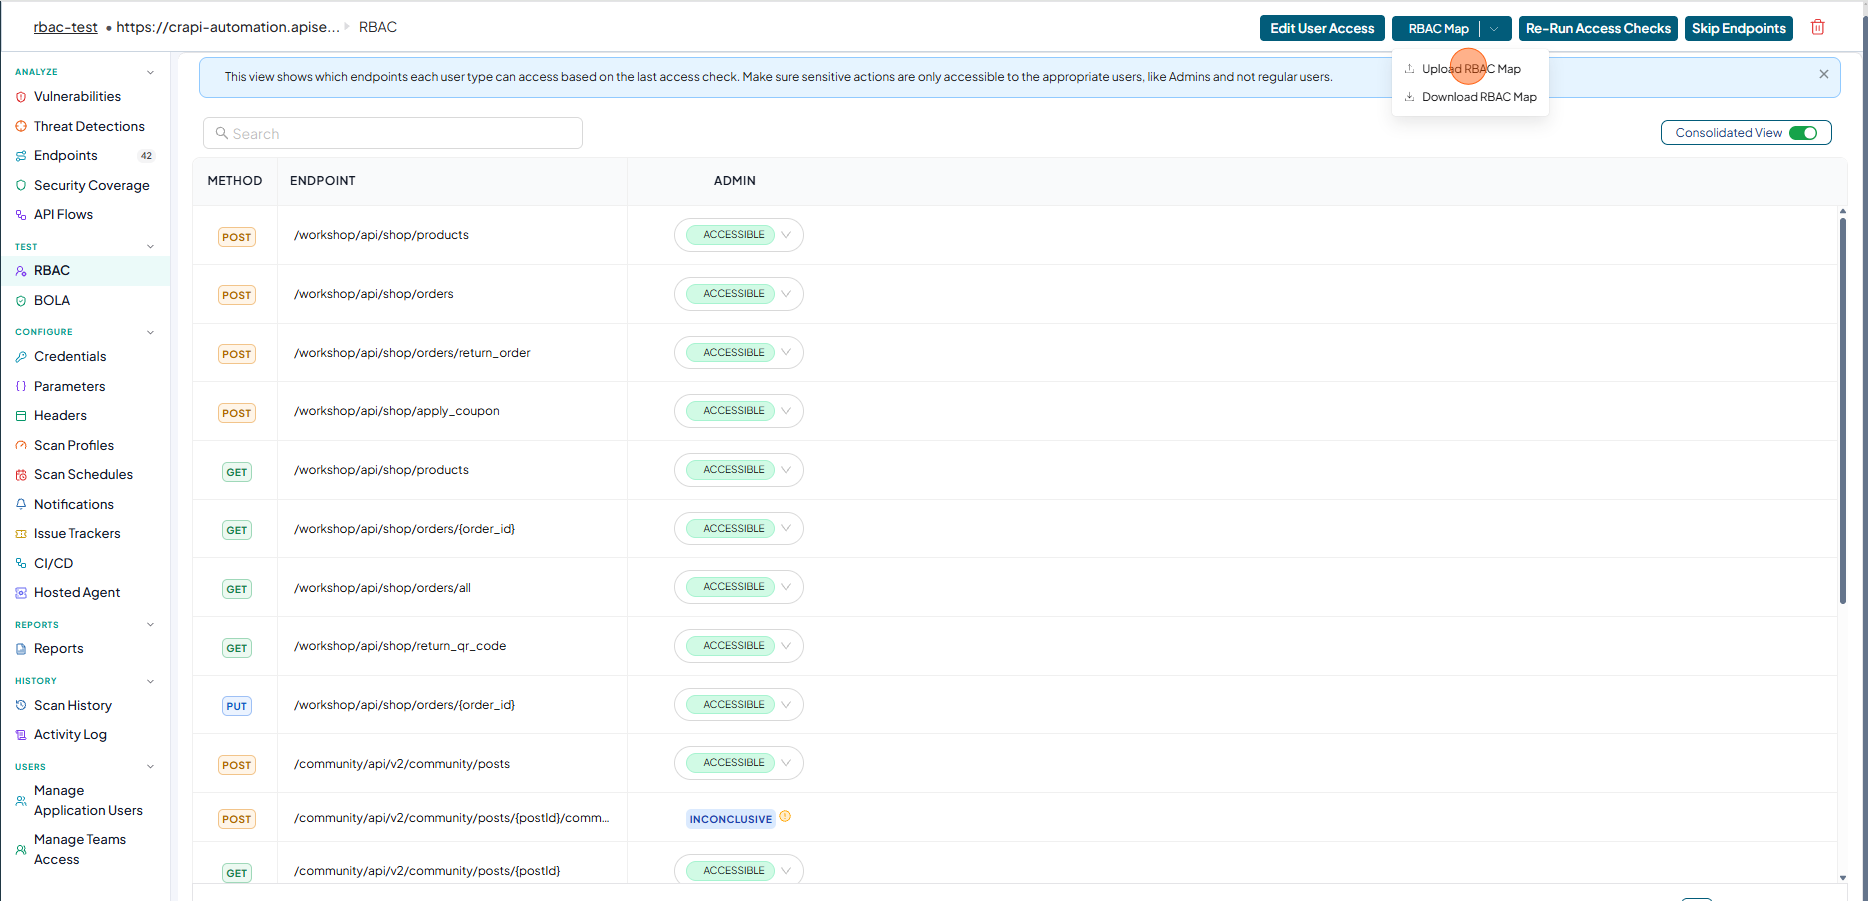
Click RBAC Map → Upload RBAC Map. You can edit and update this CSV file and upload it to quickly verify role-based access permissions.
-
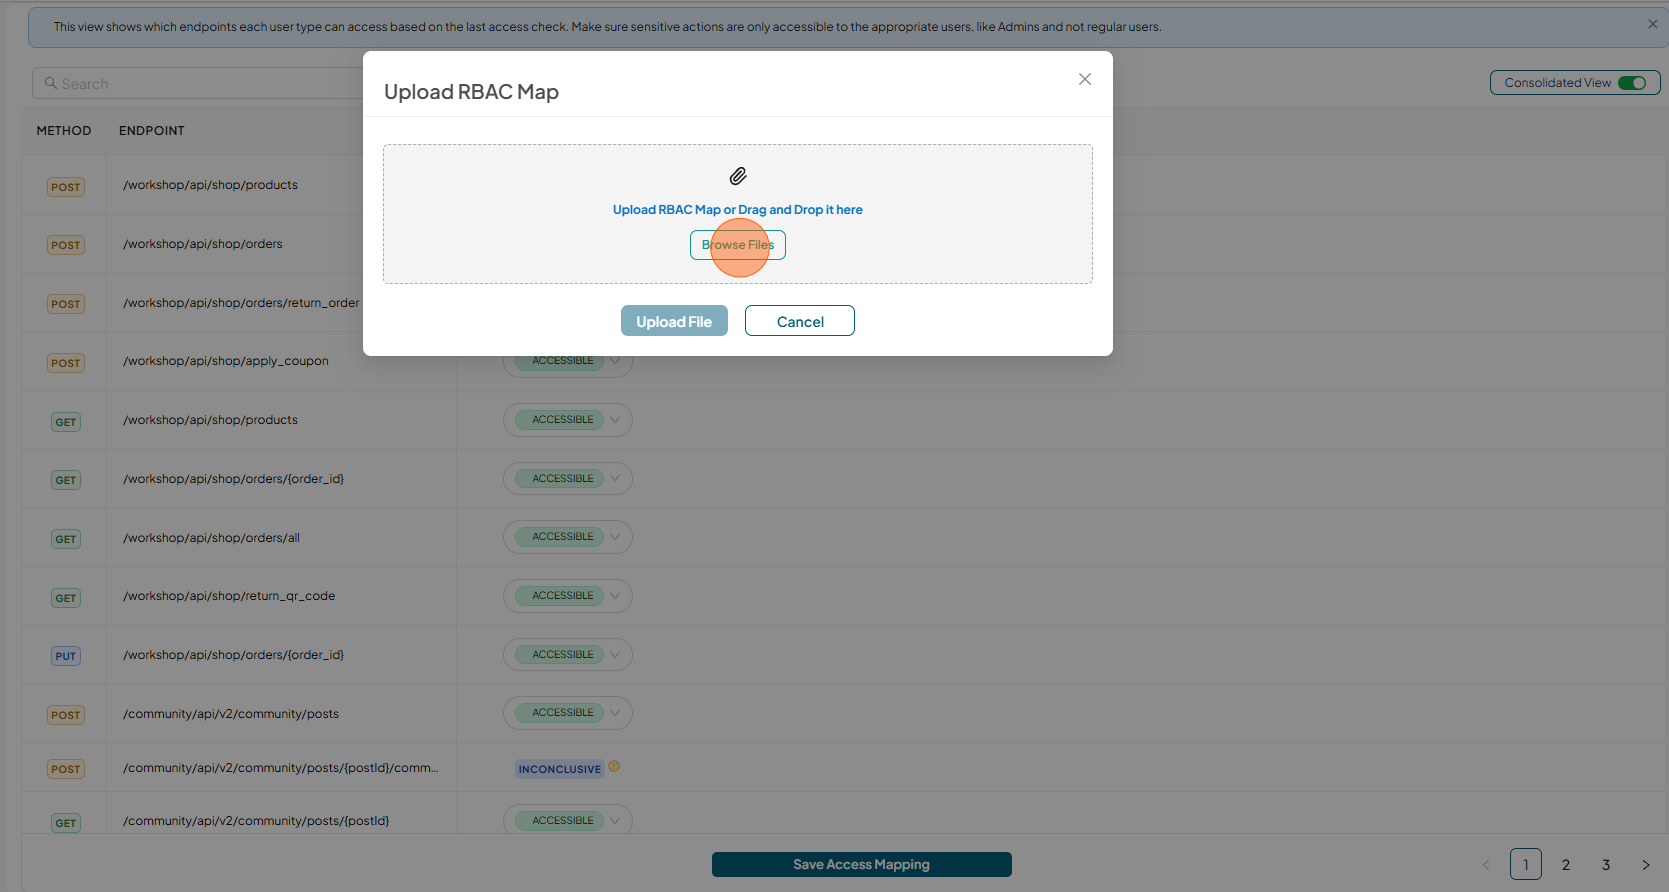
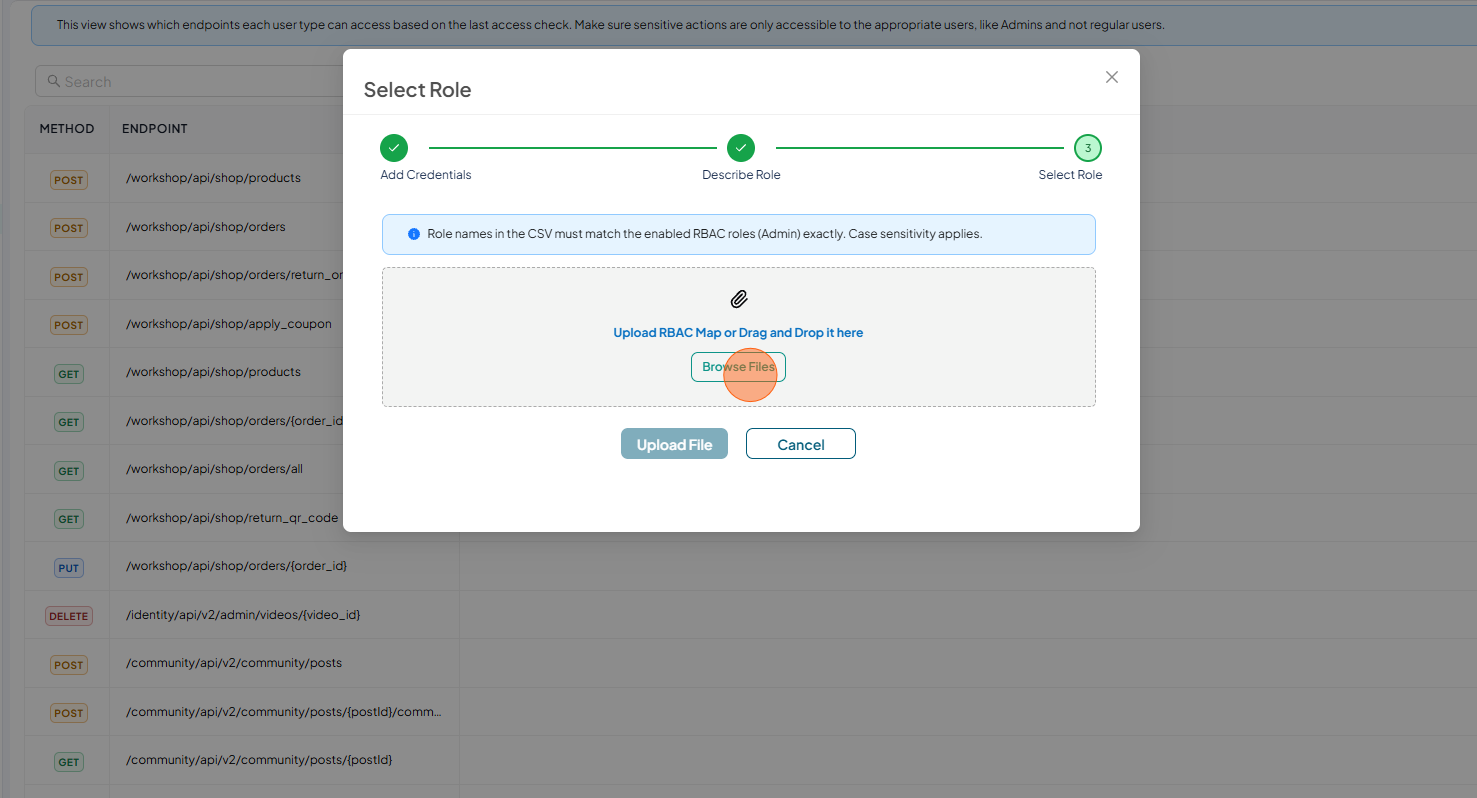
Click Browse files and upload the RBAC Map
-
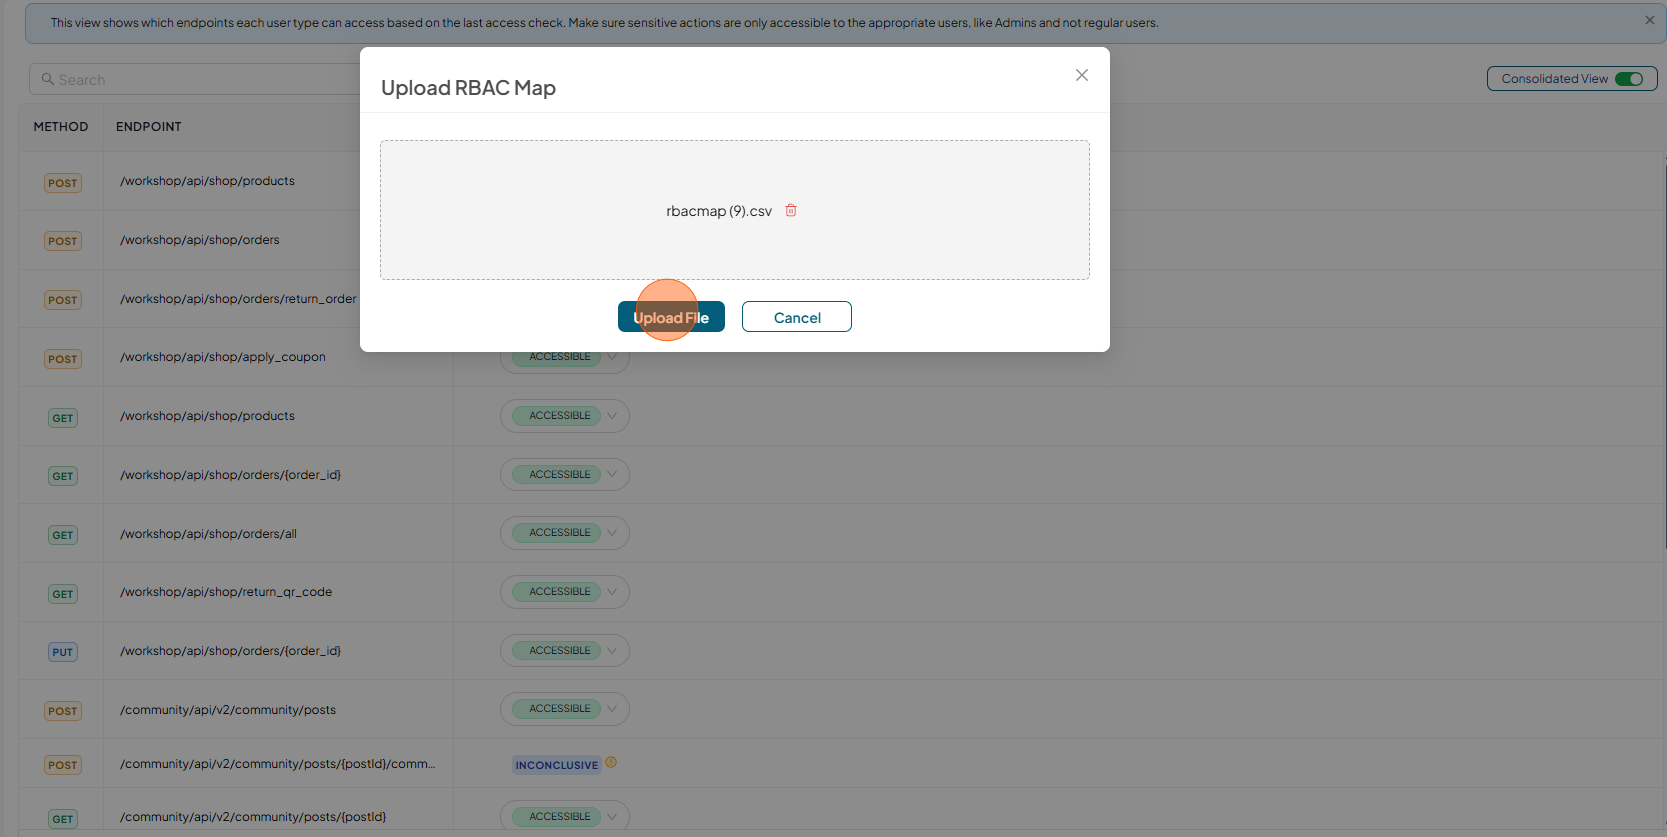
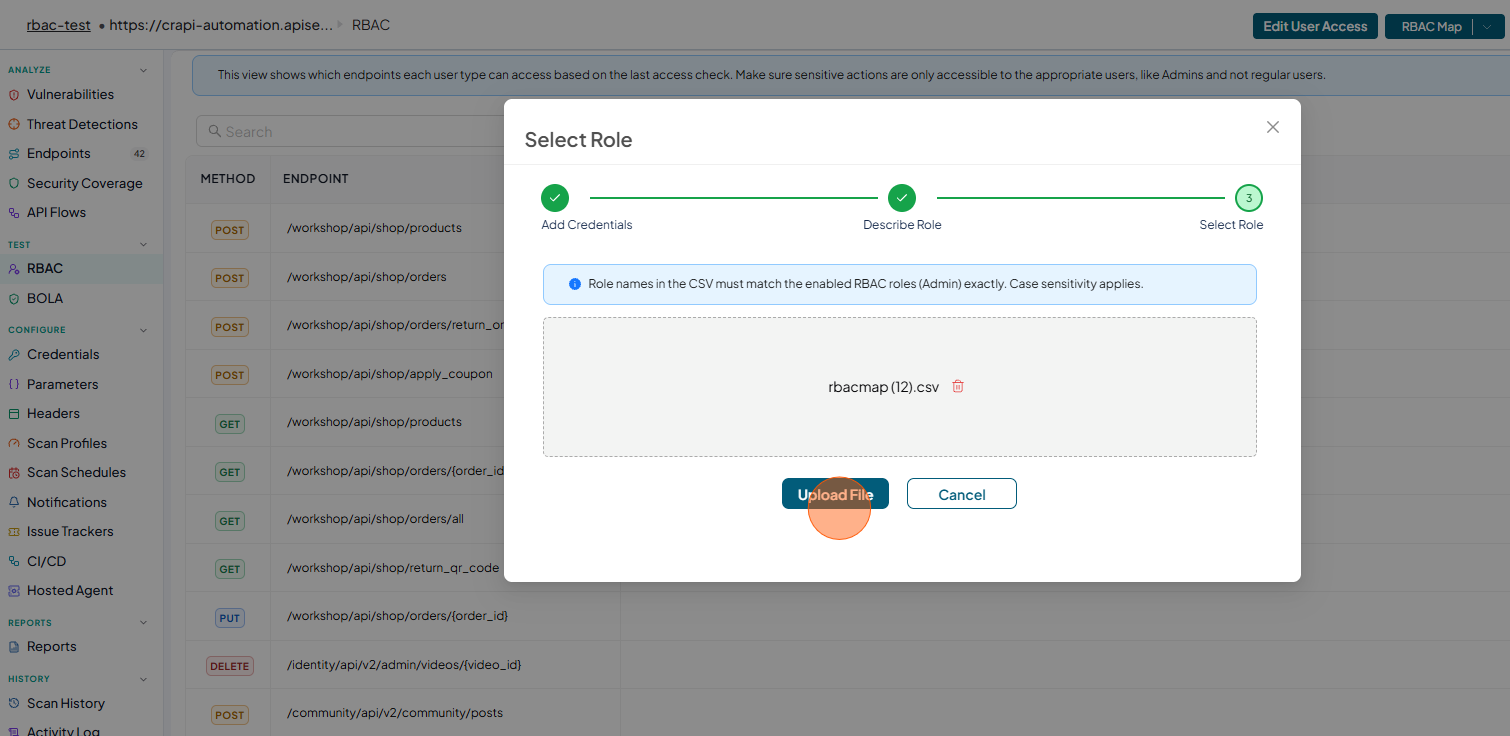
Click Upload File
-
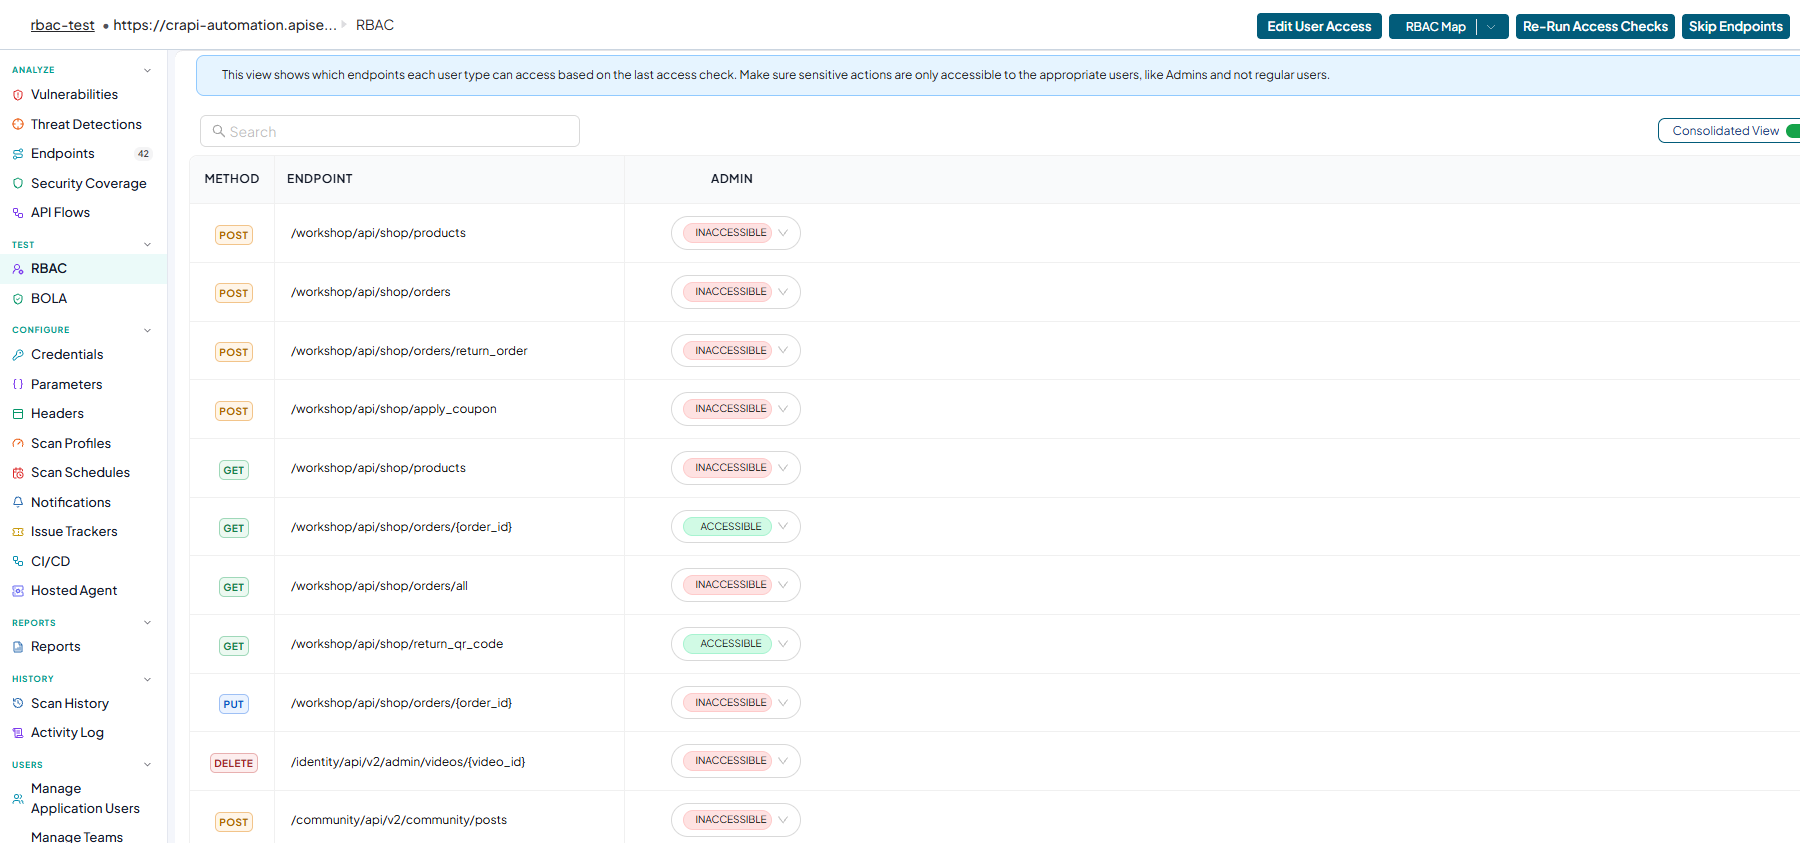
Verify and confirm the Access Permissions for each endpoint

-
-
Upload RBAC Map During Configuration
You can also configure RBAC in a new application using a RBAC Map CSV file.
-
Open your browser and visit: https://<your-tenant>.apisecapps.com
-
Click on Application
-
On the Application details page click RBAC from left navigation
-
Click the Set Up User Access
-
Enter the Credential Name and select Credential Method and enter the required values
-
click Save Credentials to create an authentication
-
You will be prompted to enter a "Role Name" for the authentication that you have just created. Enter the role name.
-
Click Next
-
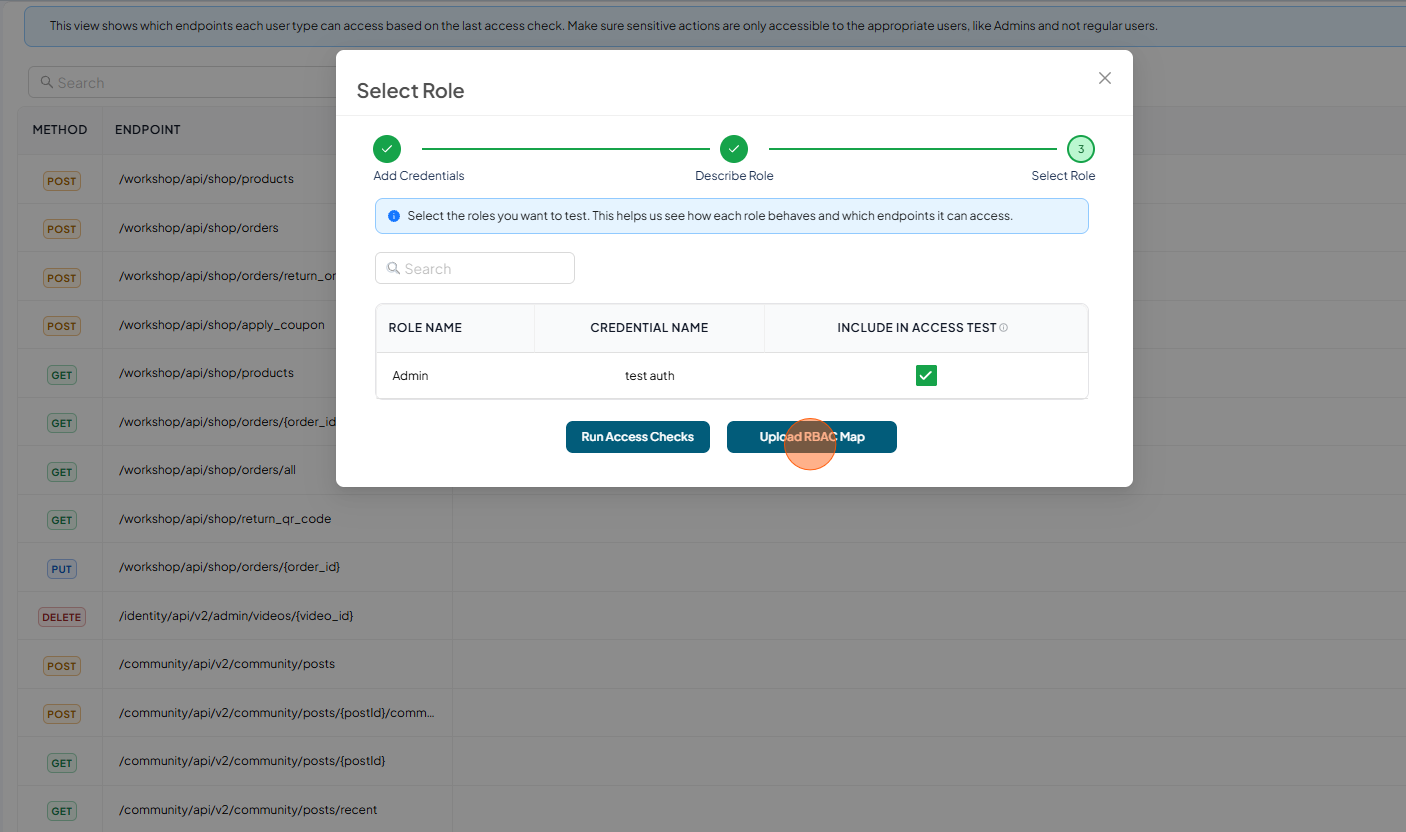
Select the role by checking the checkbox for the corresponding role under the Include In Access Test column
-
Click Upload RBAC Map
-
Click Browse files and upload the RBAC Map
-
Click Upload File
-
Verify and confirm the Access Permissions for each endpoint
-
Viewing RBAC endpoint logs
To check logs for each endpoint, switch off Consolidated View.
-
Open your browser and visit: https://<your-tenant>.apisecapps.com
-
Click on Application
-
On the Application details page click RBAC from left navigation
-
Switch off Consolidate View
-
Check Logs
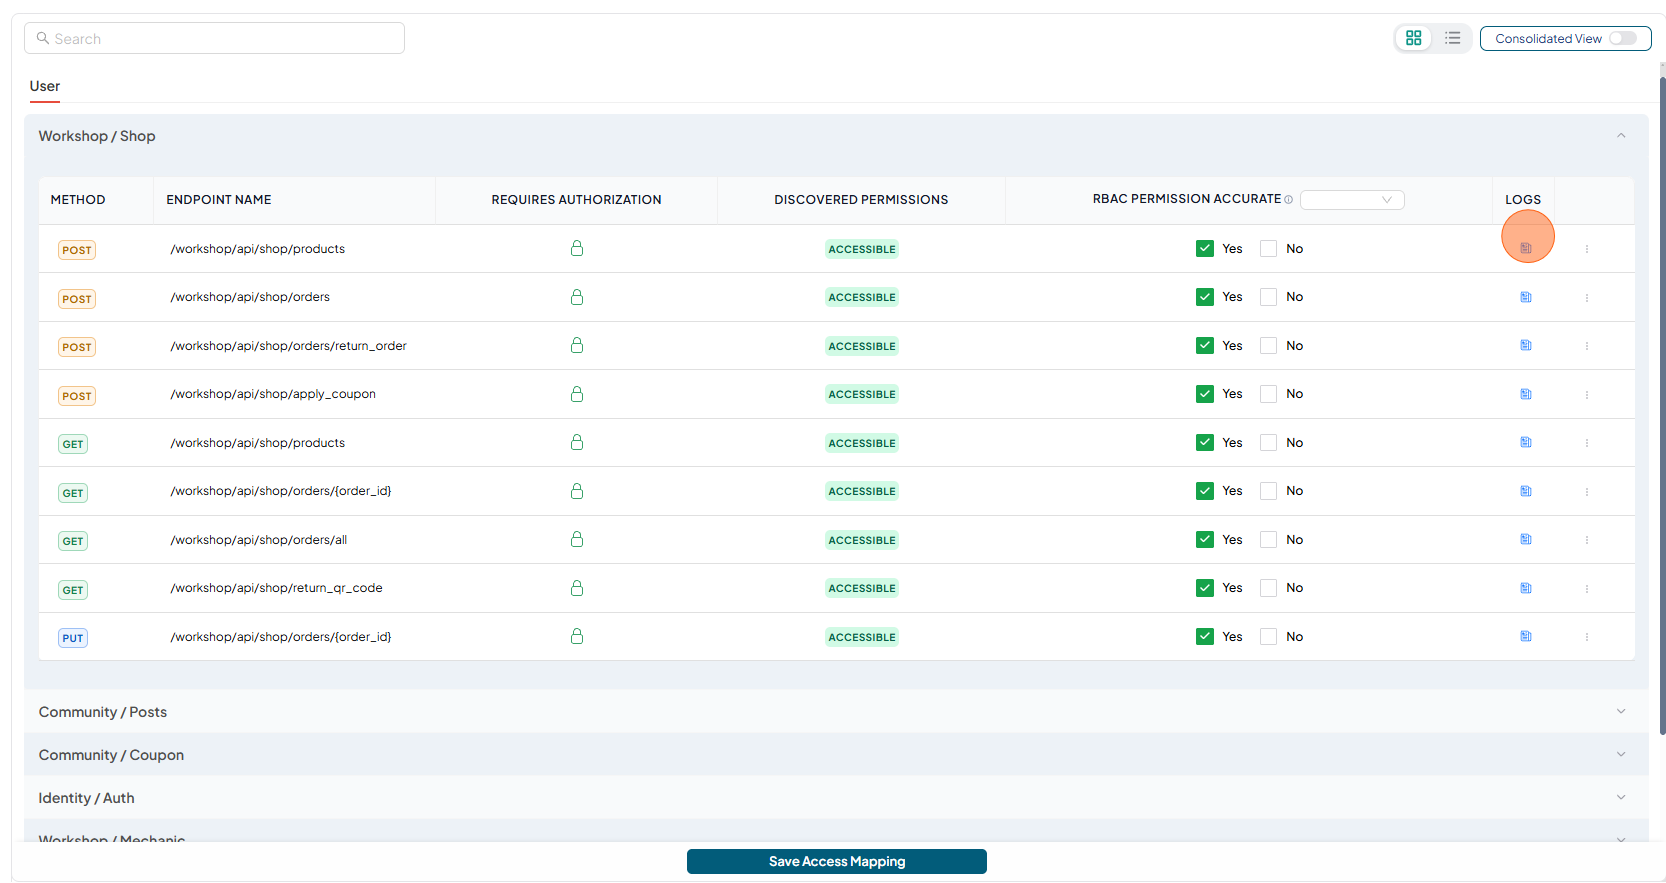 note
noteThese logs are only visible after running access checks.
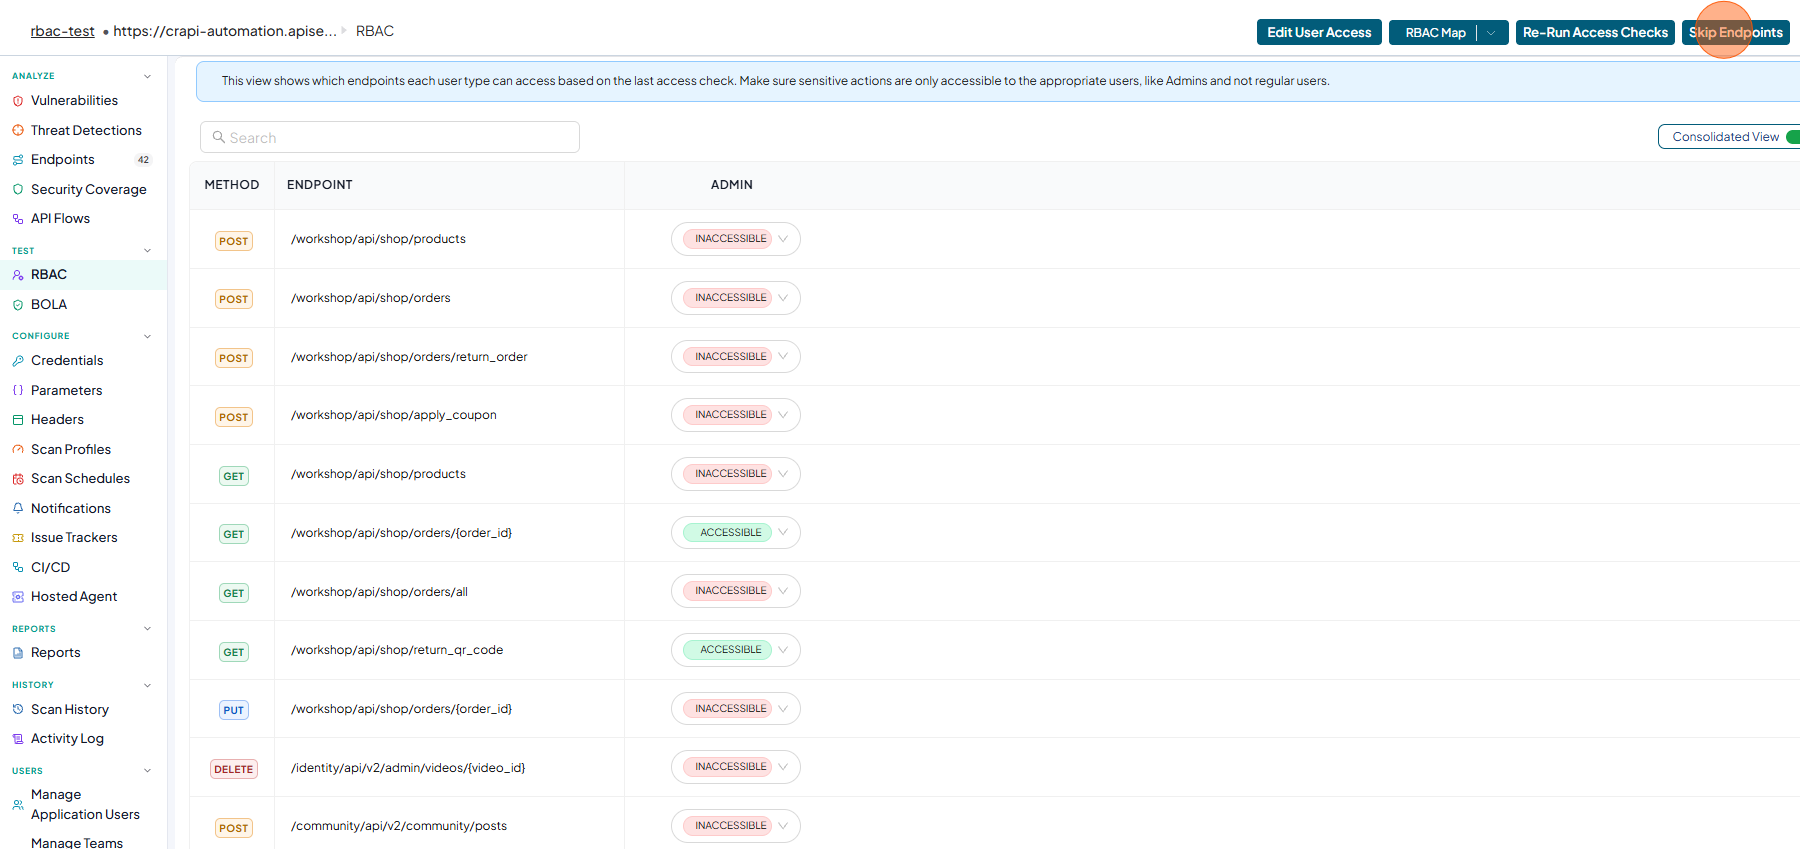
Skip Endpoints for RBAC
If you manage APIs with session-sensitive endpoints such as logout, token revocation, or session invalidation. These endpoints can interrupt active sessions if they are executed during RBAC testing.
You can now exclude these endpoints from RBAC access checks to avoid unintended session termination.
By skipping session-sensitive endpoints, RBAC testing:
- Keeps your session active during the entire test run
- Delivers accurate and trustworthy RBAC results
- Avoids false access failures caused by session invalidation
- Saves time by reducing repeated tests and manual troubleshooting
To Skip Endpoints
-
Open your browser and visit: https://<your-tenant>.apisecapps.com
-
Click on Application
-
On the Application details page click RBAC from left navigation
-
Click on Skip Endpoints
-
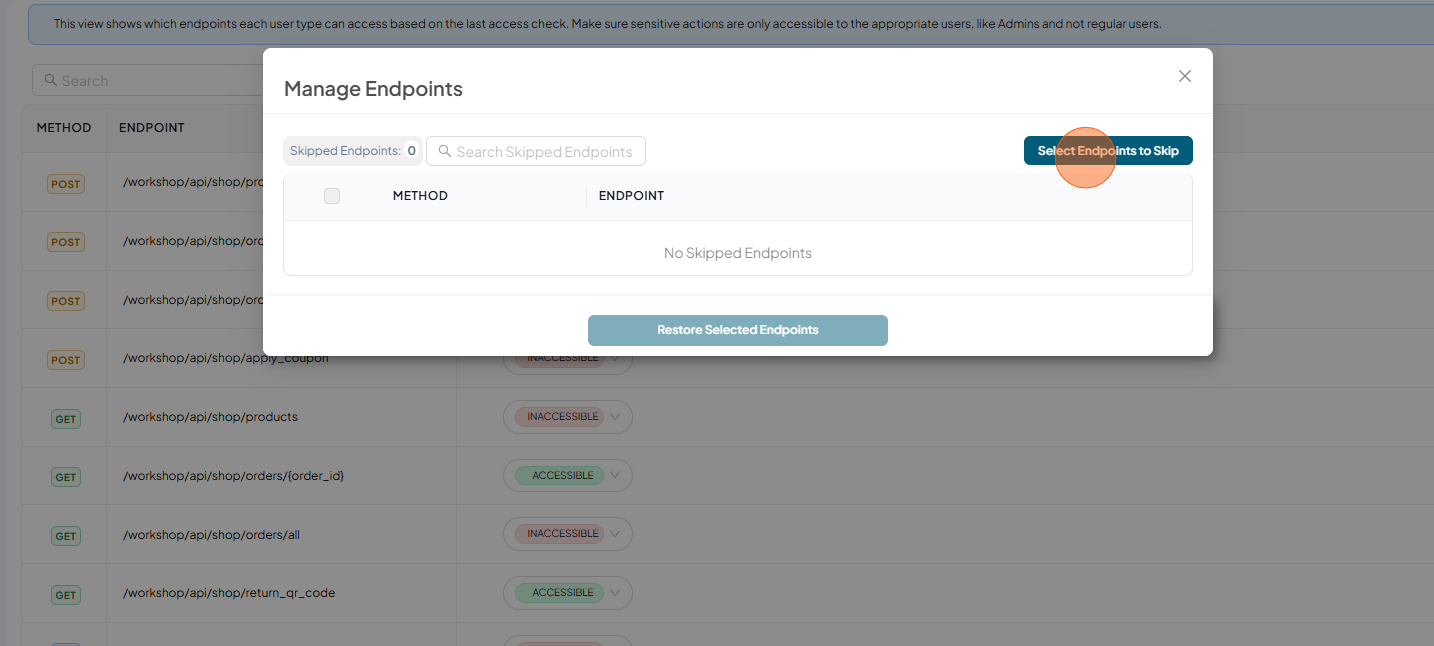
Click on Select Endpoints to Skip
-
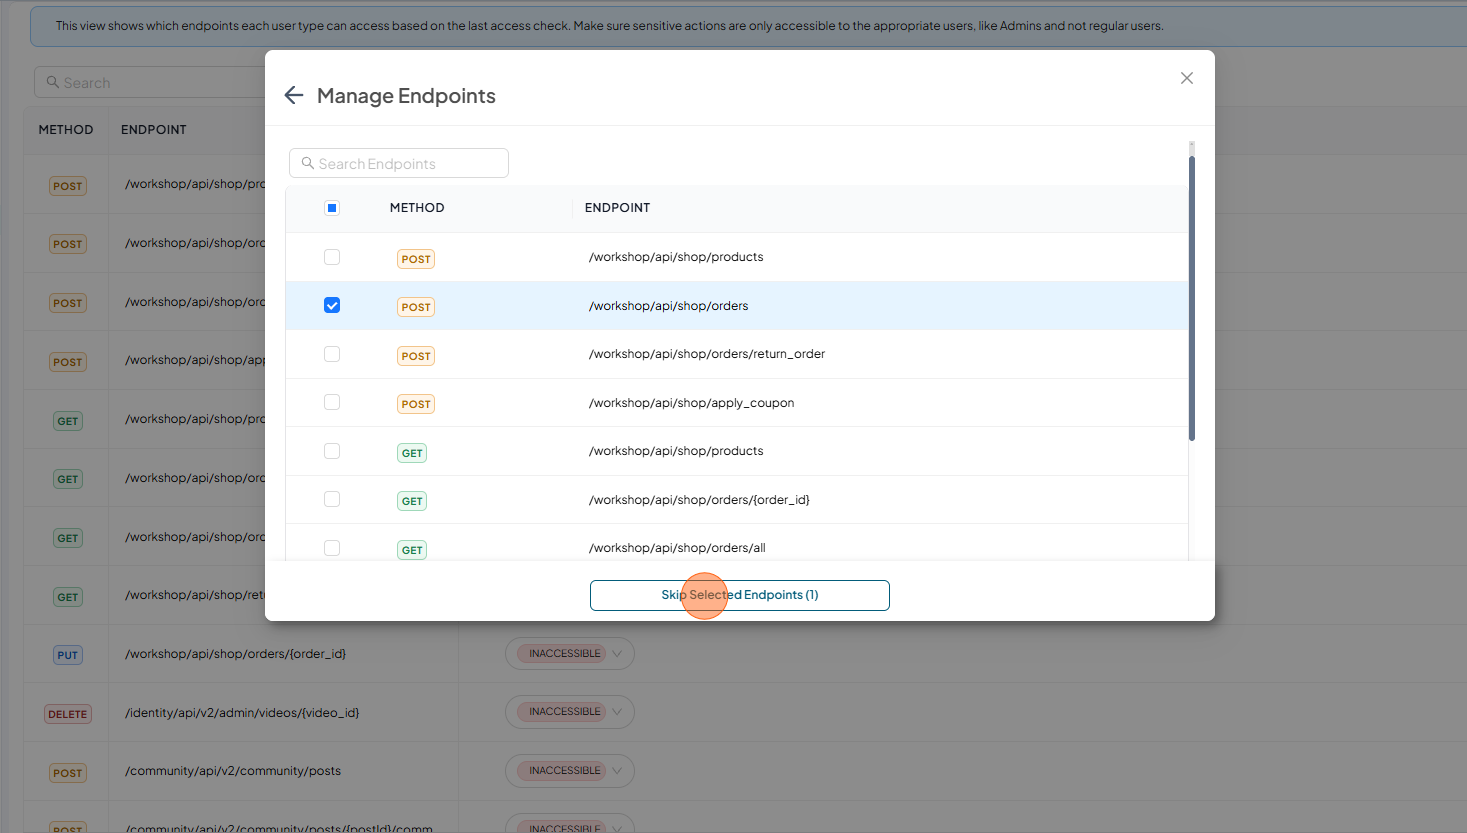
Select the endpoint and click on Skip Selected Endpoints
-
View the Skipped endpoints list
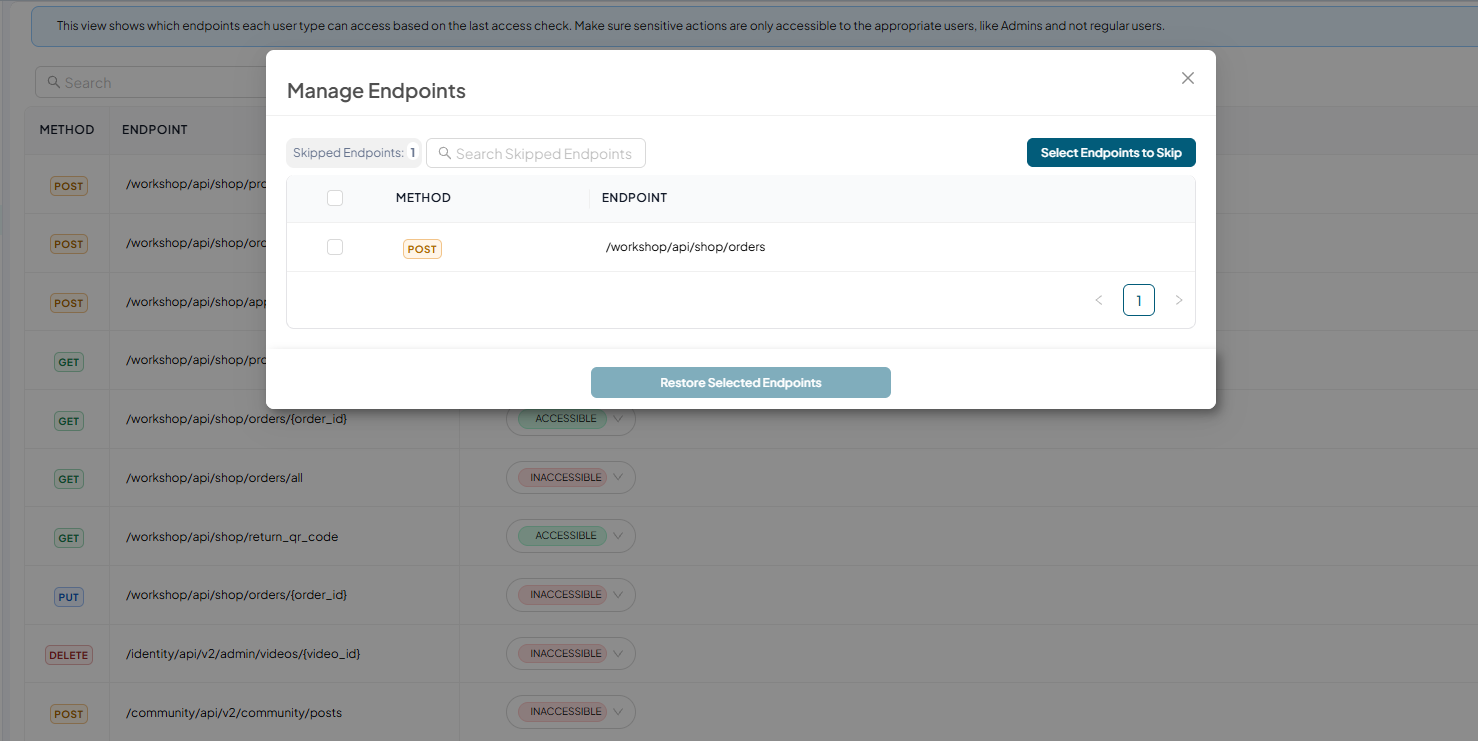
Restore Skipped Endpoints
To restore skipped endpoints
-
Open your browser and visit: https://<your-tenant>.apisecapps.com
-
Click on Application
-
On the Application details page click RBAC from left navigation
-
Click on Skip Endpoints
-
Skipped Endpoints list
-
Select the endpoint to restore and Click on Restore Selected Endpoints
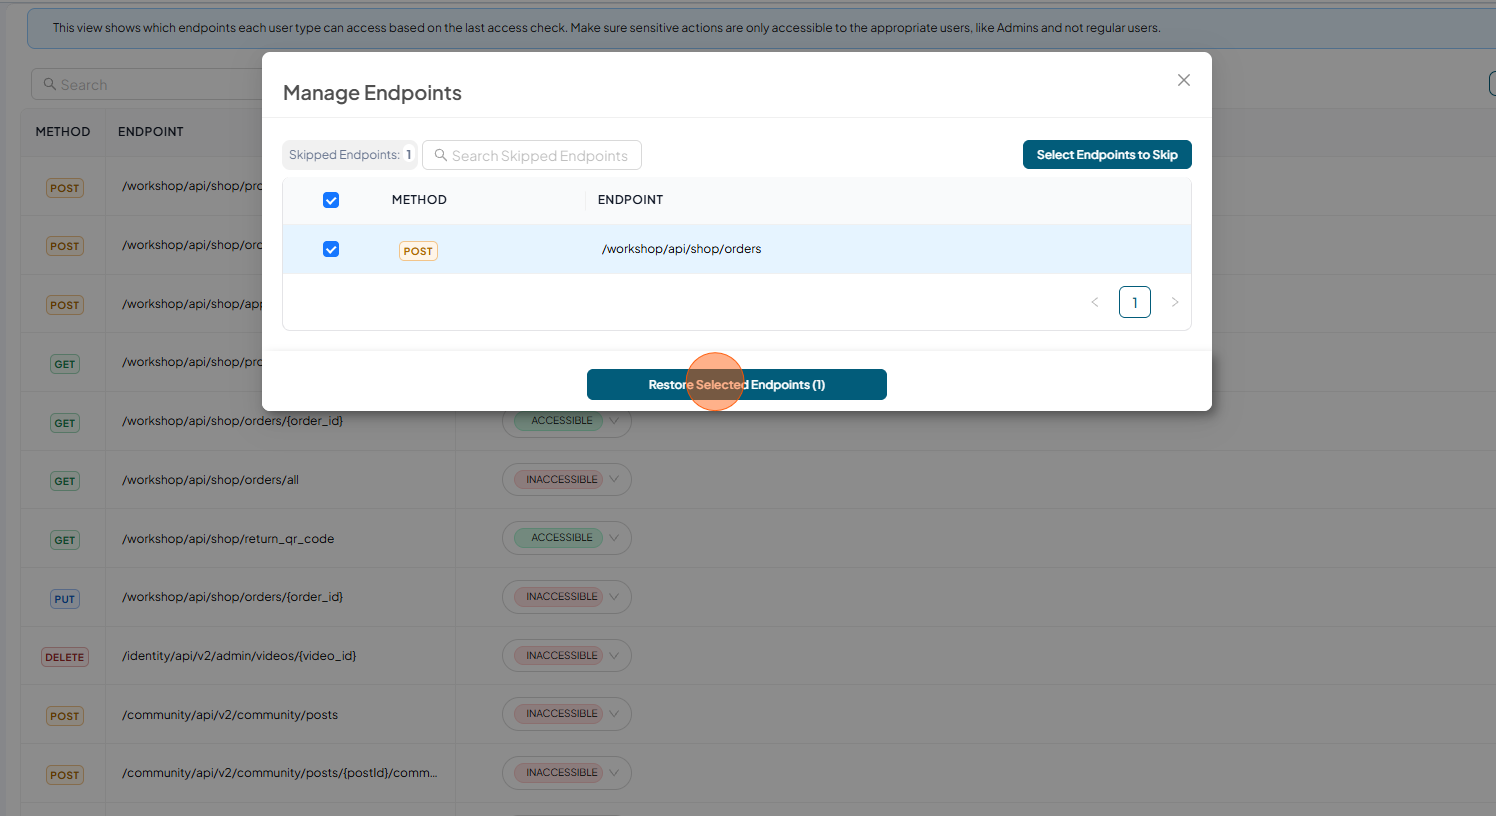
-
The restored endpoints are availbel for RBAC access checks.