AI-Driven BOLA Scenario Discovery
Navigate to URL
Open your browser and visit: https://<your-tenant>.apisecapps.com
-
Create a new application or open an existing application
-
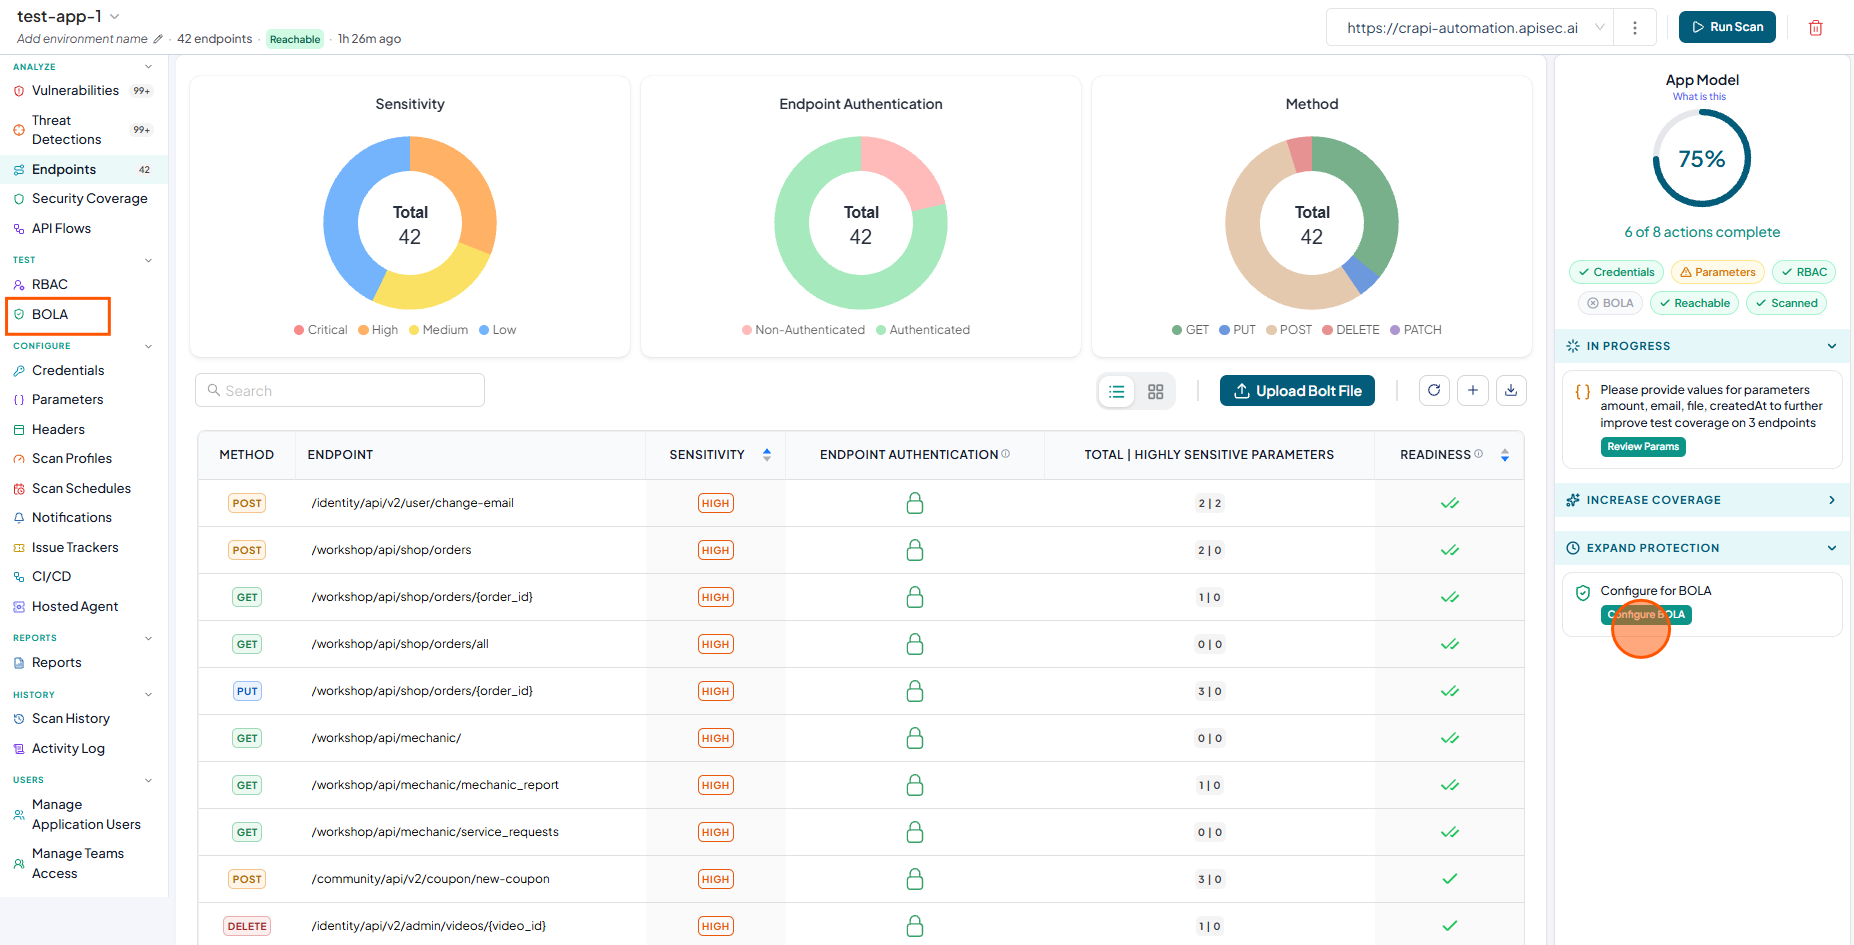
click Configure BOLA in the App Model or select BOLA from the sidebar.
-
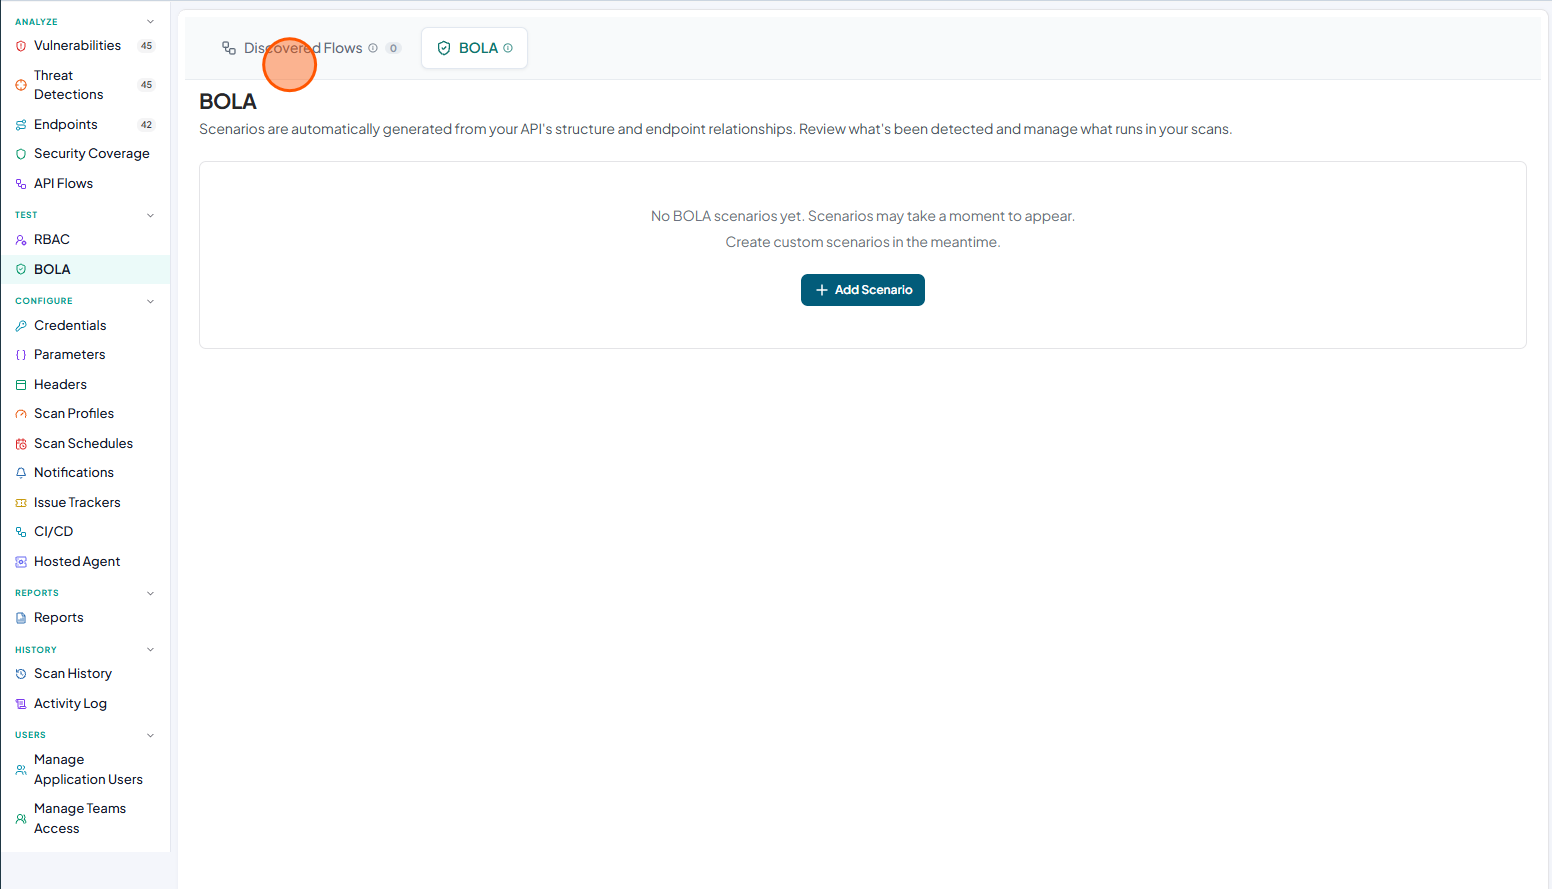
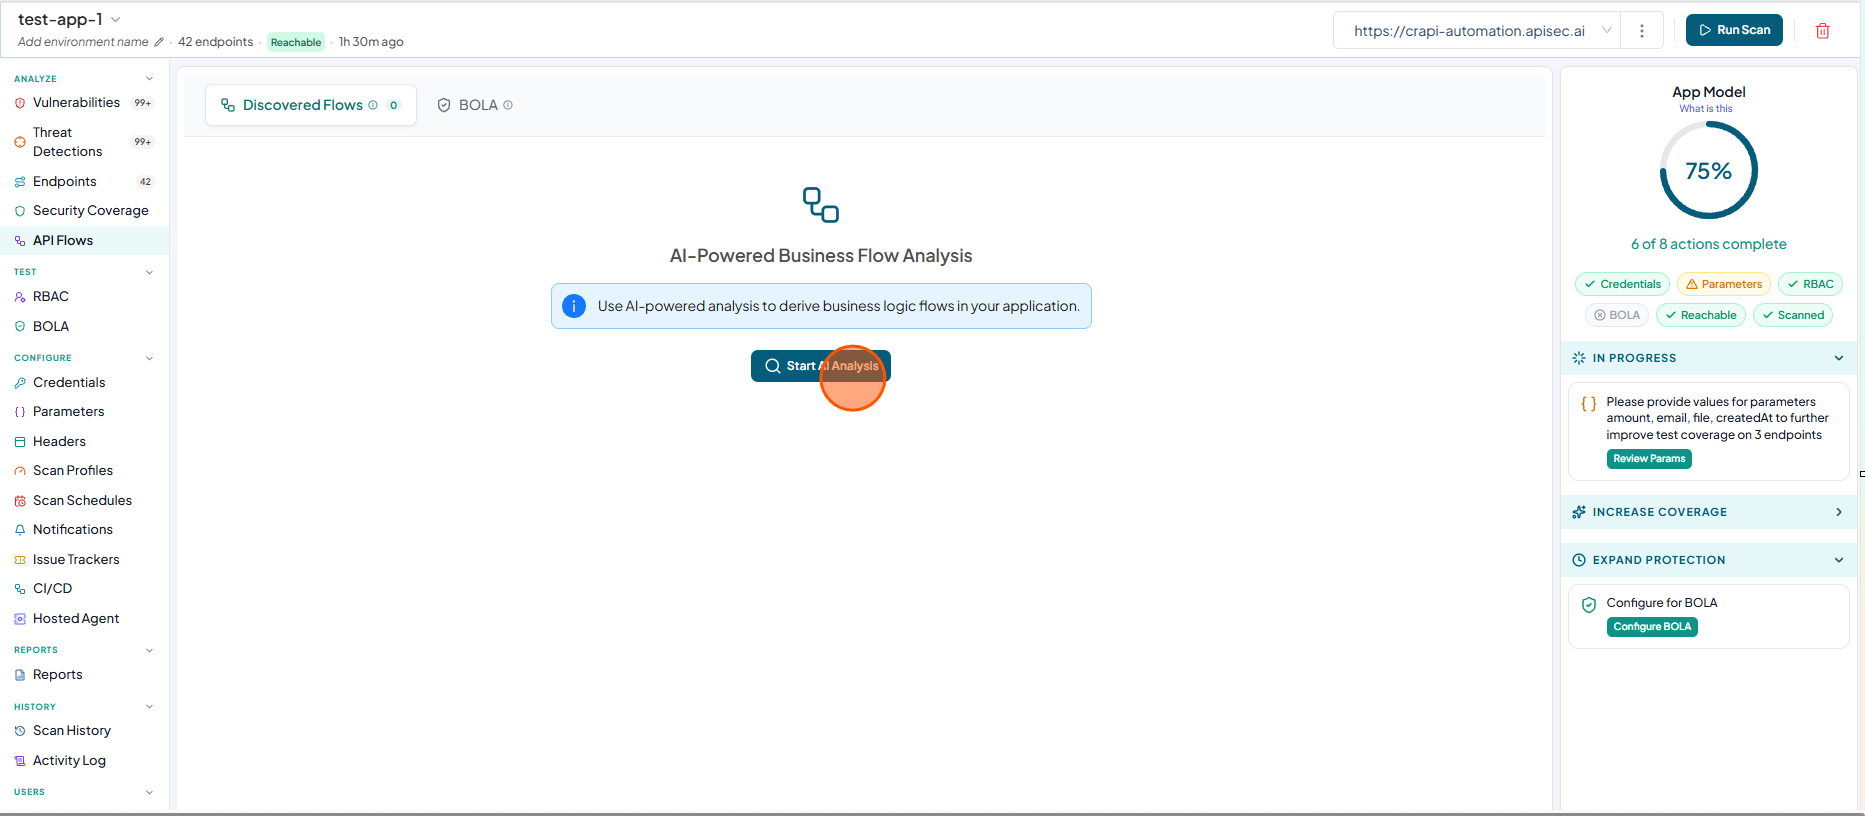
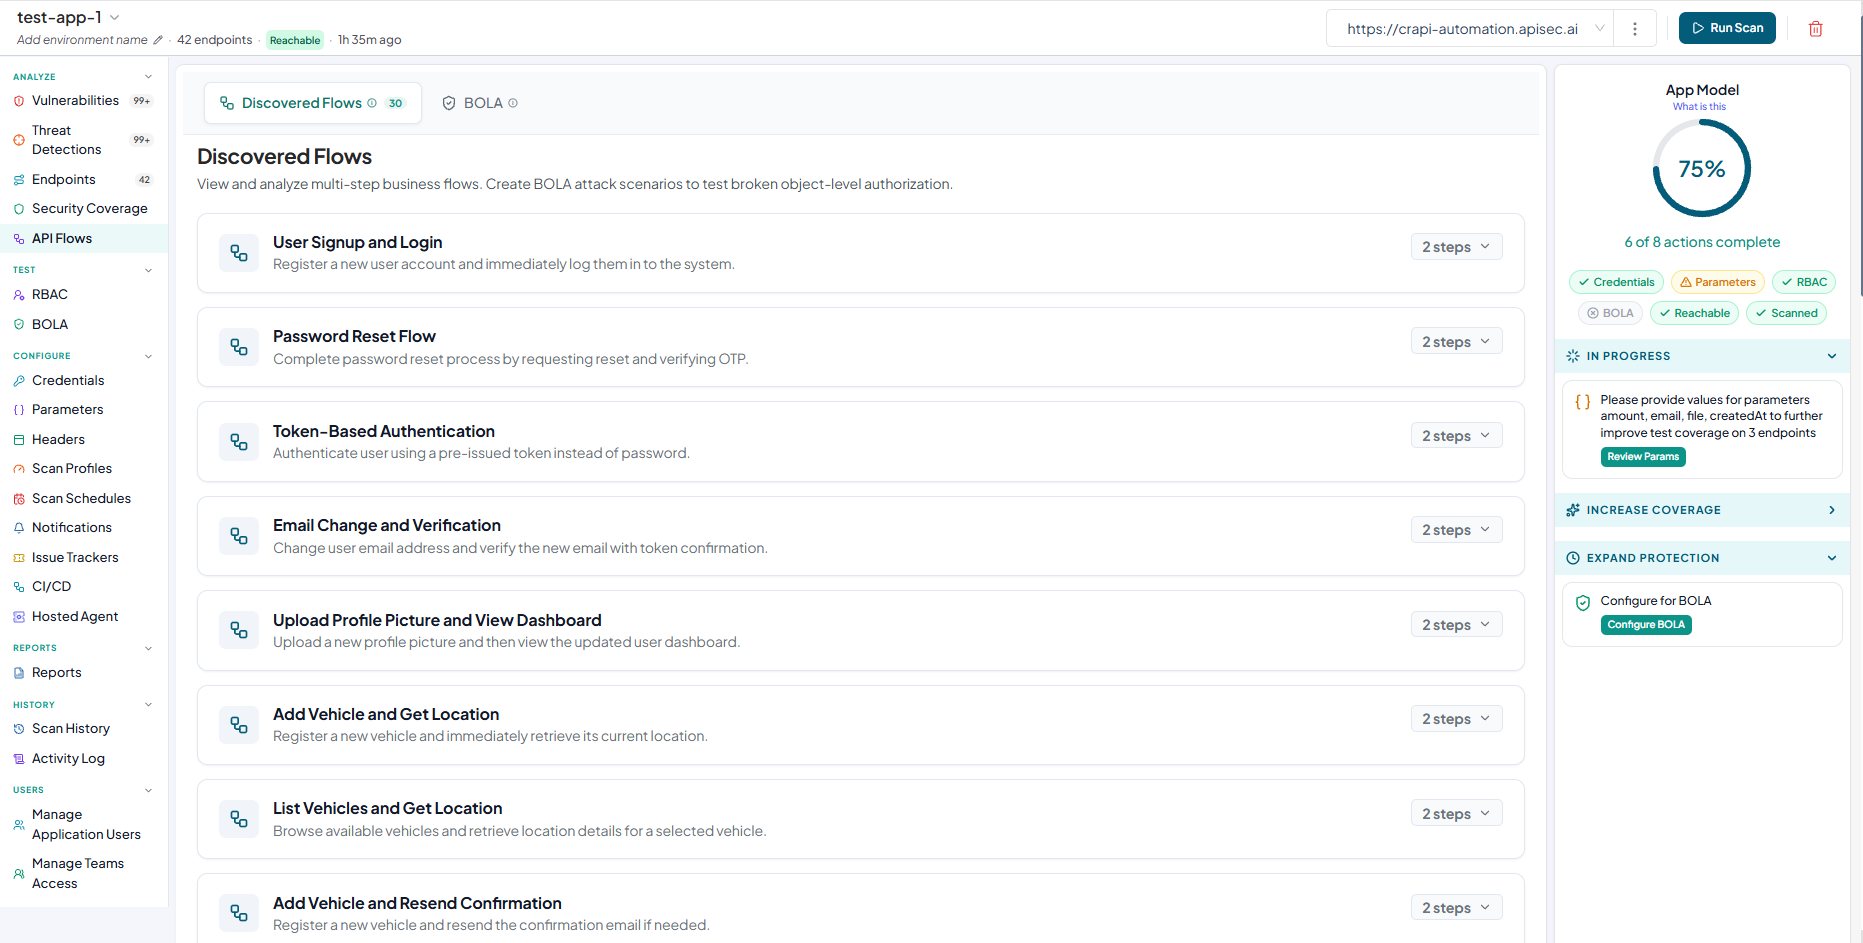
Click Discovered Flows
-
Click Start AI Analysis
-
Wait for the platform to analyze your API and discover endpoint relationships.
-
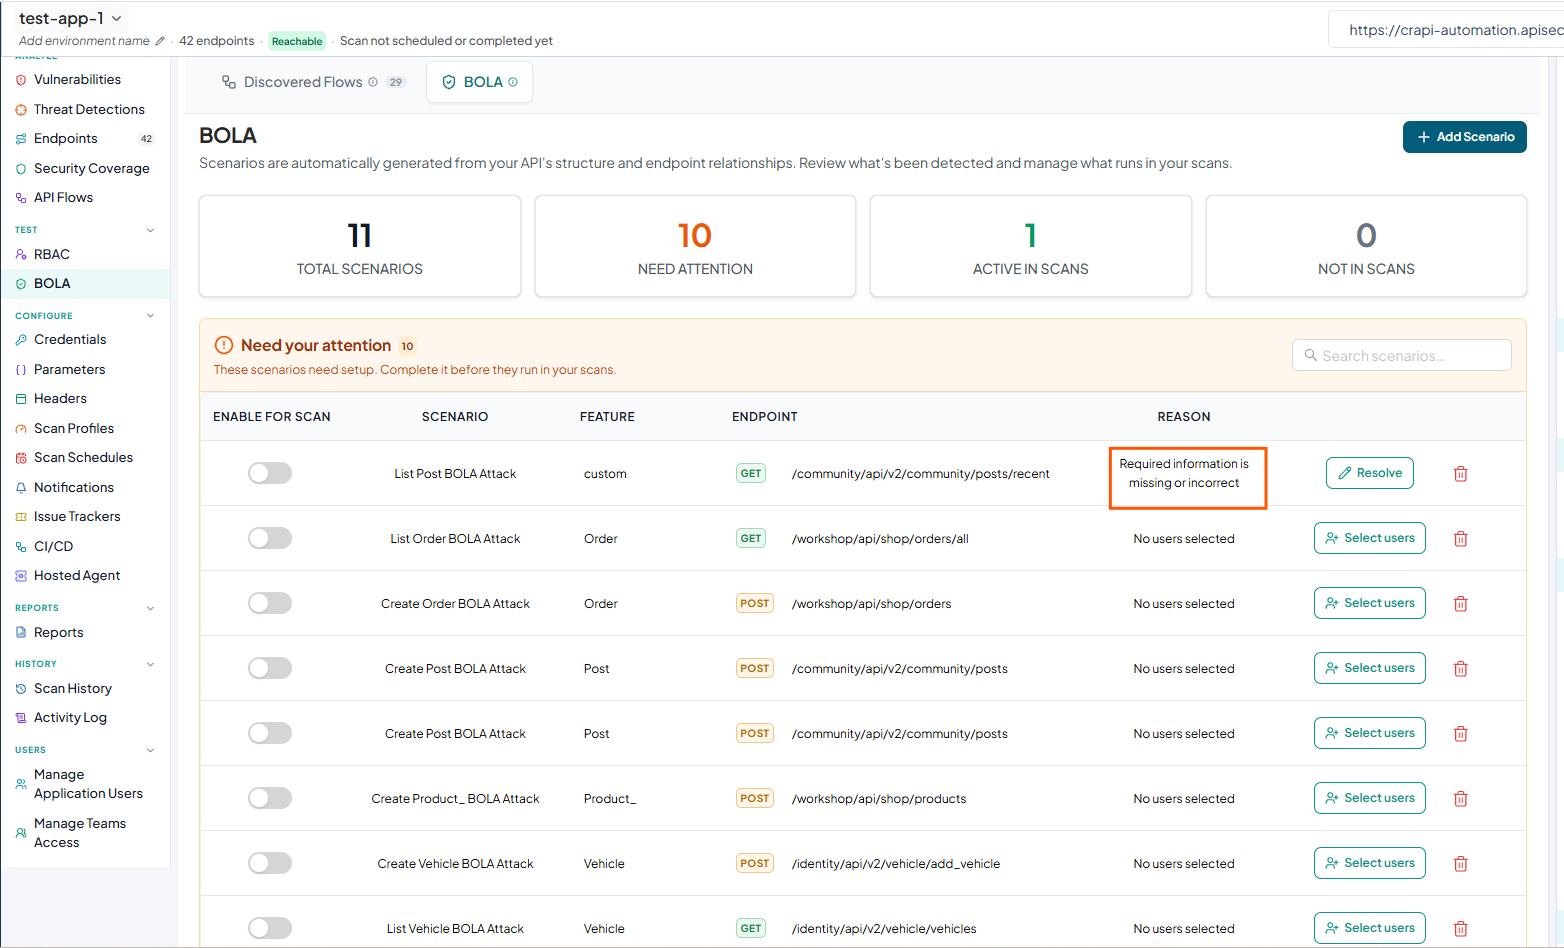
Review the automatically identified API flows based on your application’s endpoints. These flows represent real user interactions and are used to generate BOLA scenarios for testing object-level authorization. Click BOLA tab to view the generated BOLA scenarios.
-
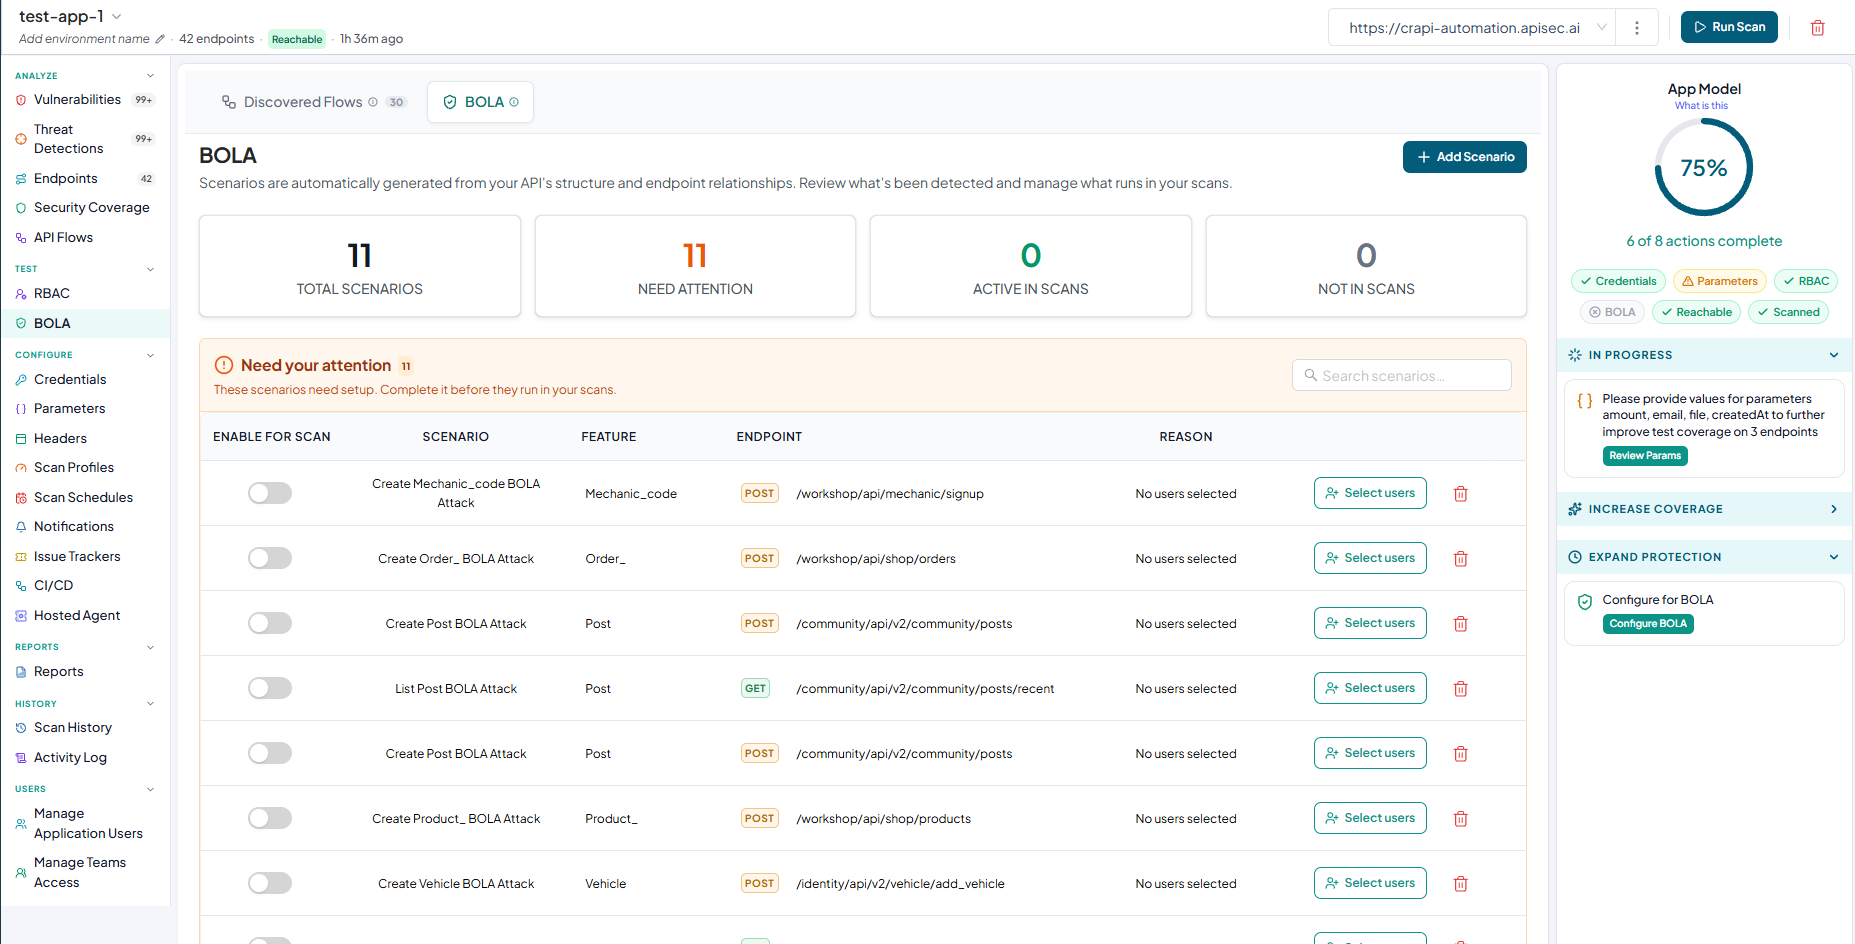
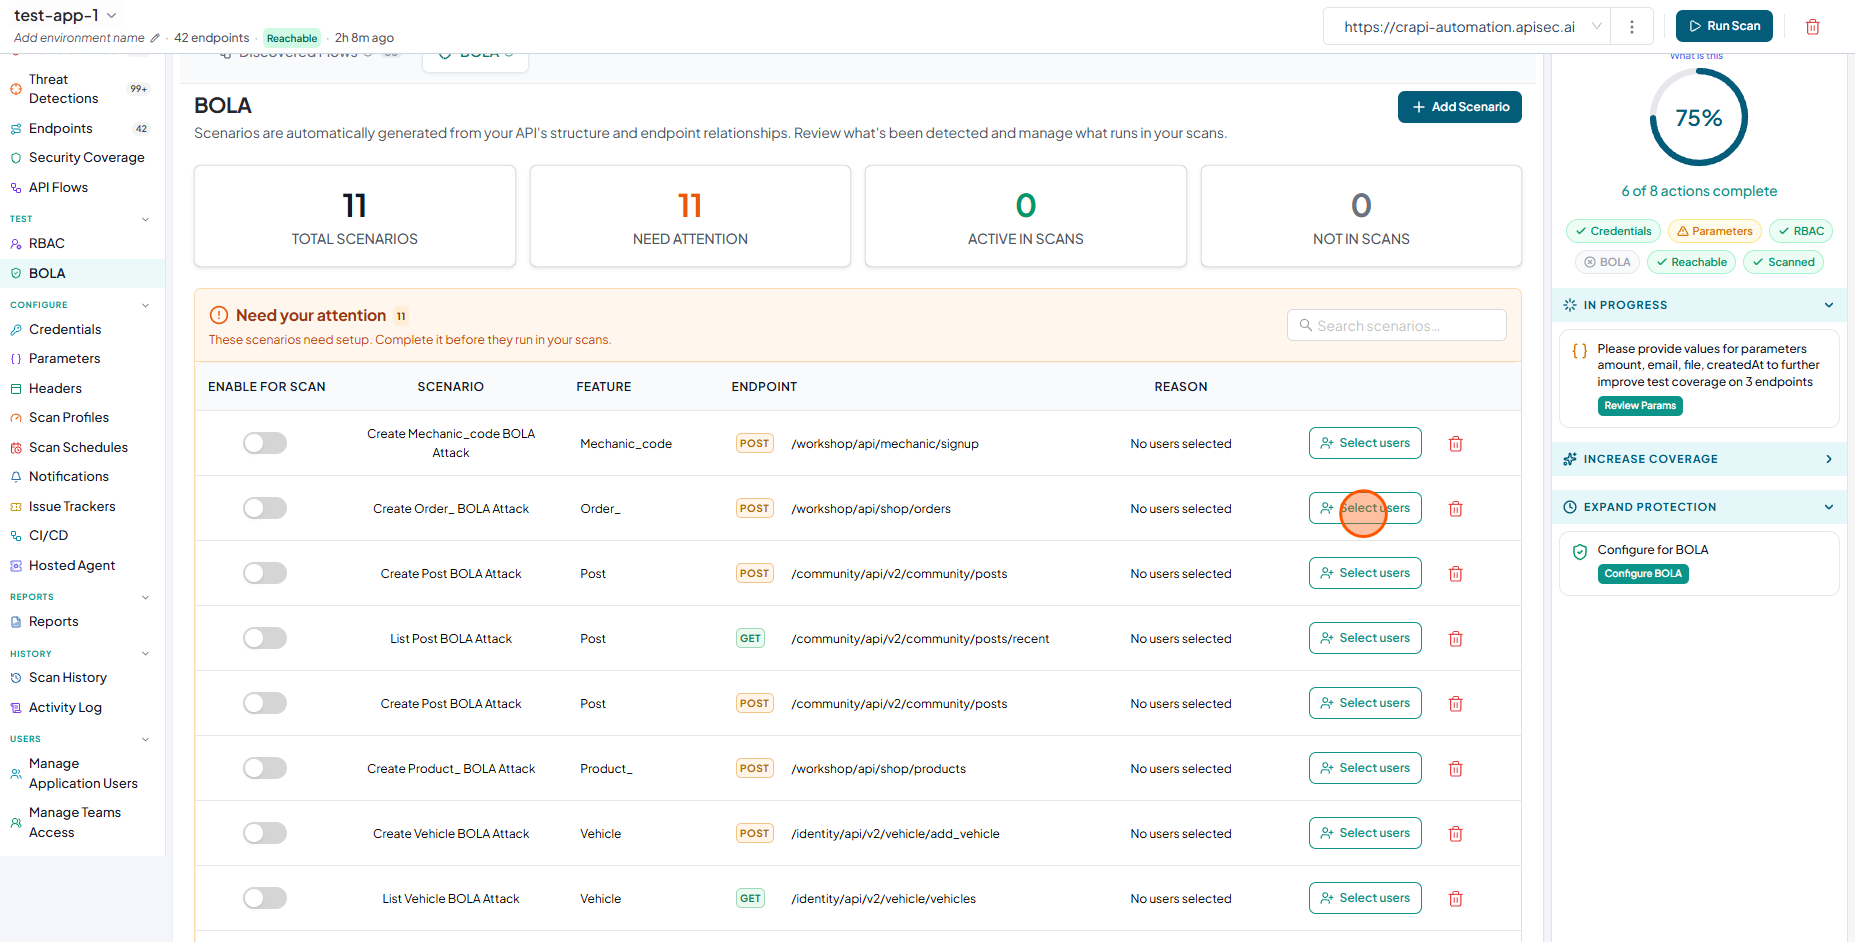
In the Needs Your Attention section, you will see the identified BOLA scenarios that require additional configuration. These scenarios are not yet ready to run in scans because required setup. To enable them for scanning, complete the necessary configuration for each scenario.
-
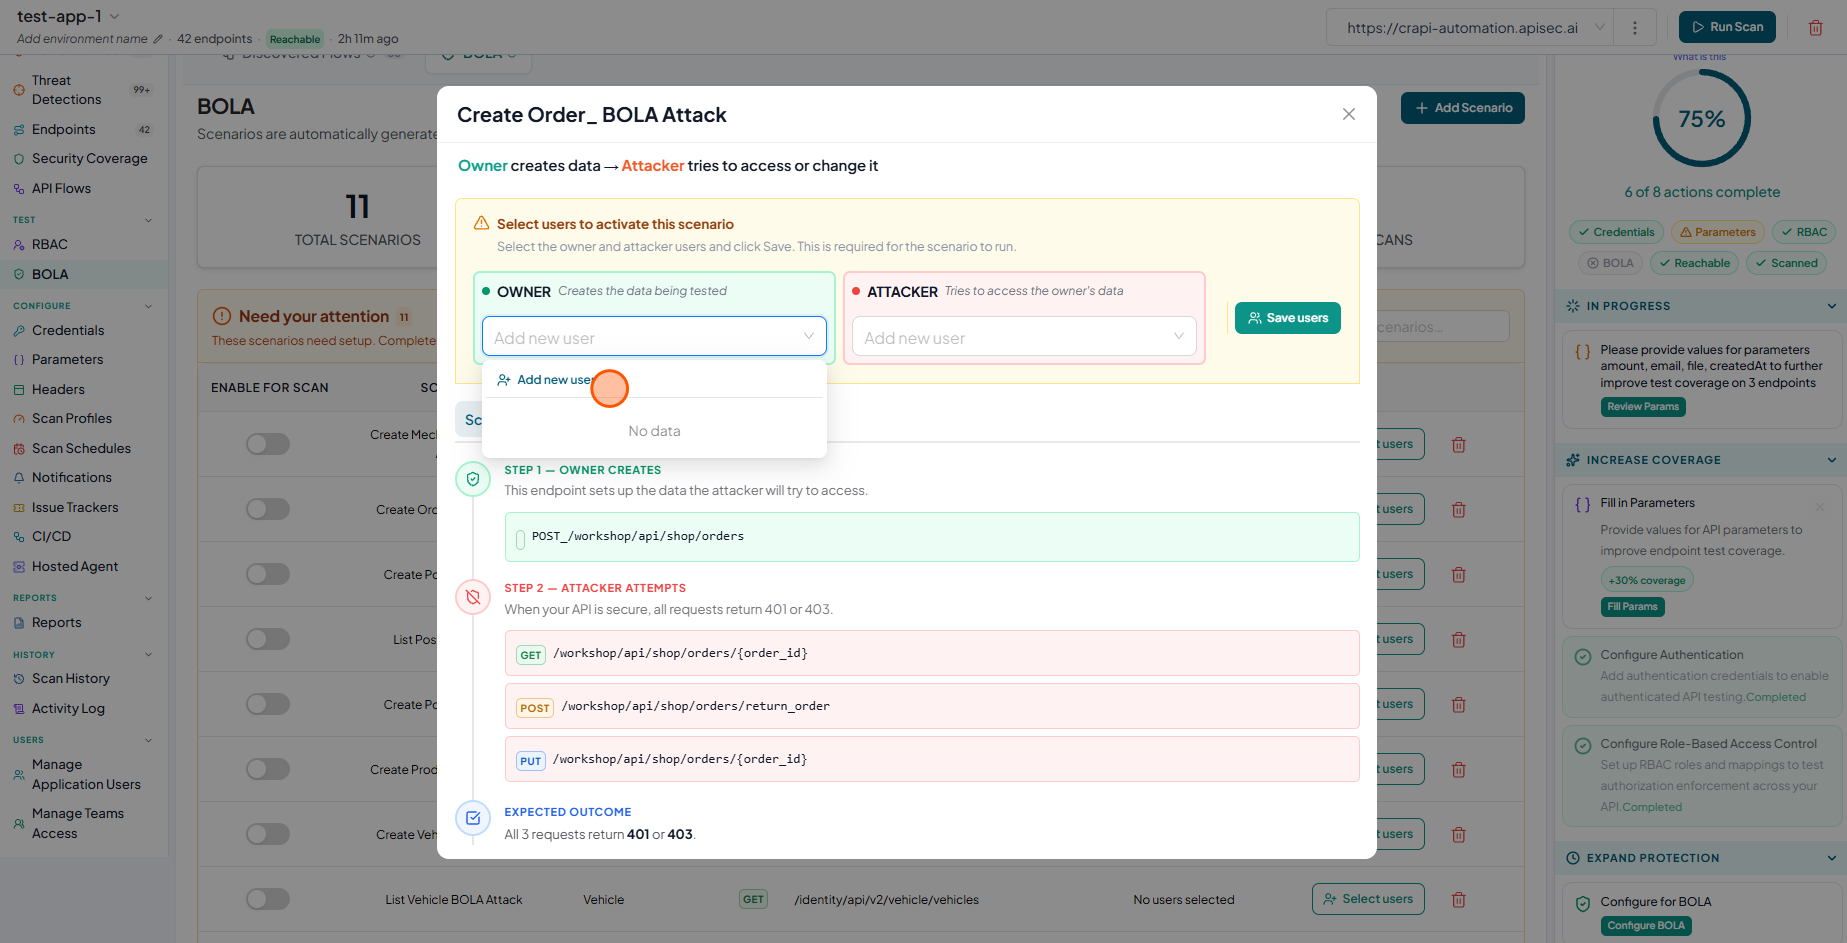
To complete the necessary configuration for the selected scenario, click Select Users
-
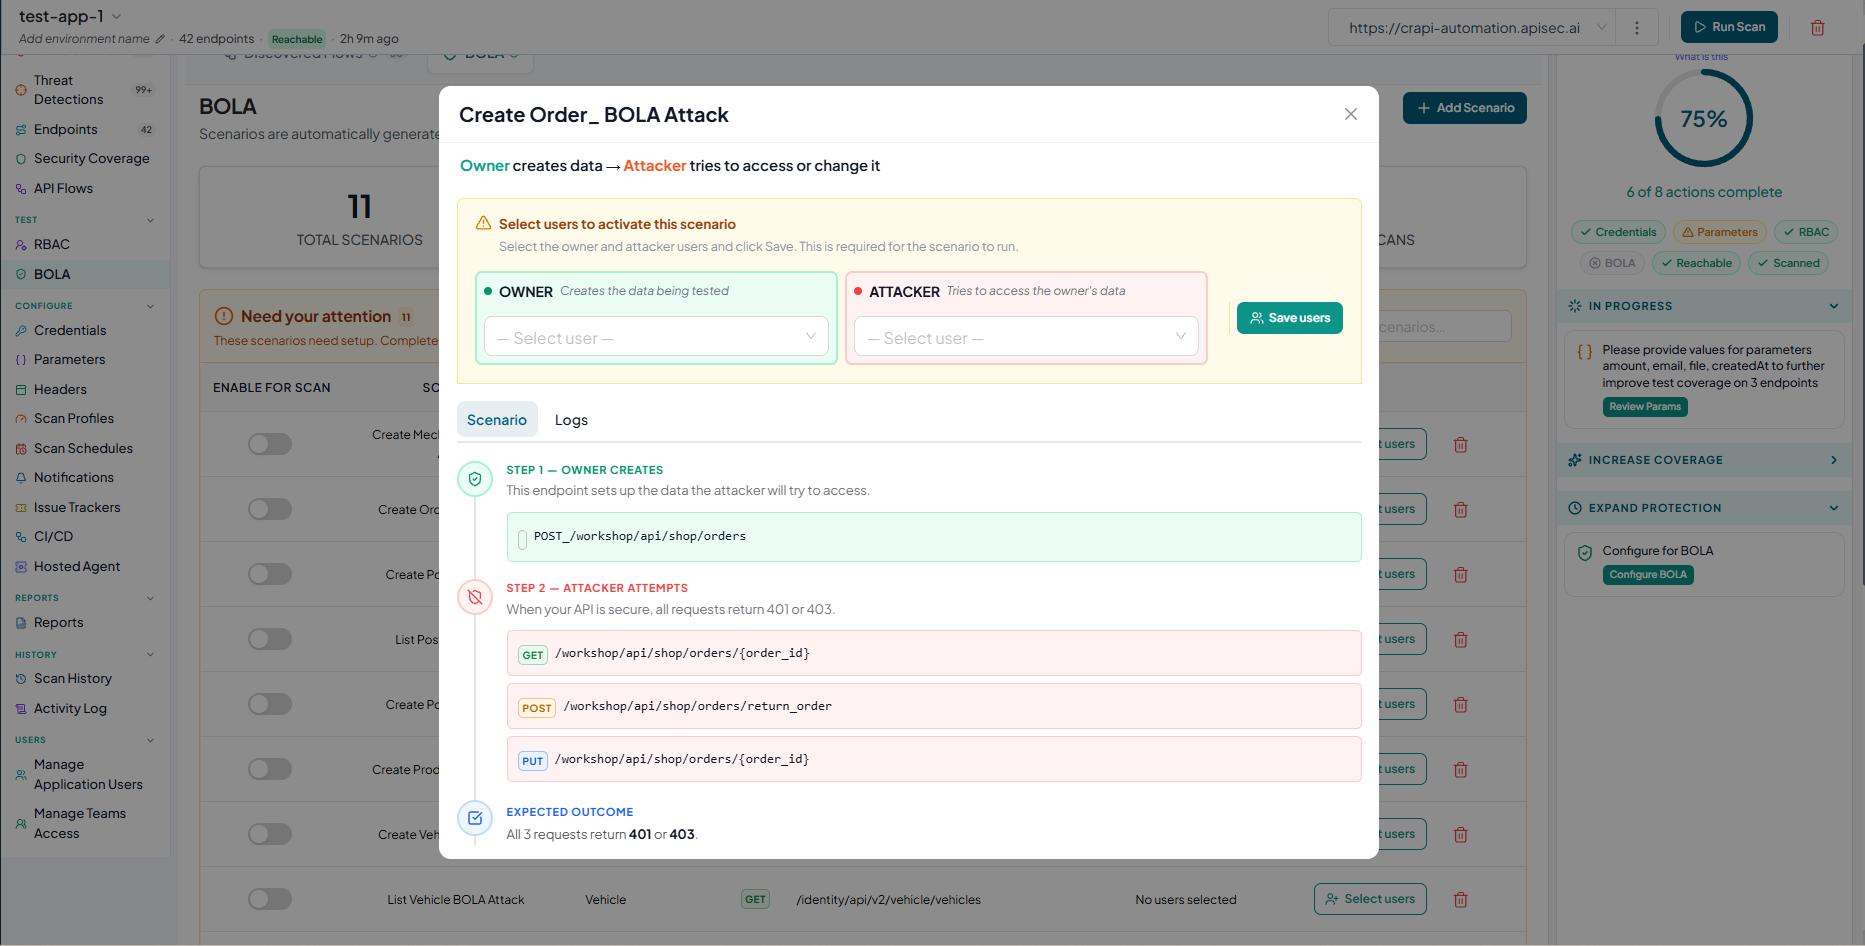
Now you will see the BOLA Configuration window.
-
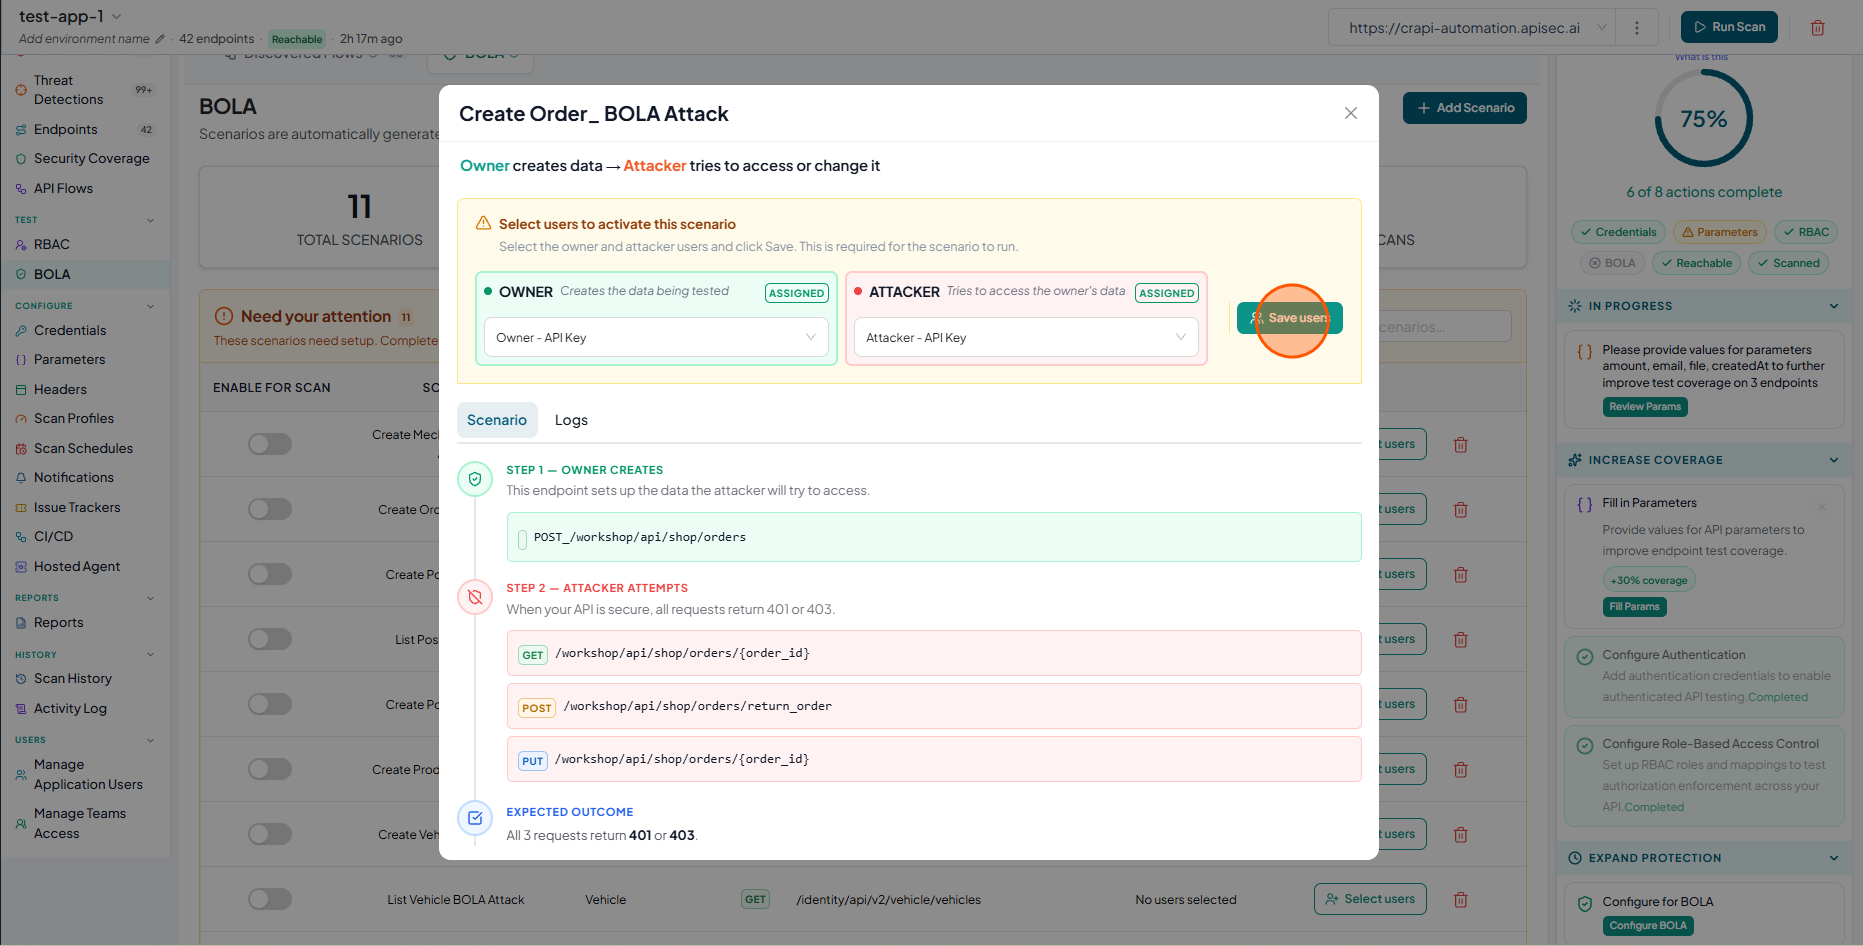
Add Owner and Attacker users and Click "Save users"
- Adding Owner:
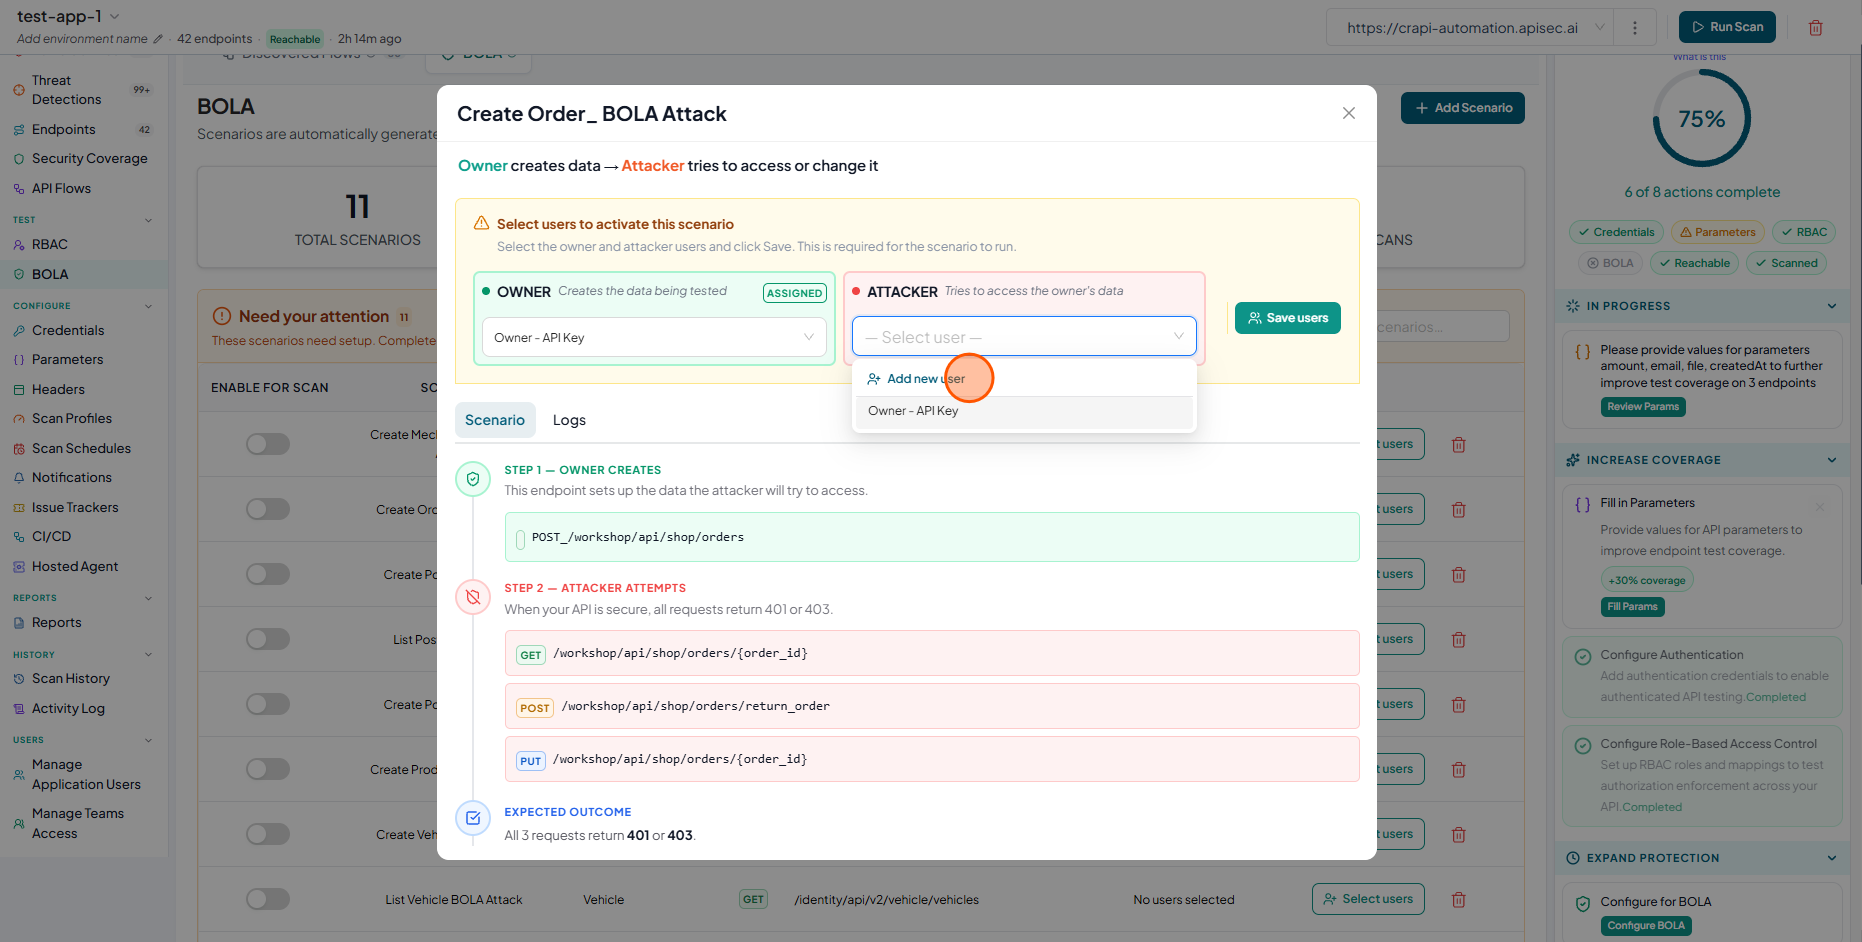
- In the Owner section, click the Add new user dropdown and select Add new user
- Fill the details and Click "Save Authentication"

- In the Owner section, click the Add new user dropdown and select Add new user
- Adding Attacker:
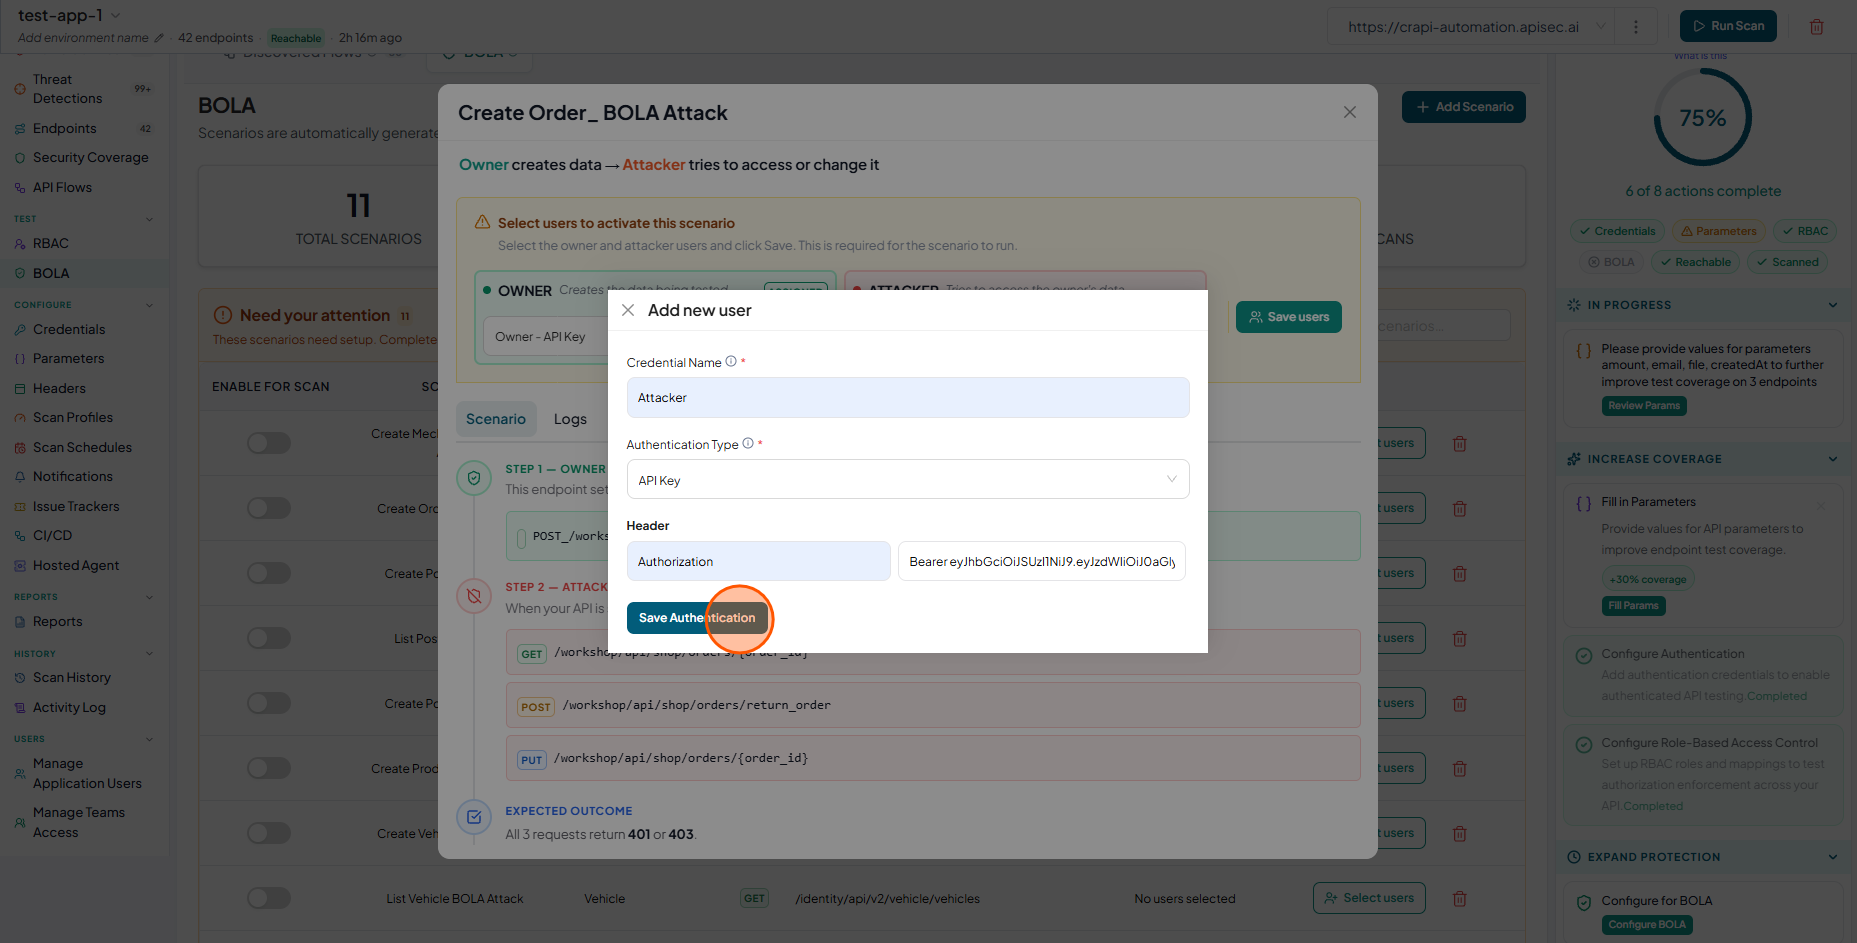
- In the Attacker section, click the Add new user dropdown and select Add new user
- Fill the details and Click "Save Authentication"
- Click Save Users
- In the Attacker section, click the Add new user dropdown and select Add new user
- Adding Owner:
-
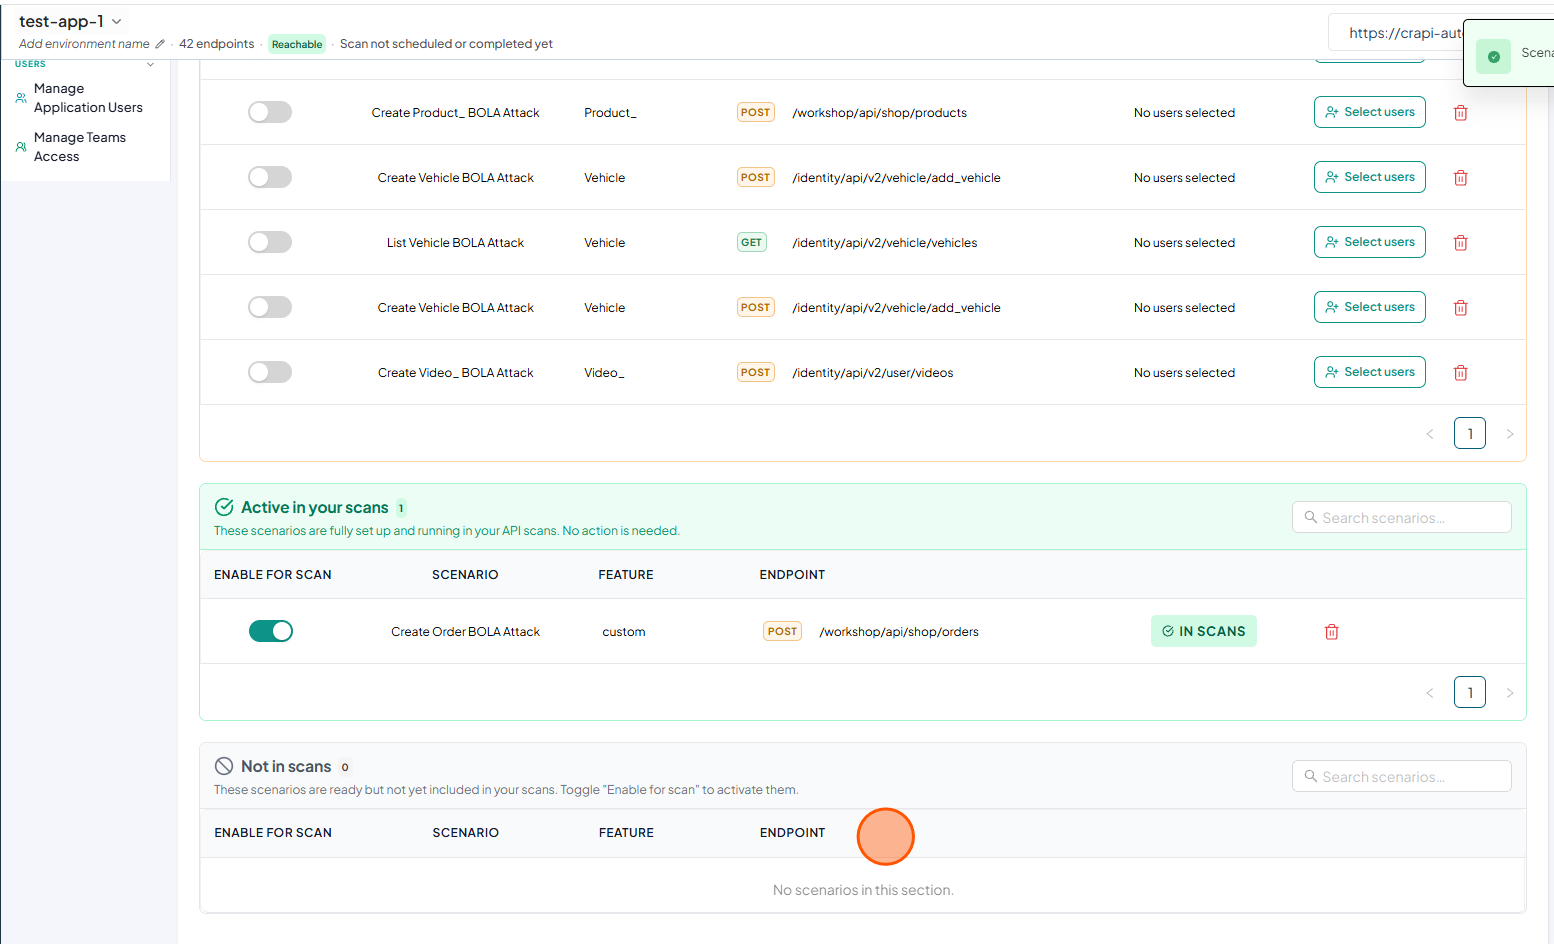
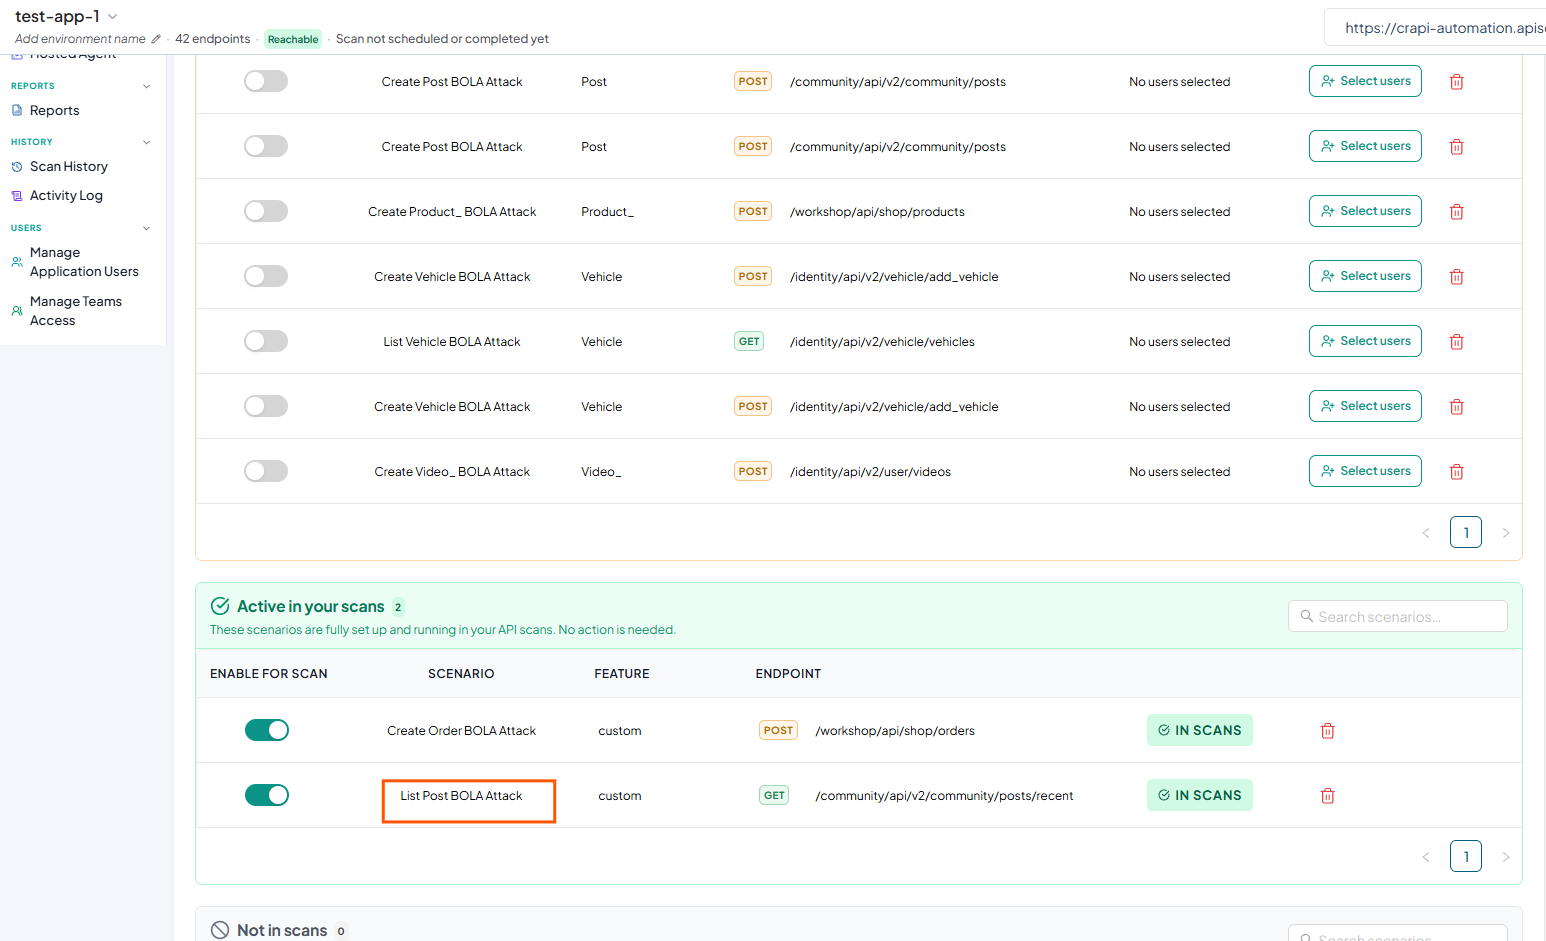
Once the scenario is properly configured, it appears in the Active in your scans section, indicating that it is validated, enabled, and actively running in your security tests.

-
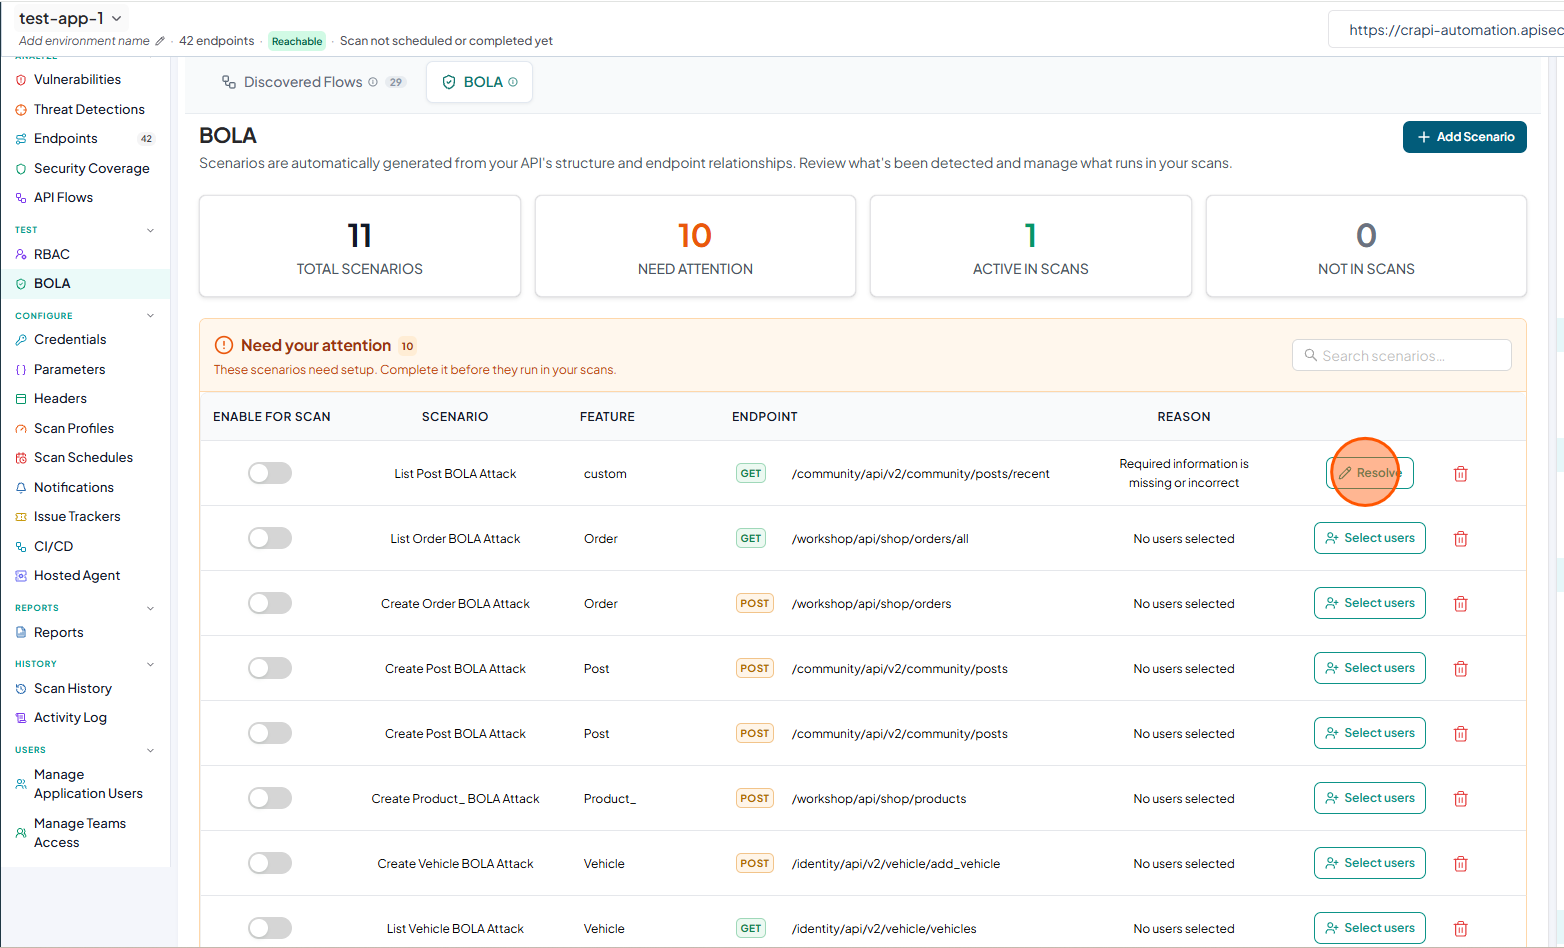
If a scenario is not properly configured, the Reason column will display details about what is missing or incorrectly configured.
-
To view or change the configuration, click Resolve
-
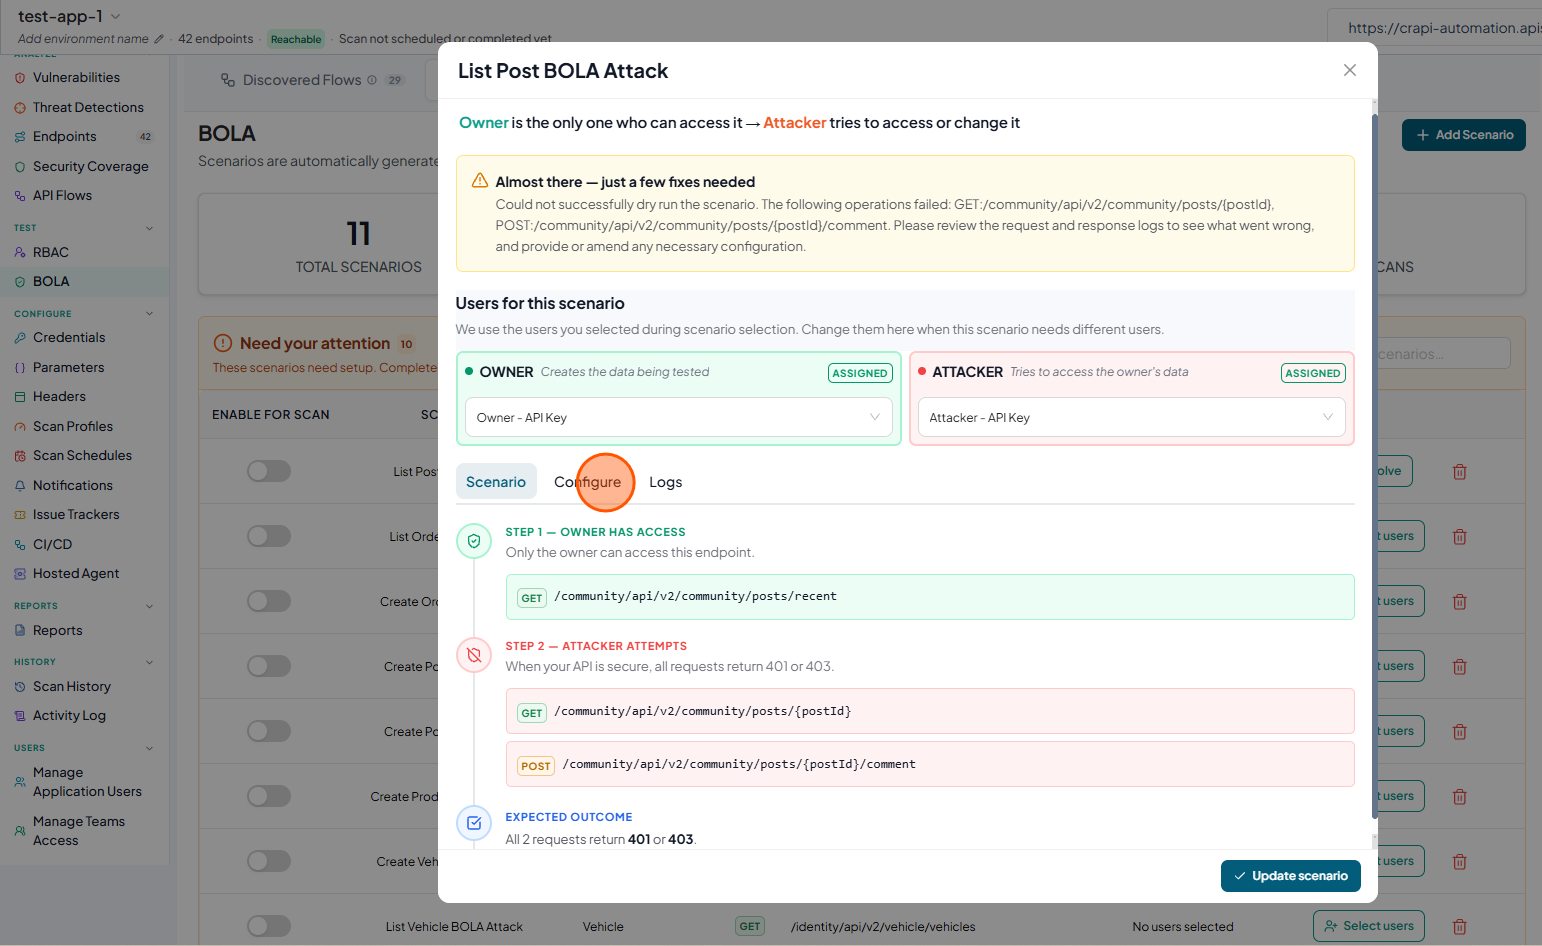
In the BOLA configuration window. Click Configure tab to review missing or incorrectly configured settings.
-
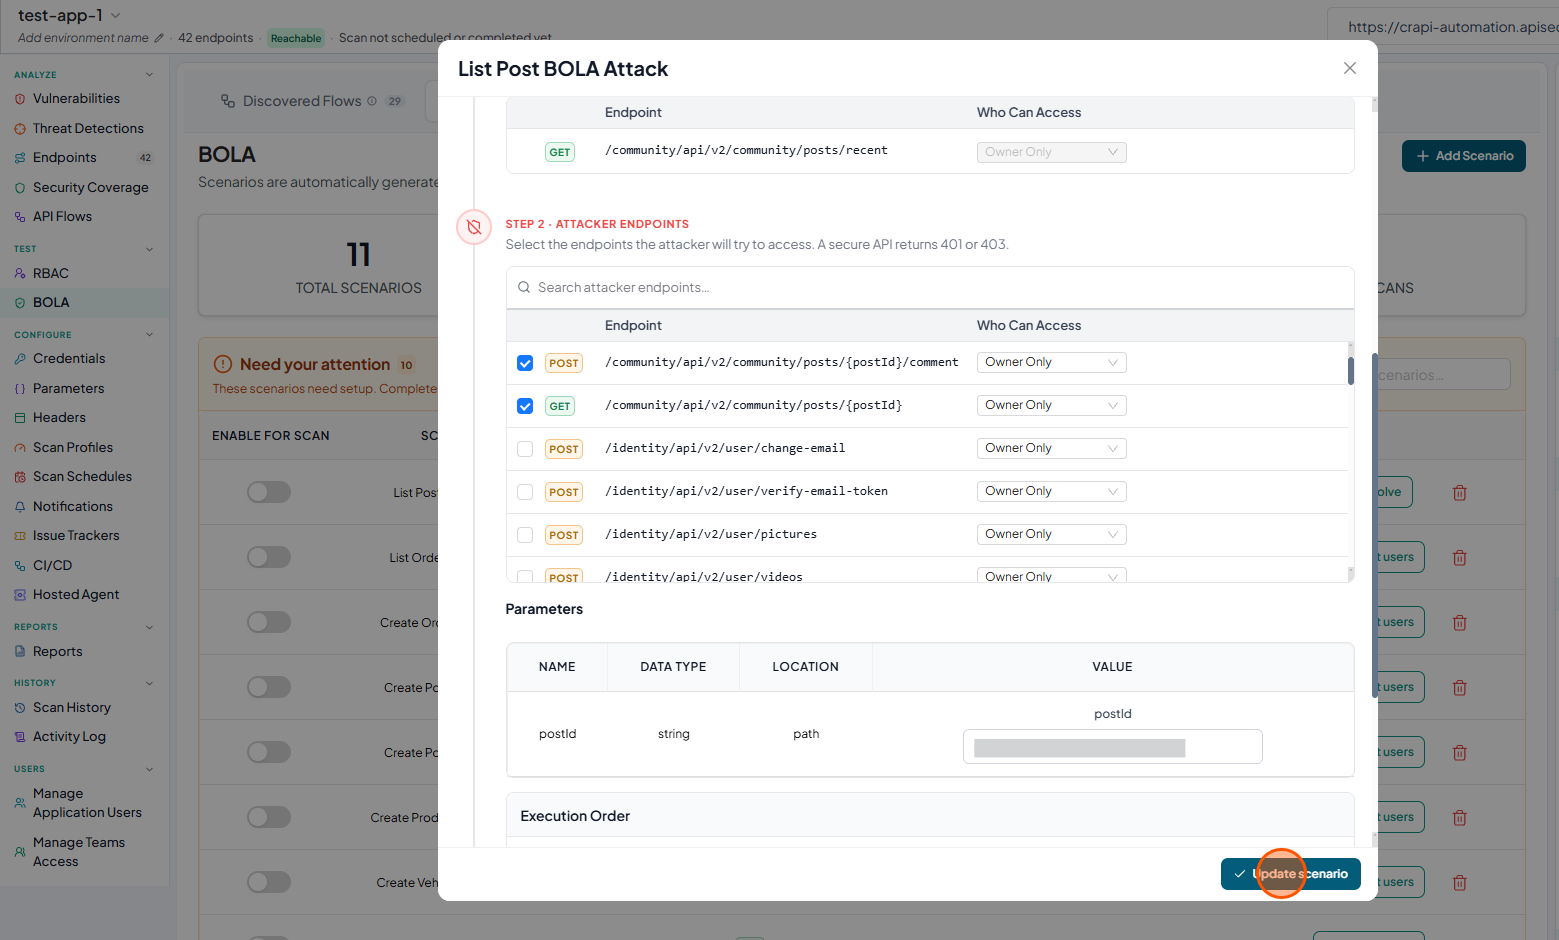
In the configuration window, provide the required details to complete the setup, and click Update scenario to save your changes..
-
Once the scenario is validated and properly configured, it appears in the Active in your scans section, indicating that it is enabled and actively running in your security tests..
-
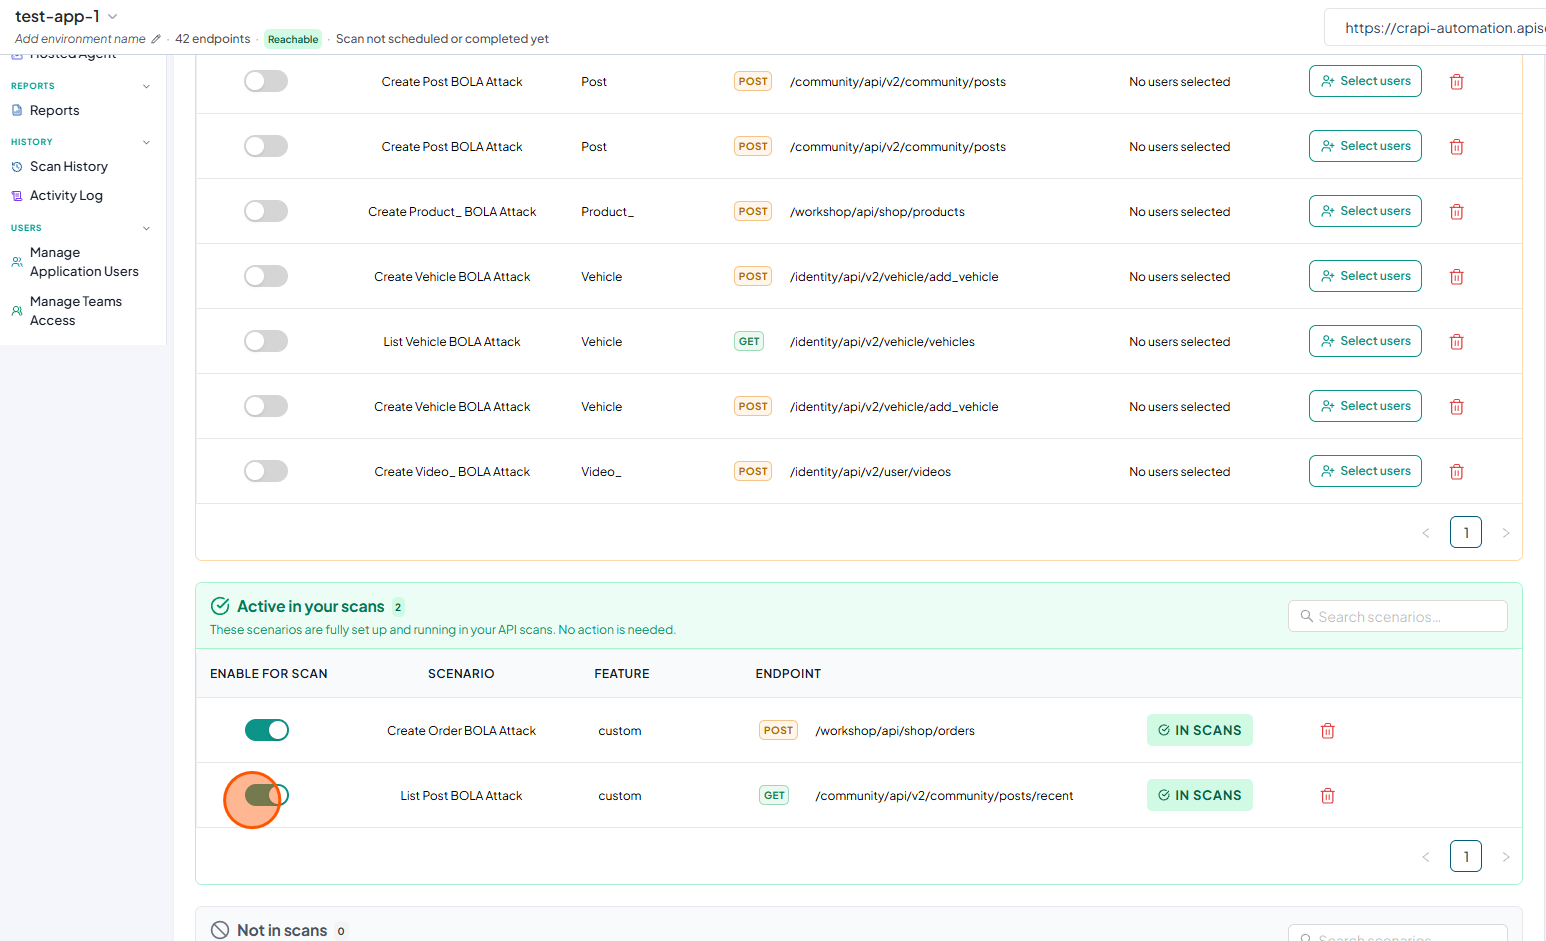
To exclude a scenario from scans, turn off the Enable for scan toggle.
-
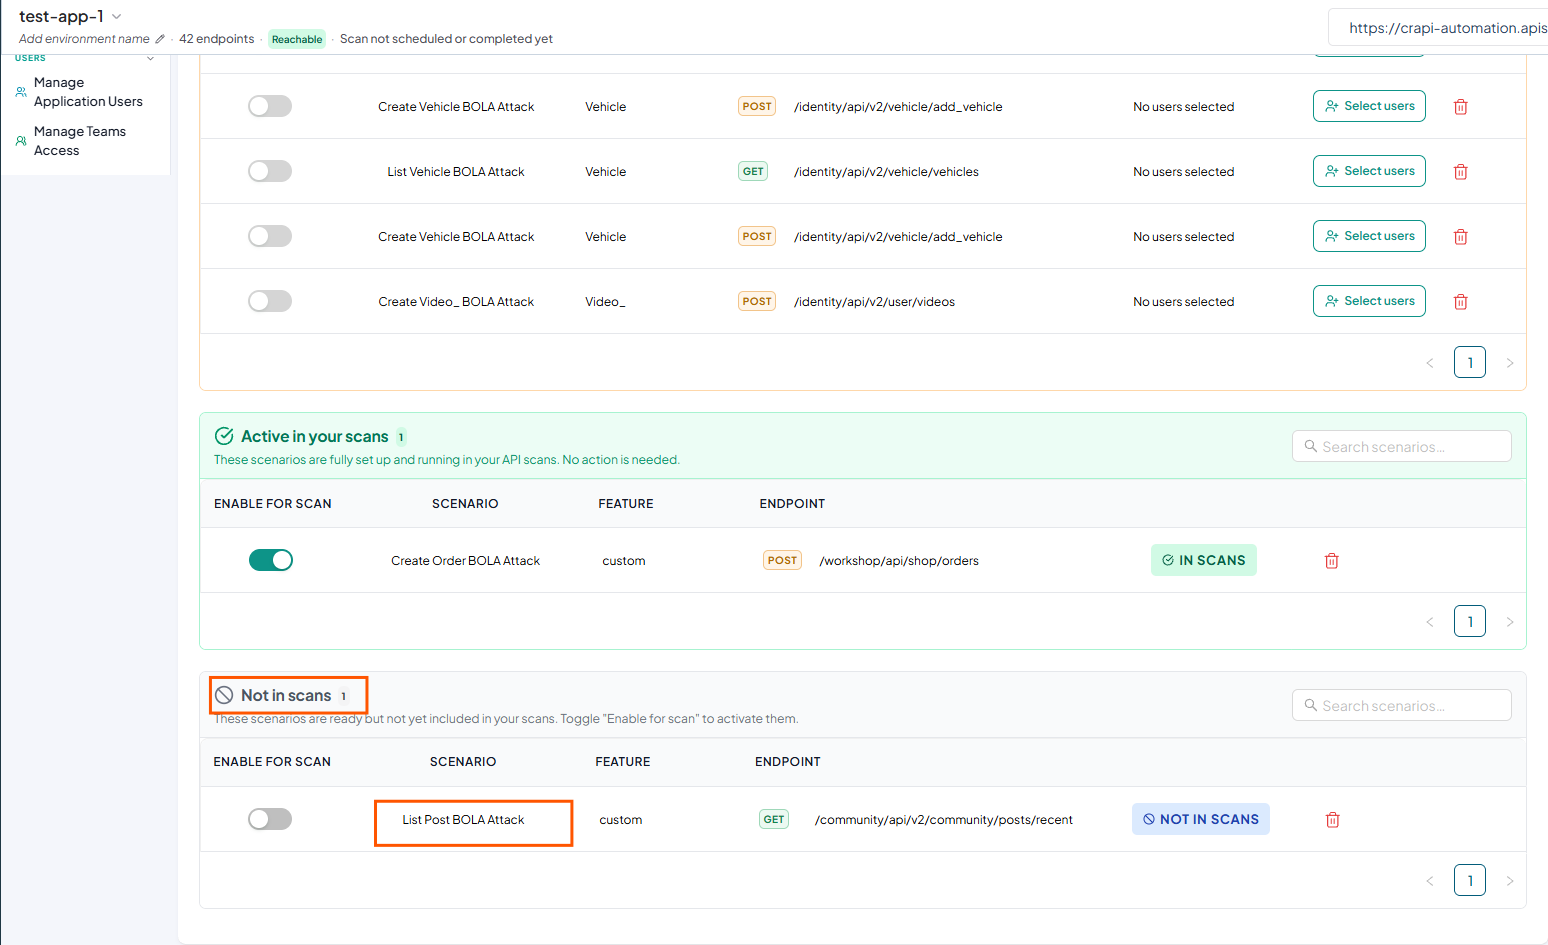
The scenario will be moved to the Not in scans section.
-
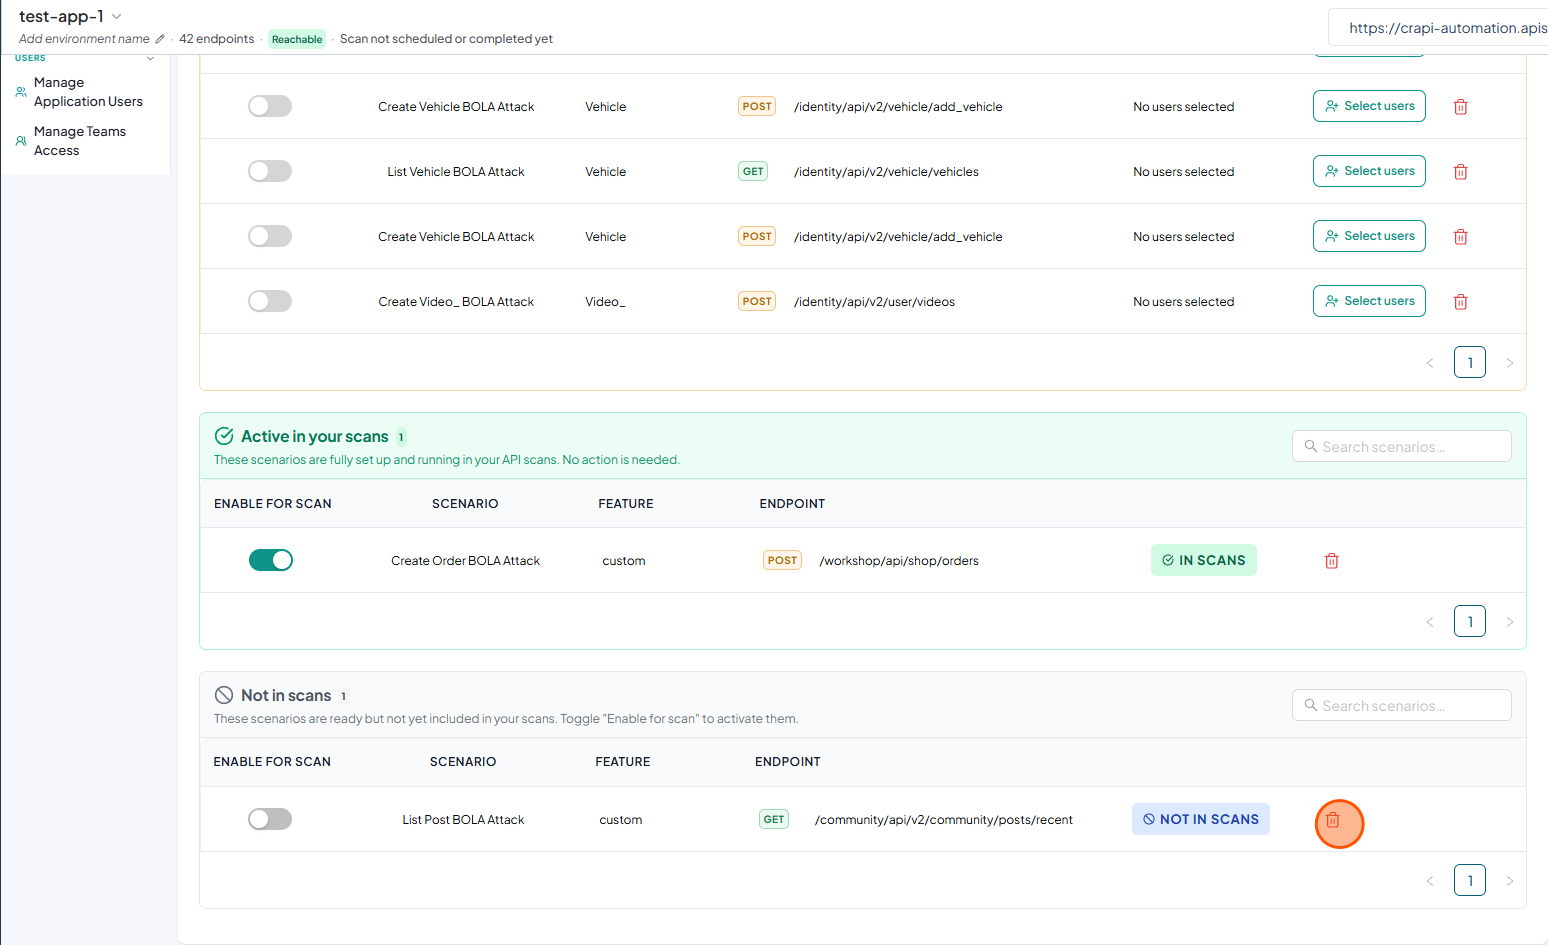
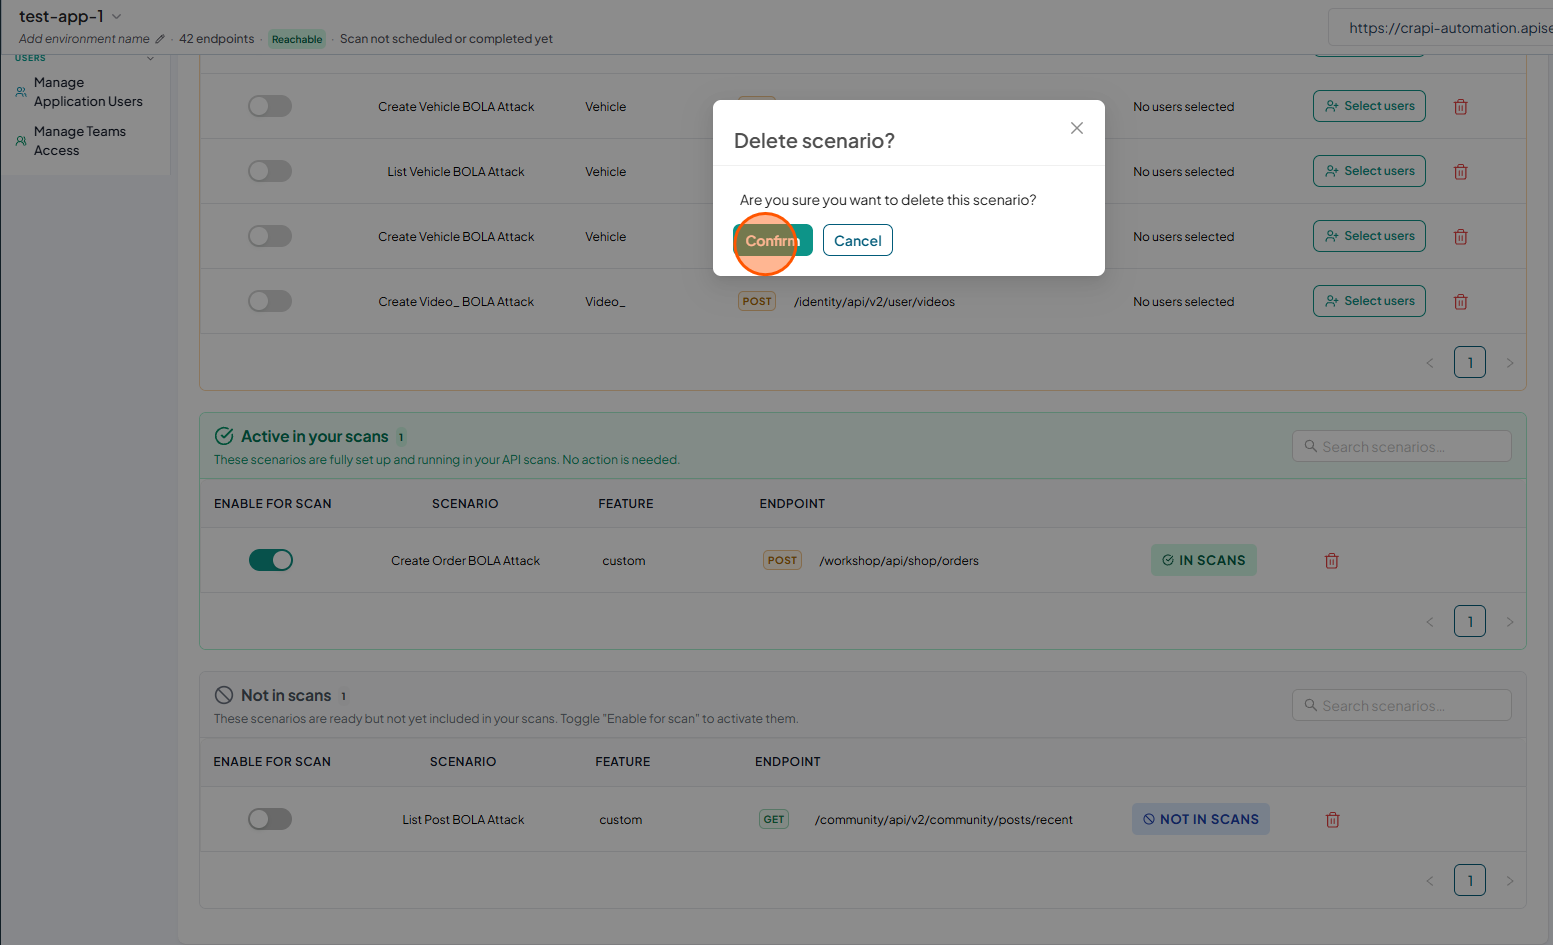
To delete a scenario, click the Delete icon for the corresponding scenario
-
Click Confirm to delete the scenario.
-
Verify that the deleted scenario no longer appears in the list.