OKTA SSO Configuration Guide
Overview
This guide outlines the process for configuring SP-Initiated Single Sign-On (SSO) with Okta for your APIsec SaaS application using SAML authentication. This setup enables users to initiate authentication directly from the APIsec login page, redirecting them to Okta for authentication before granting access.
To enforce role-based access control (RBAC), we will configure two groups in Okta to manage user permissions within APIsec.
Prerequisites
- Administrative access to the Okta Admin Console.
- APIsec login with an ADMIN user role.
Implementation Steps
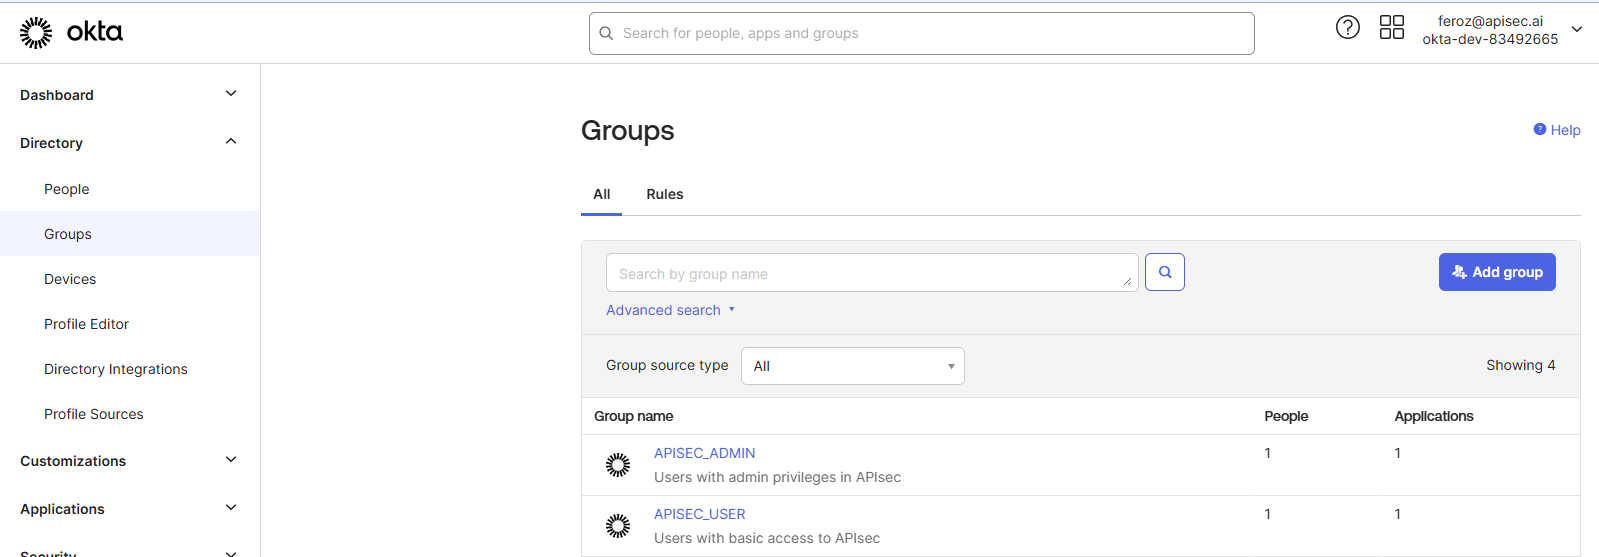
1. Group Provisioning in Okta
To enforce RBAC in APIsec, create user groups in Okta:
- Log in to the Okta Admin Console.
- Navigate to Directory → Groups.
- Click Add Group and create:
- Group Name:
APISEC_USER - Description: Users with basic access to APIsec.
- Group Name:
- Create another group:
- Group Name:
APISEC_ADMIN - Description: Users with admin privileges in APIsec.
- Group Name:
- Create another group:
- Group Name:
APISEC_VIEWER - Description: Users with read-only (view) access in APIsec.
- Group Name:
- Assign users to the appropriate groups.
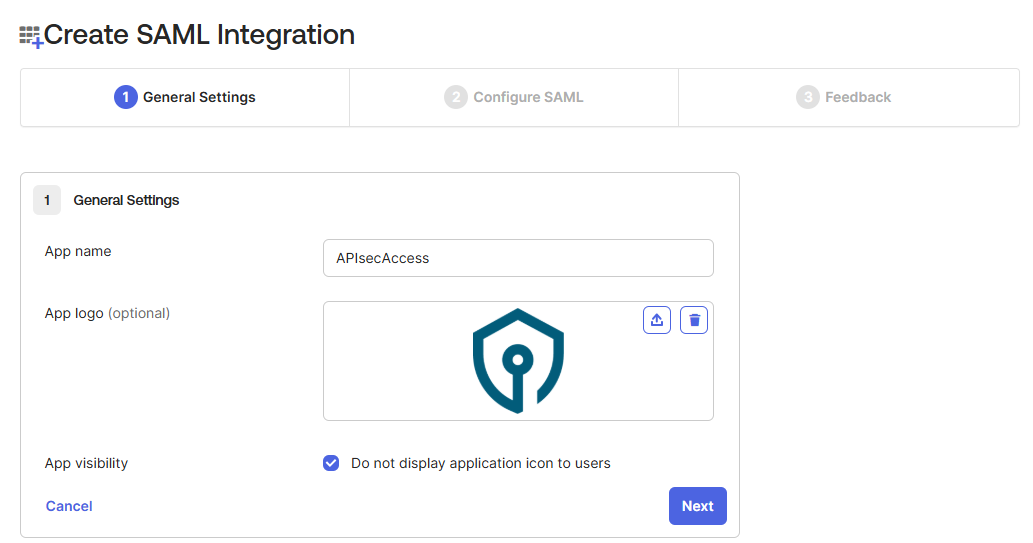
2. Application Registration in Okta
- Navigate to Applications → Applications in Okta.
- Click Create App Integration → Select SAML 2.0.
- Application Name:
APIsecAccess. - Click Next and proceed to configure SAML settings.
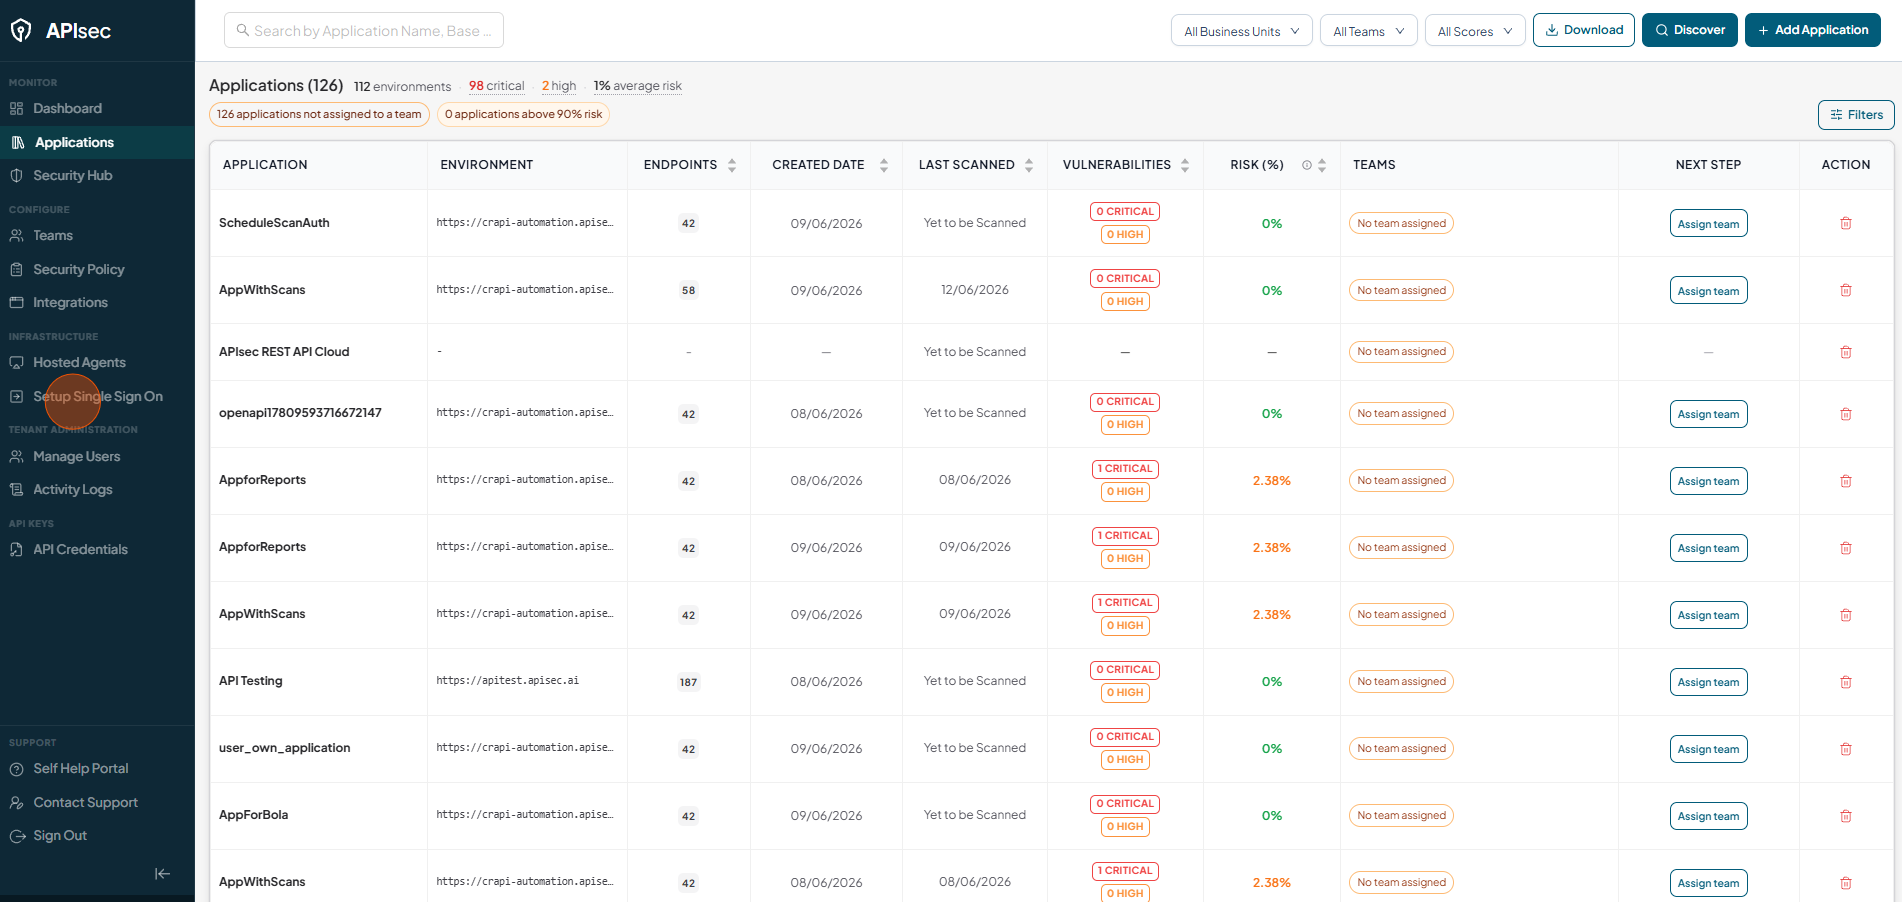
3. Obtain Single Sign-On URL & Audience URI from APIsec
-
Log in to APIsec as an ADMIN user.
-
- Click Setup Single Sign On
-
Select OKTA
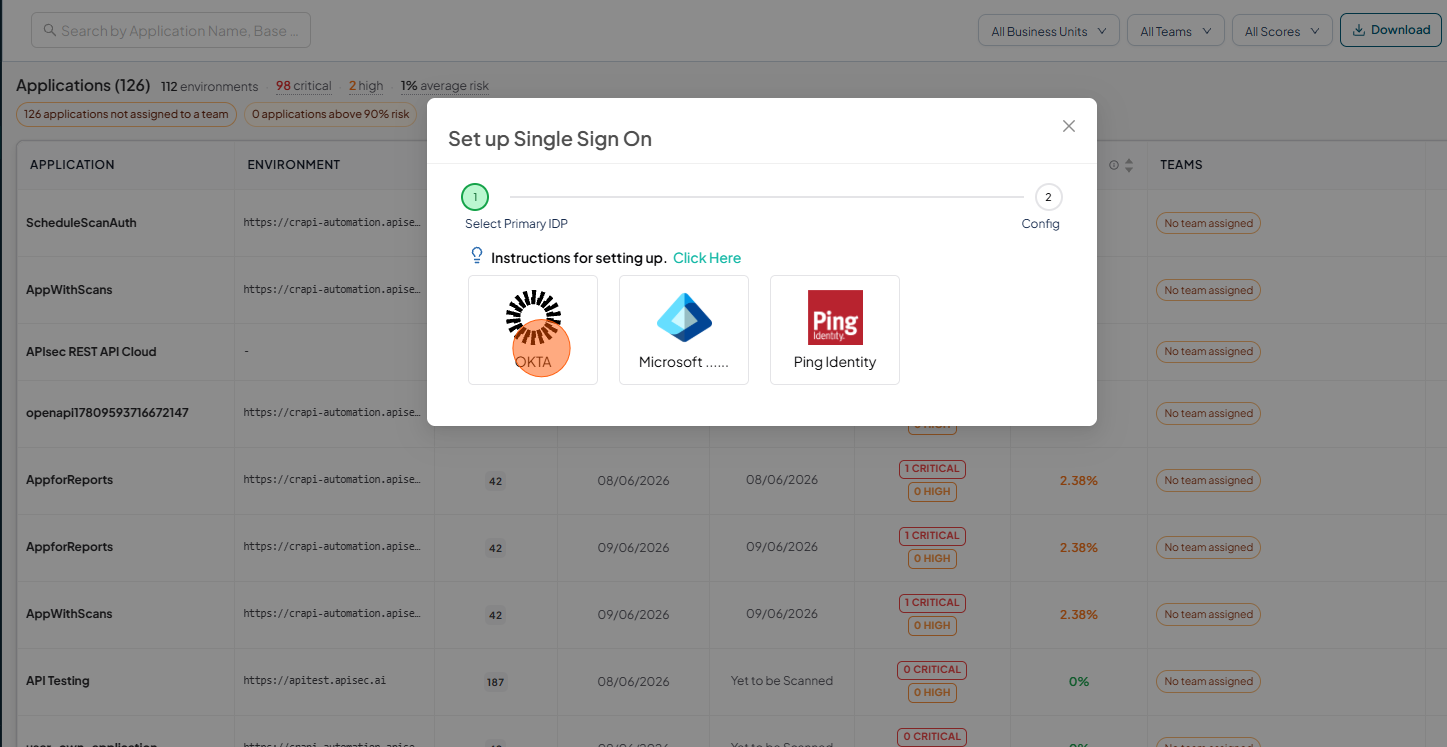
-
Copy Single Sign-on URL and Audience URI.
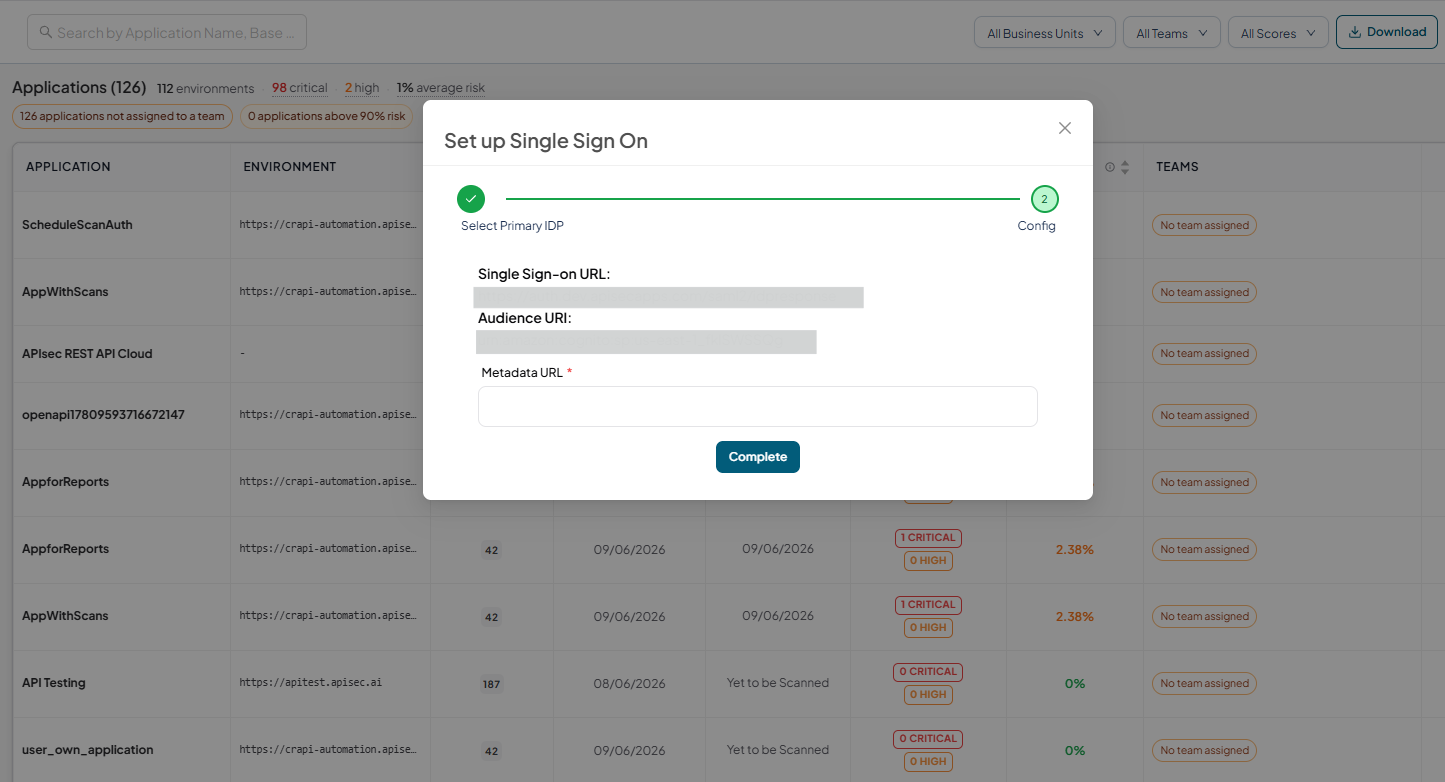
👉 Now, return to the Okta application created in Step 2 and proceed with the SSO configuration.
4. Single Sign-On Configuration in Okta
-
In the Configure SAML tab, enter the following details:
- Single sign-on URL: Enter the SSO URL retrieved from APIsec (Step 3).
- Audience URI: Enter the Audience URI retrieved from APIsec (Step 3).
- Name ID format: Select
EmailAddressfrom the dropdown. - Application Username: Select
Emailfrom the dropdown. - Update application username on: Leave as
Create and update.
-
Configure Attribute Statements:
| Name | Name Format | Value |
|---|---|---|
http://schemas.xmlsoap.org/ws/2005/05/identity/claims/emailaddress | Unspecified | user.email |
http://schemas.xmlsoap.org/ws/2005/05/identity/claims/displayName | Unspecified | user.firstName |
- Configure Group Attribute Statements:
| Name | Name Format | Filter | Value |
|---|---|---|---|
http://schemas.xmlsoap.org/ws/2005/05/identity/claims/apisecroles | Unspecified | Starts with | APIsec |
- Click Next.
- Click Finish.
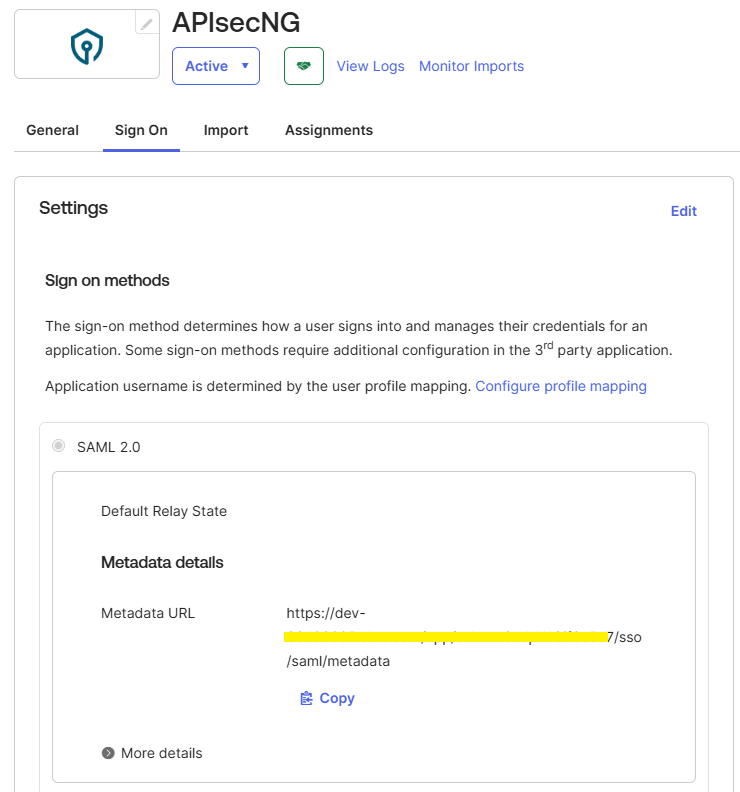
5. Metadata Configuration in Okta
-
In Okta, navigate to Sign On in the APIsec application settings.
-
Locate the Metadata URL under Metadata Details.
-
Copy the Metadata URL.
-
Log in to APIsec as an ADMIN user.
-
Click Setup Single Sign-On on the Primary Navigation Panel.
-
Select OKTA as the primary IDP and click Next.
-
Enter the Metadata URL and click Complete.
6. Testing and Validation
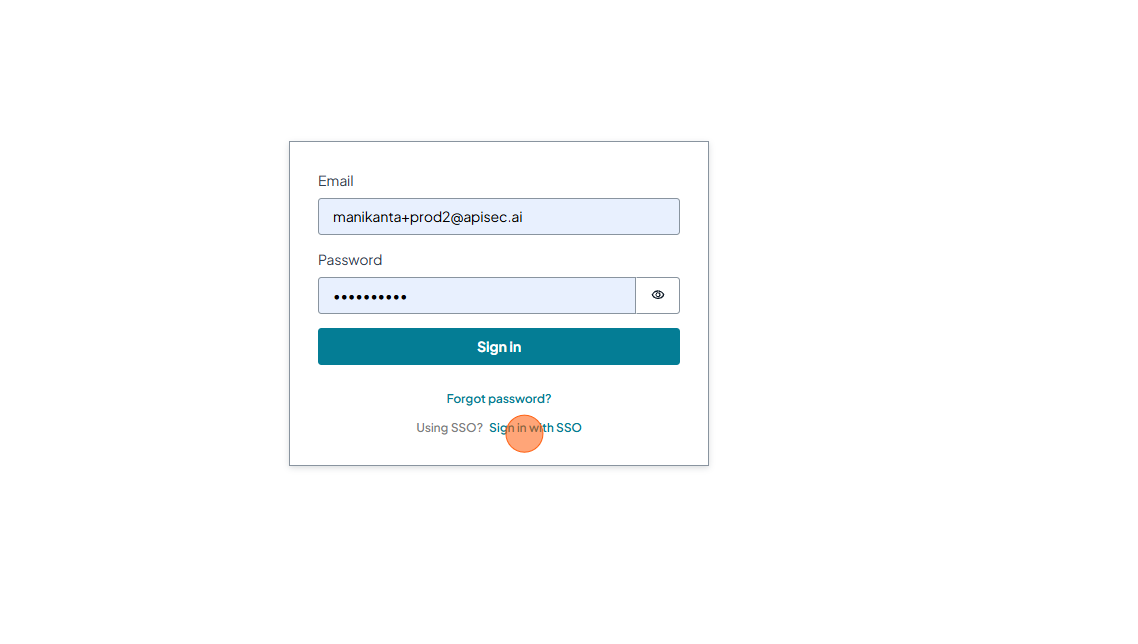
-
Log out of APIsec.
-
After completing the SSO configuration, you will find the Sign in with SSO link.
-
Click Sign in with SSO, and the user should be redirected to the Okta Login Page.
-
Attempt to log in via Okta SSO.
-
Ensure that users in the
APISEC_USERandAPISEC_ADMINgroups can access APIsec using the appropriate roles. -
If login fails, check Okta logs for errors and verify that the correct attributes are being sent.
7. Important Considerations
- Users not assigned to
APISEC_USERorAPISEC_ADMINcannot access APIsec. - A user should not be assigned to both groups simultaneously.
- If RBAC-based access control is not functioning as expected, verify that:
- The Group Claim is correctly mapped.
- The user is assigned to only one of the designated groups.
By following these steps, you can successfully integrate Okta SSO with APIsec, ensuring secure and streamlined authentication for users.