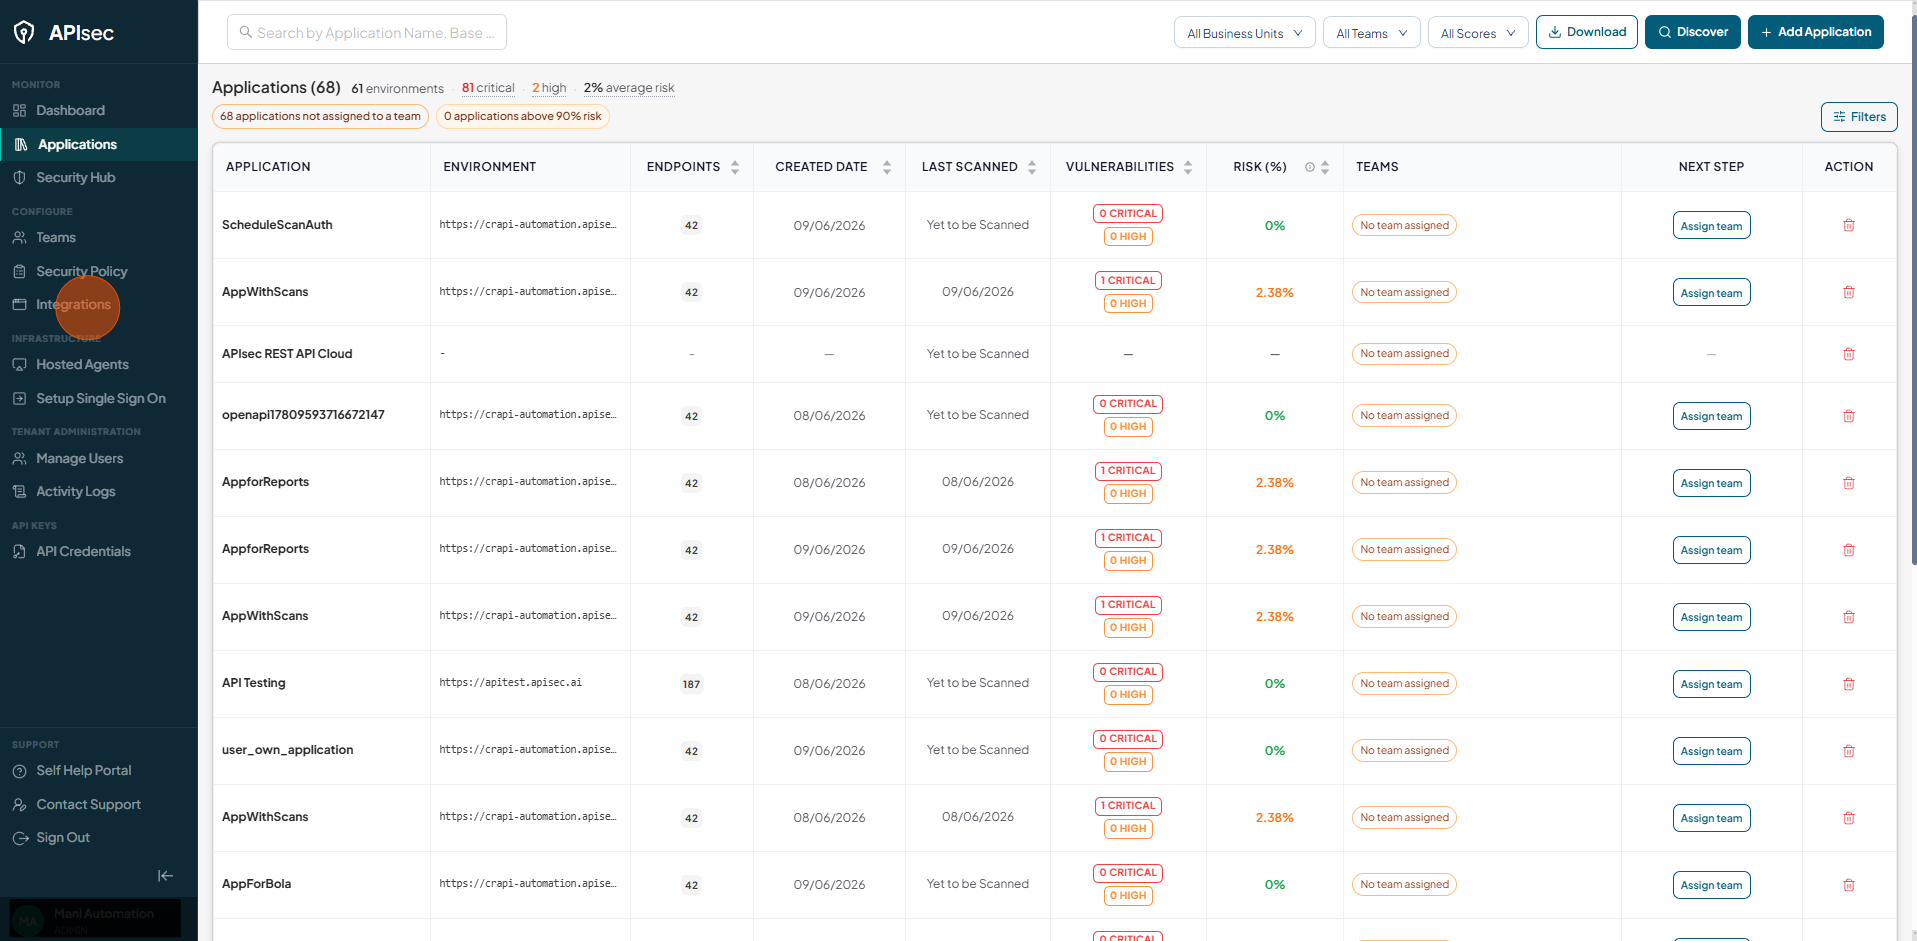
How To Onboard An Application Using Apigee API Gateway
Start Adding a New Application
-
Open your browser and visit: https://<your-tenant>.apisecapps.com
-
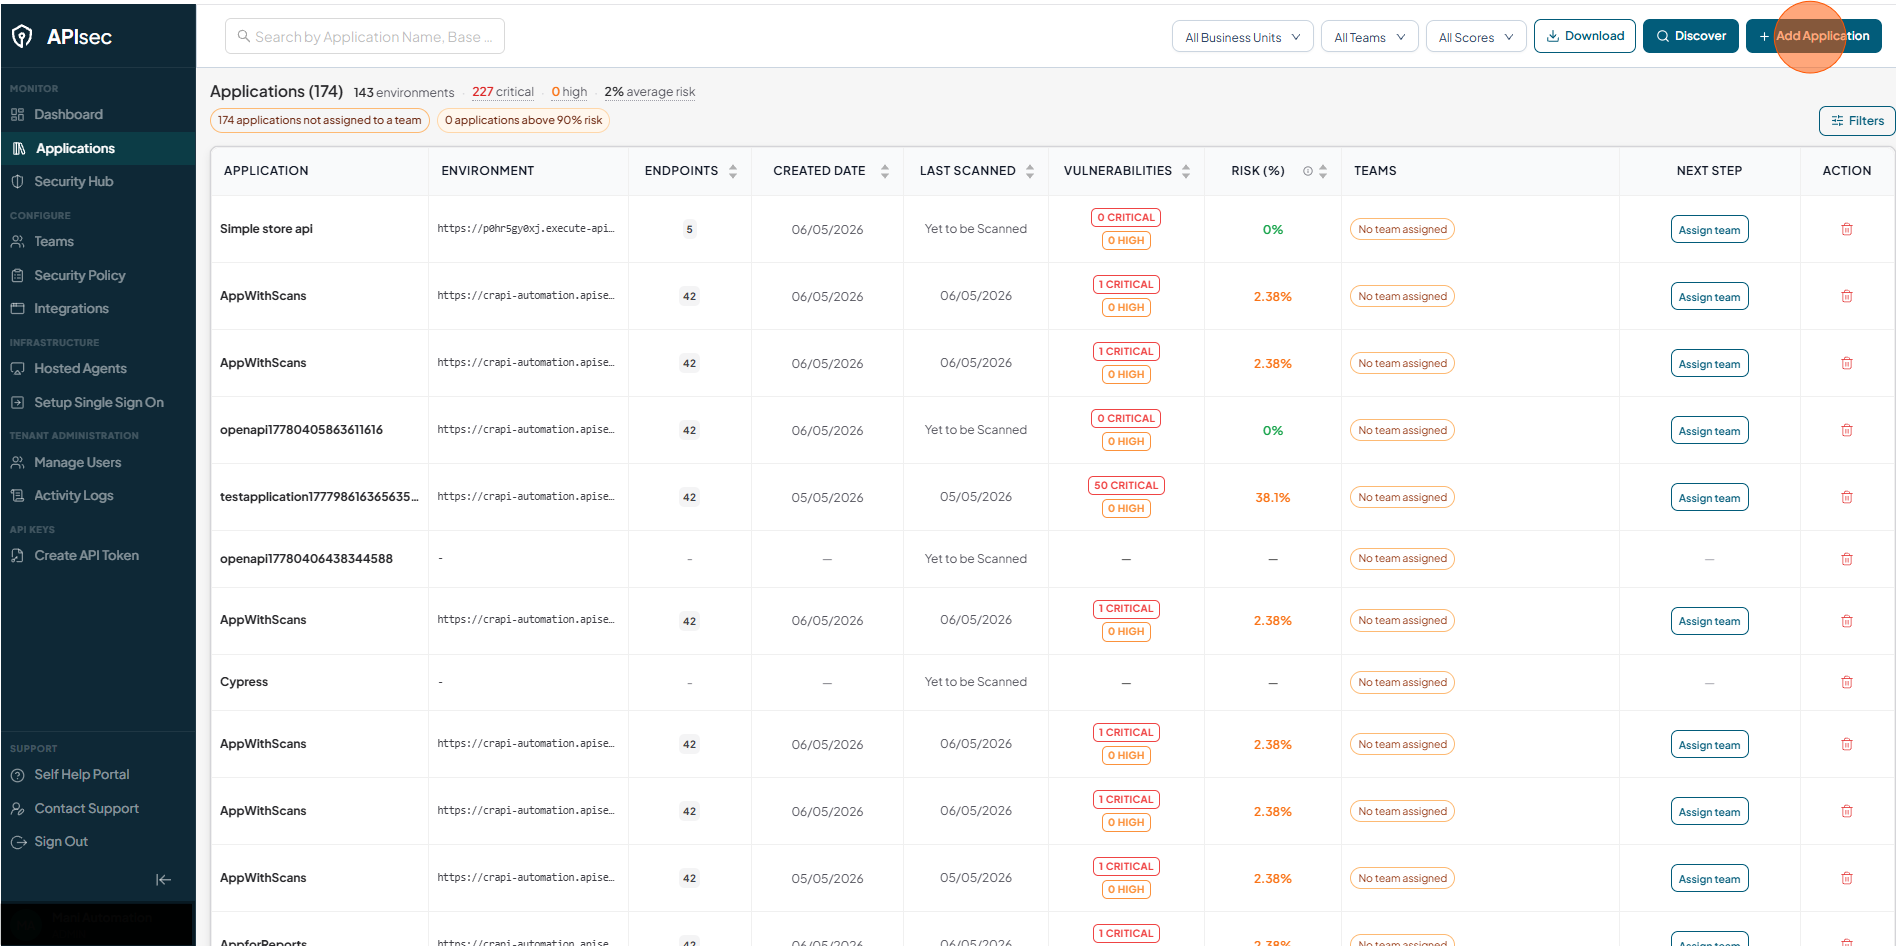
Click on the Add Application button.
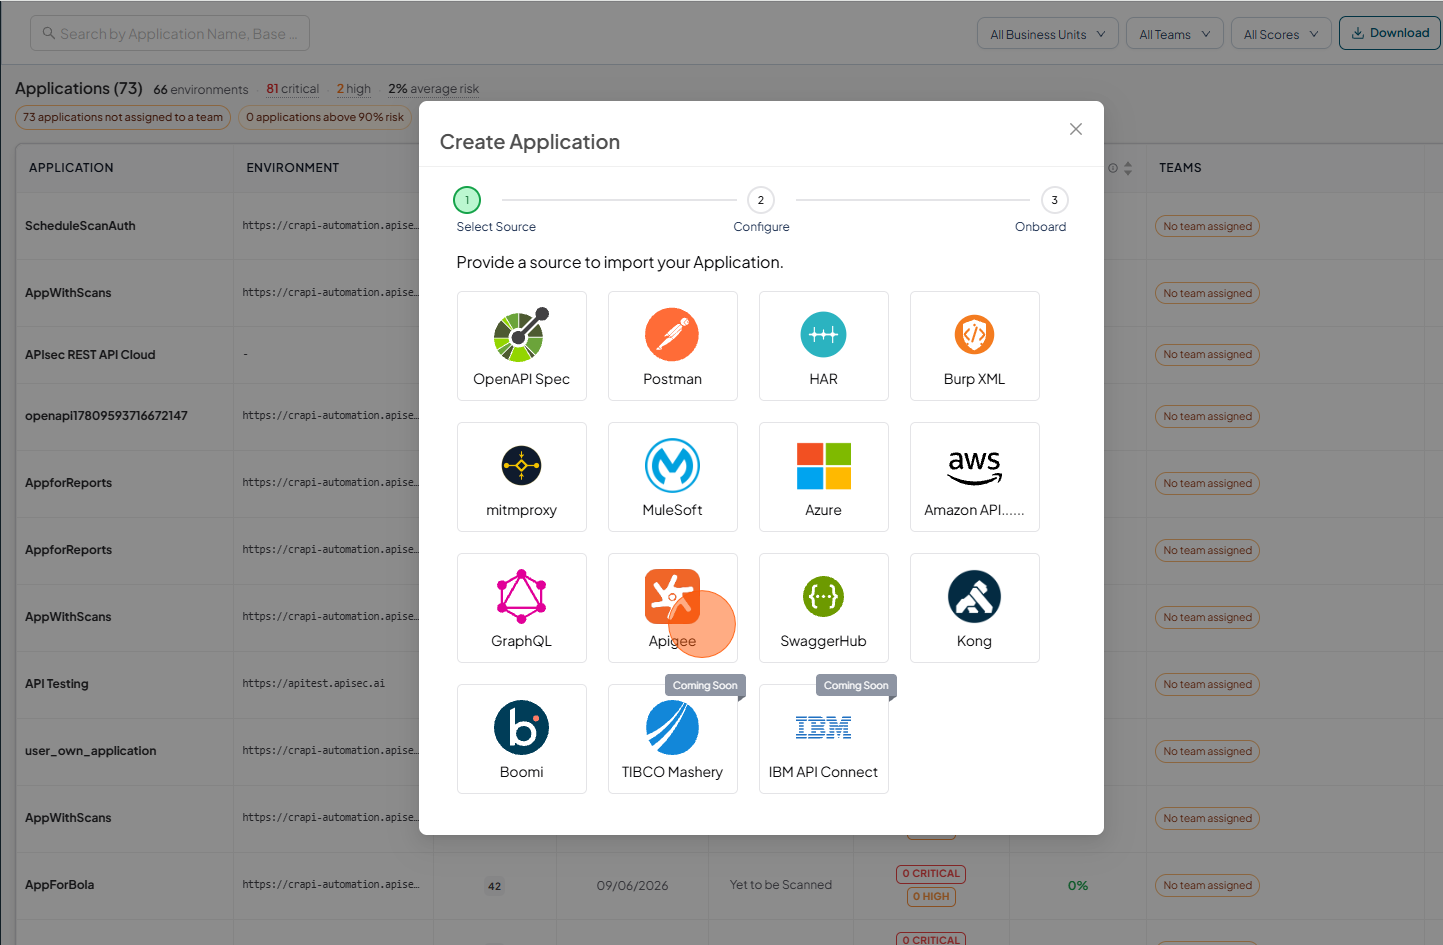
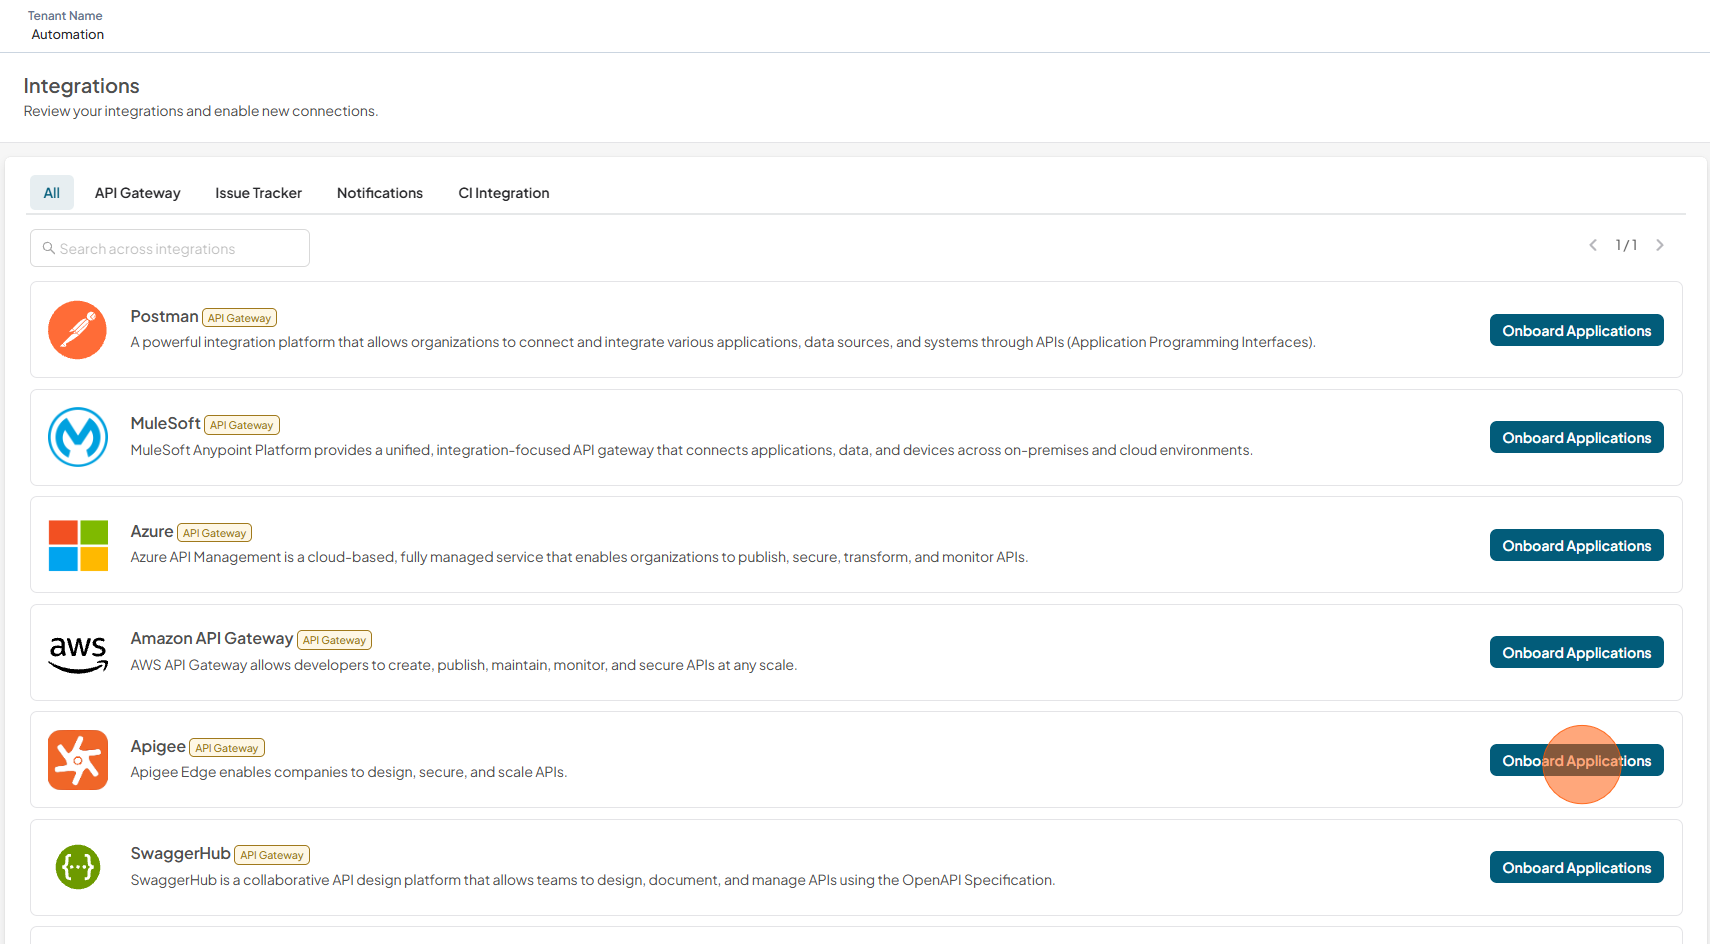
Select Apigee Gateway
-
Choose the Apigee Gateway option.
-
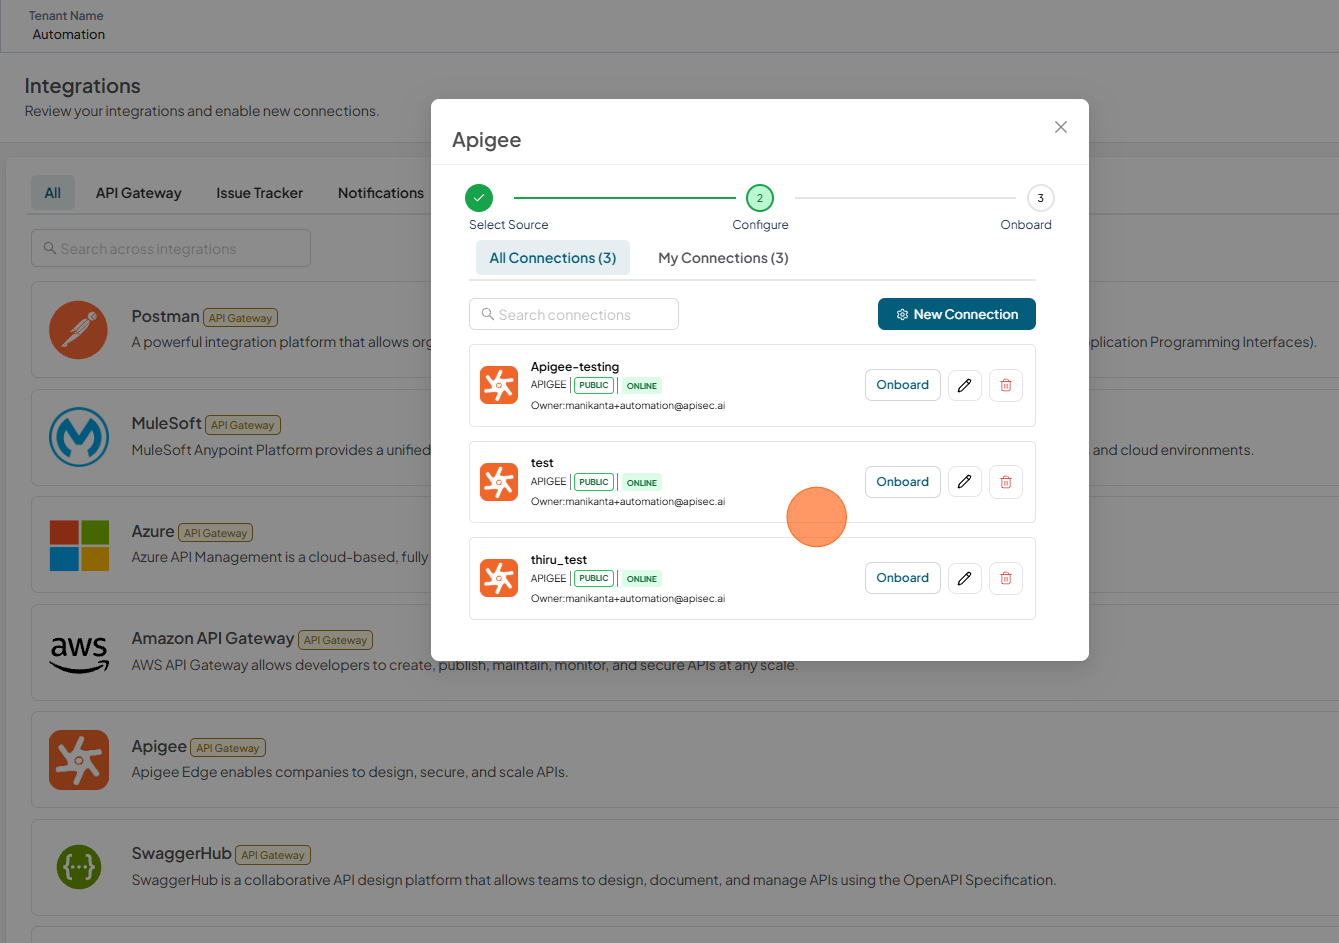
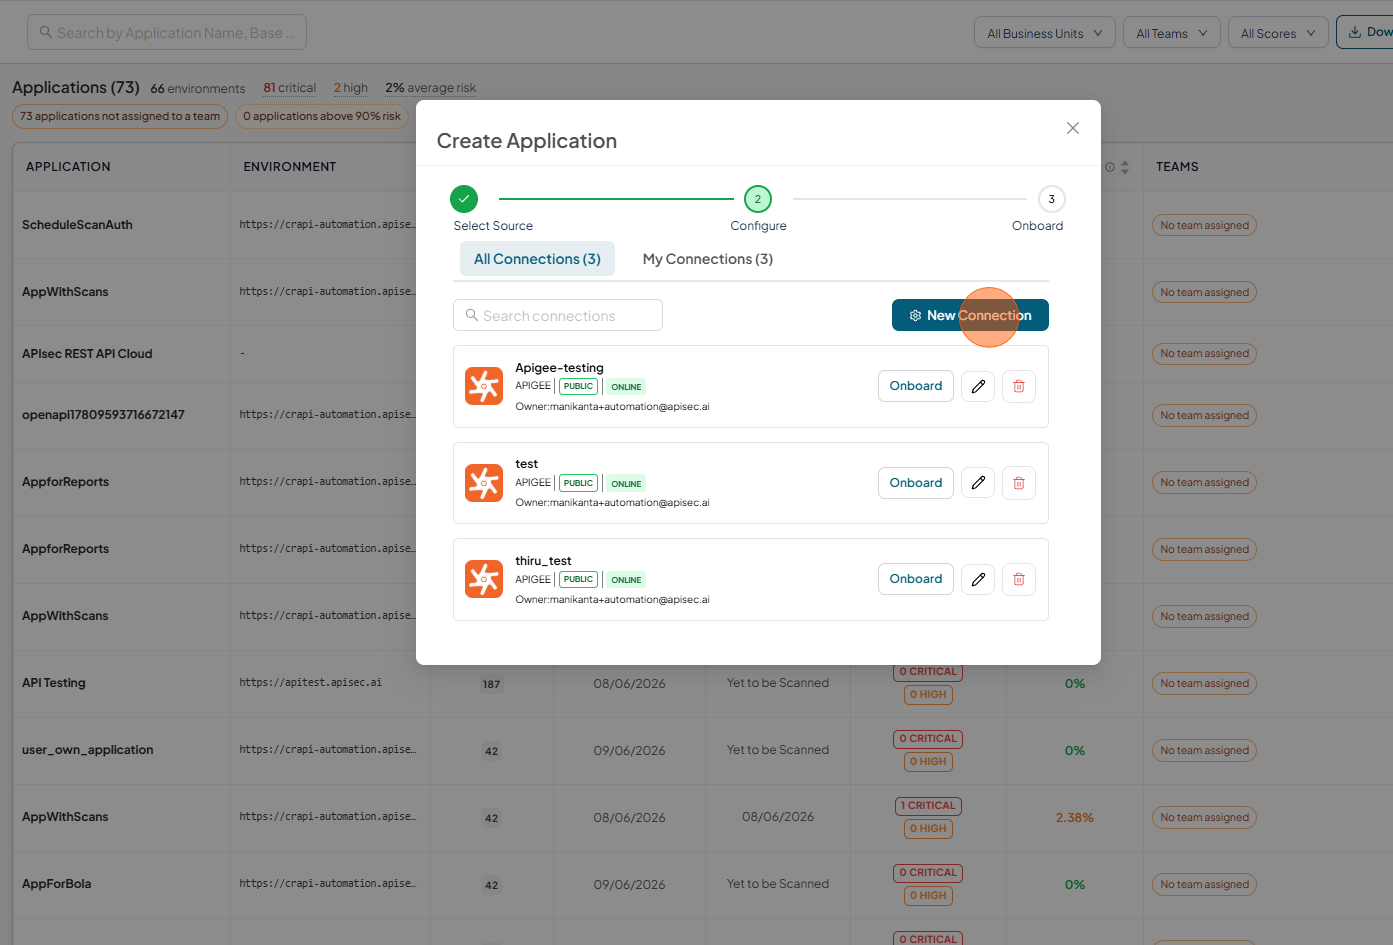
If existing connections are available, they will be displayed in the Connections list. To create a new connection, click New Connection.
-
If no connections exist, a connection form is displayed, allowing you to enter the required details and create a connection.
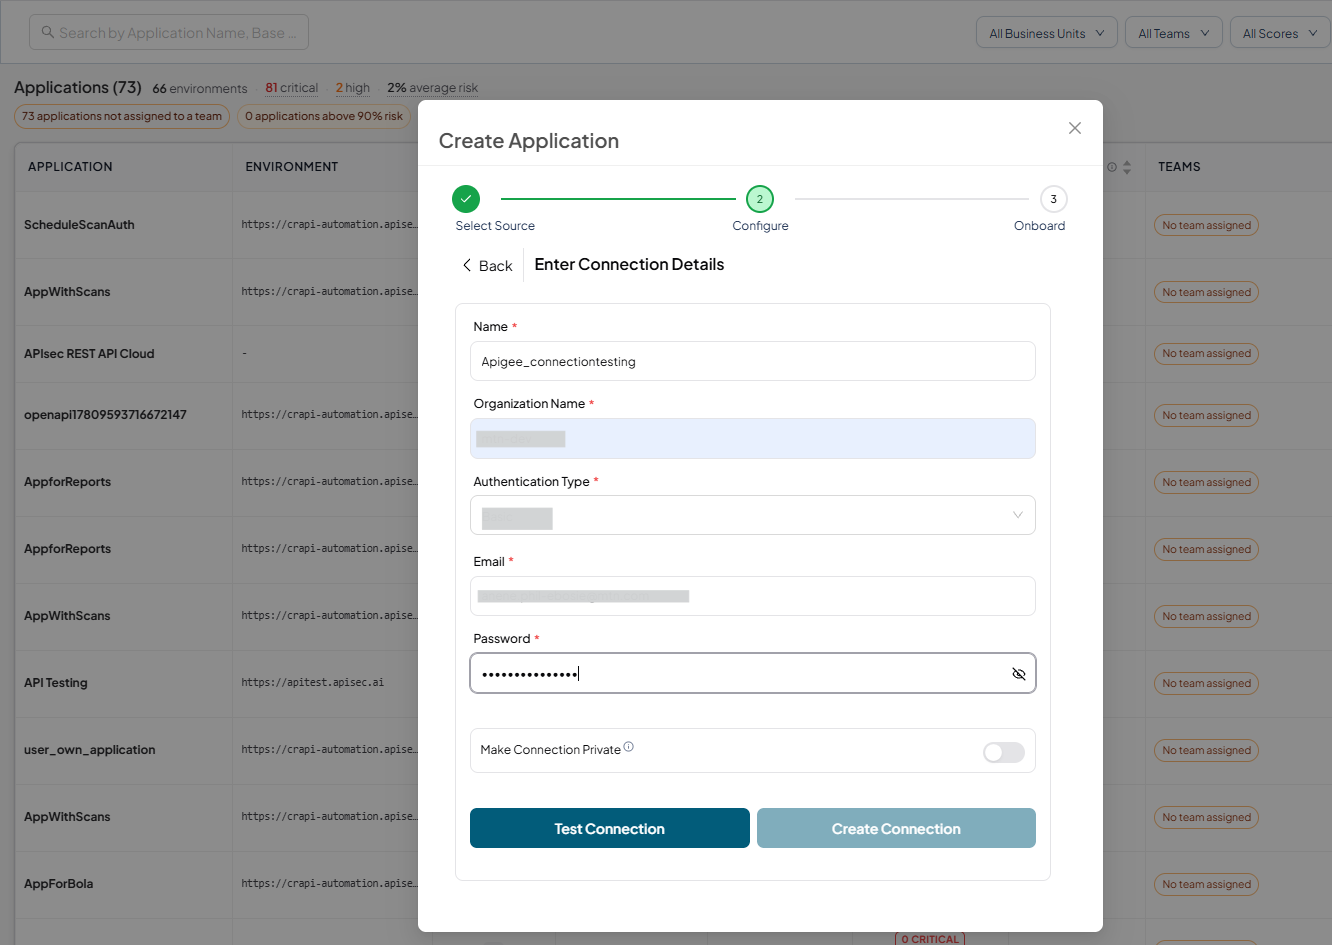
Enter Application Details
-
Fill the Form Name, Organization Name, Auth Type, Auth details.
-
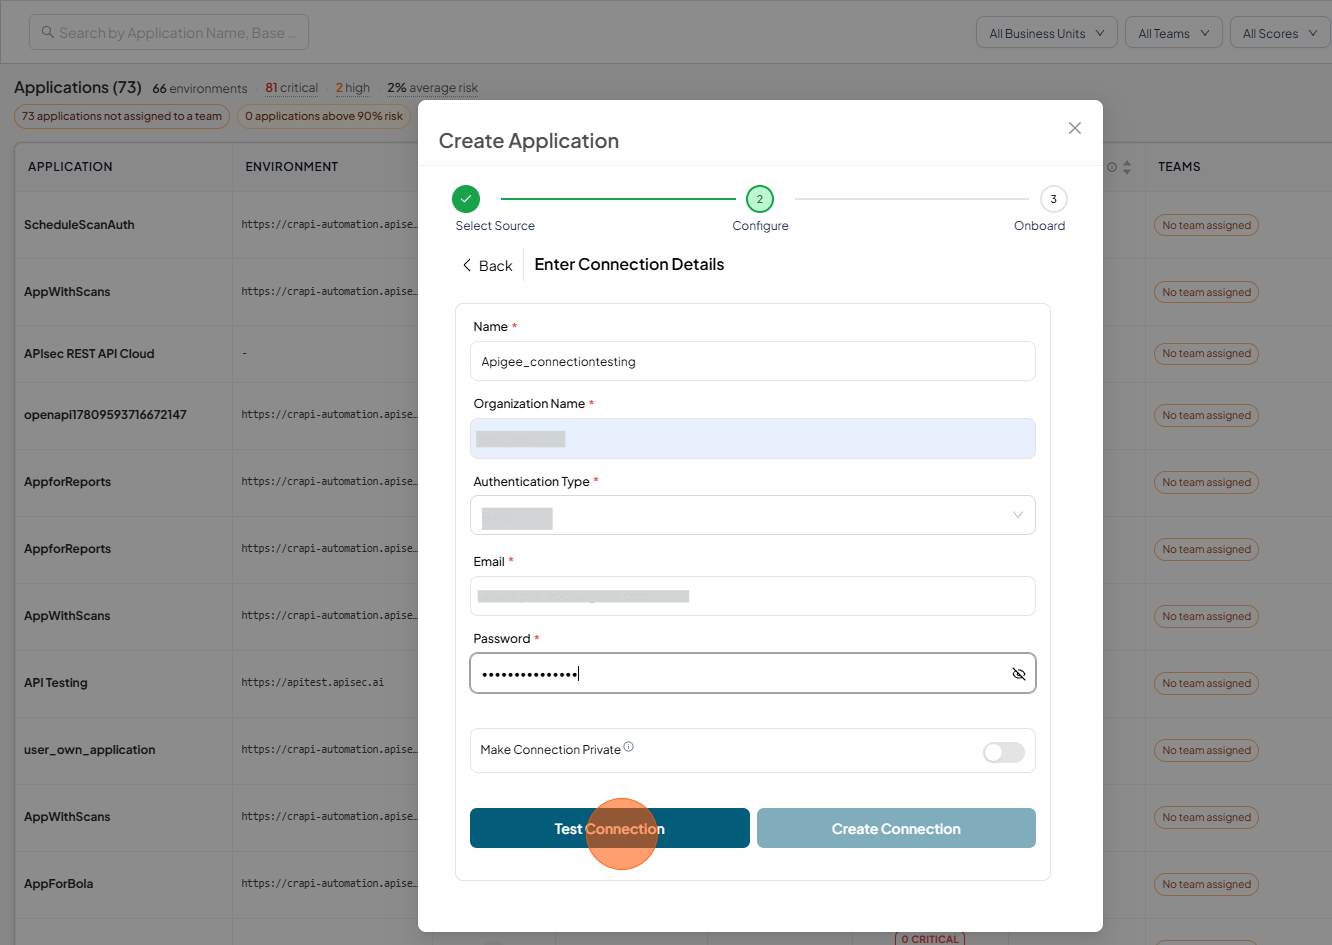
Click Test Connection
-
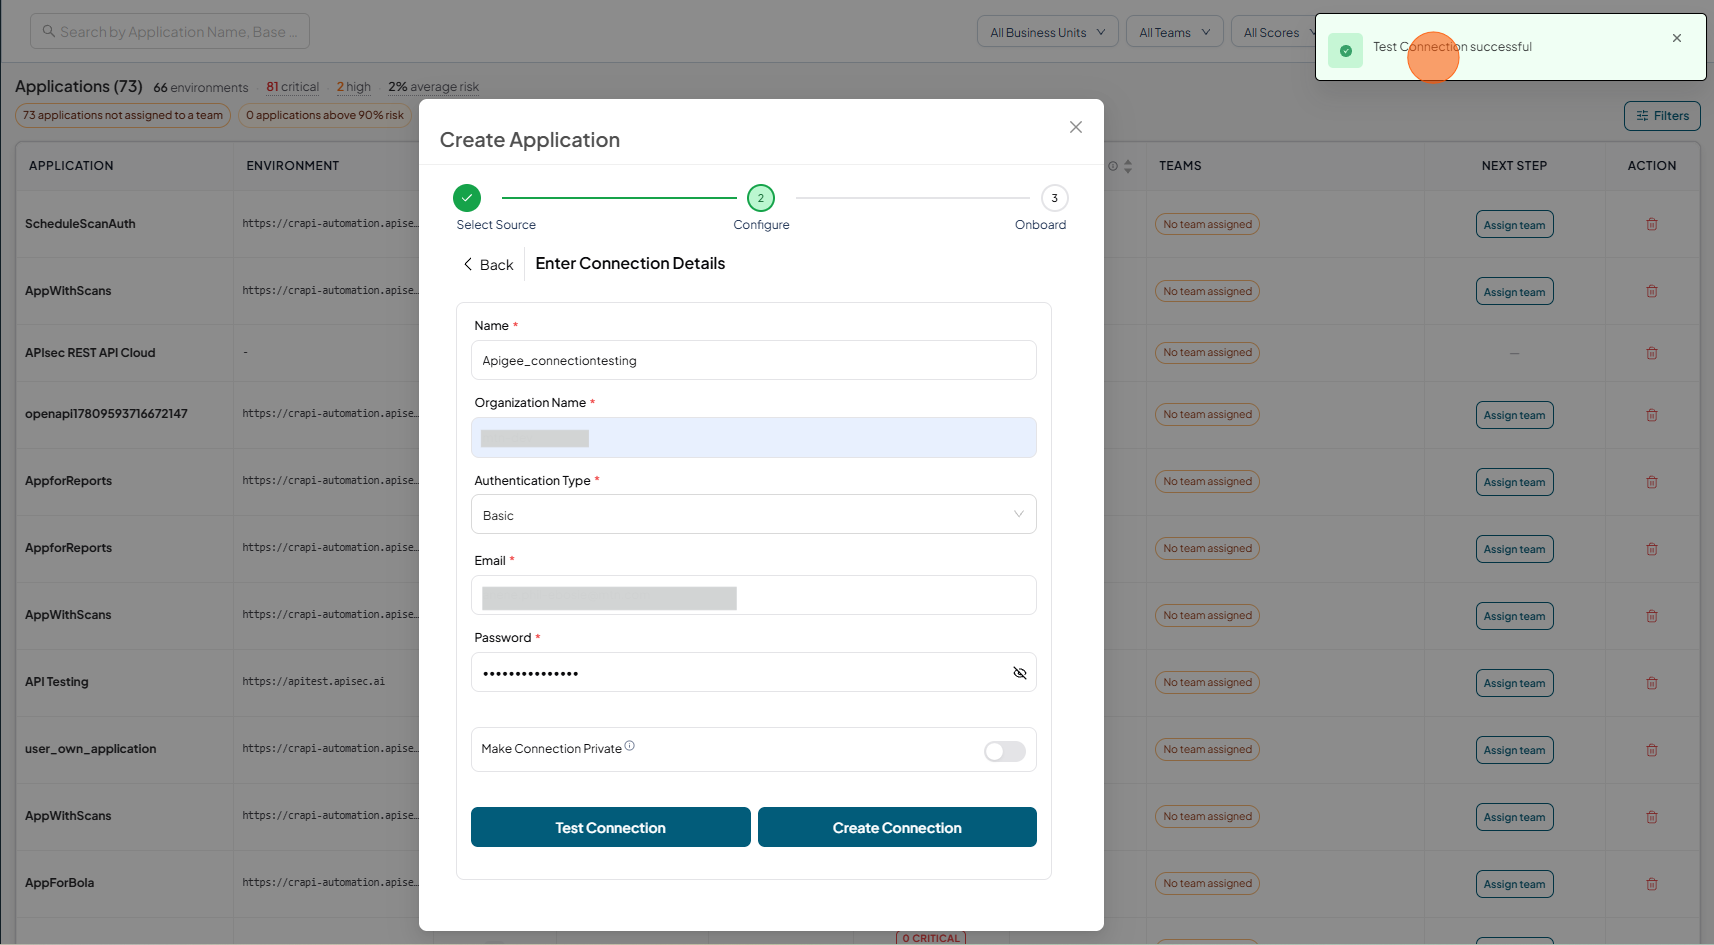
Test Success
-
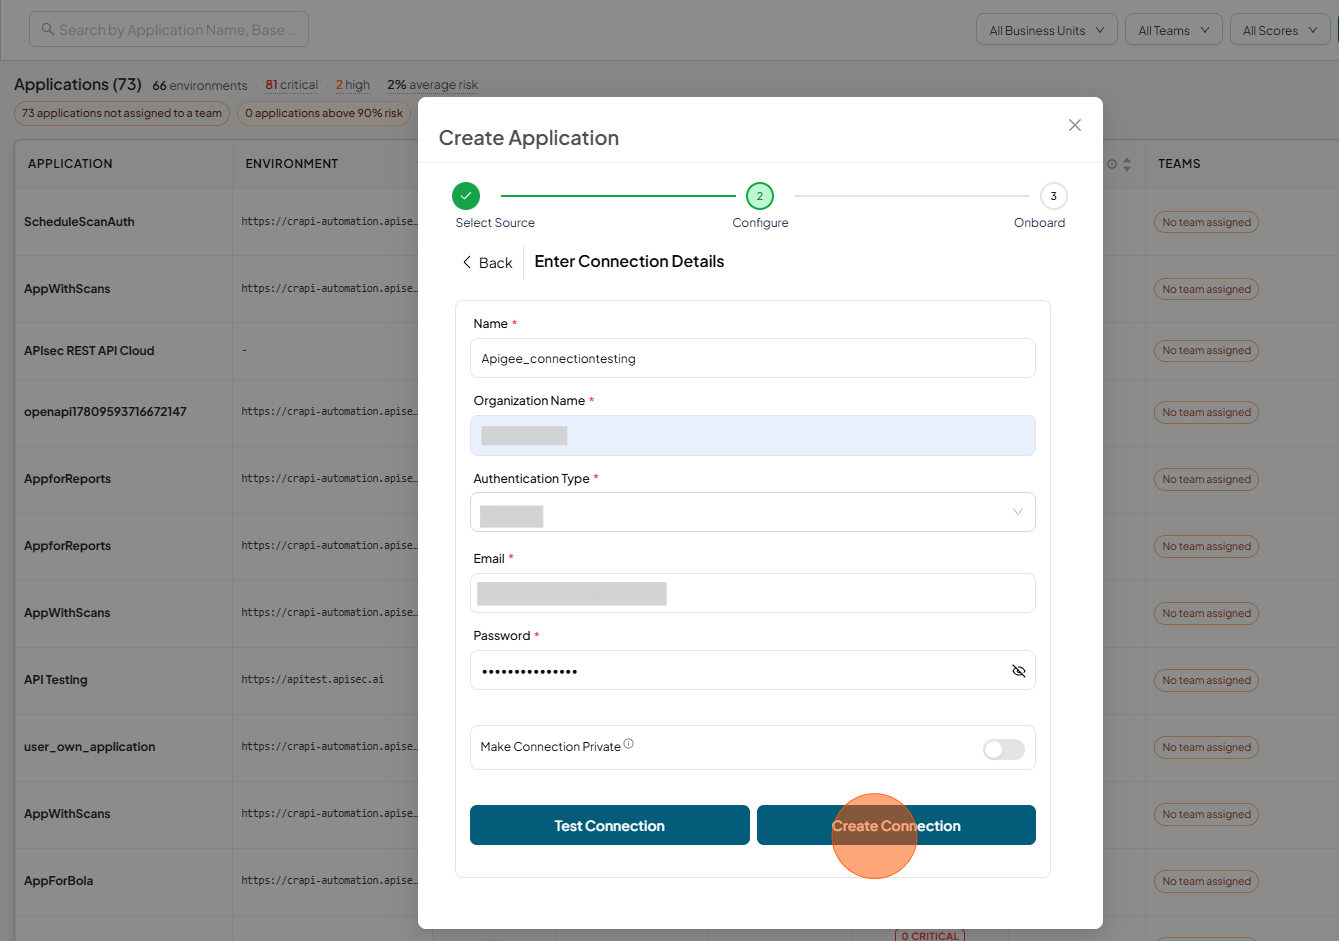
Click Create Connection
-
Select Type and API
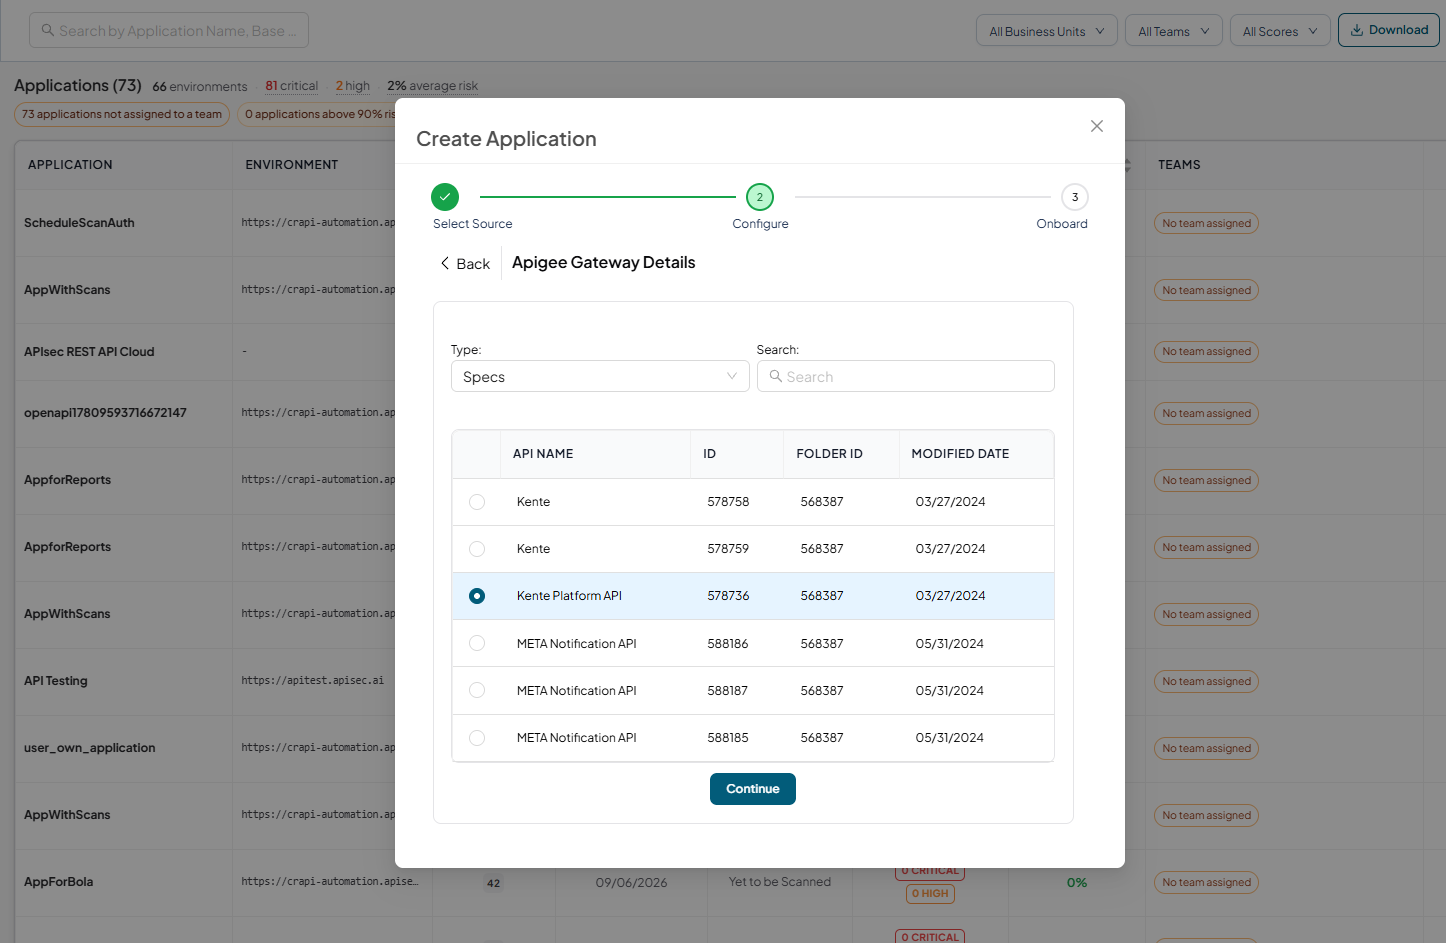
-
Click Continue
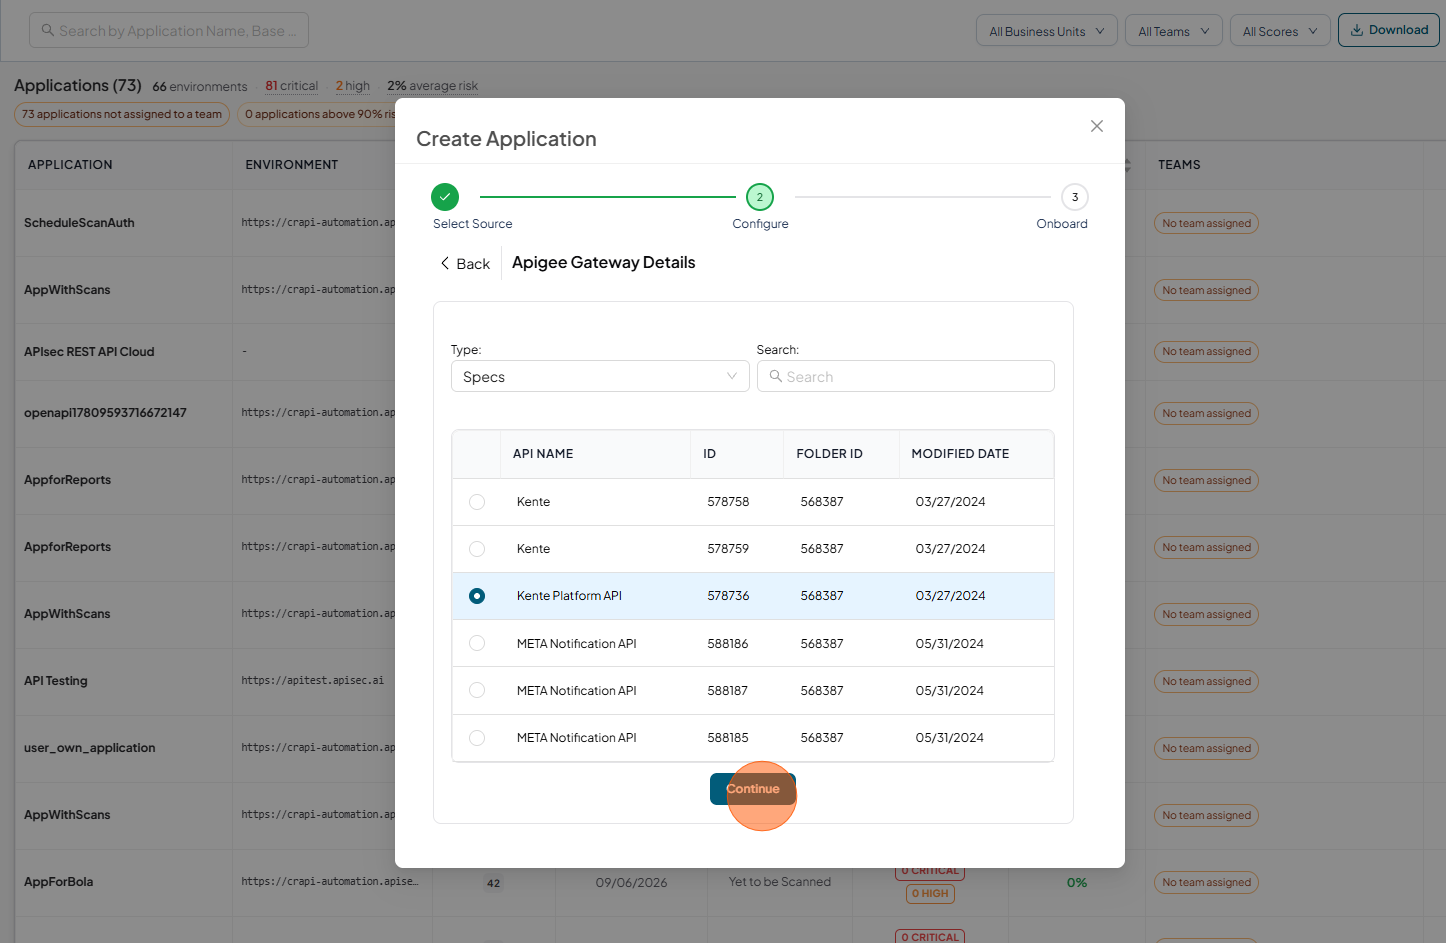
-
Click Onboard
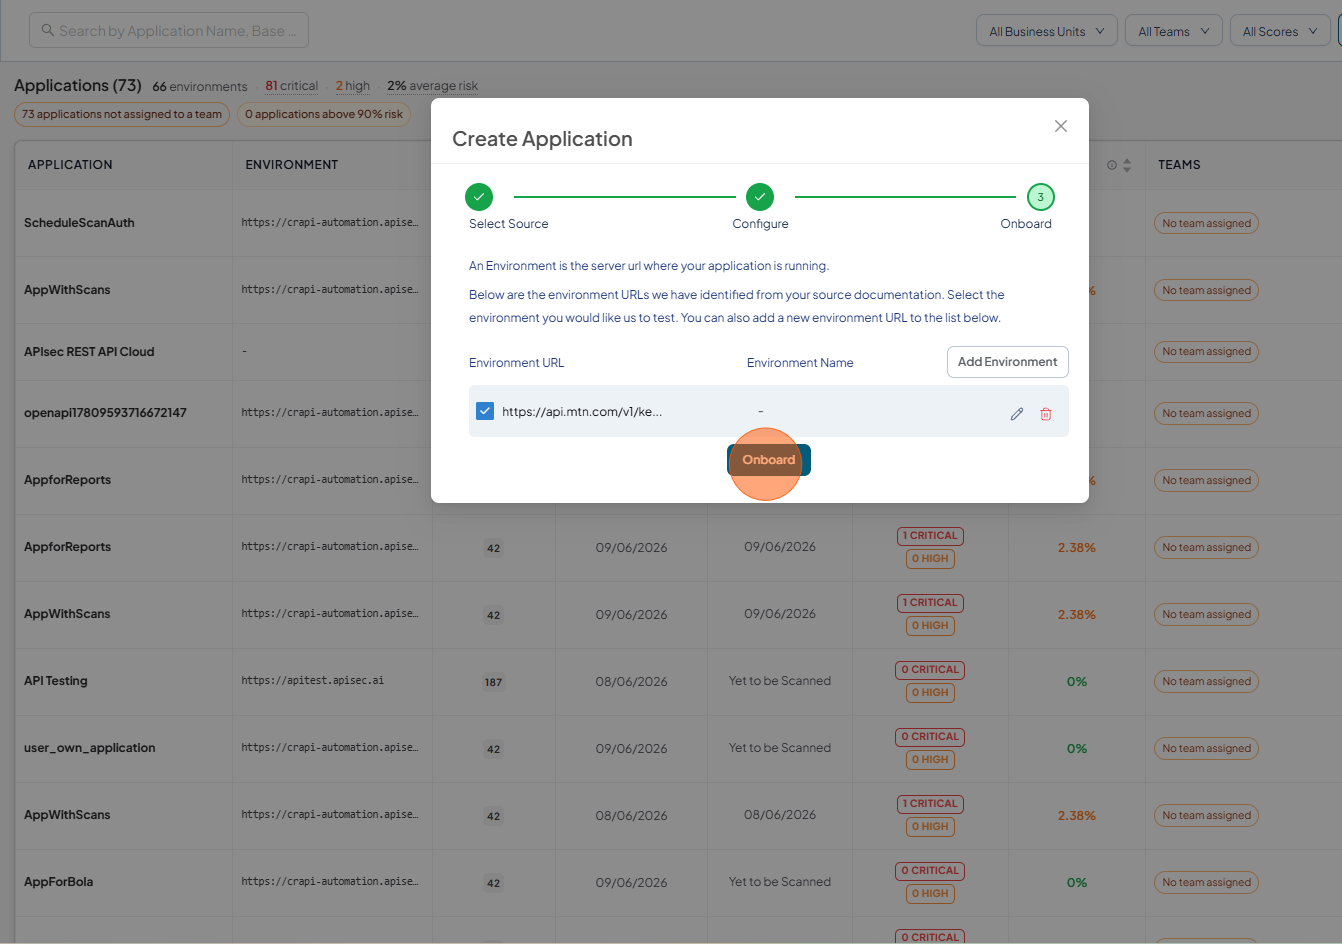
-
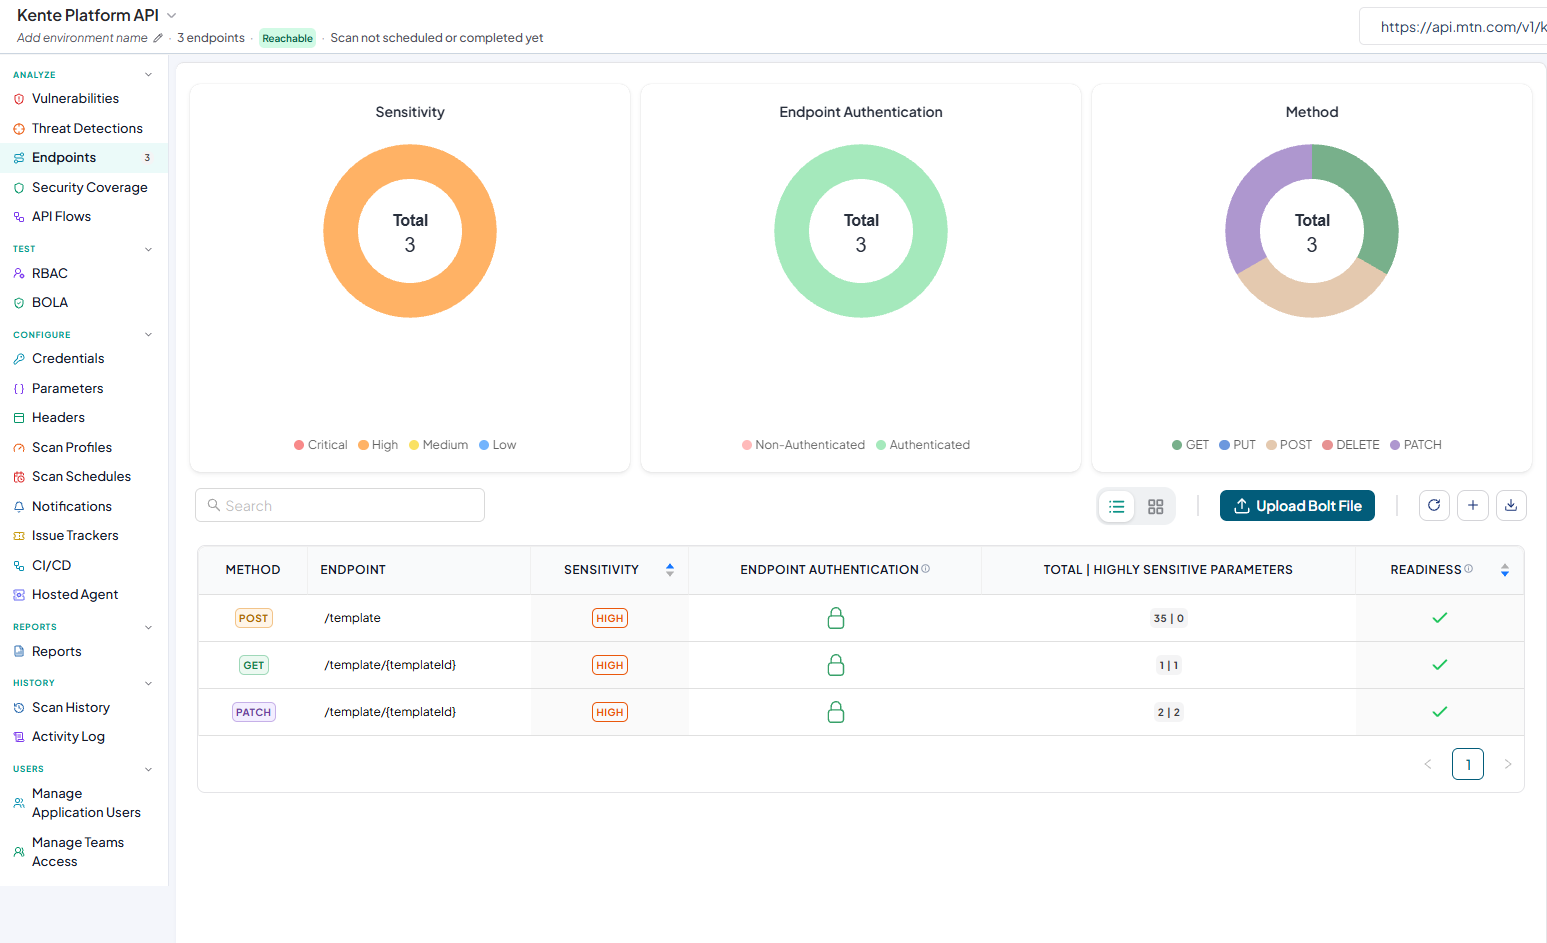
Apigee Application Dashboard
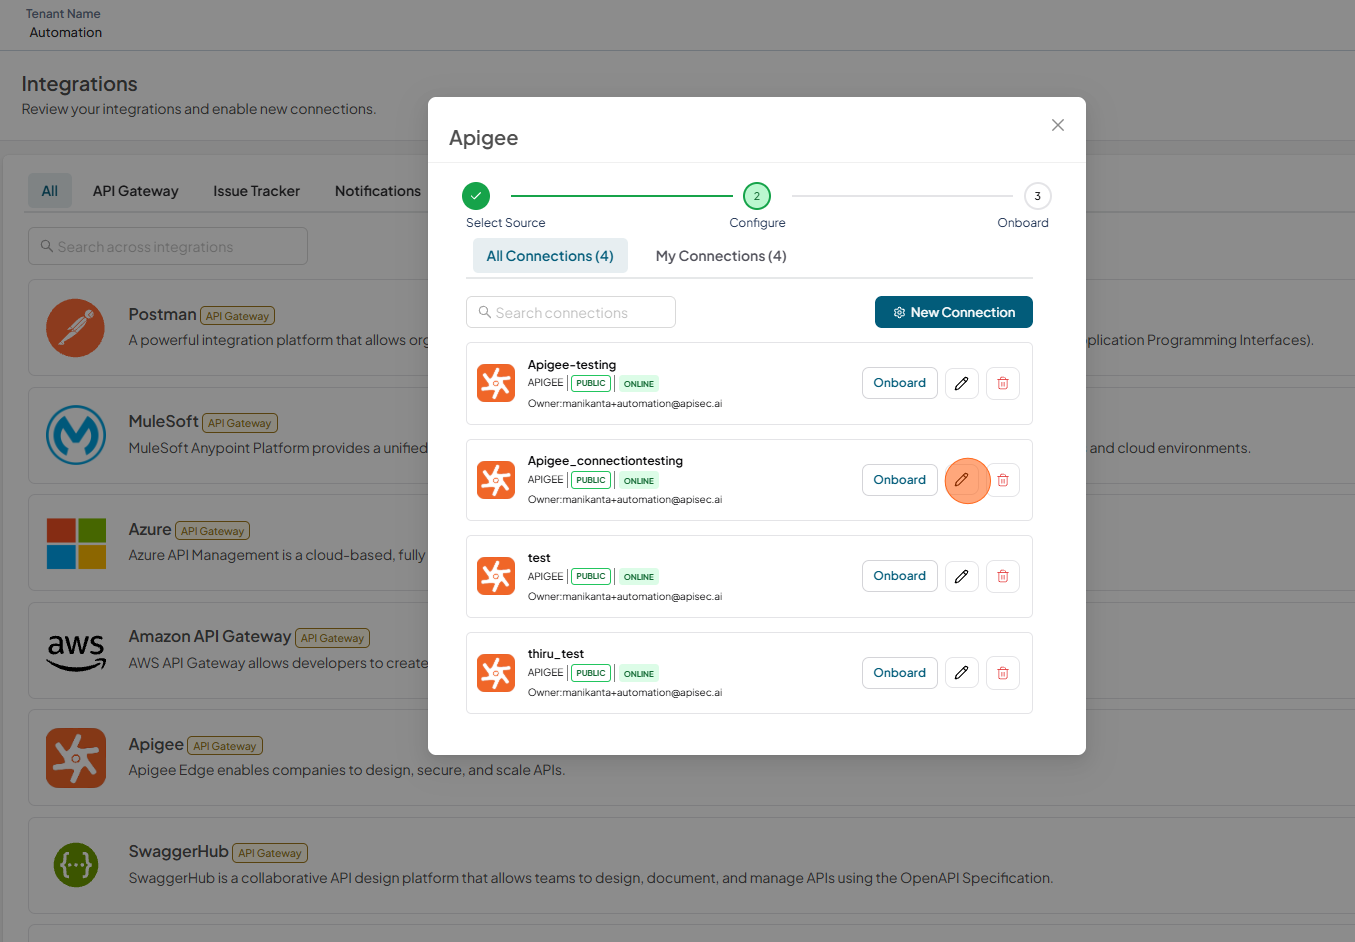
Edit Apigee Connection
-
Open your browser and visit: https://<your-tenant>.apisecapps.com
-
Click Integrations tab
-
Click Onboard Applications adjacent to the Apigee
-
A list of existing Apigee connections is displayed.
-
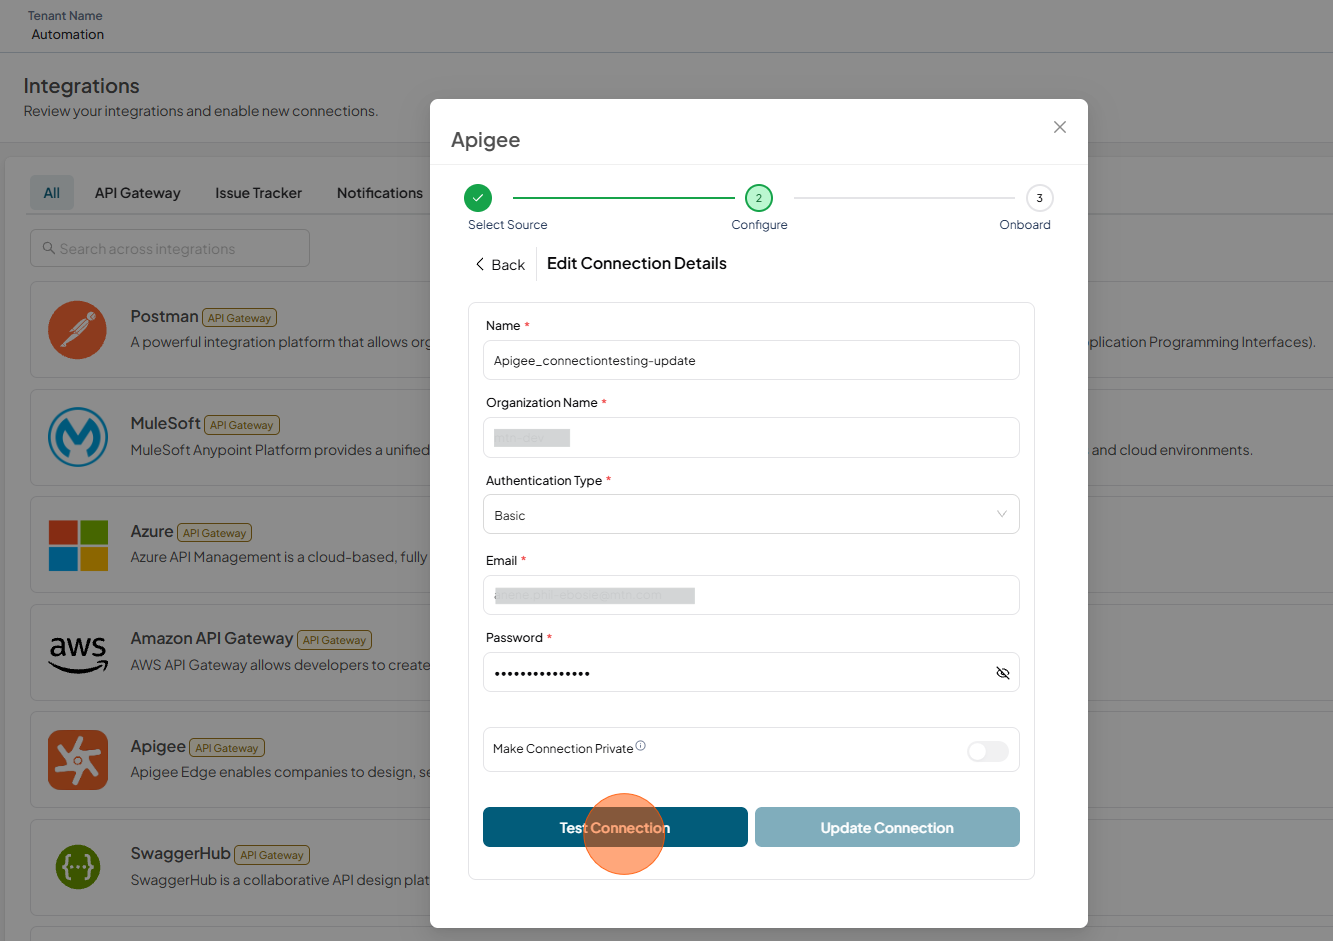
Select the Pencil icon next to the connection you want to edit.
-
Update the required details and Click on Test Connection
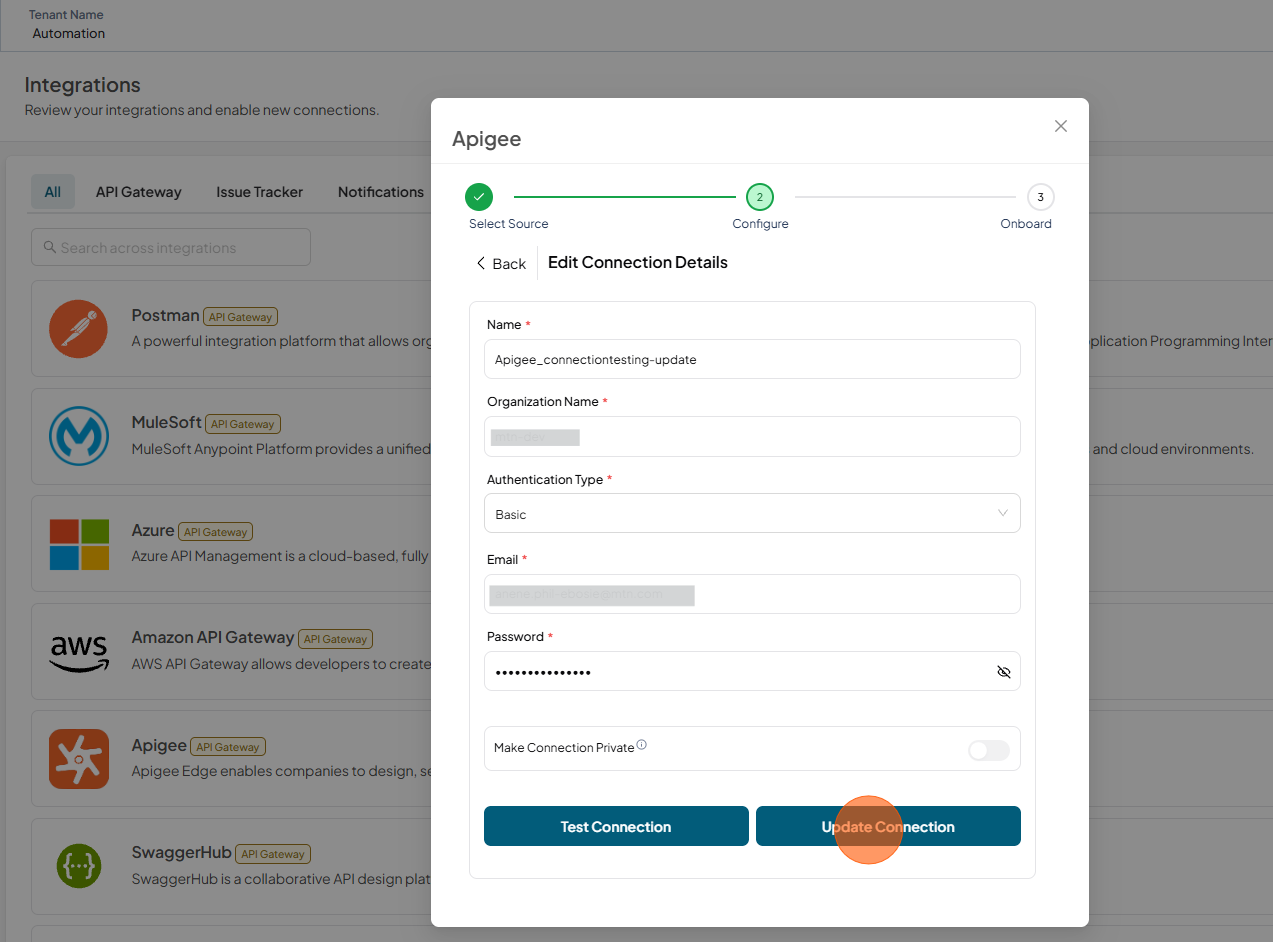
-
once Test connection successfull then Click on Update Connection
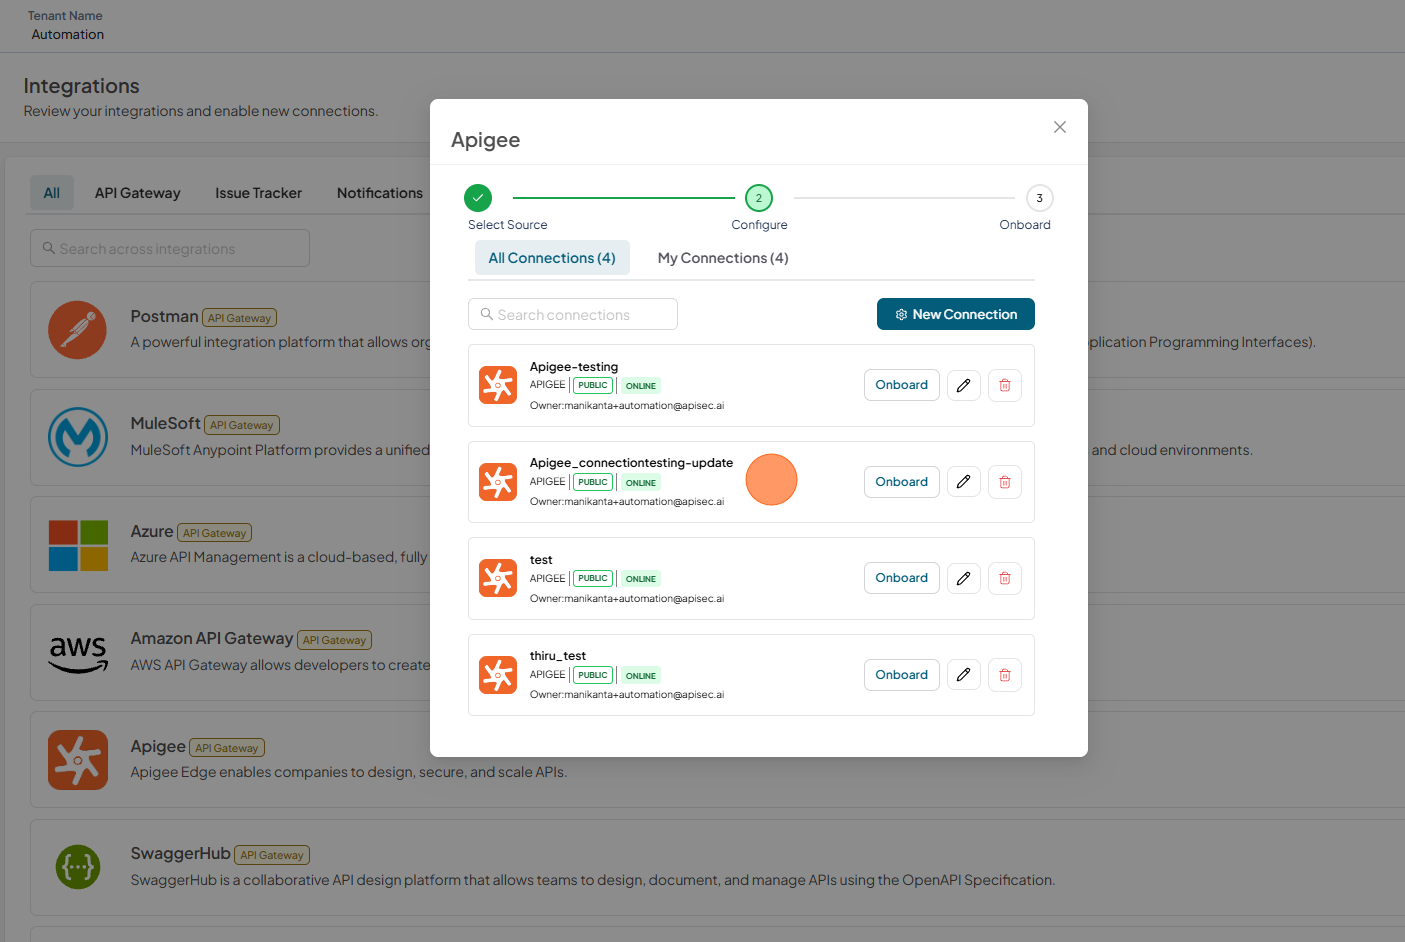
-
The updated connection is now displayed in the connections list.
Delete Apigee Connection
-
Open your browser and visit: https://<your-tenant>.apisecapps.com
-
Click Integrations tab
-
Click Onboard Applications adjacent to the Apigee
-
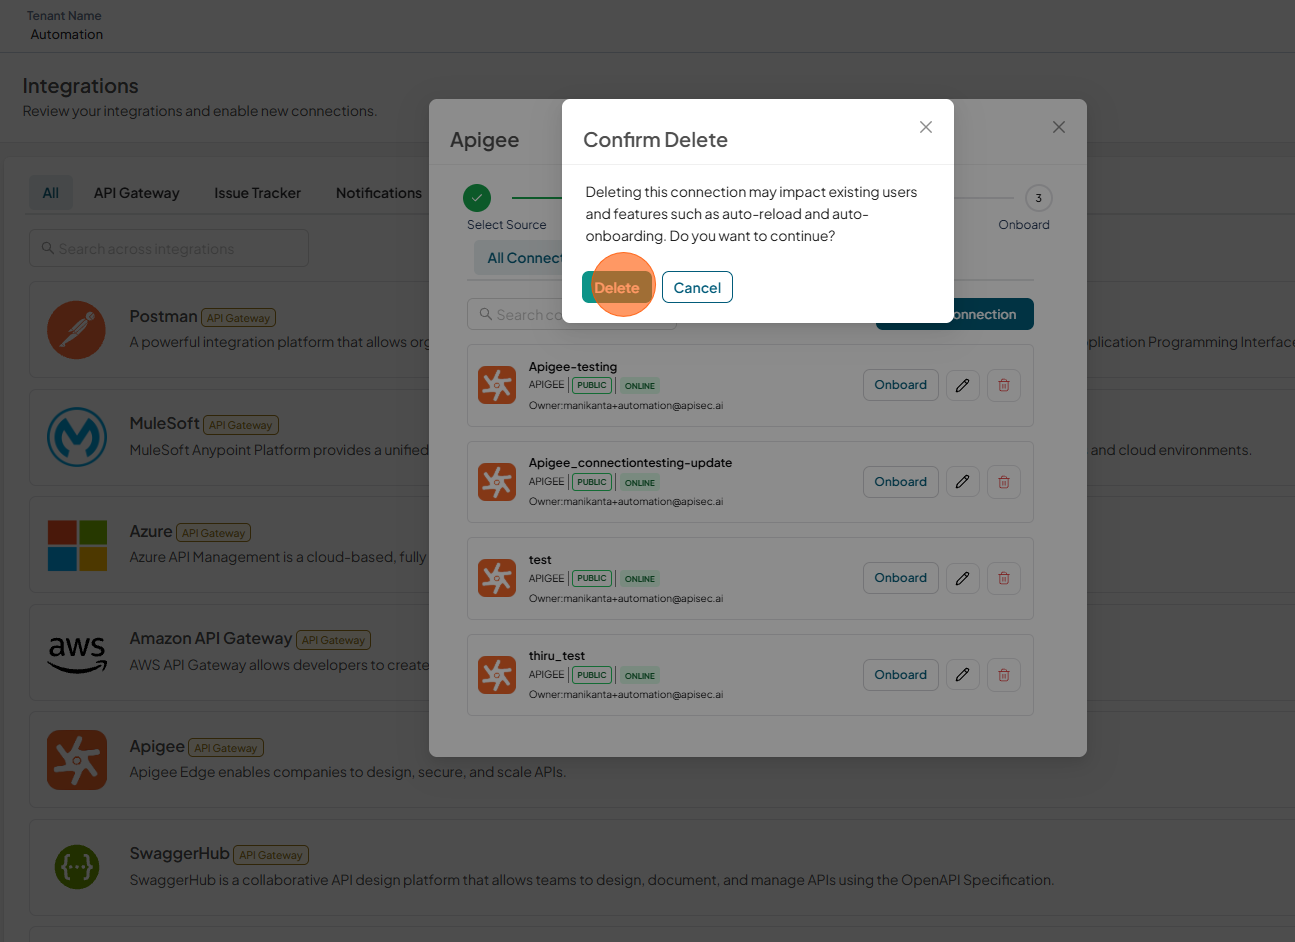
A list of existing Apigee connections is displayed.
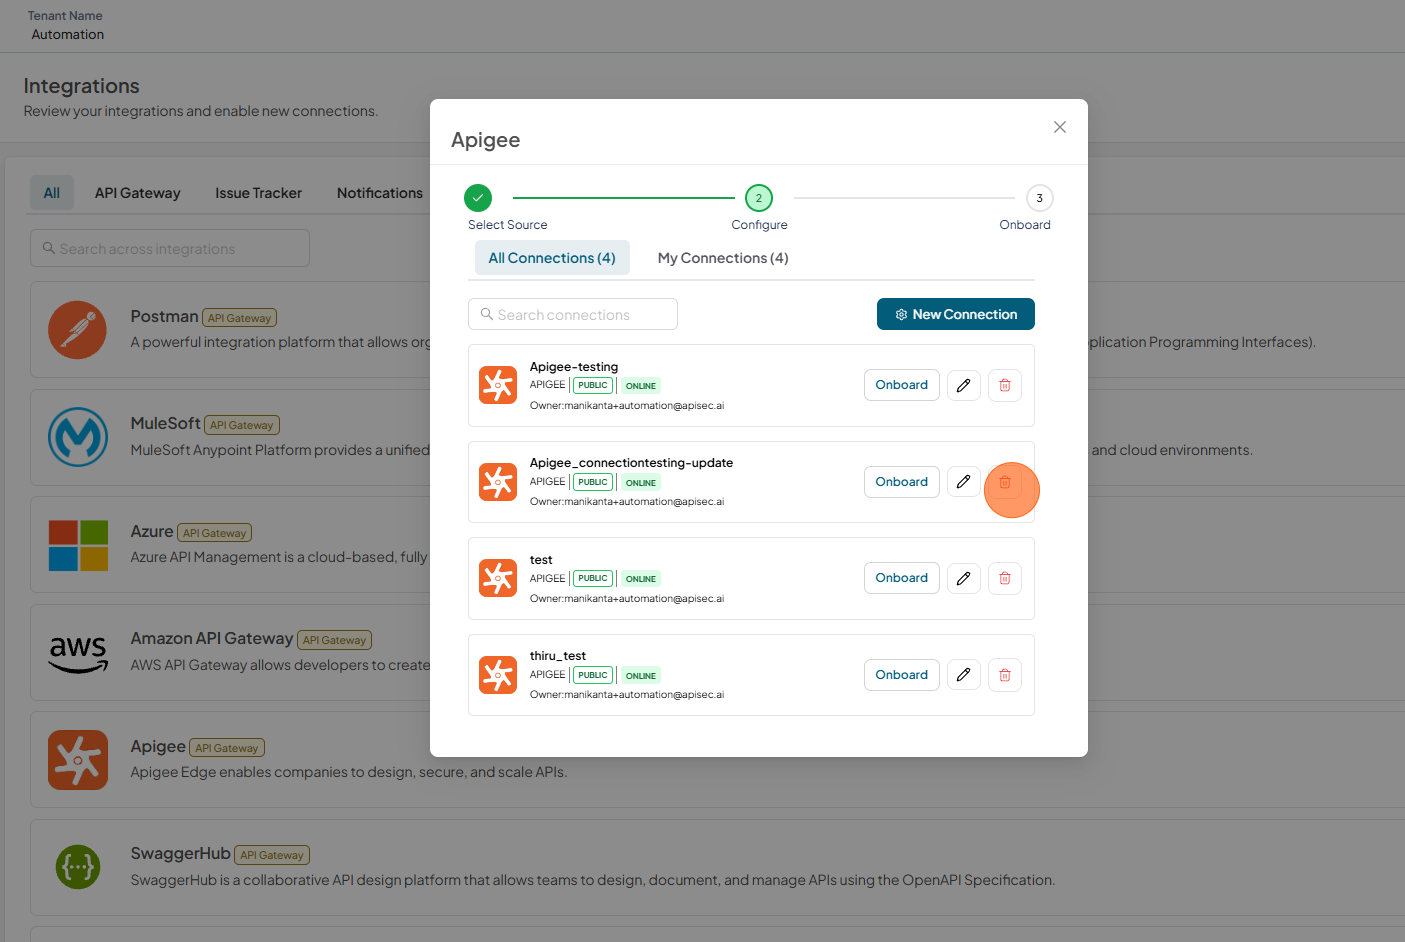
-
Select the Delete icon next to the connection you want to delete.
-
Click Delete to confirm
-
The deleted connection is no longer displayed in the connections list.