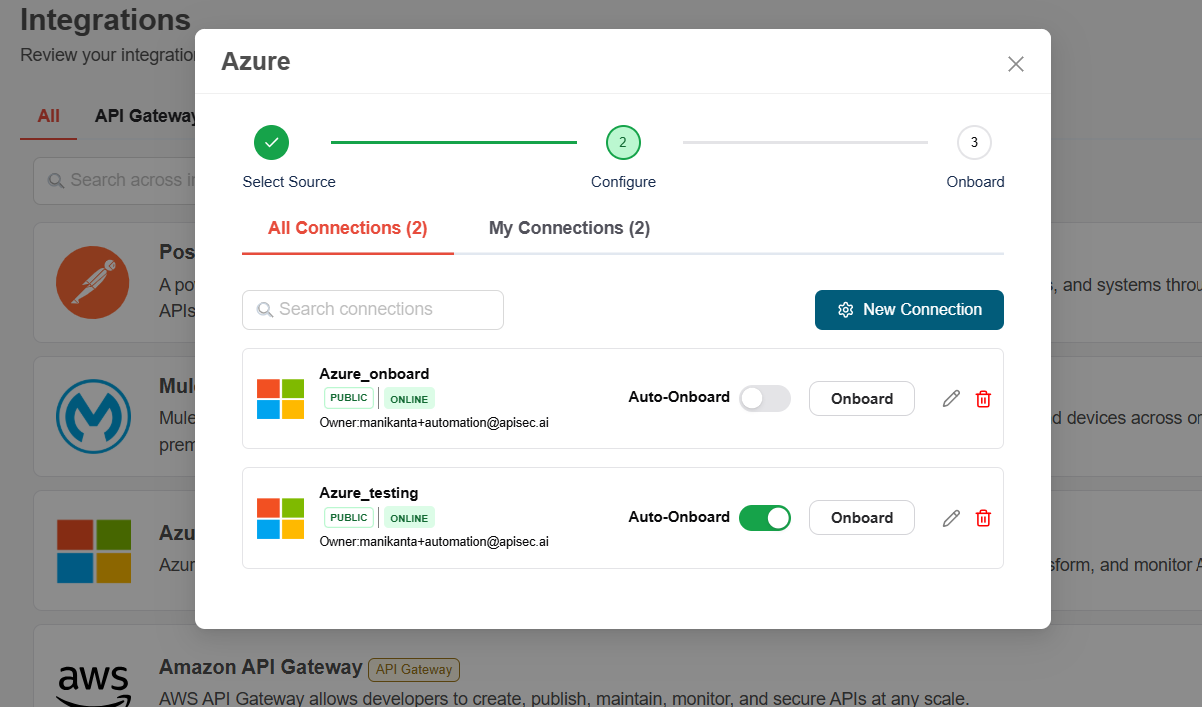
How To Onboard An Application Using Azure API Gateway
Prerequisites
Create an App Registration in Azure Active Directory (AAD)
-
Log in to Azure Portal.
-
Follow the steps below to obtain the Client ID and Tenant ID.
-
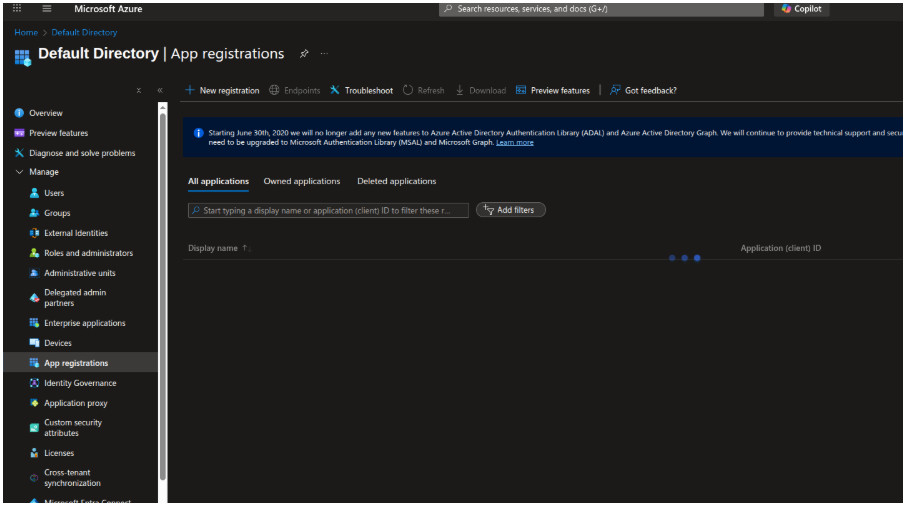
Click on New registration in App registrations
-
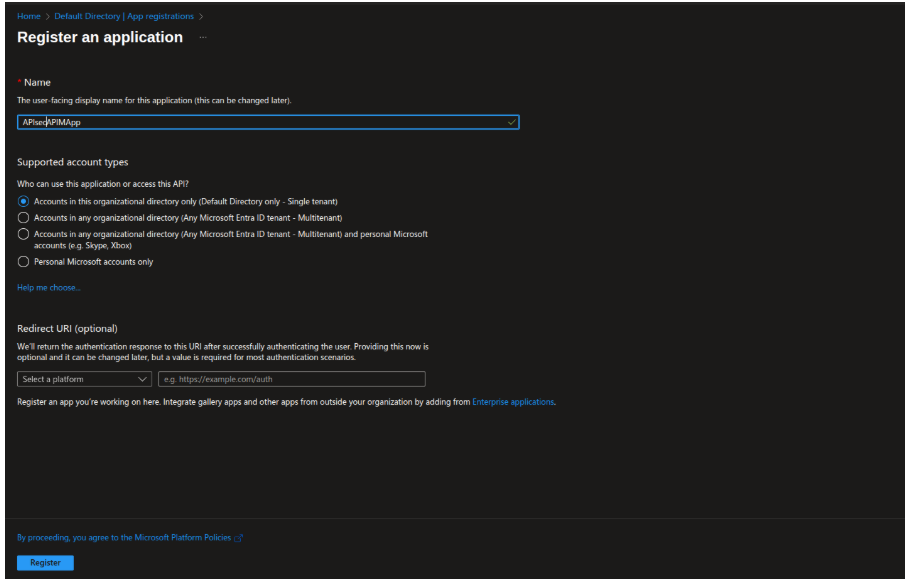
Enter the name of the application, choose supported account types, and (optionally) set a Redirect URI and Click Register
-
Copy the Application (client) ID and Directory (tenant) ID.

-
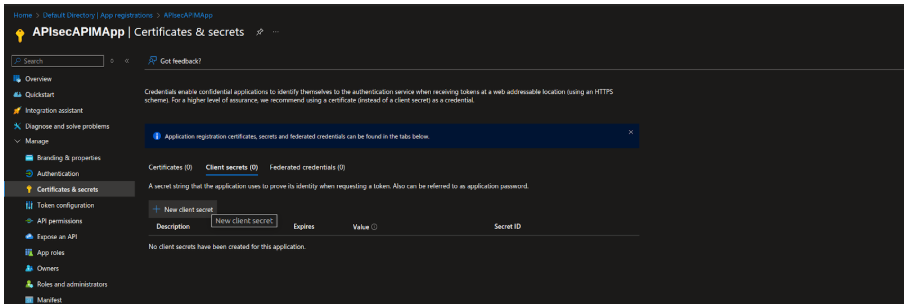
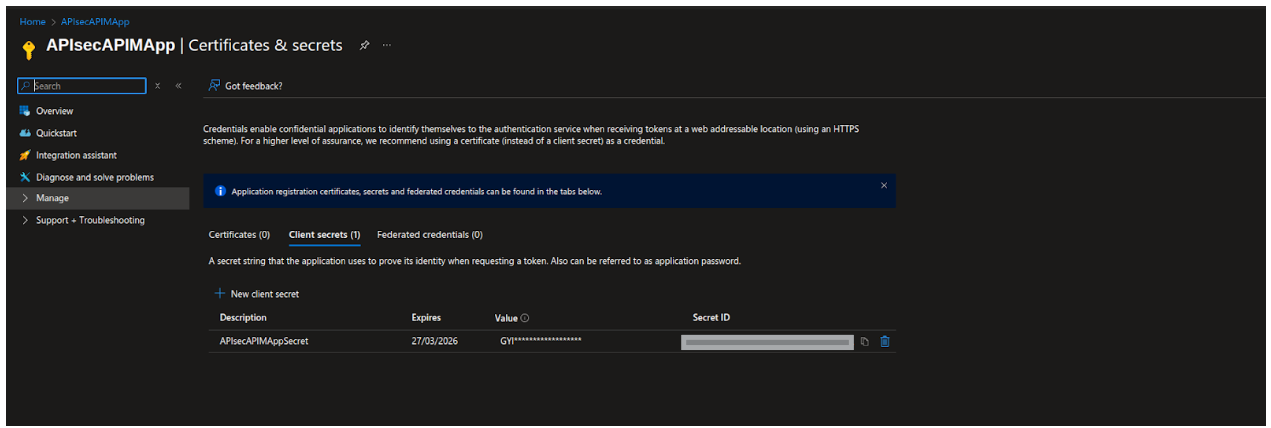
Follow the steps below to obtain Client secret i.e Key,
-
Visit Certificates & secrets and click on New client secret and then copy the generated values
-
To get Subscription Id, navigate to Subscriptions and copy Subscription ID

-
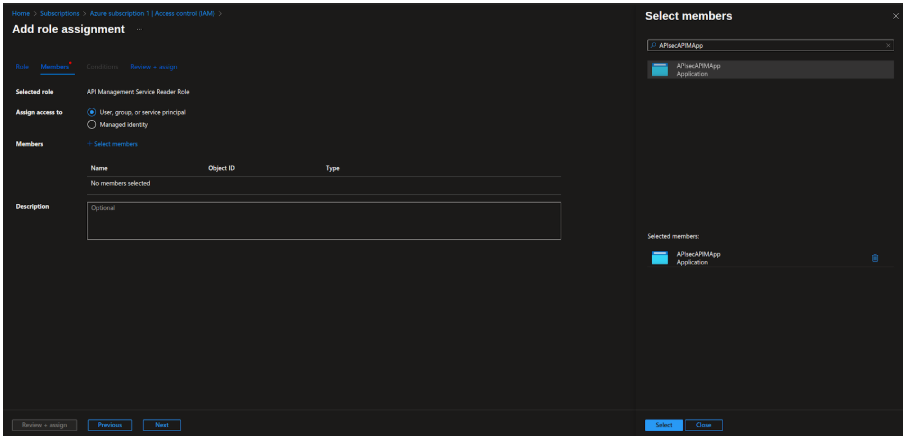
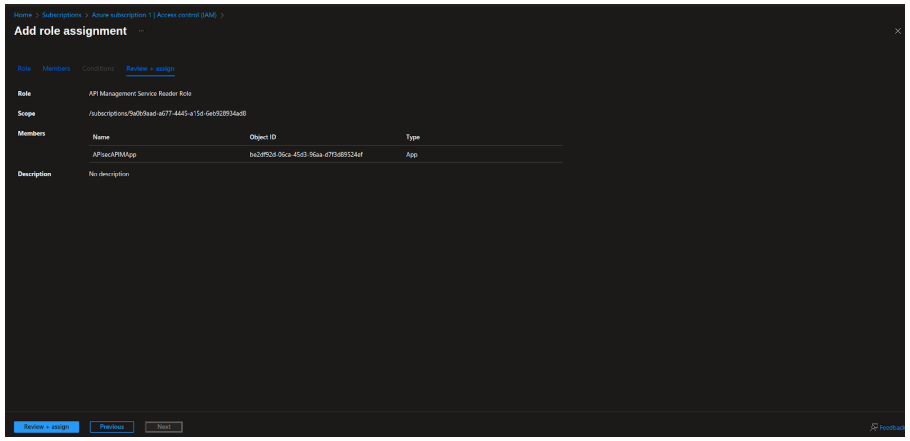
Assign the API Management Service Reader role to the App Registration on the APIM resource to allow read-only access for fetching OpenAPI specifications.
- Select Add role assignment in Select Access control (IAM)
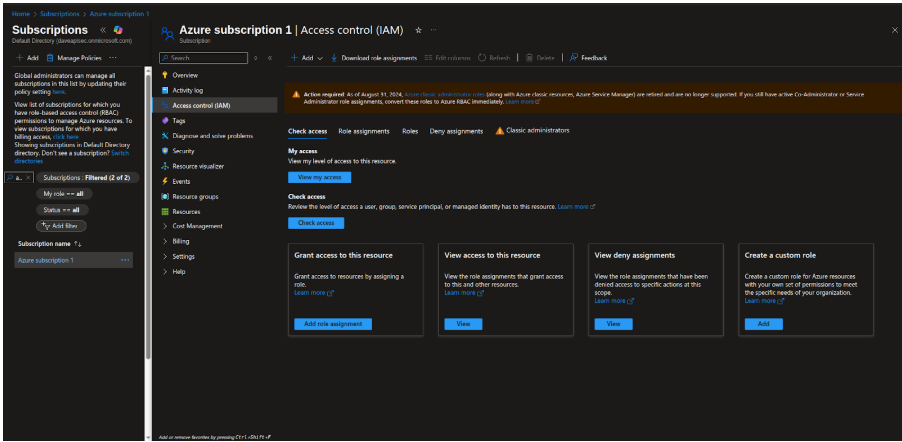
- Select the role 'API Management Service Reader'

- Assign the role to the created App Registration (Service Principal) and Click on Next
- Click Review&Assign
Azure Integration with APIsec Product
Navigate to URL
Open your browser and visit: https://<your-tenant>.apisecapps.com
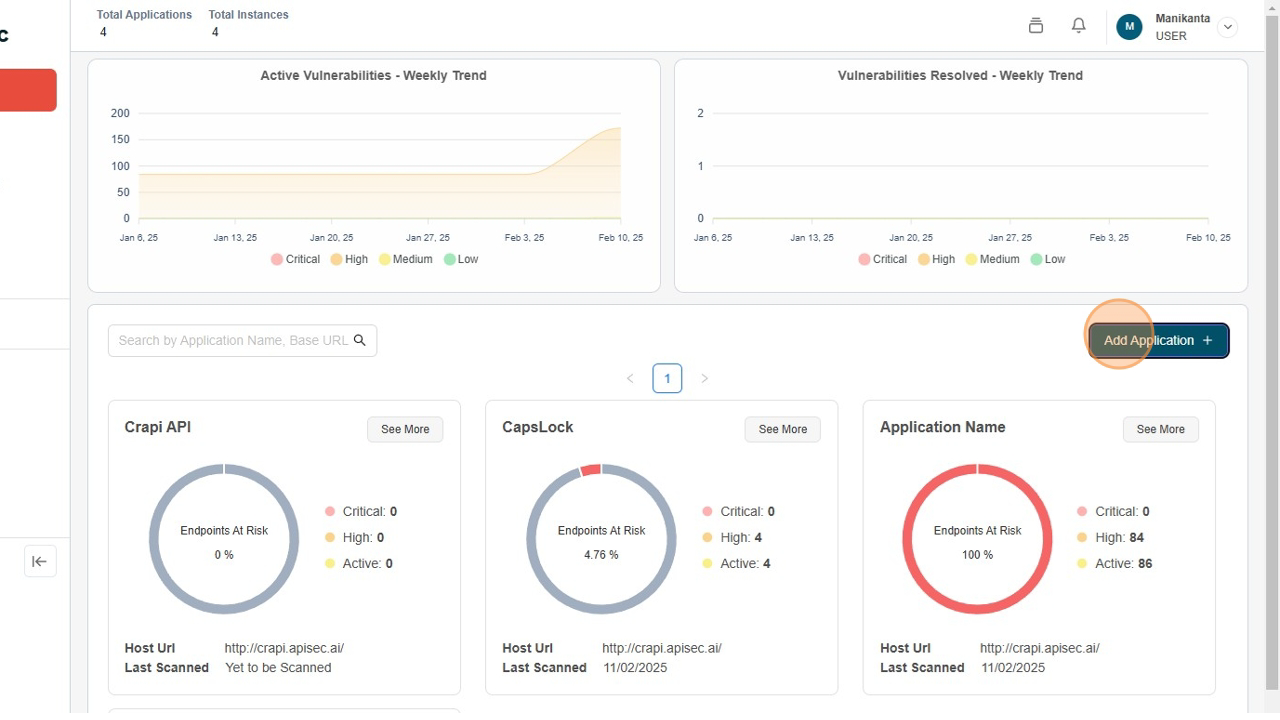
Start Adding a New Application
Click on the "Add Application" button.
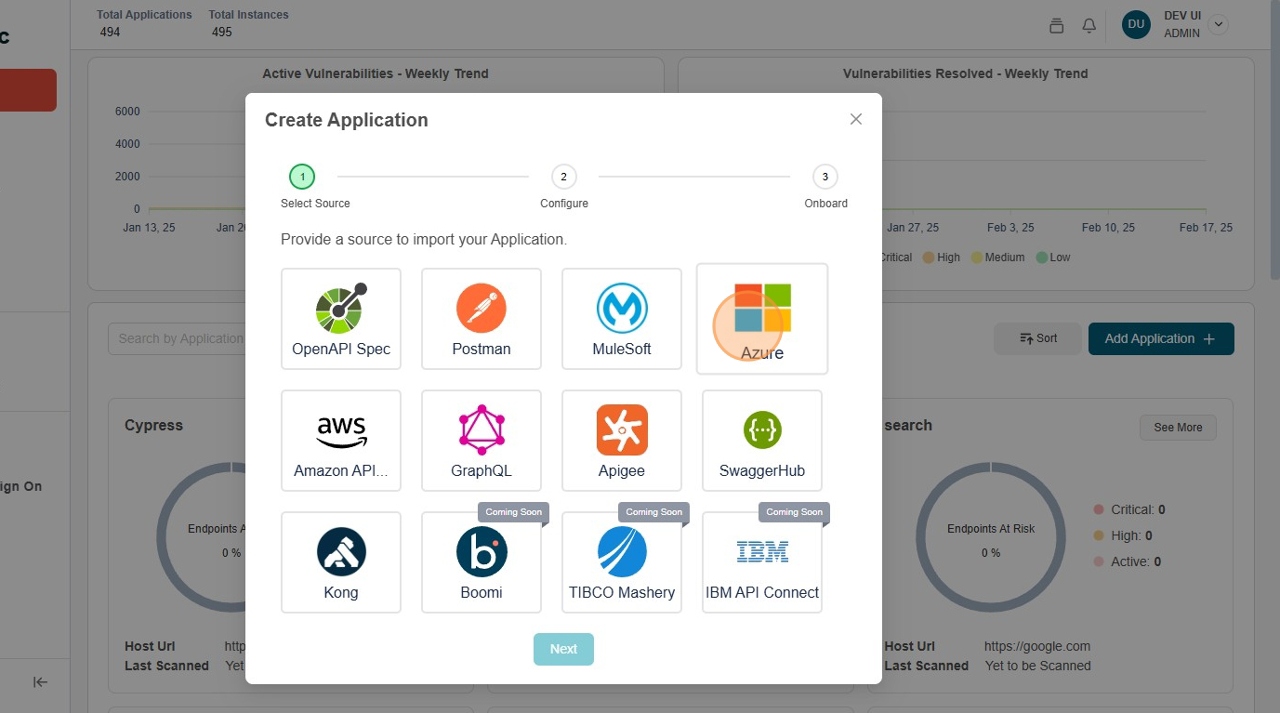
Select Azure API Gateway
-
Choose the "Azure API Gateway" option.
-
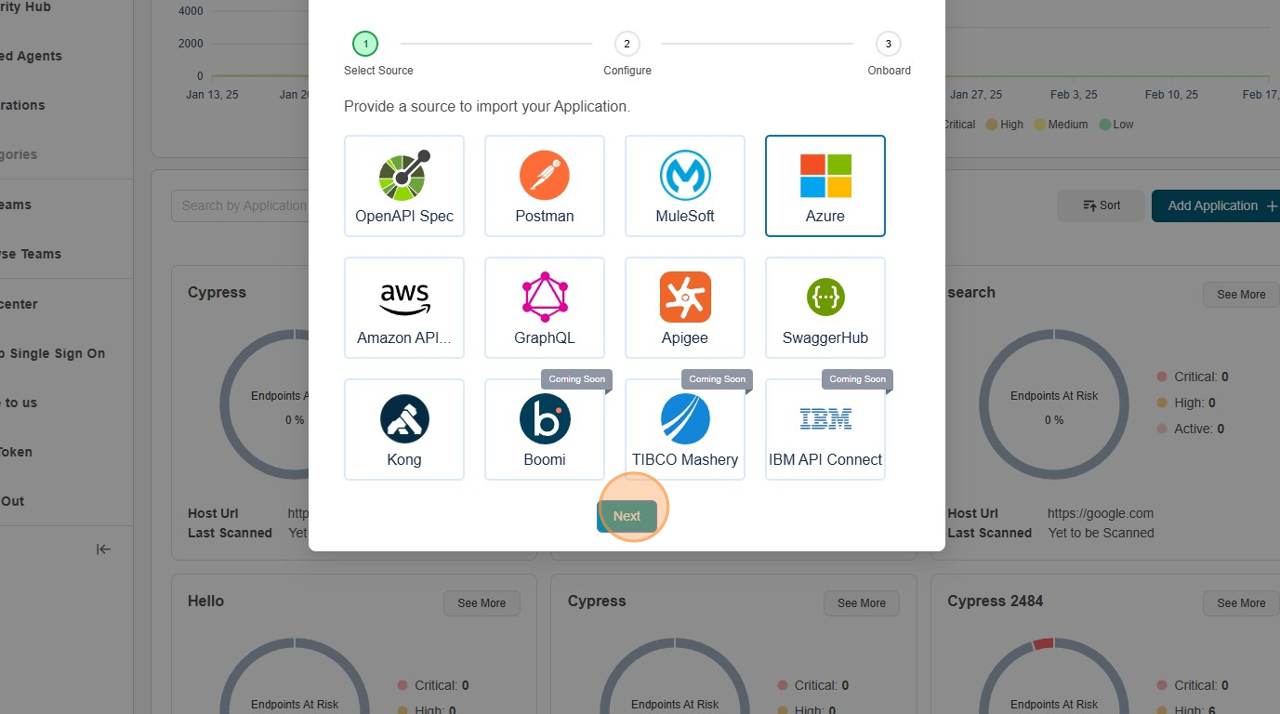
Click "Next" to proceed.
-
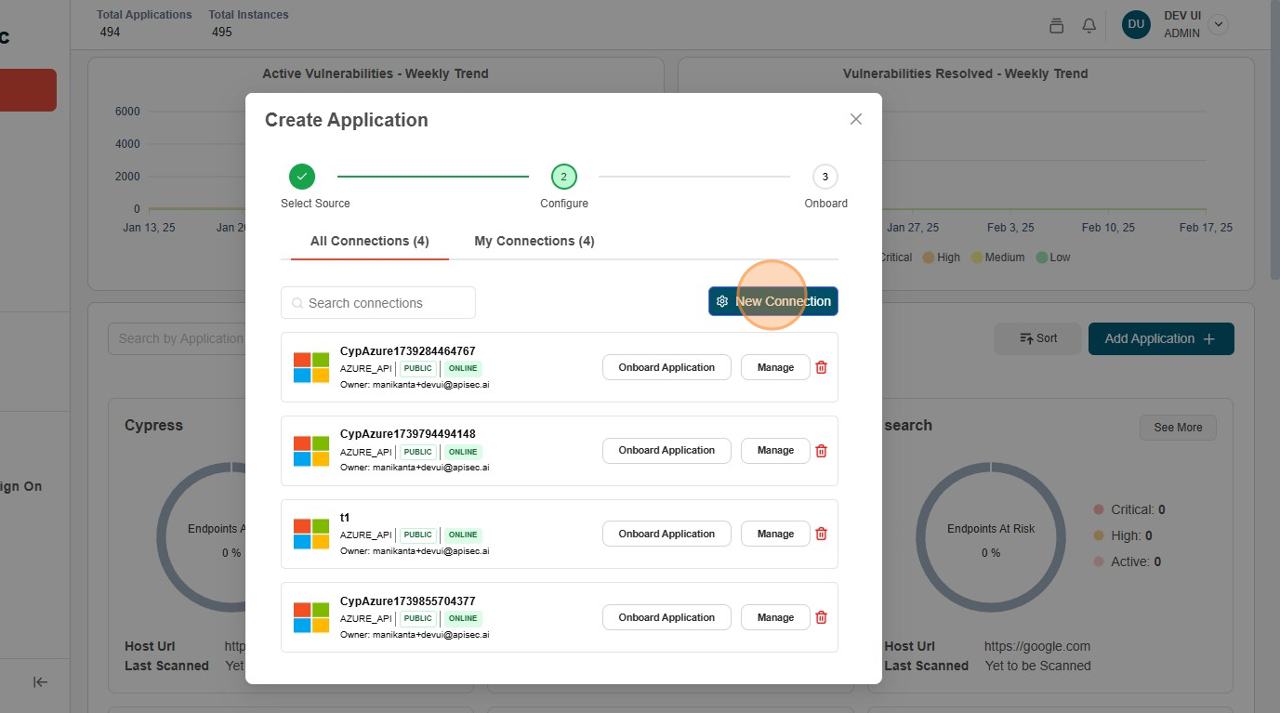
Click "New Connection"
Enter Application Details
-
Fill the Form, Name, Key, Subscription Id, Tenant Id
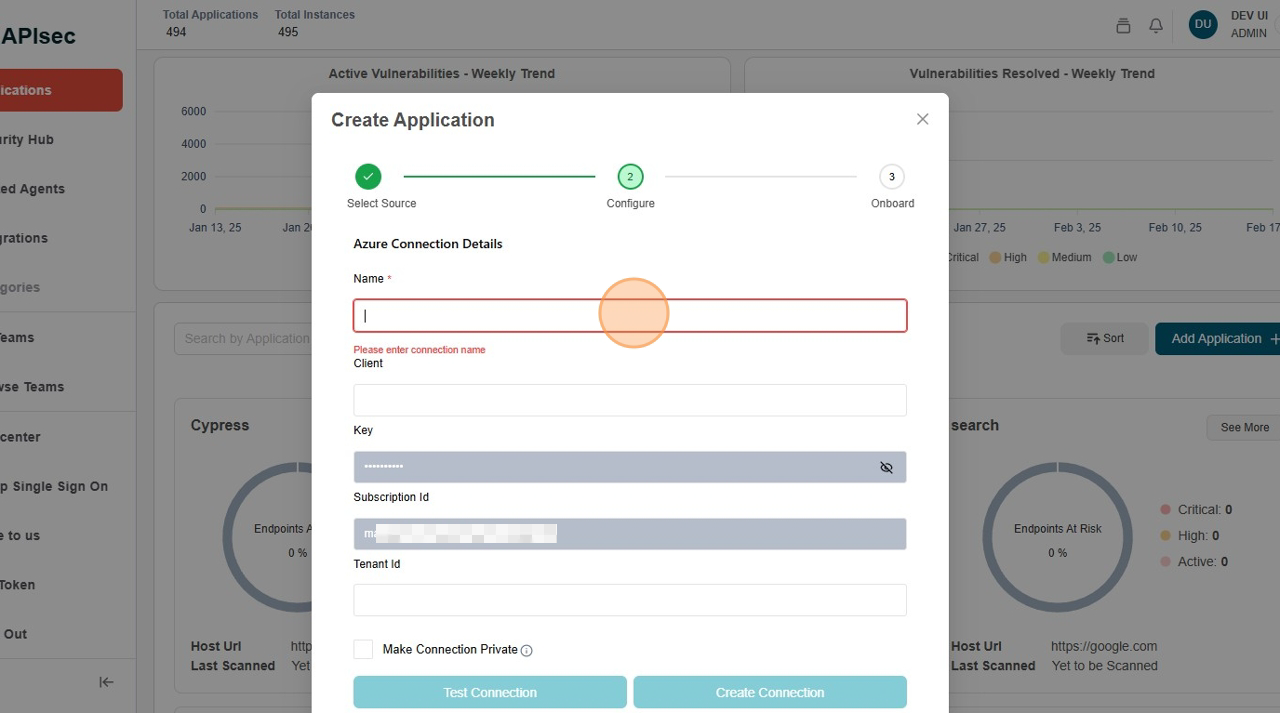
-
Click "Test Connection"
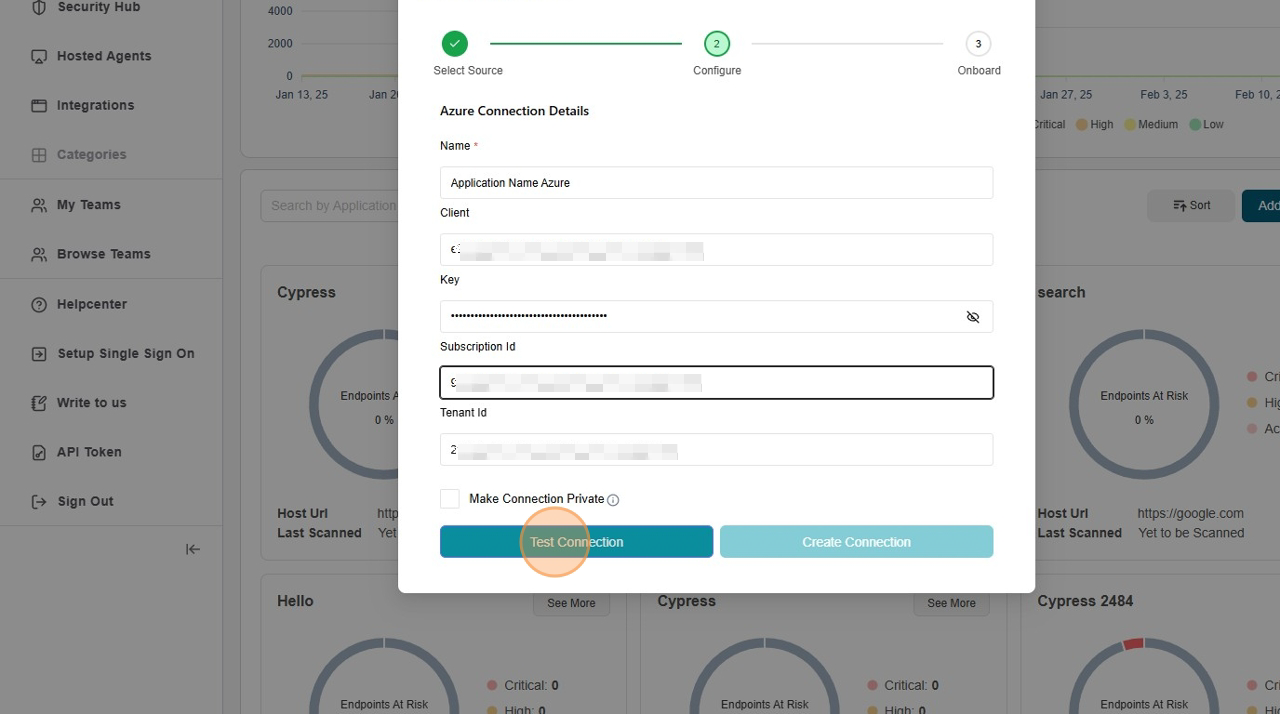
-
Click "Create Connection"
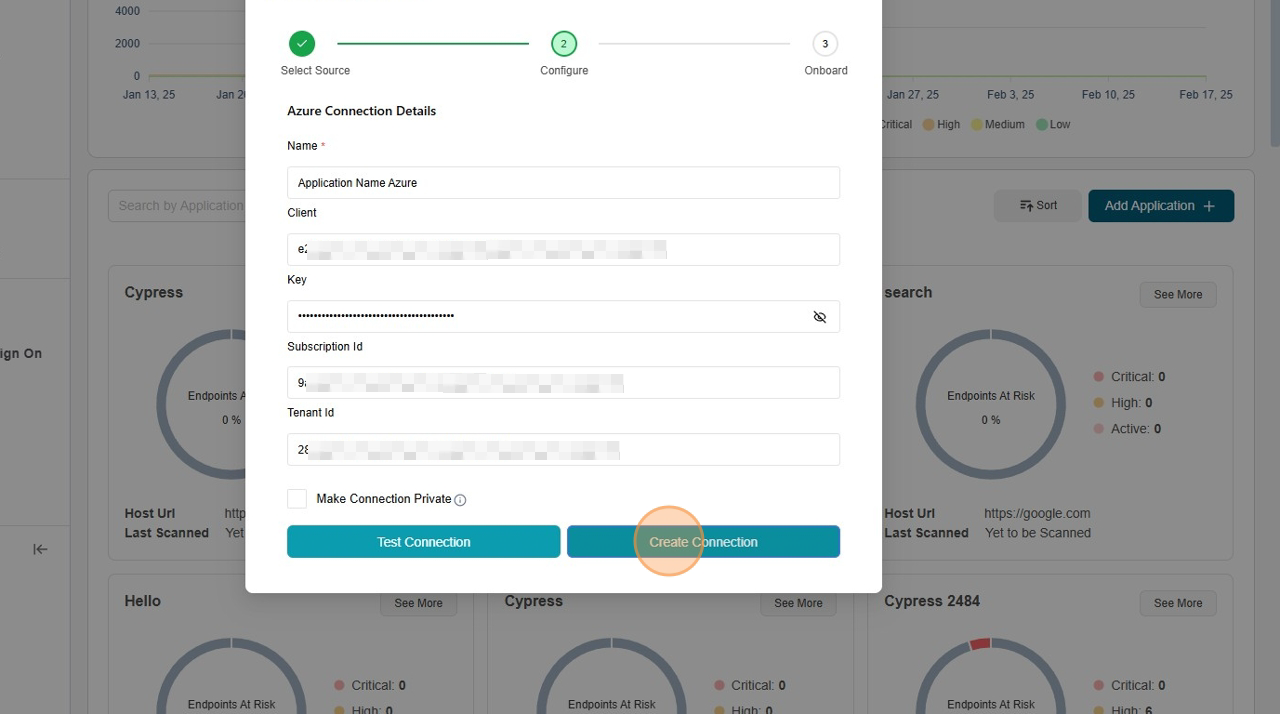
-
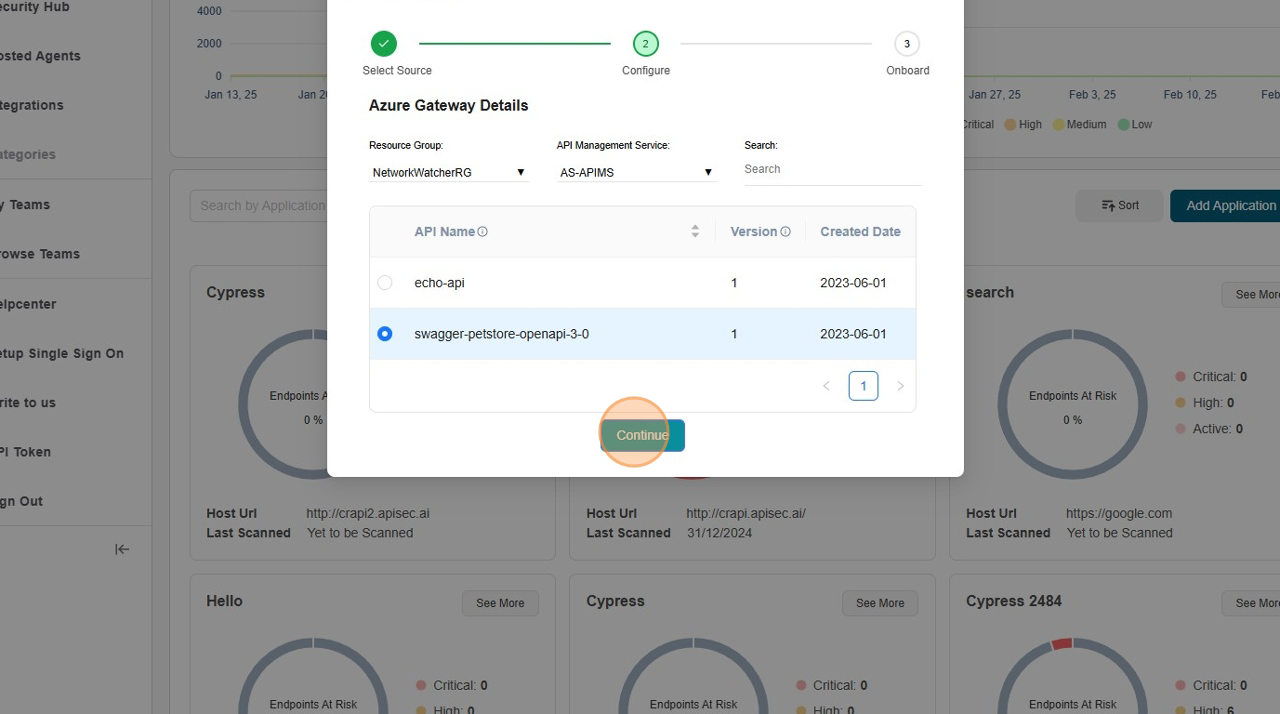
Select the Resource Group and API Management Service then Select require API
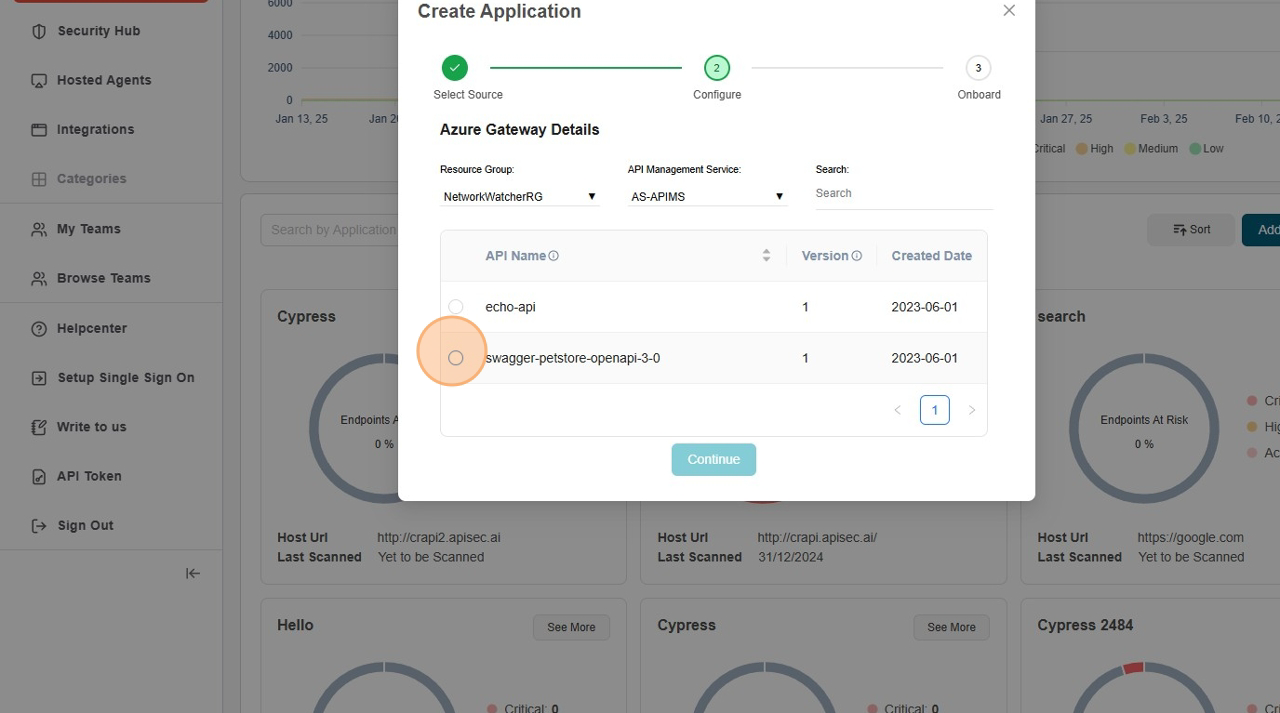
-
Click "Continue"
-
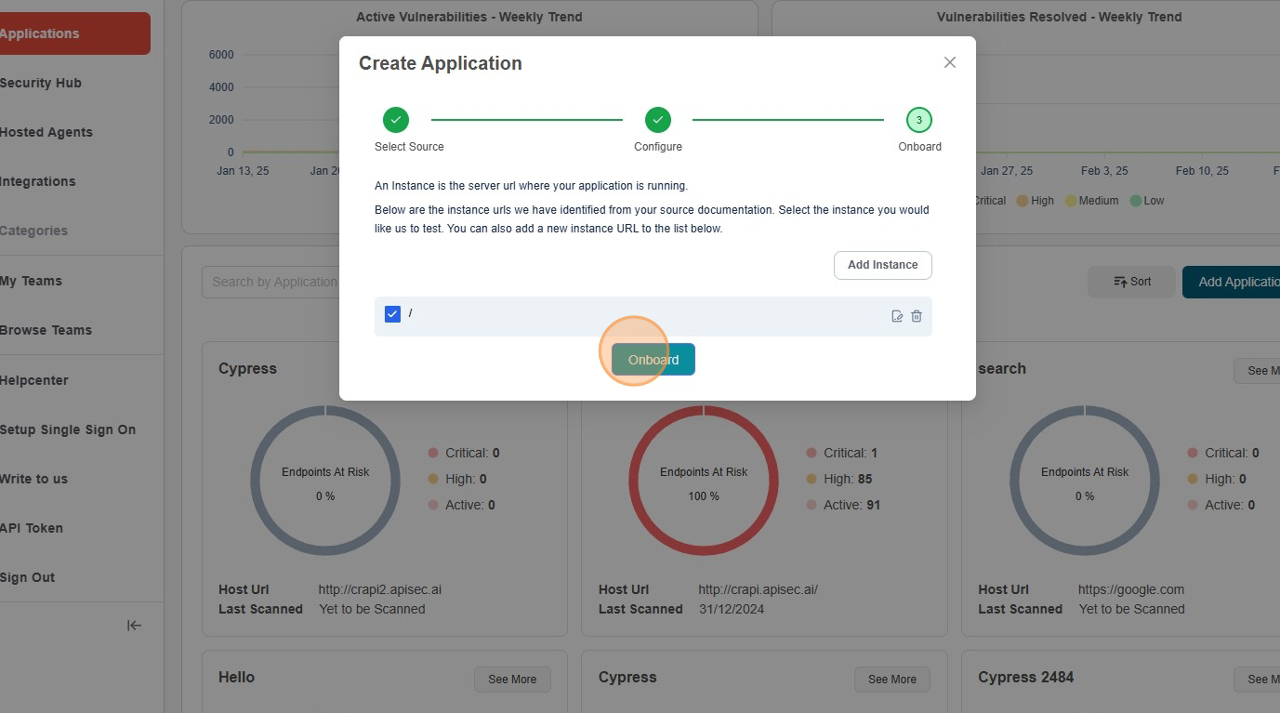
Click "Onboard"
Auto-Onboard
The Auto-Onboard feature streamlines API onboarding by automatically detecting and registering unregistered APIs from Azure Gateway. This ensures that all APIs, including newly published ones, are consistently onboarded and tested for vulnerabilities with minimal manual effort.
Enable Auto-onboard
-
Open your browser and visit: https://<your-tenant>.apisecapps.com
-
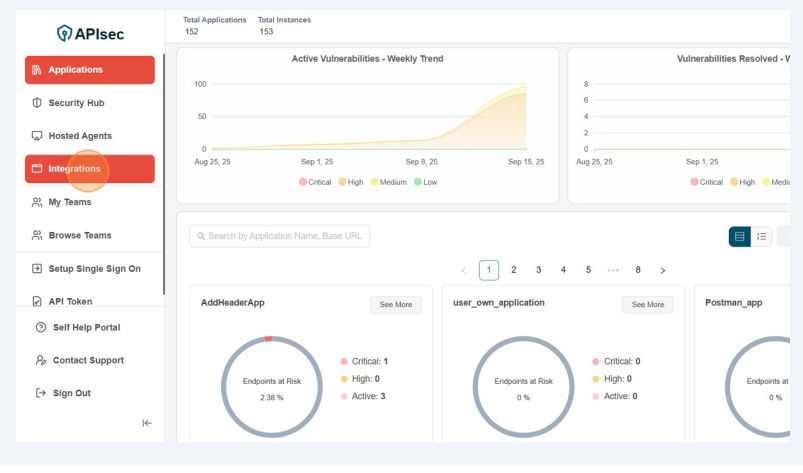
Click Integrations tab
-
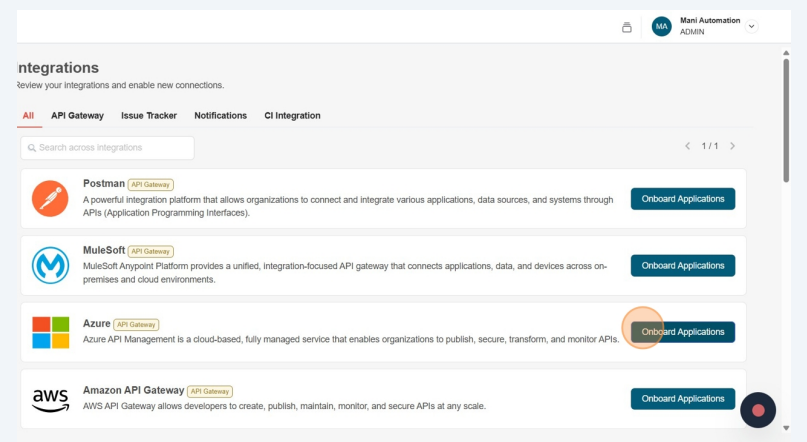
Click Onboard Applications adjacent to the Azure
-
Enable Auto-Onboard of any existing Azure Gateway connection.
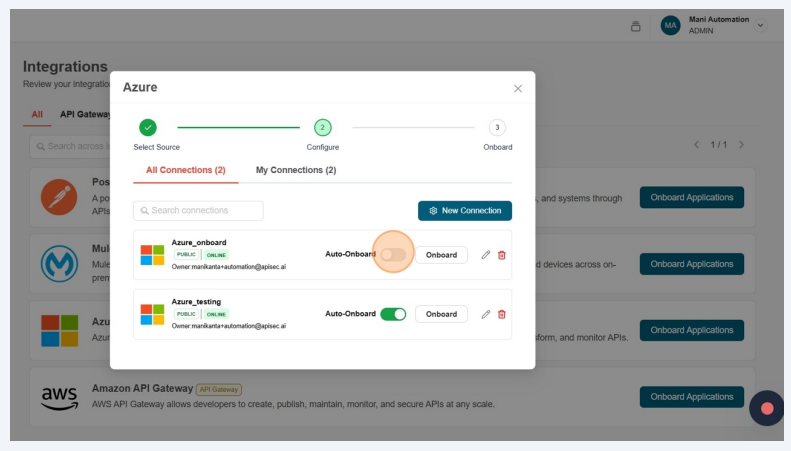
-
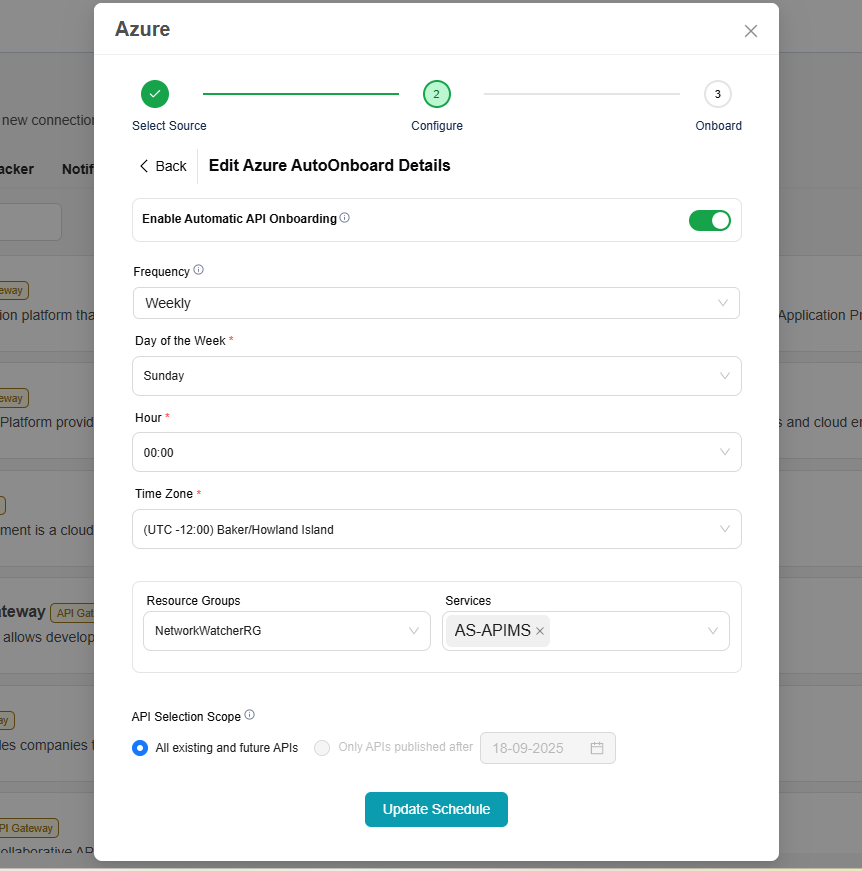
Fill the Azure AutoOnboard Details and click on Save Schedule
- Frequency – How often the onboarding should occur. By default it is weekly.
- Day of the Week – Select the specific day for onboarding.
- Hour – The exact time (in hours and minutes) when the onboarding should start.
- Timezone – The timezone in which the schedule should be applied
- Resource Groups - Select Resource Group
- Services - Select Service
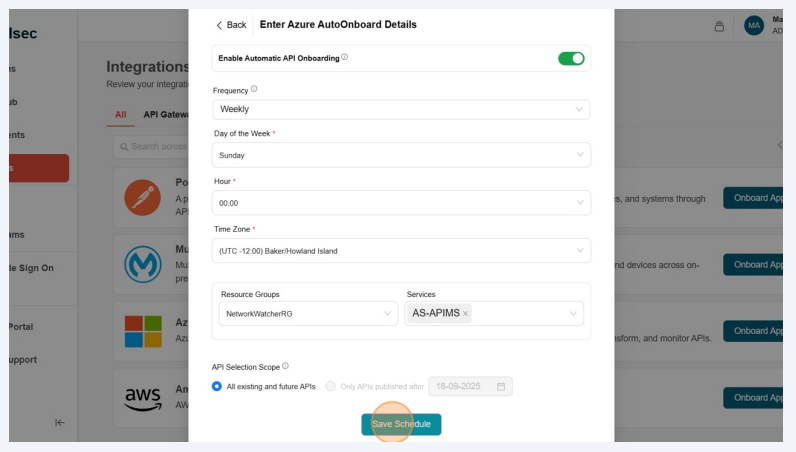
- Successfully saved auto-onboard details
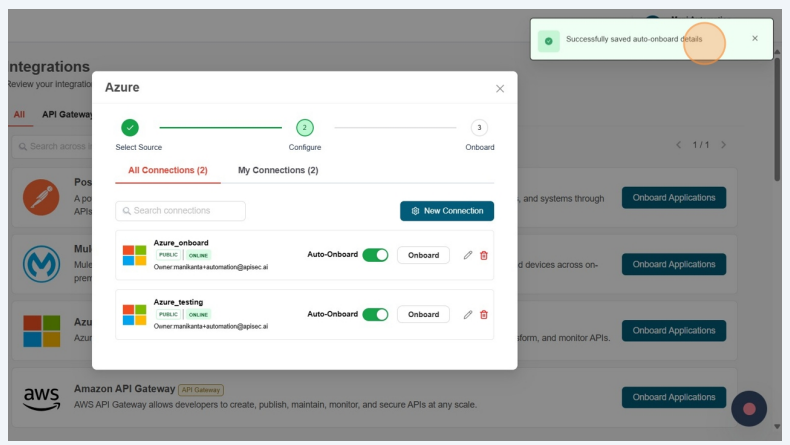
Update Schedule
-
Open your browser and visit: https://<your-tenant>.apisecapps.com
-
Click Integrations tab

-
Click Onboard Applications adjacent to the Azure

-
Click Auto-Onboard
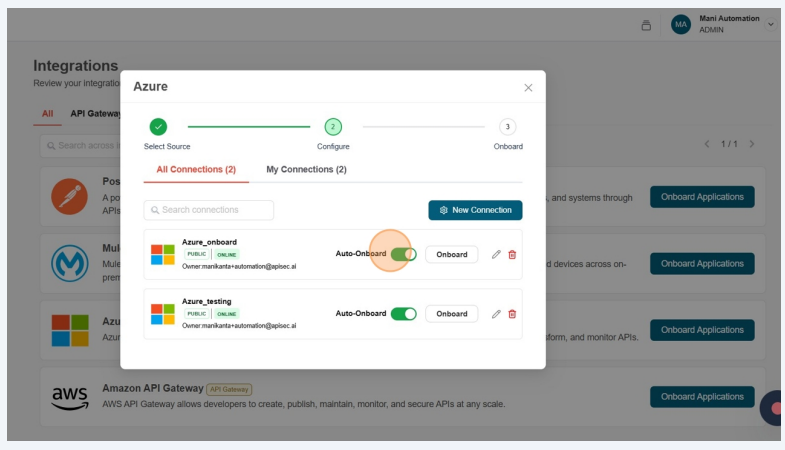
-
Update the details and Click on Update Schedule
Disable Auto-Onboard
-
Open your browser and visit: https://<your-tenant>.apisecapps.com
-
Click Integrations tab

-
Click Onboard Applications adjacent to the Azure

-
Click Auto-Onboard

-
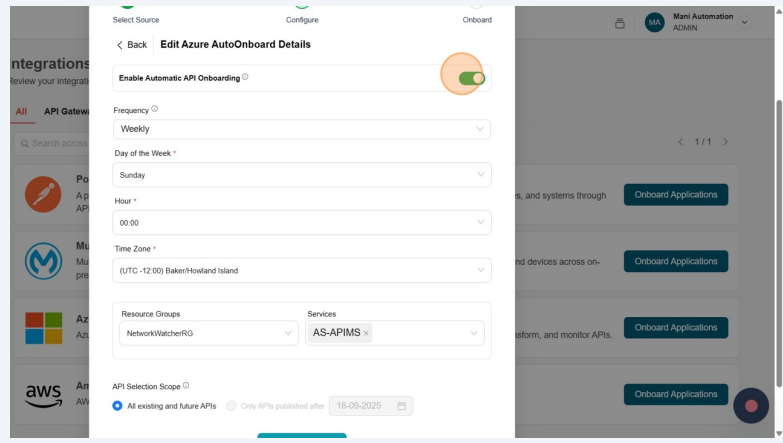
In Edit Azure AutoOnboard Details, disable the Enable Automatic API Onboarding.
-
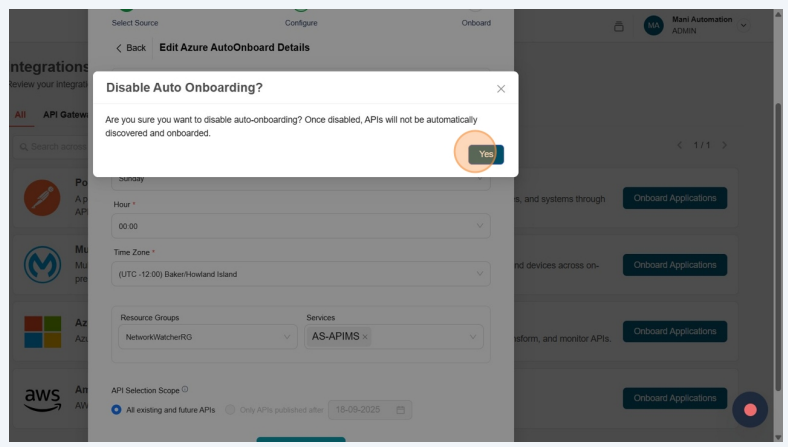
Click Yes
-
Auto-Onboard details deleted successfully!
