How To Integrate Jira With APIsec Cloud
Prerequisites
APIsec platform needs Email, API token, App URL and Project Key to configure Jira issue tracker.
-
Use the Email address of your Atlassian account (the one you use to log in to Jira)
-
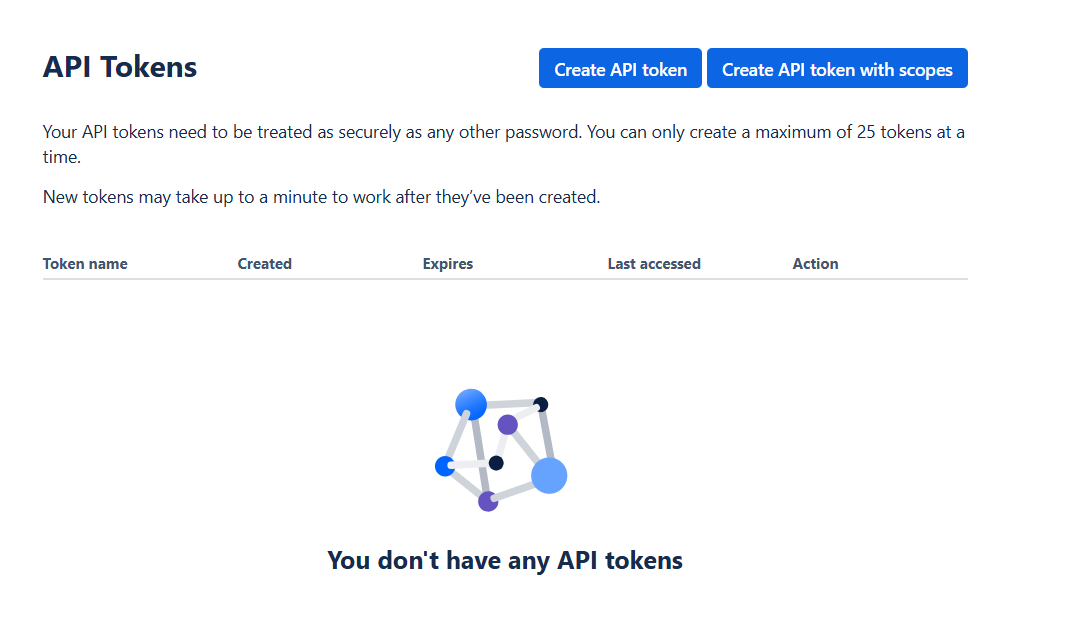
Follow the steps below to obtain API token
- Log in to https://id.atlassian.com/manage-profile/security/api-tokens and complete the verification using the code received via email.
- Click on Create API token
-
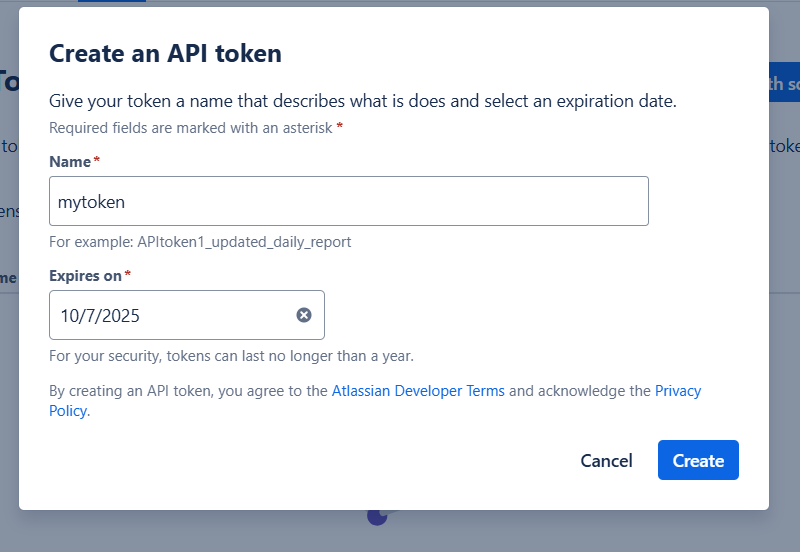
Give your token a Name that describes what is does and select an expiration date and Click Create.
-
Copy your API token

-
Jira App URL: This is your Jira site URL, visible in the browser when you log in to Jira
-
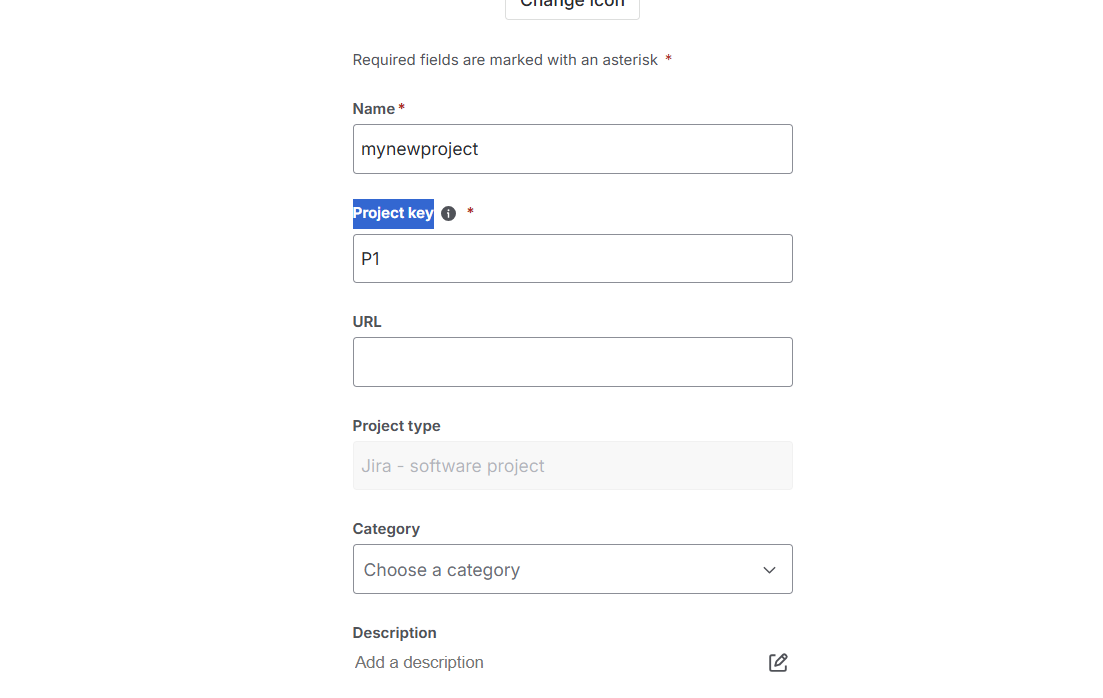
Project Key: Visit Project settings and get the Project key
Create a JIRA Connection
-
Open your browser and visit: https://<your-tenant>.apisecapps.com
-
Click on "Integrations"
-
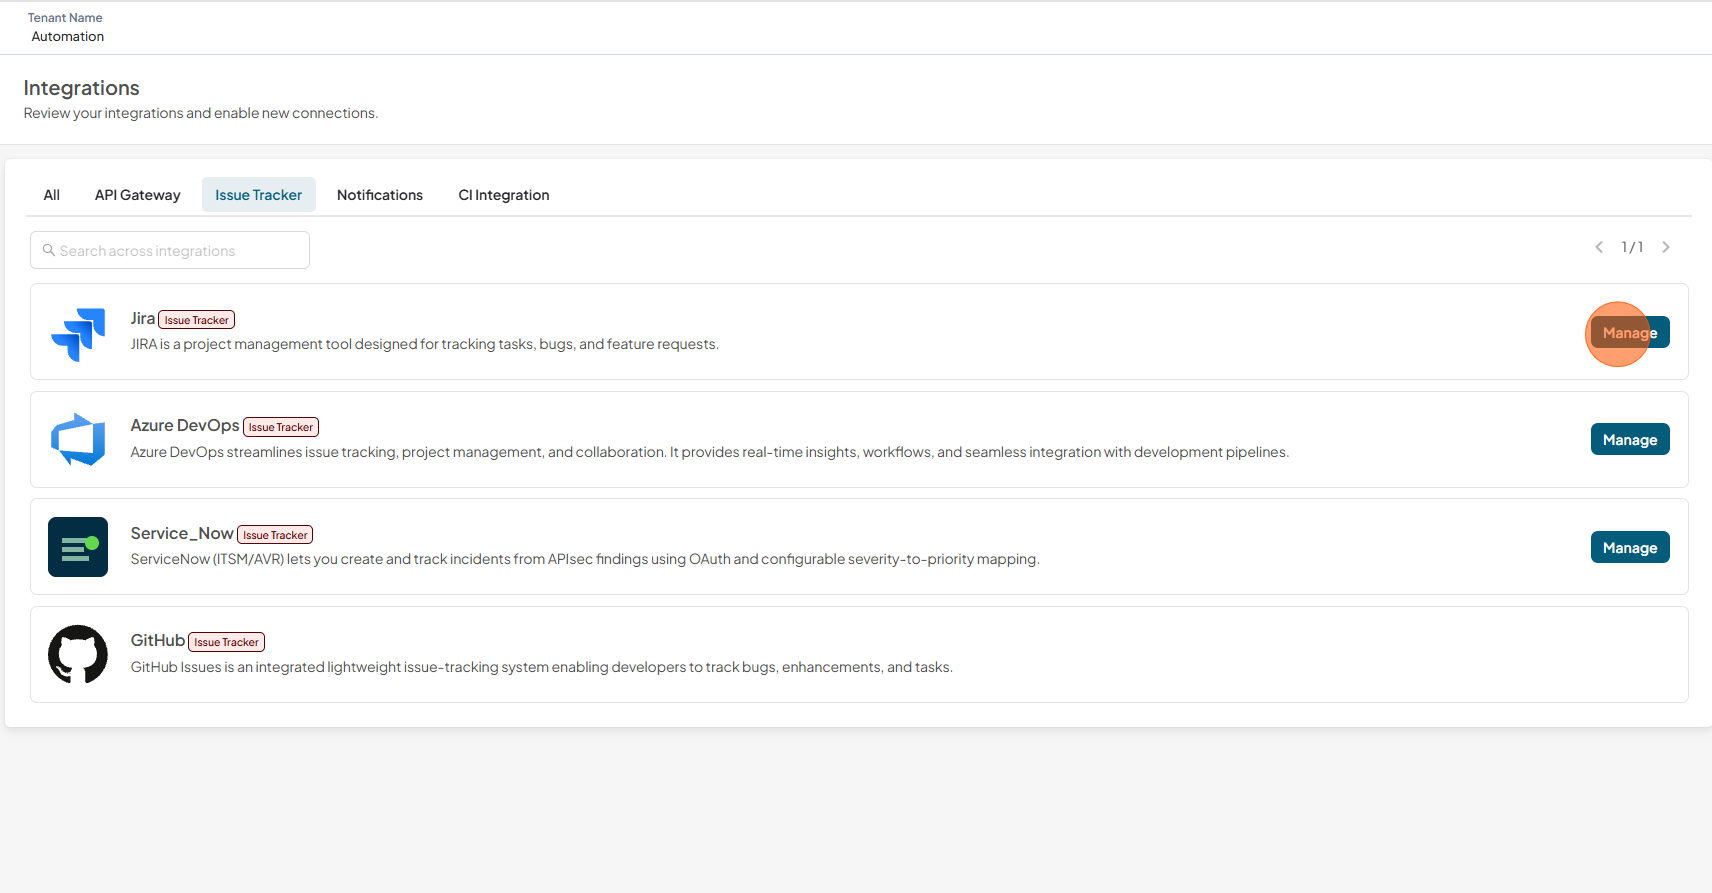
Click on "Issue Tracker" tab
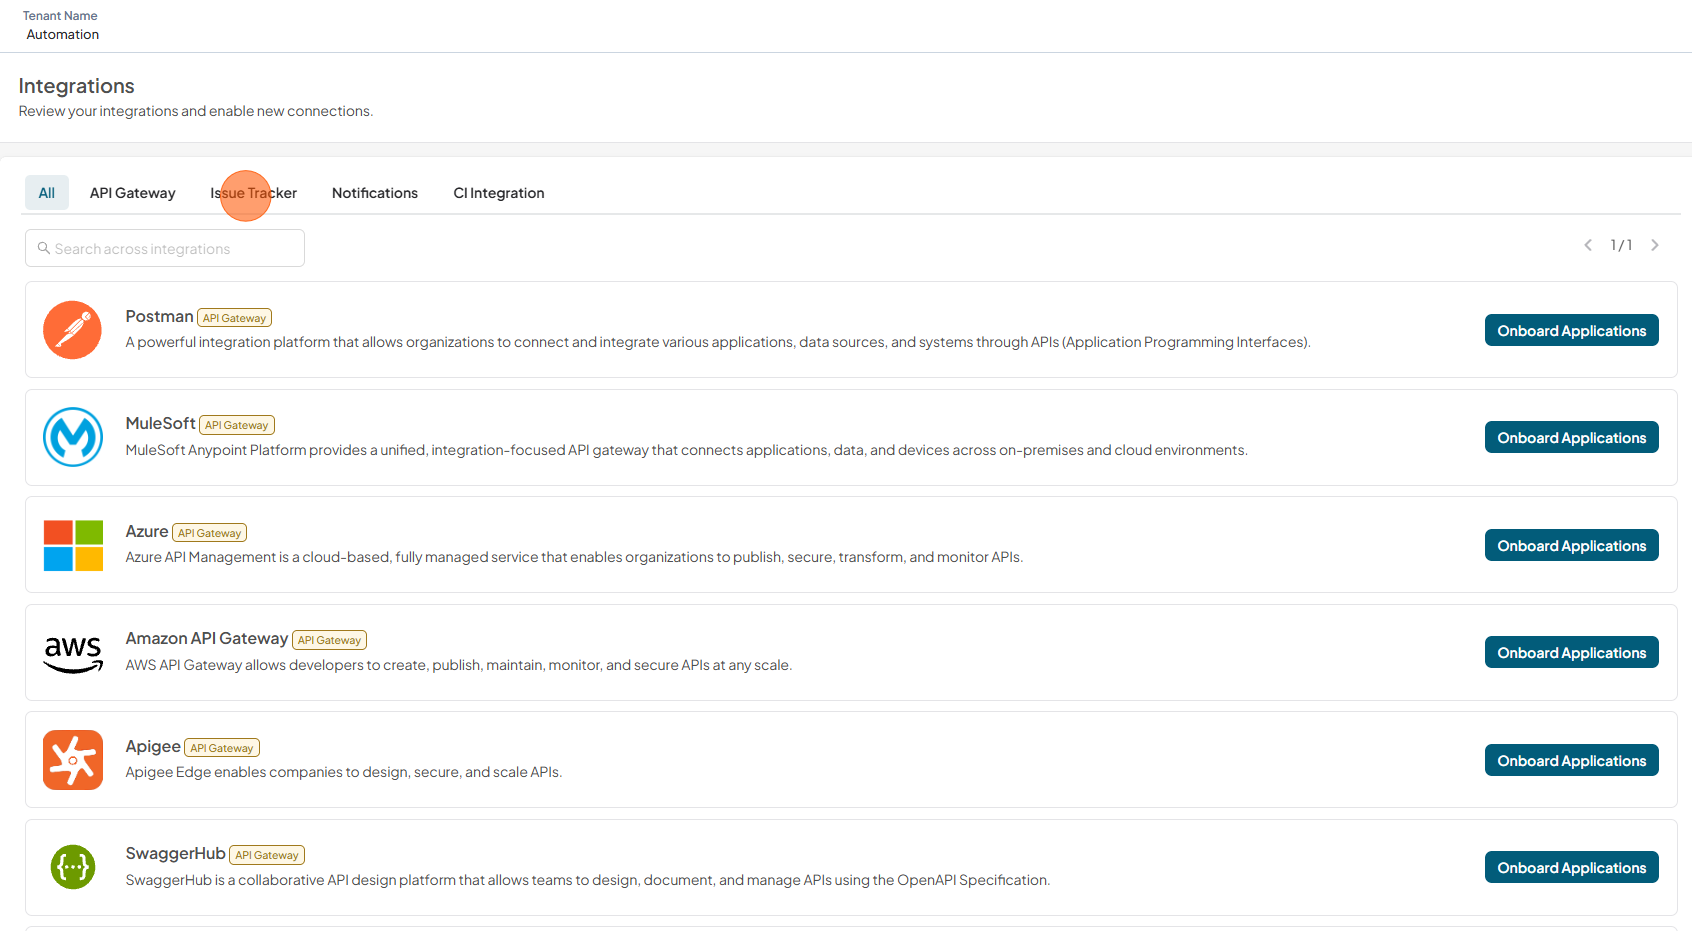
-
You will found the JIRA Issue Tracker
-
Click Manage
-
There are two scenarios here, first if already existing JIRA integrations, then it will list item with New Connection Button
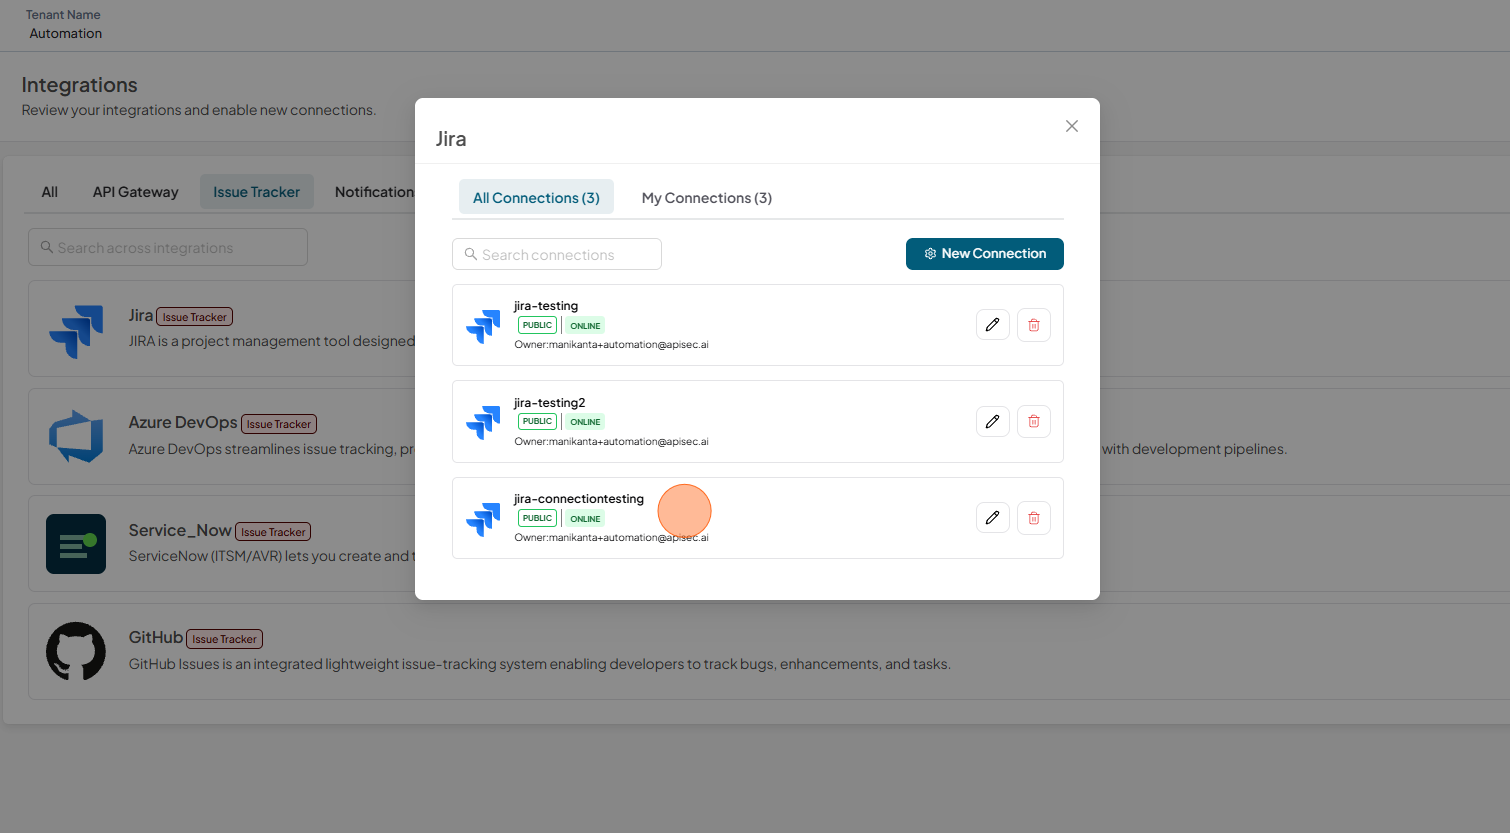
this case you need to click New Connection.
-
Or you will directly get the form for create JIRA integrations
-
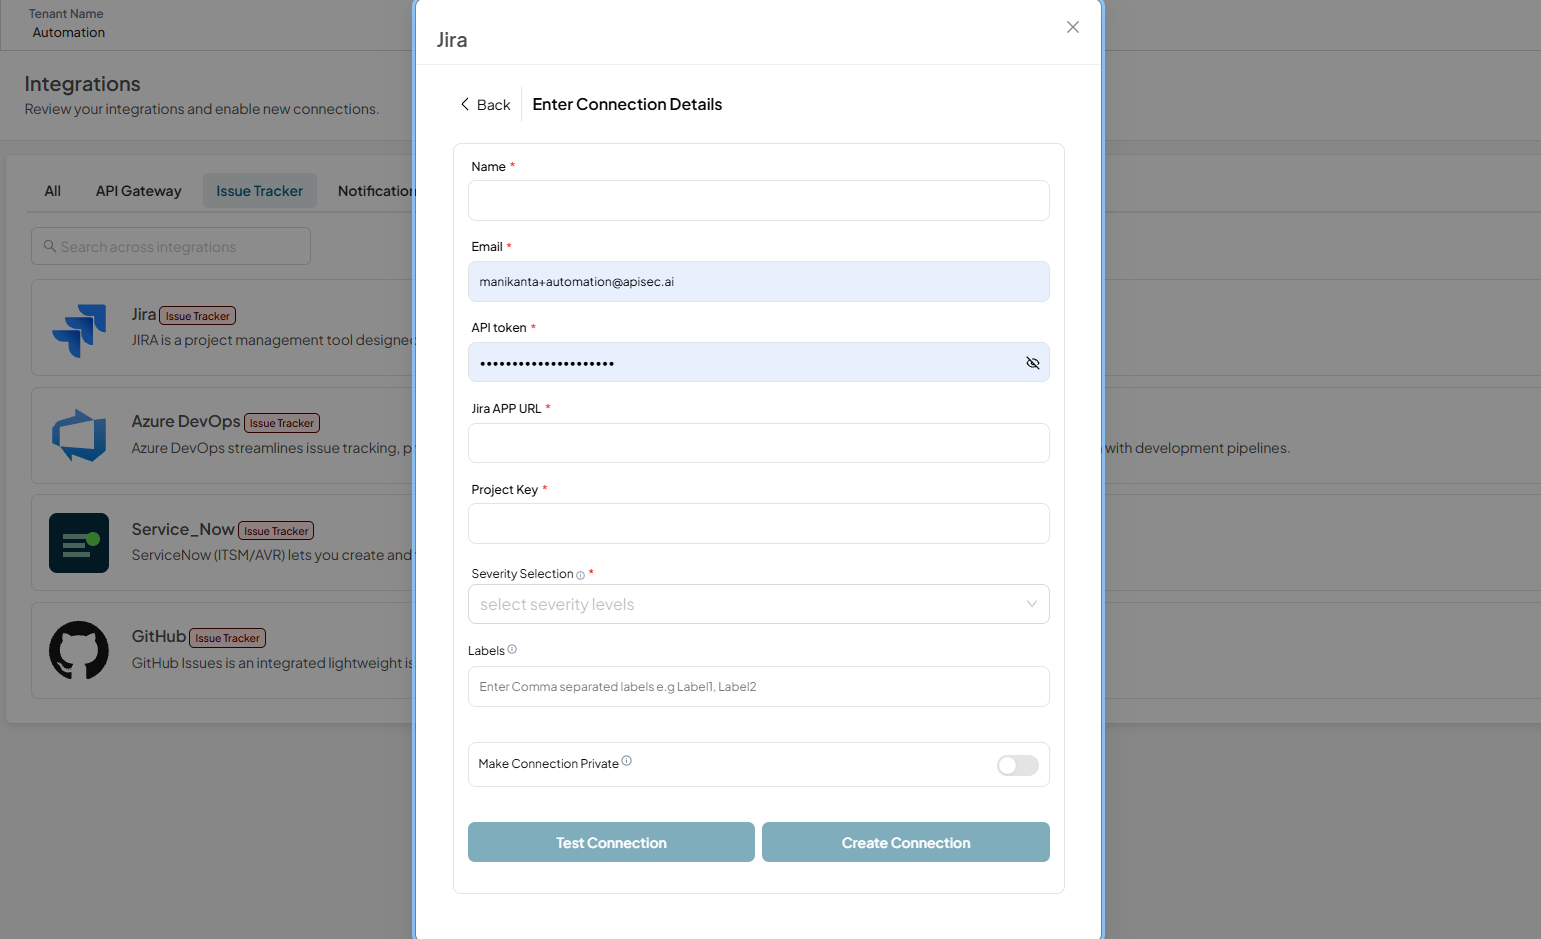
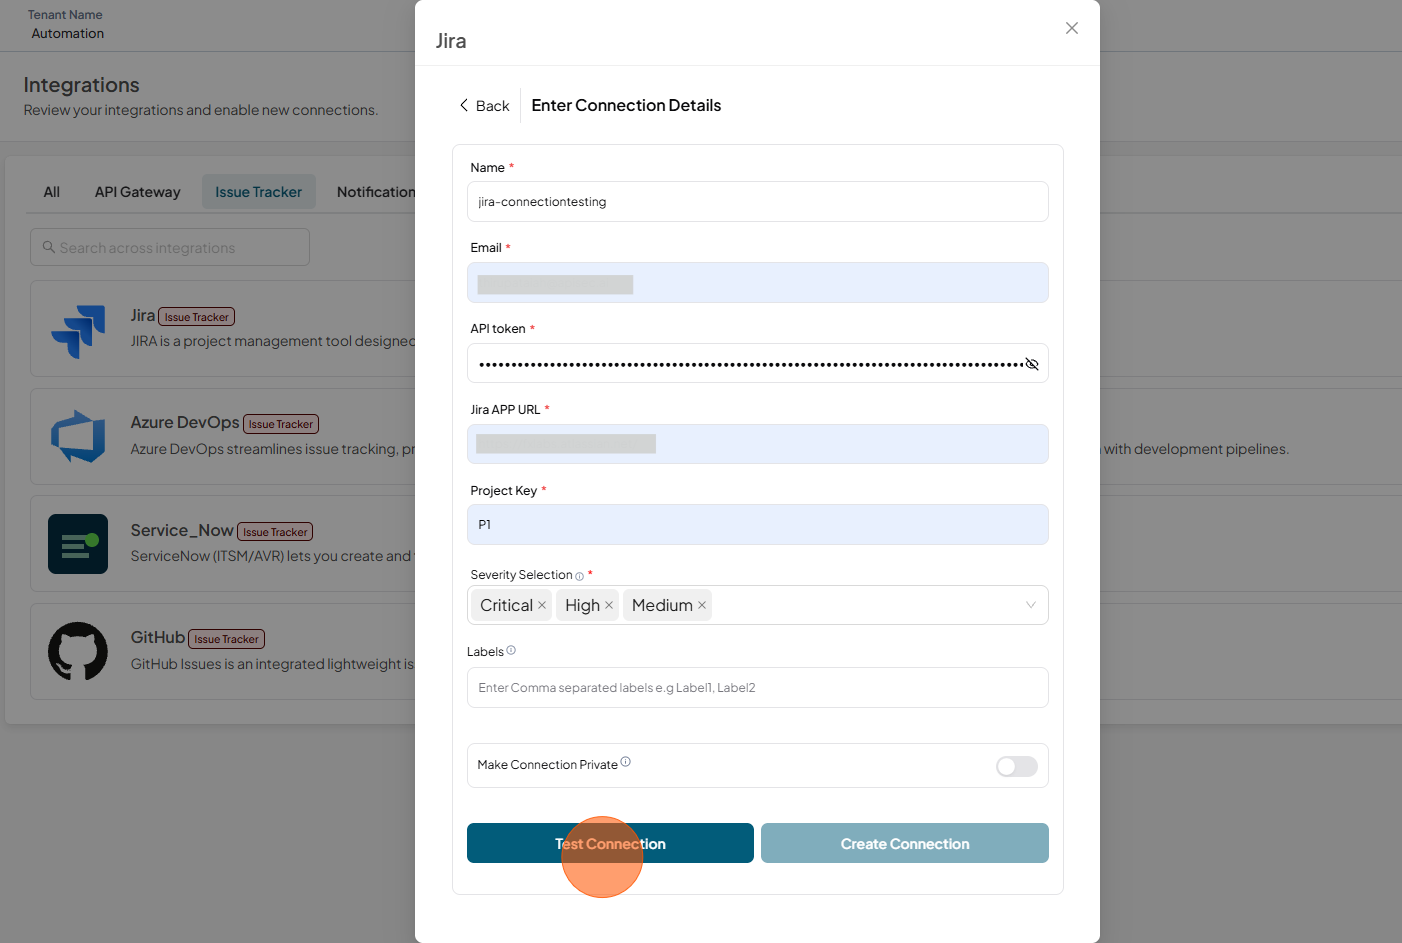
Fill the form with all the required fields.
- Name – Enter Name.
- E-mail – Enter E-mail.
- API Token – Enter API token for authentication.
- Jira App URL – Enter the URL of your Jira application.
- Project Key – Specify the key of the Jira project.
- Severity Selection – A multi-select dropdown with options Critical, High, Medium, and Low. So, users can have control over which severity levels (Critical, High, Medium, Low) are synced to their issue tracker.
- Labels – Enter single-word labels without spaces. For multiple labels, separate them with commas (,).
-
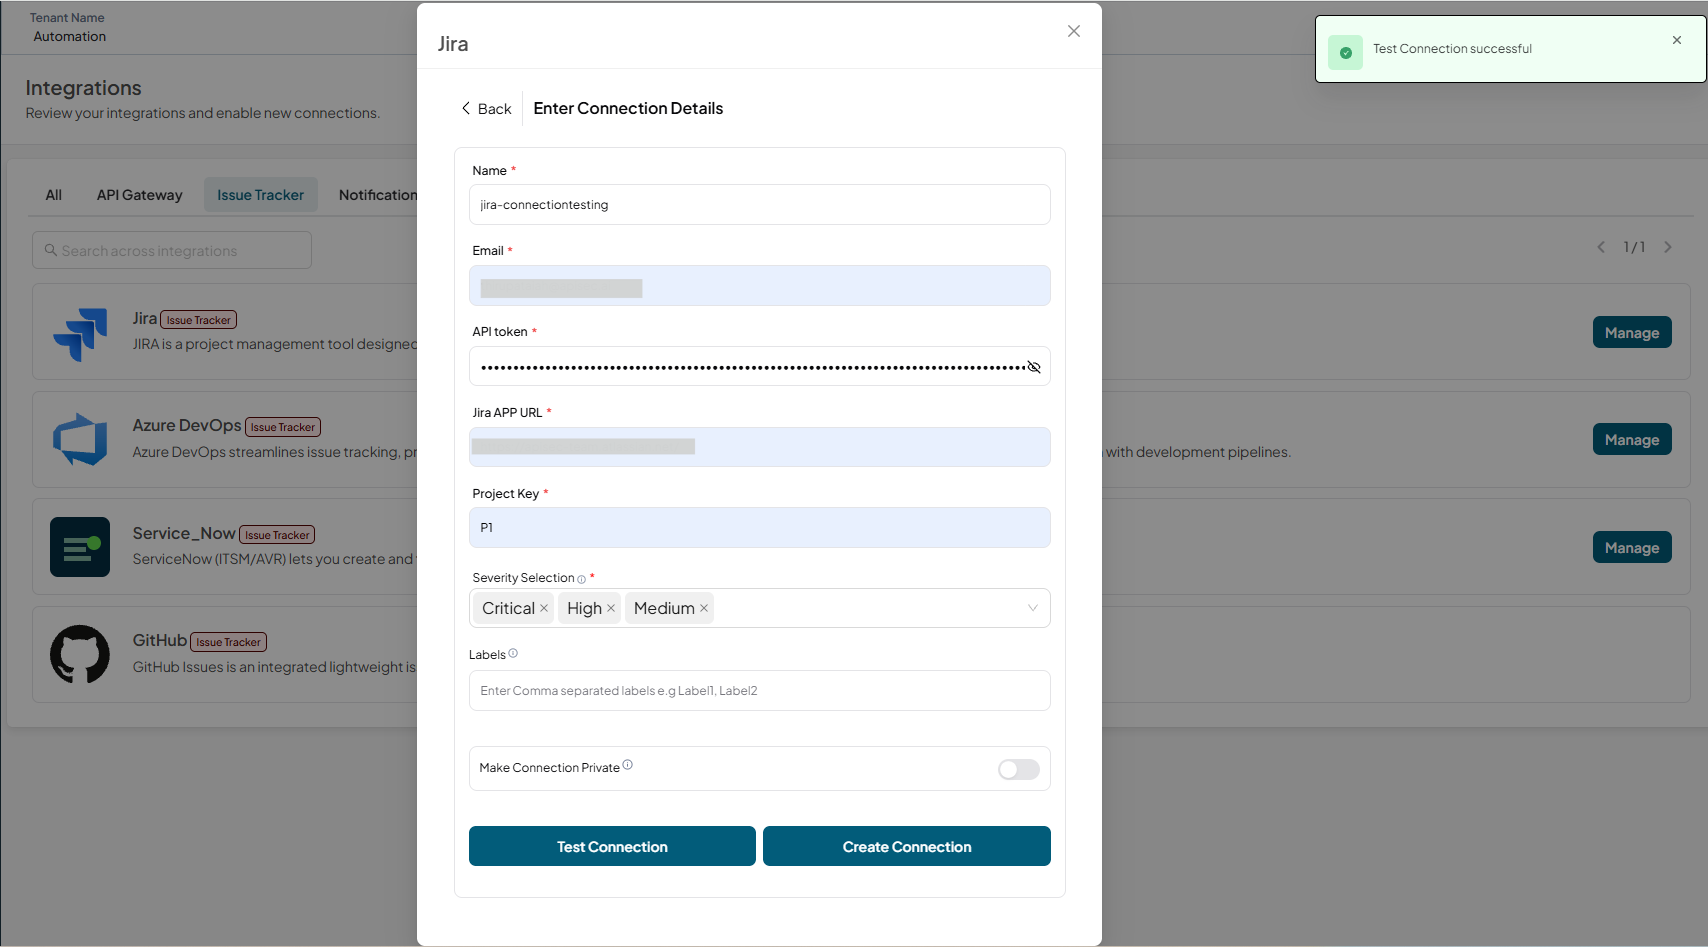
Click Test Connection
-Test connection successful.
-
-
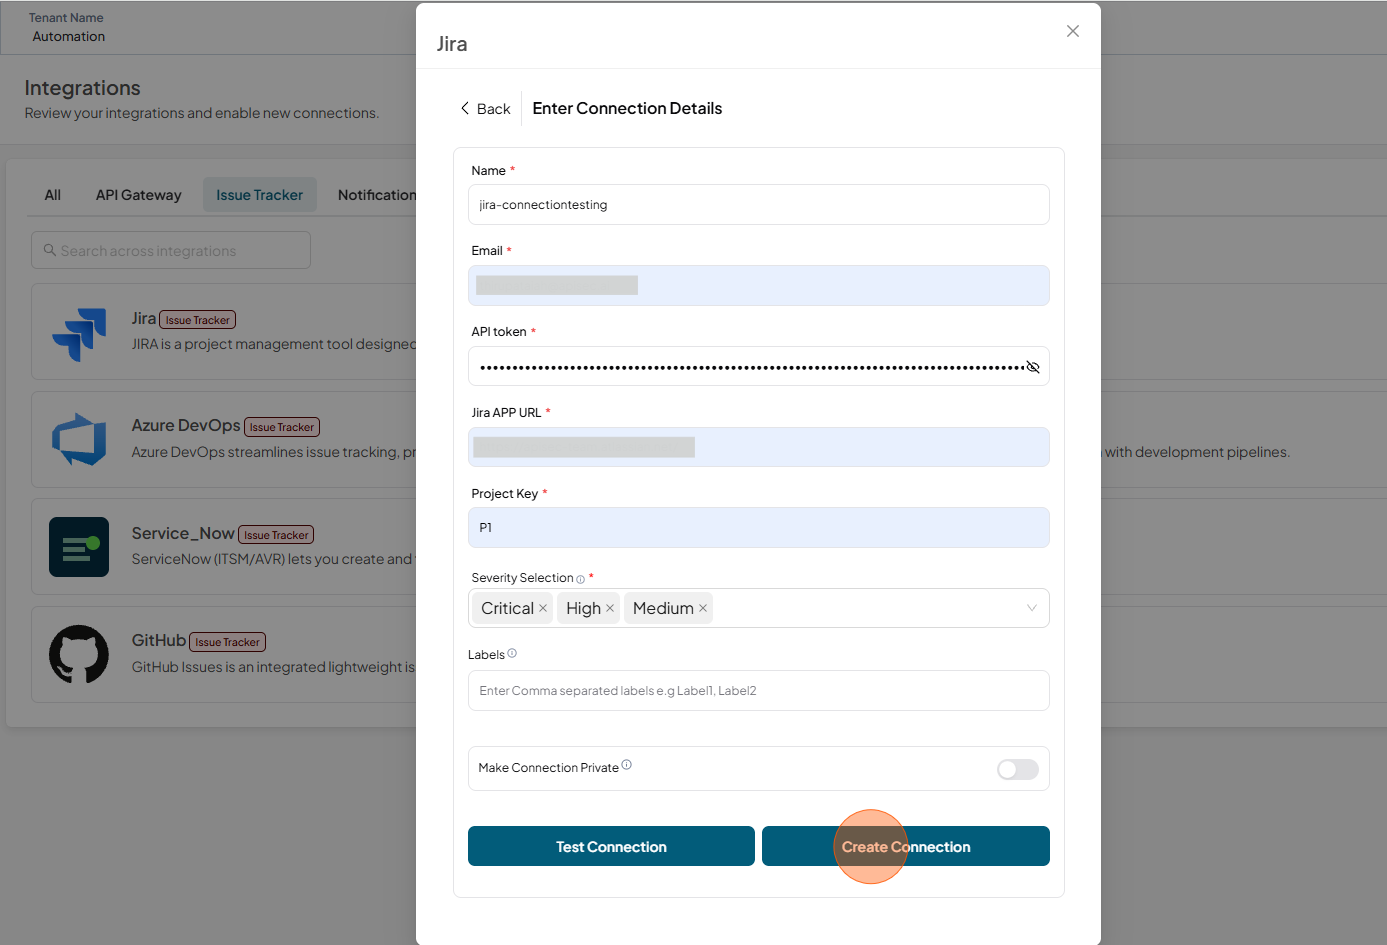
Click Create Connection
-
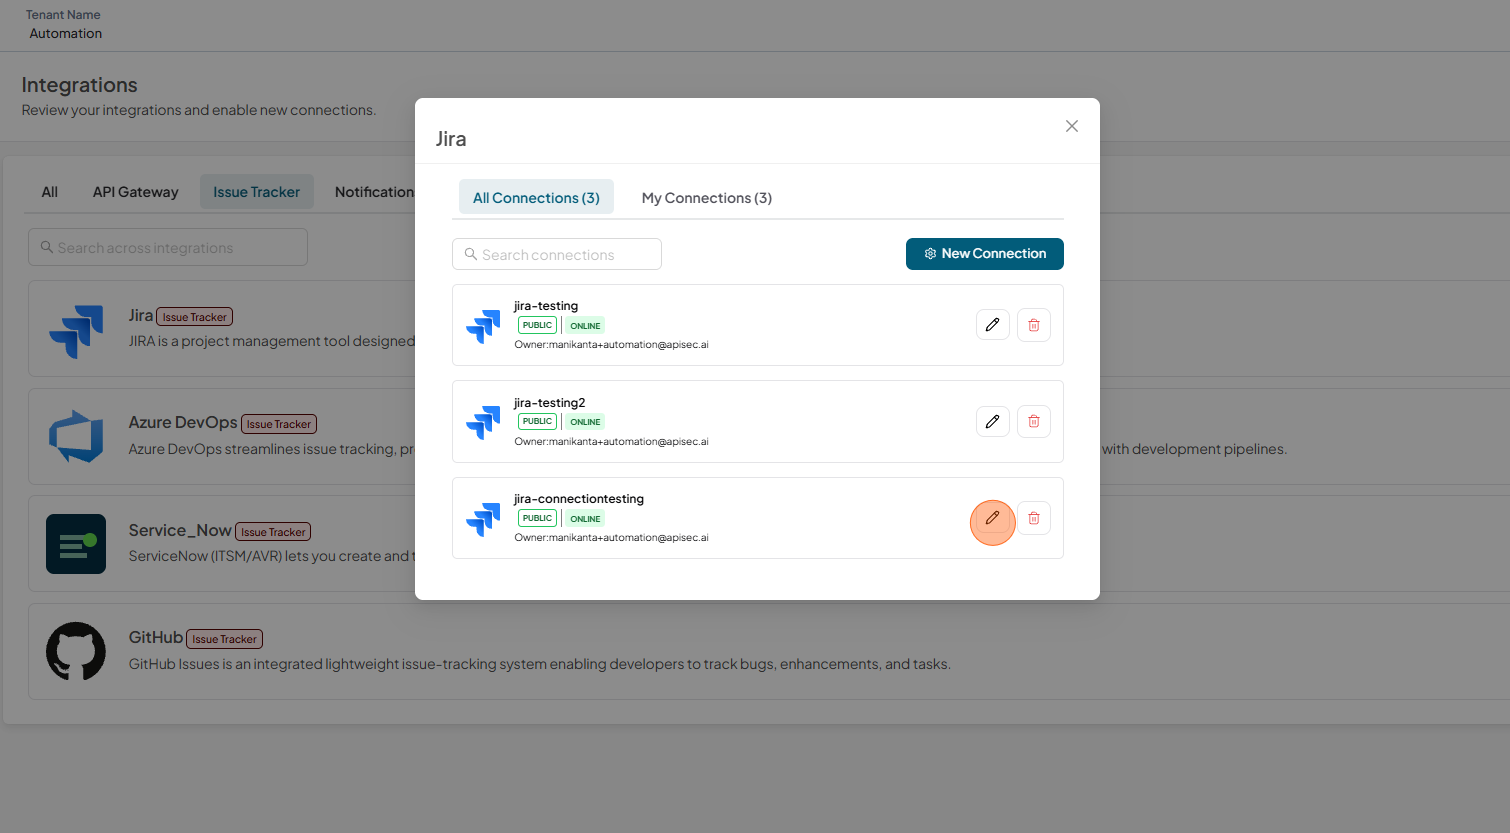
Check name is present in the integrations list
Edit a JIRA Connection
-
Open your browser and visit: https://<your-tenant>.apisecapps.com
-
Click on "Integrations"
-
Click on "Issue Tracker" tab
-
You will found the JIRA Issue Tracker
-
Click Manage
-
-
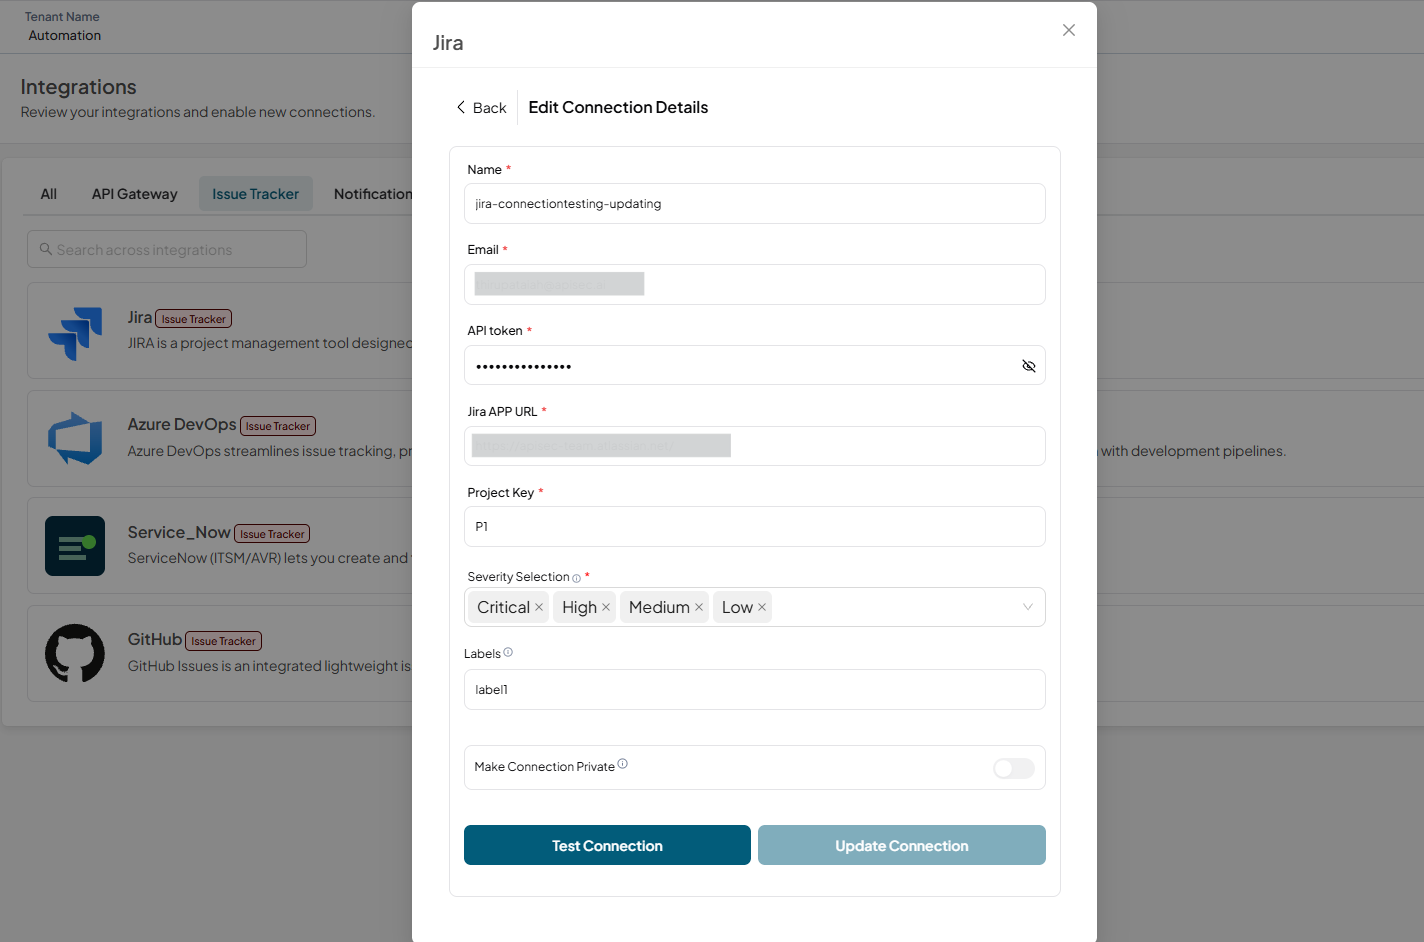
Select the Pencil icon next to the connection you want to edit.
-
Edit the connection details. Now you can also update severity filters for the existing connection (If they are not updated). Changes will apply for future scans and close the tickets automatically that doesn't match the severity to maintain consistency. However, the corresponding vulnerabilities will still exist in the platform.
-
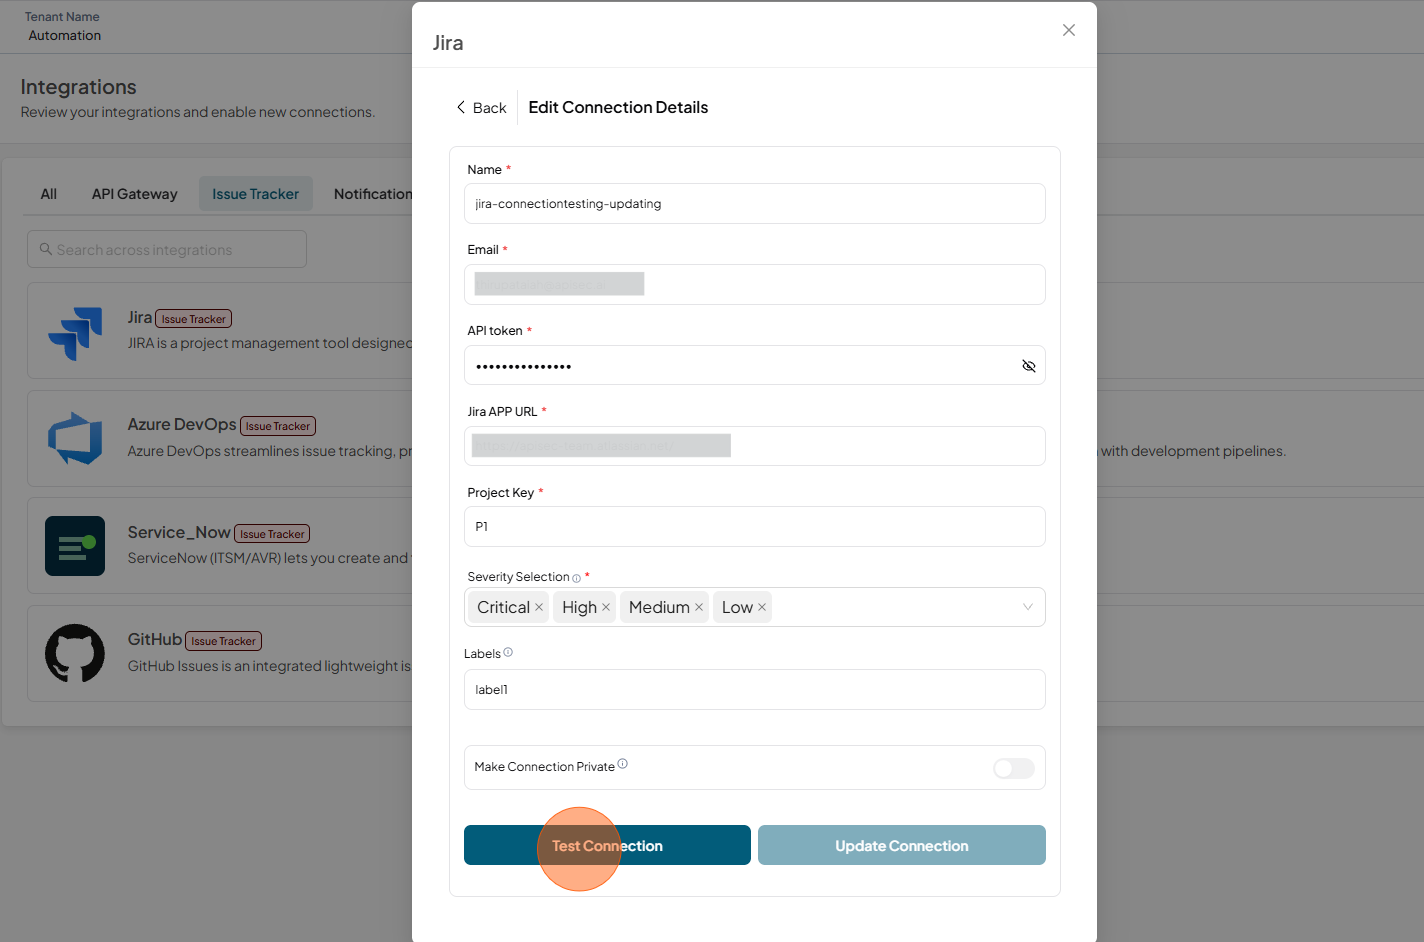
Click Test Connection
-
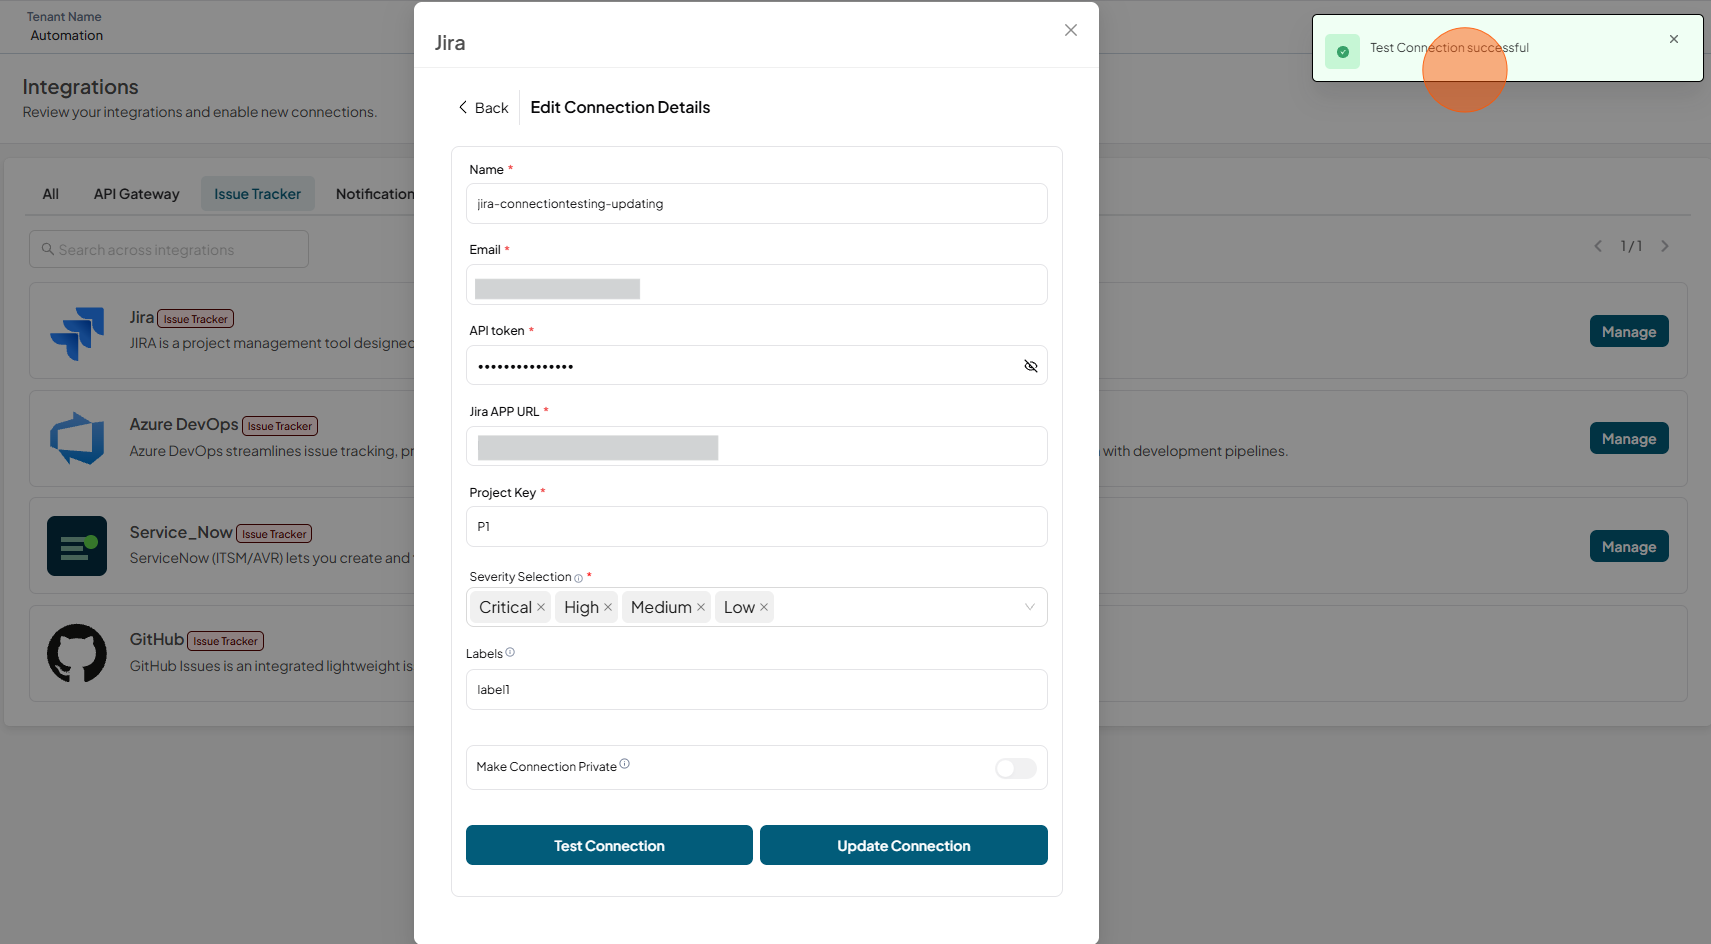
Test connection successful.
-
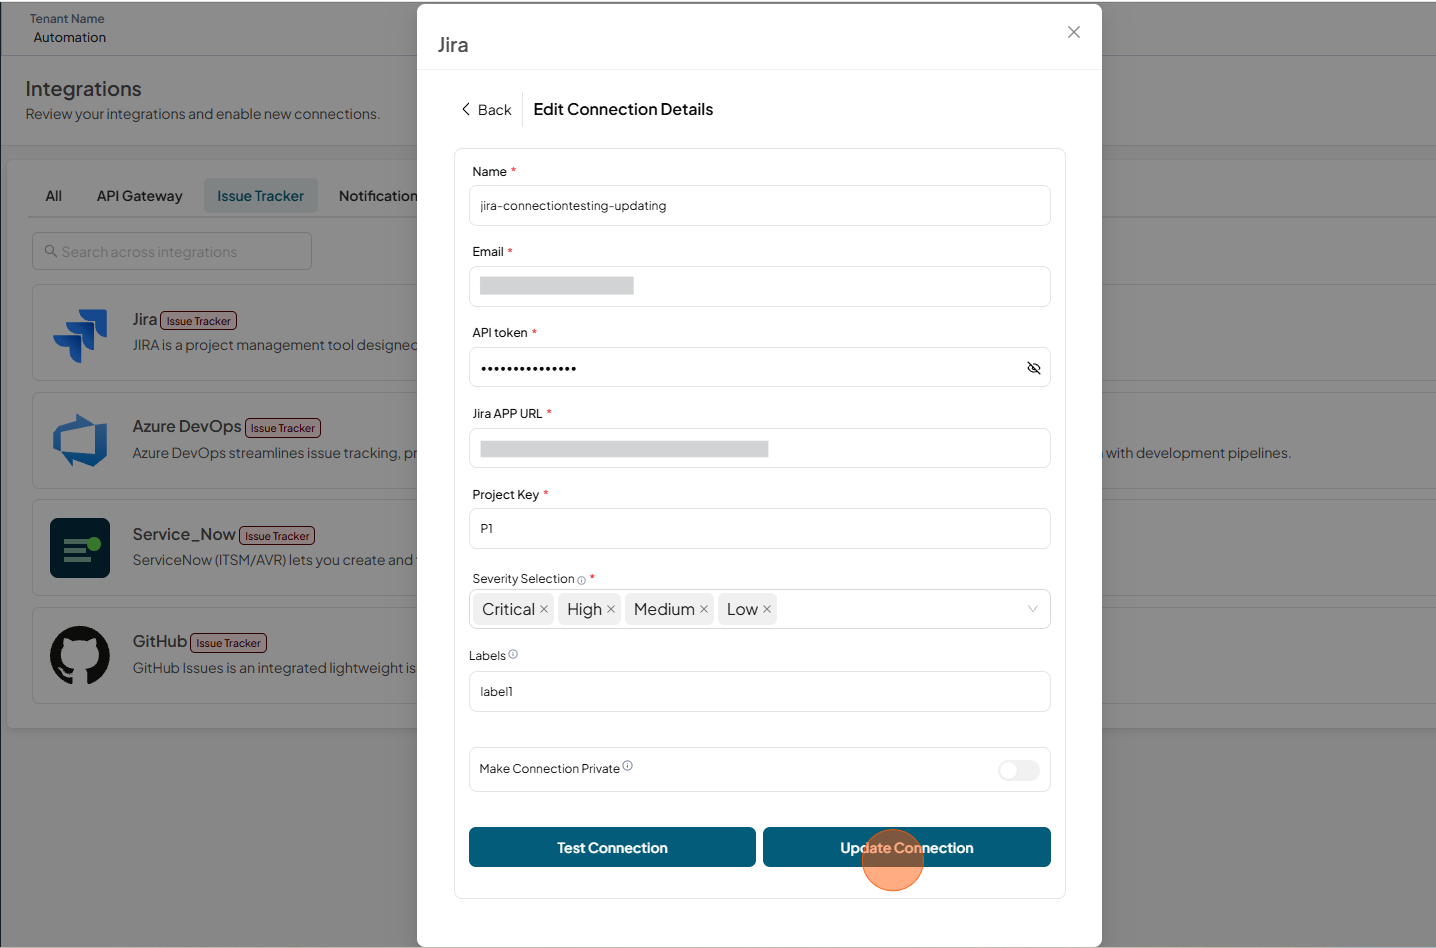
Click Update Connection
Delete a JIRA Connection
-
Open your browser and visit: https://<your-tenant>.apisecapps.com
-
Click on "Integrations"
-
Click on "Issue Tracker" tab
-
You will found the JIRA Issue Tracker
-
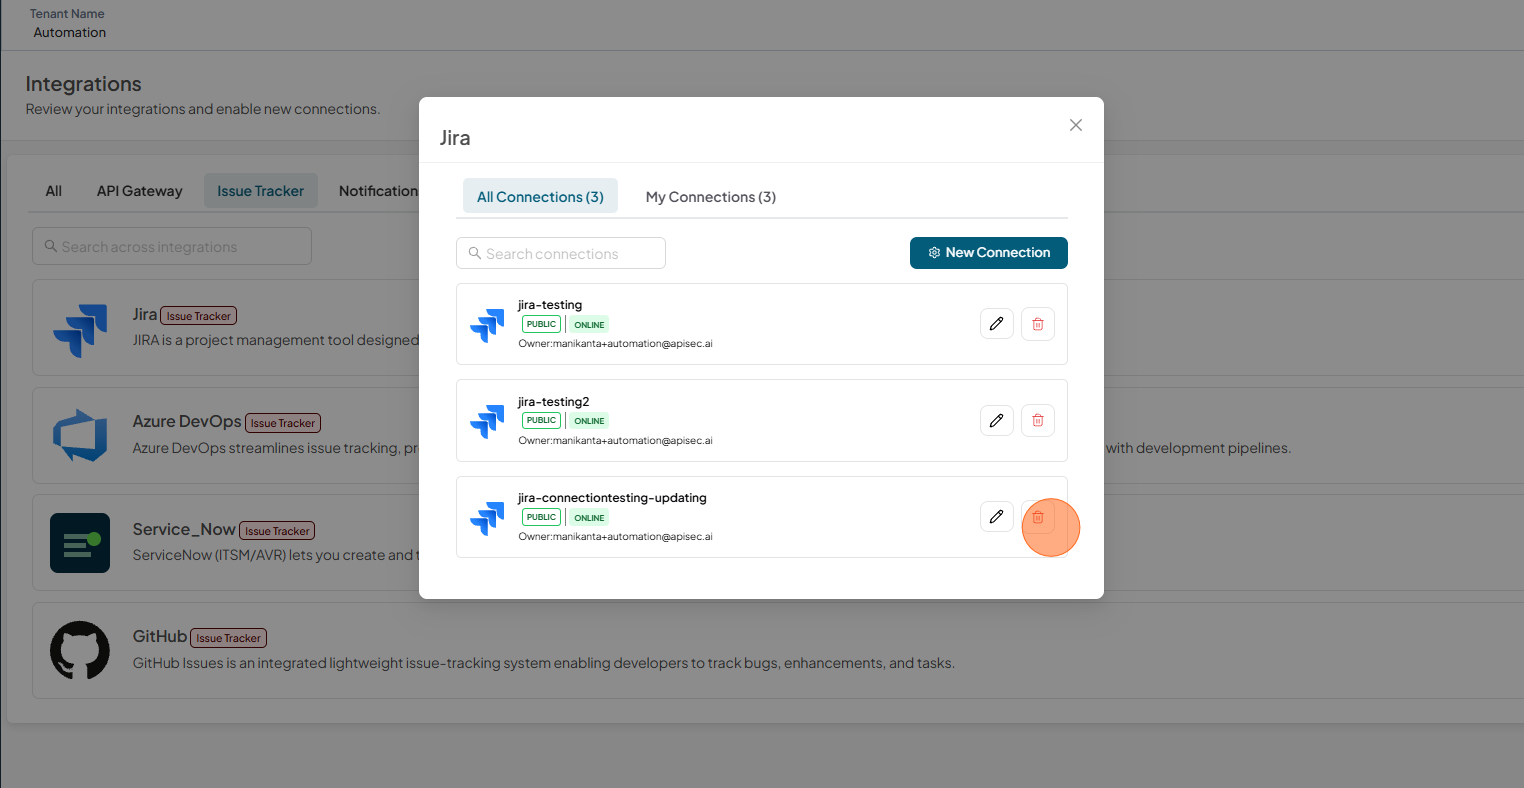
Click Manage
-
-
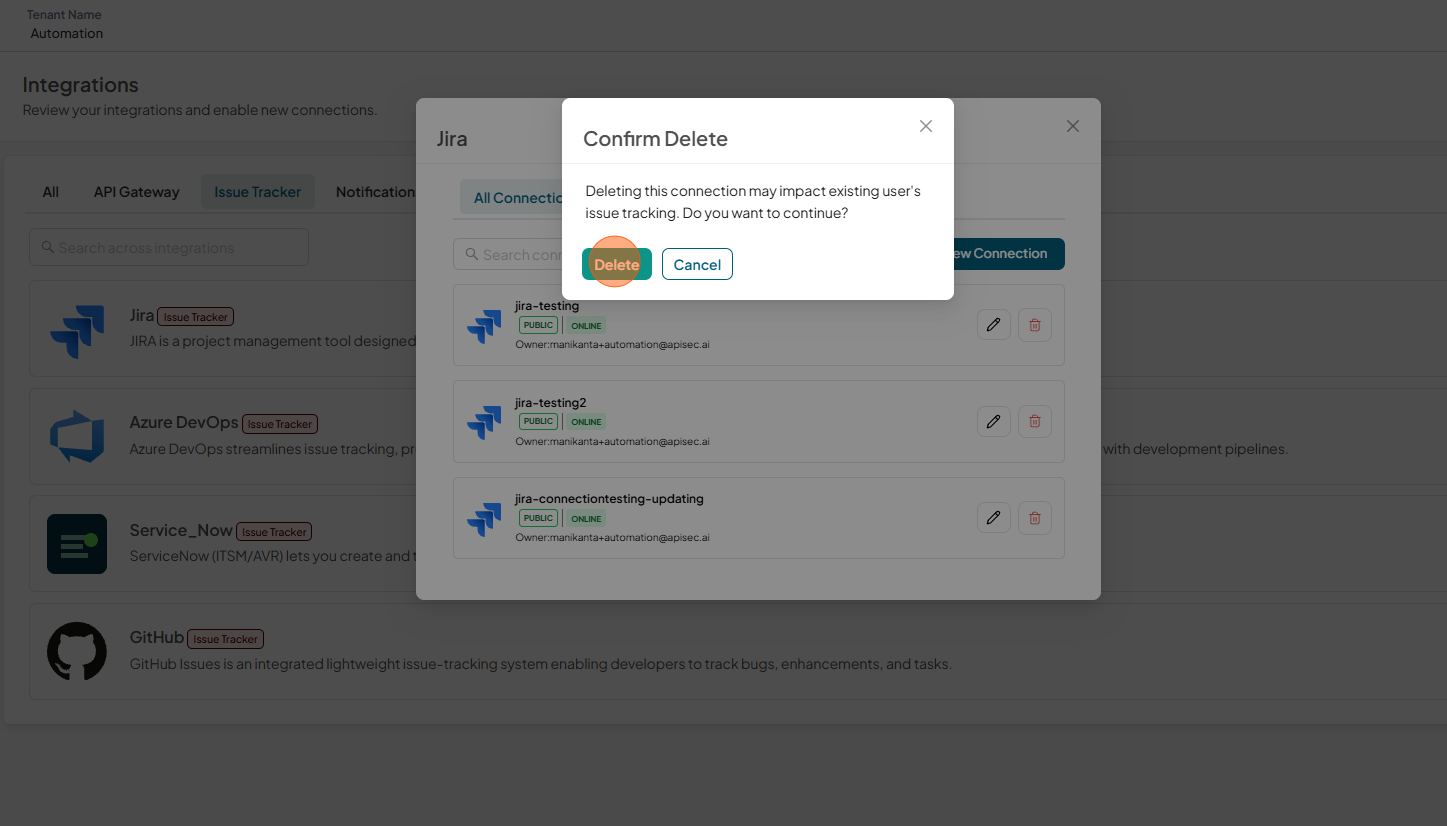
Click icon Delete
-
Click Delete to confirm,
Setting Up Jira connection with the application
You can integrate Jira with the application to automatically track and manage issues. This integration will be used to create tickets in Jira for easier tracking and resolution.
-
Navigate to: https://<your-tenant>.apisecapps.com
-
Click on Application
-
From the left navigation select Issue Tracker
-
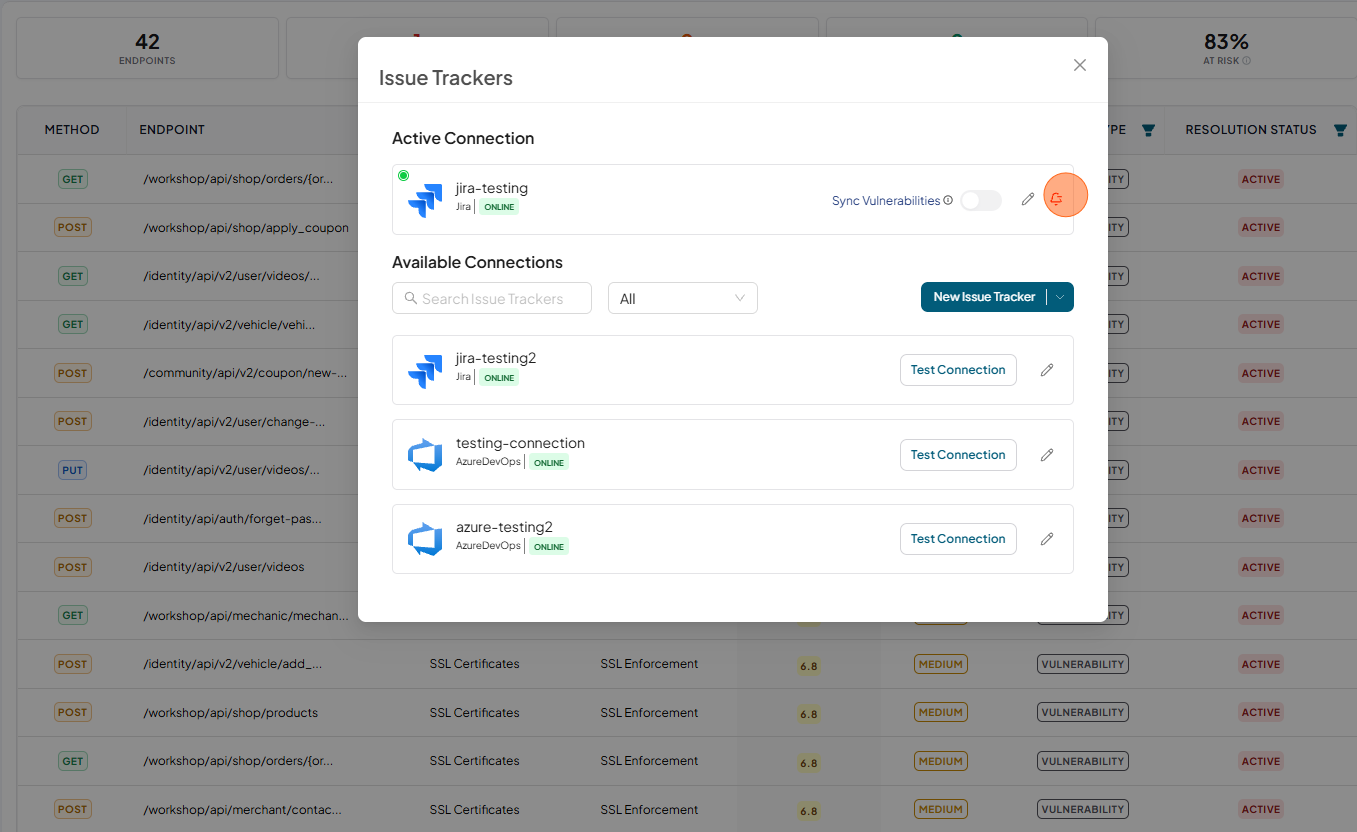
Now you found the list of Issue Trackers available in the tenant.
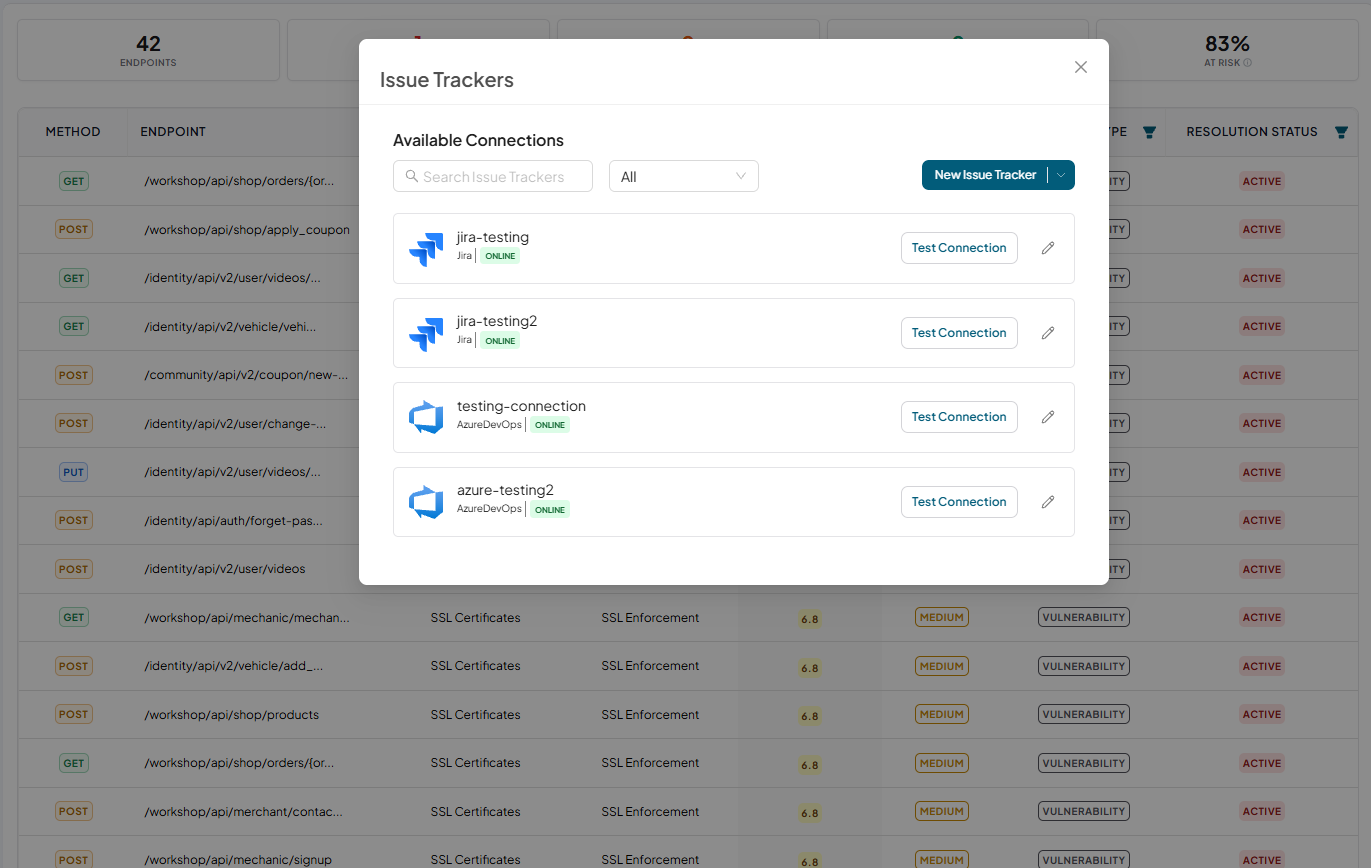
From here, if you want to create a new Jira connection, then click on the "New Issue Tracker" and then select Jira create a new connection.
-
From that list, select Jira connection and click on the Test Connection to test the connection.
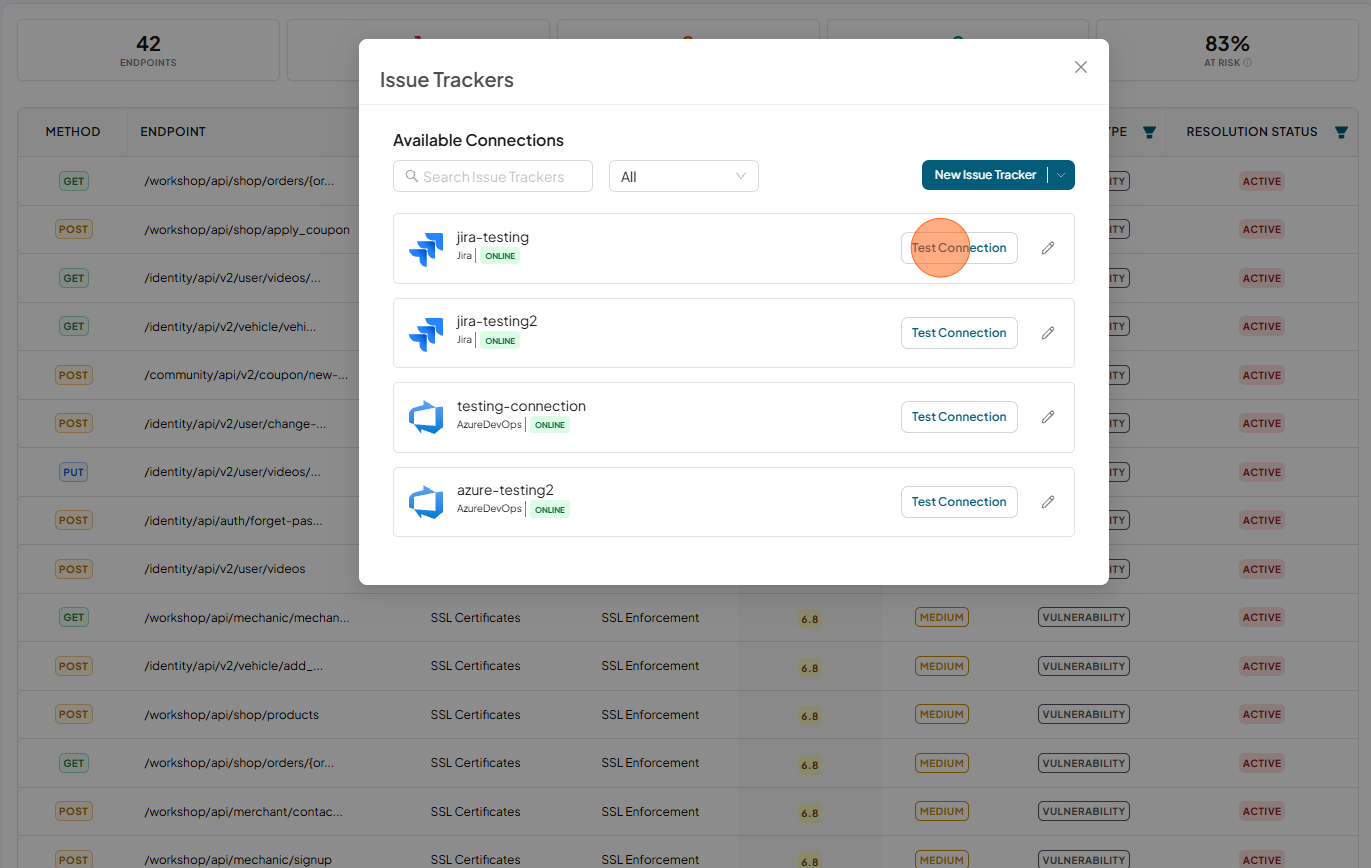
-
Test Connection successful
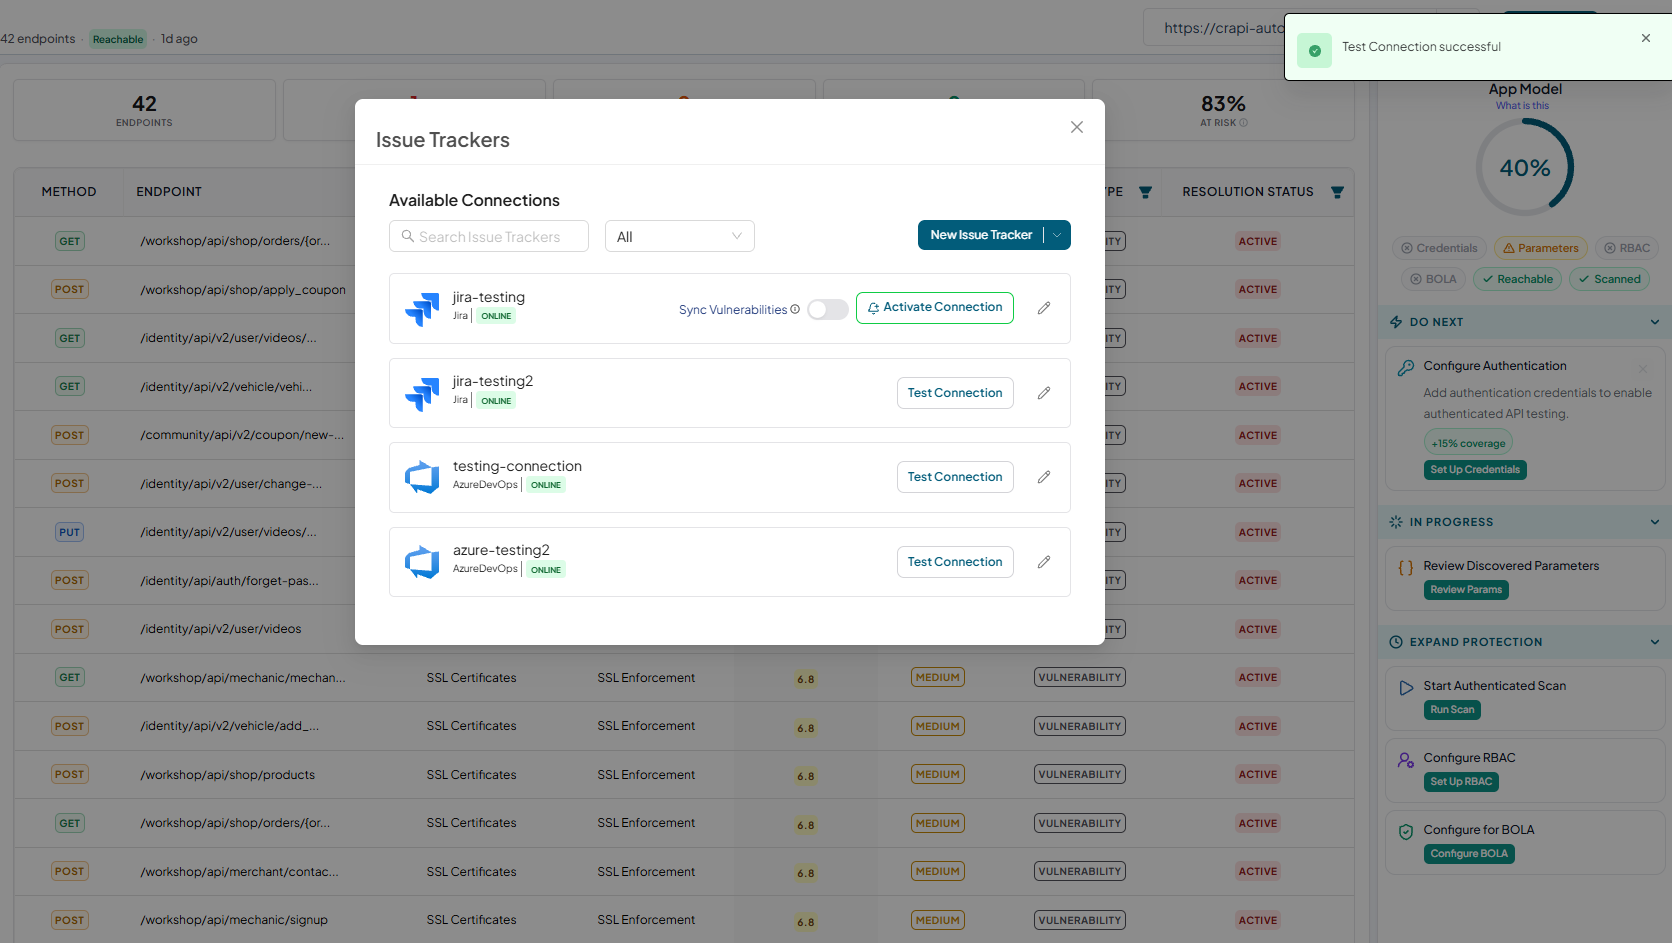
-
Now click on the Activate Connection
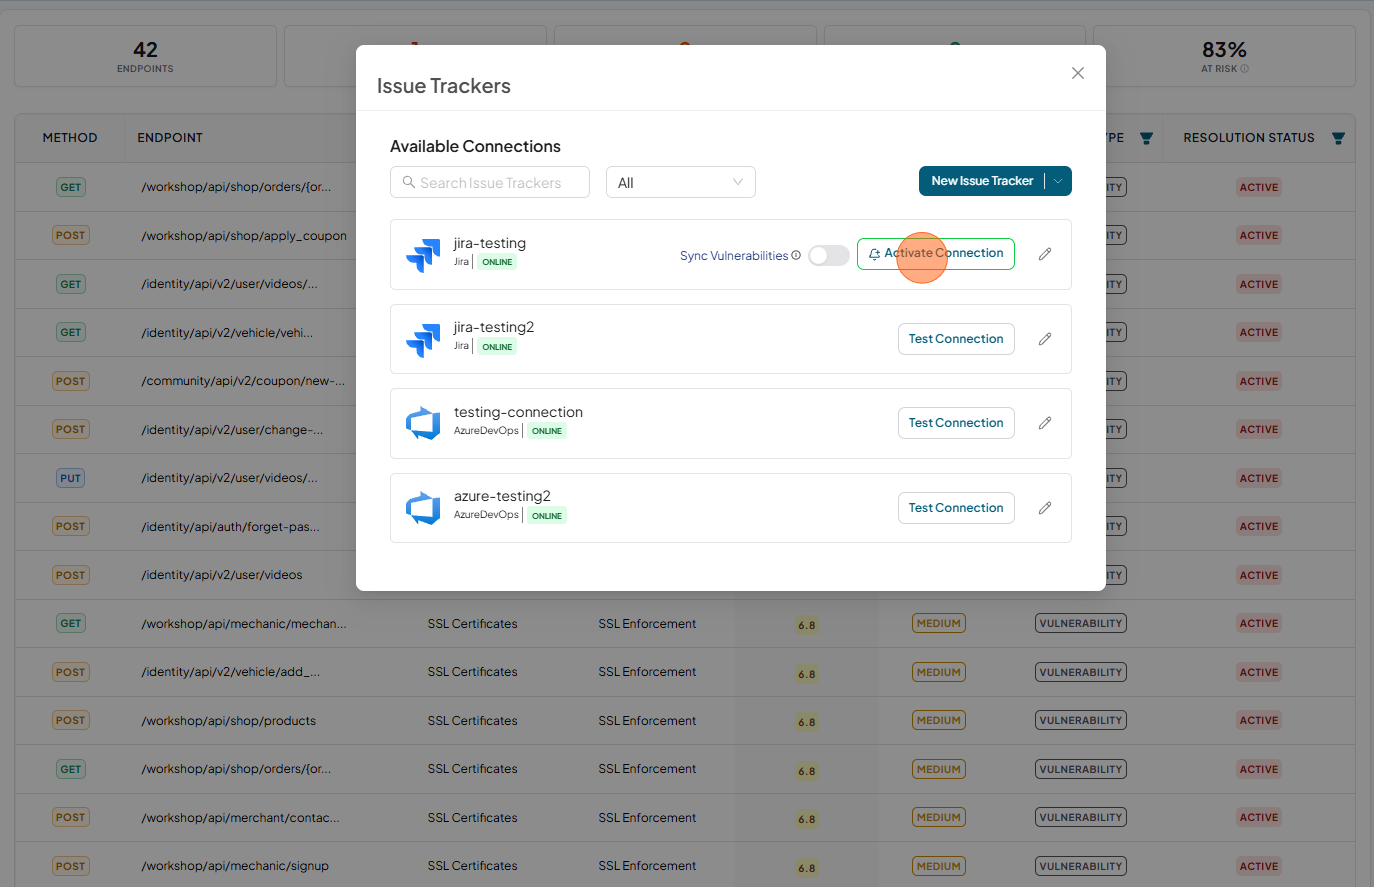
-
Connection activated
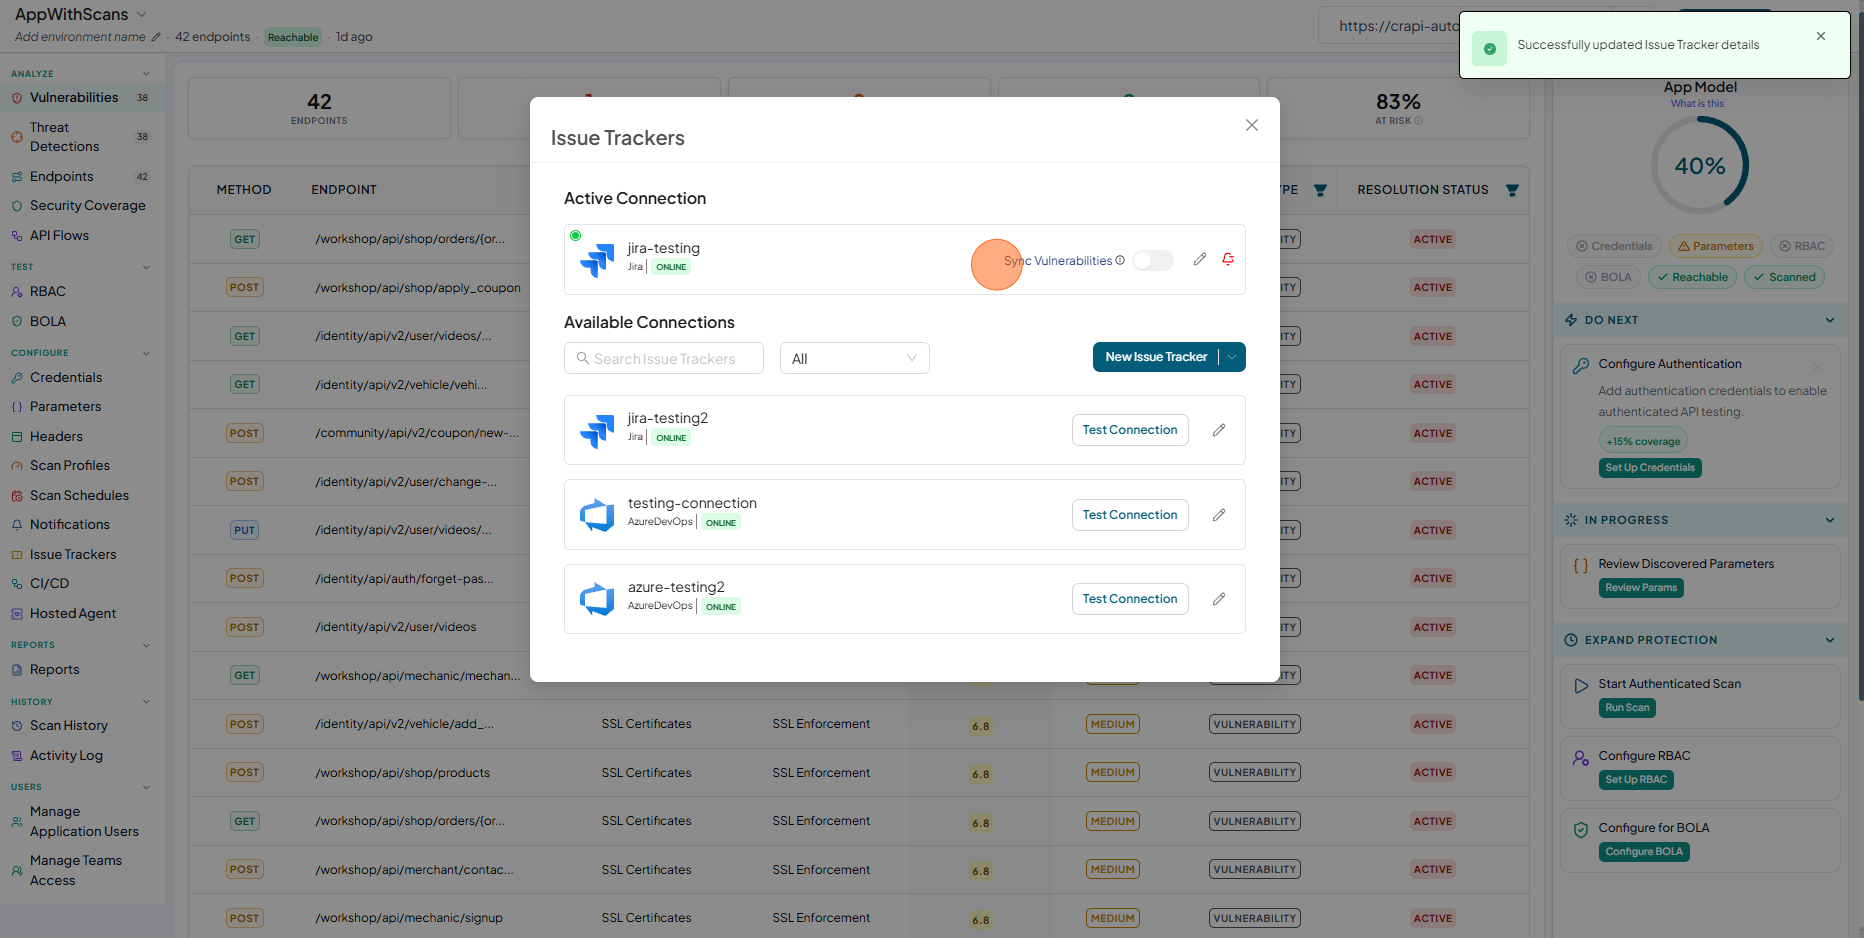
Now the configured connection will appear in the list as First connection.
noteuser role with View permissions can not configure Jira issue tracker in shared application.
-
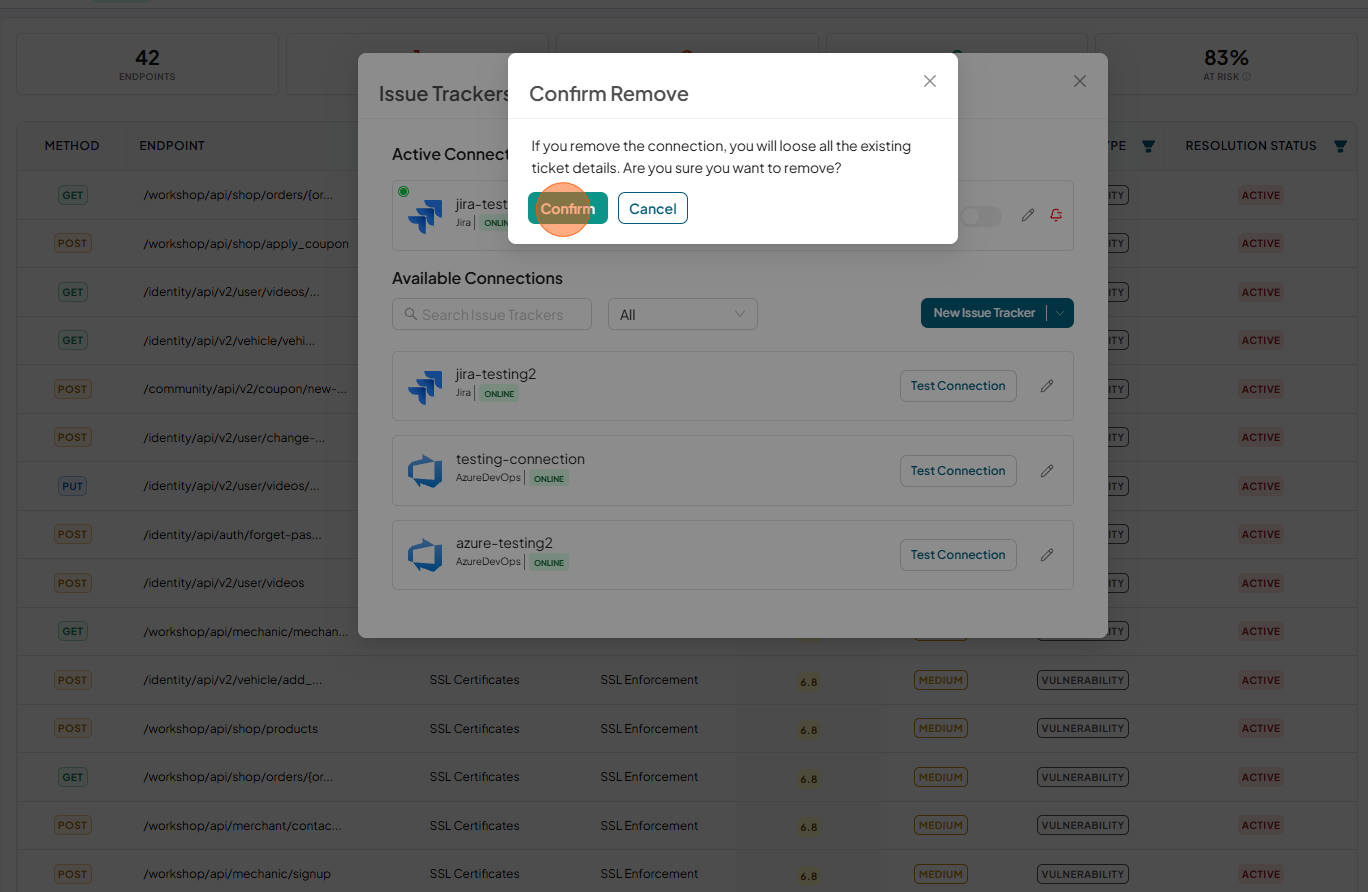
To remove the connection from the application, Click on the Delete icon beside the configured connection”
-
Click Confirm to confirm,
 note
noteuser role with View permissions can not remove Jira issue tracker from shared application.