How To Onboard An Application Using Amazon API Gateway
Prerequisites
APIsec platform allows on boarding via AWS gateway in three credential types.
- AWS User
- Assume Role
- Central Role ARN
Prerequisites for AWS User
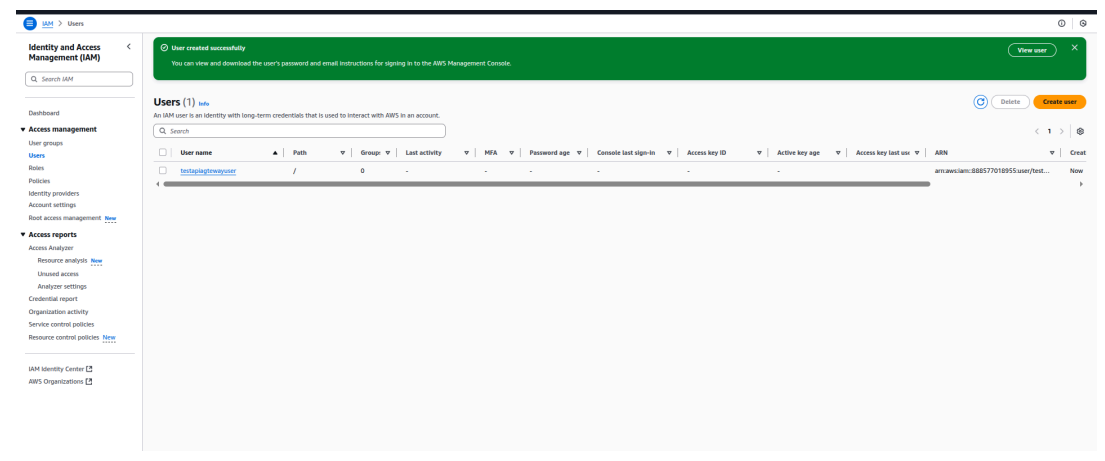
1. Create an IAM User
- Log in to your AWS Management Console.
- Navigate to IAM → Users → Create Users.
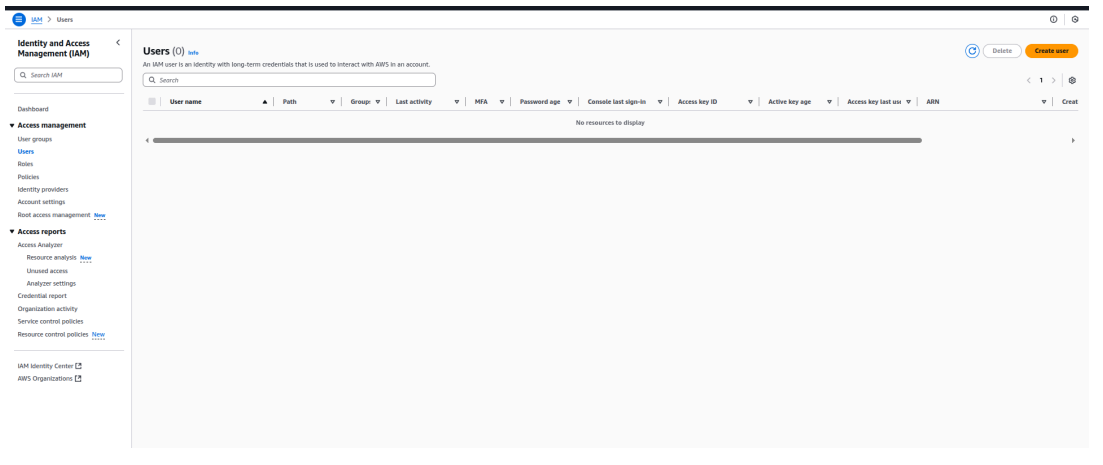
- Enter a Username (e.g., apisec-apigateway-user)
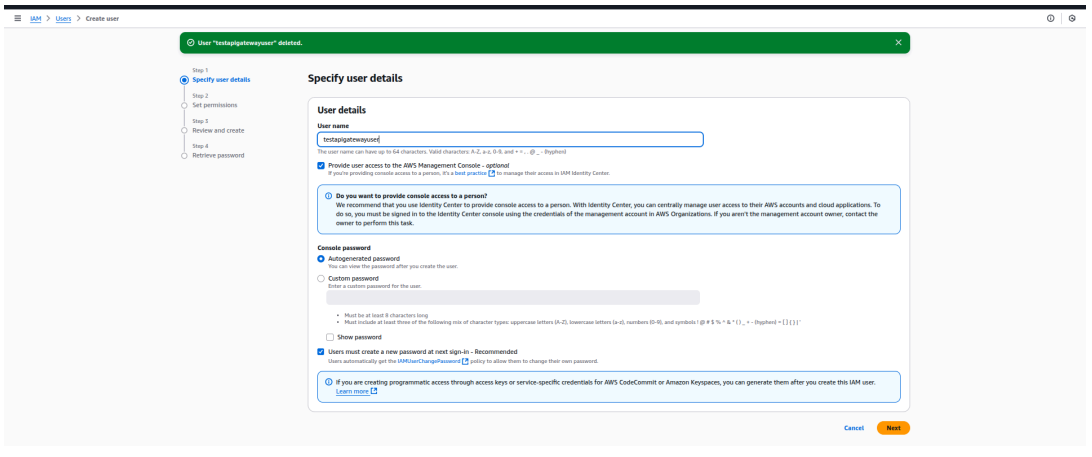
- Click Next

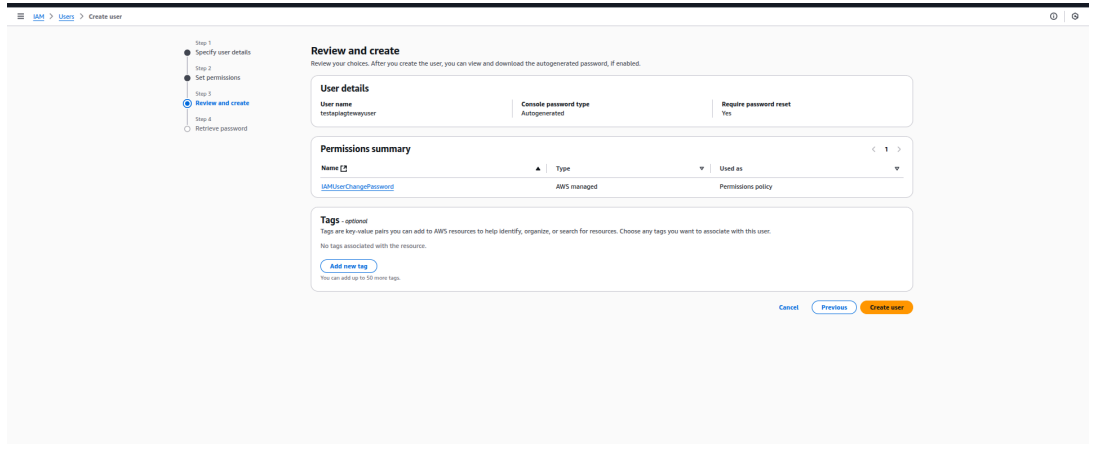
- Click Create User
2. Attach Required Permissions
- Click the user created in the previous step.
- In the Permissions tab, select Create in-line policy from the Add Permissions dropdown.
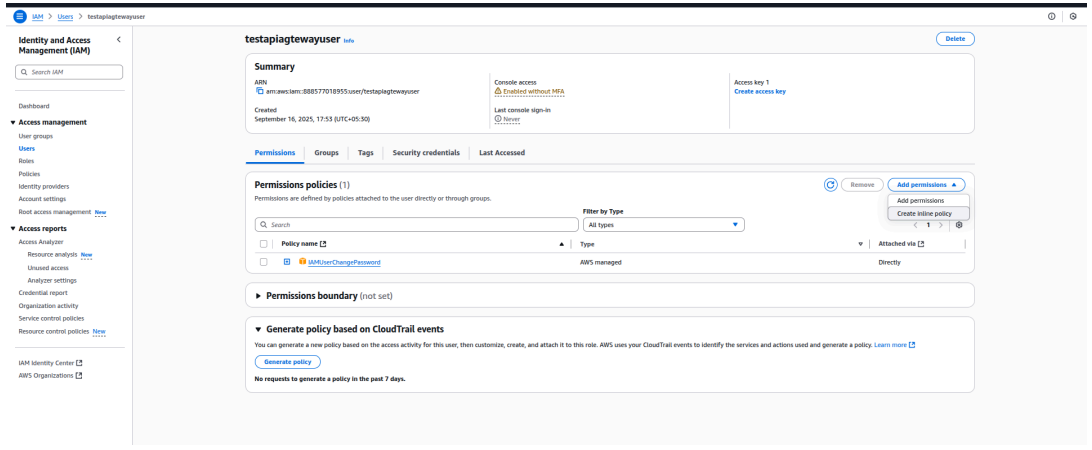
- Add the following custom inline policy in JSON format.
{
  "Version": "2012-10-17",
  "Statement": [
    {
      "Effect": "Allow",
      "Action": "apigateway:GET",
      "Resource": "*"
    }
  ]
}
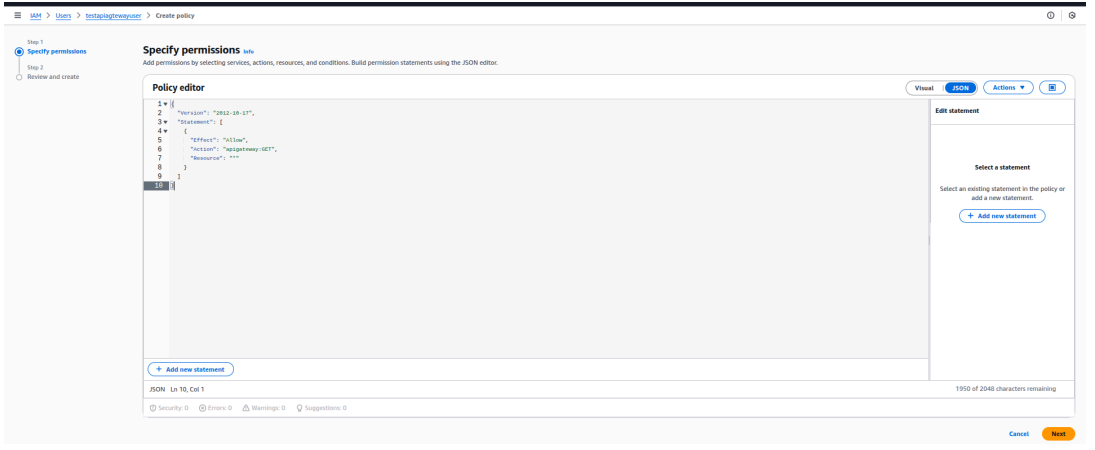
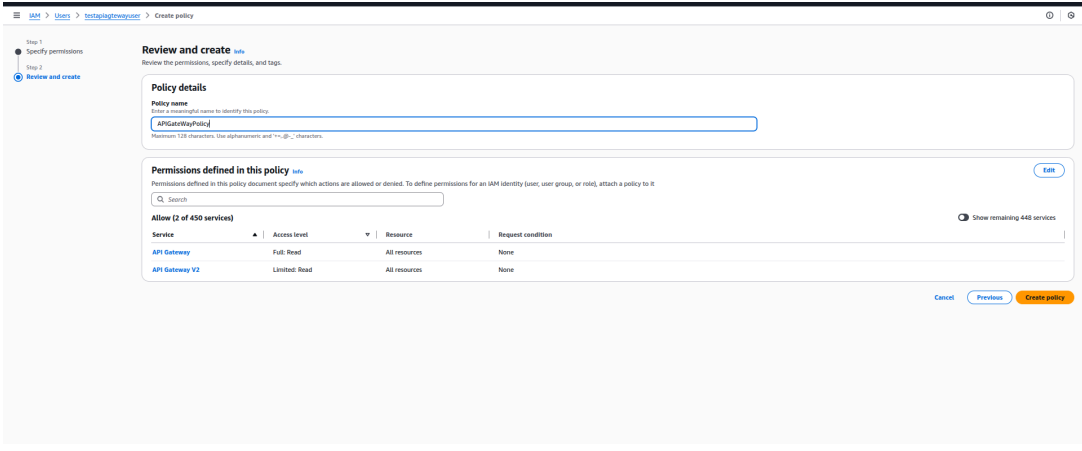
- Click Next
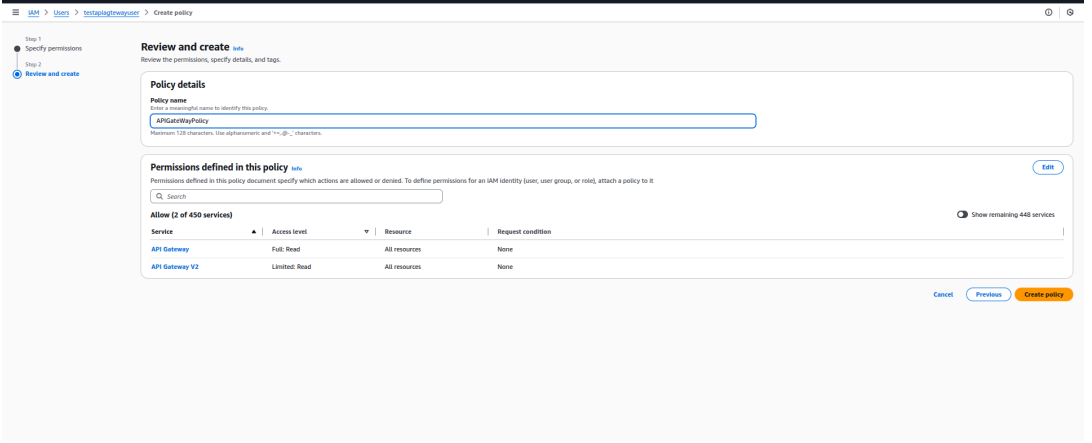
- Enter policy name and click Create policy
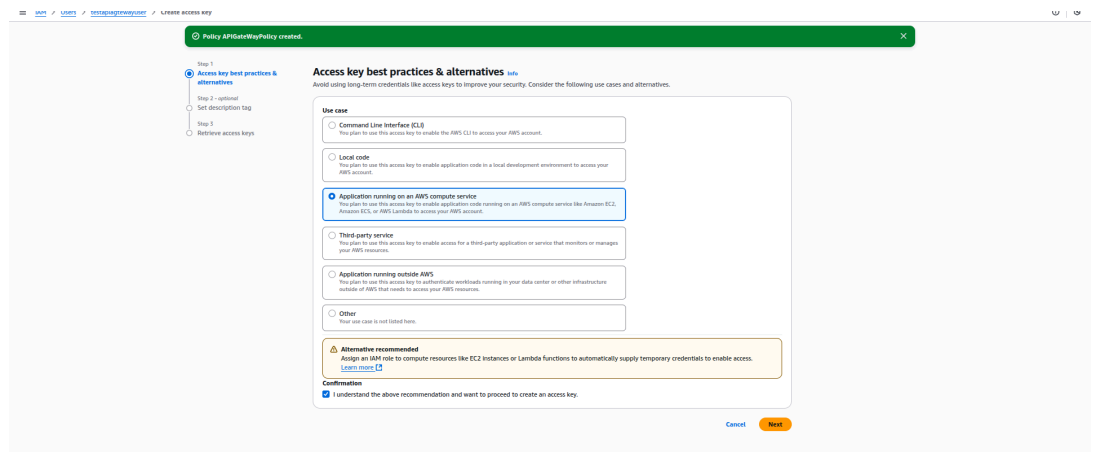
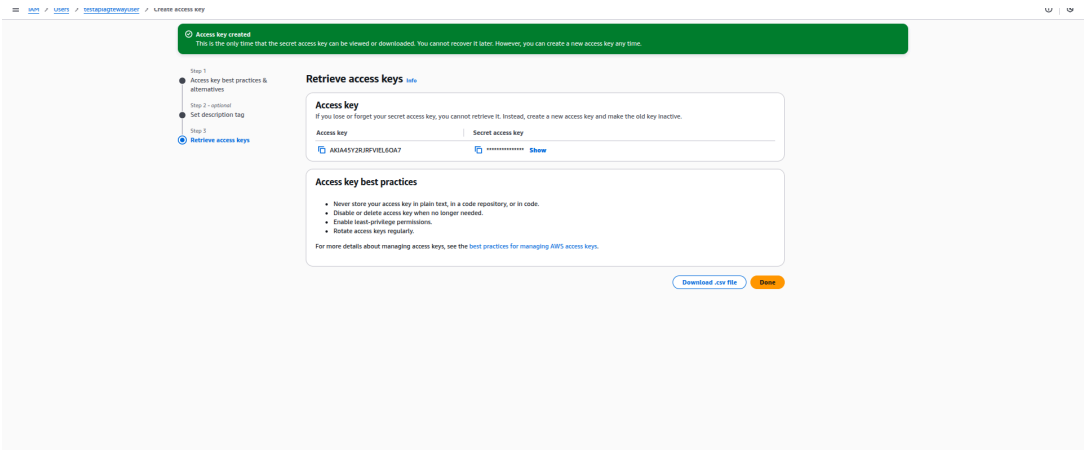
3. Create Access Key
- Once the IAM user is created, go to the user’s Security credentials tab.
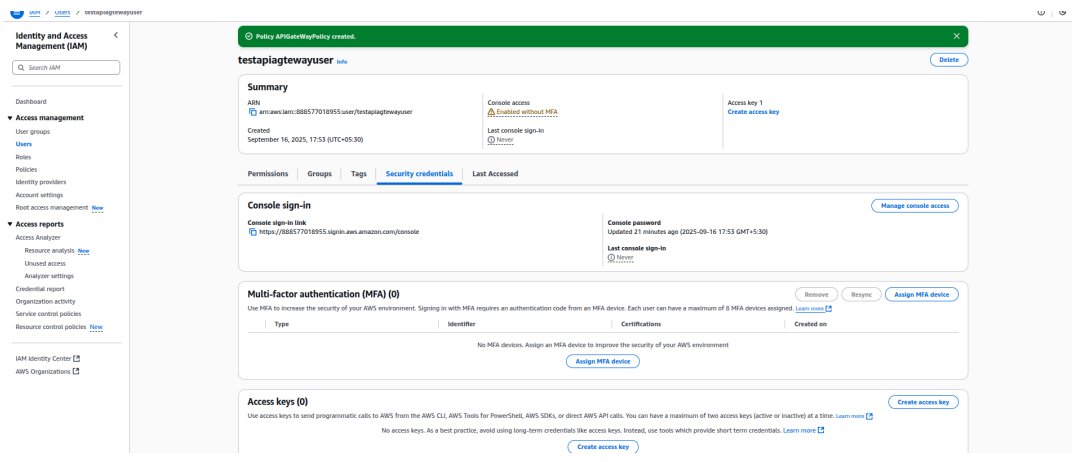
- Under Access keys, click Create access key.
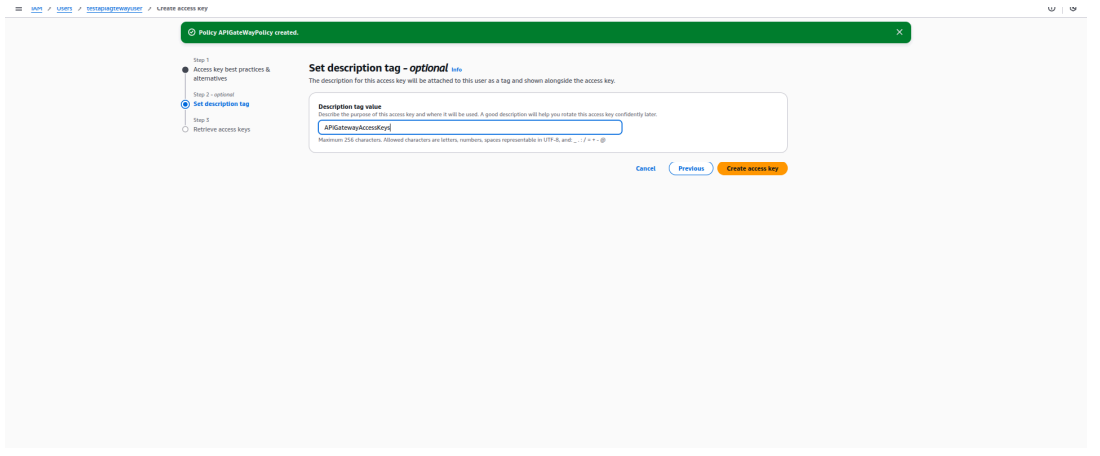
- Copy the Access Key ID and Secret Access Key to integrate AWS API Gateway in the APIsec platform.
Prerequisites for Assume Role
APIsec now supports integrating with AWS API Gateway using IAM Roles, offering a more secure and manageable alternative to long-lived IAM User credentials.
With this enhancement, customers can configure a self-owned IAM role in their accounts for APIsec to use — eliminating the need to store static access keys. APIsec utilizes the AWS Security Token Service (STS) to temporarily assume the specified role, obtaining short-lived credentials to securely perform the required read operations (e.g., retrieving API definitions from API Gateway).
This approach aligns with AWS security best practices by:
- Reducing the exposure of long-lived IAM credentials.
- Enabling fine-grained access control via trust policies.
- Providing an auditable and controlled mechanism for APIsec to access AWS resources.
Once configured, APIsec securely assumes the customer’s IAM Role at runtime to perform necessary operations on API Gateway, ensuring a secure, auditable, and compliant integration flow.
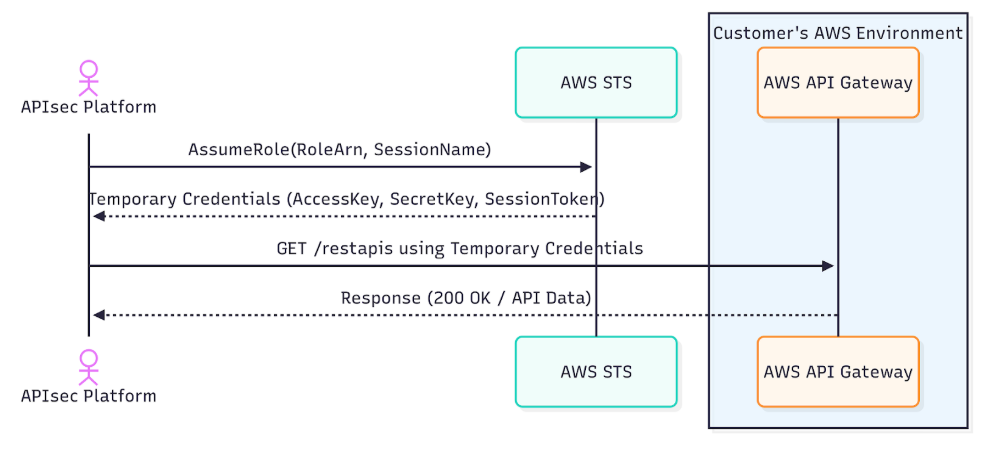
For APIsec platform to onboard via Assume Role, it needs Role Arn (Amazon Resource Name of the IAM role to assume for this connection) and Session Name (To identify the temporary security credentials used in this connection) which is an optional.
1.Contact APIsec Support
Before proceeding, contact APIsec Support to obtain:
-
The AWS ARN that includes APIsec’s AWS Account ID.
This ARN will be required when configuring the trust policy in your AWS account.
Example:
Note
arn:aws:iam::111122223333:role/MyAccessRole
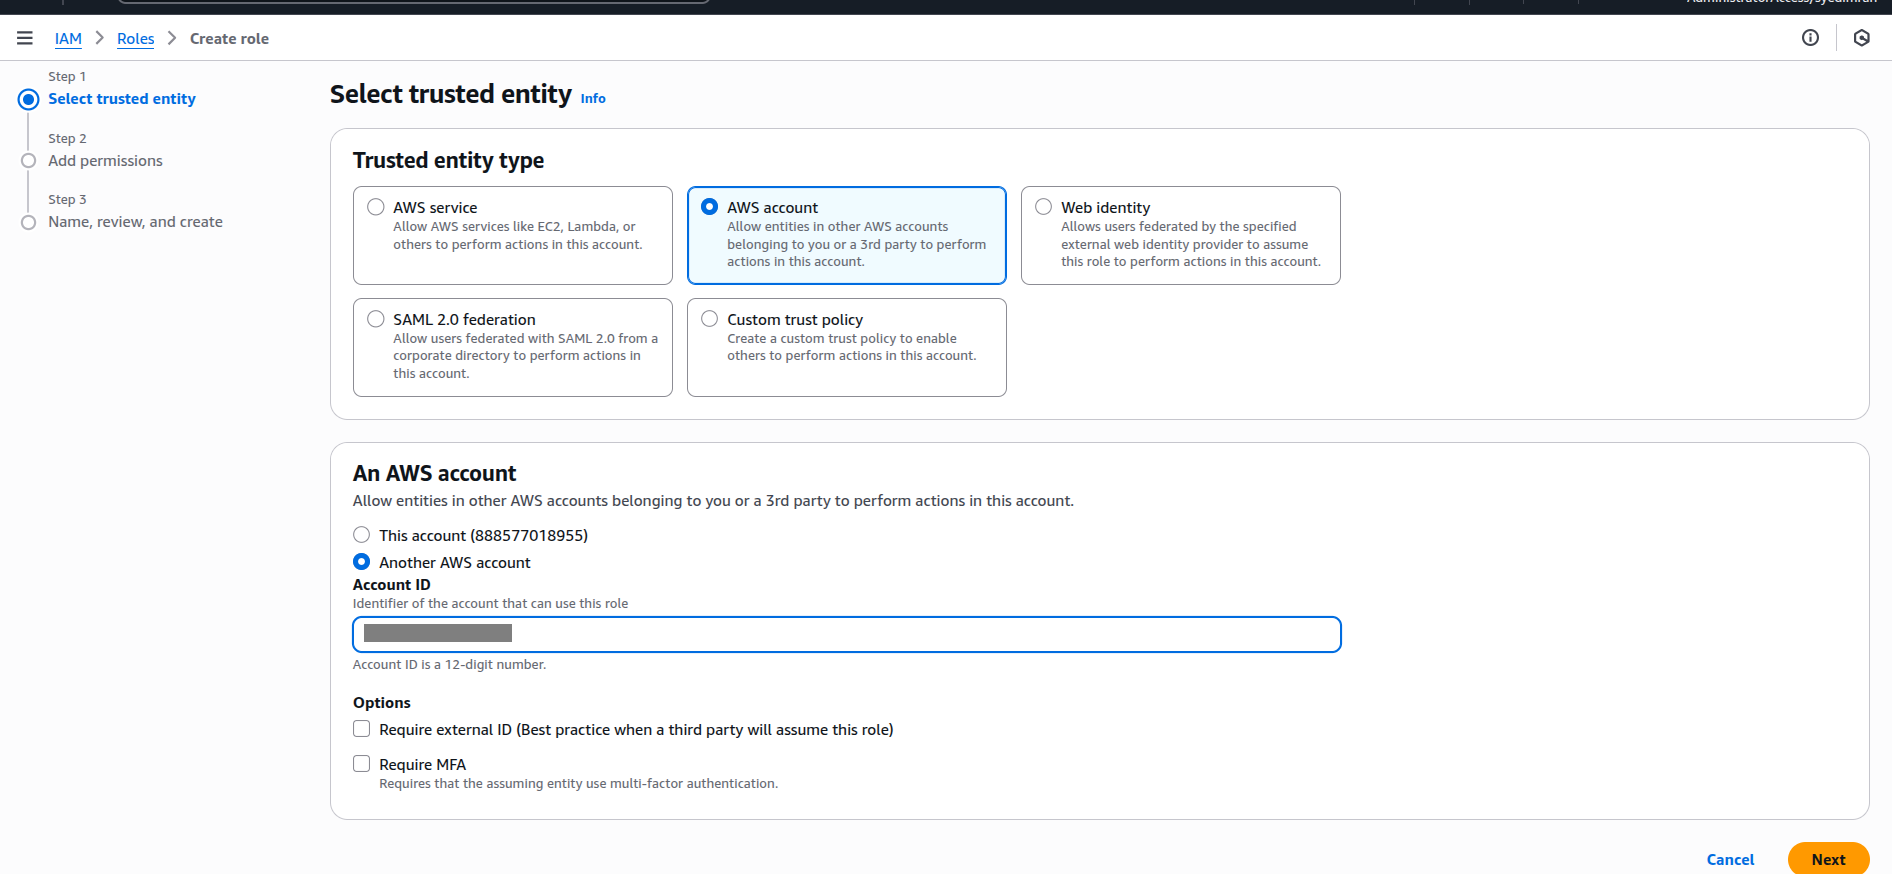
2.Create an IAM Role in Your AWS Account
-
Sign in to your AWS Management Console.
-
Navigate to IAM → Roles → Create role.

-
Select Trusted Entity Type → Another AWS account.
-
Enter the another AWS Account ID.
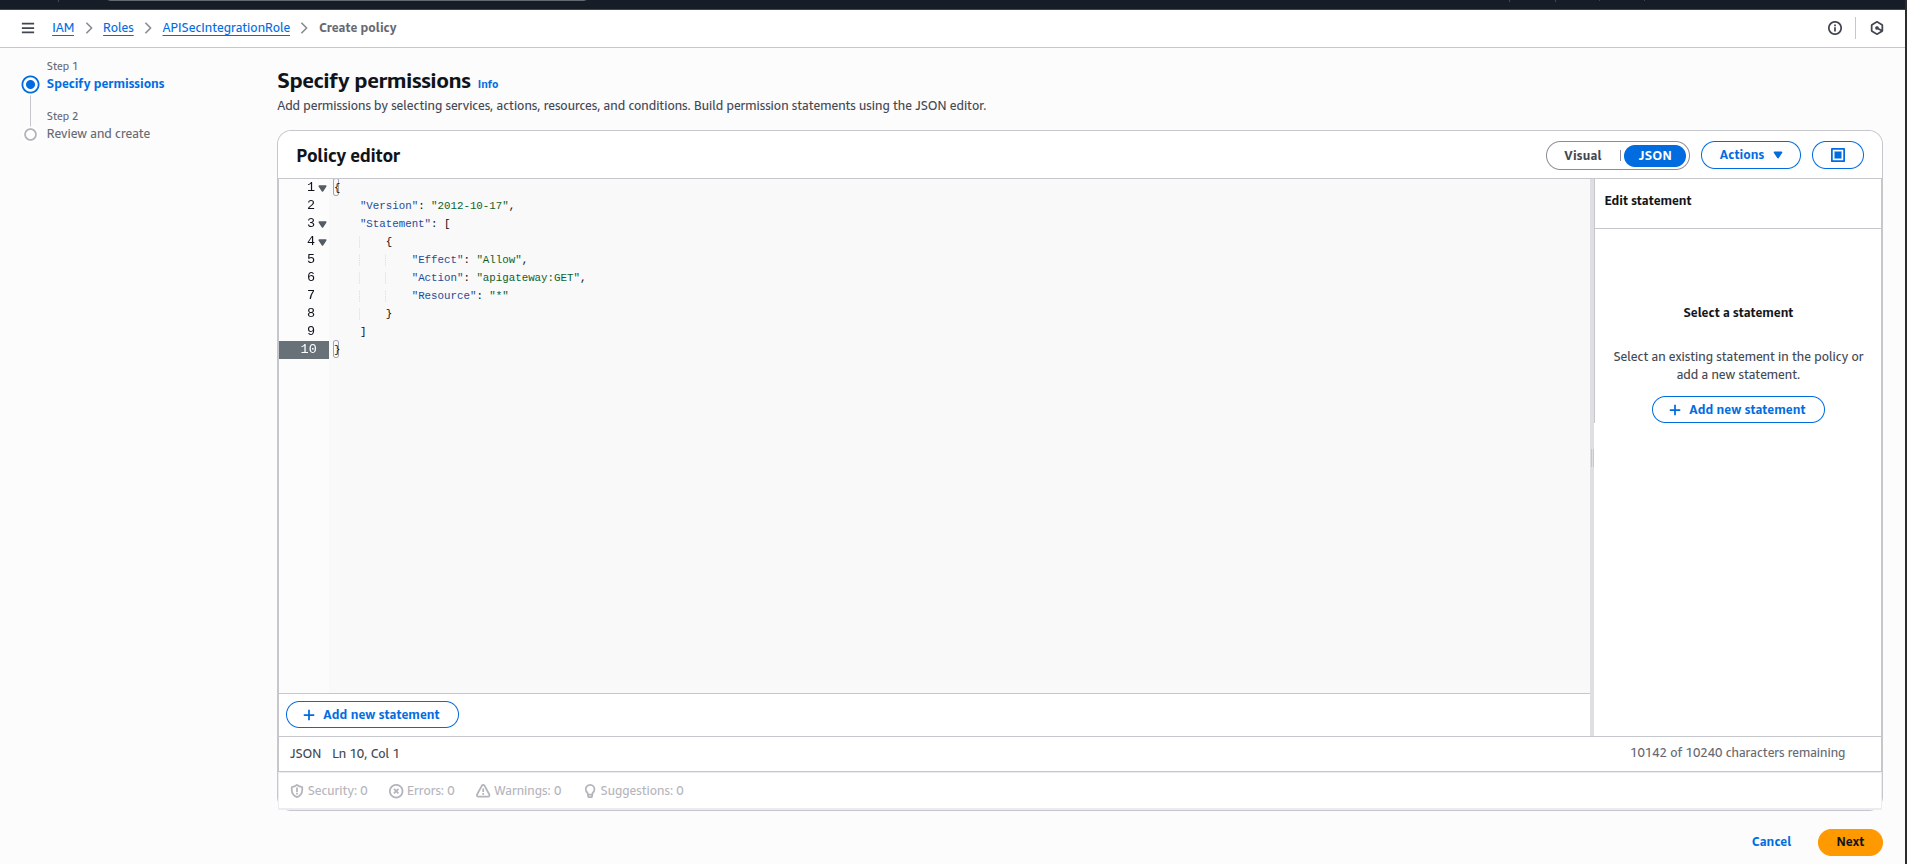
3.Attach a Policy to Grant GET Access to the API Gateway
Attach a new or existing policy that provides read-only (GET) permissions to the API Gateway. Example Policy
{
  "Version": "2012-10-17",
  "Statement": [
    {
      "Effect": "Allow",
      "Action": ["apigateway:GET"],
      "Resource": "*"
    }
  ]
}
Save this as APIGatewayGETAccessPolicy and attach it to the IAM Role.
4.Configure the Trust Policy
Once the IAM Role is created, define a “Trust Relationship” allowing APIsec’s AWS Account to assume it. Below is the sample example. Replace the ARN whcih you have got from the APIsec support team in the first step.
{
  "Version": "2012-10-17",
  "Statement": [
    {
      "Effect": "Allow",
      "Principal": {
        "AWS": "arn:aws:iam::111122223333:role/MyAccessRole"
      },
      "Action": "sts:AssumeRole"
    }
  ]
}
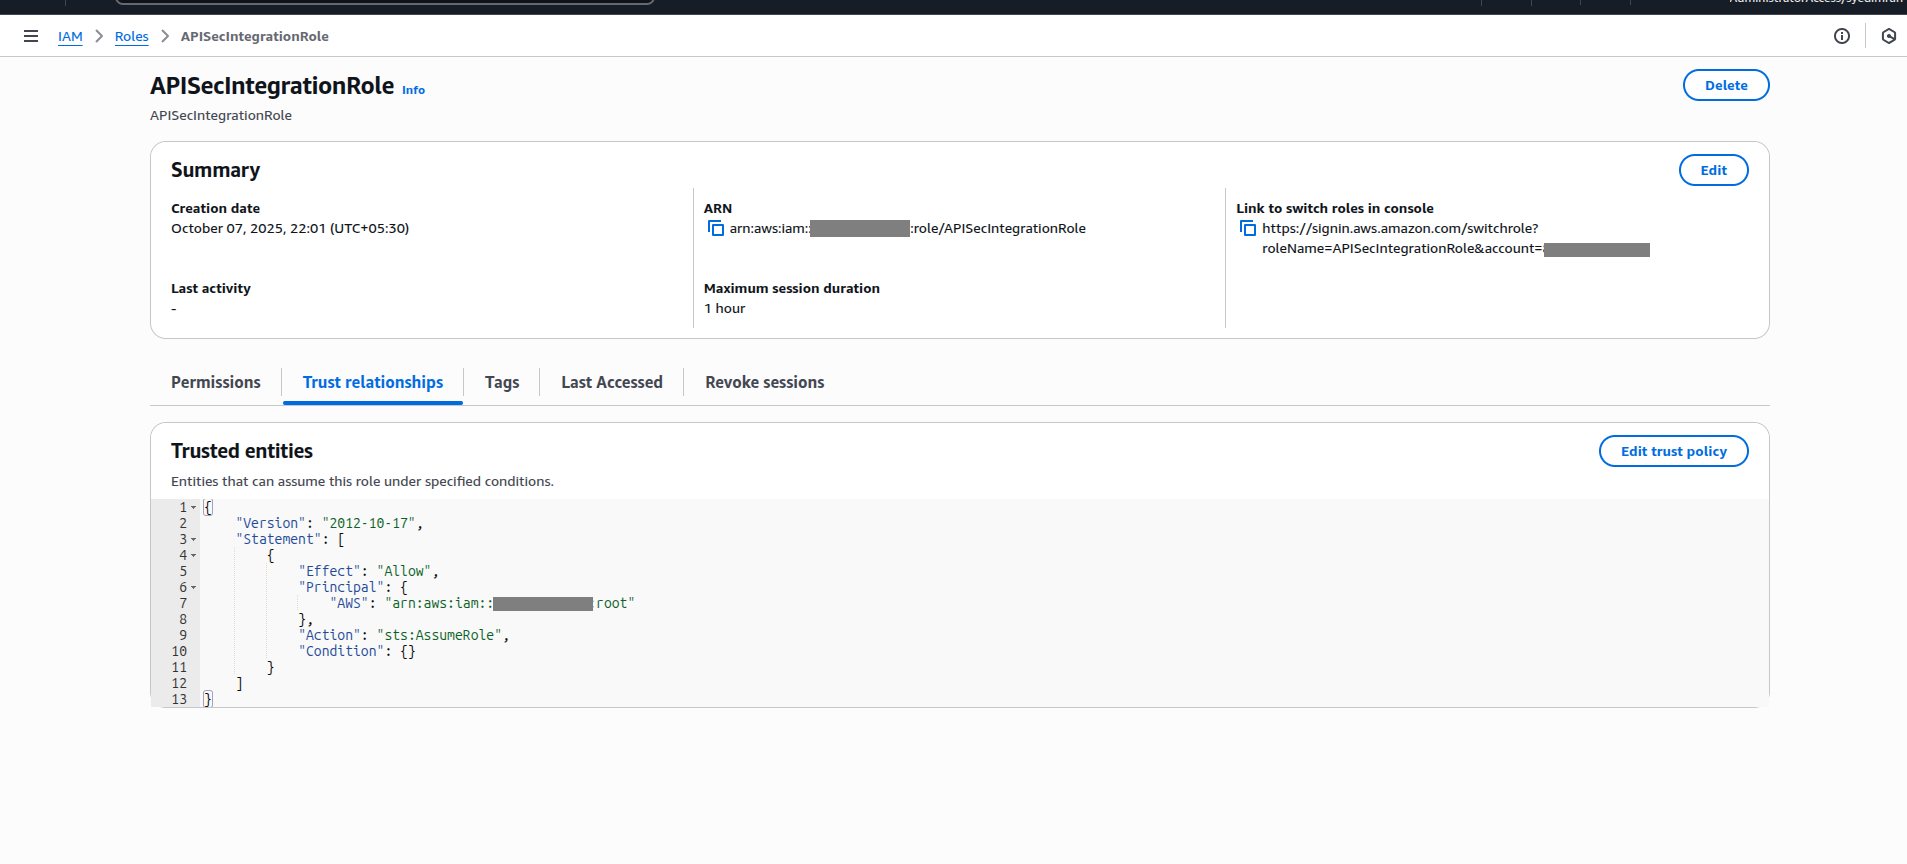
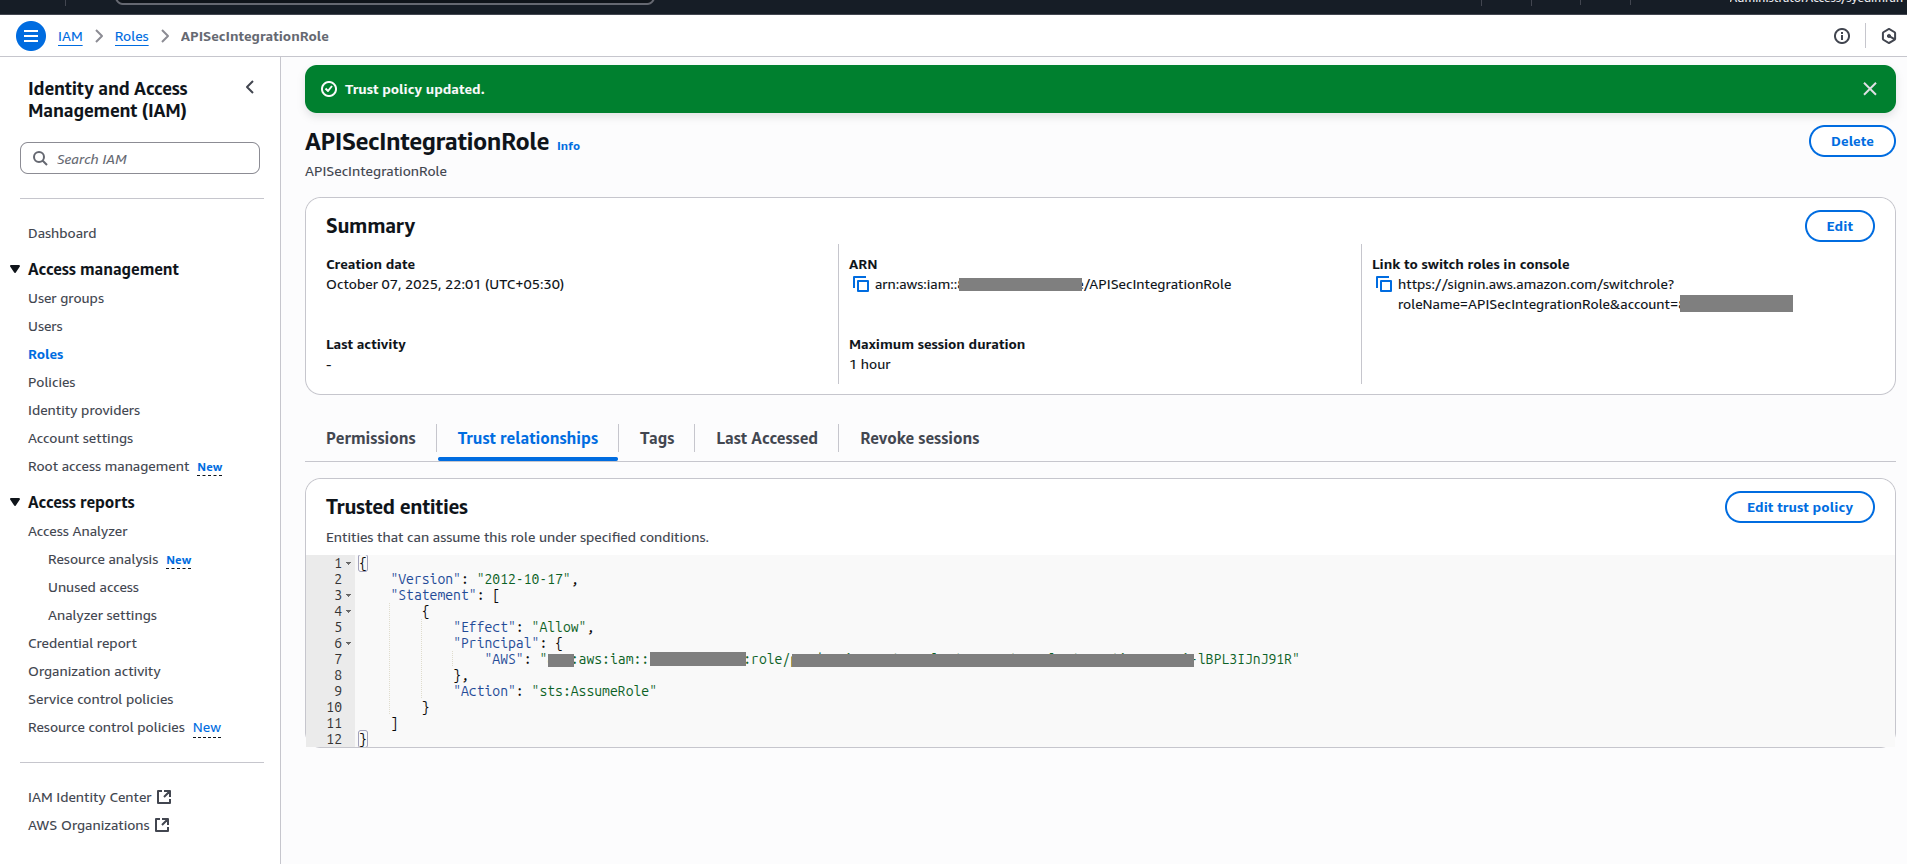
You can edit this policy under: IAM → Roles → [Your Role] → Trust relationships → Edit trust policy.
5.Copy the Role ARN
Once your IAM Role is ready:
- 1.Go to the Role Summary page in AWS IAM.
- 2.Copy the Role ARN (e.g., arn:aws:iam::999988887777:role/APIGatewayAccessRole).
Prerequisites for Central Role ARN
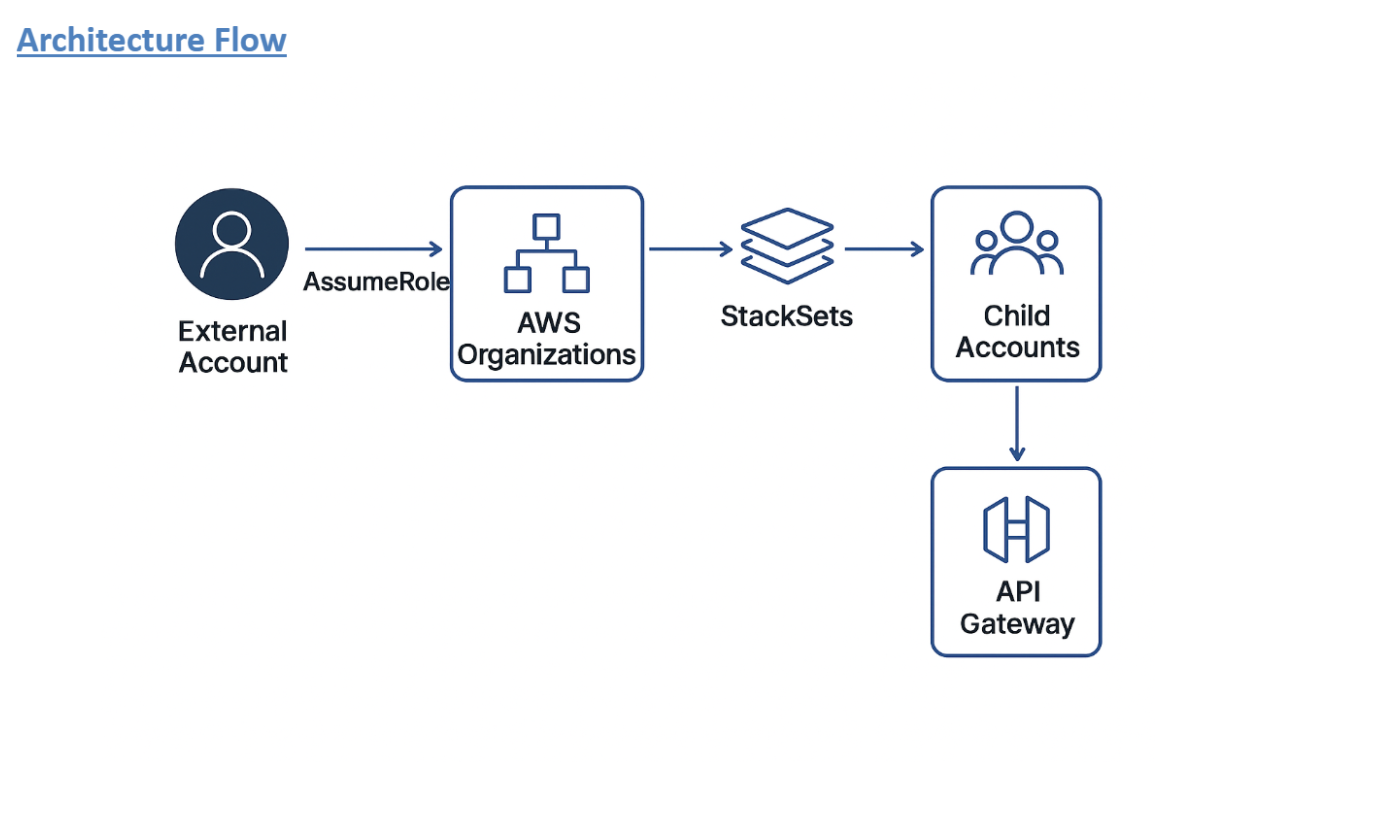
Organizations managing APIs across multiple AWS accounts often maintain separate integration connections in the APIsec platform using individual Assume Role configurations. This approach introduces scalability issues and operational complexity as the number of AWS accounts increases.
To streamline integration management, a Cross-Account IAM Role Assumption model can be implemented. In this model, a Central IAM Role in the primary AWS account is granted permissions to assume Child Roles across multiple linked accounts. Each Child Role provides controlled access to resources such as API Gateway within its respective account.
The APIsec platform connects to the Central Role, which assumes the necessary Child Roles to access and onboard APIs across all accounts. This enables organizations to:
- Create and manage one AWS integration connection in the APIsec platform.
- Access and onboard APIs from multiple AWS accounts through delegated role assumption.
- Creating IAM roles in child accounts is managed from the central account, allowing the solution to scale without requiring manual setup.
- Minimize operational overhead in large multi-account environments.
Before deploying CloudFormationStack for CentralRole and StackSets for ChildRole, ensure the following prerequisites are met:
- AWS Organizations is enabled, and your account is the management account.
- You’ve enabled trusted access for AWS CloudFormation StackSets in Organizations.
- You have the necessary IAM permissions to create StackSets and IAM roles.
- You’ve identified the central account and the target child accounts or Organizational Units (OUs).
1. Central Role Stack (in Central Account)
This CloudFormation template creates a CentralRole that can assume roles in child accounts and list accounts via AWS Organizations.
AWSTemplateFormatVersion: "2010-09-09"

Resources:
  APIsecCentralRole:
    Type: AWS::IAM::Role
    Properties:
      RoleName: APIsecCentralRole
      AssumeRolePolicyDocument:
        Version: "2012-10-17"
        Statement:
          - Effect: Allow
            Principal:
              AWS: arn:aws:iam::<EXTERNAL_USER_OR_ACCOUNT>:role/APIsecExternalRole
            Action: sts:AssumeRole
      Policies:
        - PolicyName: APIsecCentralRolePolicy
          PolicyDocument:
            Version: "2012-10-17"
            Statement:
              - Effect: Allow
                Action:
                  - sts:AssumeRole
                  - organizations:ListAccounts
                Resource: "*"
Please Contact APIsec support team to get APIsec AWS ARN to be updated in above template before deployment.
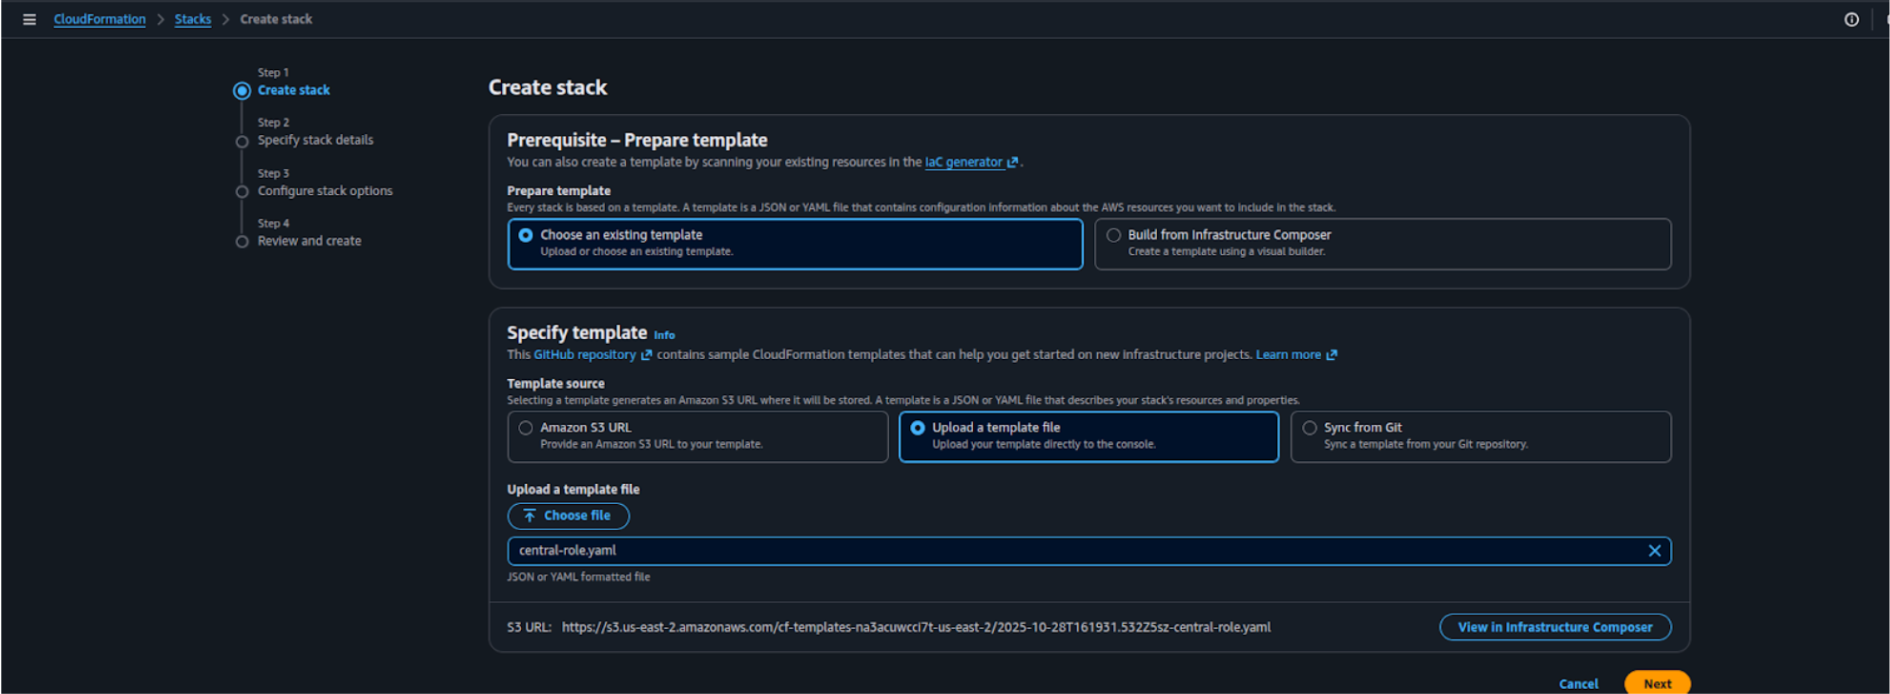
2. Deploying Central Role Stack via Console
To deploy the CentralRole CloudFormation stack from a local template file, follow these steps:
- Go to the AWS Management Console and open the CloudFormation service.

- Click Create stack
- For Prepare template, select Choose existing template.
- Under Specify template, select Upload a template file.
- Click Choose file, and upload your
central-role.yaml(the CloudFormation file containingAPIsecCentralRole). - Click Next to proceed with stack configuration.
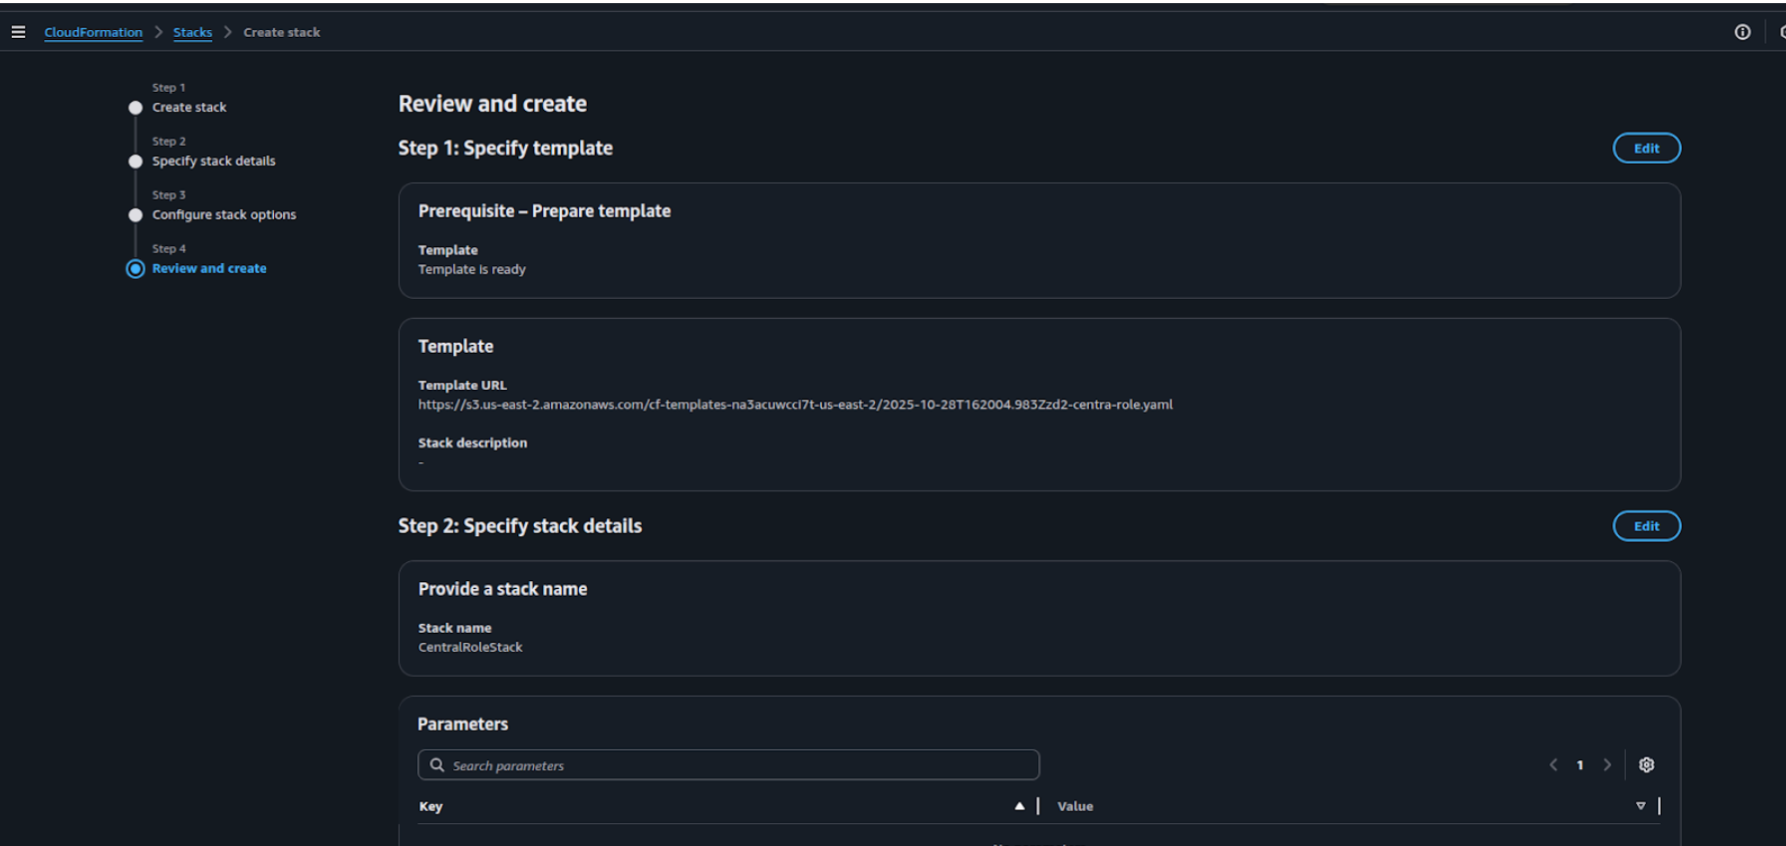
- Enter a stack name, for example: CentralRoleStack.

-
Leave the parameters as default and click Next.
-
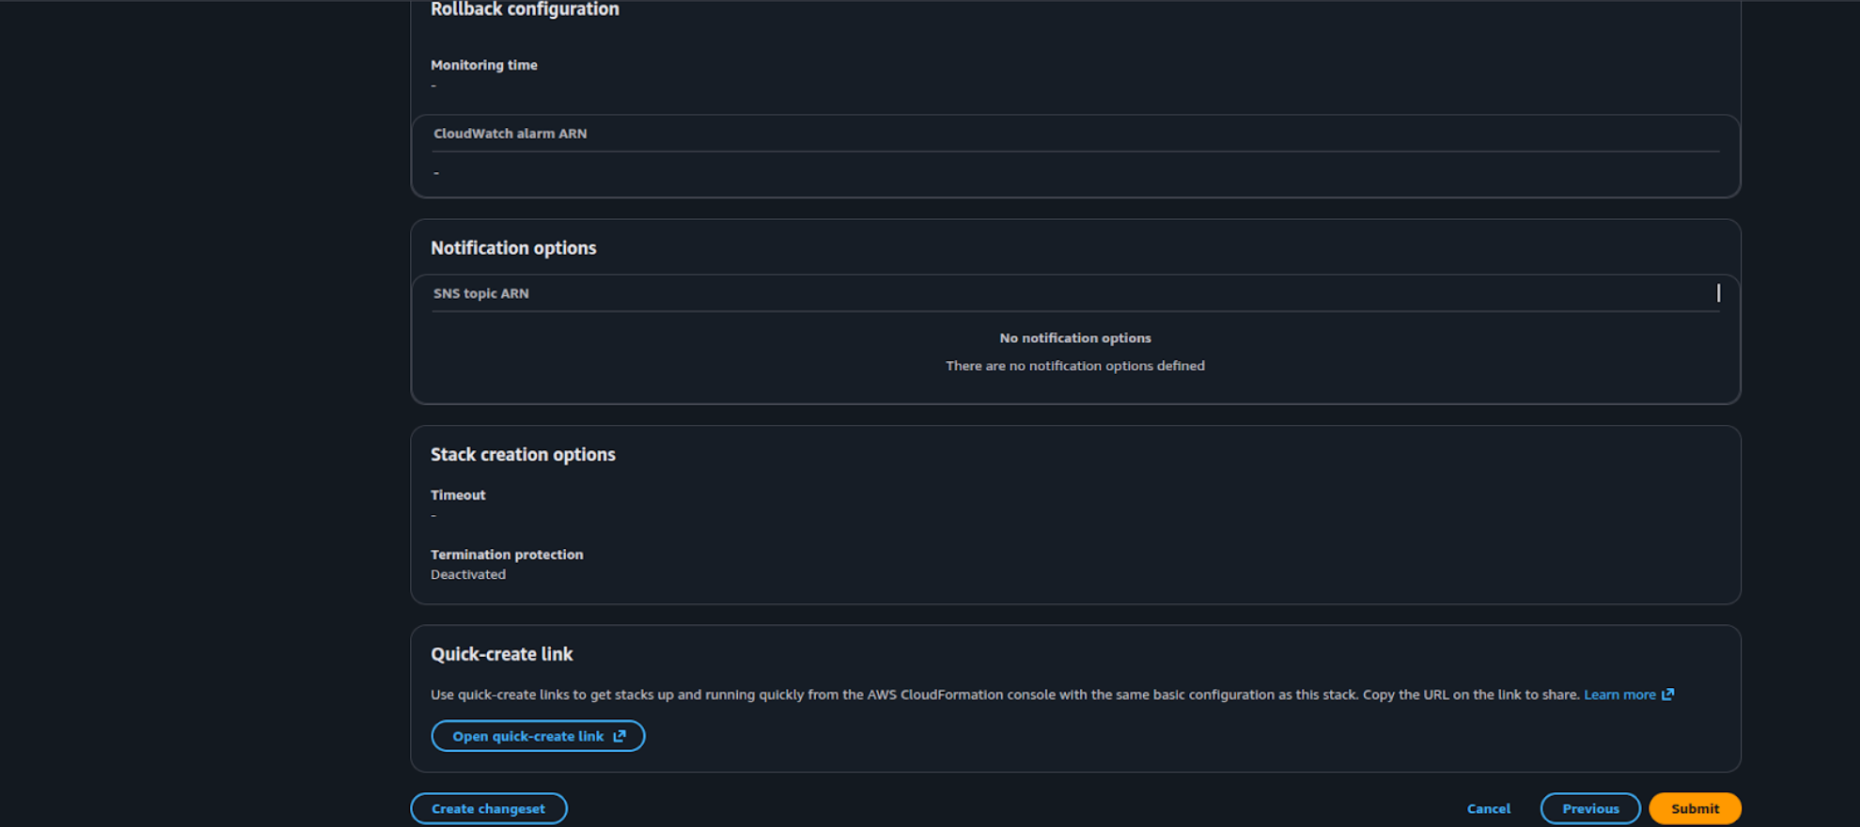
On the Configure stack options page, you can leave all settings as default or optionally add tags for easier identification.
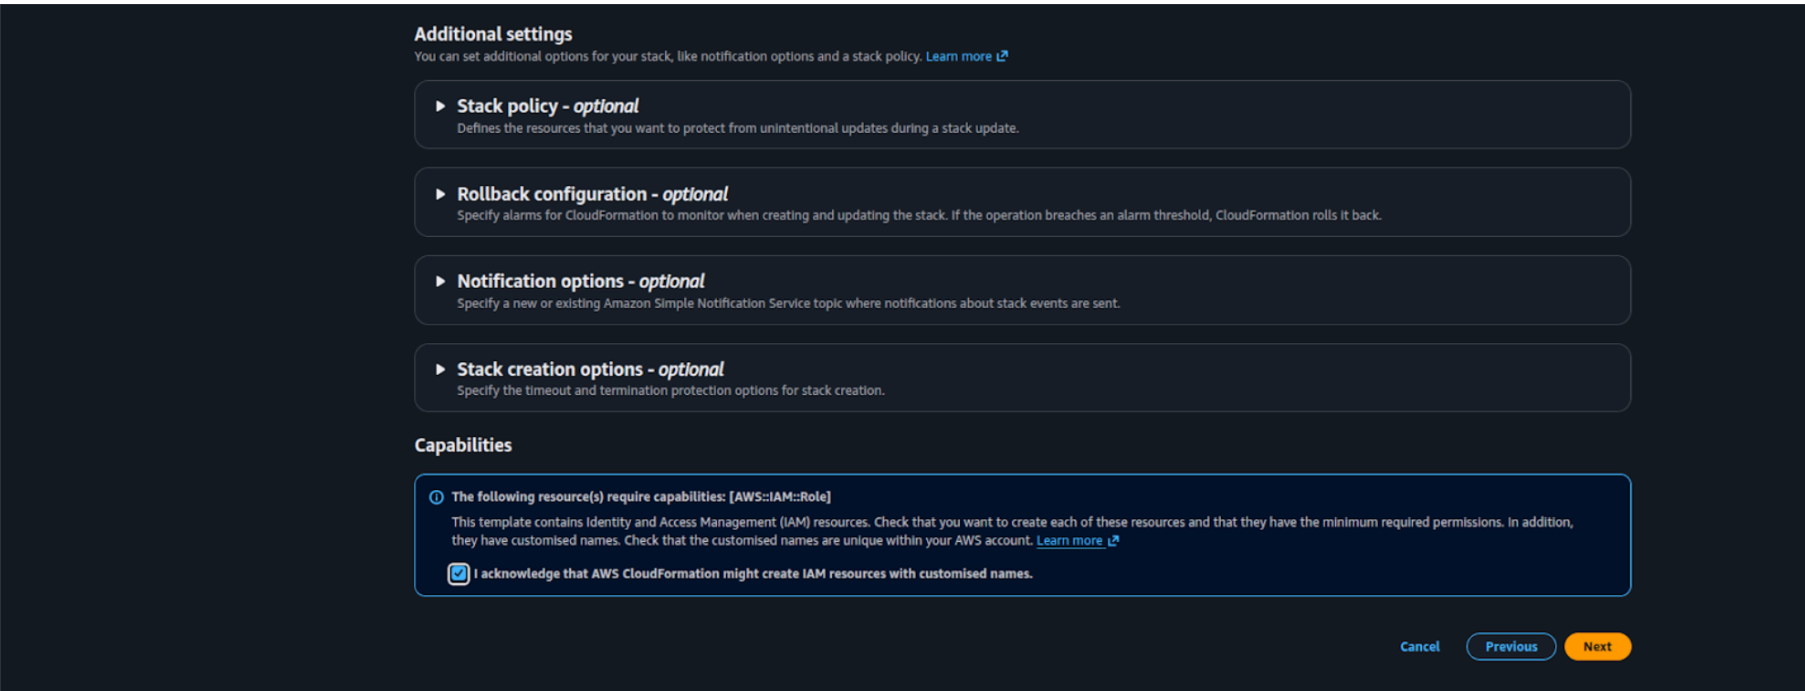
Scroll down to the bottom of the page and select the checkbox:
“I acknowledge that AWS CloudFormation might create IAM resources.”
Click Next.
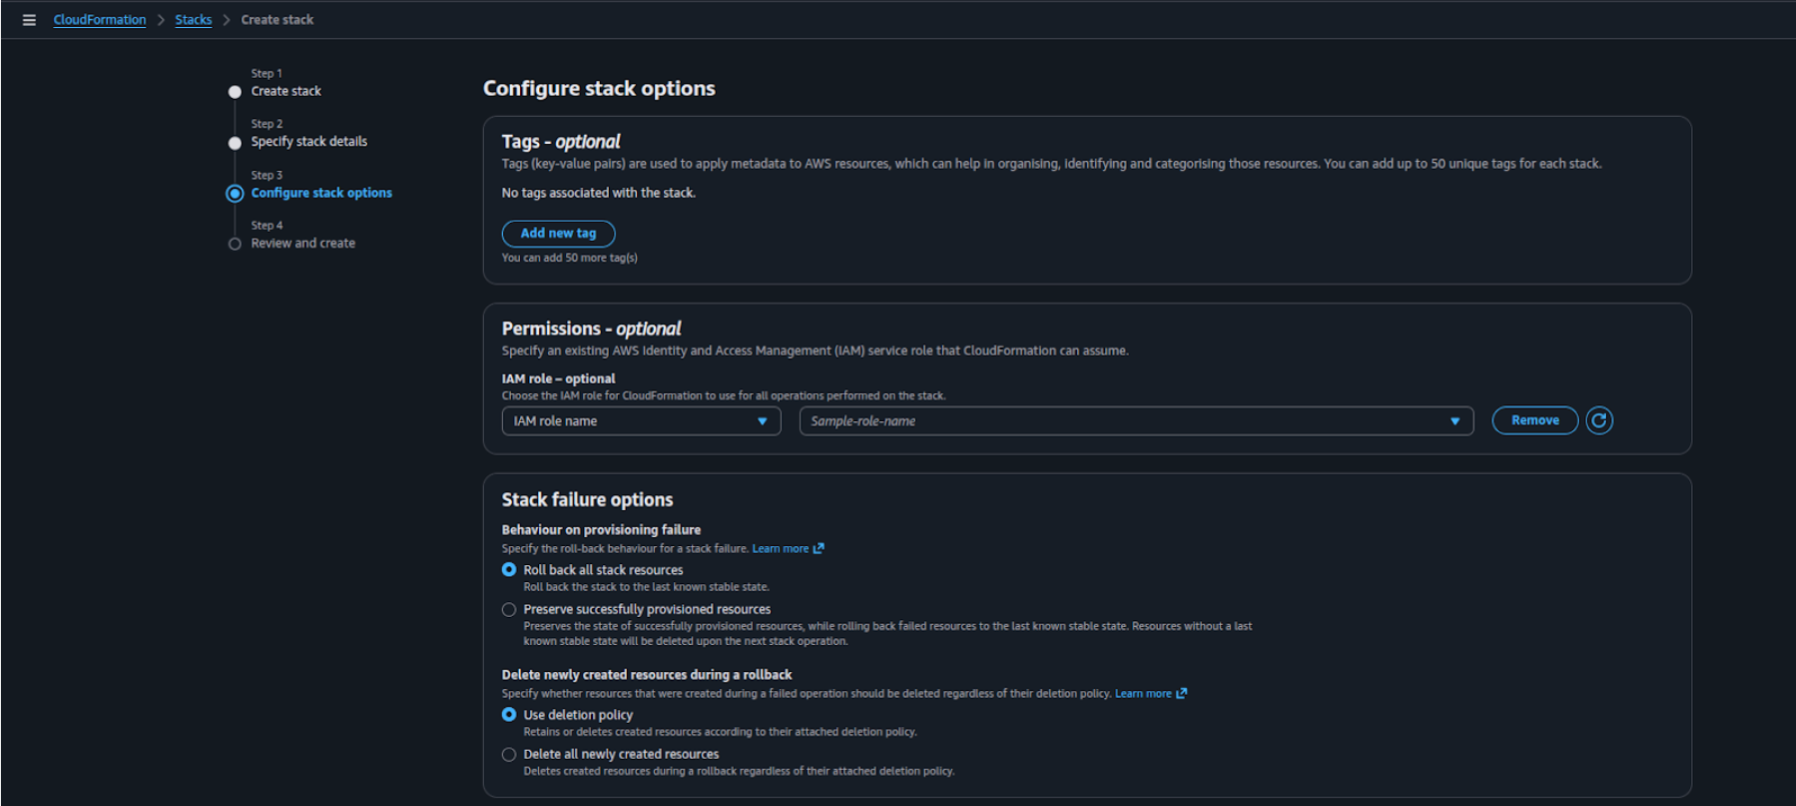
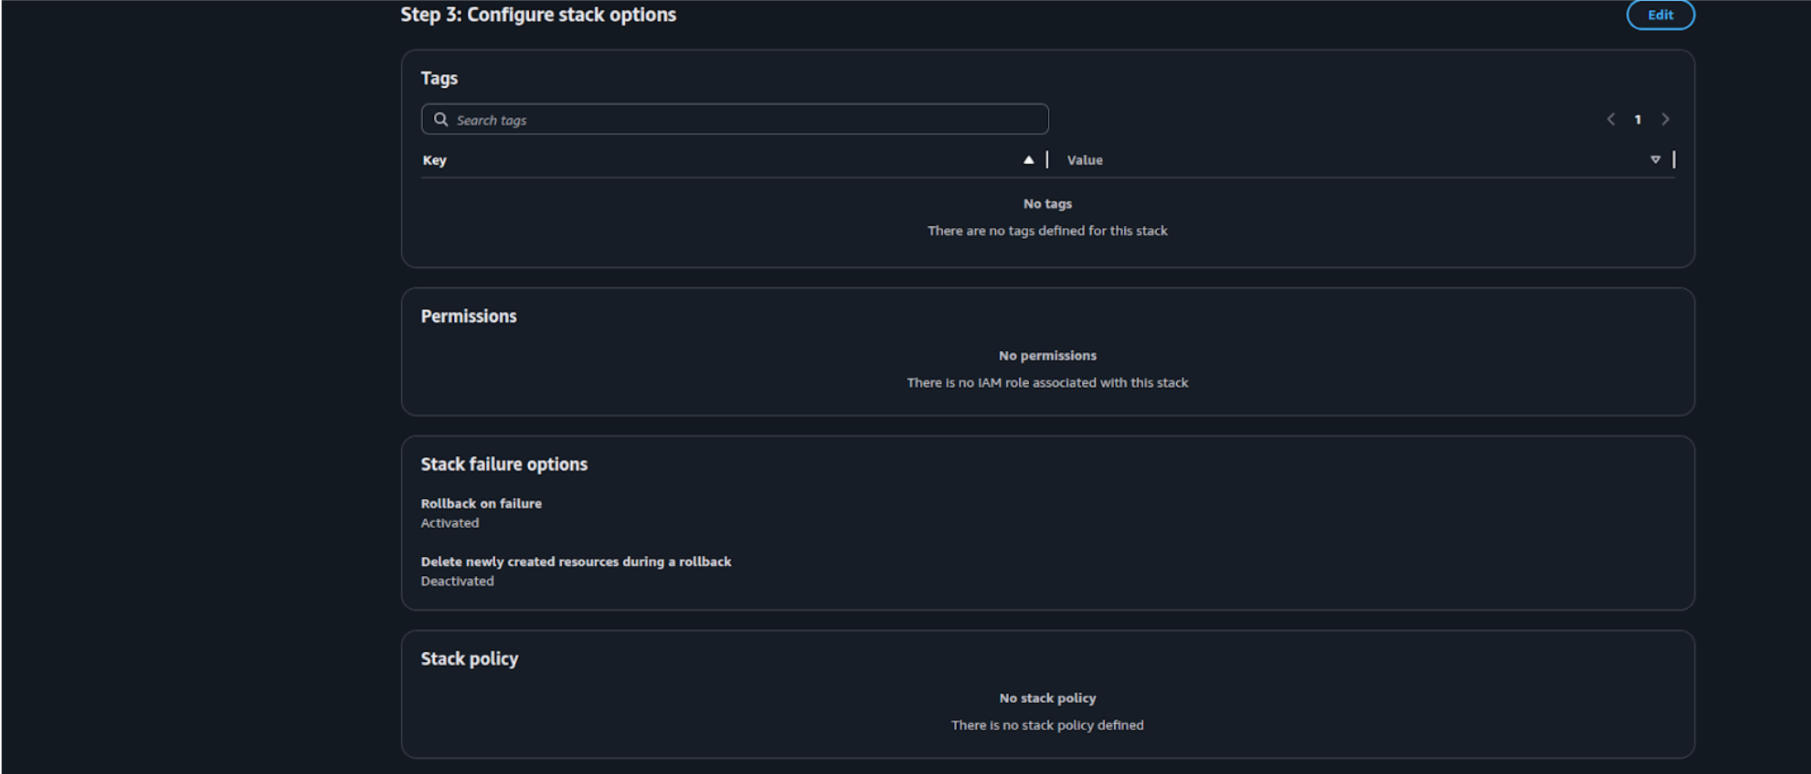
- On the Review and Create page, review the configuration details, then scroll down and click Submit to create the stack.
-
Wait a few minutes for the deployment to complete.
-
The stack status should change to CREATE_COMPLETE once it’s successfully created.
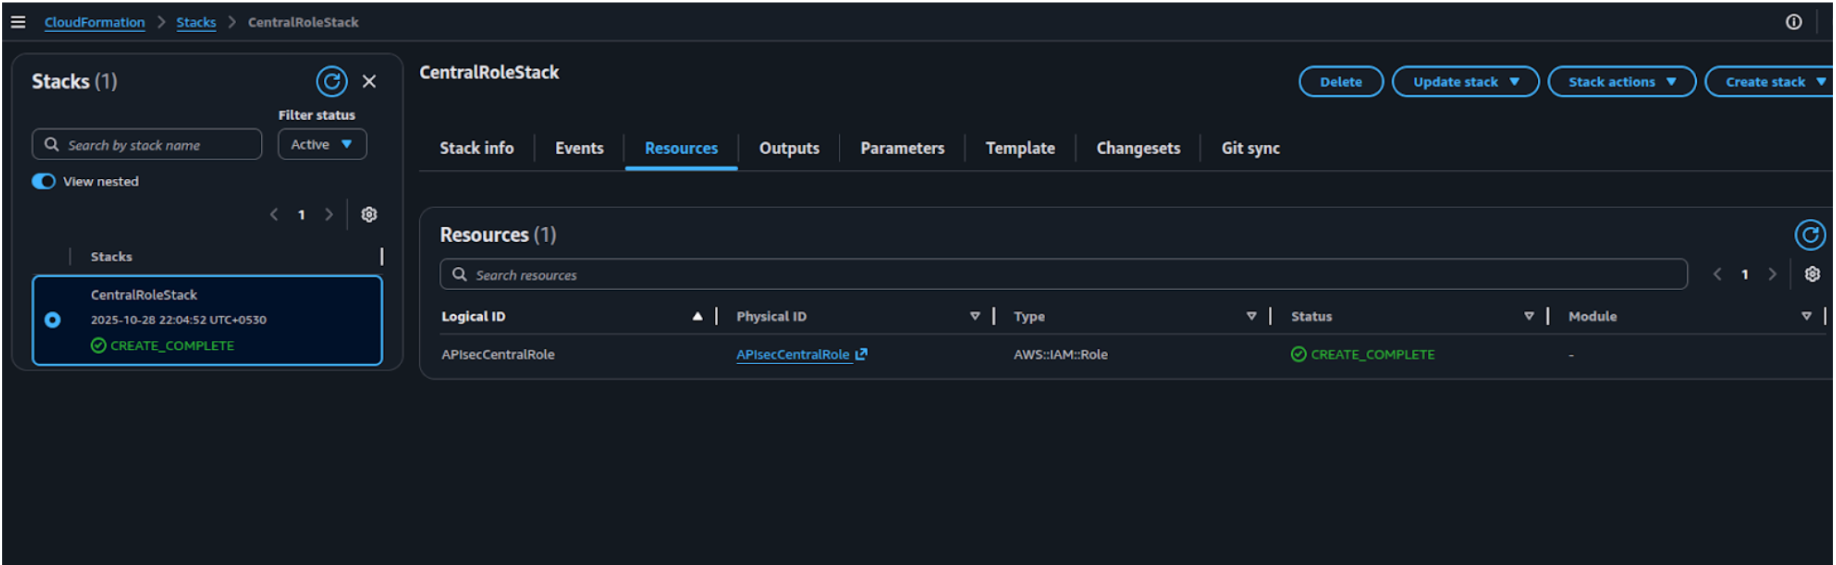
-
Go to AWS IAM and open Roles to copy the APIsecCentralRole ARN.
-
Use this ARN in the APIsec platform after deploying the ChildRole StackSets (if not already done).
3. Child Role StackSet Template (Target Accounts)
This template should be deployed via an Organization-level StackSet to all target accounts or OUs where the CentralRole needs to access the API Gateway.
AWSTemplateFormatVersion: "2010-09-09"

Resources:
  APIsecChildRole:
    Type: AWS::IAM::Role
    Properties:
      RoleName: APIsecChildRole
      AssumeRolePolicyDocument:
        Version: "2012-10-17"
        Statement:
          - Effect: Allow
            Principal:
              AWS: "arn:aws:iam::<CENTRAL_ACCOUNT_ID>:role/APIsecCentralRole"
            Action: sts:AssumeRole
      Policies:
        - PolicyName: APIsecChildRolePolicy
          PolicyDocument:
            Version: "2012-10-17"
            Statement:
              - Effect: Allow
                Action:
                  - apigateway:GET
                Resource: "*"
Please update CENTRAL_ACCOUNT_ID with your aws org root management account ID in the above template before deployment.
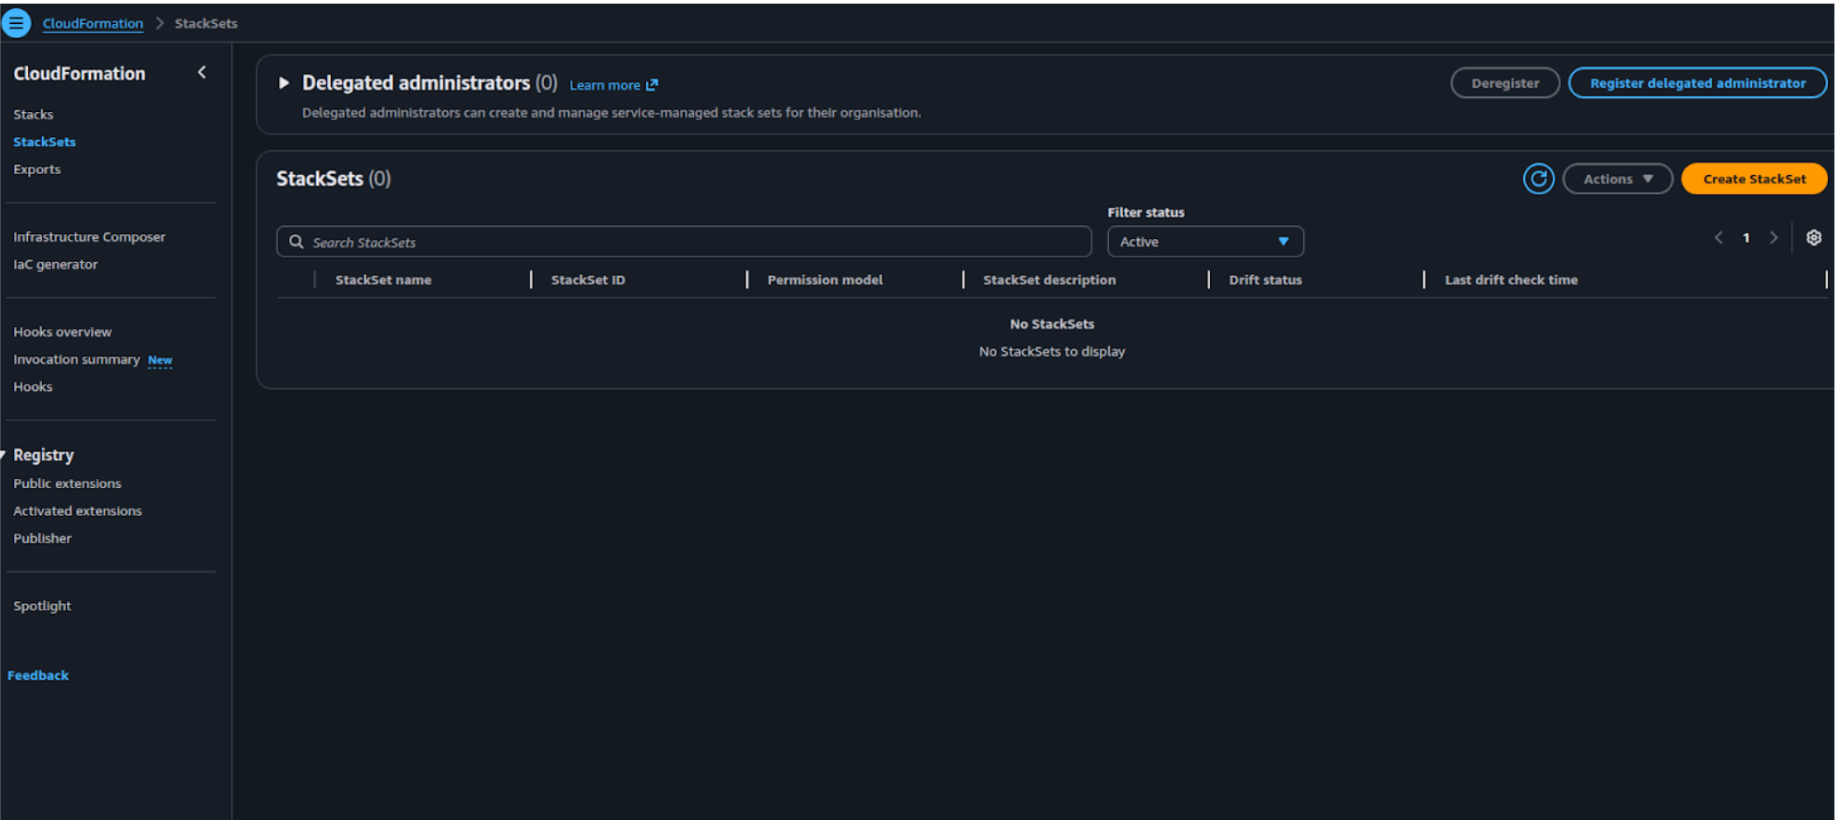
4. StackSet Deployment Steps (Console)
- In the AWS CloudFormation console under StackSets (within your management account), choose Create StackSet to begin the setup.
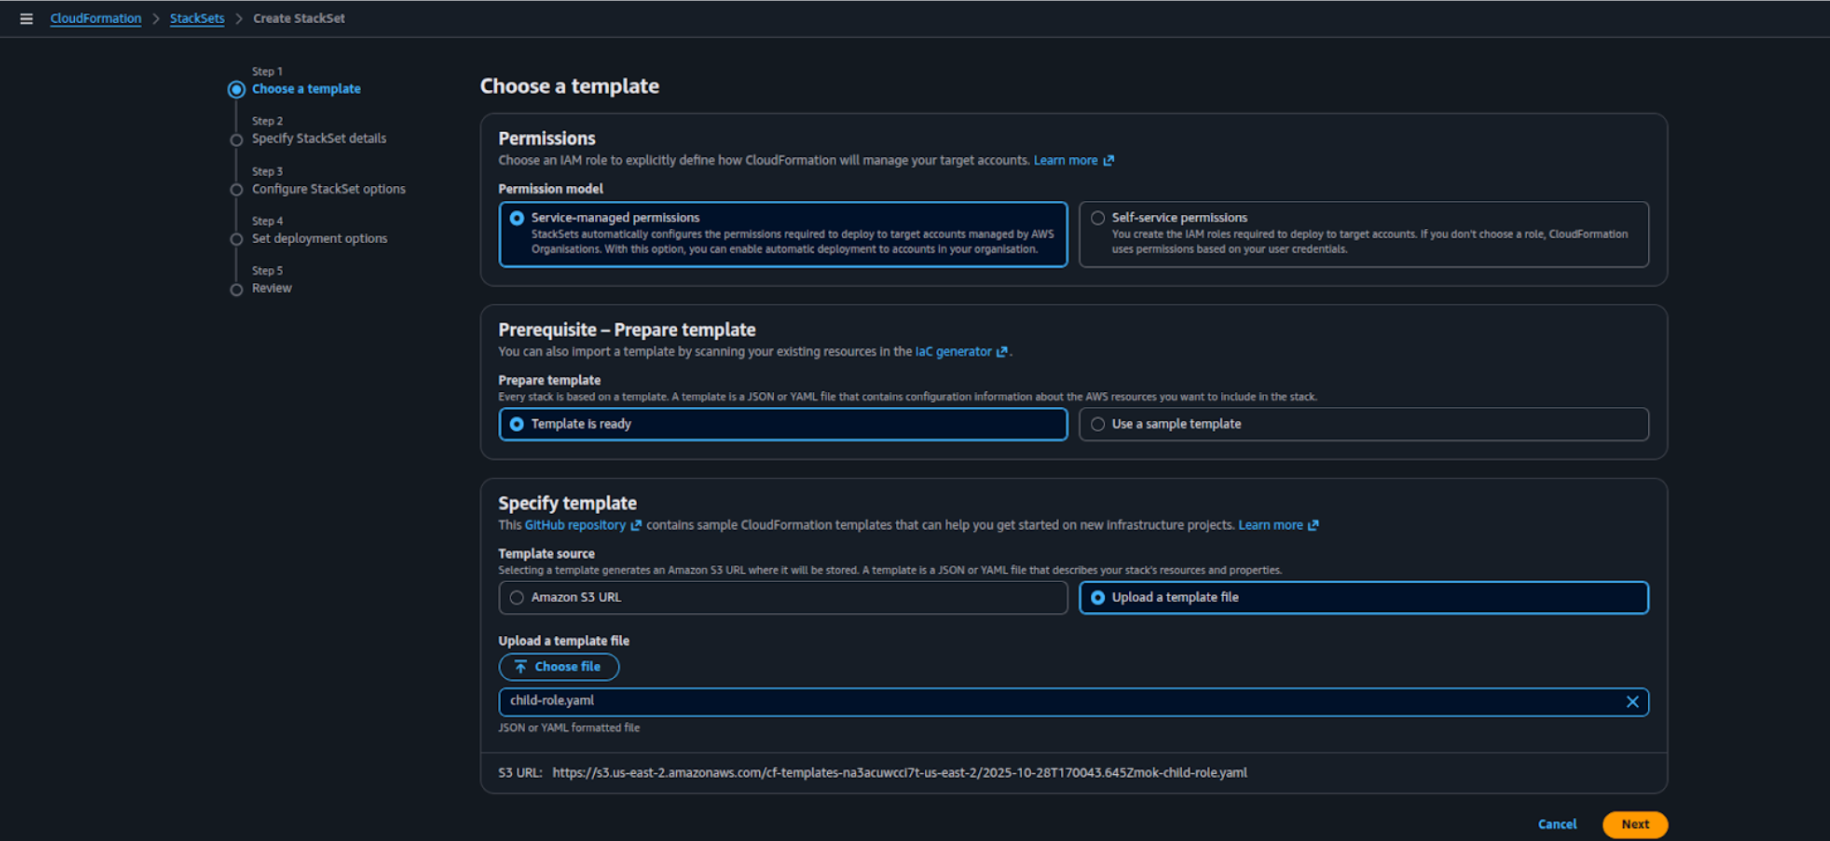
- Choose a template
a) Under Permissions, select Service-managed permissions.
b) Under Prerequisite – Prepare template, select Template is ready.
c) Under Specify template, choose Upload a template file and upload the ChildRole template file.
d) Click Next to continue.
- On the Specify Stack Details page, enter a StackSet name (e.g., ChildRoleStackSet) and click Next.

-
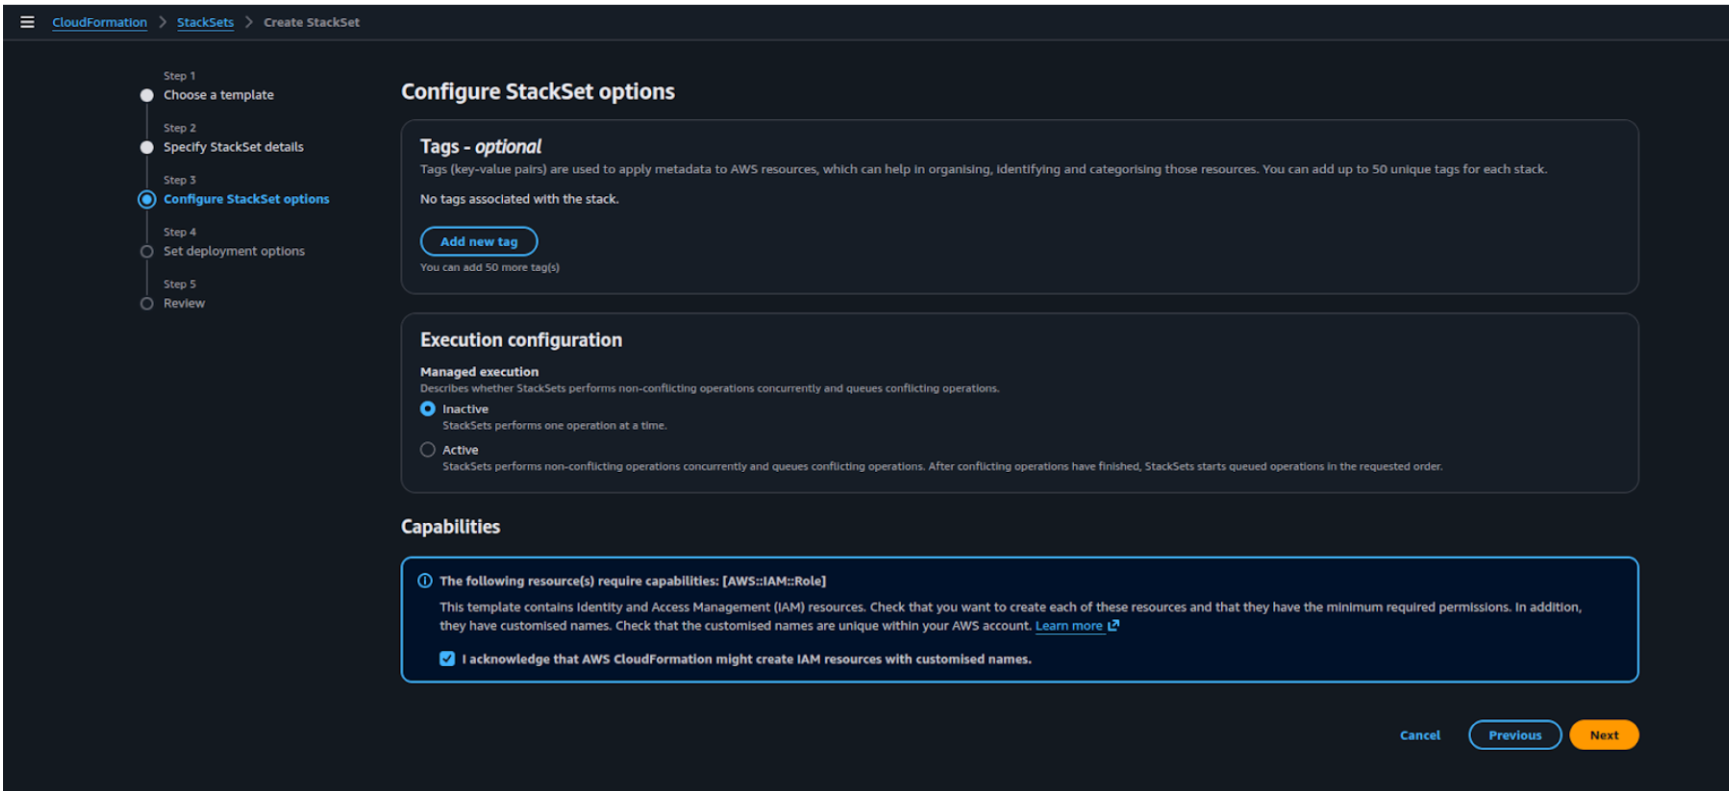
Under Execution configuration, select Inactive to ensure stack instances are created one after another.In the Capabilities section, check the box for:
I acknowledge that AWS CloudFormation might create IAM resources with customized names.
Click Next to continue.
-
On Set deployment options page
5a) Under Add stacks to stack set select “Deploy new stacks”
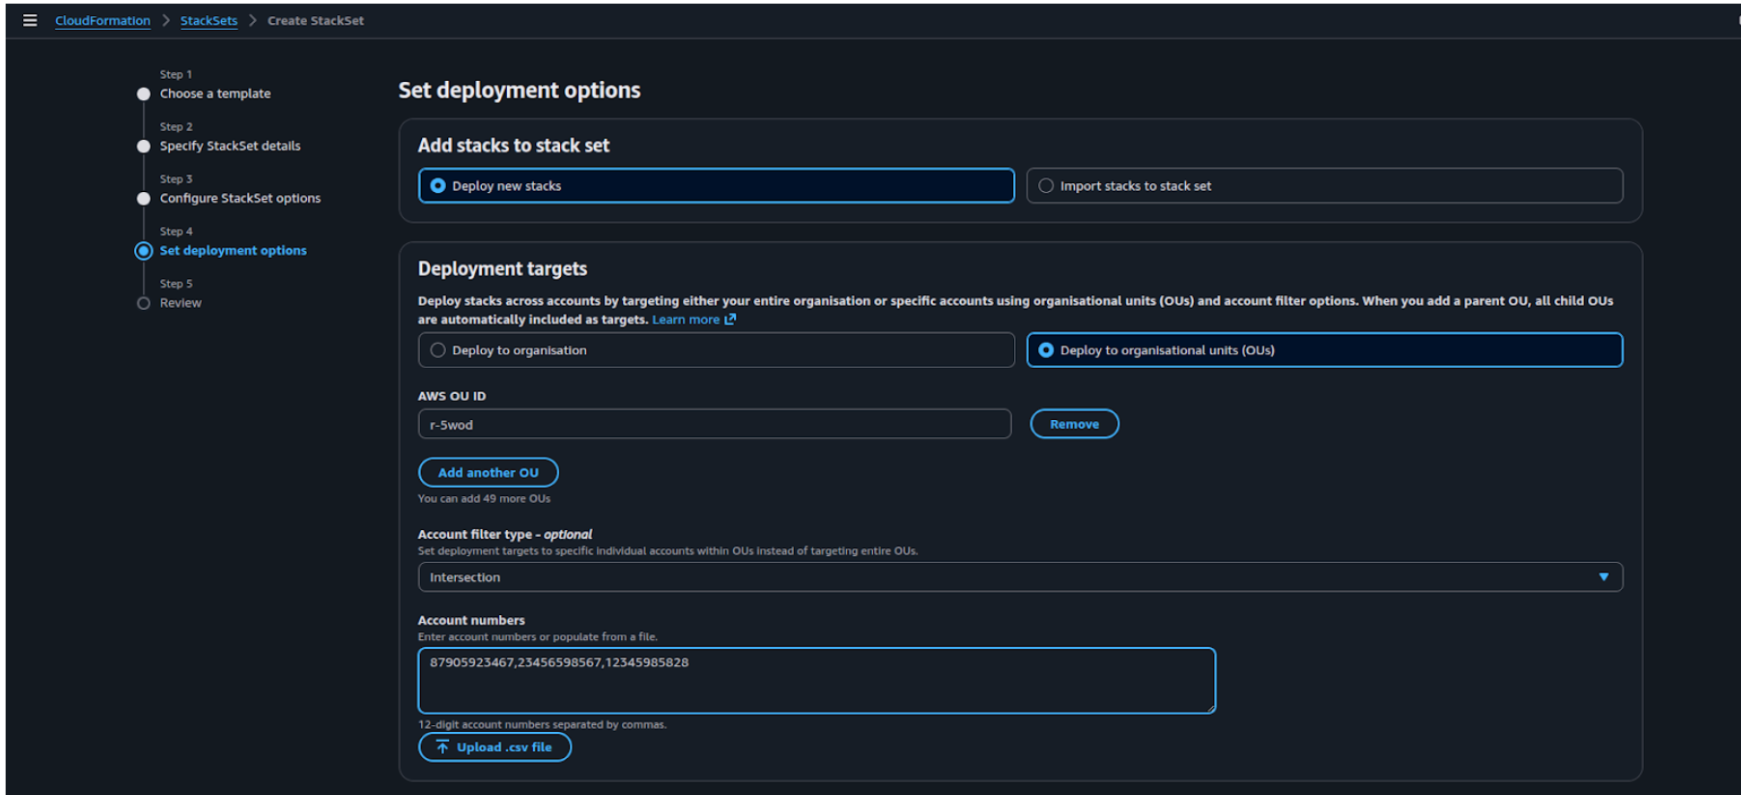
5b) Under Specify deployment targets:
- Option A: Deploy to organization for creating stacksets in entire org accounts
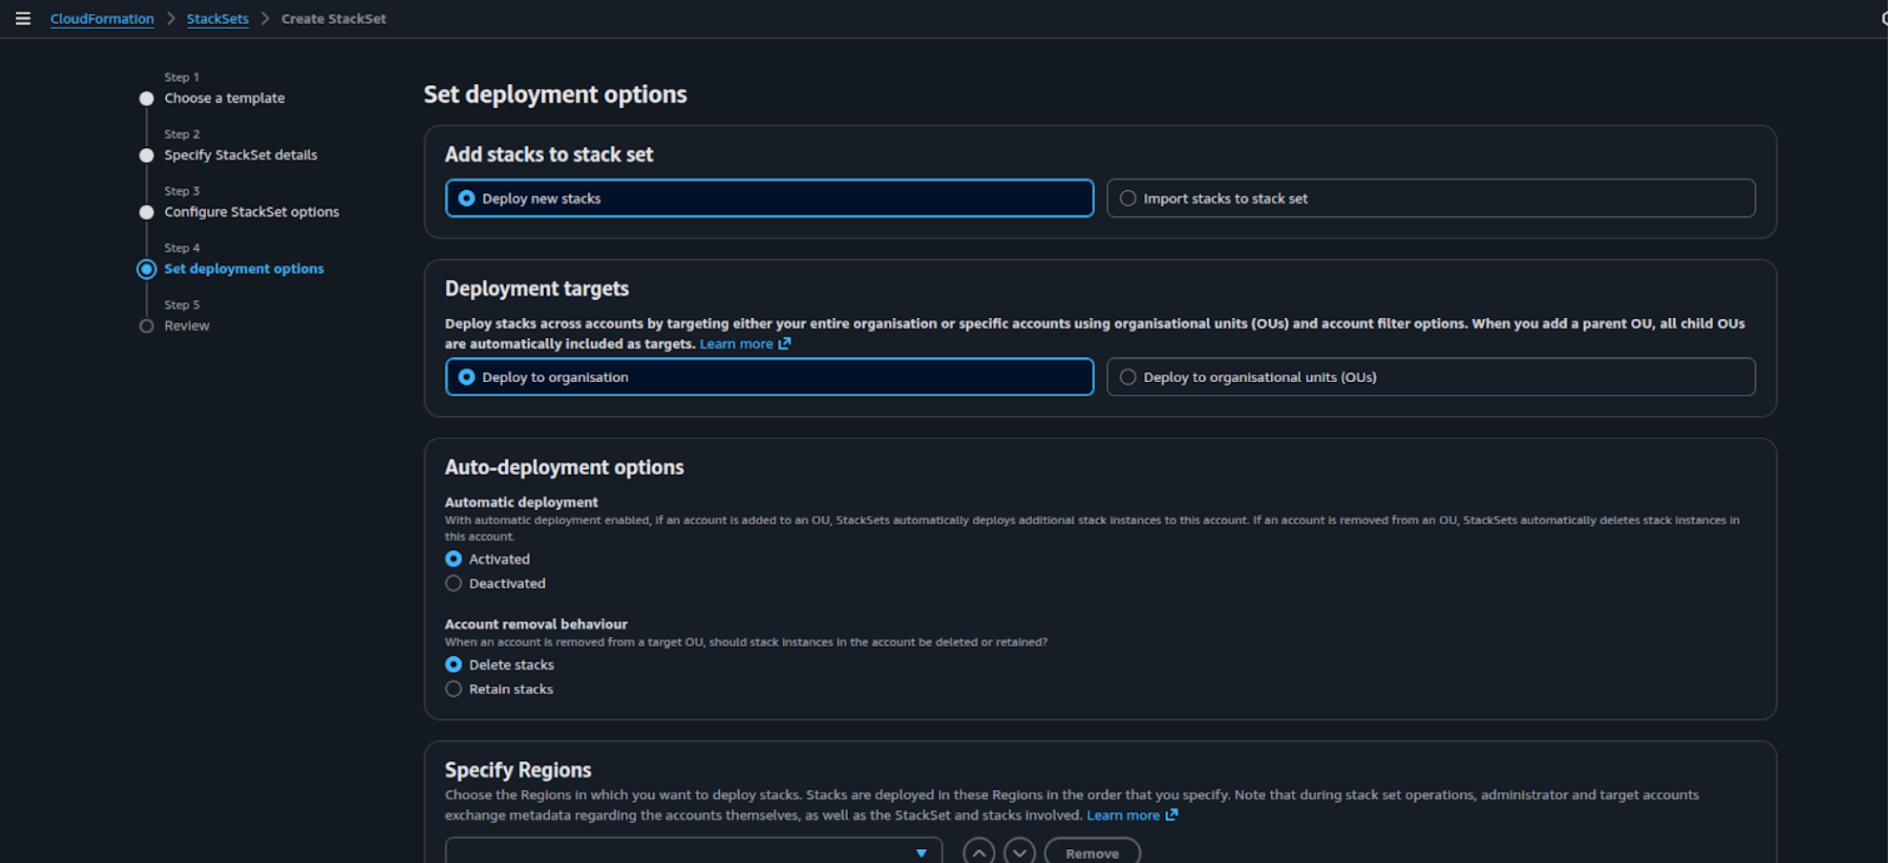
-
Option B: Deploy to organization units to target specific accounts in OUs
i) Specify AWS OU IDs
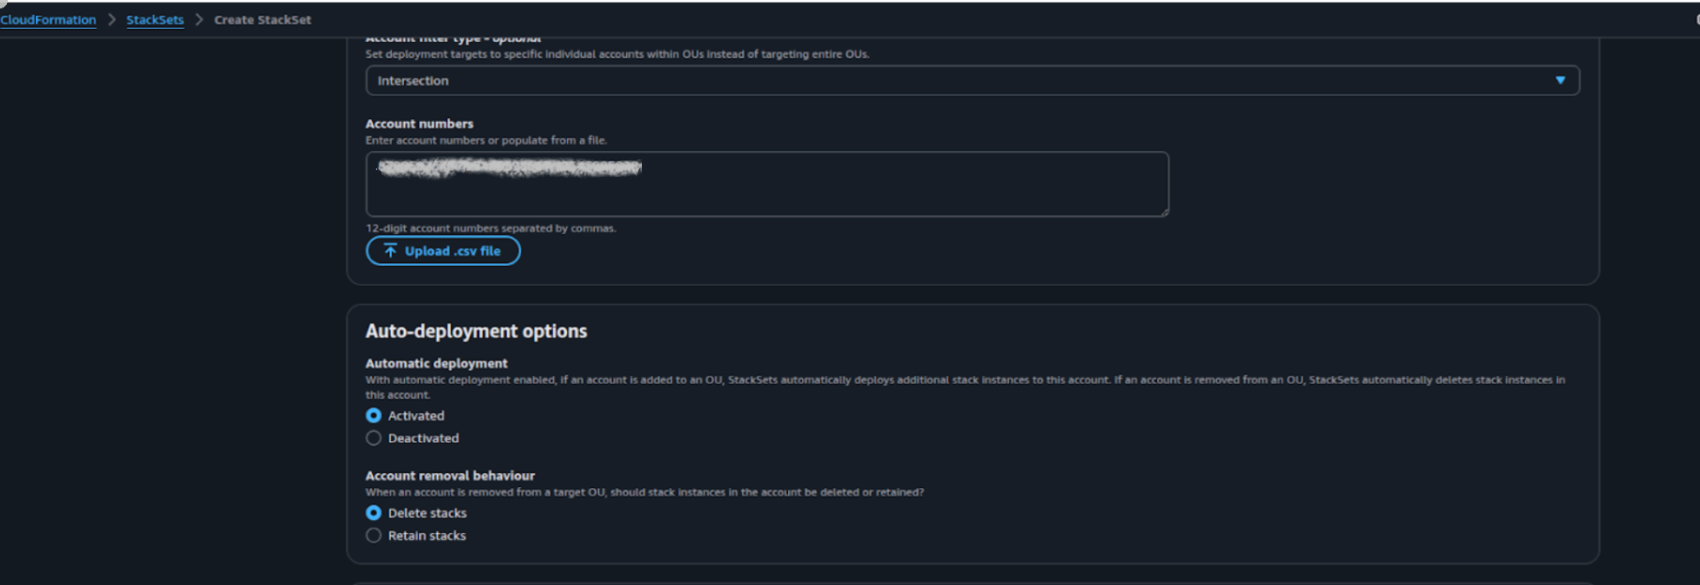
ii) For Account Filter Type select intersection
iii)In Account Number field specify aws accounts IDs
5c) Under Auto-deployment options
i) For Automatic deployment select Activated
ii) For Account Removal Behaviour select Delete Stacks
5d) Under Specify Region, choose your target regions (for example, us-east-1).Keep the default deployment options and click Next to proceed.
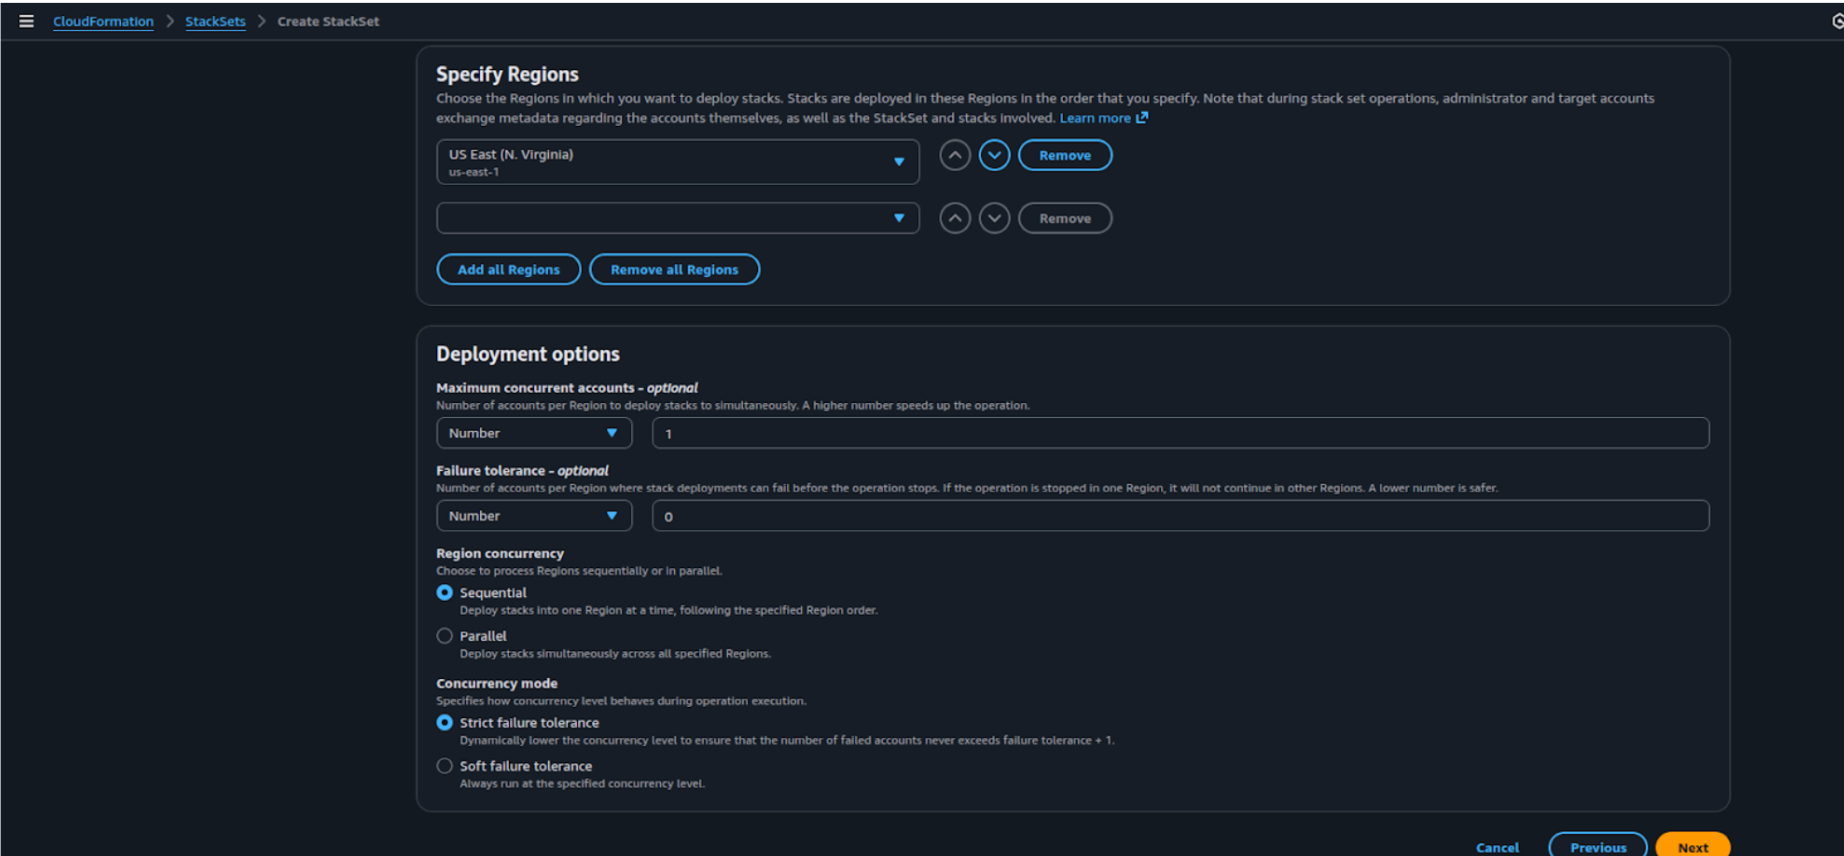
-
On Review page, review the options and click the Submit to create stackset.

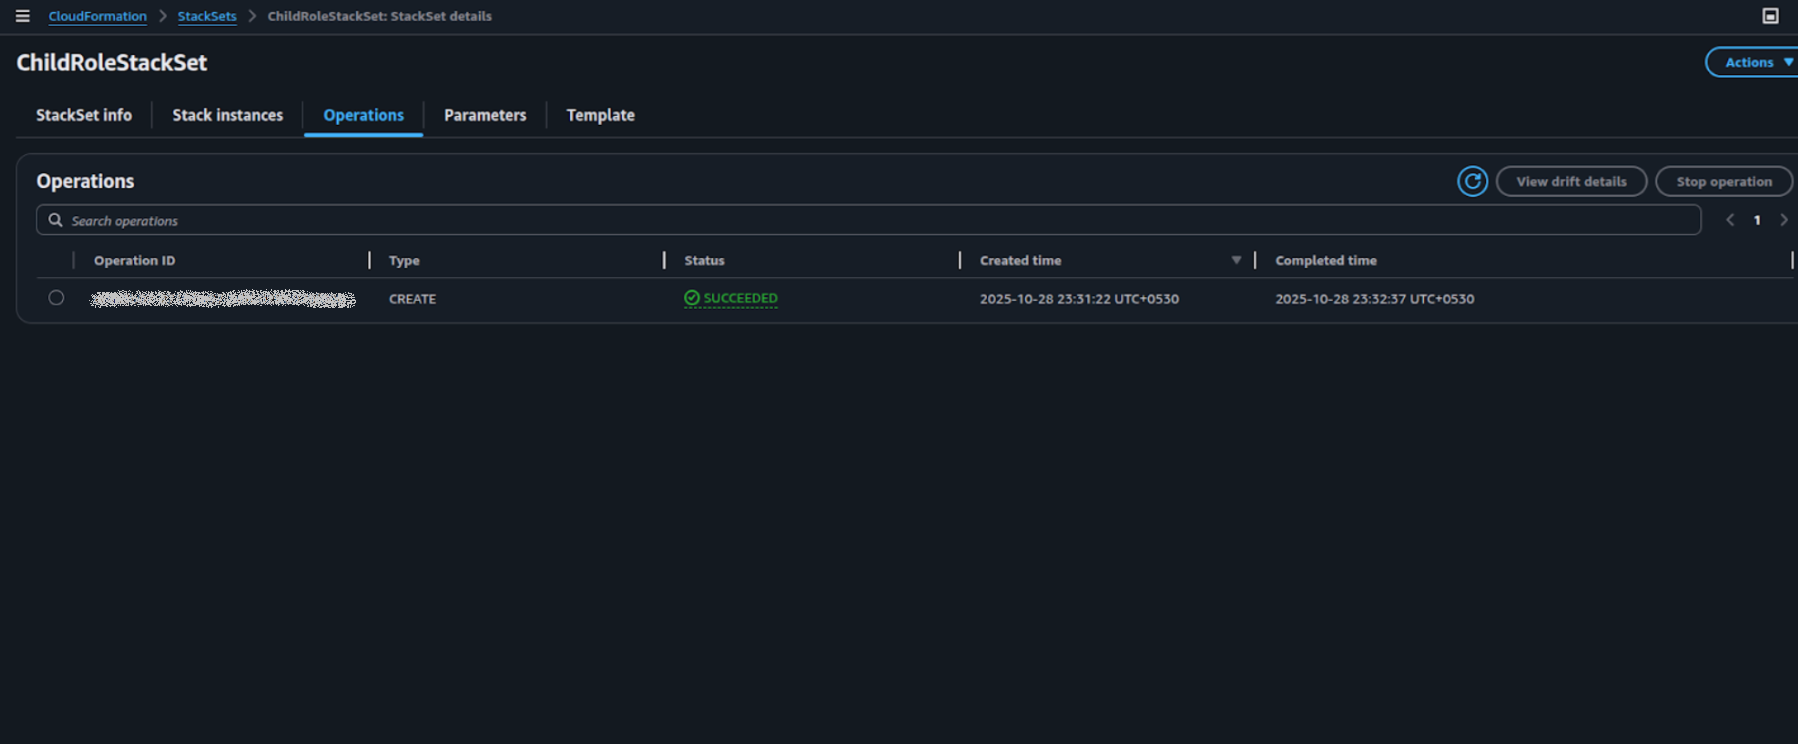
Now you can create an AWS Integration connection in the APIsec platform using this Central ARN.
AWS API Gateway Integration with APIsec Product
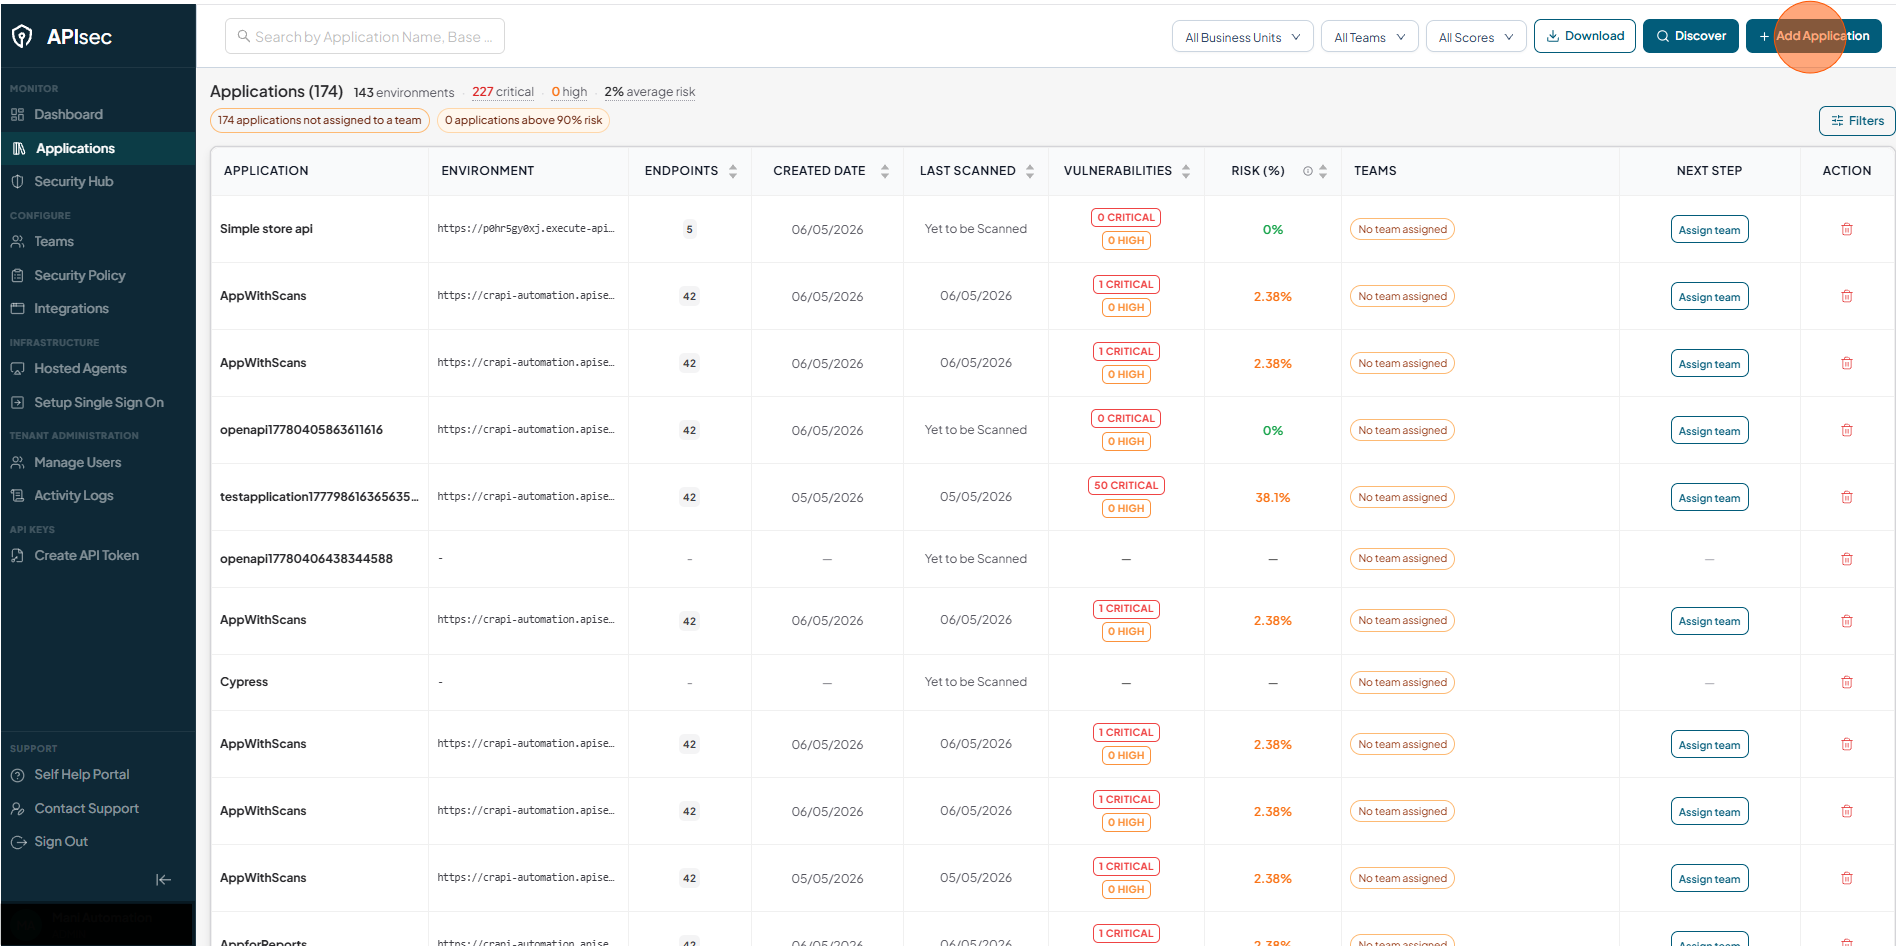
Start Adding a New Application
-
Open your browser and visit: https://<your-tenant>.apisecapps.com
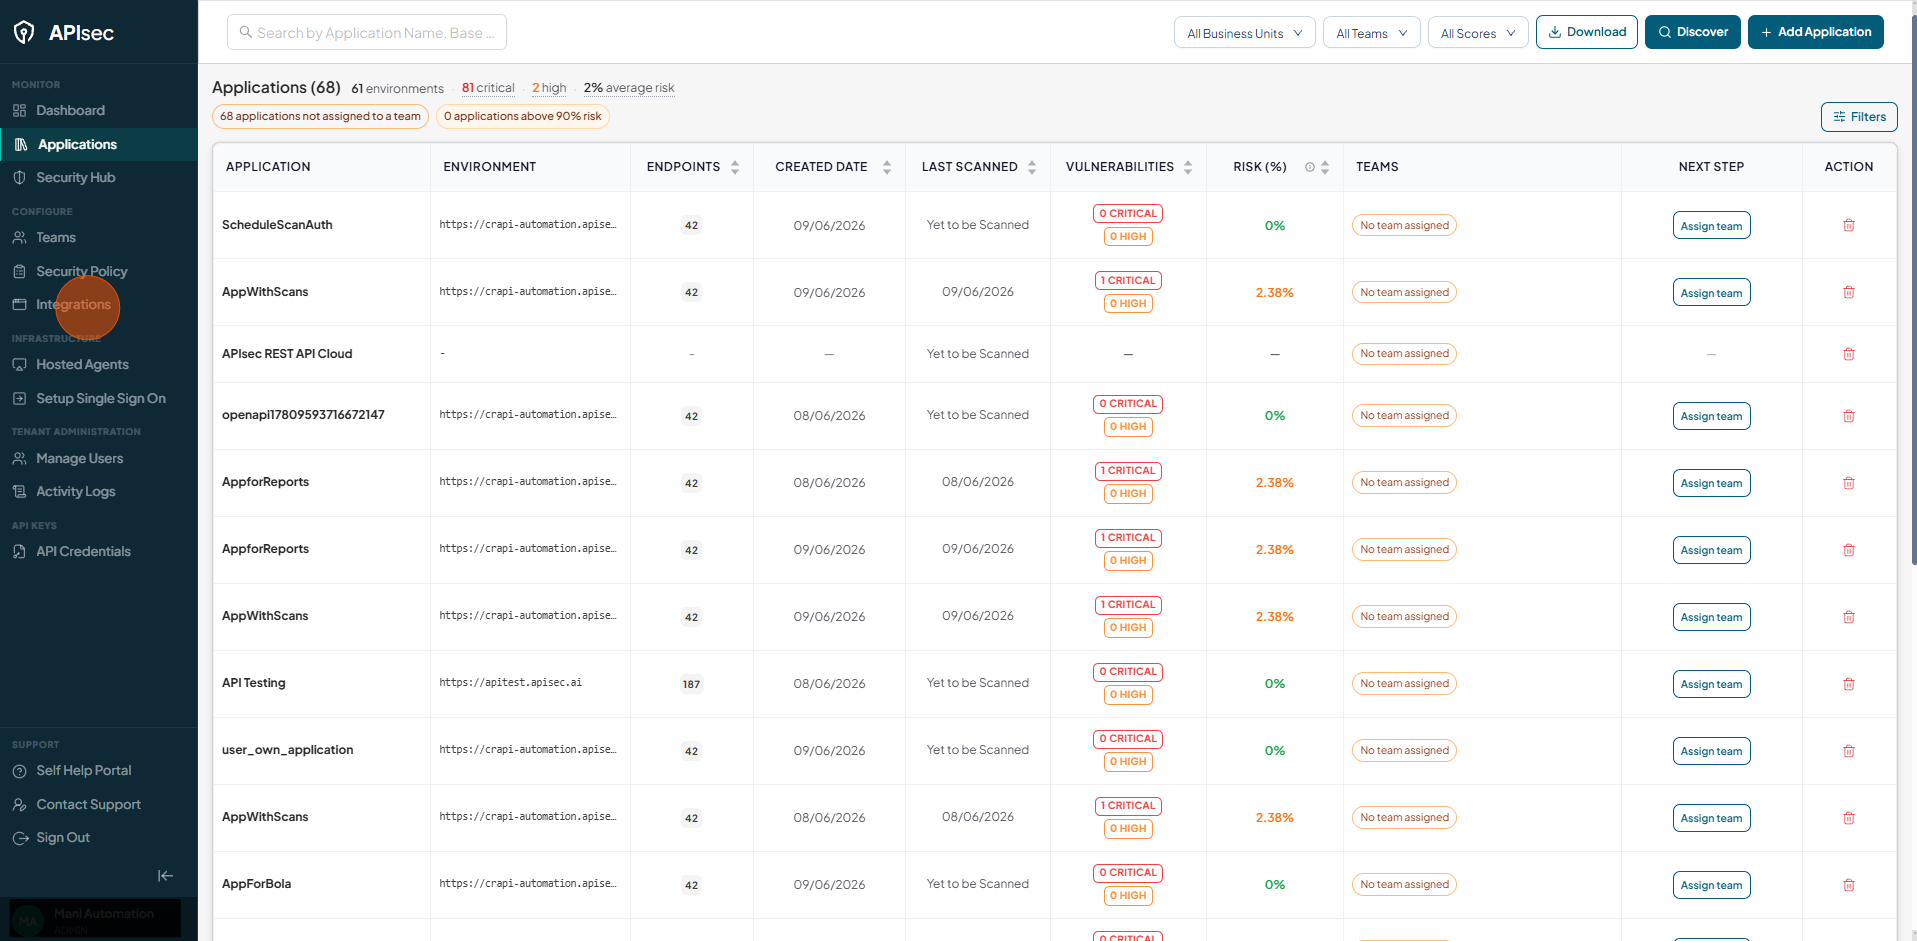
-
Click on the Add Application.
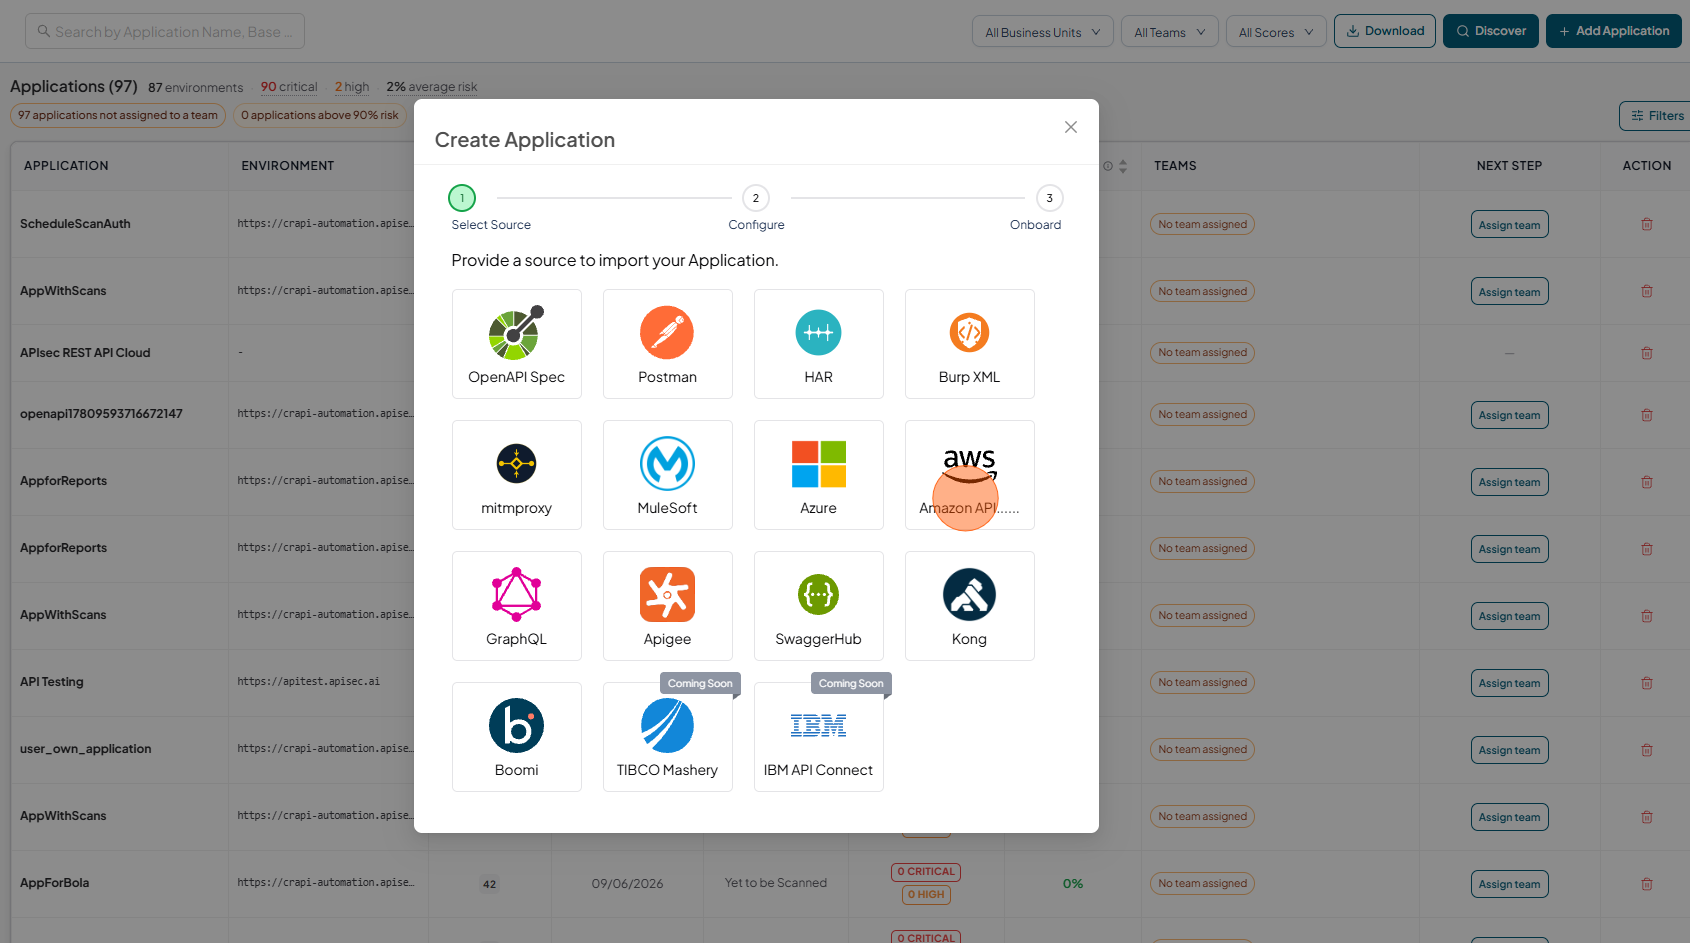
Select Amazon API Gateway
-
Choose the "Amazon API Gateway"
-
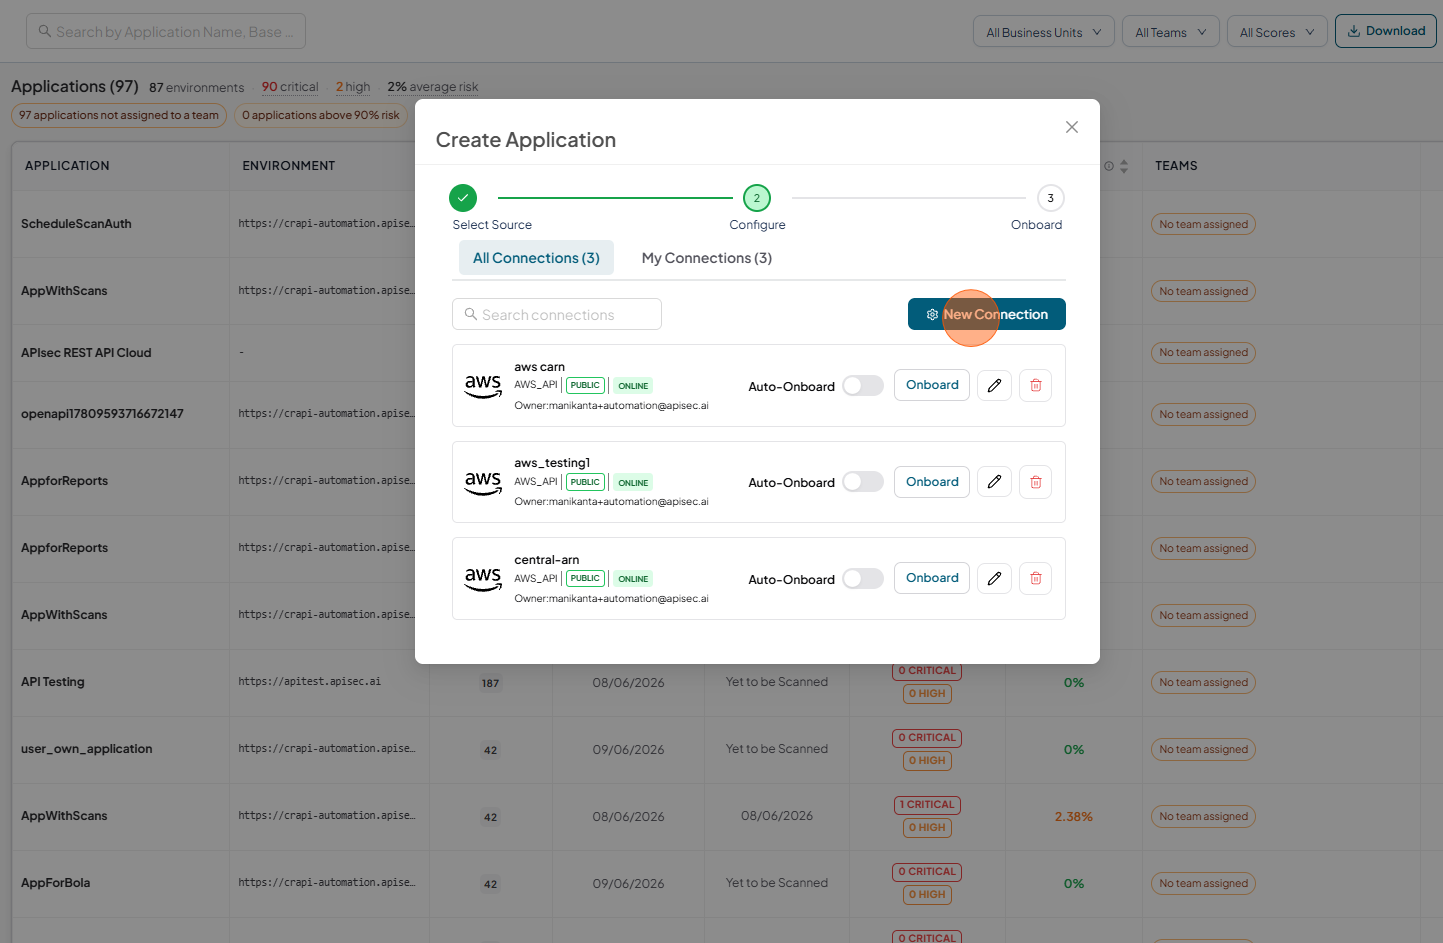
If existing connections are available, they will be displayed in the Connections list. To create a new connection, click New Connection.
-
If no connections exist, a connection form is displayed, allowing you to enter the required details and create a connection.
-
Click "New Connection"
Enter Application Details
There are three credentials types through which we can onboard
- AWS User
- Assume Role
- Central Role ARN
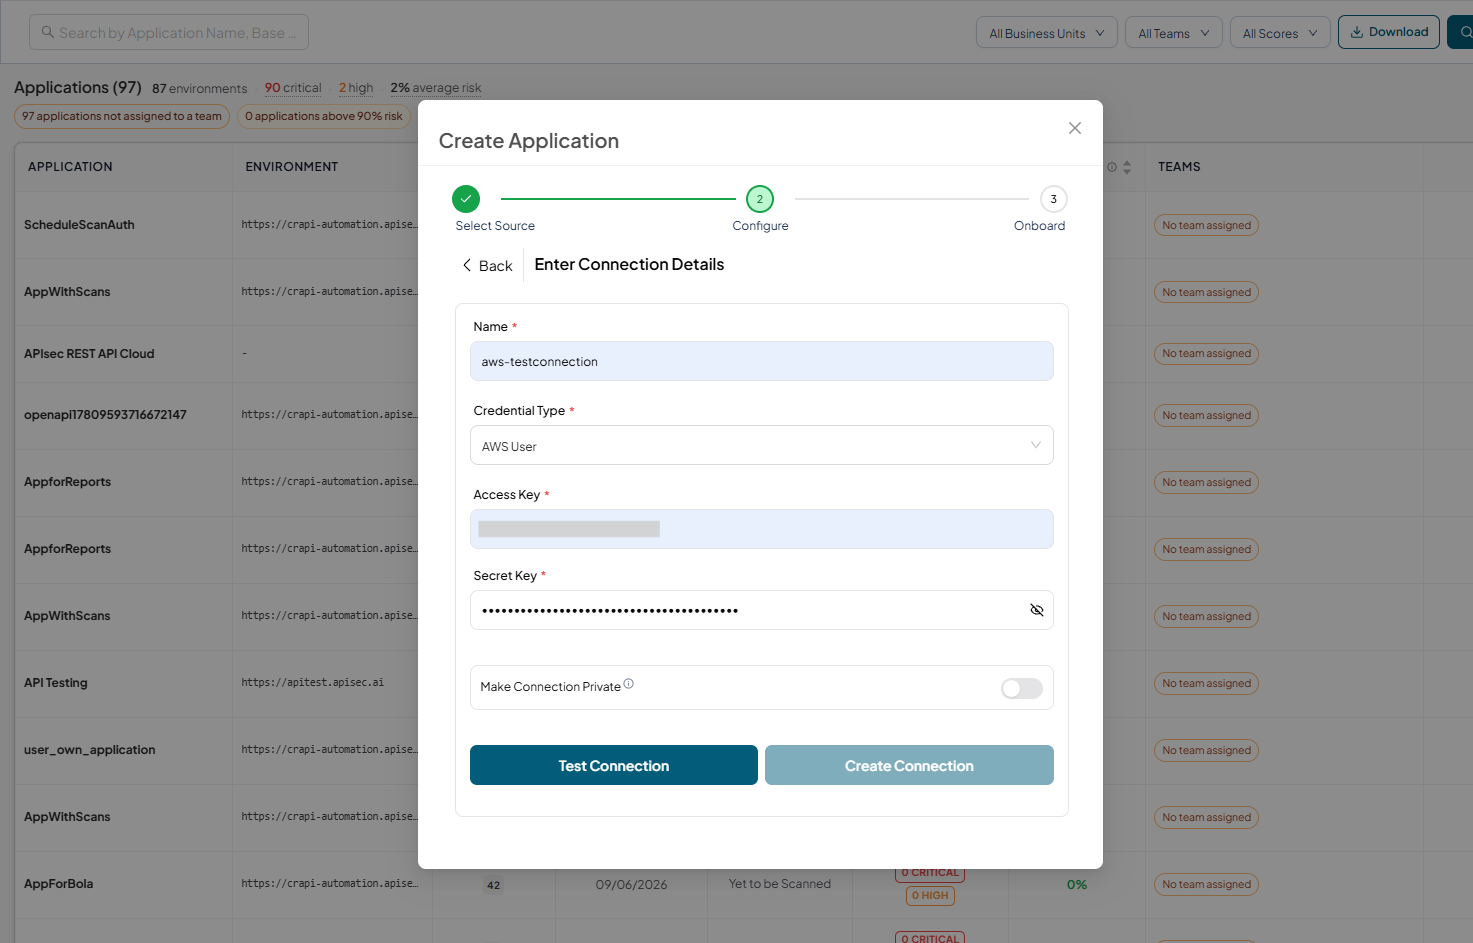
-
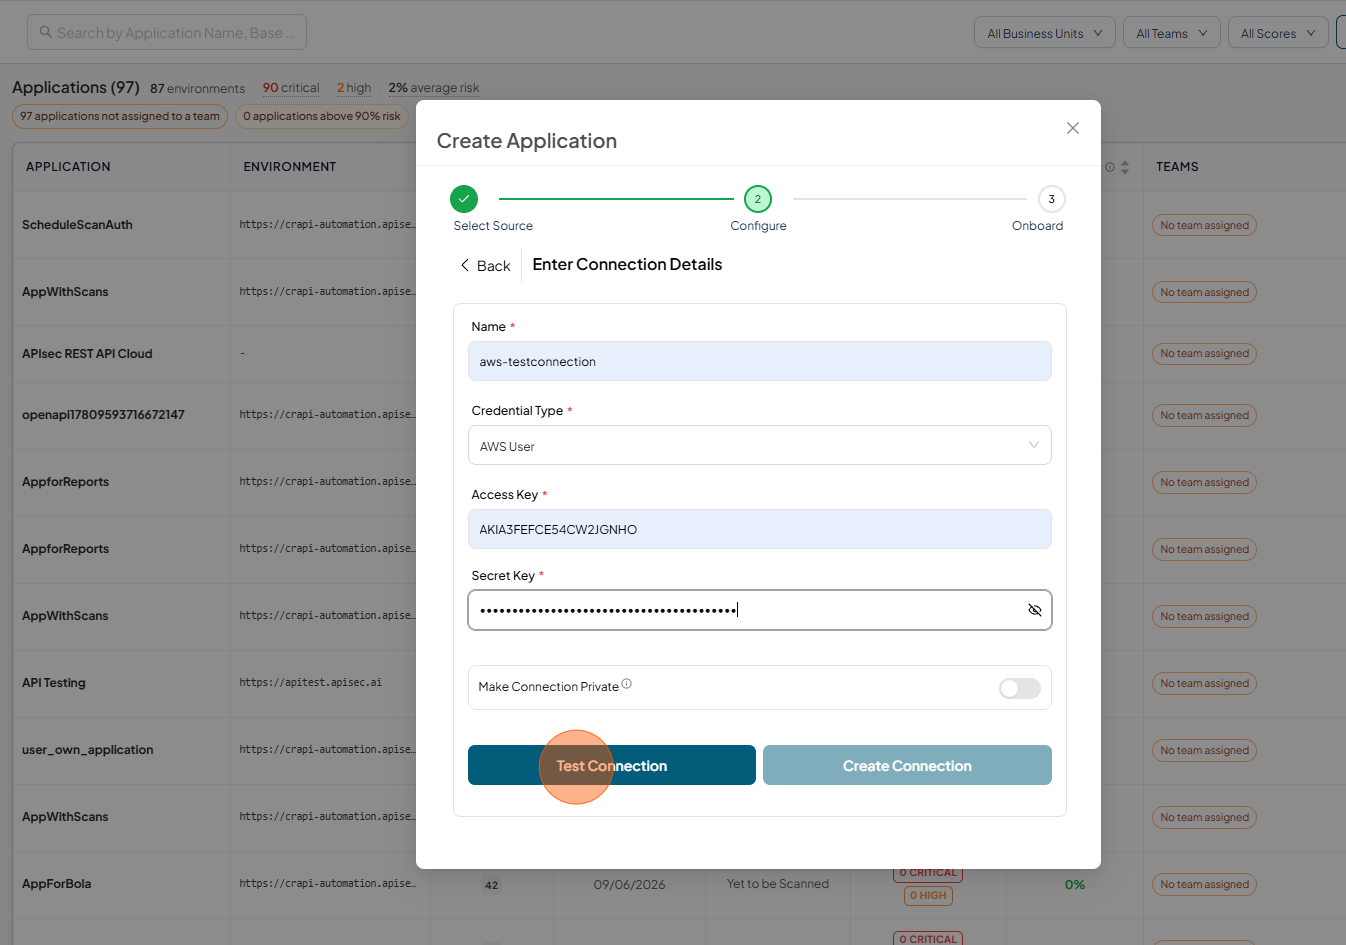
Enter the following details for AWS User credential type
-
Name: Enter a unique name for the connection.
-
Credential Type: Select the type of credential to use as AWS User.
-
Access Key: Enter the AWS Access Key associated with your IAM user.
-
Secret Key: Enter the corresponding AWS Secret Key.
-
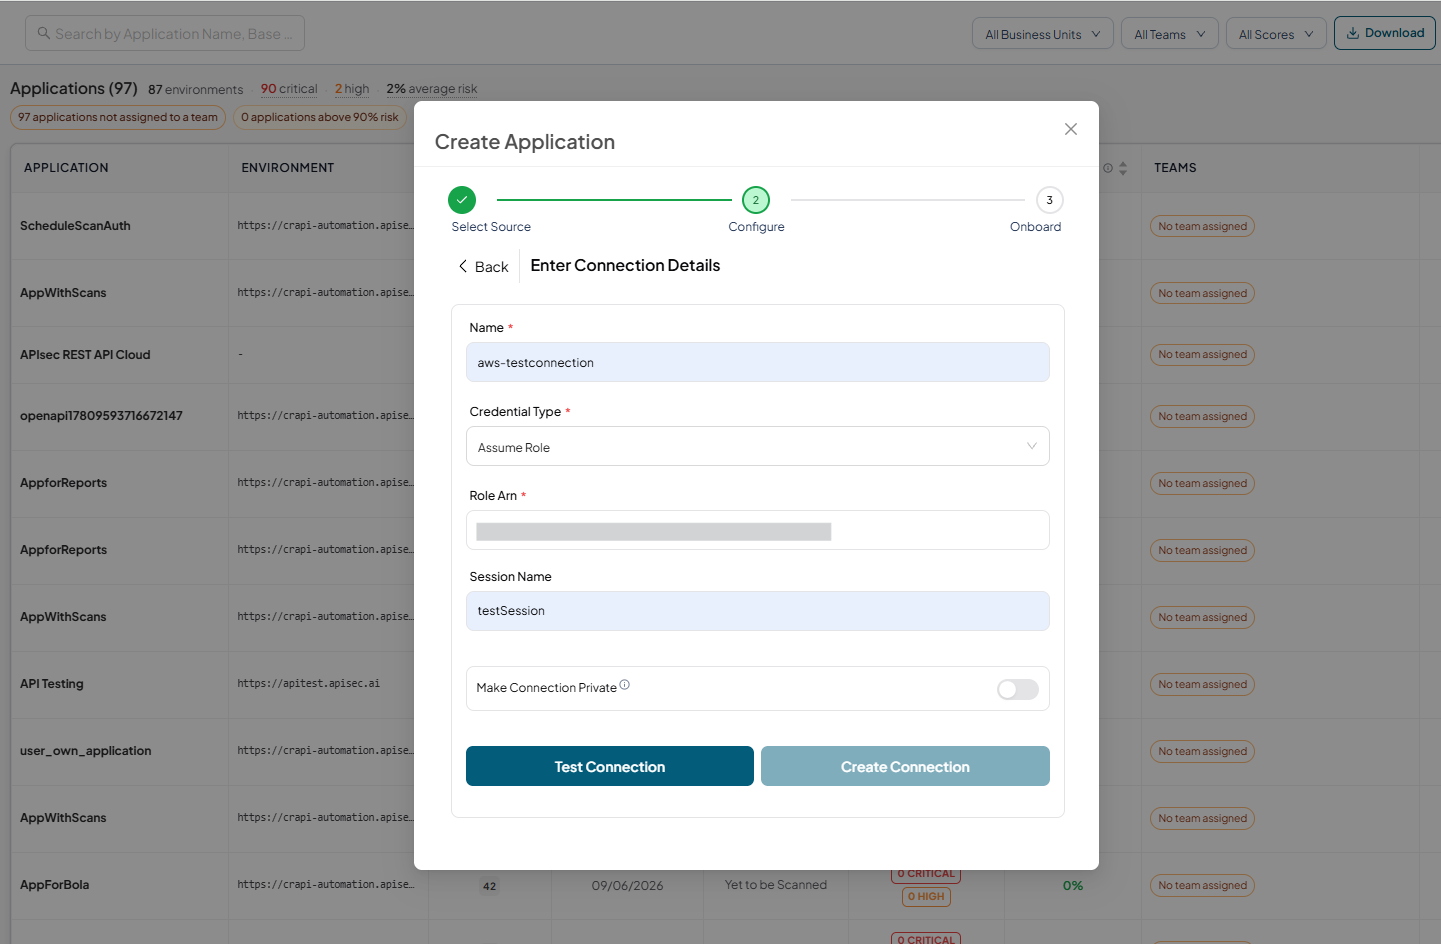
-
Enter the following details for Assume Role credential type
- Name: Enter a unique name for the connection.
- Credential Type: Select the type of credential to use as Assume Role.
- Role Arn: Enter the Amazon Resource Name (ARN)
- Session Name:(optional) Provide a session name to identify the temporary security credentials used in this connection.
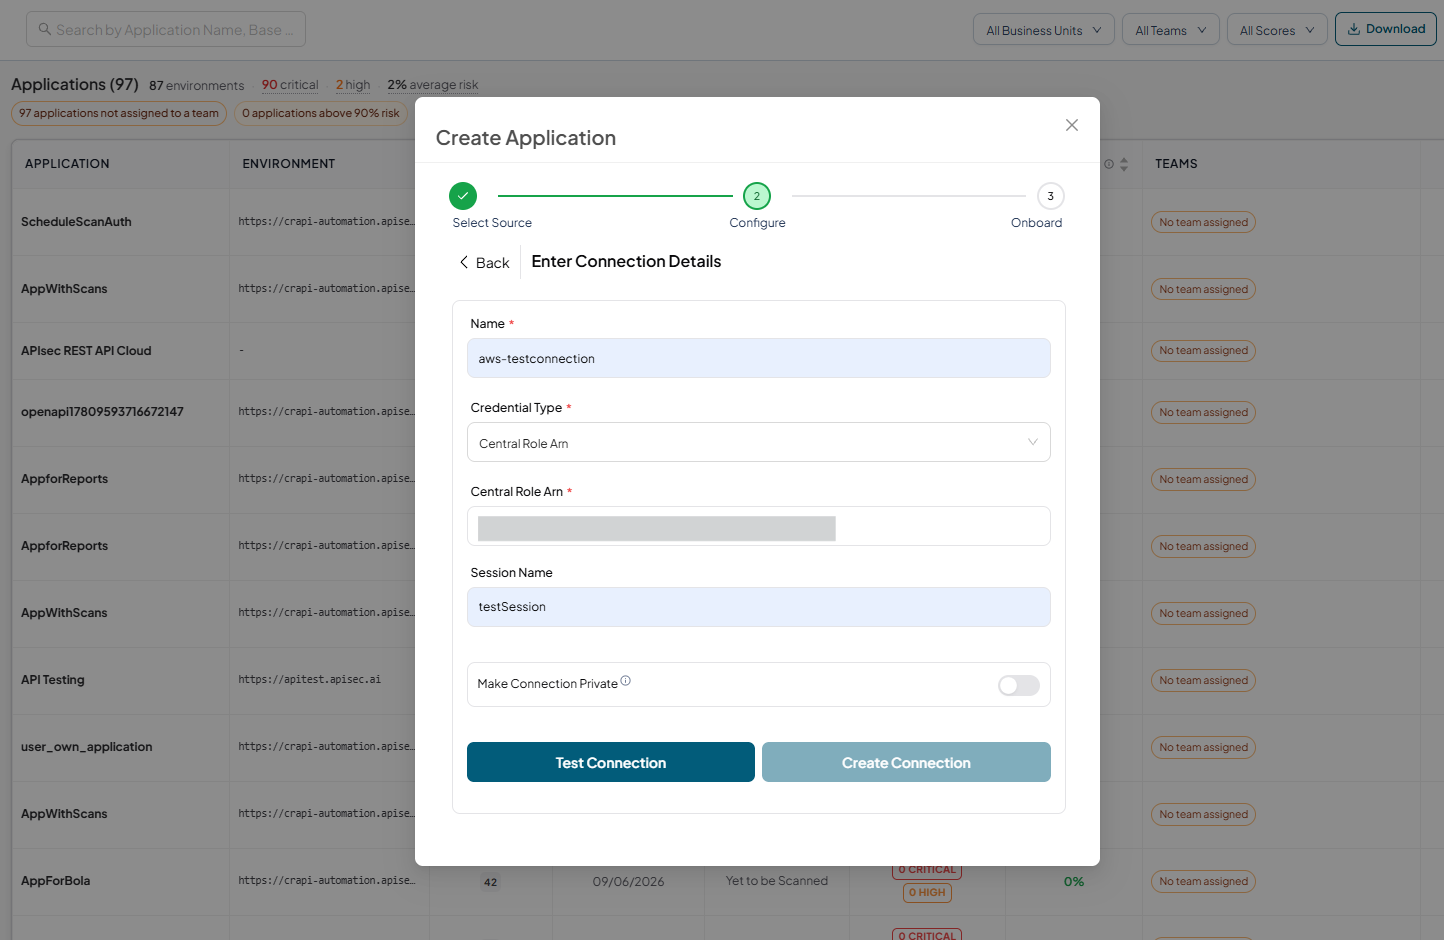
-
Enter the following details for Central Role ARN credential type
- Name: Enter a unique name for the connection.
- Credential Type: Select the type of credential to use as Central Role ARN.
- Central Role Arn: Enter the APIsecCentralRole ARN.
- Session Name:(optional) Provide a session name to identify the temporary security credentials used in this connection.
-
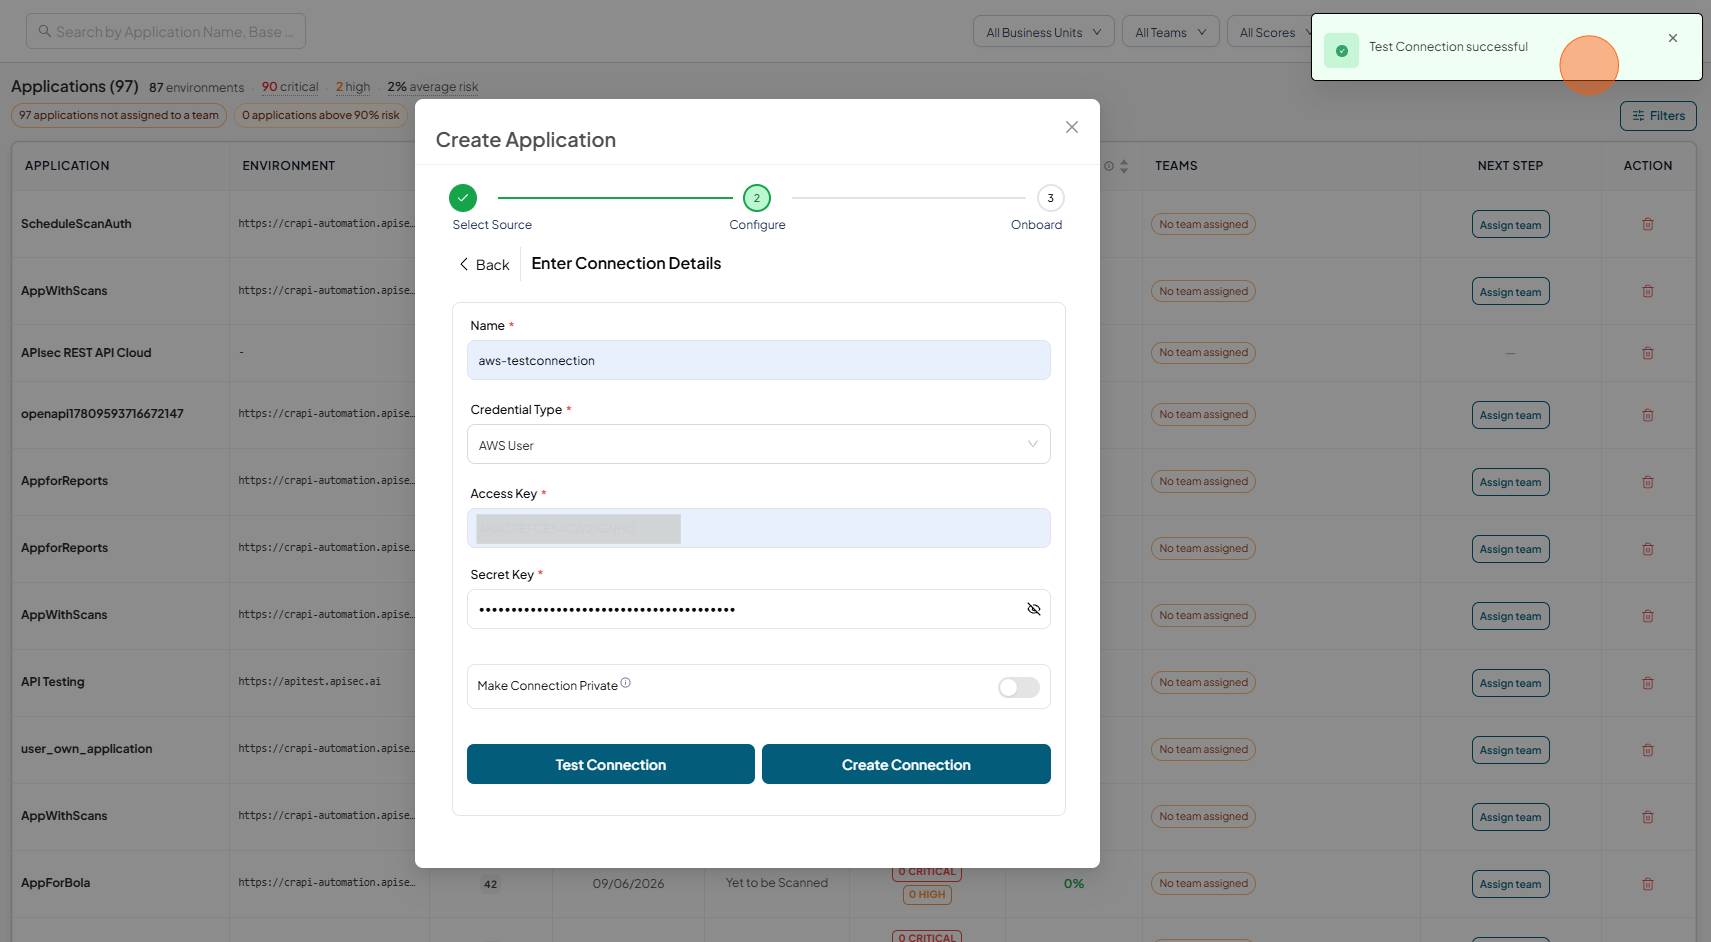
Click Test Connection
-
Test Connection successful
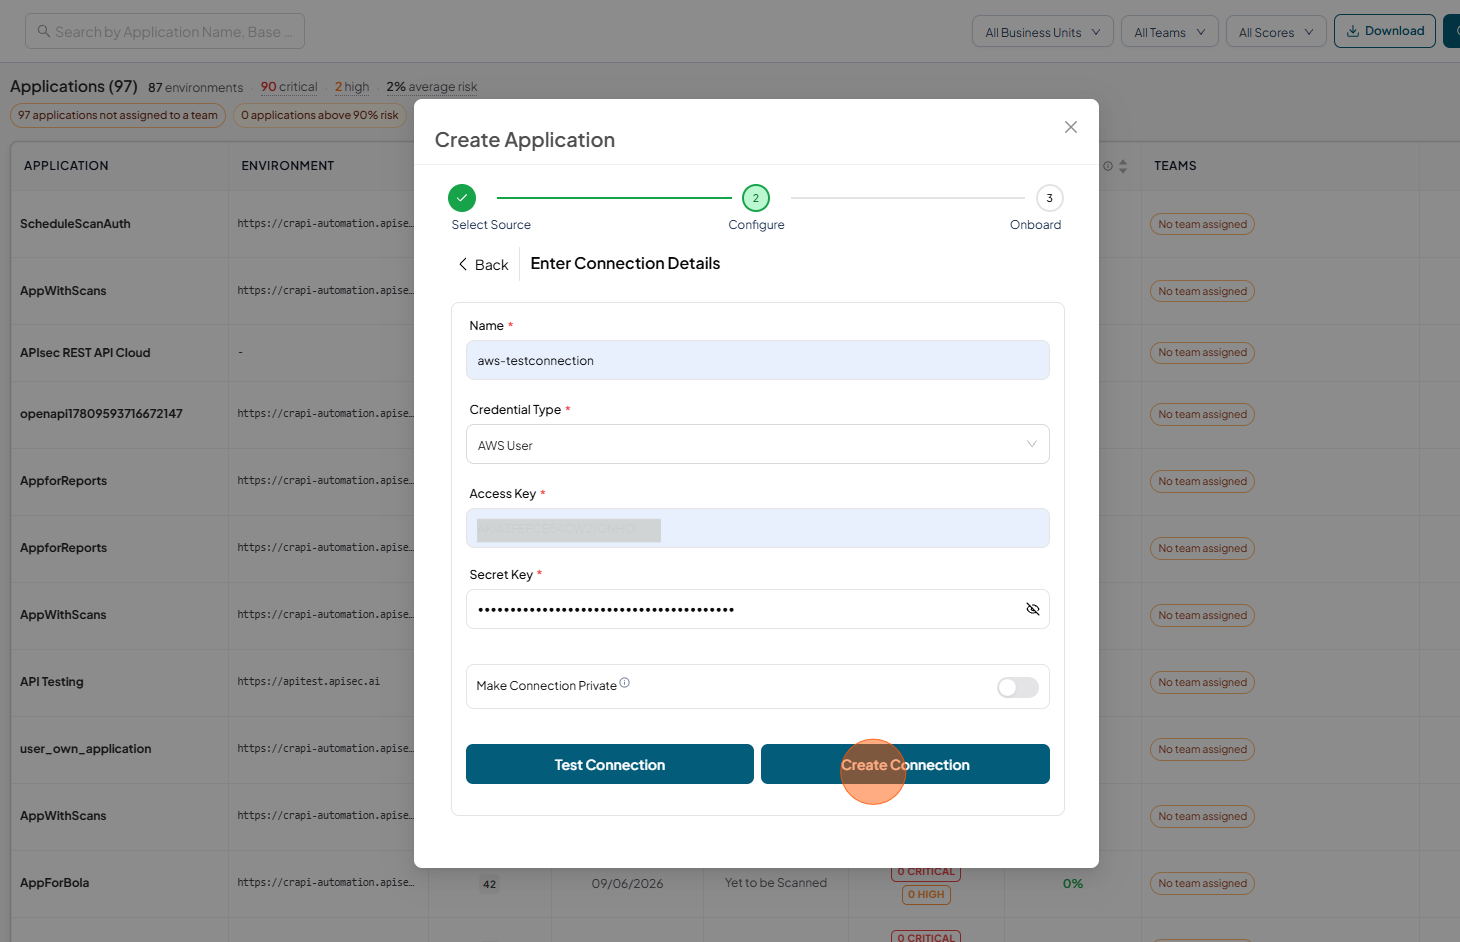
-
Click Create Connection
-
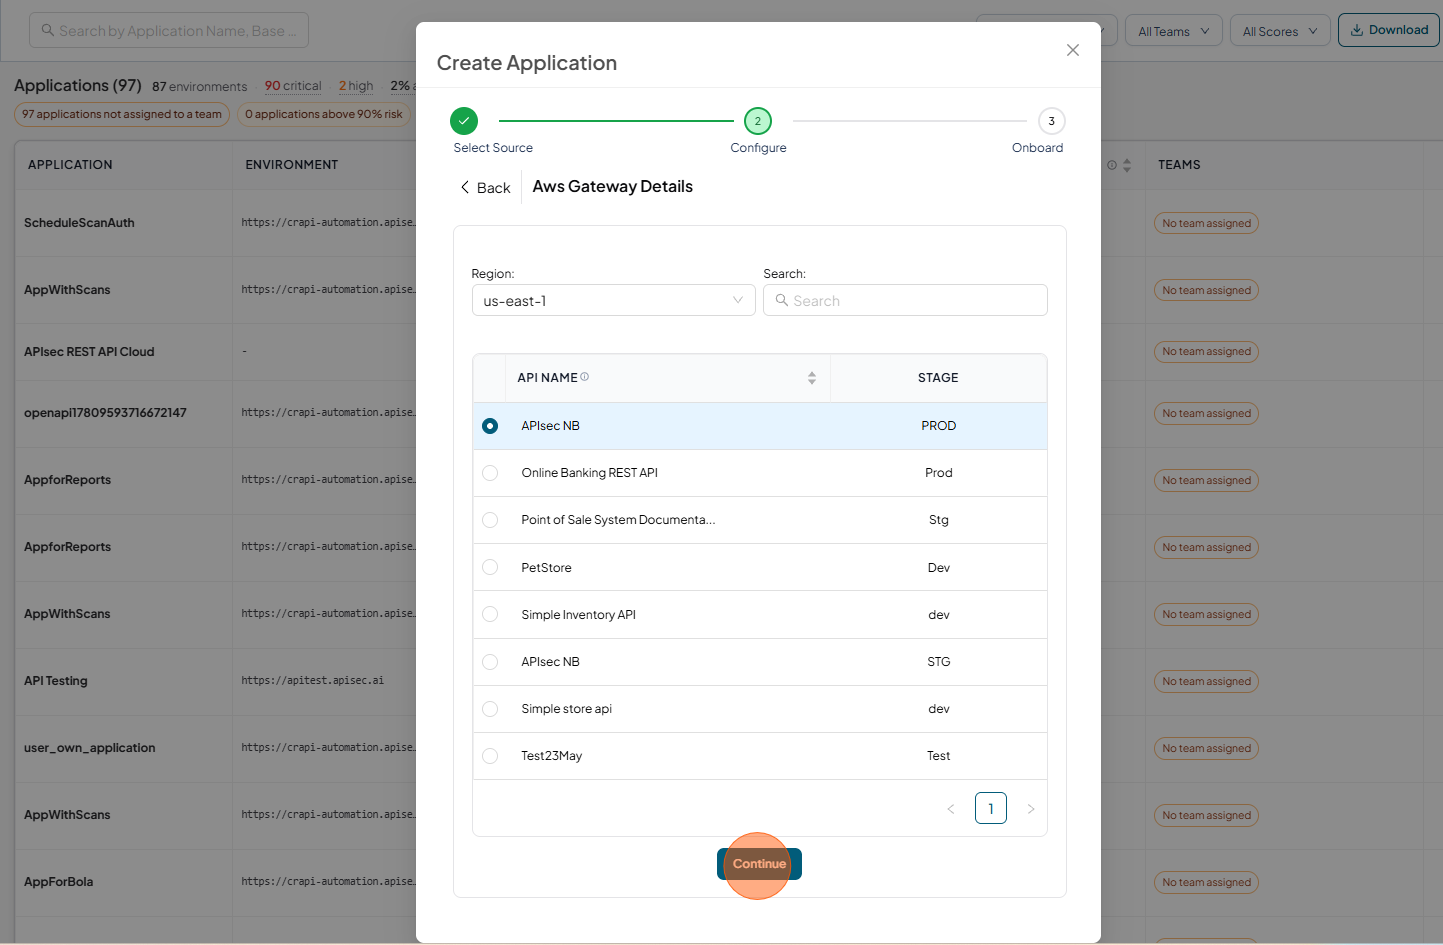
Select Region and API
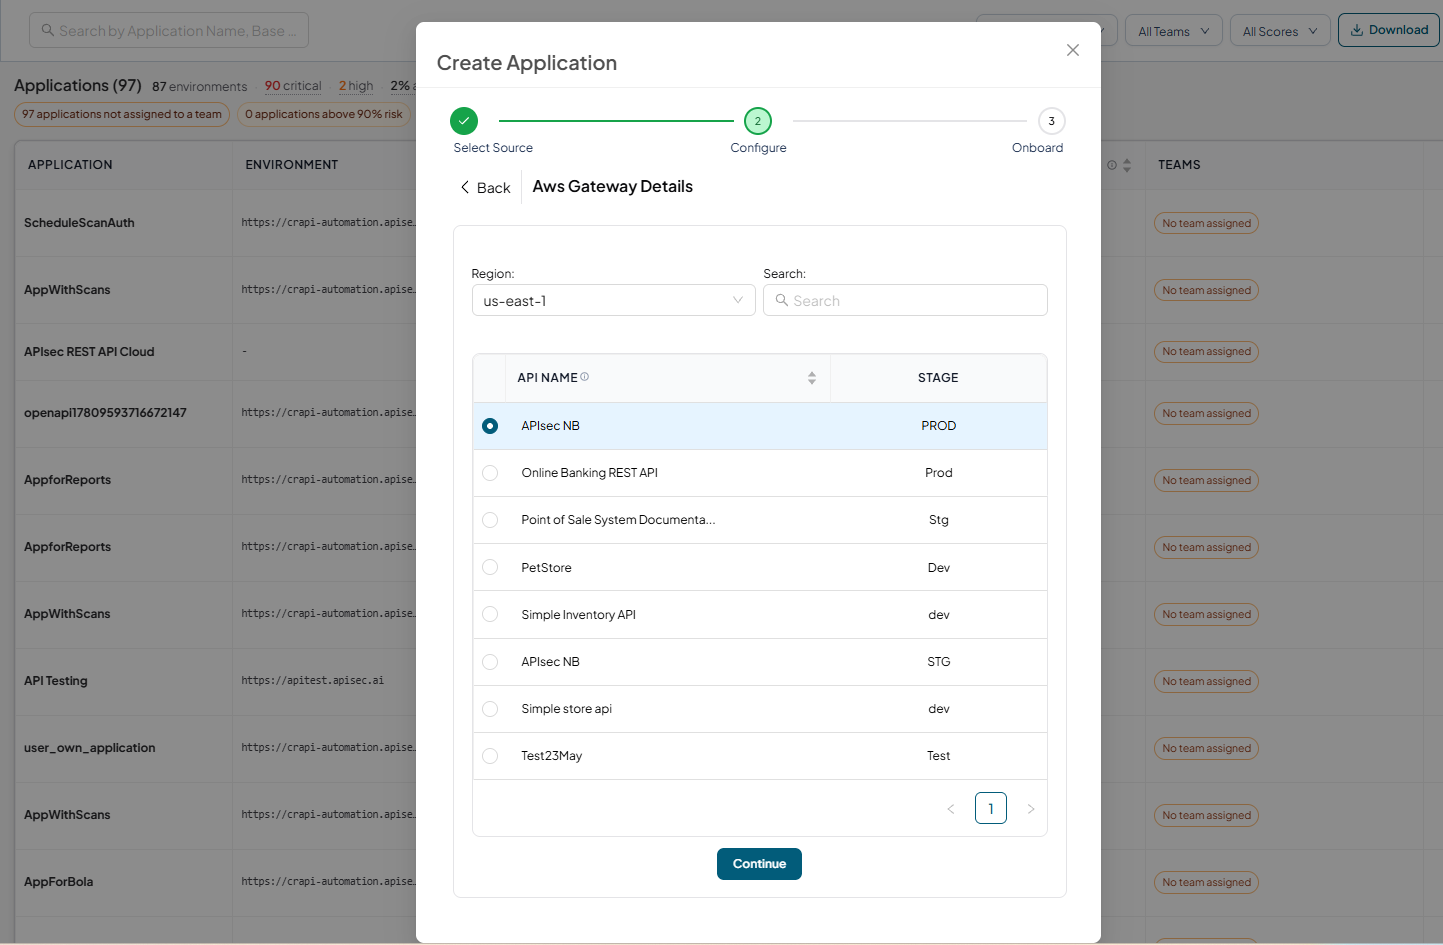
-
Click Continue
-
Click Onboard
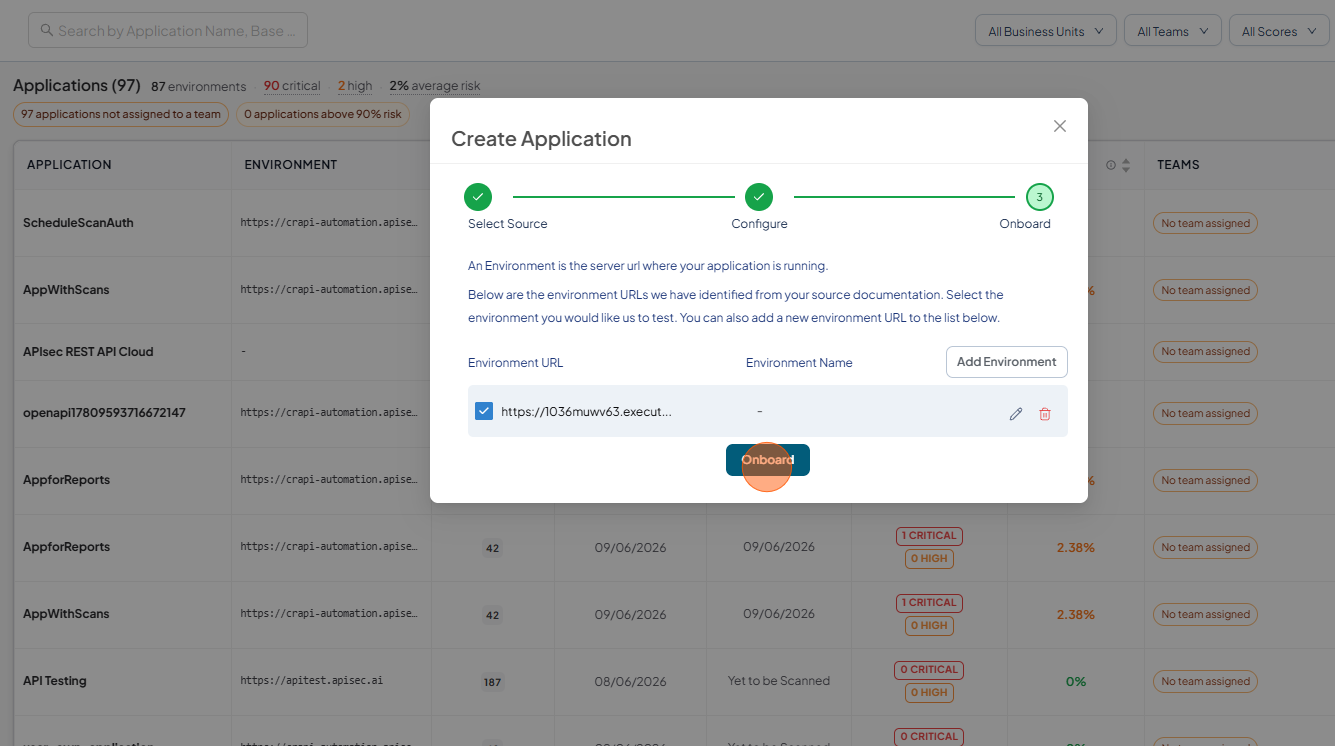
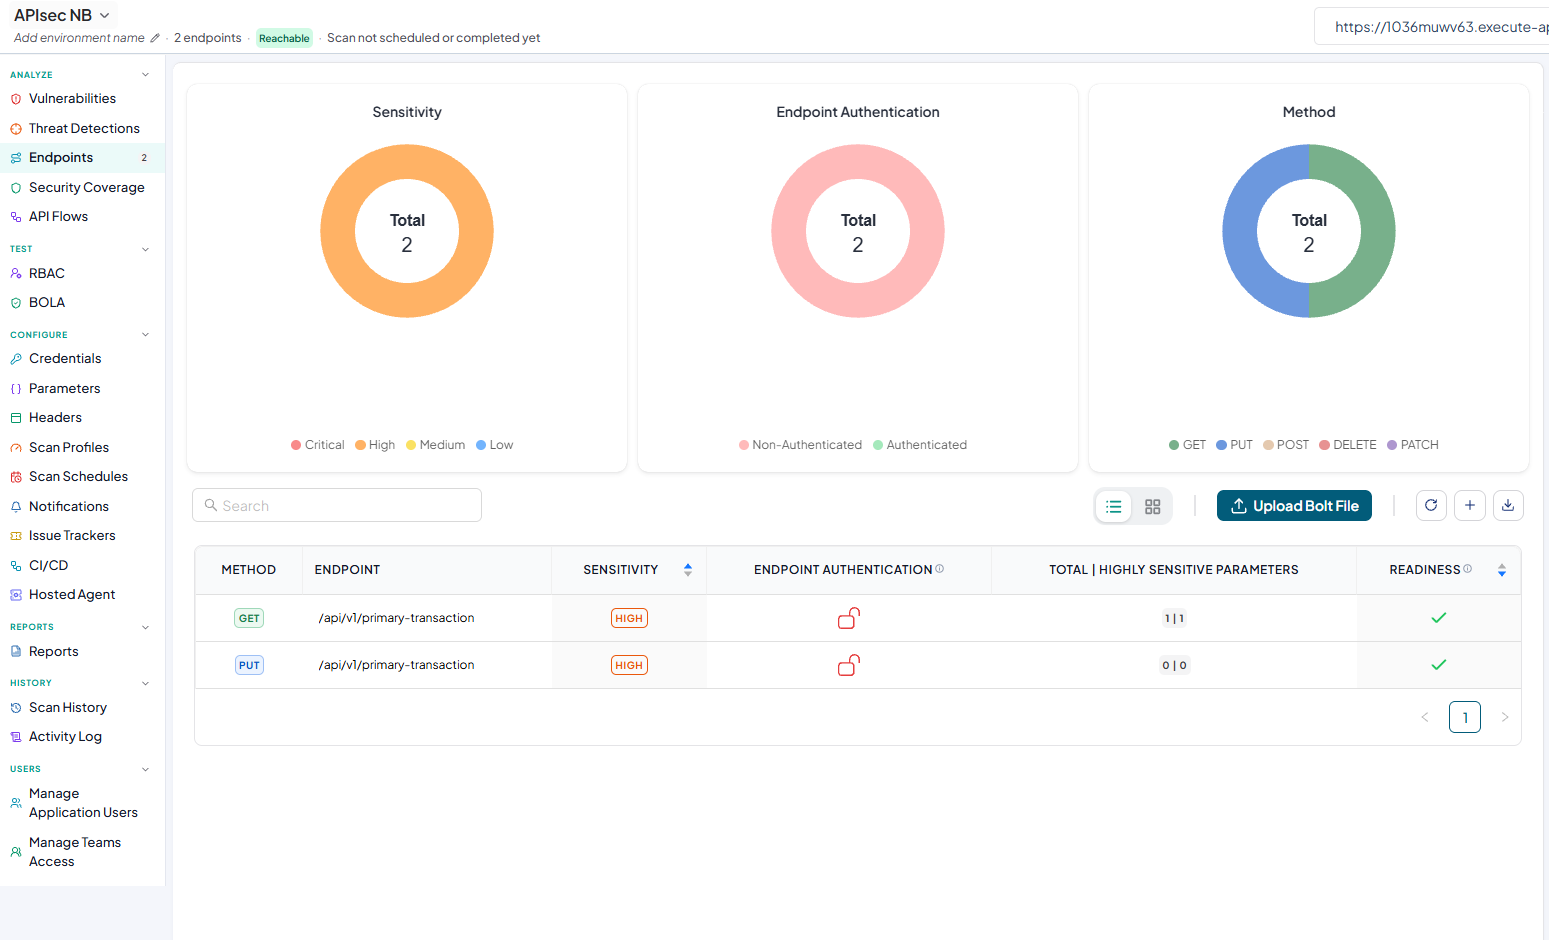
-
Application Dashboard
Auto-Onboard
The Auto-Onboard feature streamlines API onboarding by automatically detecting and registering unregistered APIs from AWS API Gateway. This ensures that all APIs, including newly published ones, are consistently onboarded and tested for vulnerabilities with minimal manual effort.
Enable Auto-onboard
-
Open your browser and visit: https://<your-tenant>.apisecapps.com
-
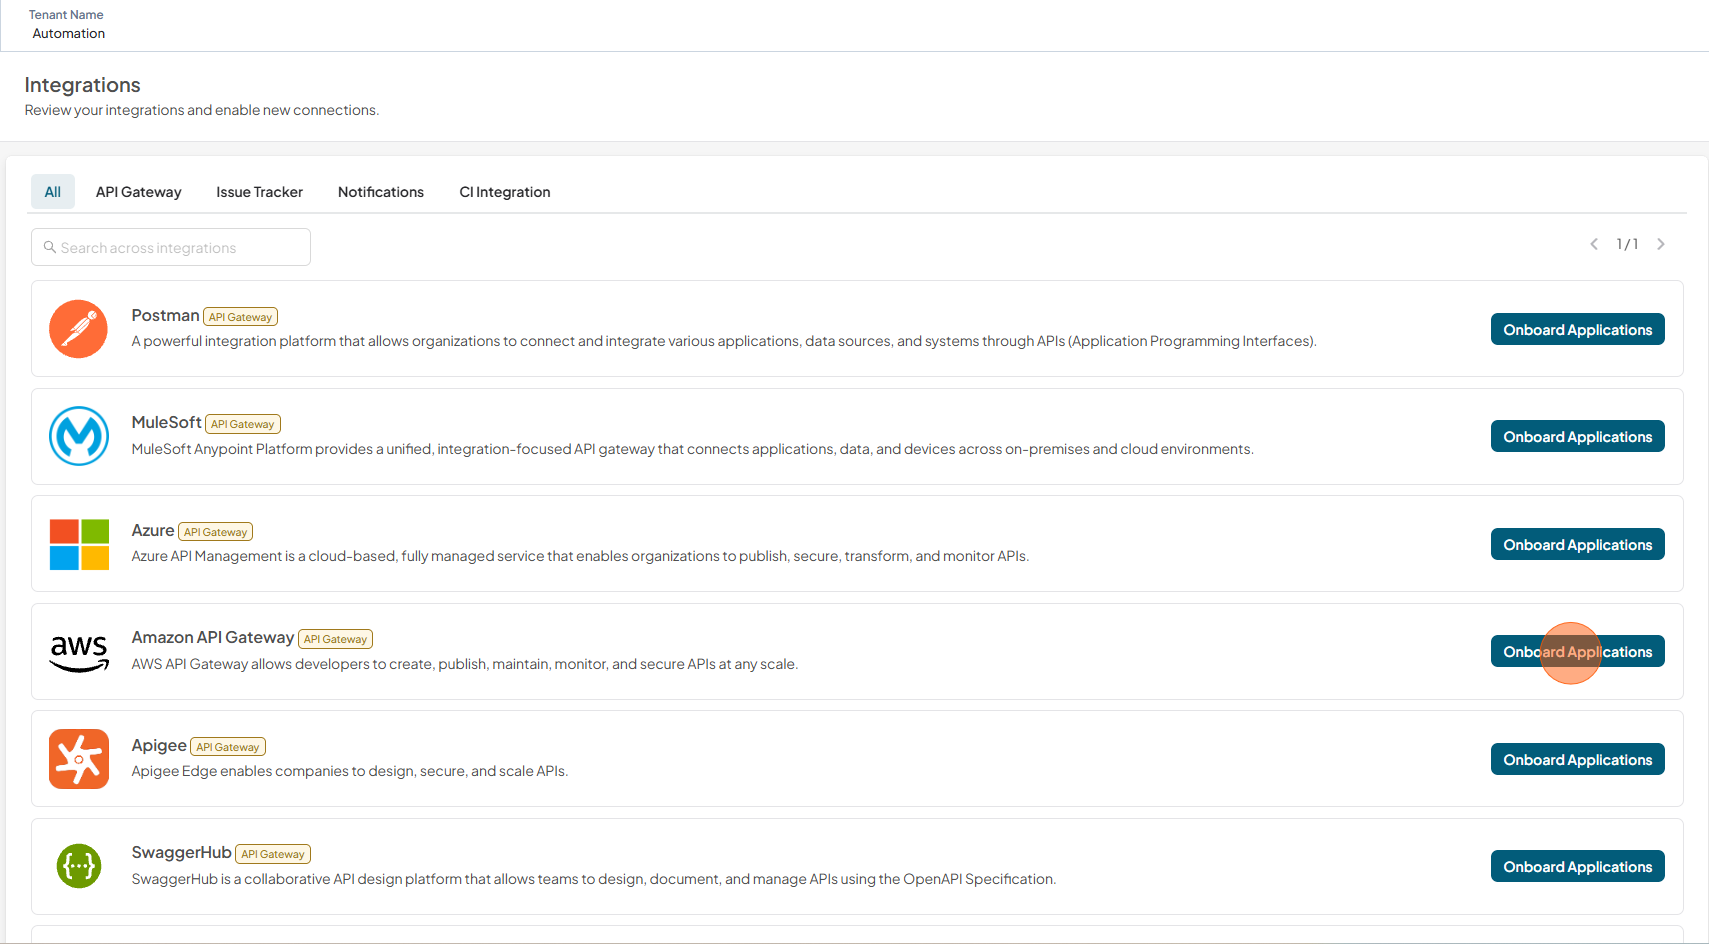
Click Integrations tab
-
Click Onboard Applications adjacent to the Amazon API Gateway
-
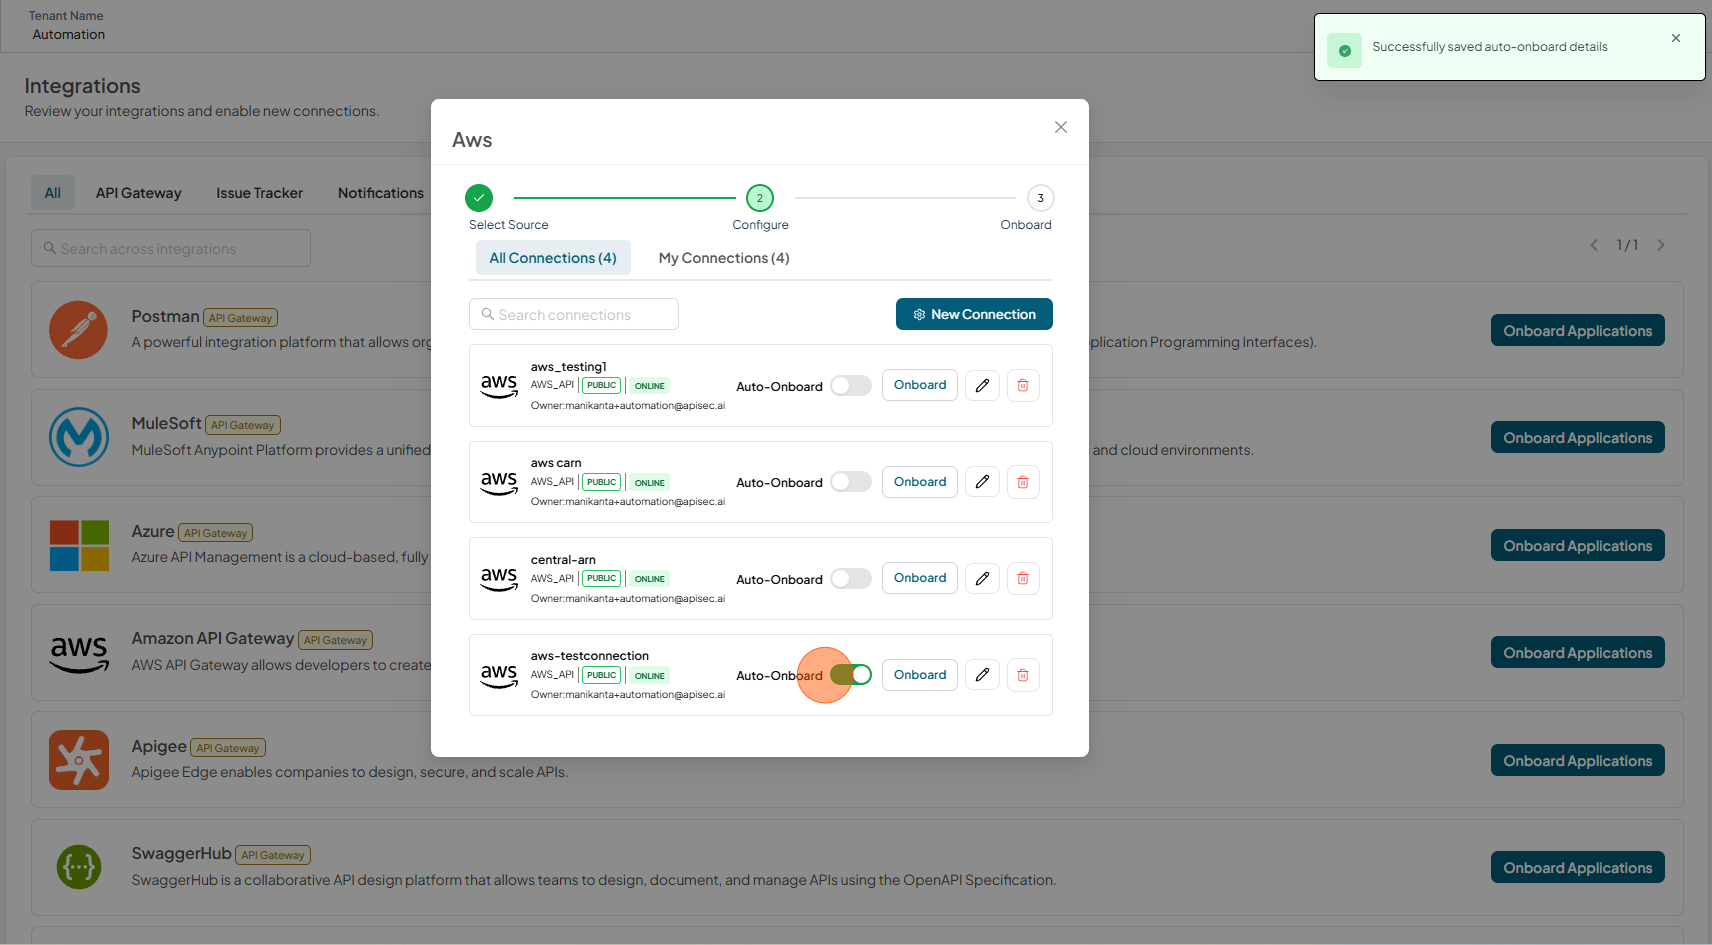
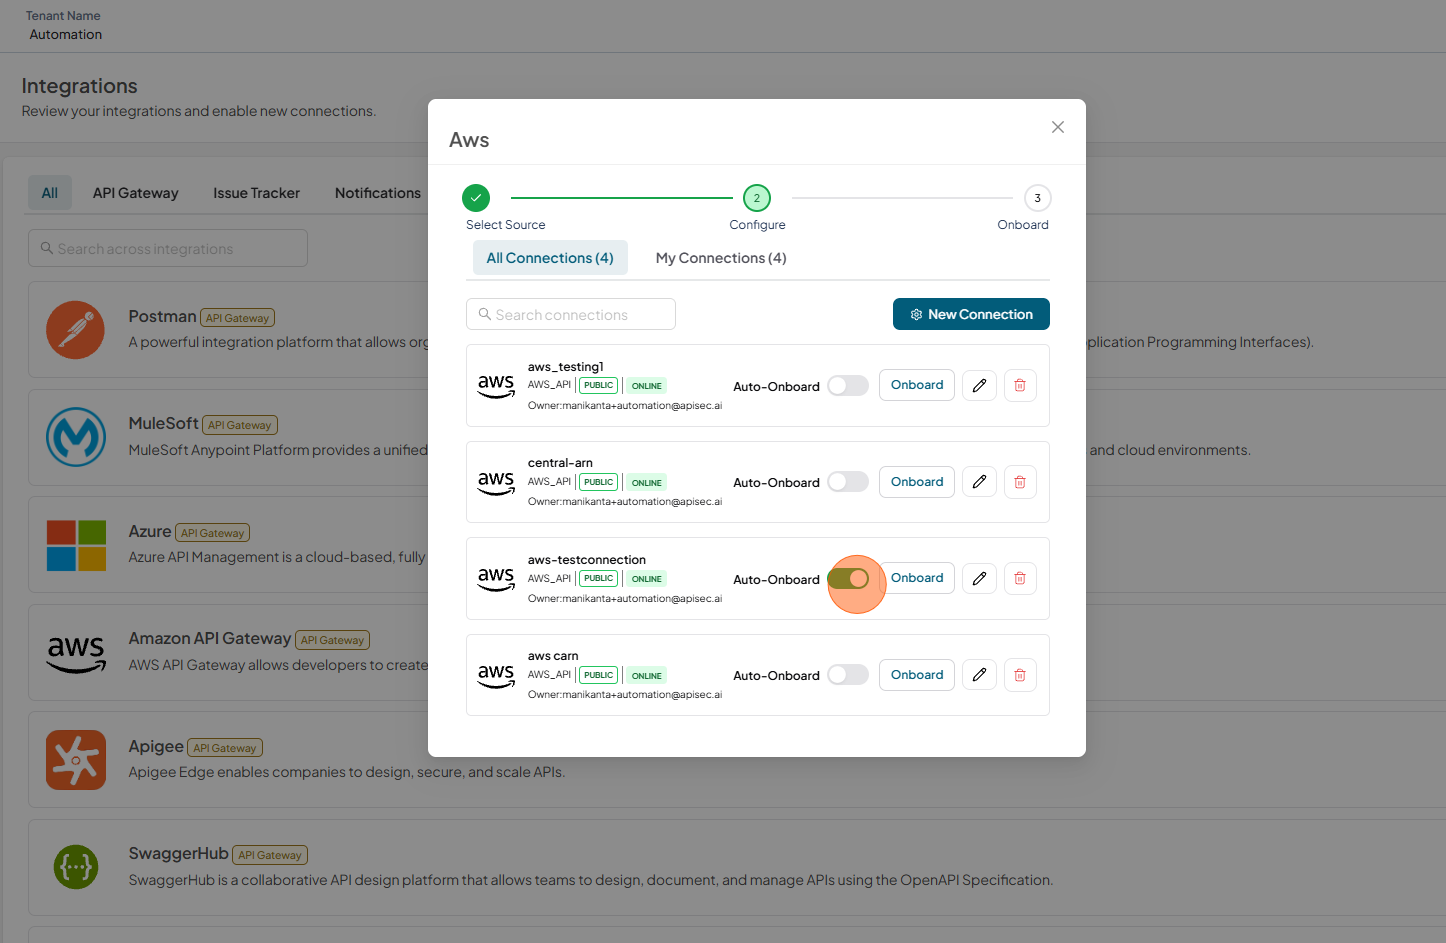
Enable Auto-Onboard of any existing AWS connection.

-
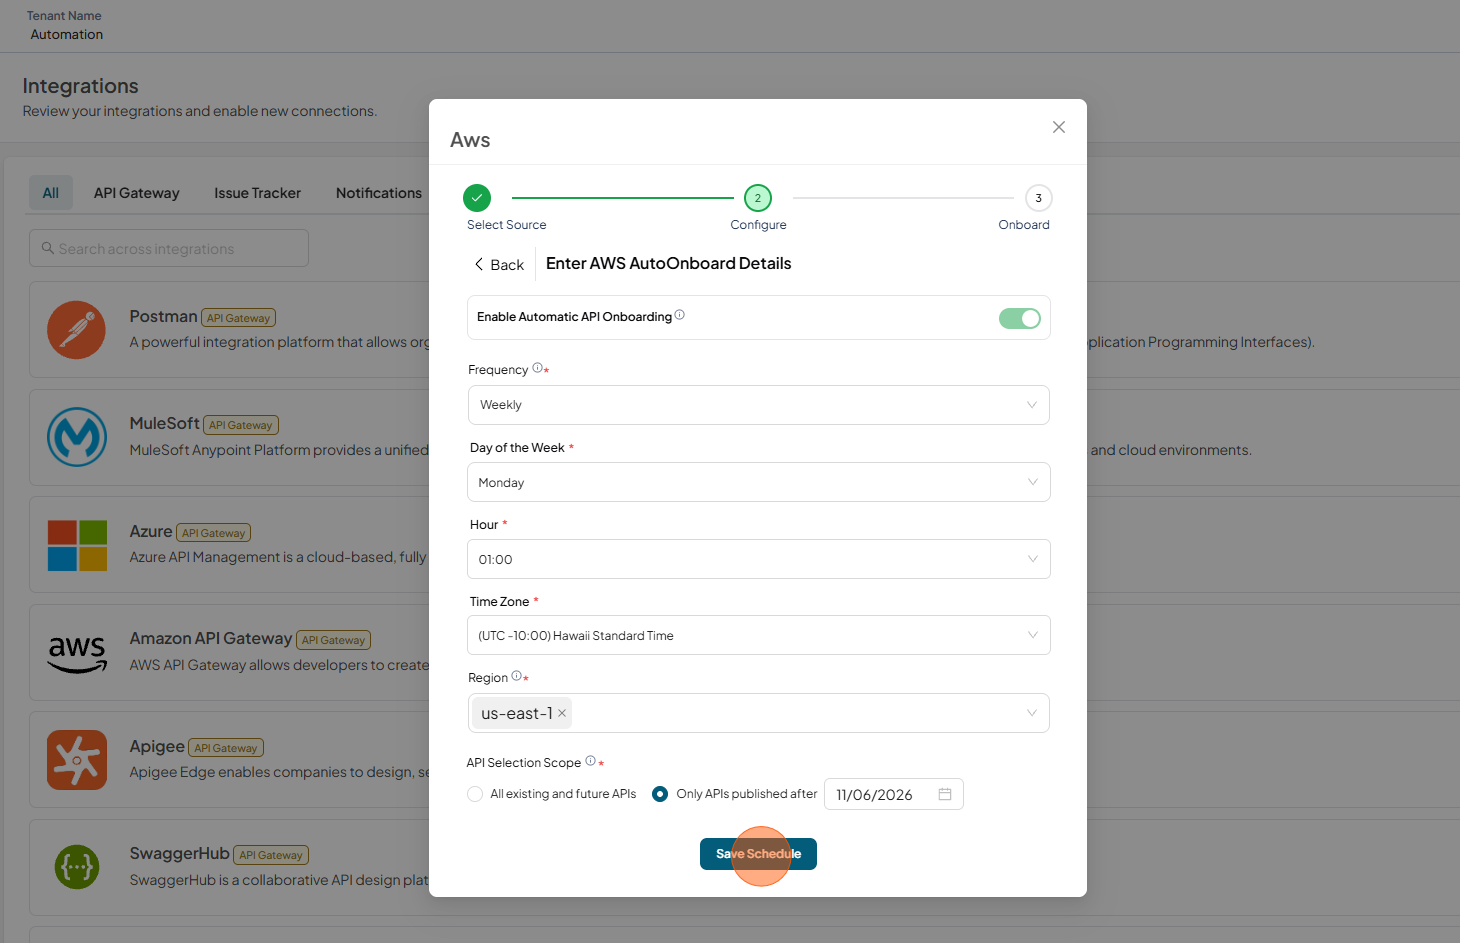
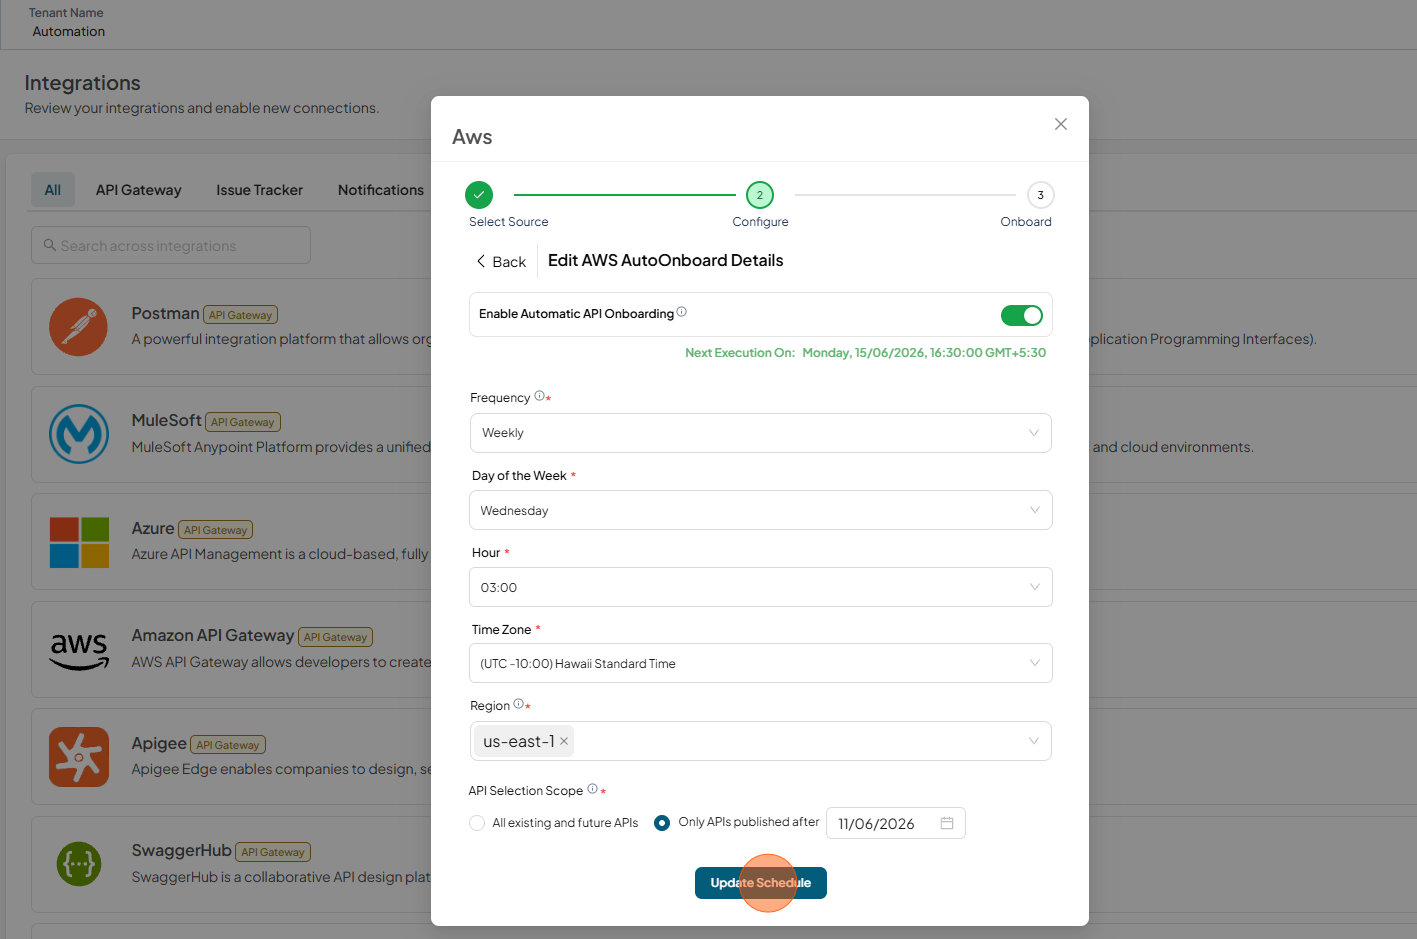
Fill the AWS AutoOnboard Details and click on Save Schedule
- Frequency – How often the onboarding should occur. By default it is weekly.
- Day of the Week – Select the specific day for onboarding.
- Hour – The exact time (in hours and minutes) when the onboarding should start.
- Timezone – The timezone in which the schedule should be applied
- Region – The AWS region from which resources will be onboarded(applicable for credential types AWS User and Assume Role).
- API Selection Scope - Select whether to auto-onboard all available APIs or limit onboarding to only those published after the specified date.
-
Successfully saved auto-onboard details
Update Schedule
-
Open your browser and visit: https://<your-tenant>.apisecapps.com
-
Click Integrations tab
-
Click Onboard Applications adjacent to the Amazon API Gateway
-
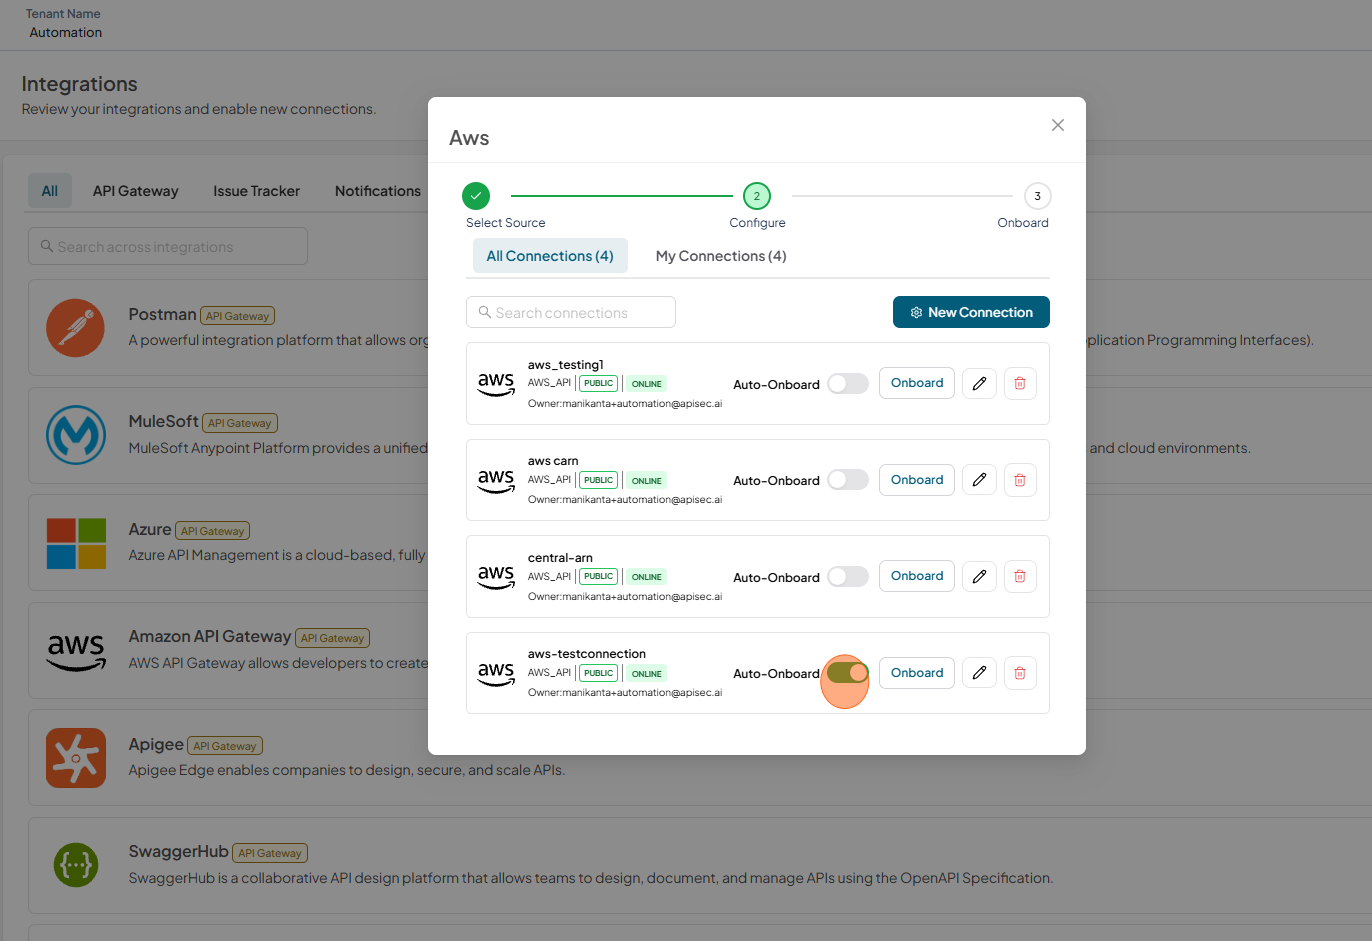
Click Auto-Onboard enabled toggle
-
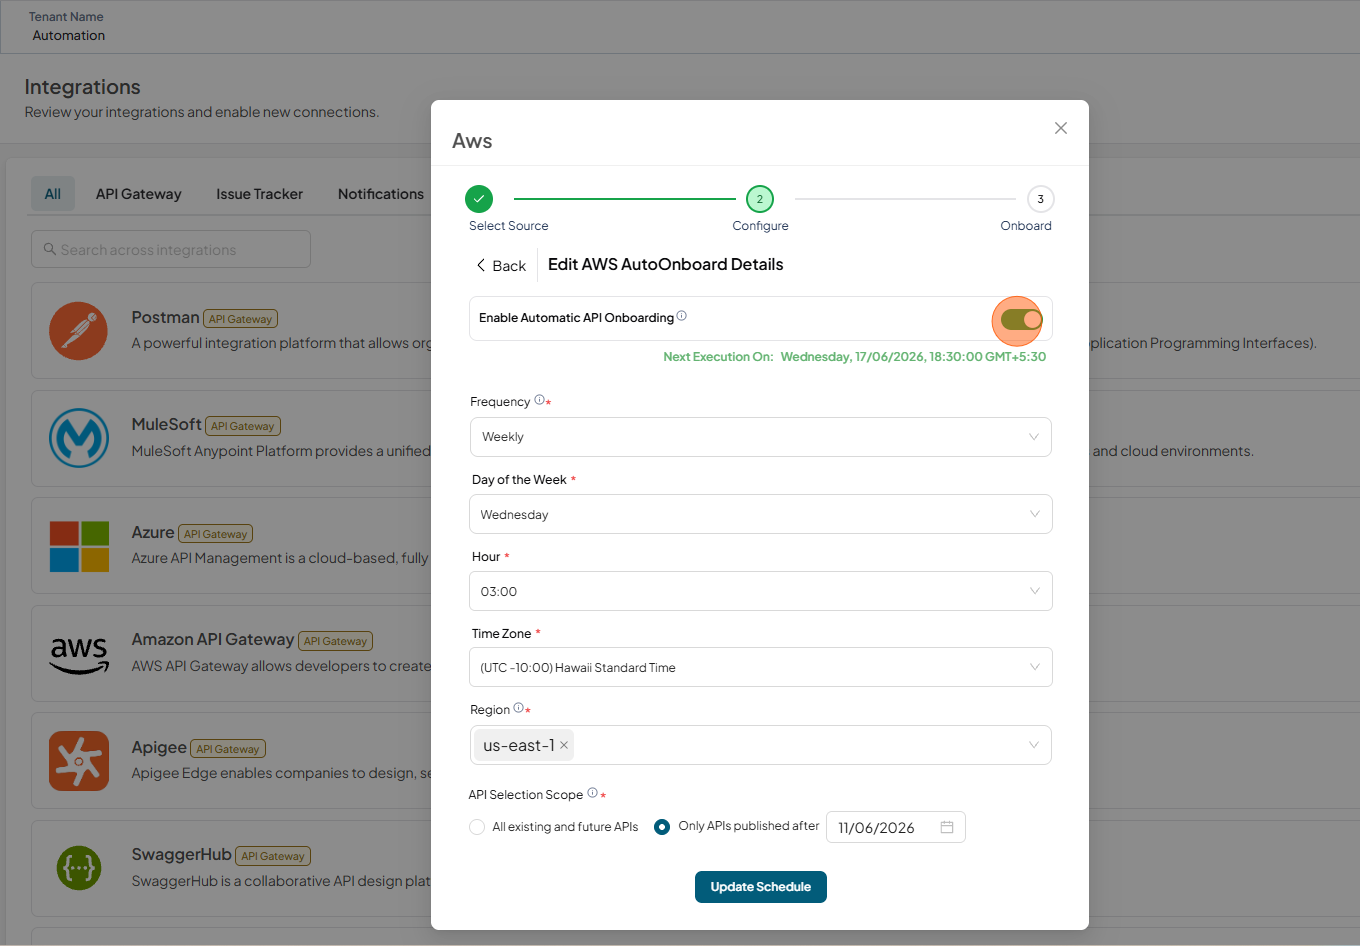
Update the details and Click on Update Schedule
Disable Auto-Onboard
-
Open your browser and visit: https://<your-tenant>.apisecapps.com
-
Click Integrations tab
-
Click Onboard Applications adjacent to the Amazon API Gateway
-
Click Auto-Onboard enabled toggle
-
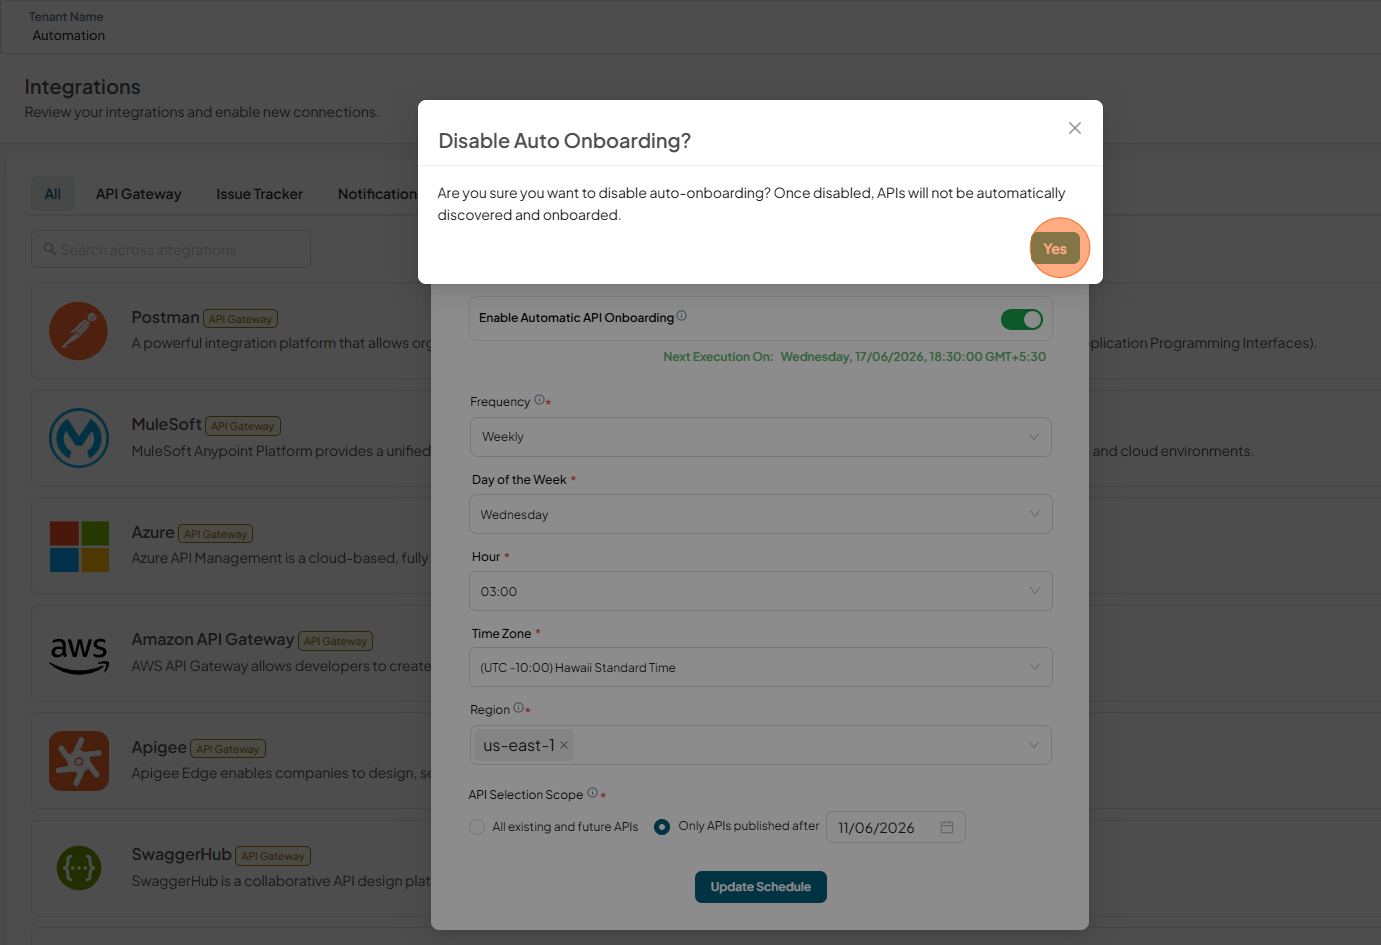
In Edit AWS AutoOnboard Details, disable the Enable Automatic API Onboarding.
-
Click Yes to confirm
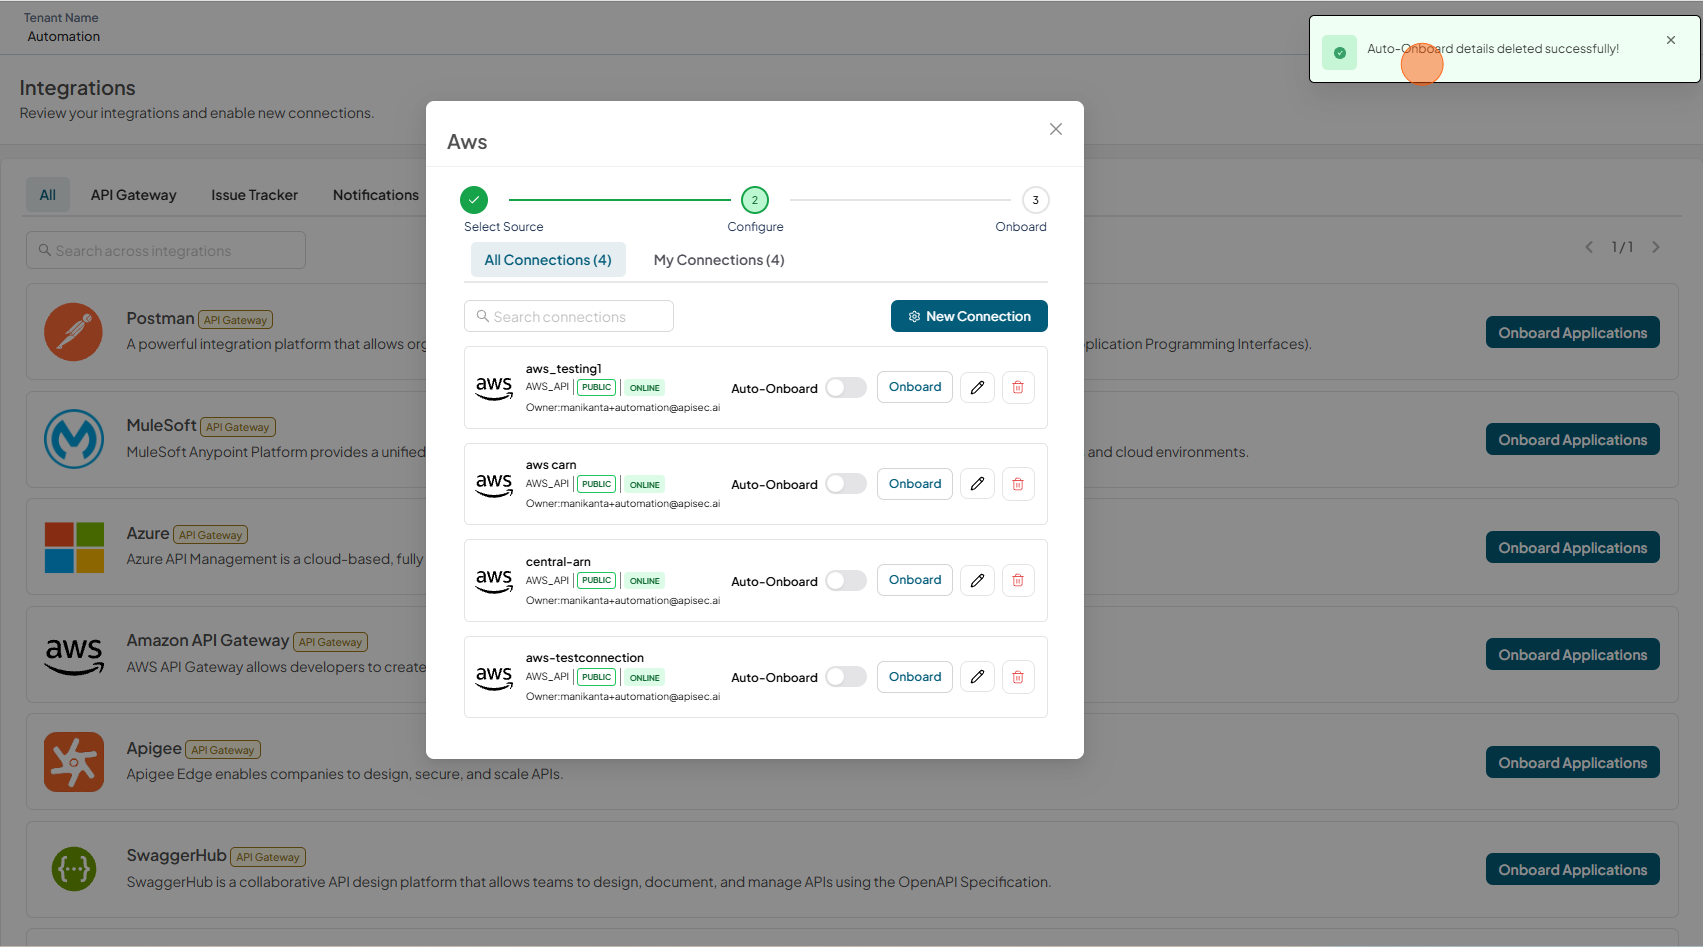
-
Auto-Onboard details deleted successfully!
Edit AWS Connection
-
Open your browser and visit: https://<your-tenant>.apisecapps.com
-
Click Integrations tab
-
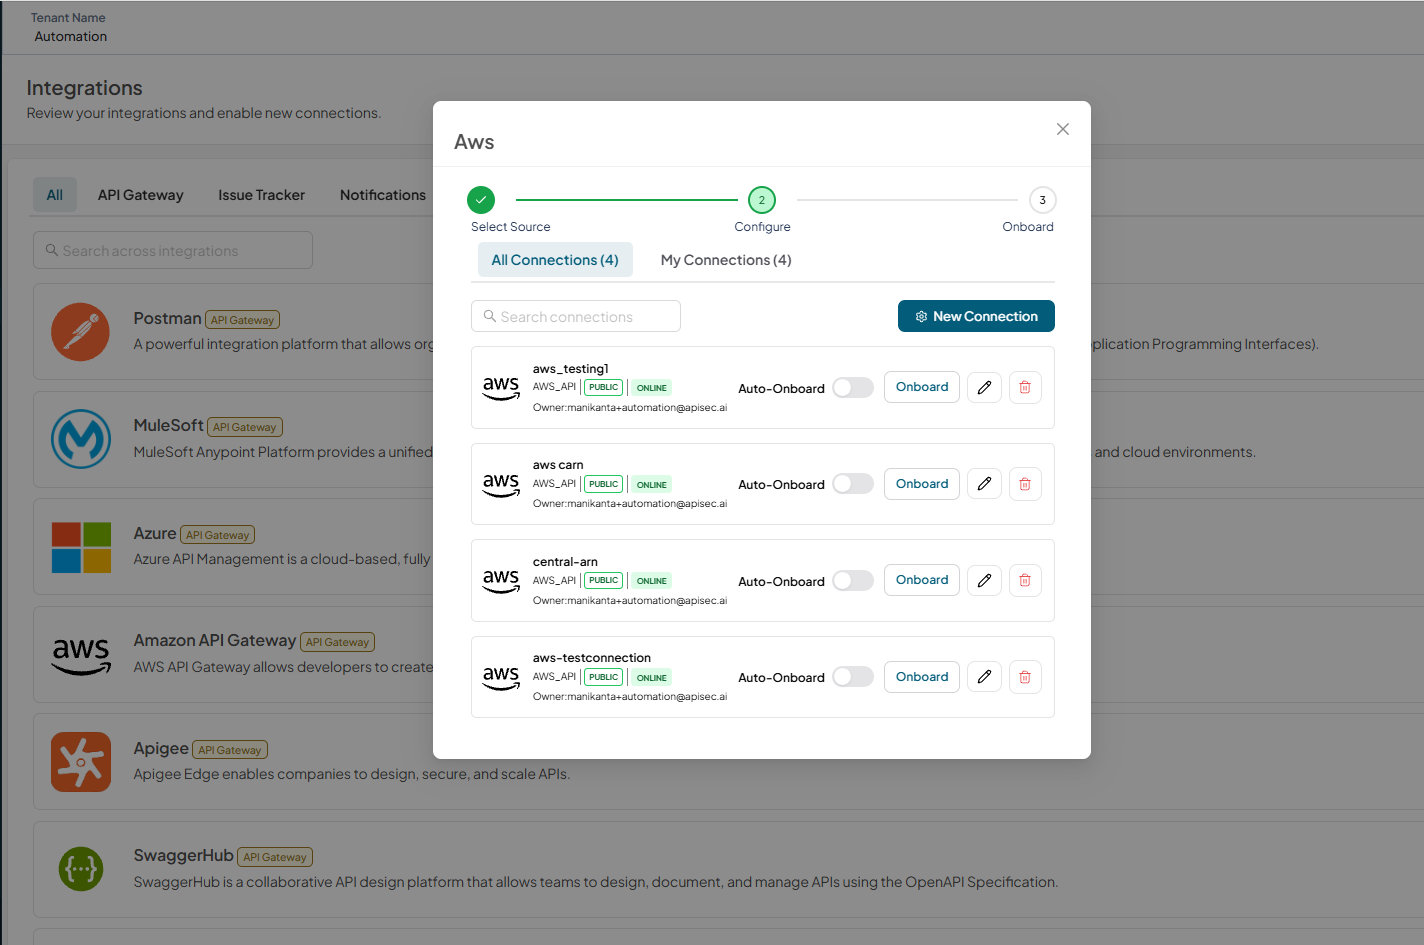
Click Onboard Applications adjacent to the Amazon API Gateway
-
A list of existing Azure connections is displayed.
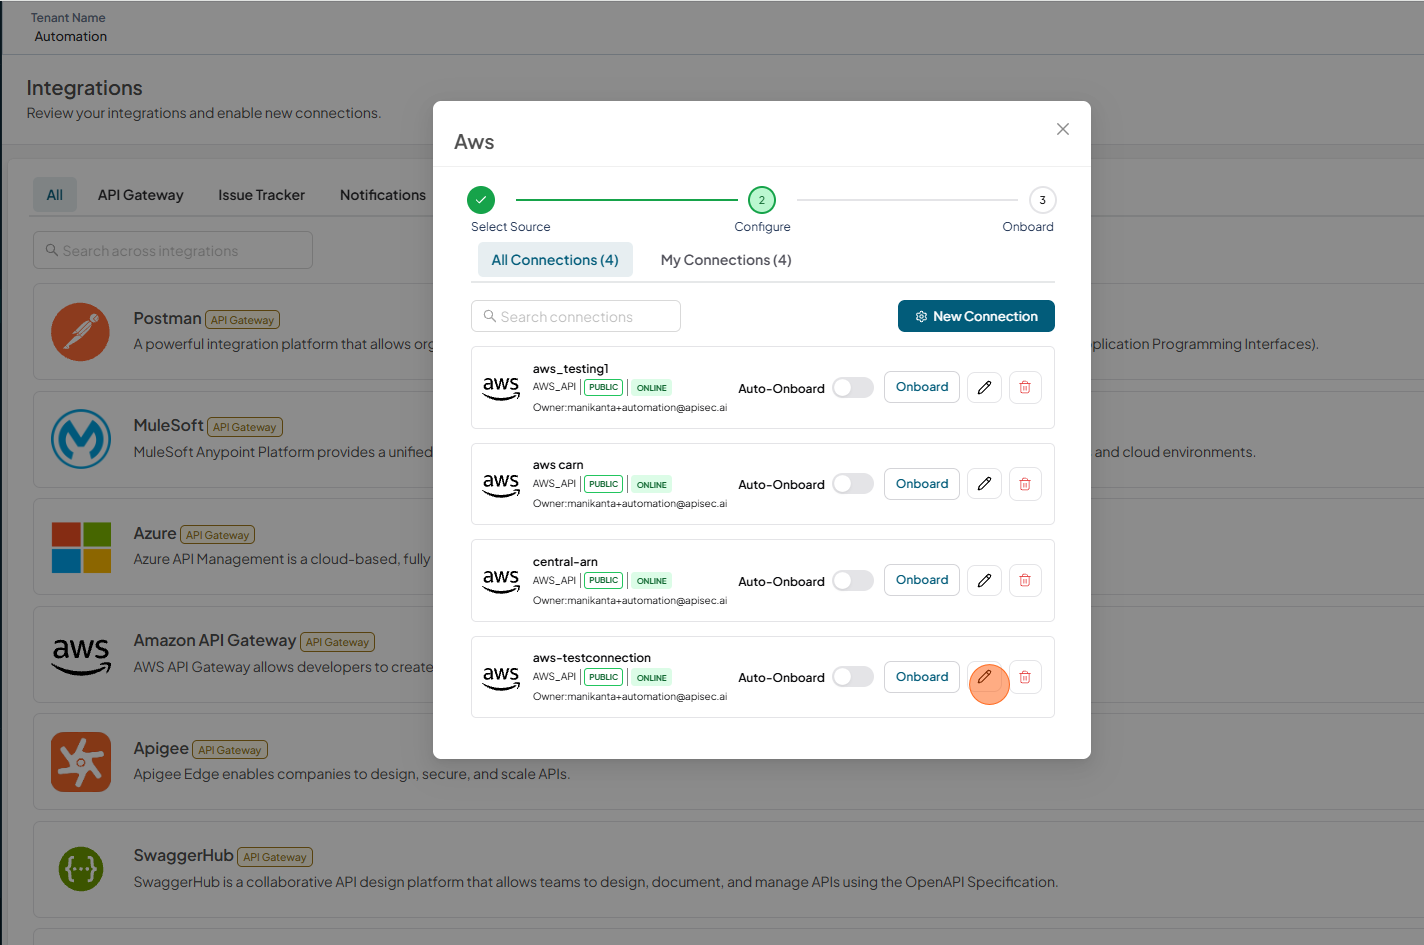
-
Select the Pencil icon next to the connection you want to edit.
-
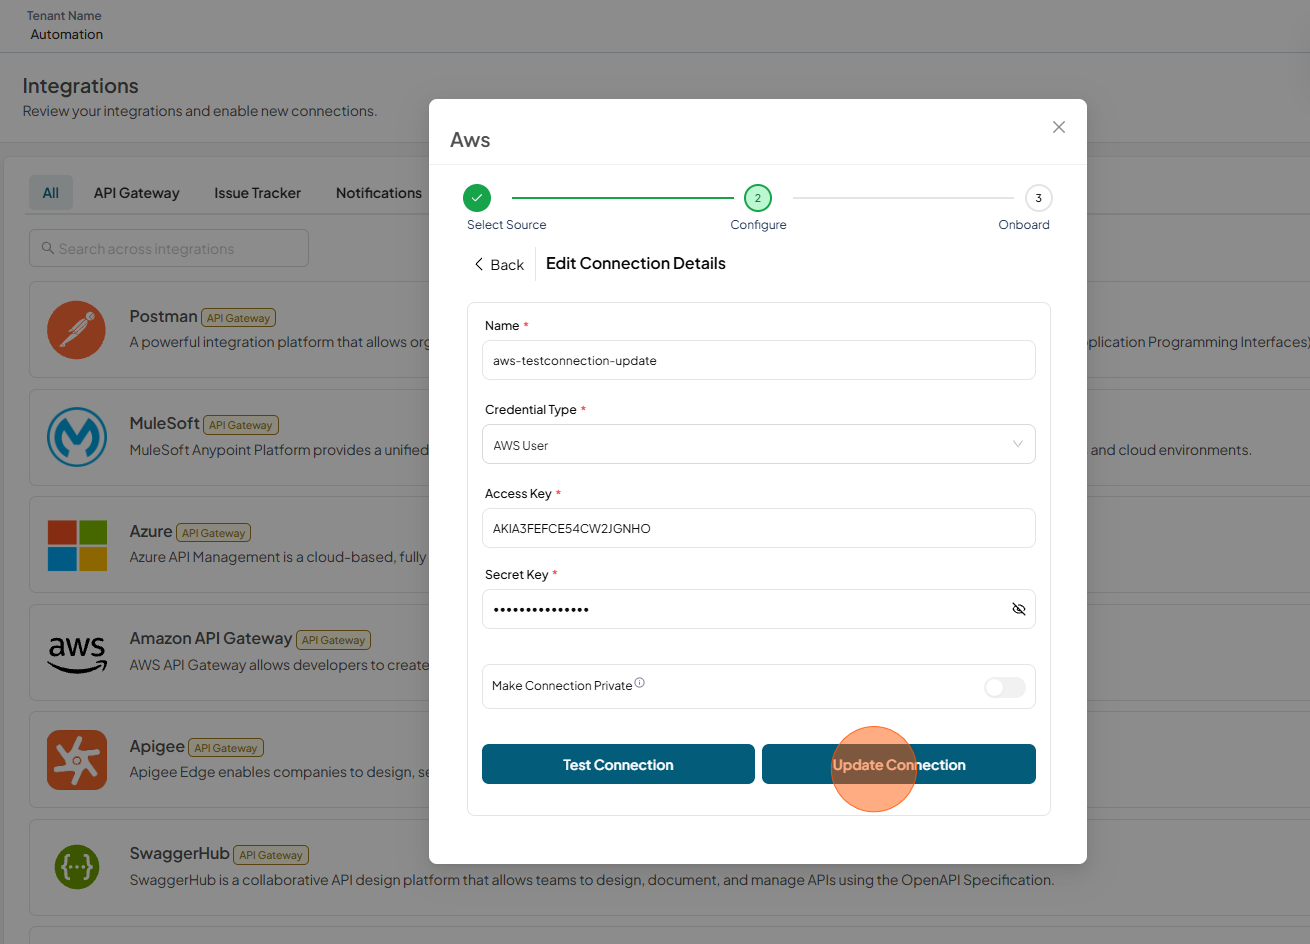
Update the required details and Click on Test Connection
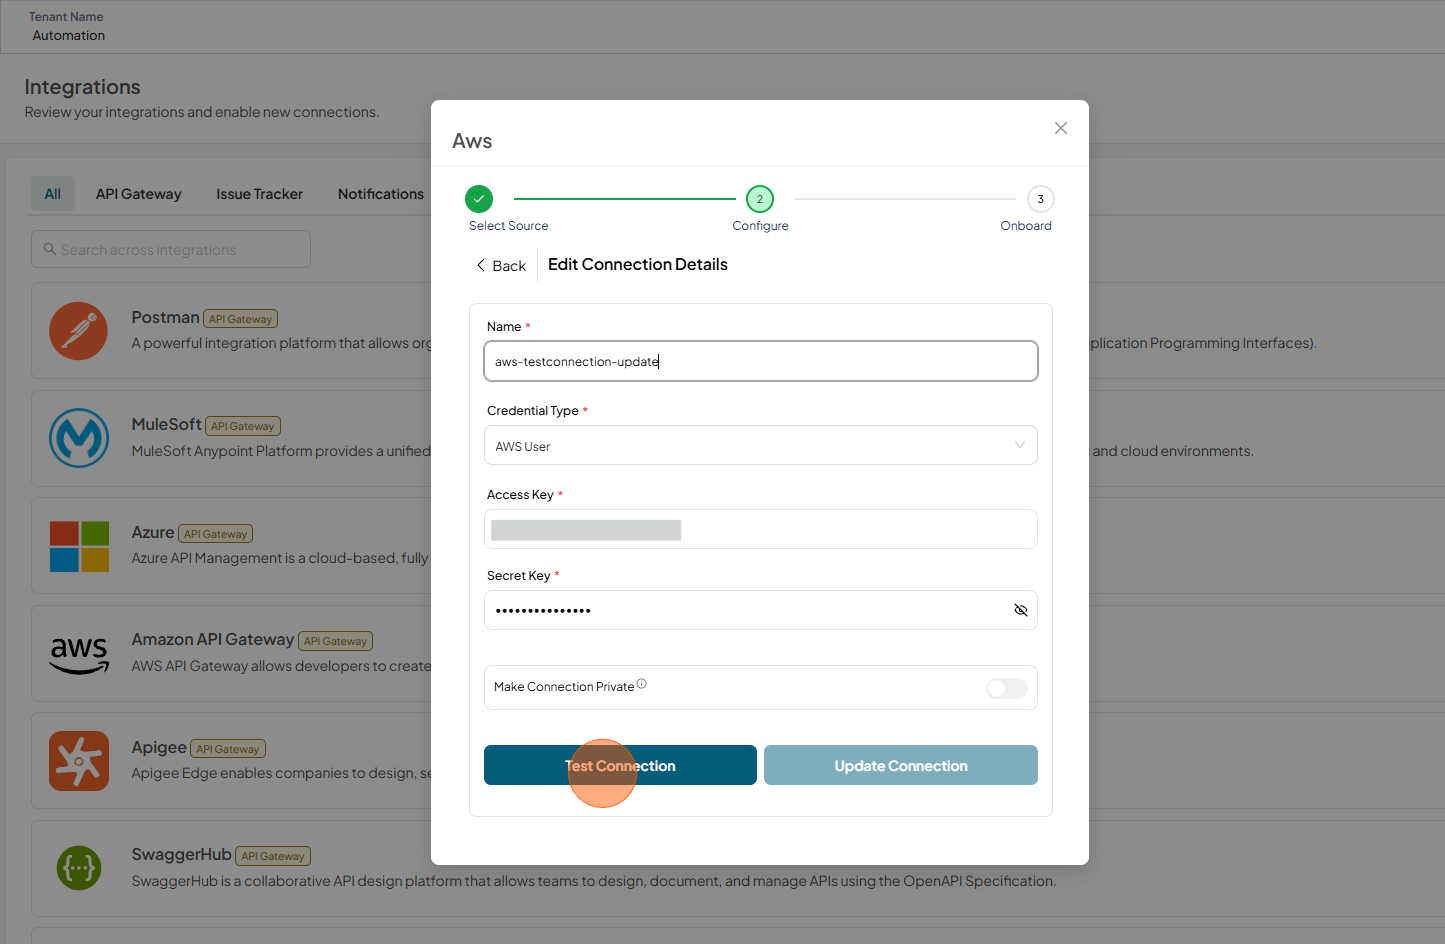
-
Once Test connection successfull then Click on Update Connection
-
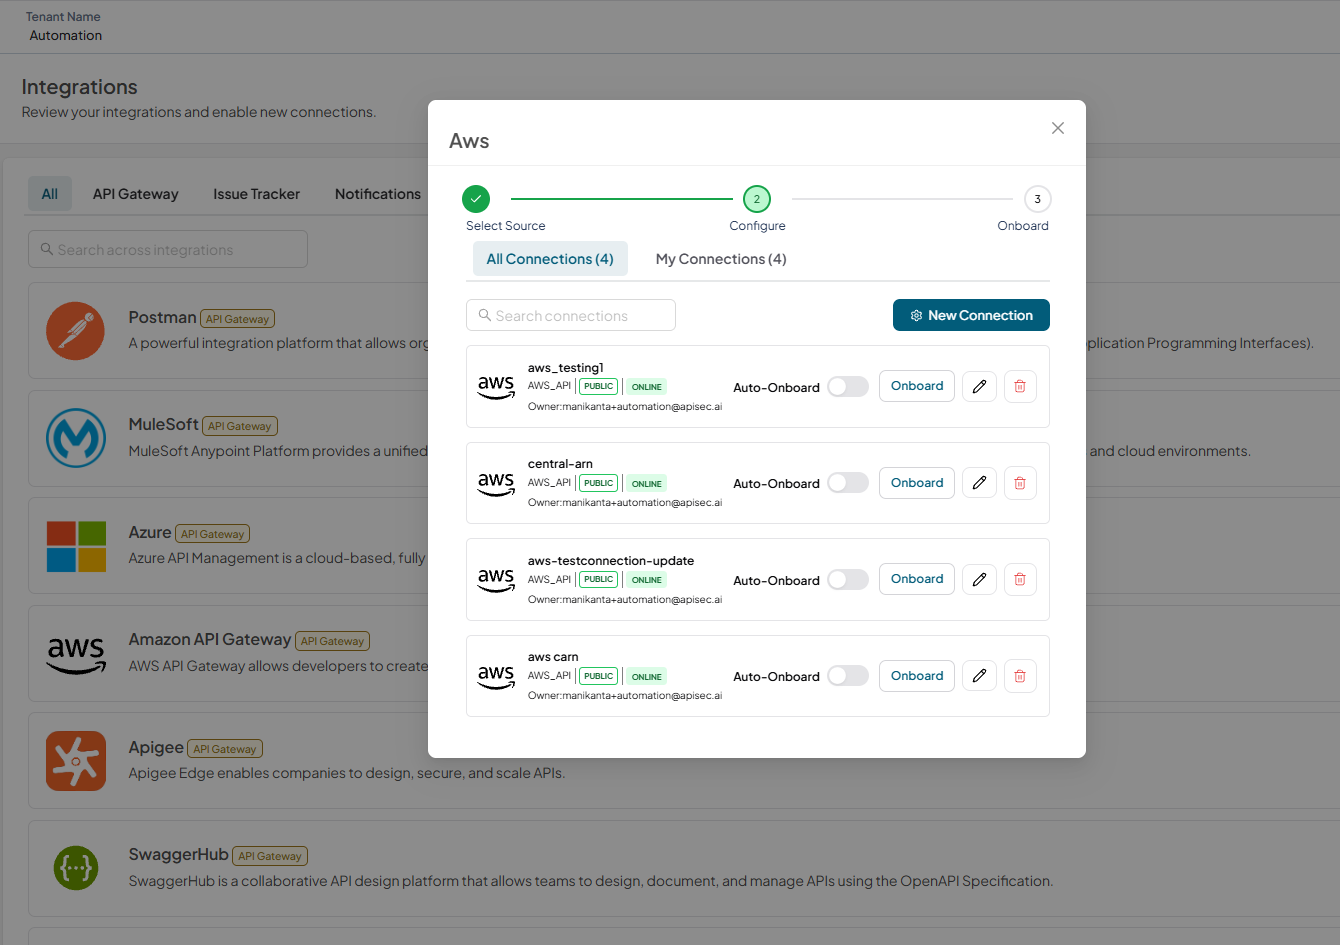
The updated connection is now displayed in the connections list.
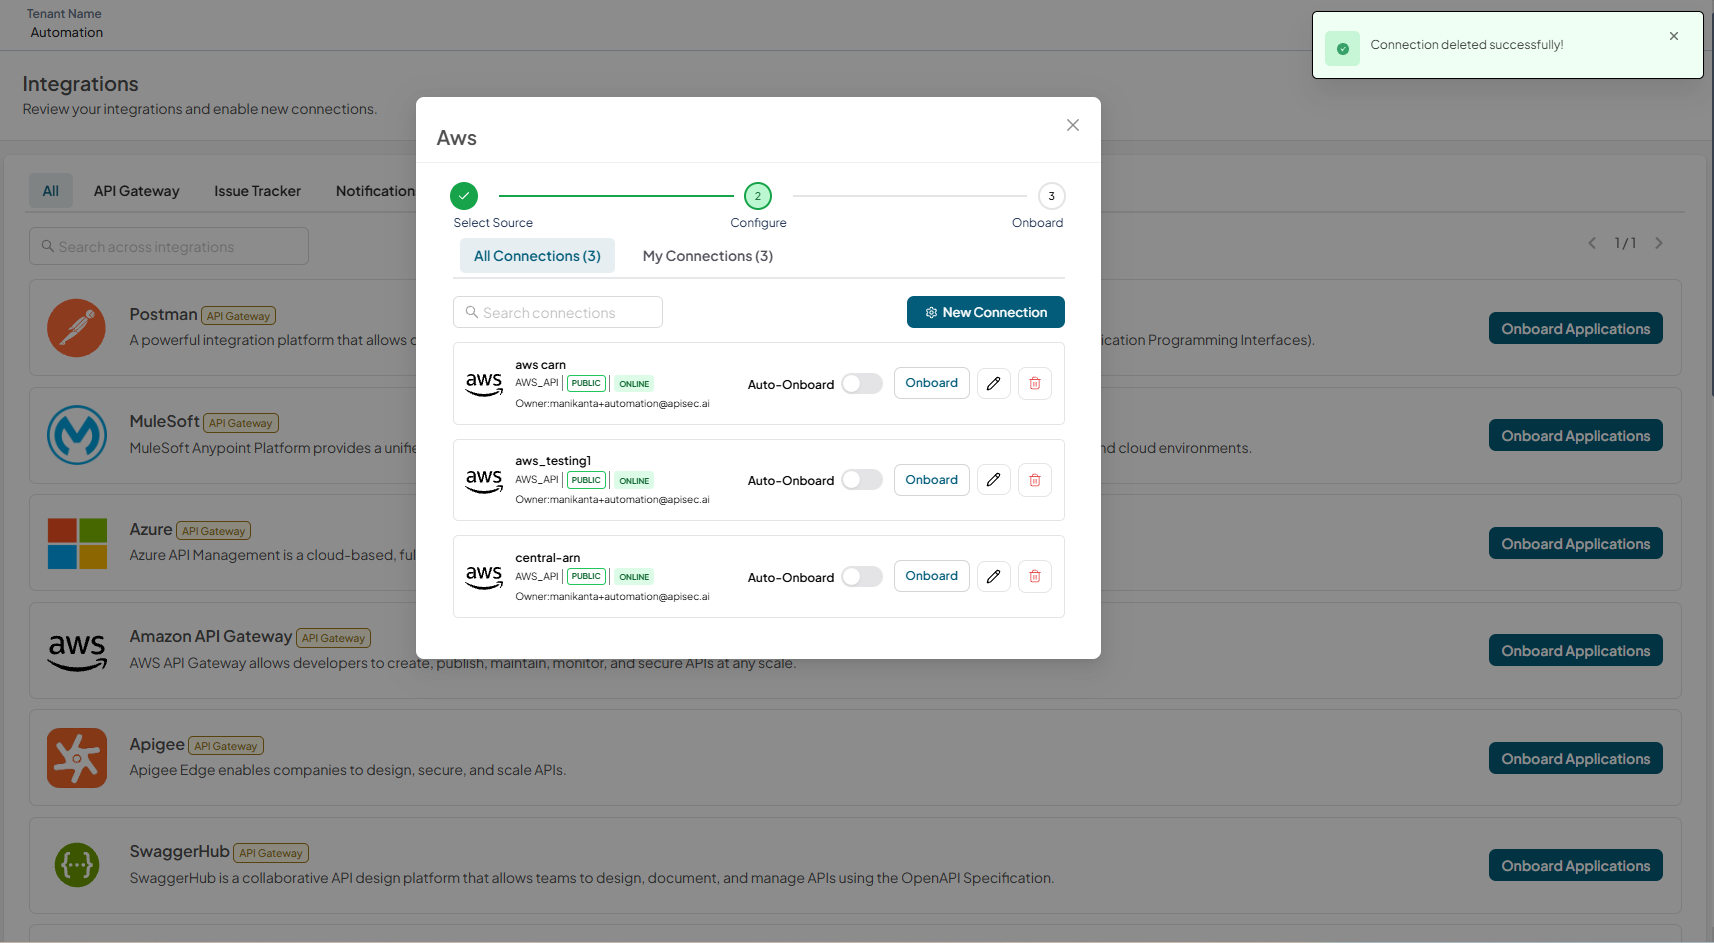
Delete AWS Connection
-
Open your browser and visit: https://<your-tenant>.apisecapps.com
-
Click Integrations tab
-
Click Onboard Applications adjacent to the Amazon API Gateway
-
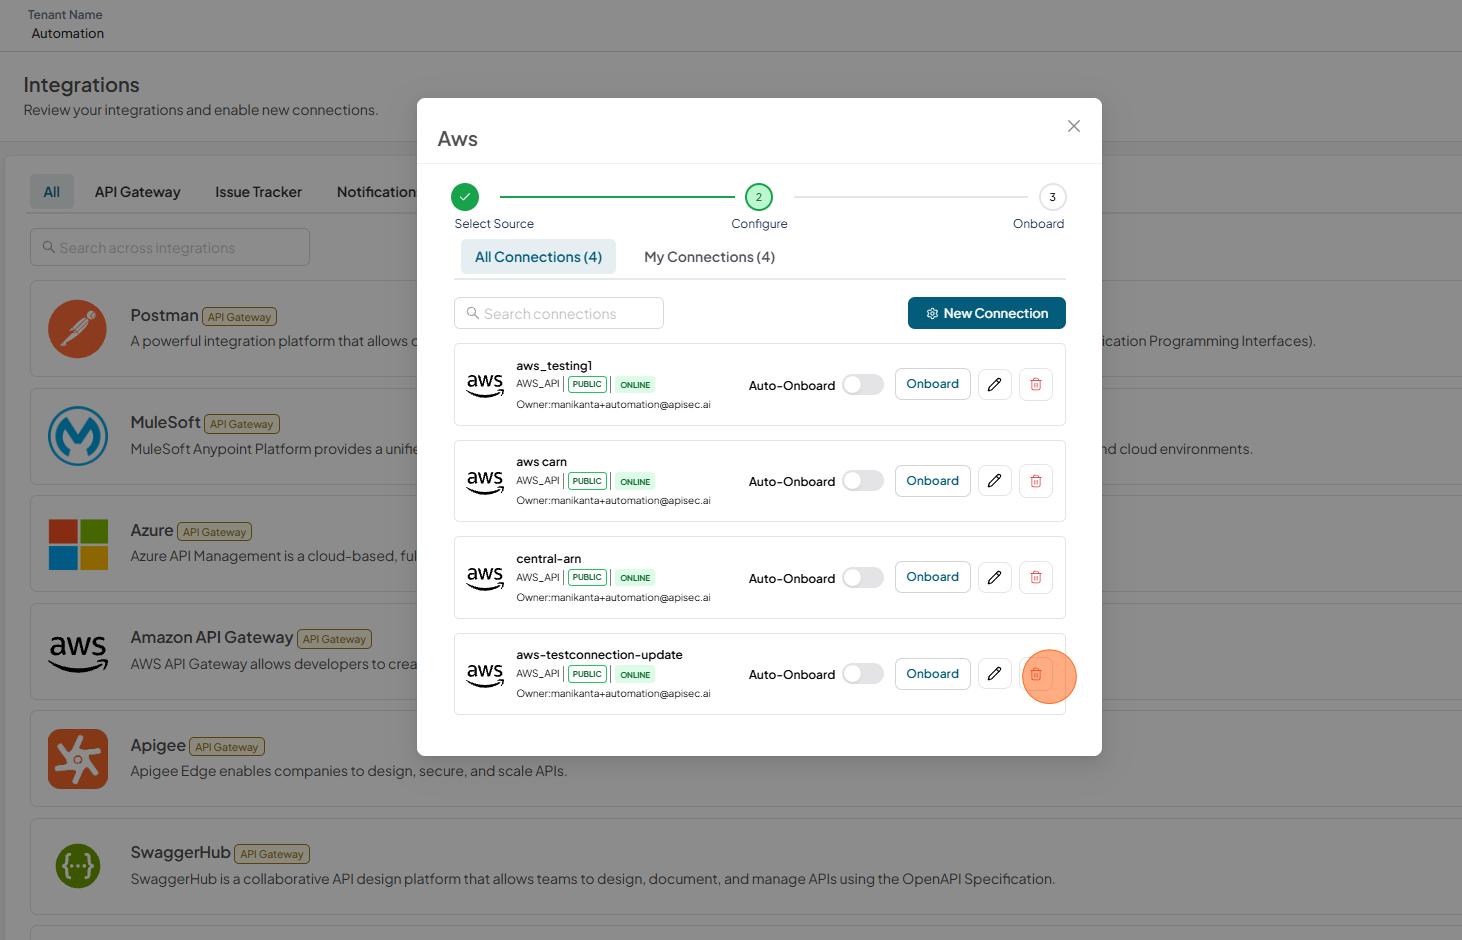
A list of existing Azure connections is displayed.
-
Select the Delete icon next to the connection you want to delete.
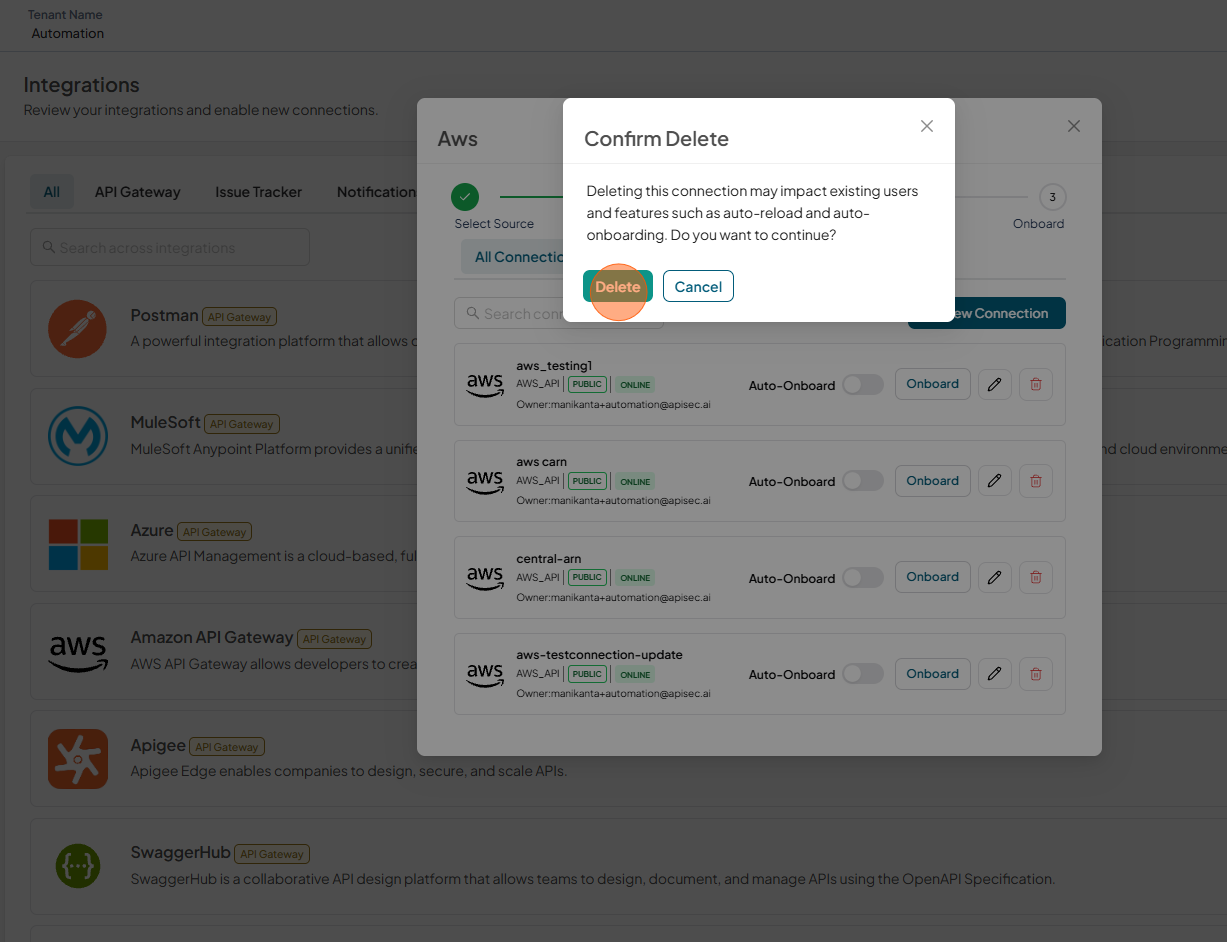
-
Click Delete to confirm
-
The deleted connection is no longer displayed in the connections list.