How To Integrate Azure DevOps With APIsec Cloud
Prerequisites
-
The APIsec platform requires the Personal Access Token, Organization Name, Project, and optionally the Area Path to connect with Azure DevOps using the Personal Access Token method.
Personal Access Token
Follow the steps below to obtain Personal Access Token
-
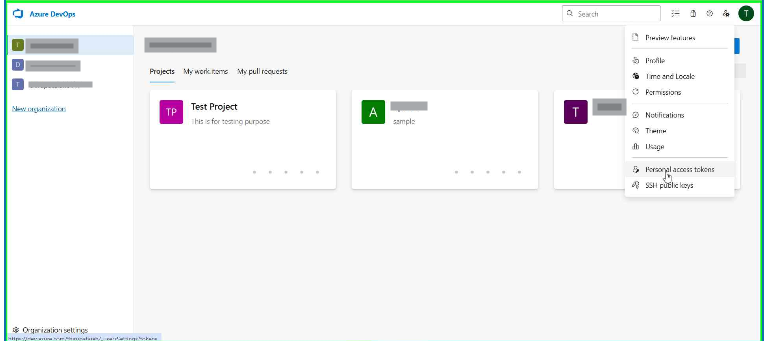
log in to Azure DevOps account
-
Click on User Setting and select Personal Access Token
-
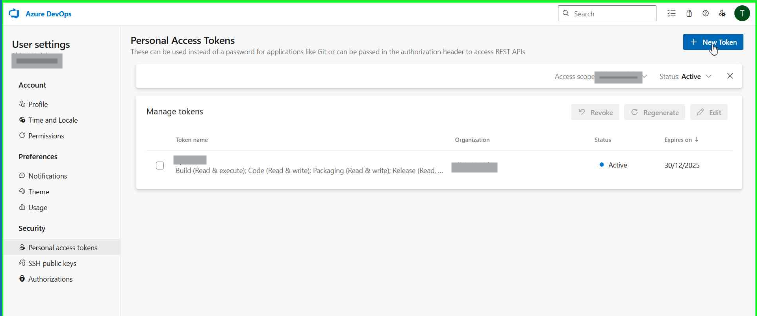
Click on New Token
-
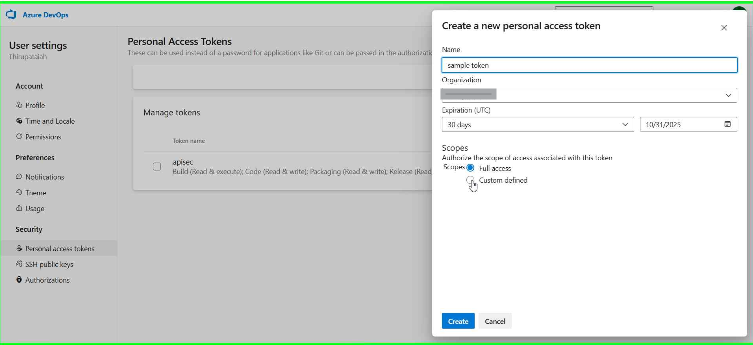
Enter token name and select scope
-
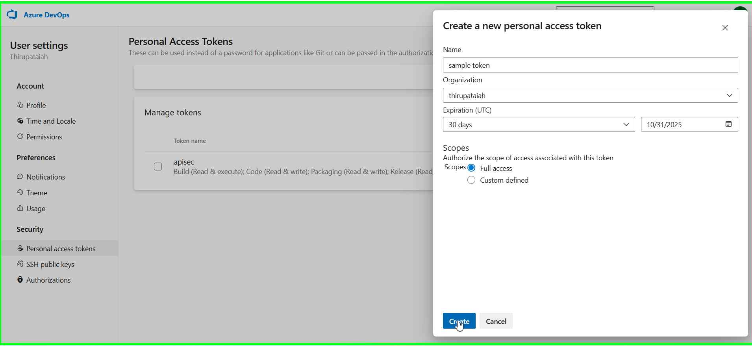
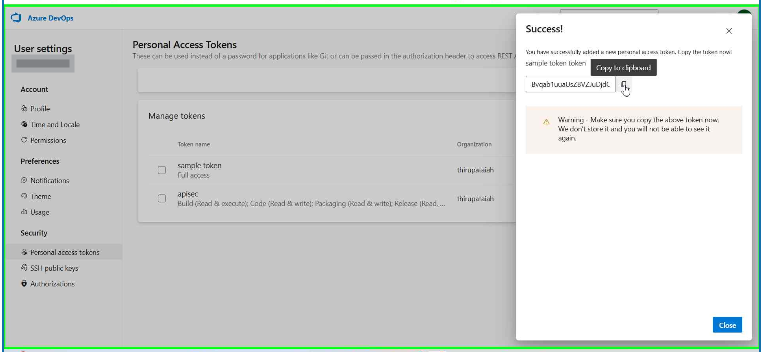
Click on Create and Copy the token
-
Organization Name: Copy Organization name from the dash board
-
Project: Copy Project from the dash board
-
Area Path (optional): It will be used by teams to determine what shows up on the team's backlog and what work items the team is responsible for.
-
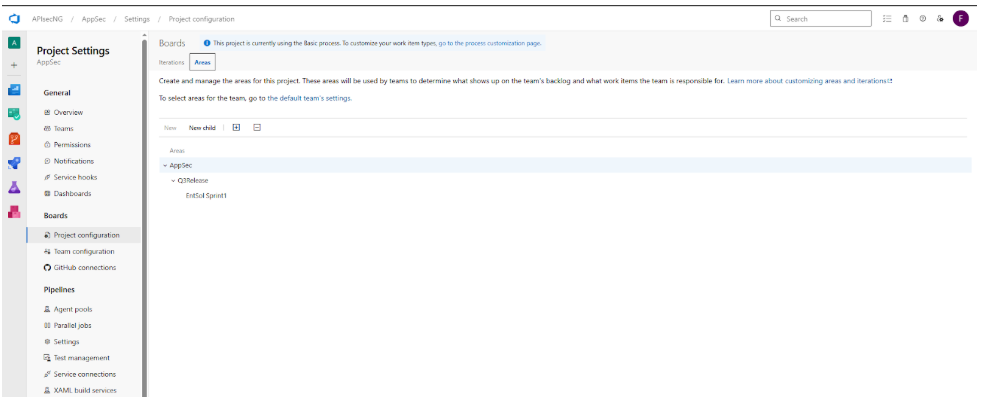
Follow the steps below to obtain Area path
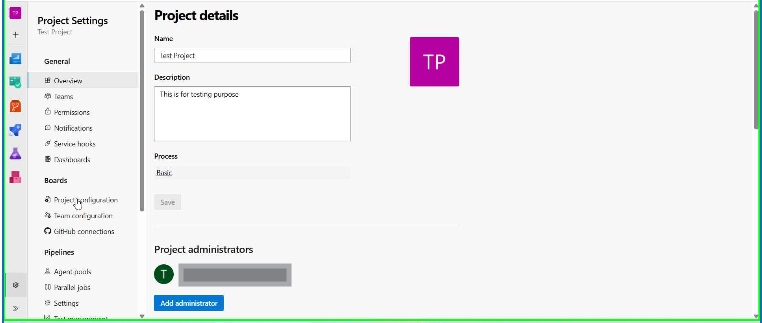
- Click on Project Settings
- Click on Project configuration
- Select Areas
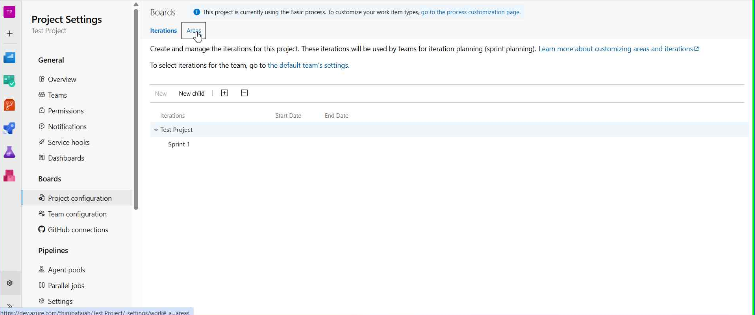
- Click on New Child,
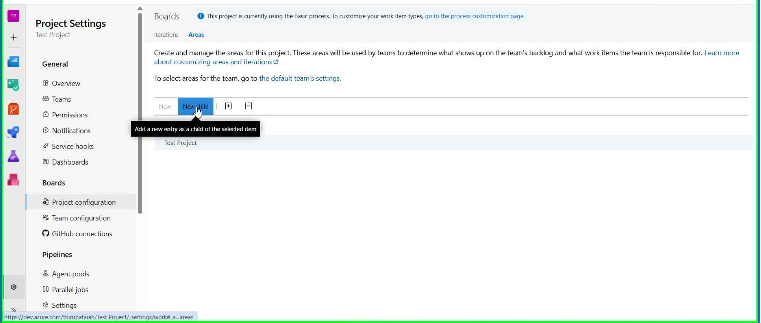
- Enter Area name and Click Save and close and copy the name

- Click on Project Settings
-
-
Service Principal
Follow the steps below to obtain Service Principal
-
1.Create a Service Principal
-
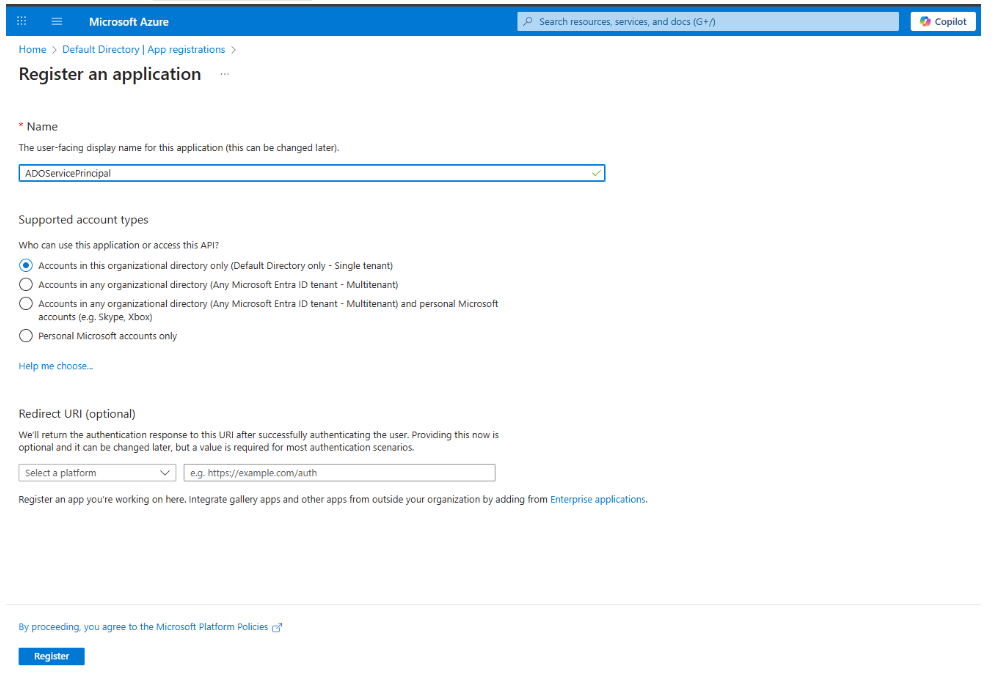
Go to the Azure Portal → Microsoft Entra ID → App registrations → New registration.
-
Enter a name (e.g., ADOServicePrincipal).
-
Select “Accounts in this organizational directory only”.
-
Set the Redirect URI (optional for service principals).
-
Click Register.
-
-
2.Retrieve Tenant ID and Client ID
- After registering the application:
- Go to the Overview page of your registered app.
- Copy the following values:
- Application (client) ID → This is your CLIENT_ID.
- Directory (tenant) ID → This is your TENANT_ID.
- Save both securely — you will need them to configure the connection in APIsec.

-
3.Generate a Client Secret
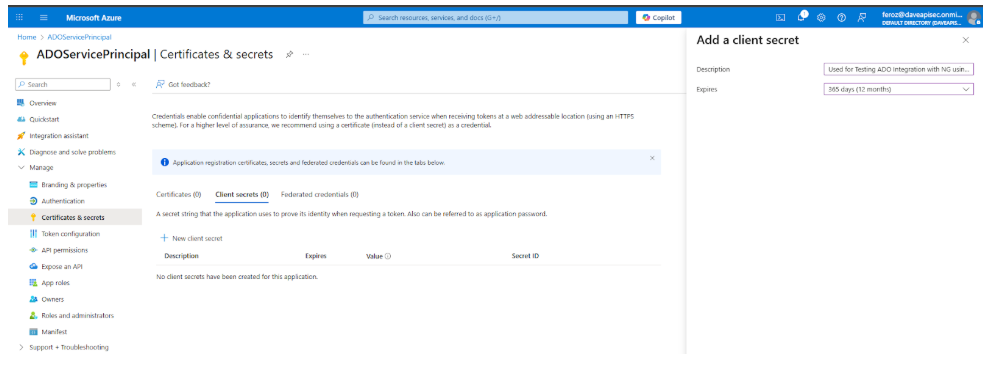
- Open your newly created app.
- Navigate to Certificates & secrets → New client secret.
- Add a description and set an expiration (e.g., 6 or 12 months).
- Copy and securely store the generated value — this is your CLIENT_SECRET.
-
4.Add Microsoft Graph Permission
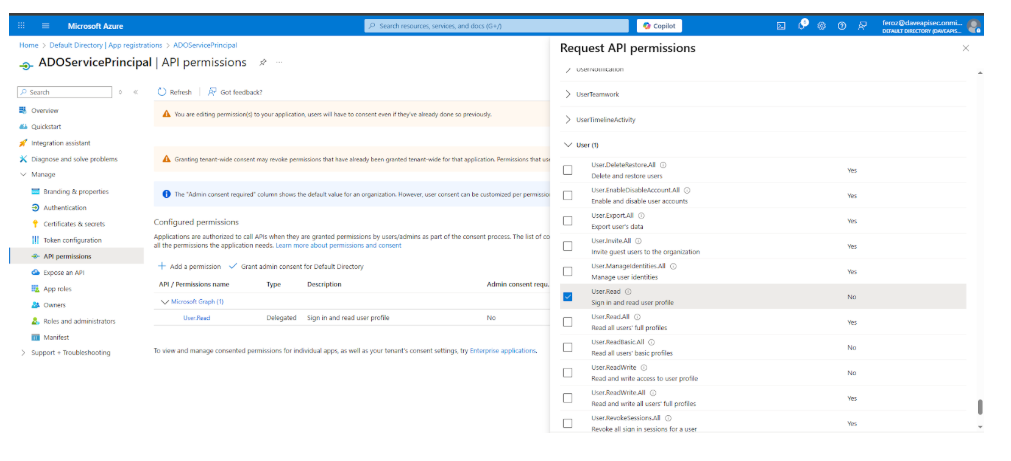
- Navigate to API Permissions → Add a permission → Microsoft Graph → Delegated permissions.
- Select User.Read.
- Click Add Permissions
- Click Grant admin consent for Default Directory.
-
5.Create a Project and Define Area Path
- In ADO, create a new Project (if not already available) under Organization Settings → Projects → New Project.
- Under the project, go to Boards → Project Configuration → Areas and Iterations.
- Define an Area Path (used to categorize and track bugs created by APIsec).
Create an Azure DevOps Connection
-
Open your browser and visit: https://<your-tenant>.apisecapps.com
-
Click on "Integrations"
-
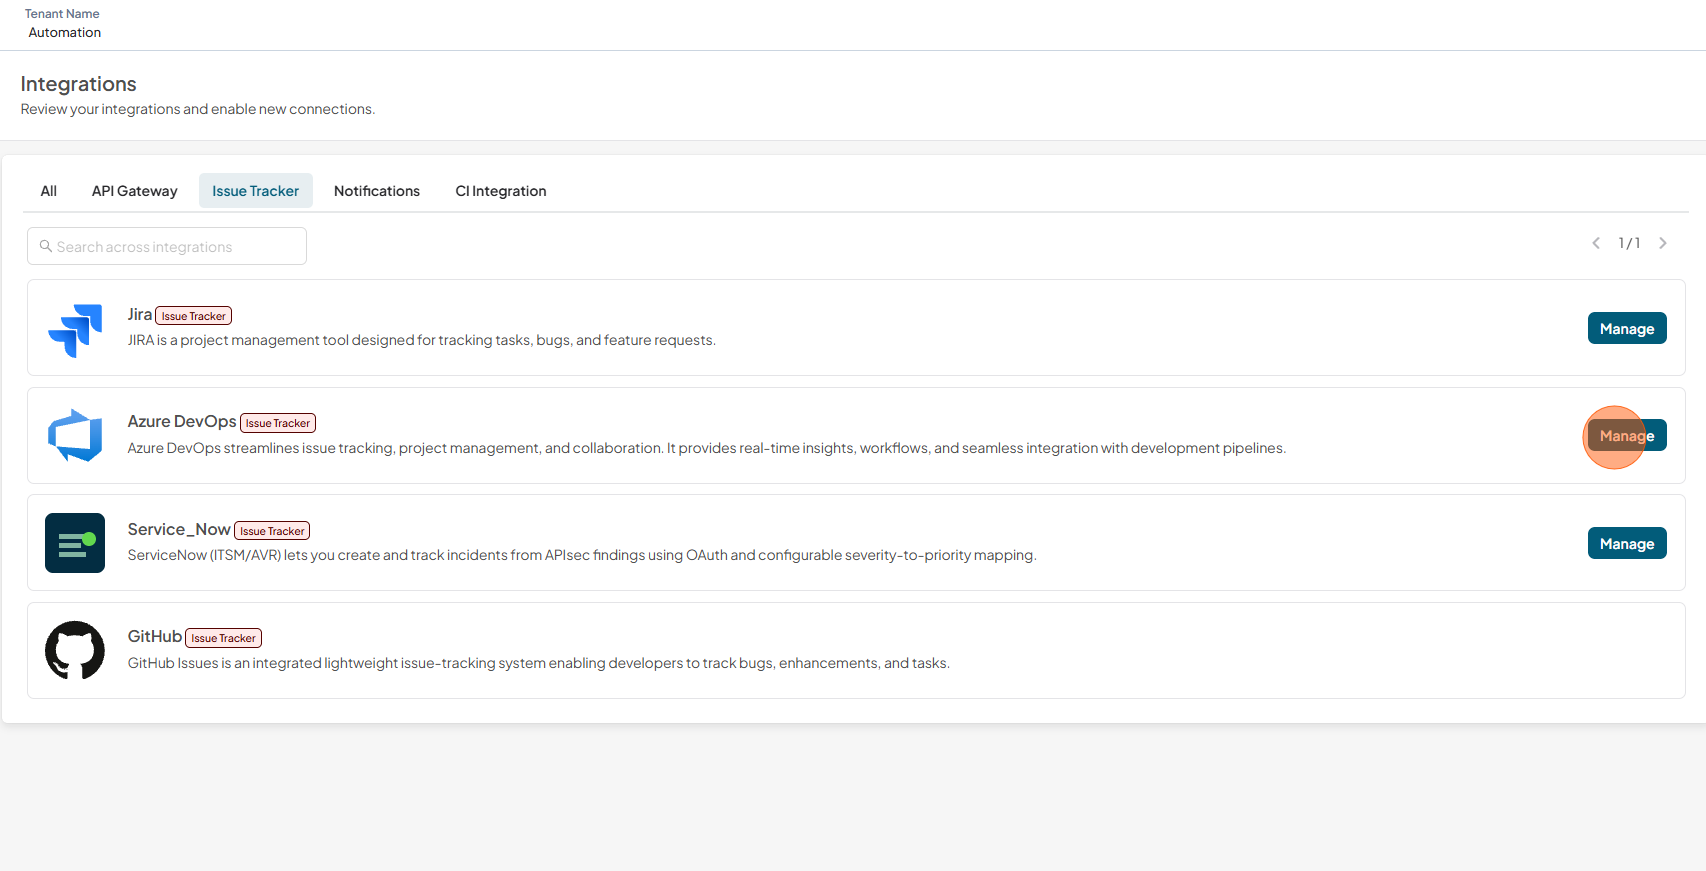
Click on "Issue Tracker" tab
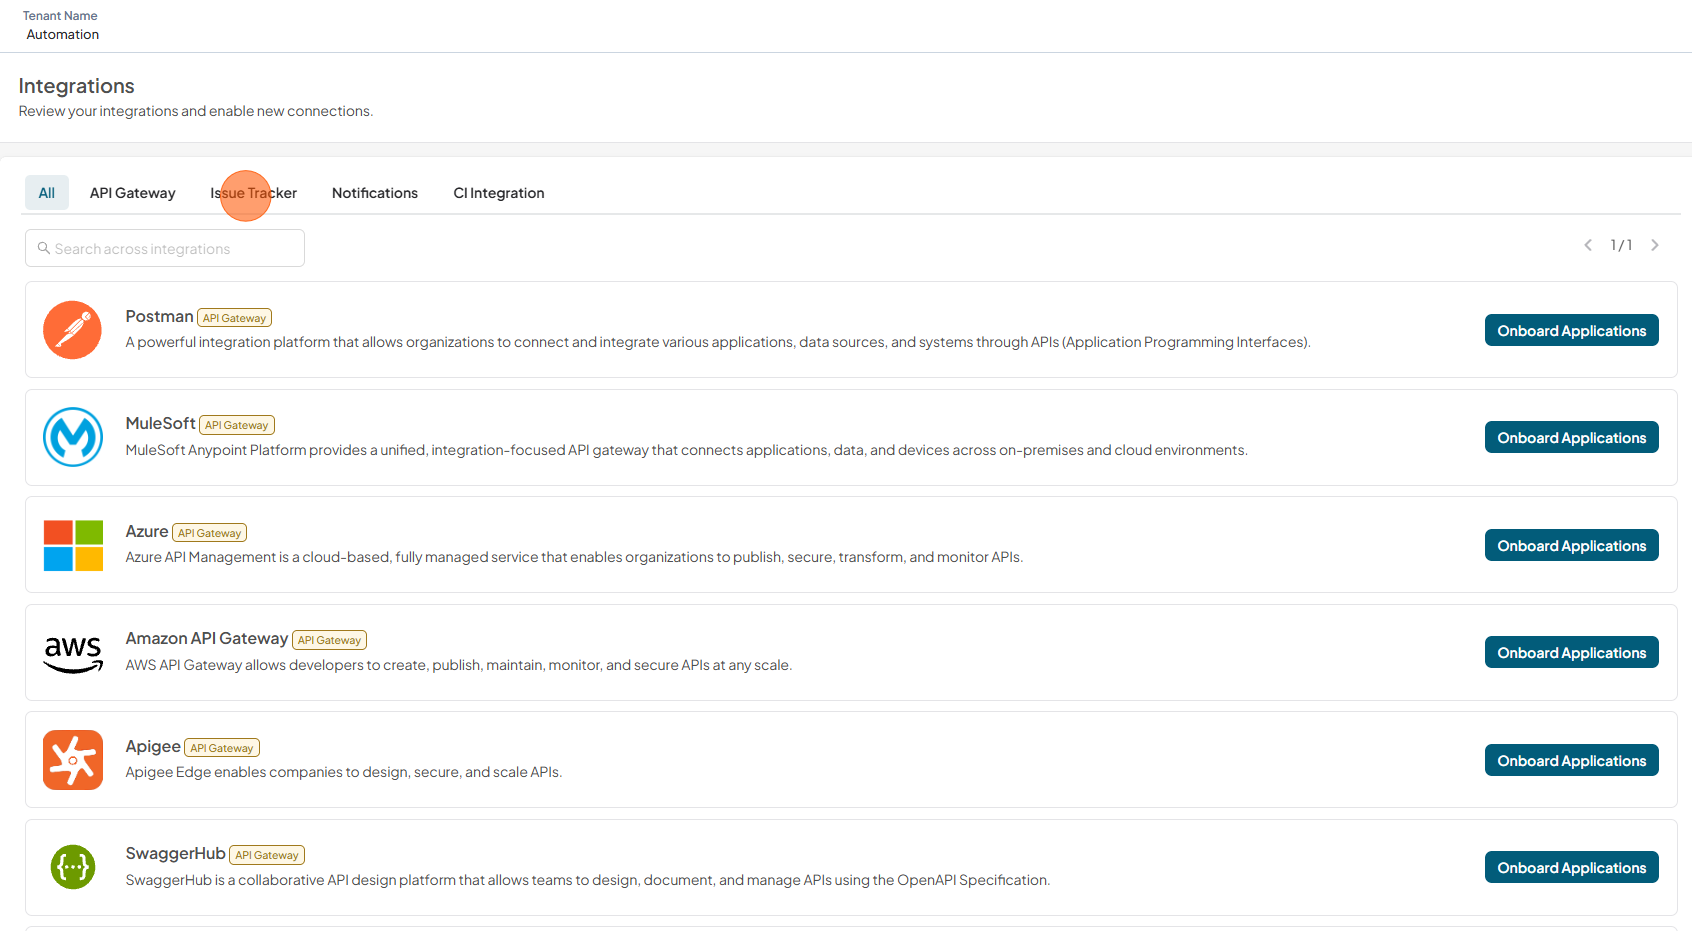
-
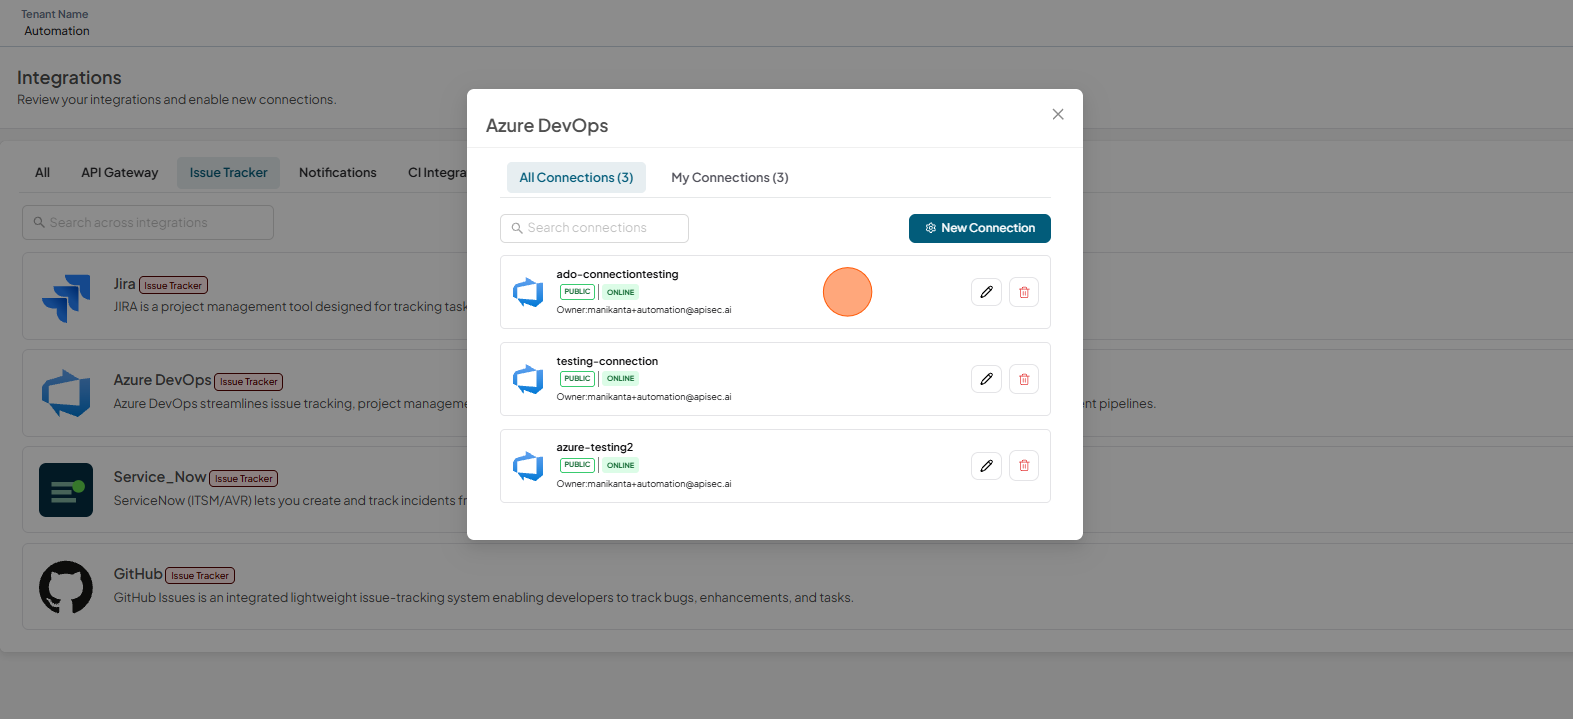
You will found the Azure DevOps Issue Tracker.
-
Click Manage
-
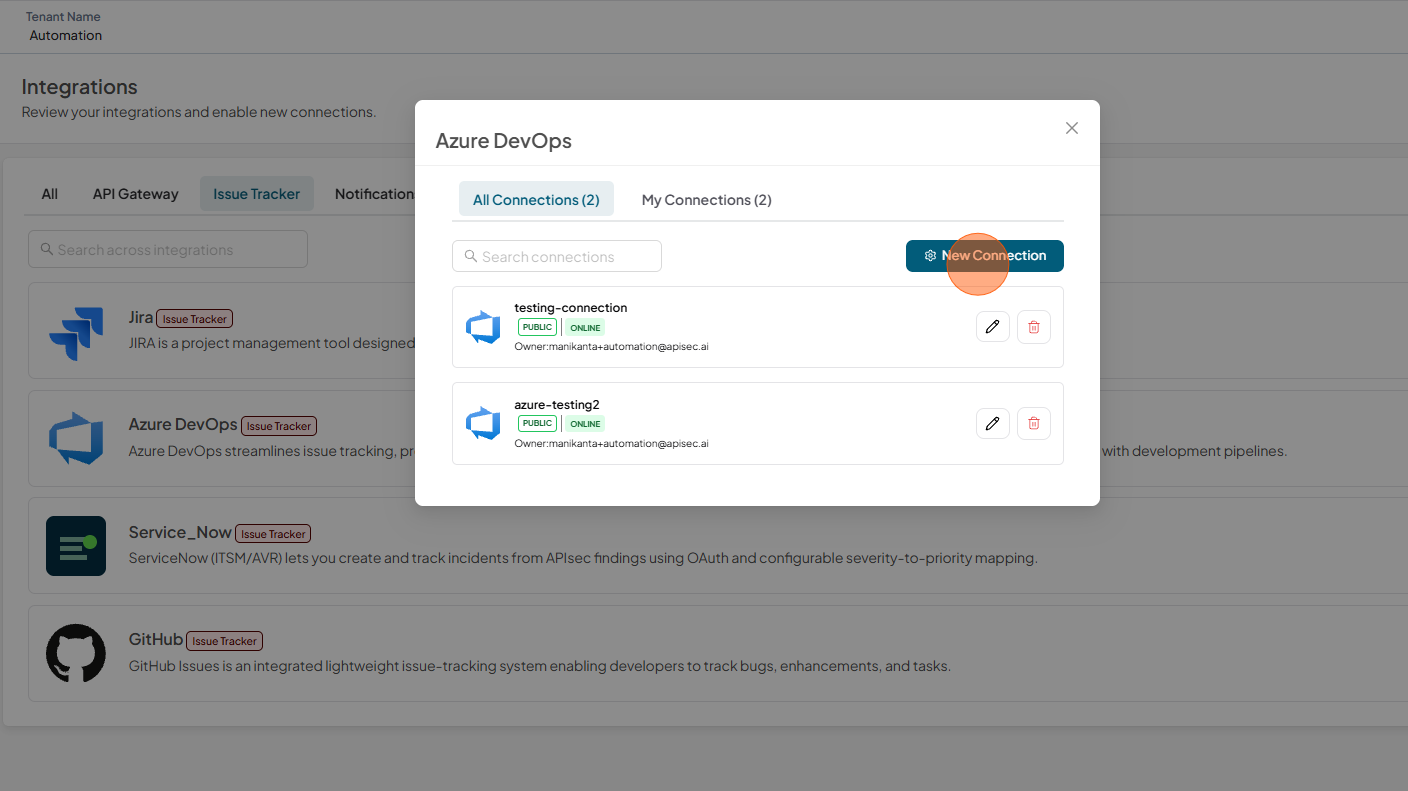
There are two scenarios here, first if already existing Azure DevOps Connections, then it will list item with New Connection
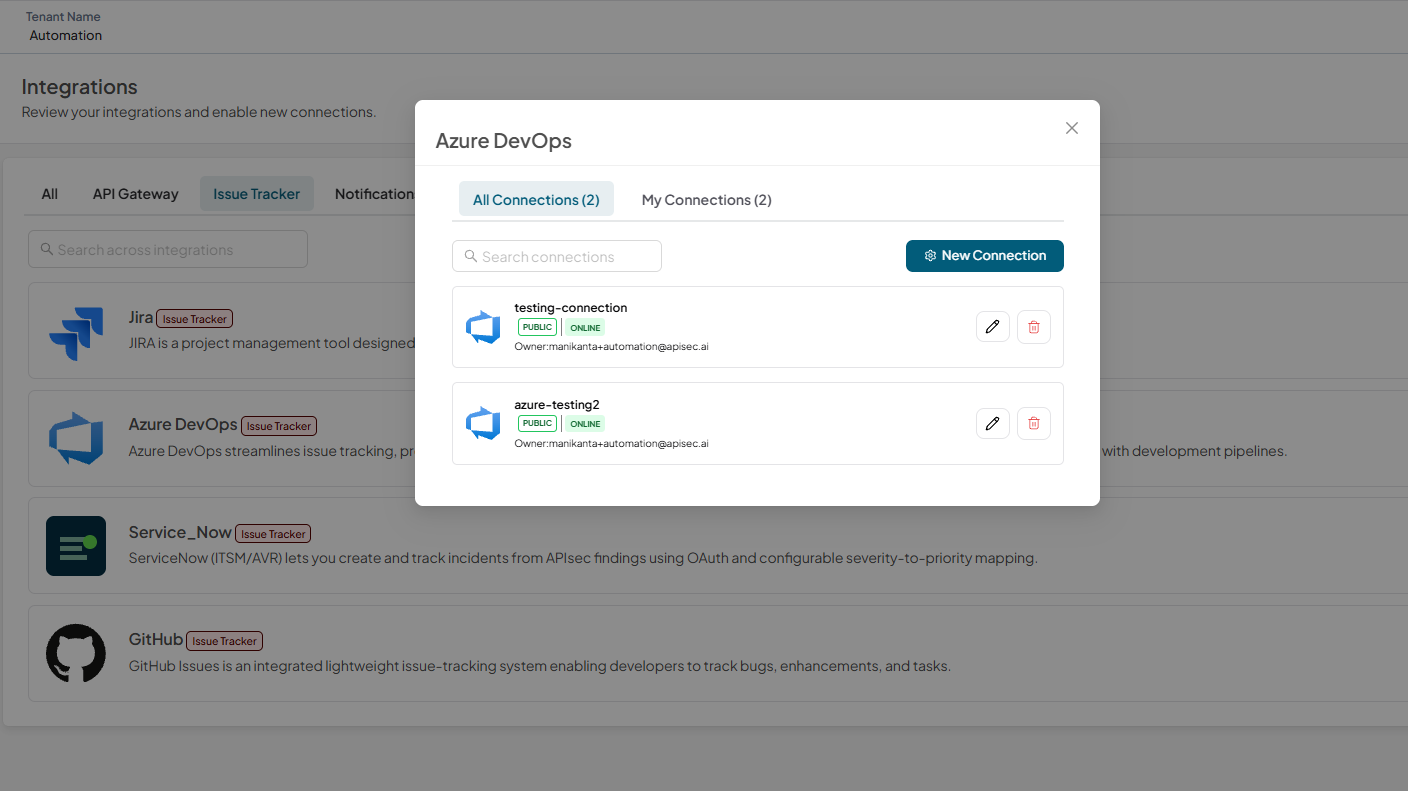
-
In this case you need to click New Connection. Or you will directly get the form for create Azure DevOps Connection.
-
The Azure DevOps connection form is displayed.
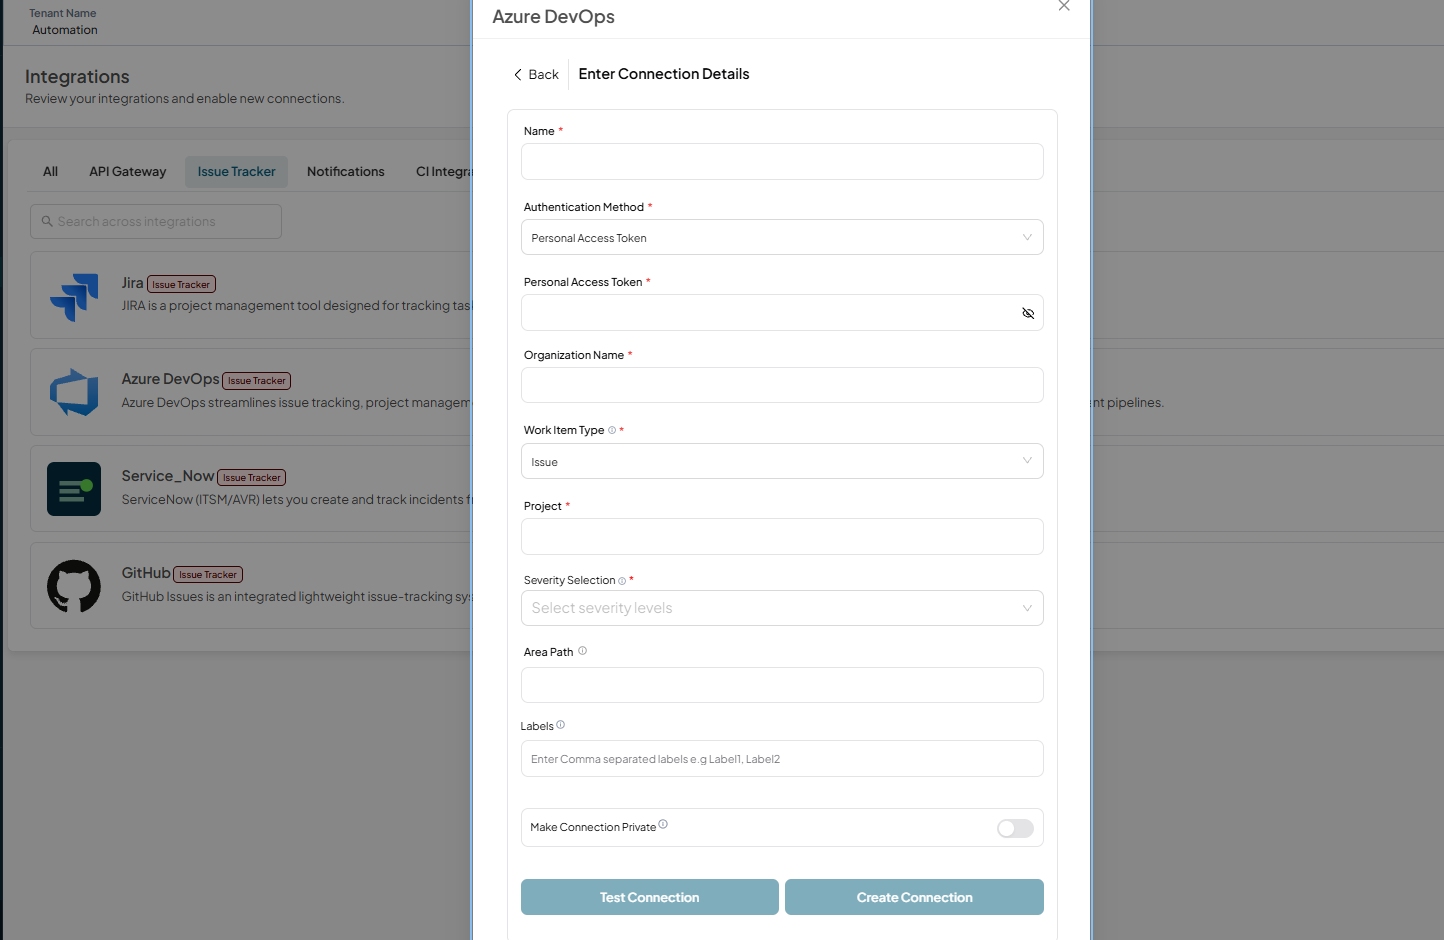
We provide two authentication methods for connecting your Azure DevOps account:
- Personal Access Token (PAT)
- Service Principal.
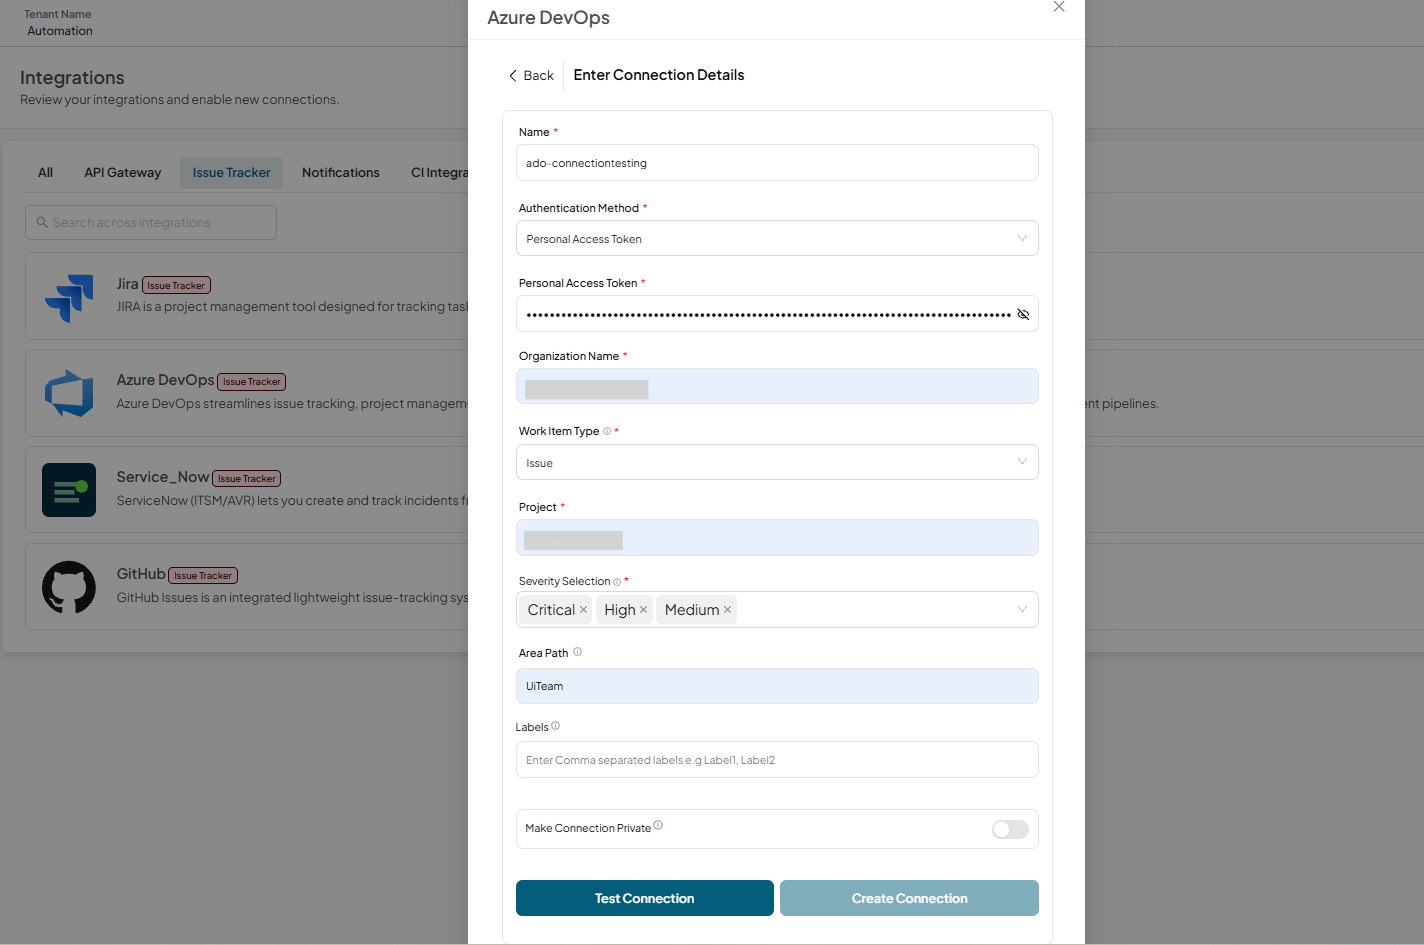
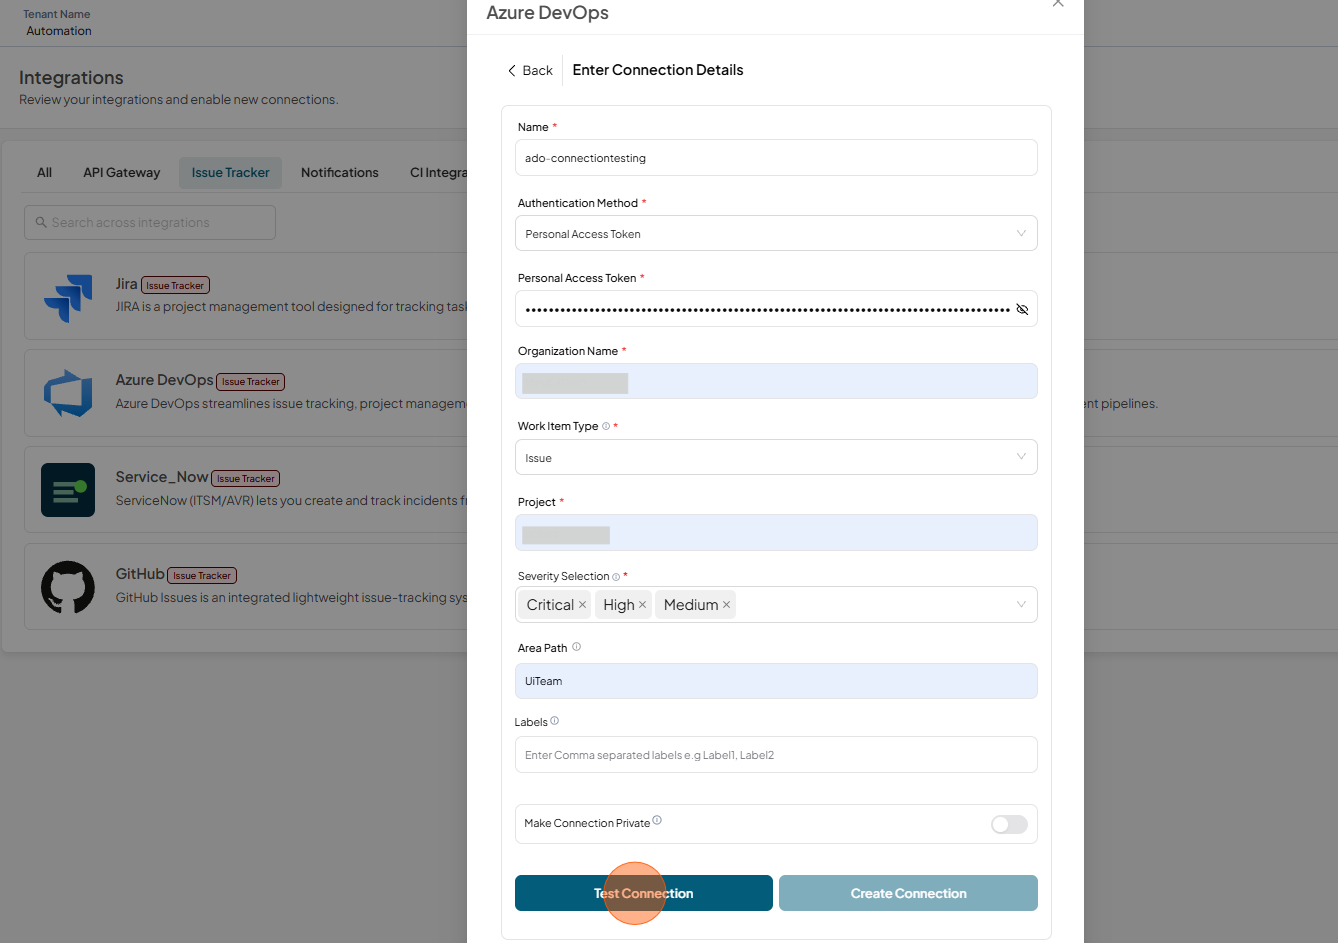
PAT is the default method shown when you create a new Azure DevOps issue tracker. Fill the form with all the required fields.
-
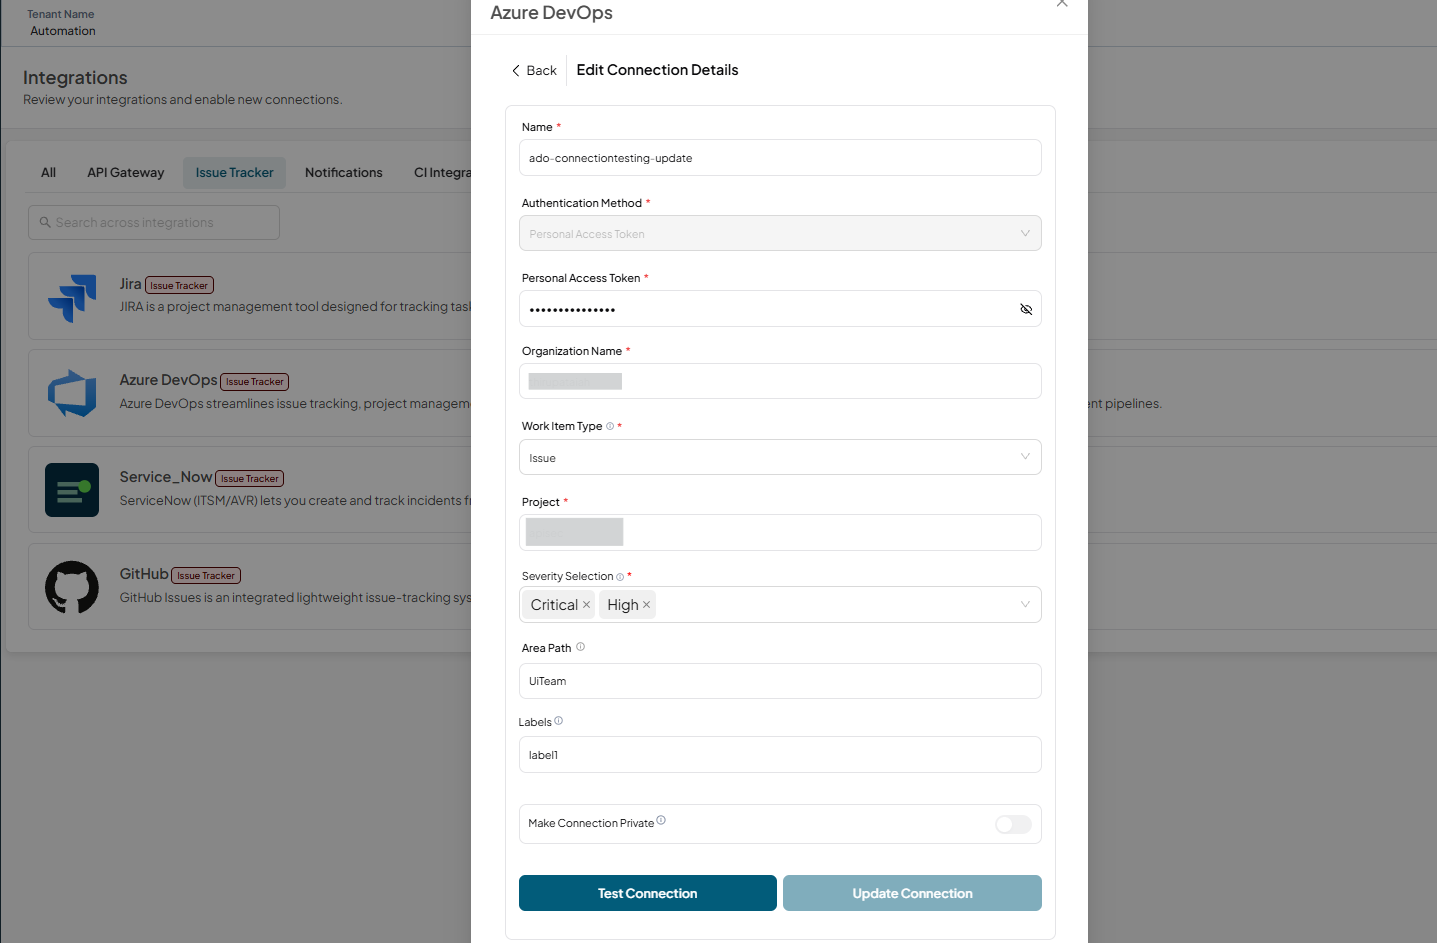
Name - Specify a unique name for the connection.
-
Authentication Method - Personal Access Token (PAT)
-
Personal Access Token - Personal Access Token (PAT) generated from your account
-
Organization Name - Enter the name of your organization as registered in your service
-
Work Item Type - Choose whether vulnerabilities create an Issue or a User Story in Azure DevOps.
-
Project - Enter target project within your organization
-
Severity Selection – A multi-select dropdown with options Critical, High, Medium, and Low. So, users can have control over which severity levels (Critical, High, Medium, Low) are synced to their issue tracker.
-
Area Path - Enter Area Path without the project name.
-
Labels – Enter single-word labels without spaces. For multiple labels, separate them with commas (,).
-
Make Connection Private - Toggle this switch to make the connection private
-
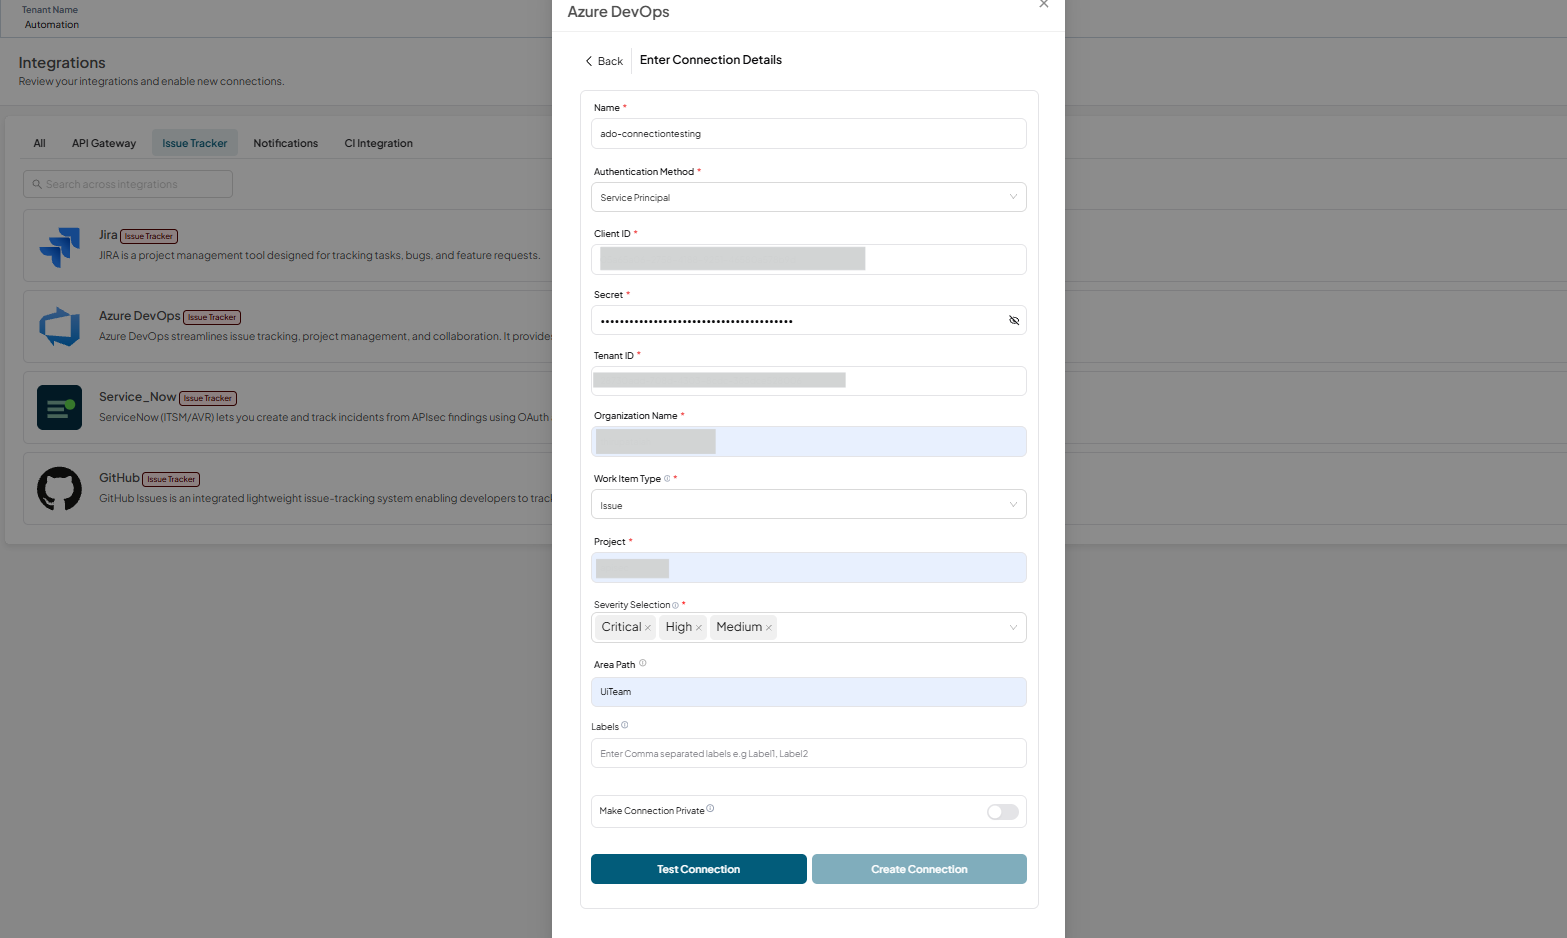
If you are using Service Principal to create a new Azure DevOps issue tracker then select Service Principal as the authentication method and fill the form with all the required fields.
-
Name - Specify a unique name for the connection.
-
Authentication Method - Service Principle
-
Client ID - Enter the Client ID
-
Secret - Enter the Client Secret associated with your Azure AD application.
-
Tenant ID - Provide the Tenant ID
-
Organization Name - Enter the name of your organization as registered in your service
-
Work Item Type - Choose whether vulnerabilities create an Issue or a User Story in Azure DevOps.
-
Project - Enter target project within your organization
-
Severity Selection – A multi-select dropdown with options Critical, High, Medium, and Low. So, users can have control over which severity levels (Critical, High, Medium, Low) are synced to their issue tracker.
-
Area Path - Enter Area Path without the project name.
-
Labels – Enter single-word labels without spaces. For multiple labels, separate them with commas (,).
-
Make Connection Private - Toggle this switch to make the connection private
-
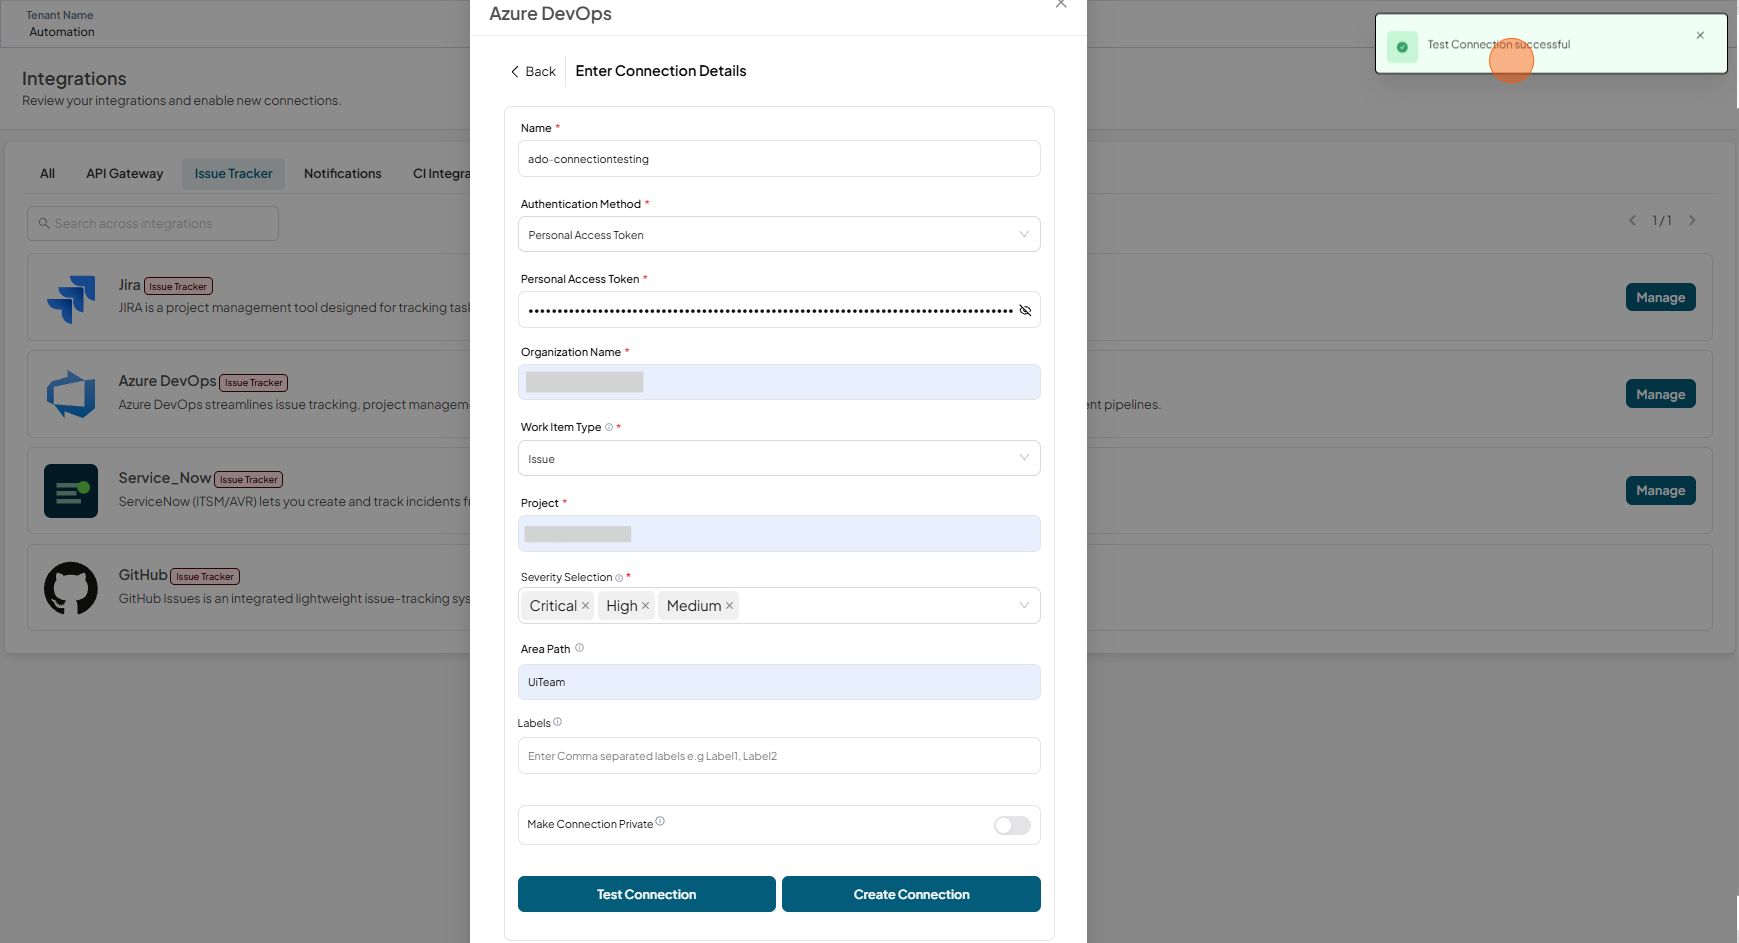
Click Test Connection
-
Test connection successful
-
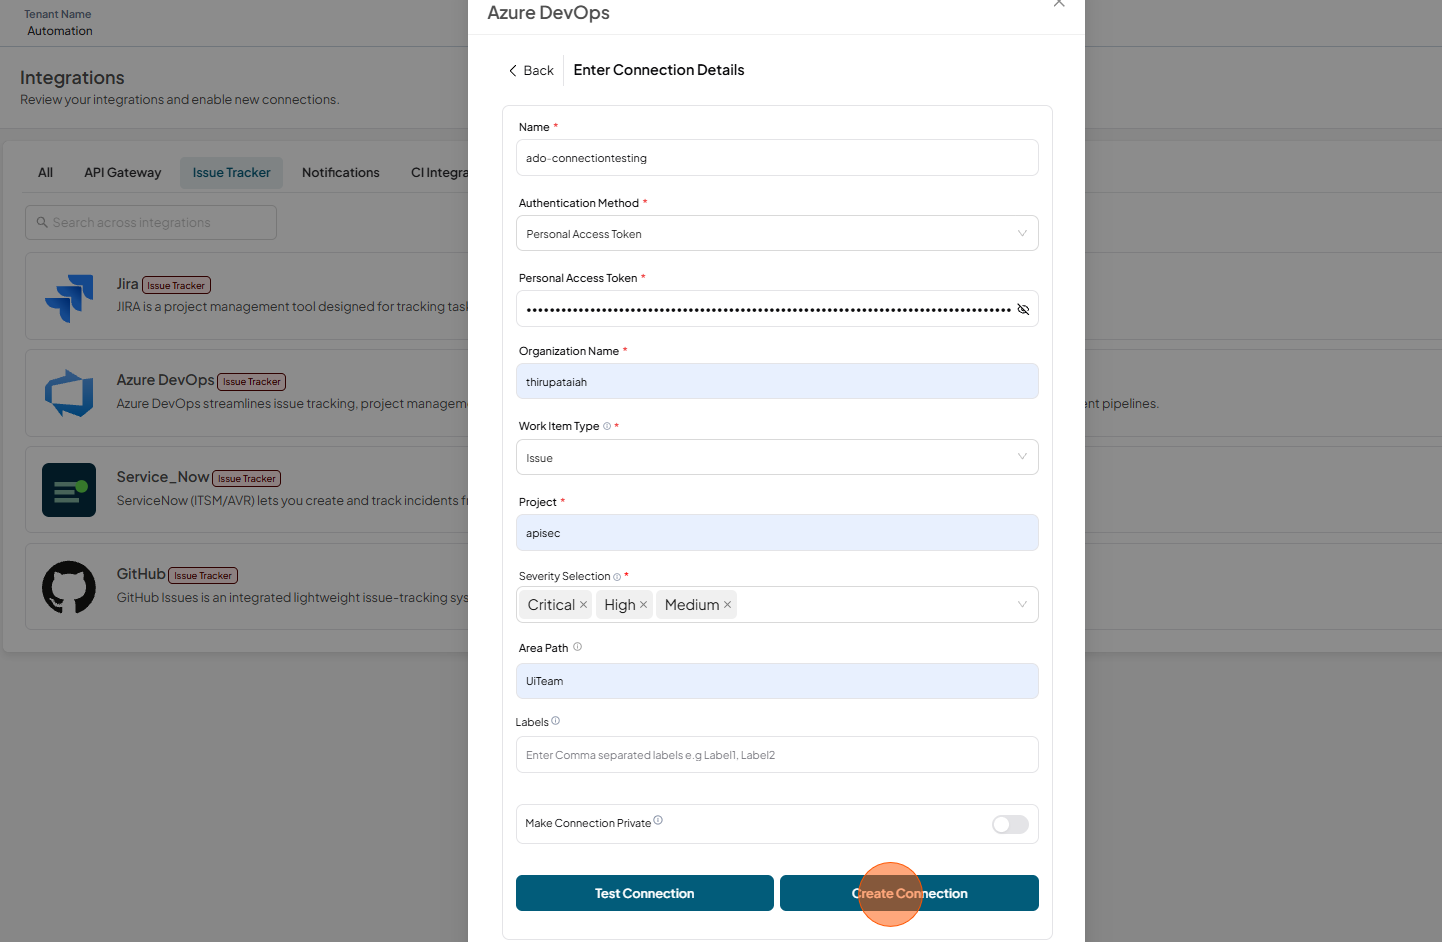
Now click Create Connection
-
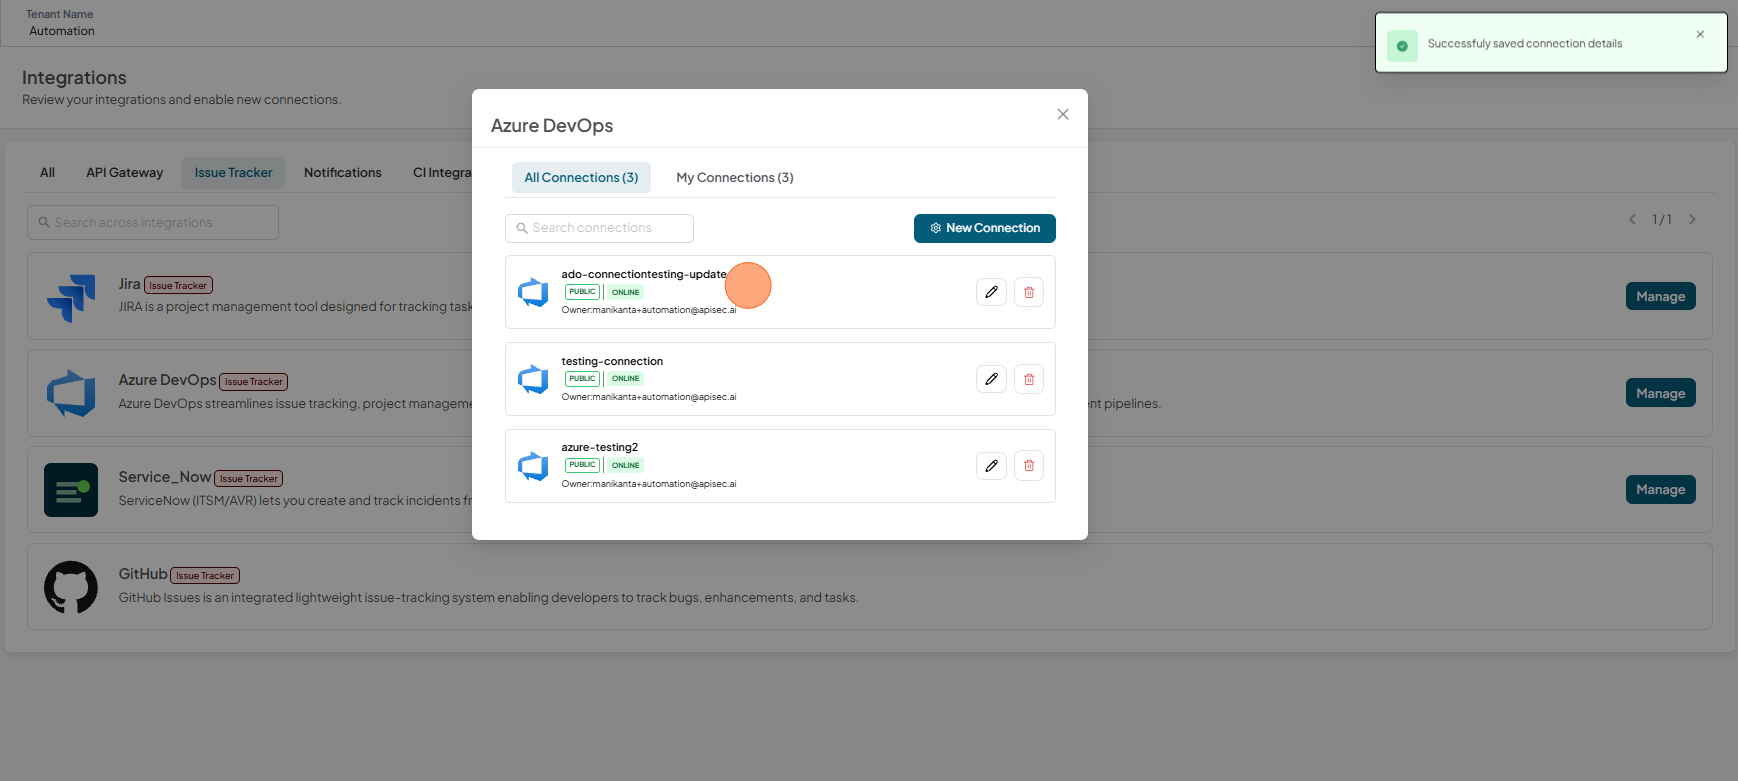
You can now view the created connection in the list below
-
Edit an Azure DevOps Connection
-
Open your browser and visit: https://<your-tenant>.apisecapps.com
-
Click on "Integrations"
-
Click on "Issue Tracker" tab
-
You will found the Azure DevOps Issue Tracker.
-
Click Manage
-
-
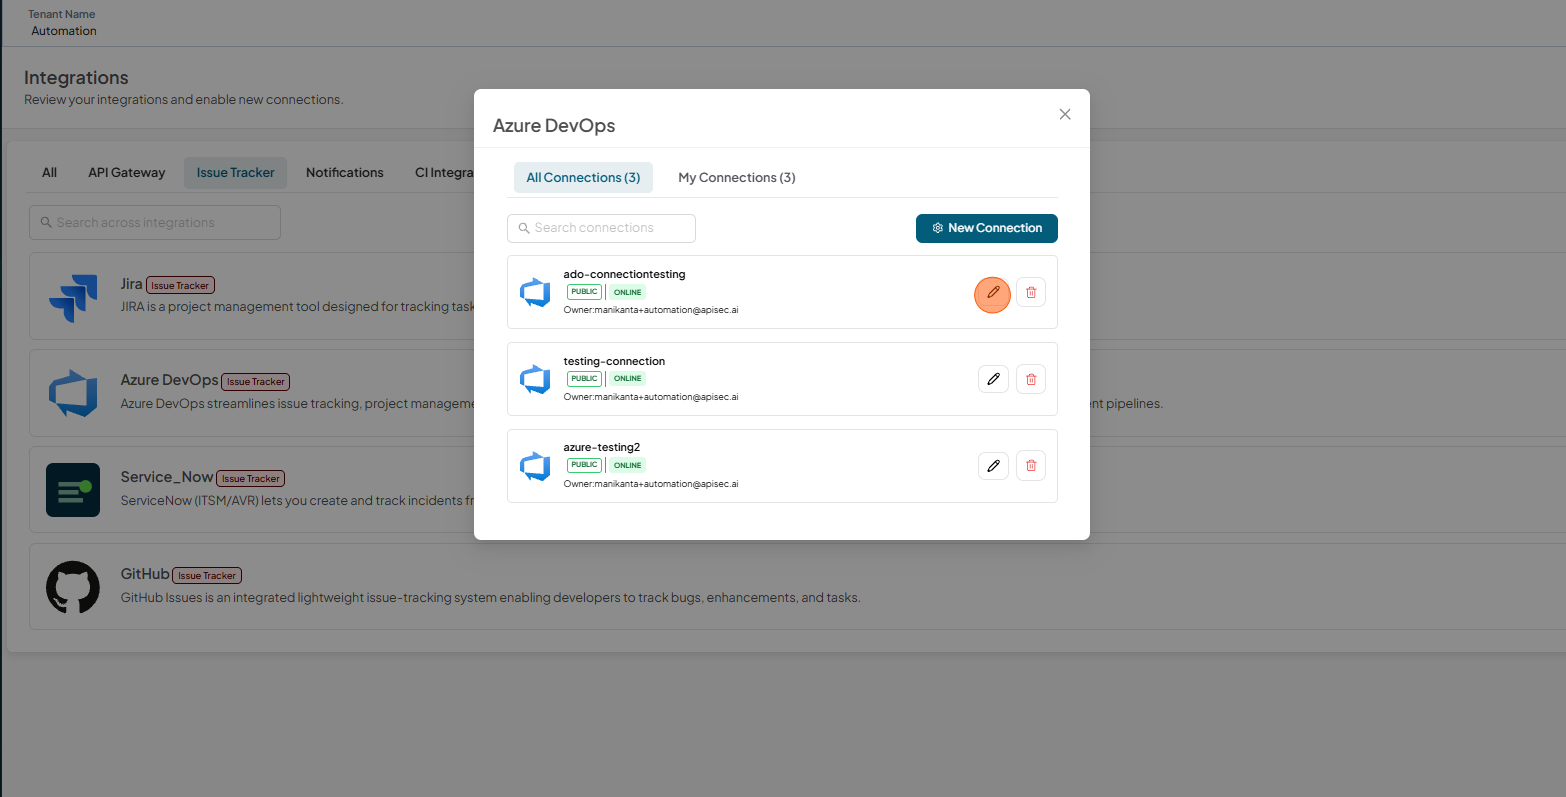
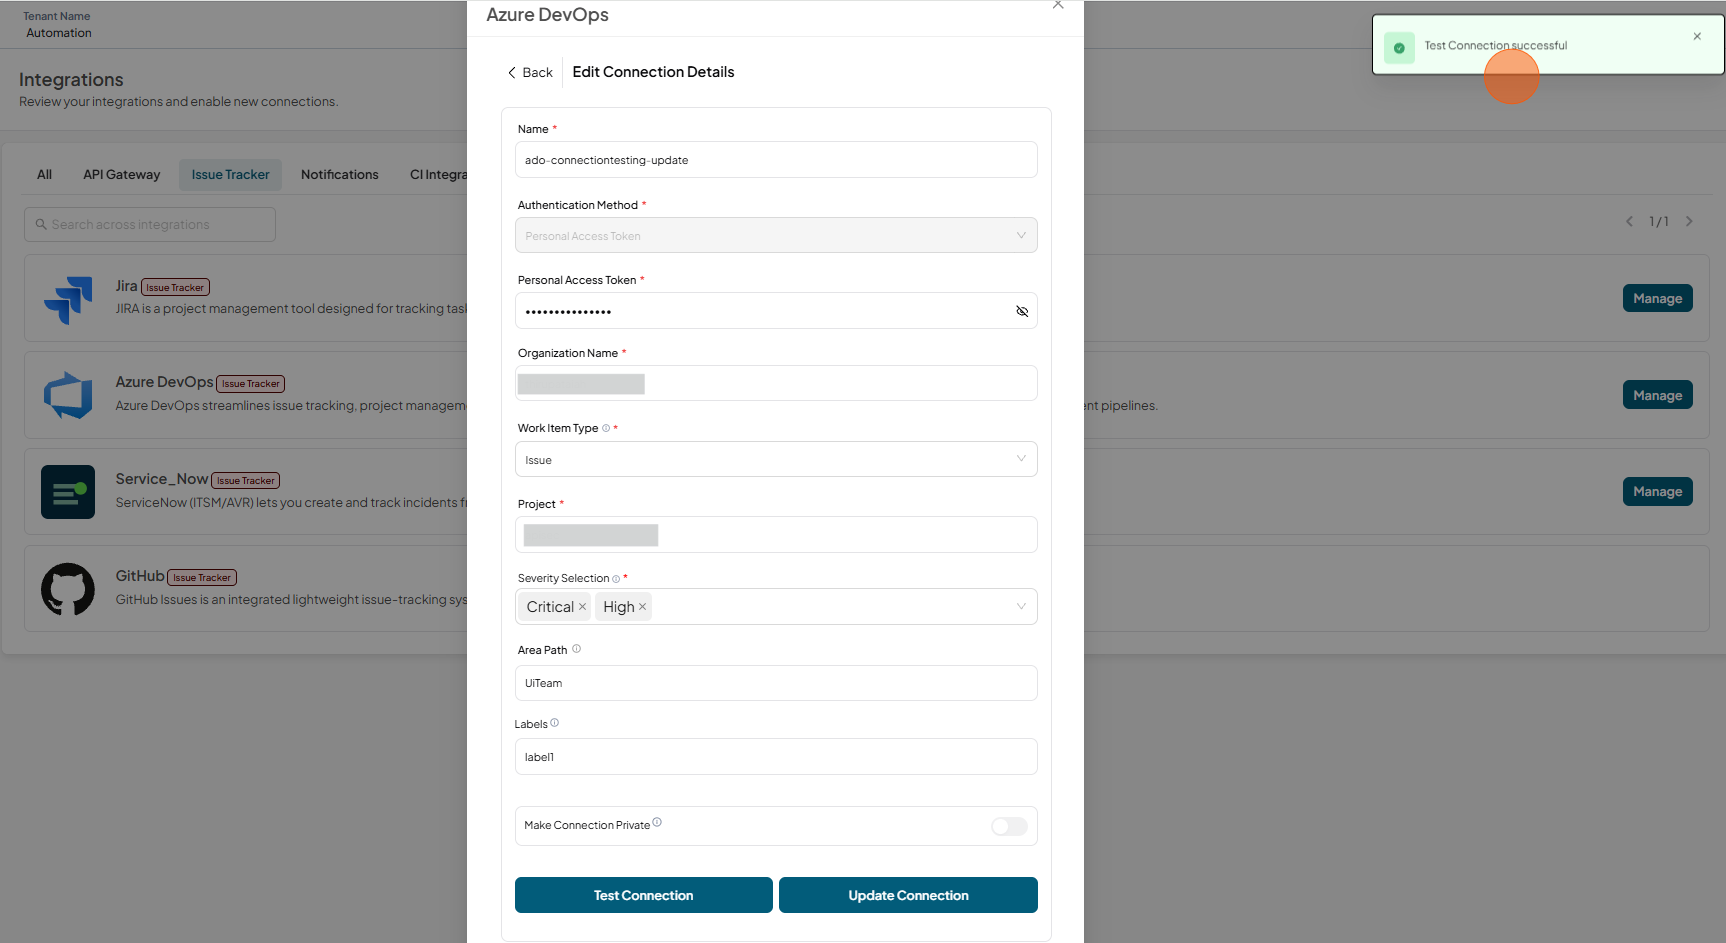
Click on "Pencil" for desired azuredevops connection to Edit.
-
Edit the connection details. Now you can also update severity filters for the existing connection (If they are not updated). Changes will apply for future scans and close the tickets automatically that doesn't match the severity to maintain consistency. However, the corresponding vulnerabilities will still exist in the platform.
-
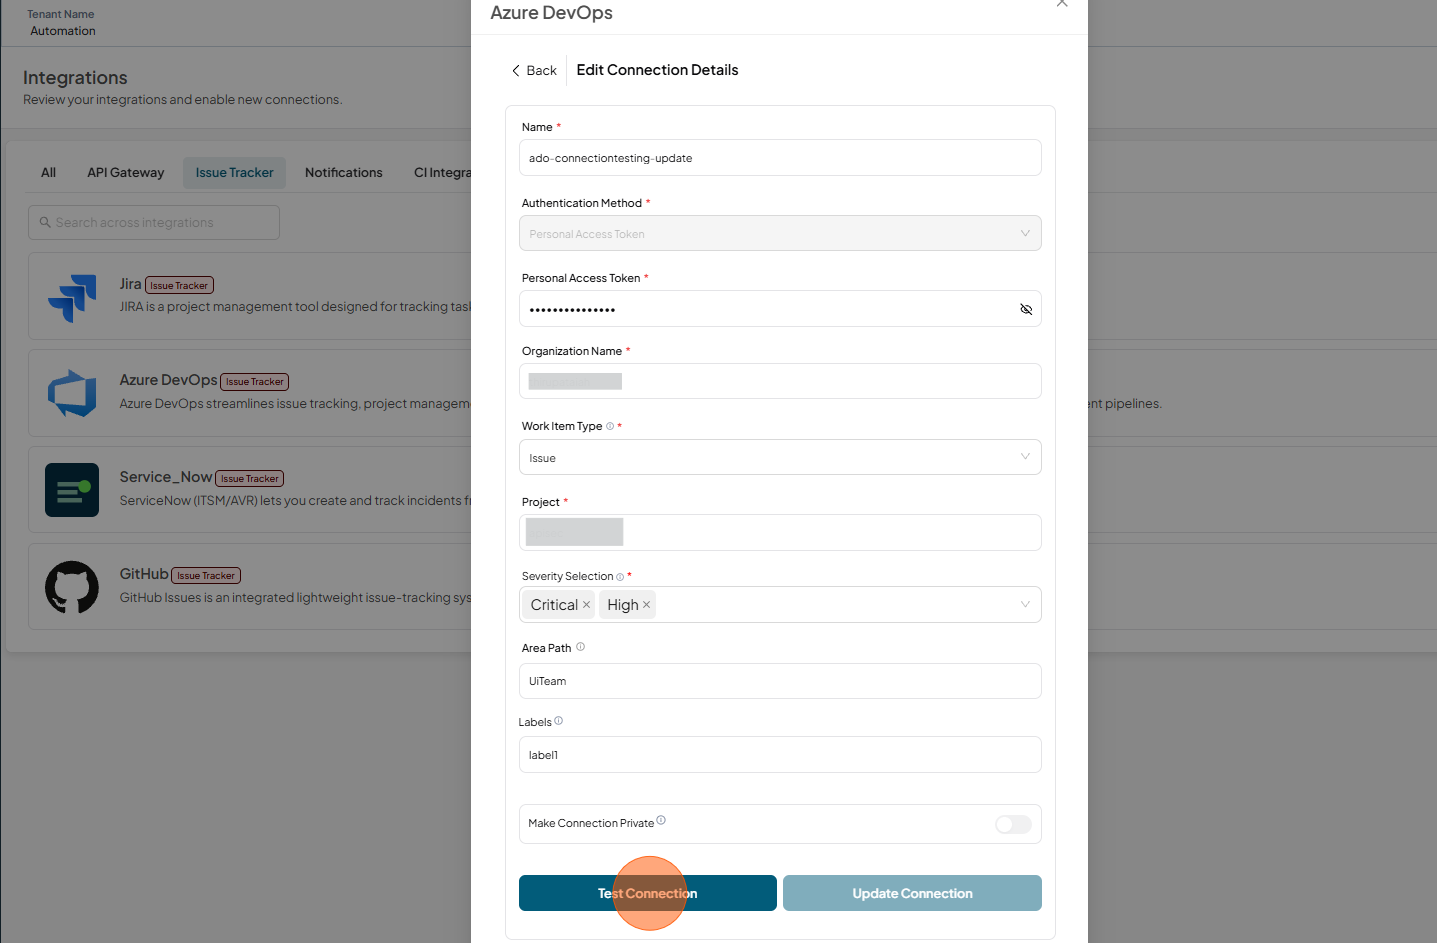
Click Test Connection
-
Test connection successful
-
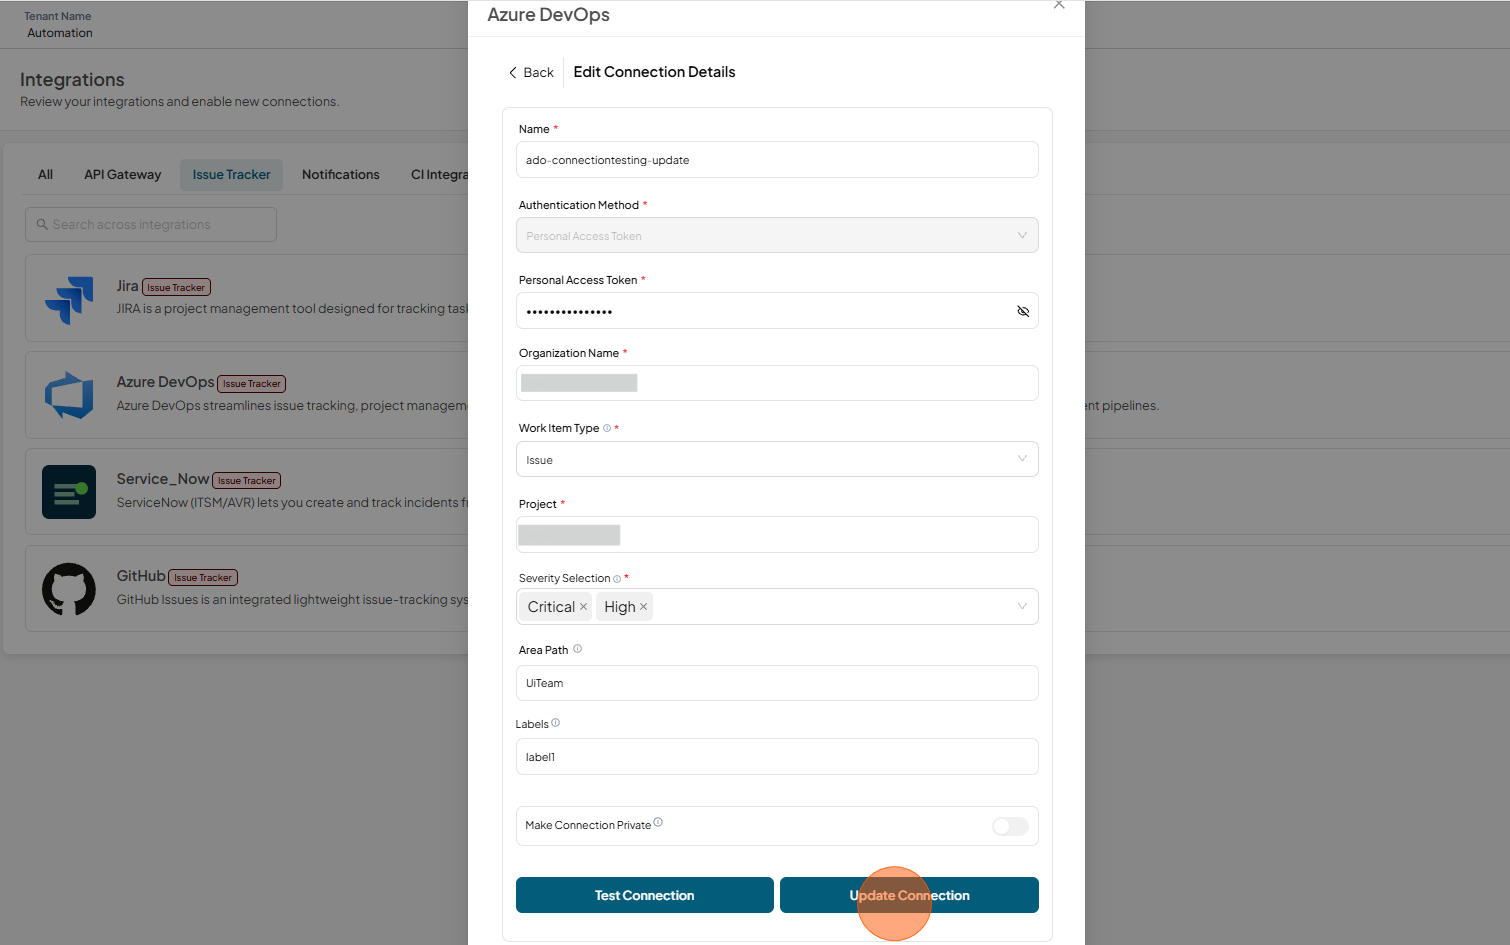
Click Update Connection
-
Get connections list
Delete a Azure DevOps Integrations
-
Open your browser and visit: https://<your-tenant>.apisecapps.com
-
Click on "Integrations"
-
Click on "Issue Tracker" tab
-
You will found the Azure DevOps Issue Tracker.
-
Click Manage
-
-
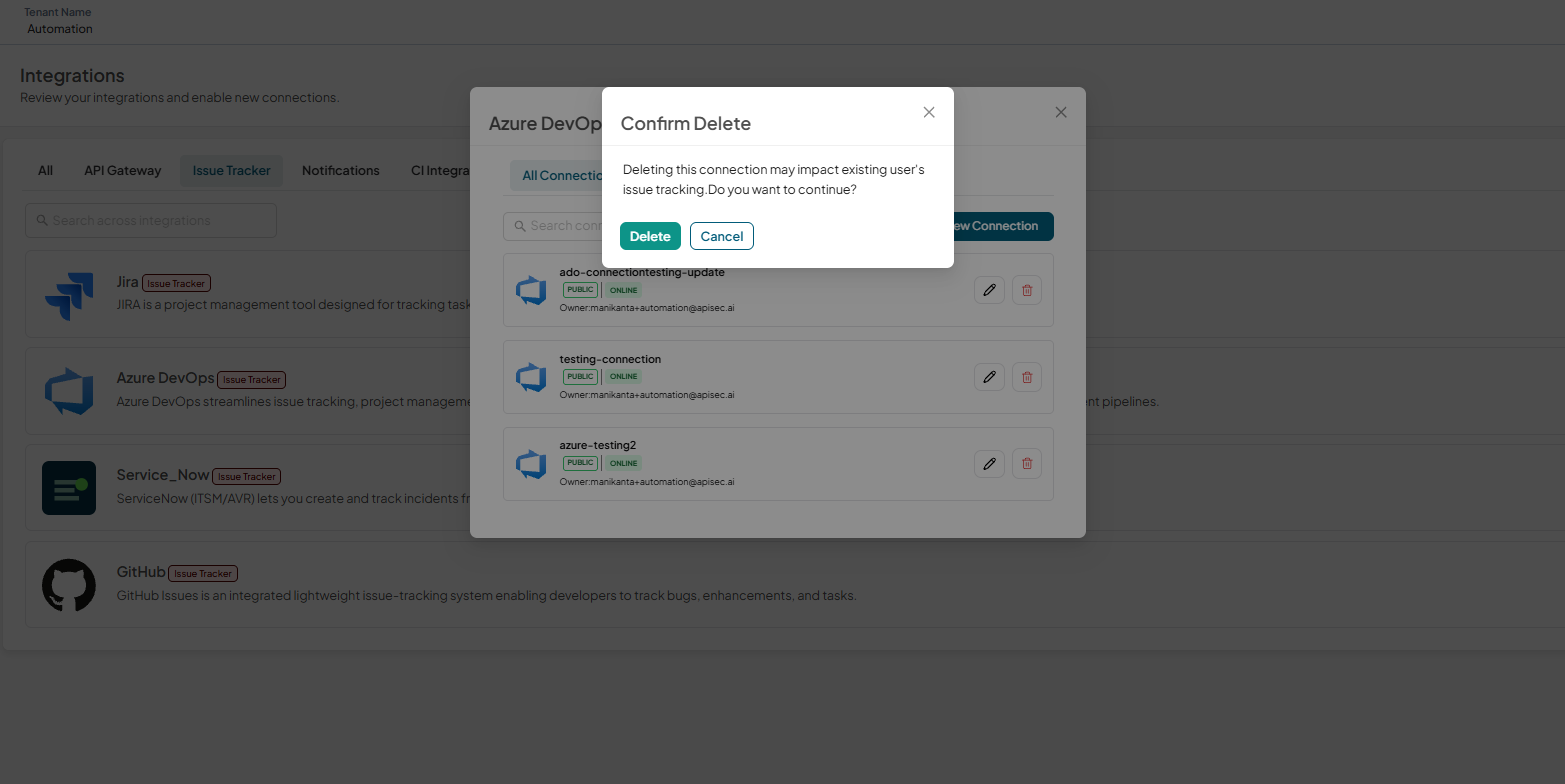
Click Delete icon for desired azure devops connection
-
Click Delete to confirm
Setting Up Azure DevOps connection with the application
You can integrate Azure DevOps with the application to automatically track and manage issues. This integration will be used to create tickets in Azure DevOps for easier tracking and resolution.
-
Navigate to: https://<your-tenant>.apisecapps.com
-
Click on Application
-
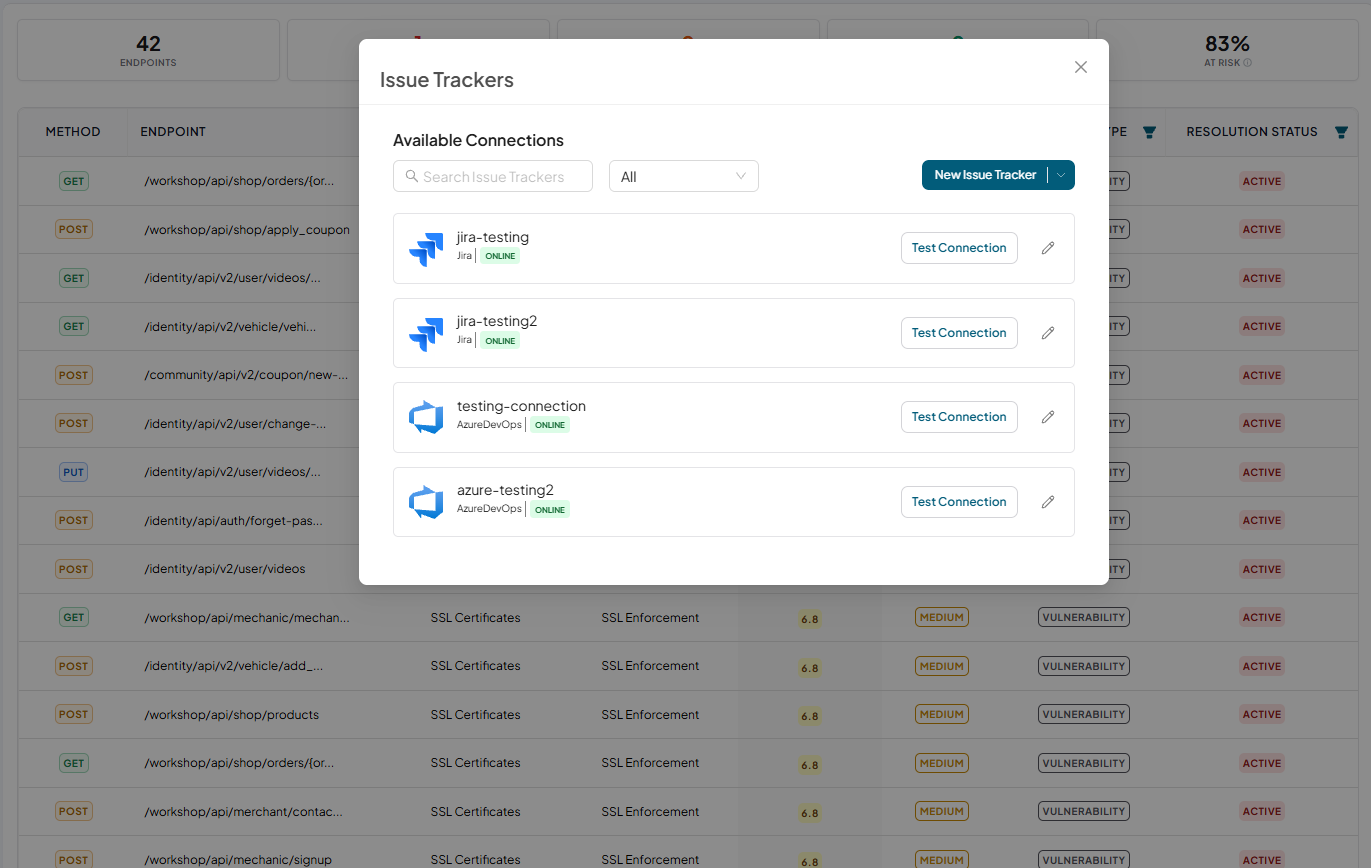
From the left navigation select Issue Tracker
-
Now you found the list of Issue Trackers available in the tenant.
-
From here, if you want to create a new Azure DevOps connection, then click on the New Issue Tracker and then select AzureDevOps and create a new connection.
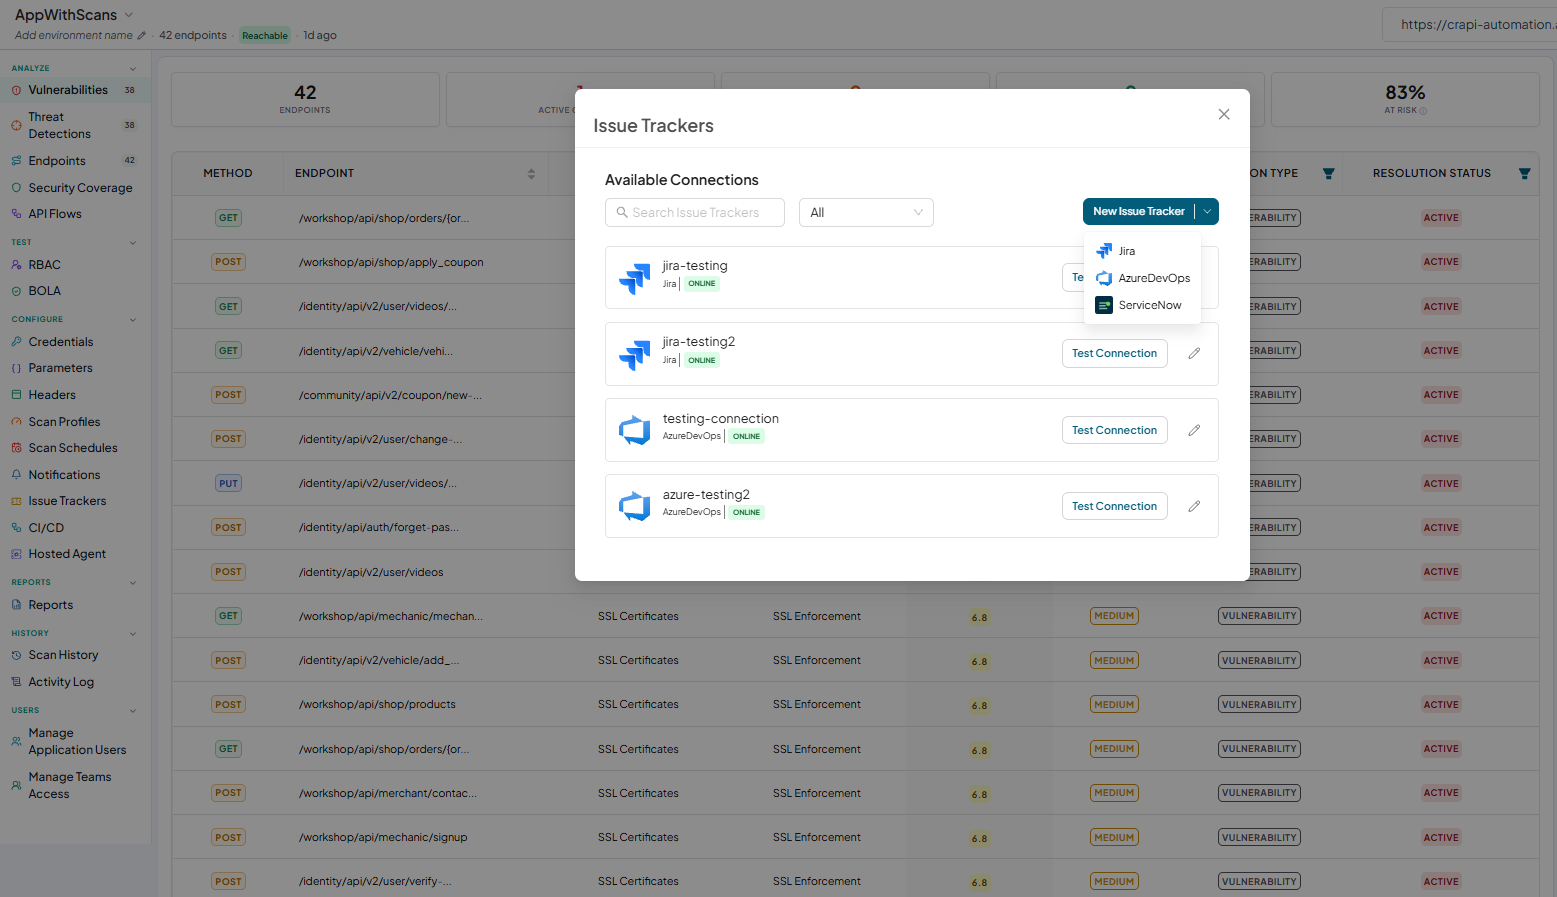
-
From that list, select Azure DevOps connection and click on the Test Connection to test the connection.
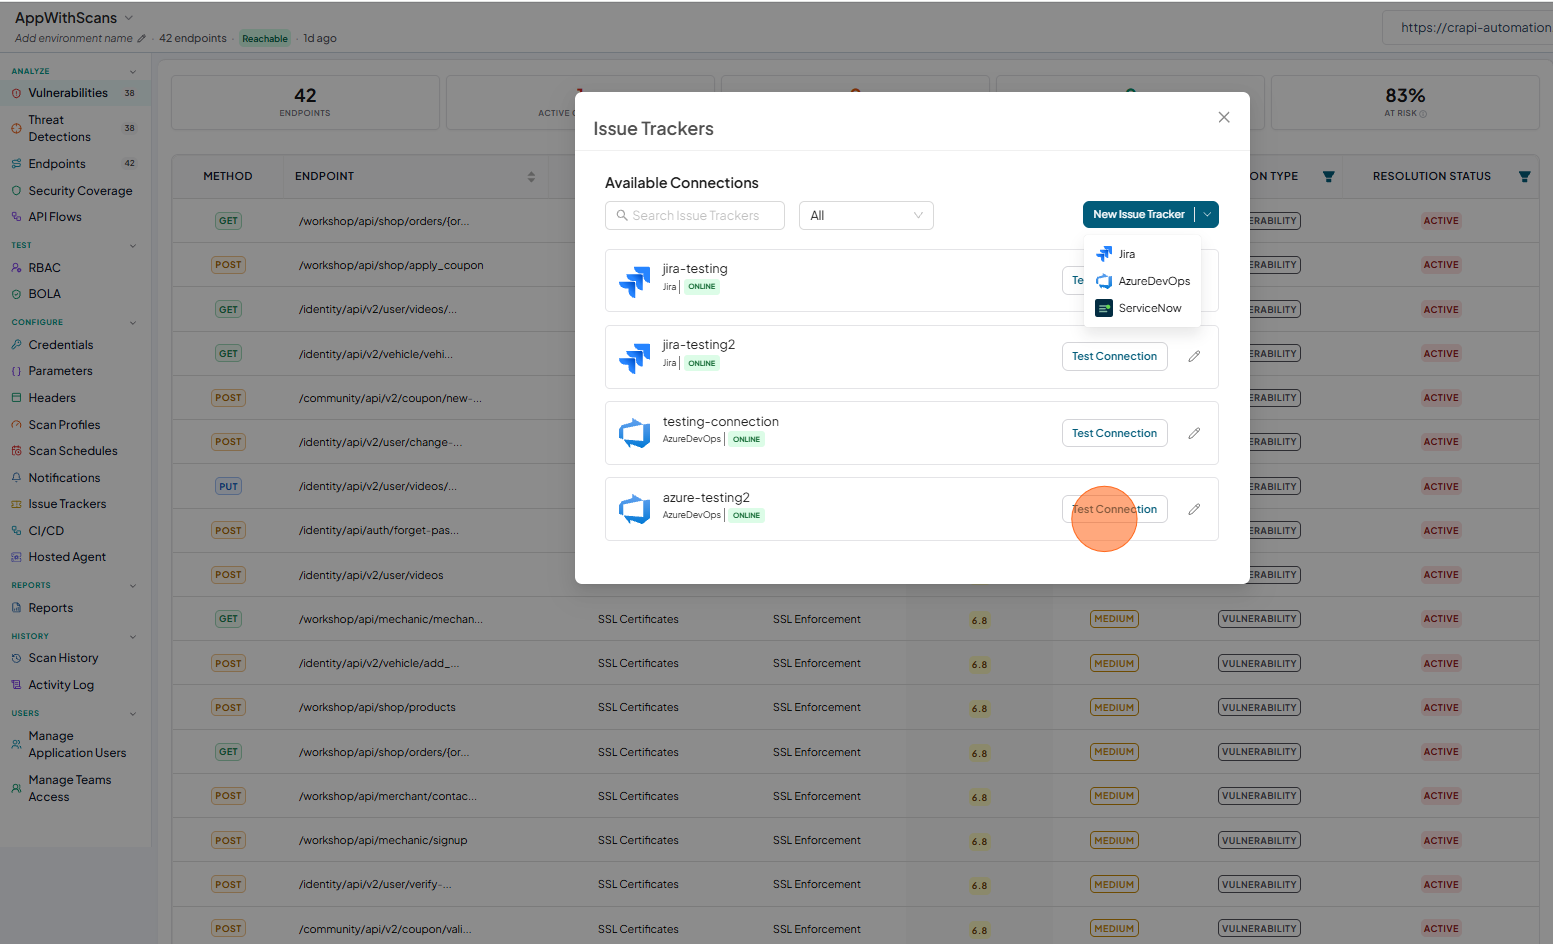
-
Test connection successful.
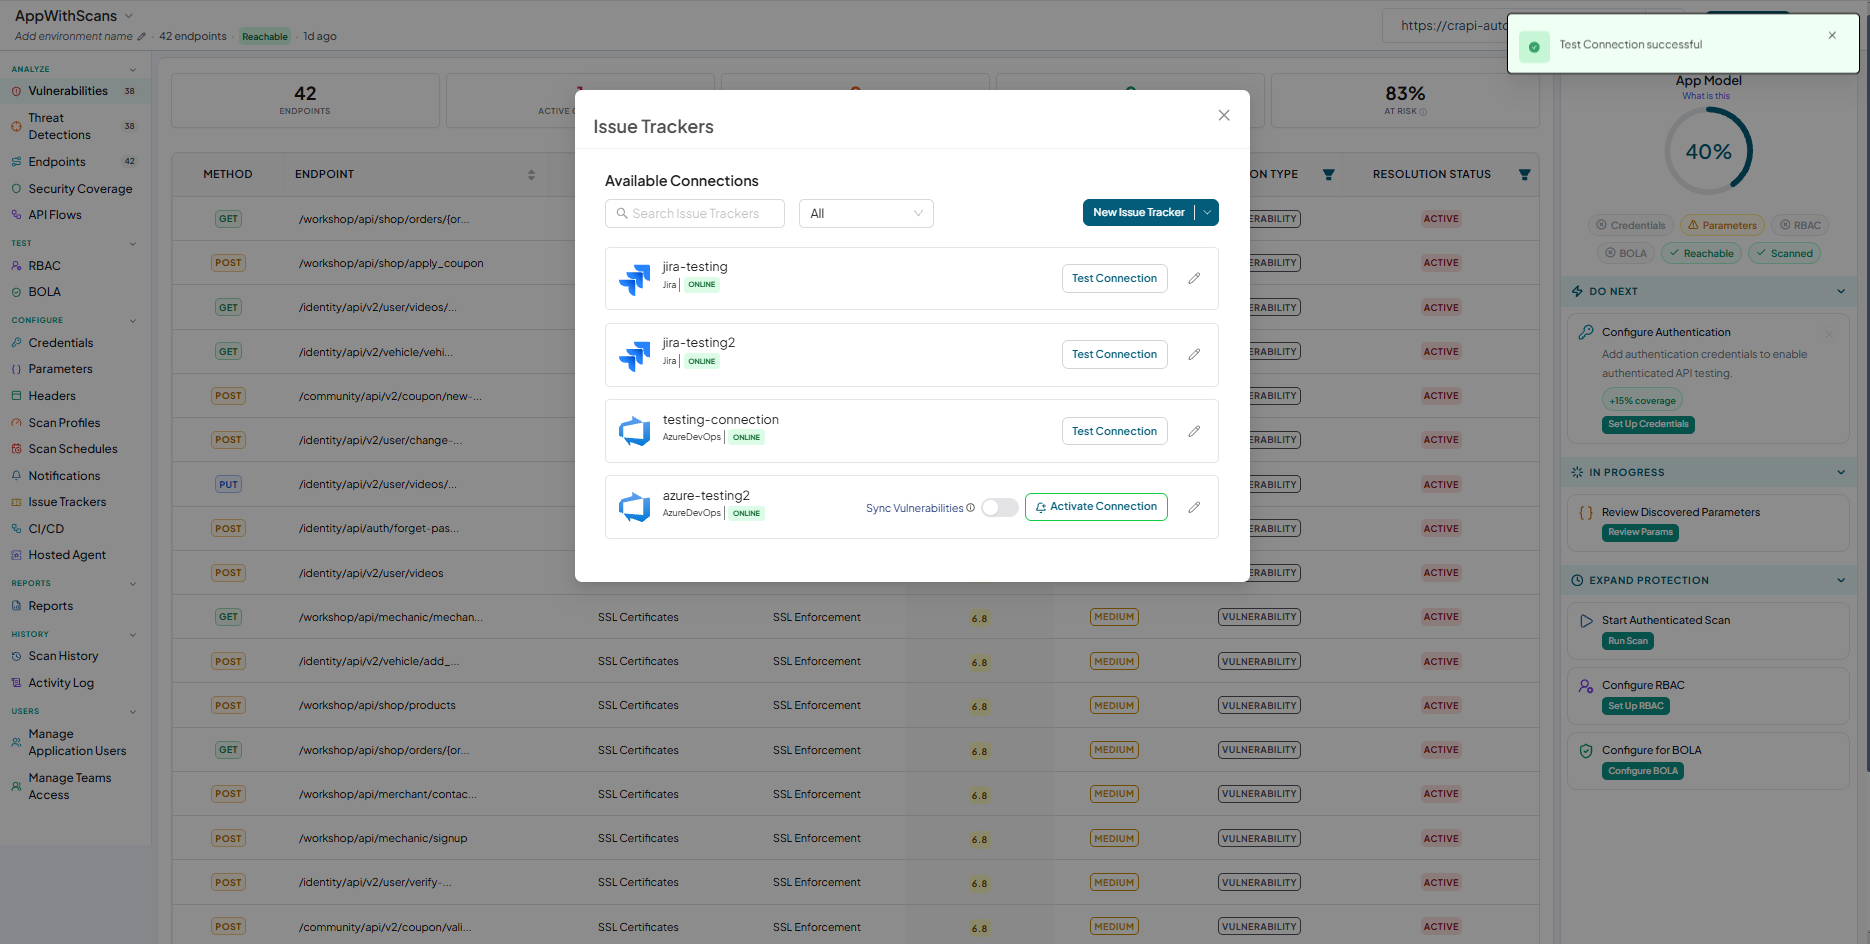
-
Now click on the Activate Connection
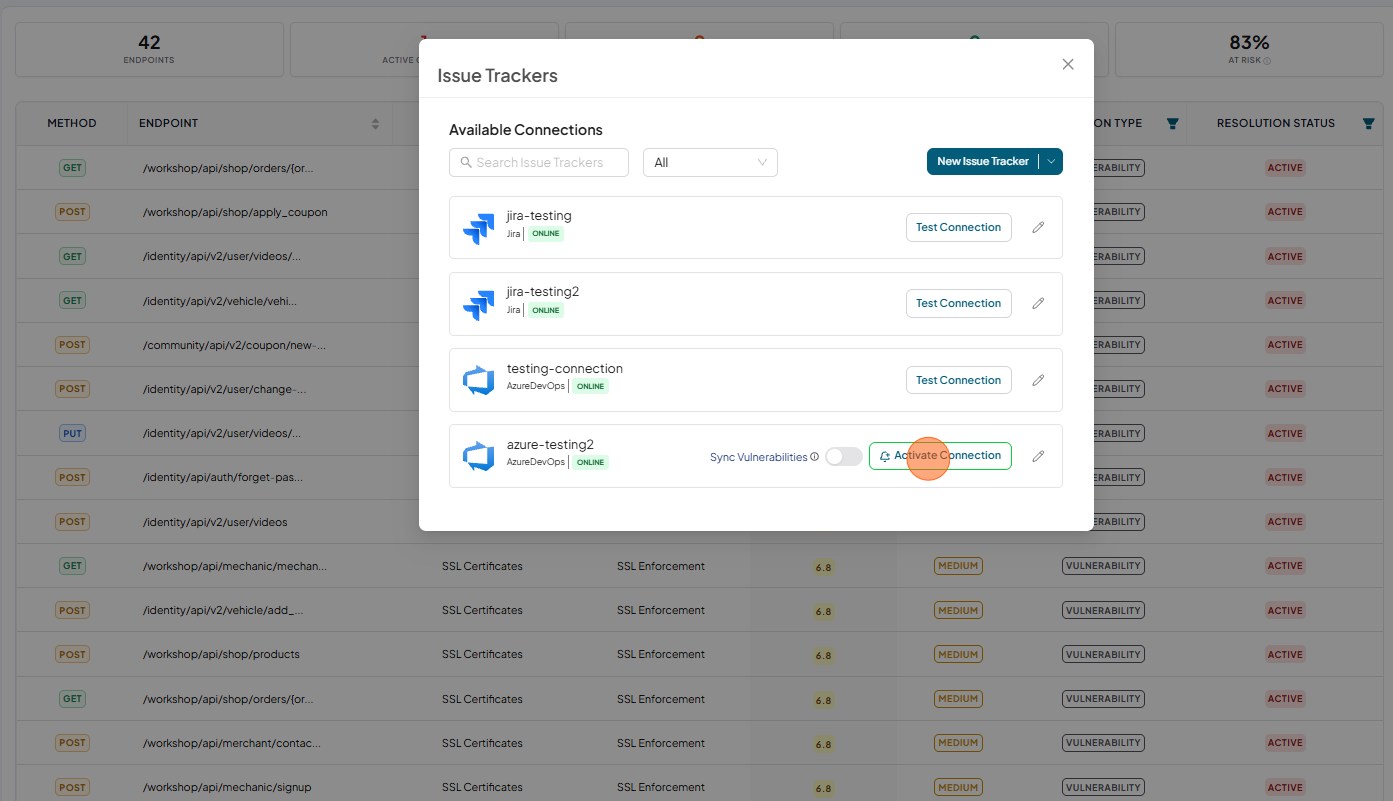
-
Connection activated.
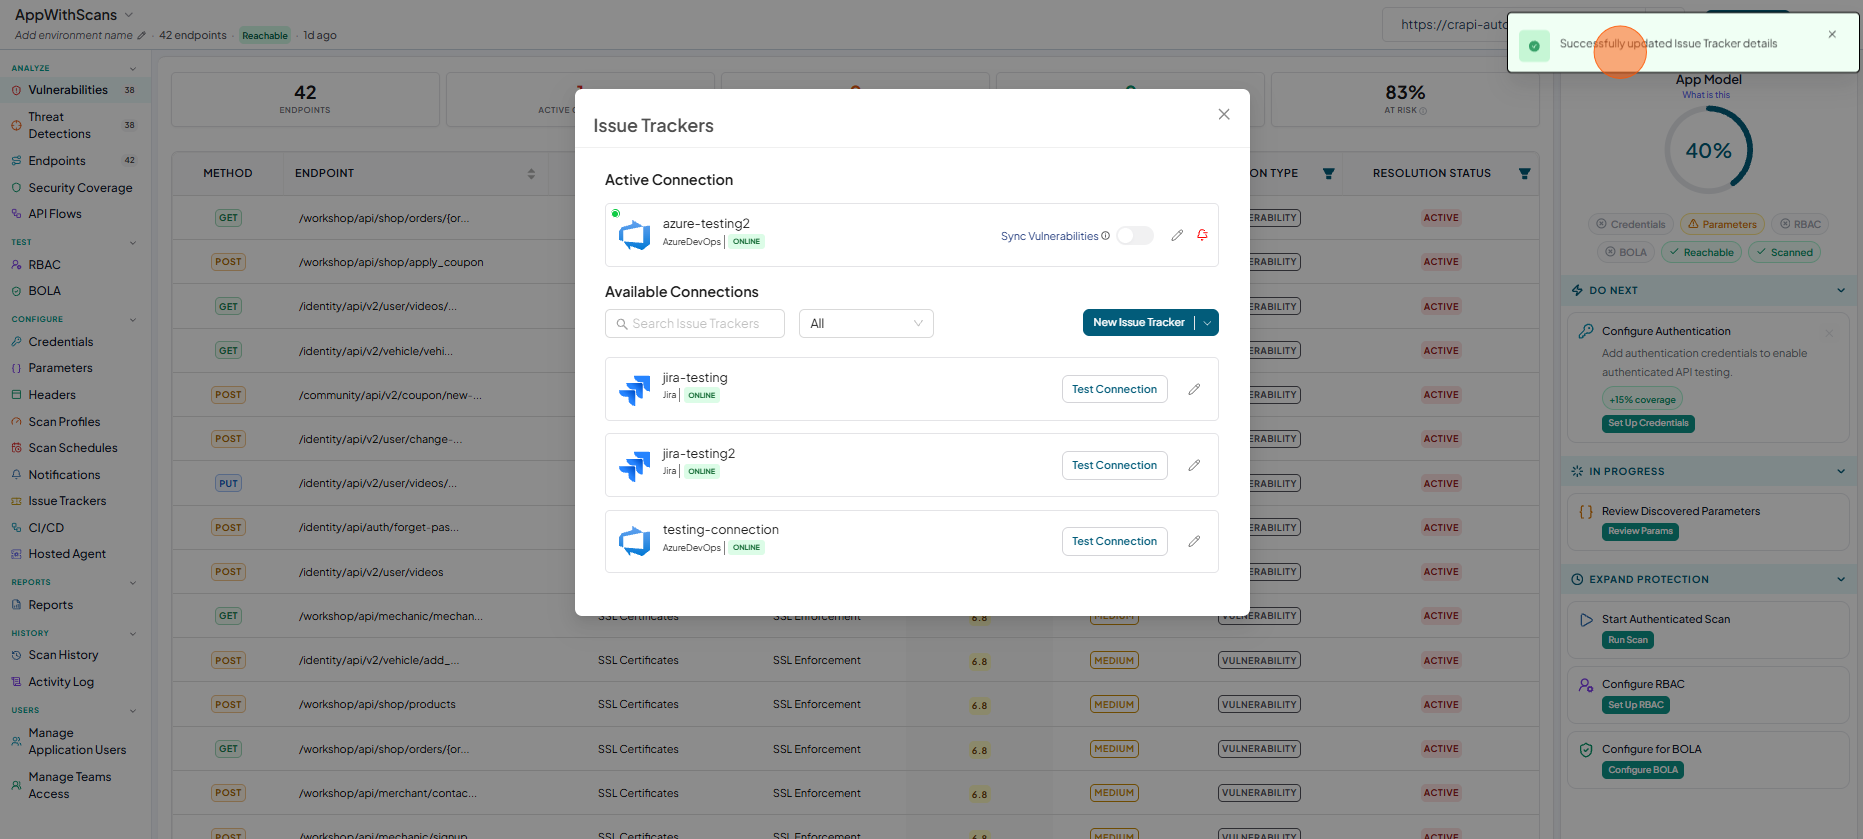
Now the configured connection will appear in the list as First connection.
noteuser role with View permissions can not configure Azure DevOps issue tracker in shared application.
-
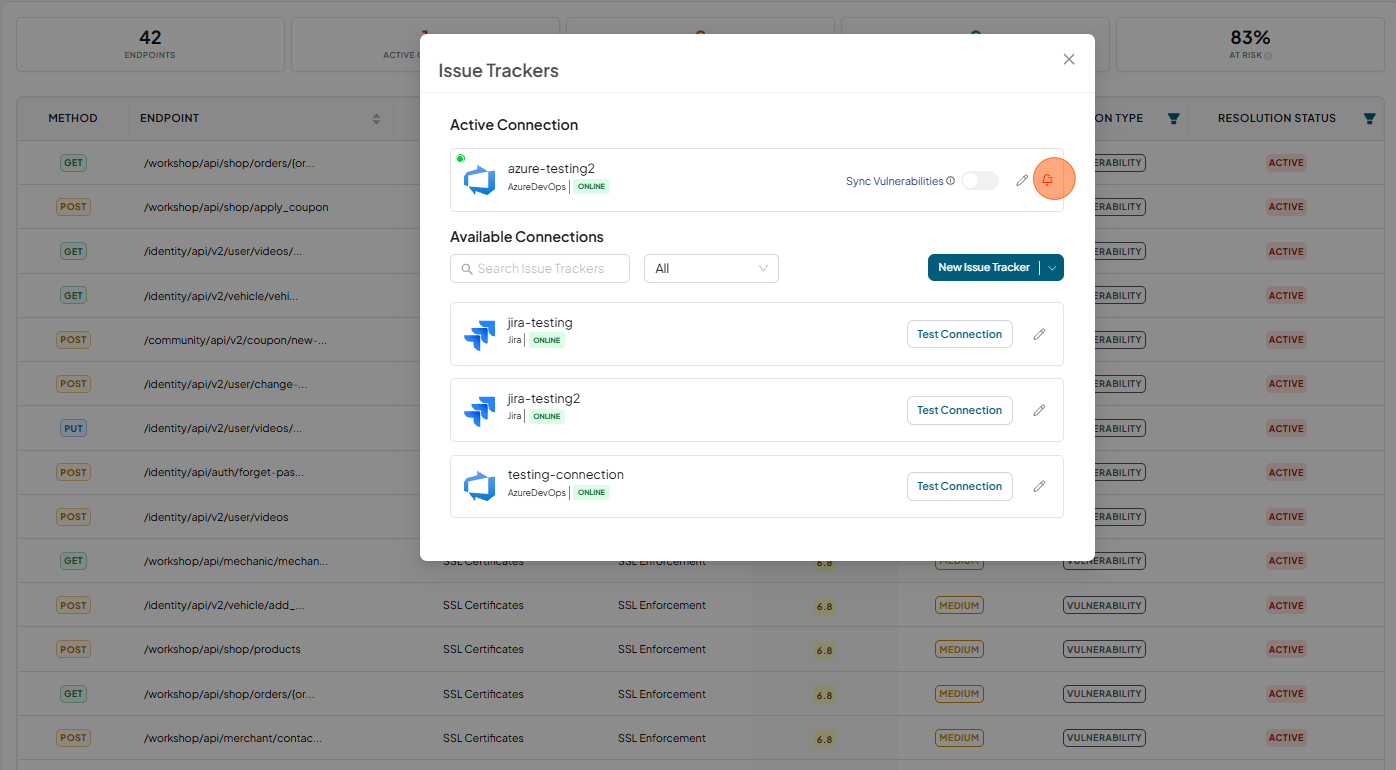
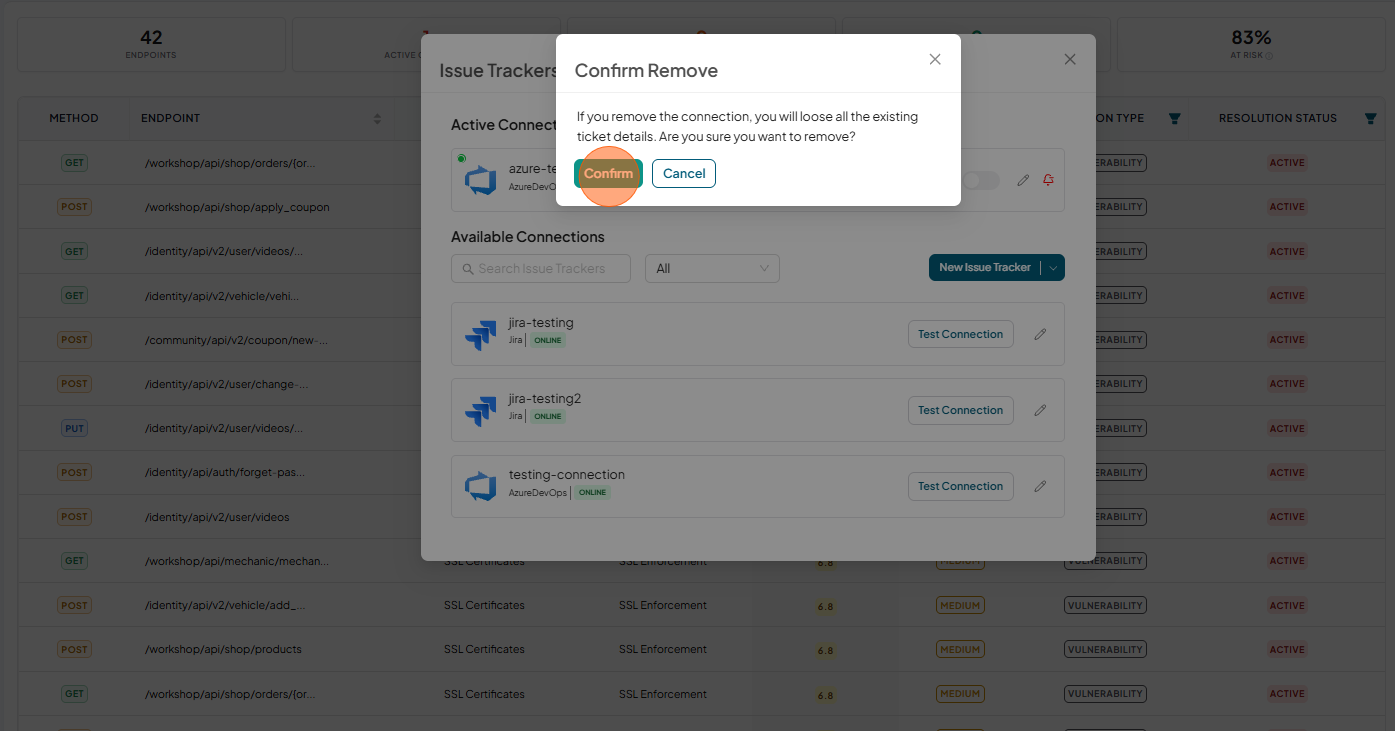
To remove the connection from the application, Click on the Delete icon beside the configured connection”
-
Click Confirm to remove the connection
 note
noteuser role with View permissions can not remove Azure DevOps issue tracker from shared application.