How To Onboard An Application Using Postman Gateway
Prerequisites
- A Postman account (signed in on the web or desktop app).
- Access to the team/workspace whose collections/APIs you want to use.
- At least one Postman Workspace you can access.
- If your company uses Postman Enterprise, a Team Admin might control who can generate keys and set org-wide expiry—if you don’t see the option to create a key, ask your admin.
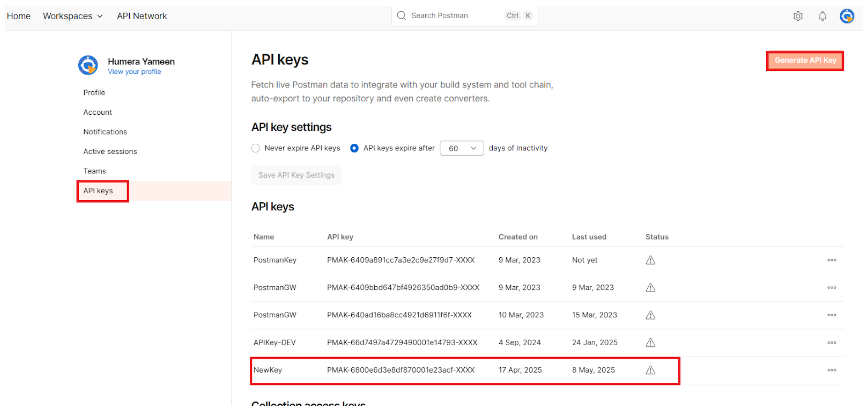
Get your Postman API key
-
In Postman, click your avatar → Settings.
-
On the Account settings page, open API keys.
-
Click Generate API Key, give it a name, then Generate.
-
Copy the API-key (store it securely; you won’t see it again in full).
-
You can later rename, regenerate, delete, or set expiration for keys.
-
You can use this API-Key to get the list of APIs/Collections present in your Postman application by creating a Connection in the APIsec Platform.
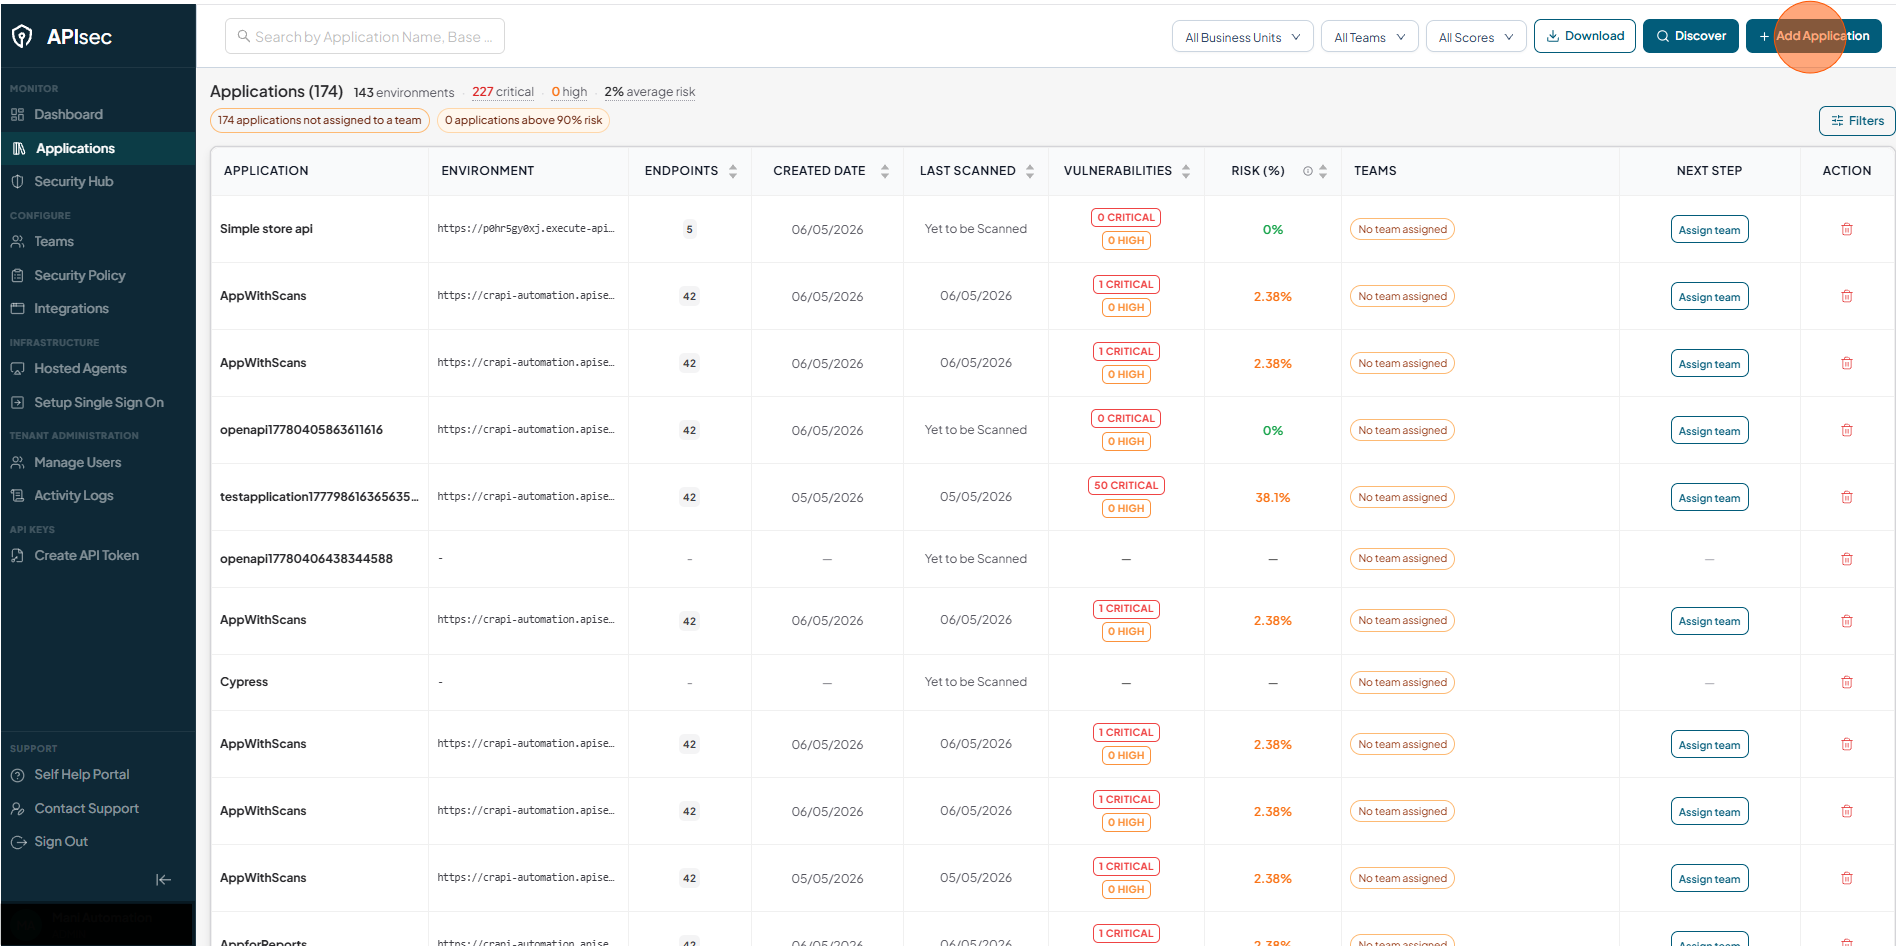
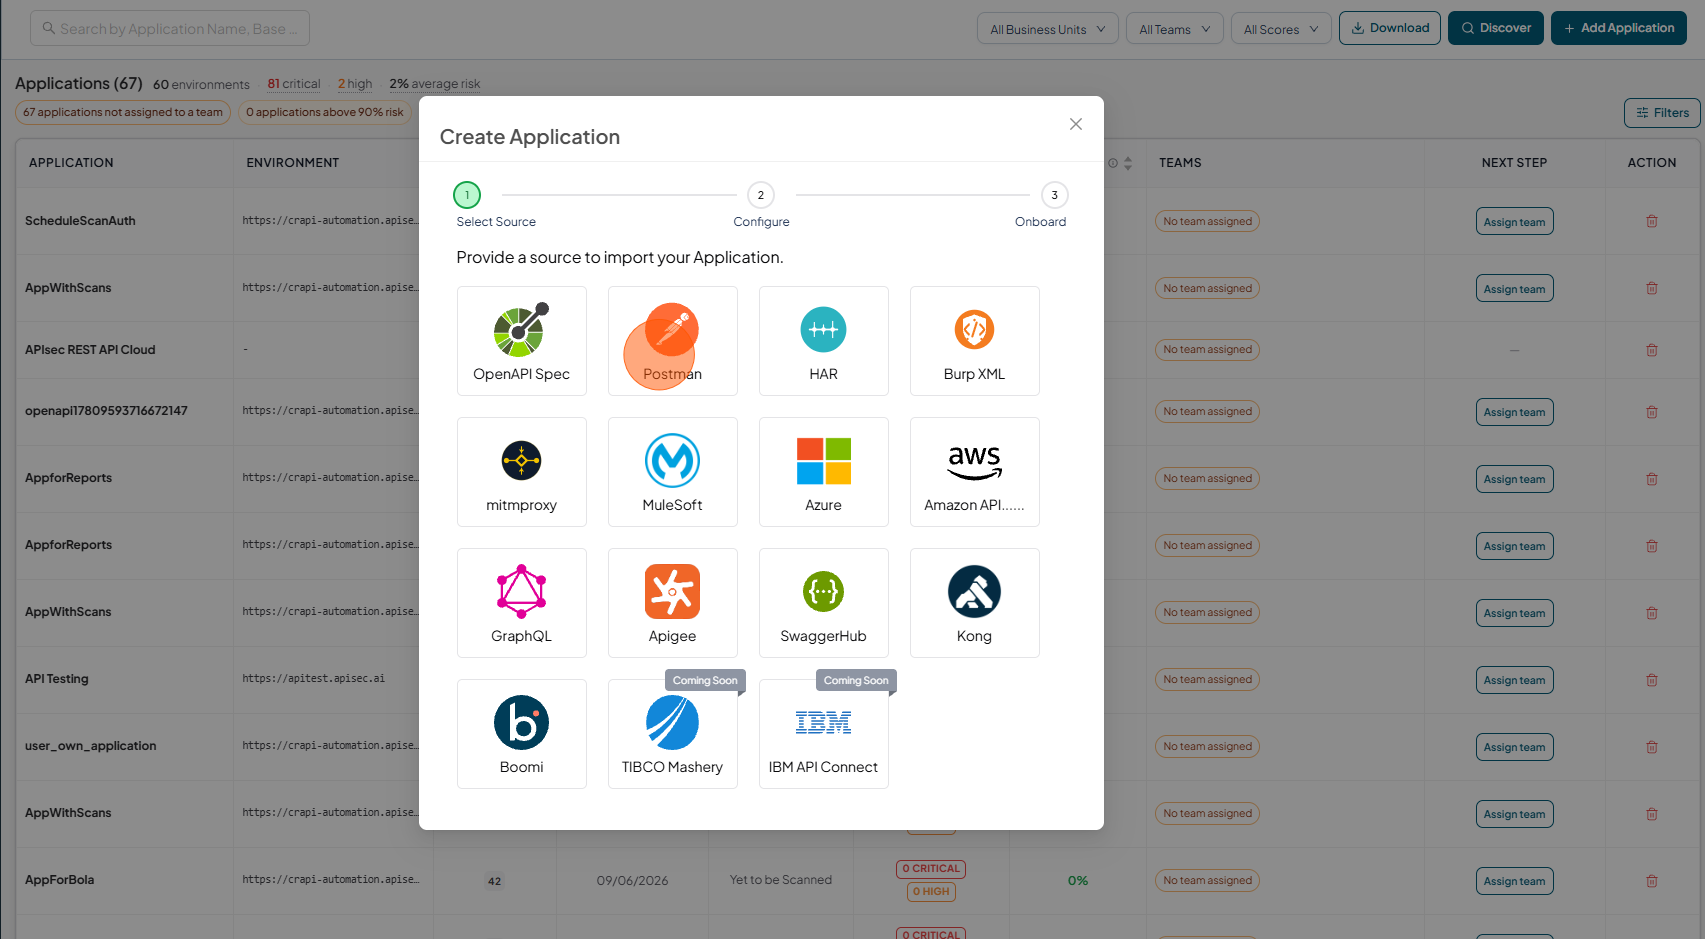
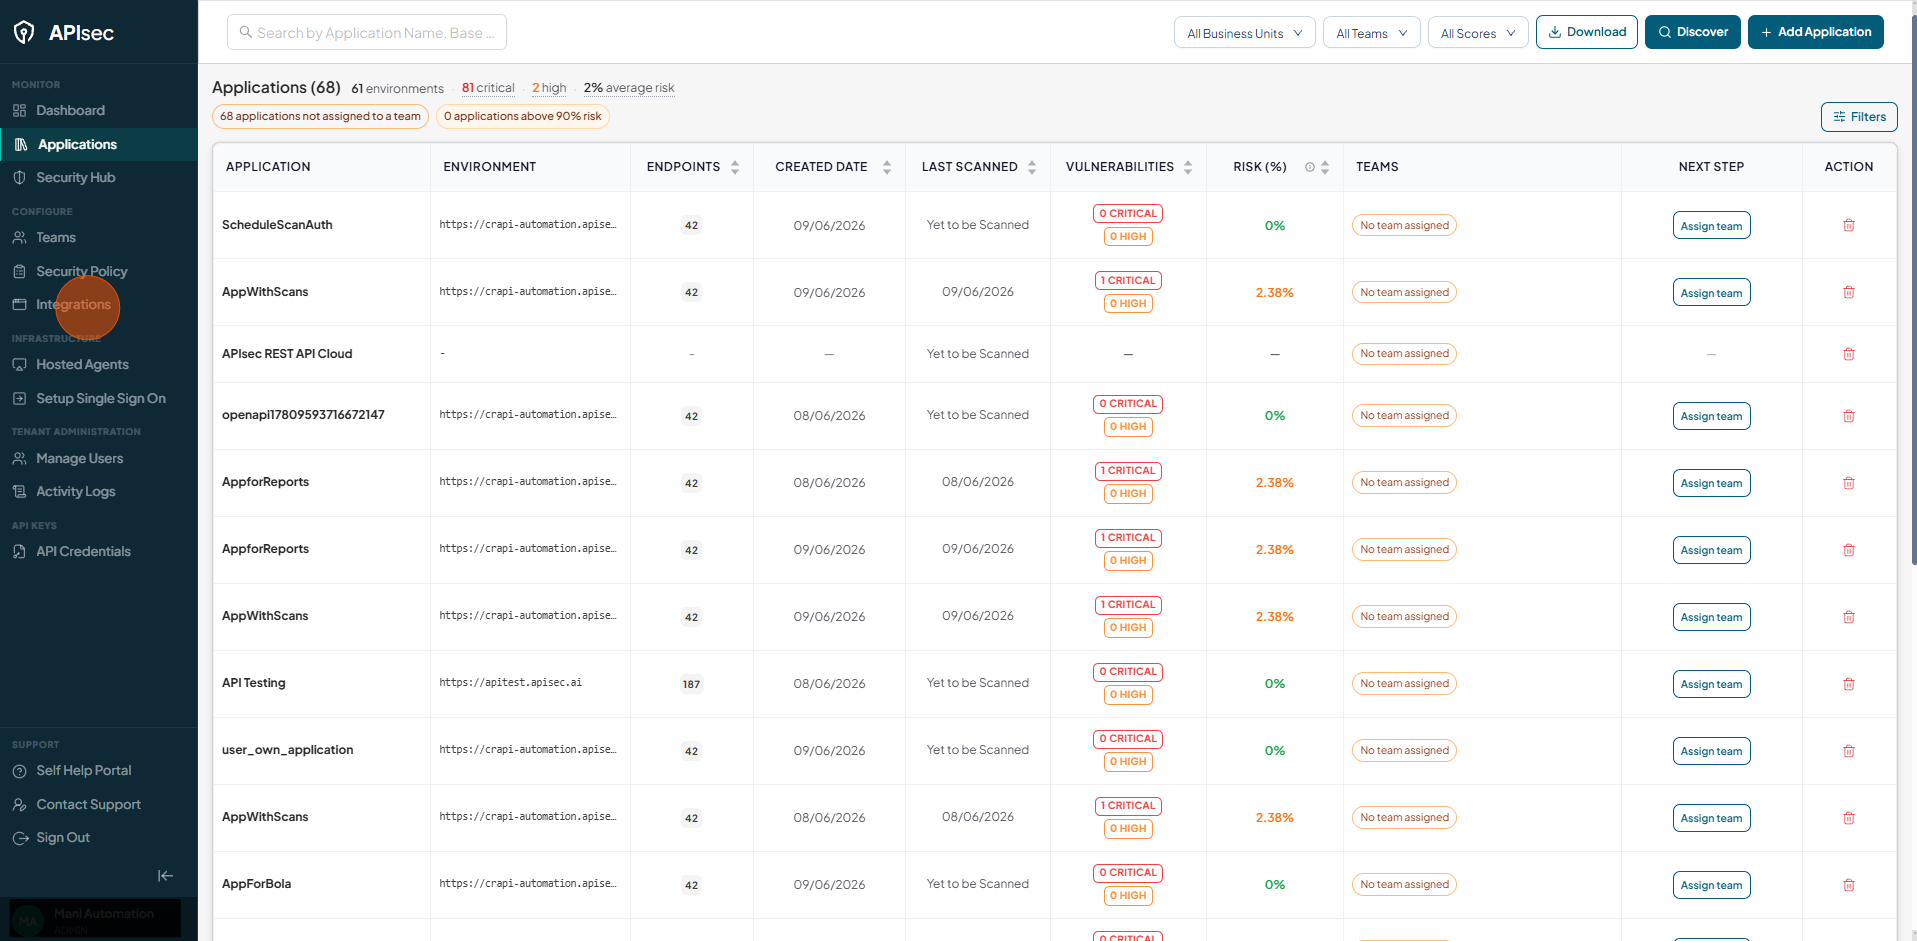
Start Adding a New Application
-
Open your browser and visit: https://<your-tenant>.apisecapps.com
-
Click on the "Add Application" button.
Select Postman Gateway
-
Choose the Postman Gateway option.
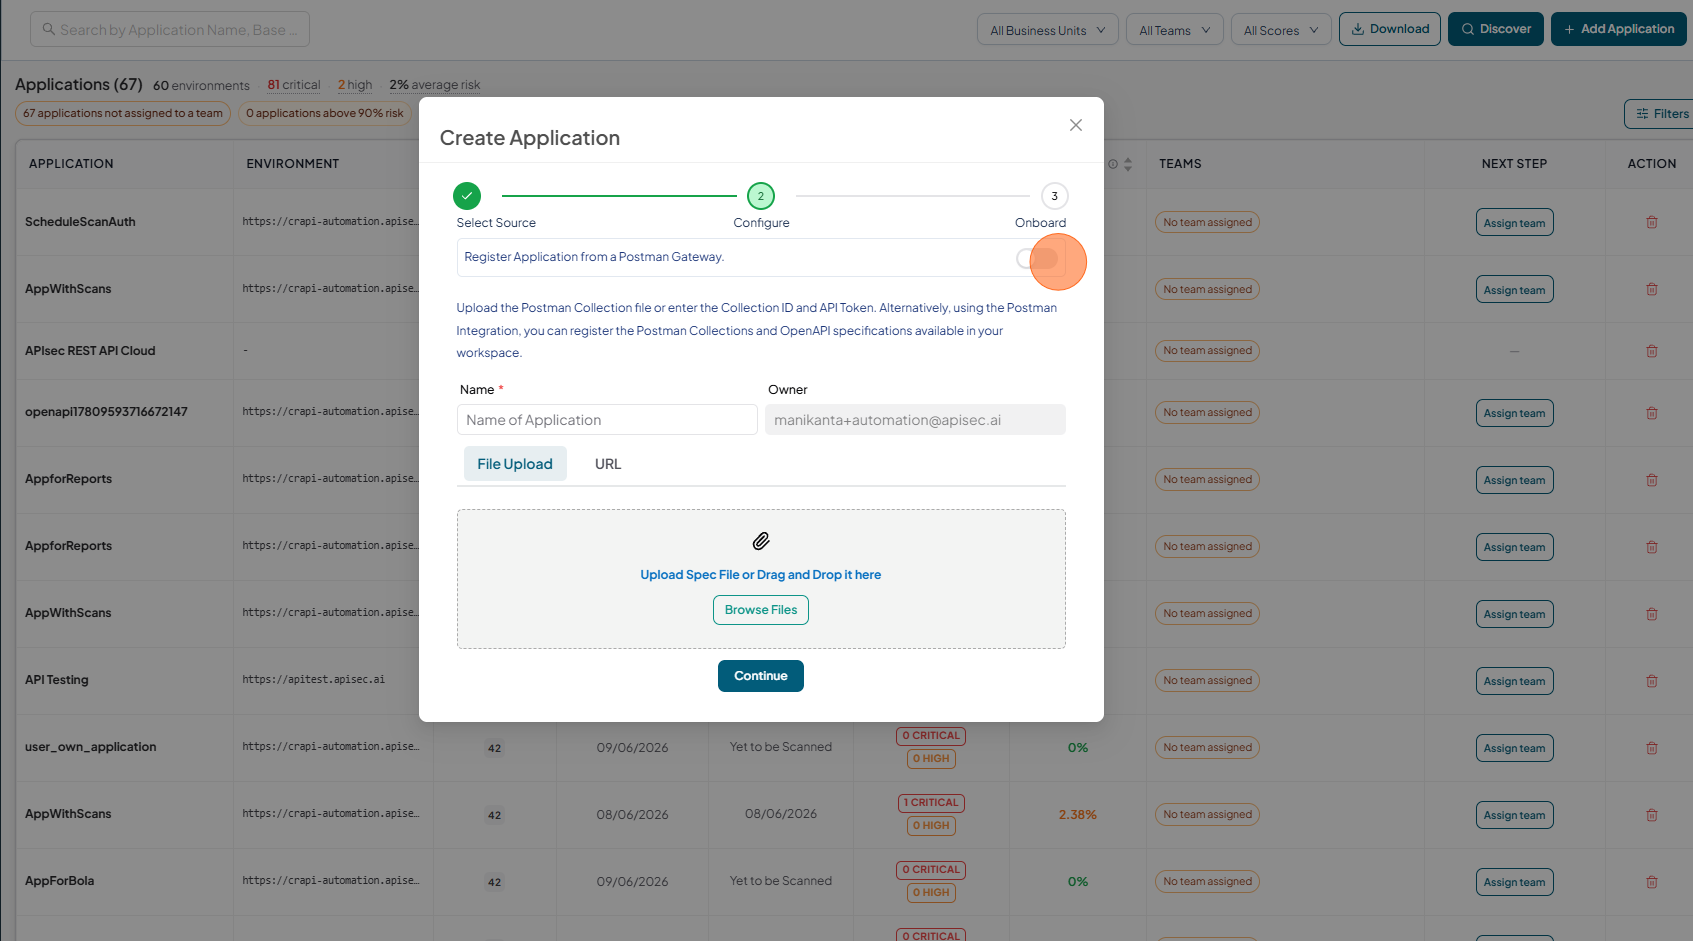
Enter Application Details
-
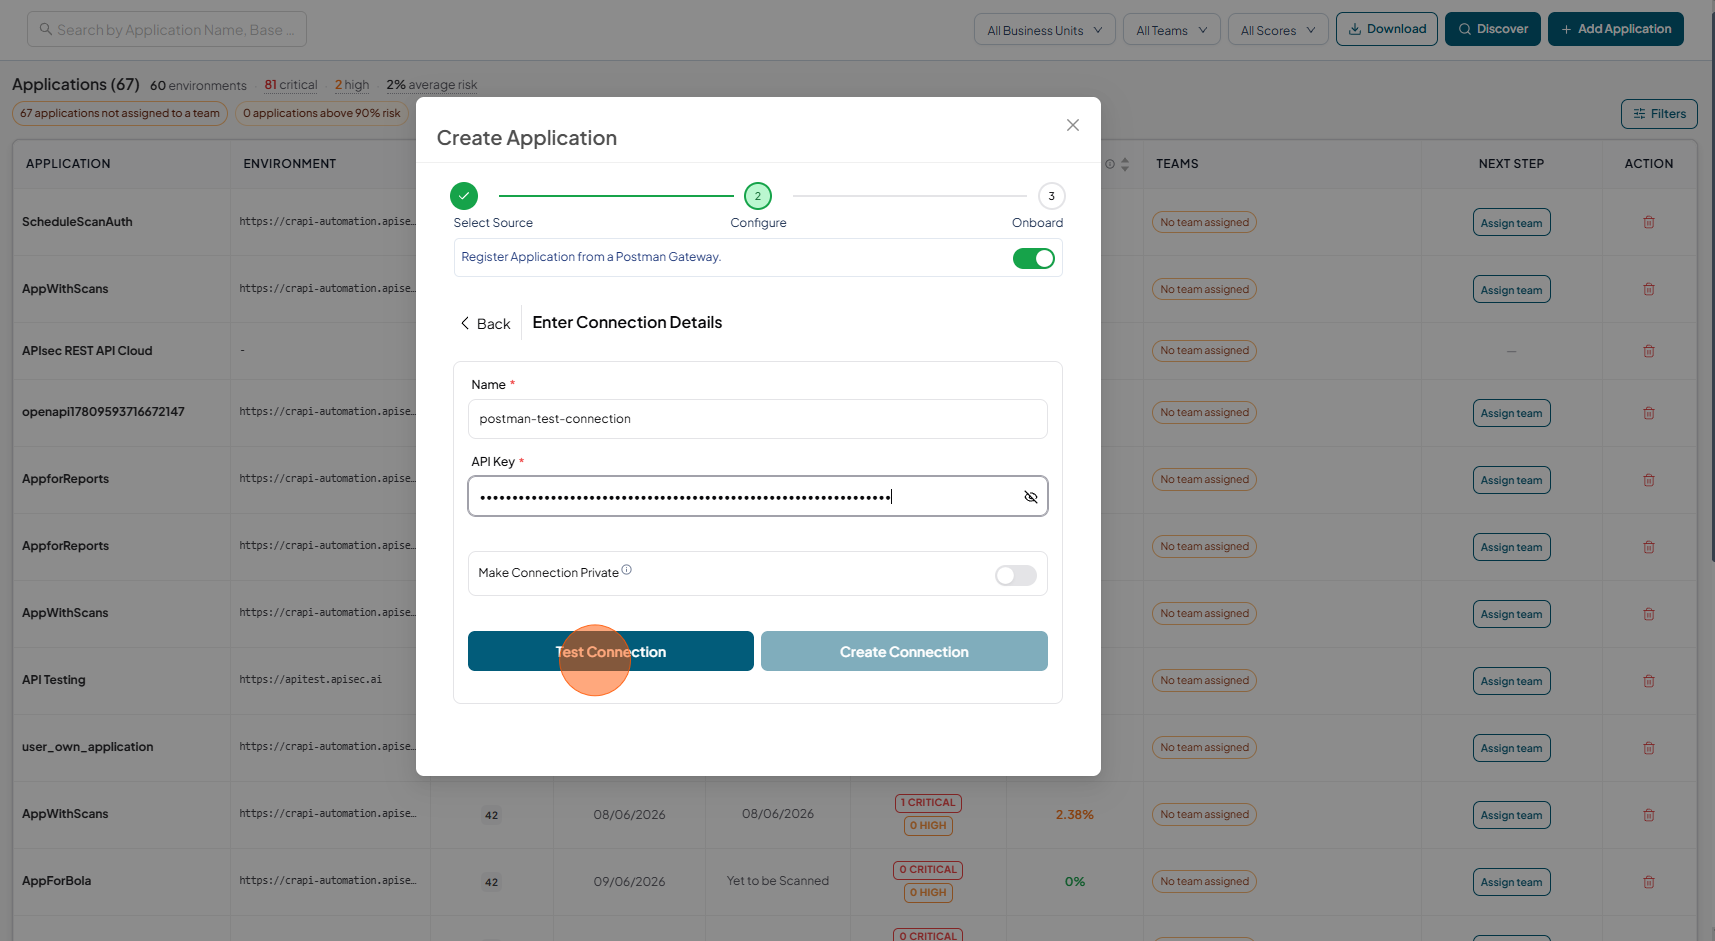
Register application from Postman Gateway, enable the toggle button
-
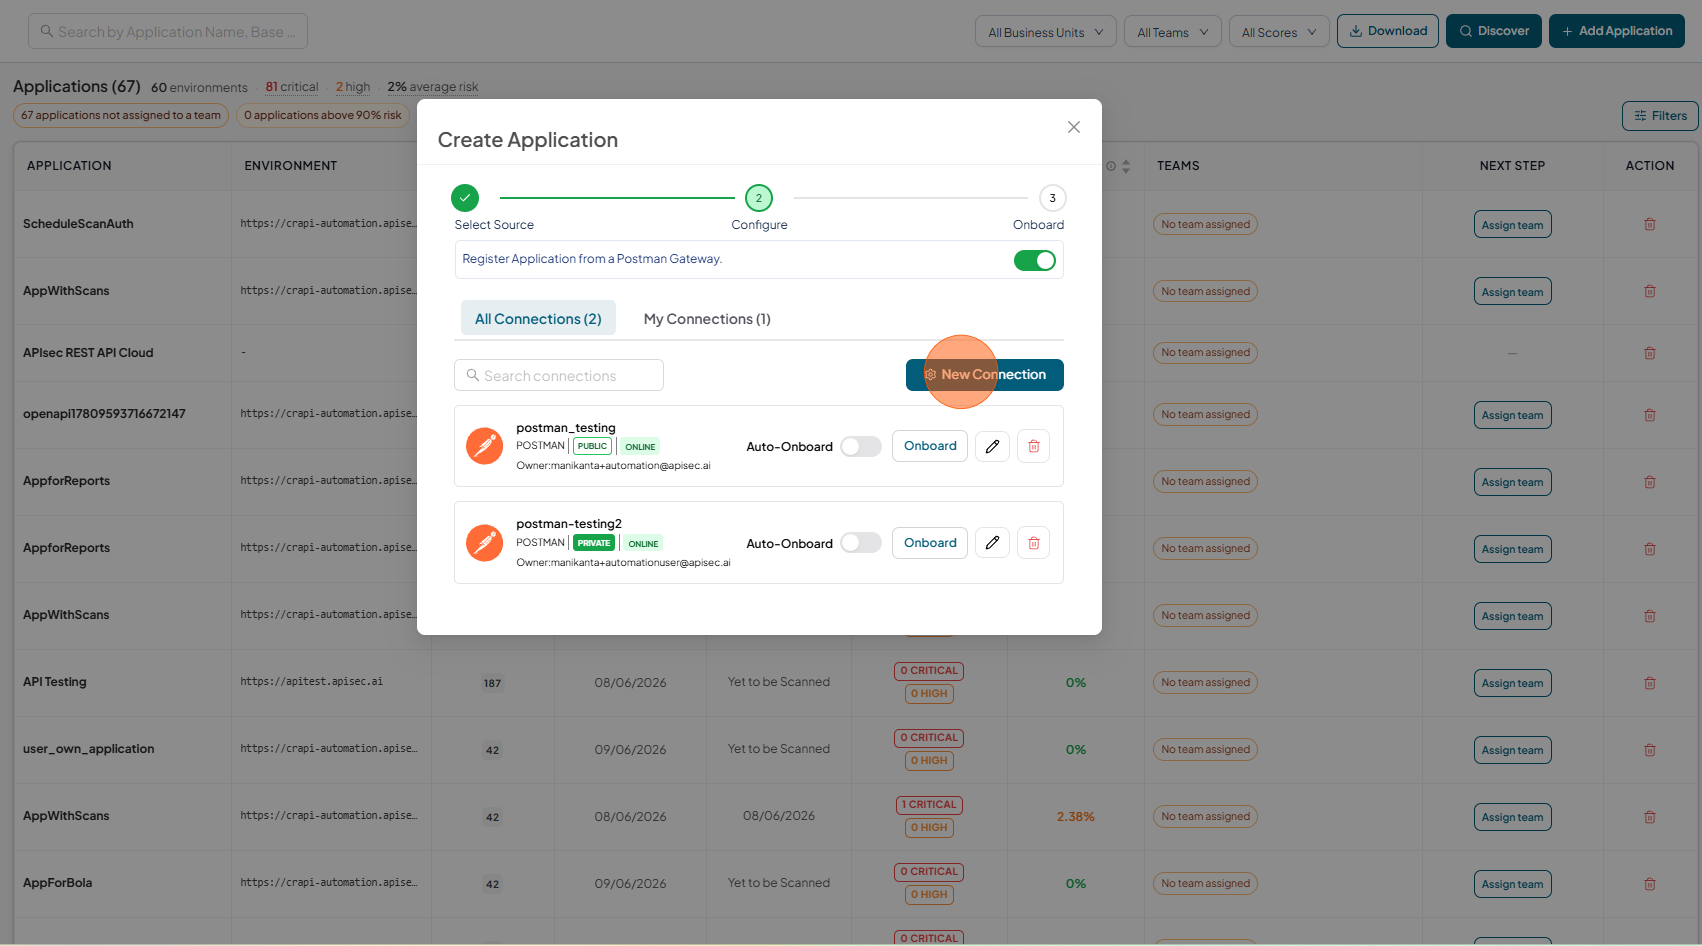
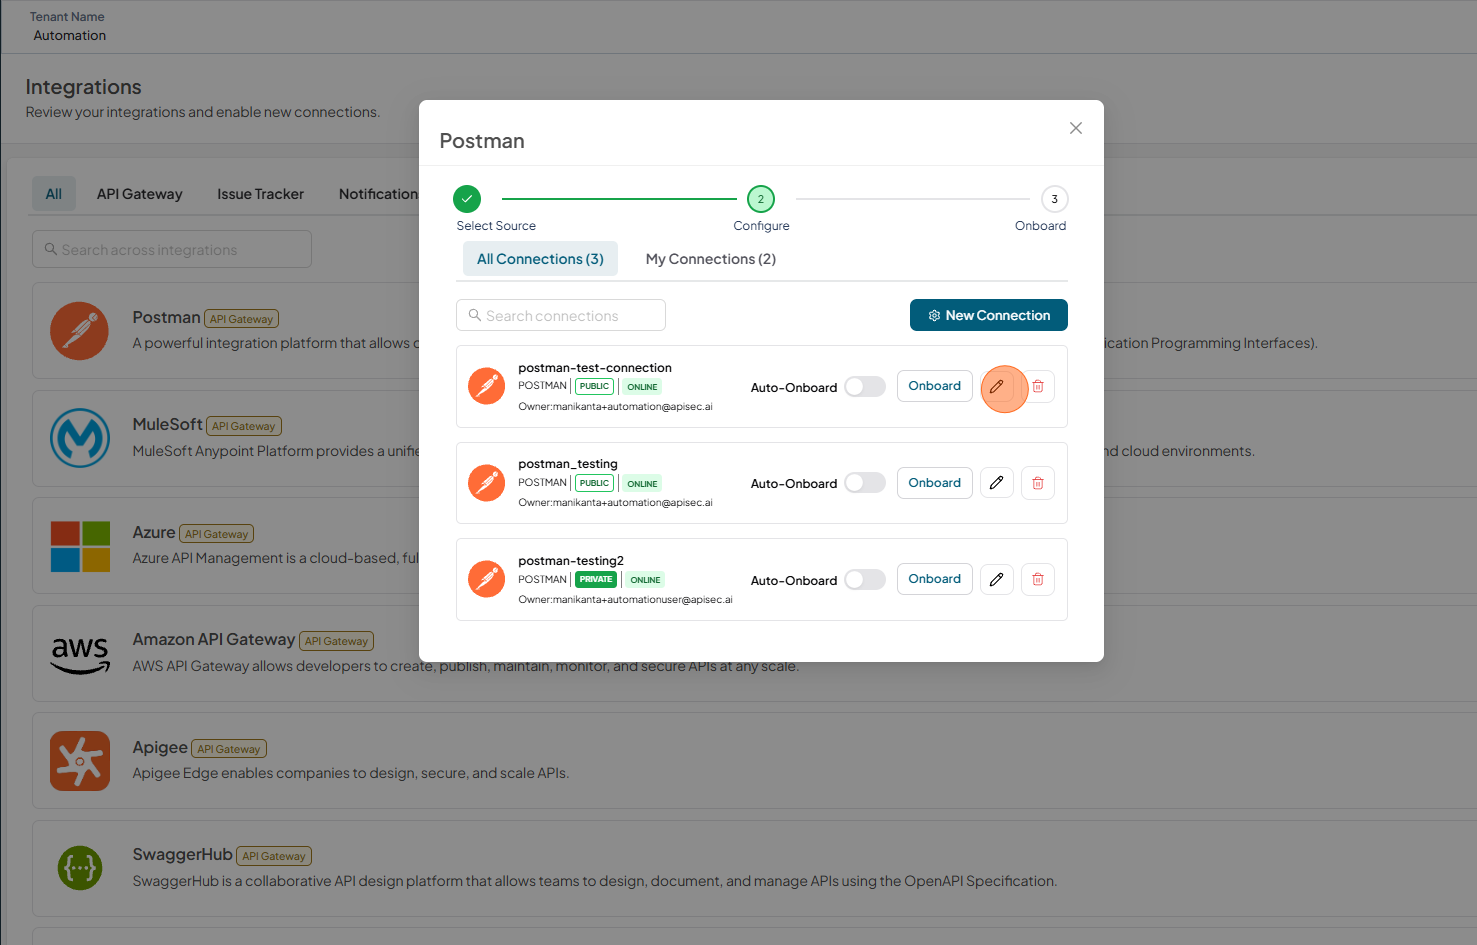
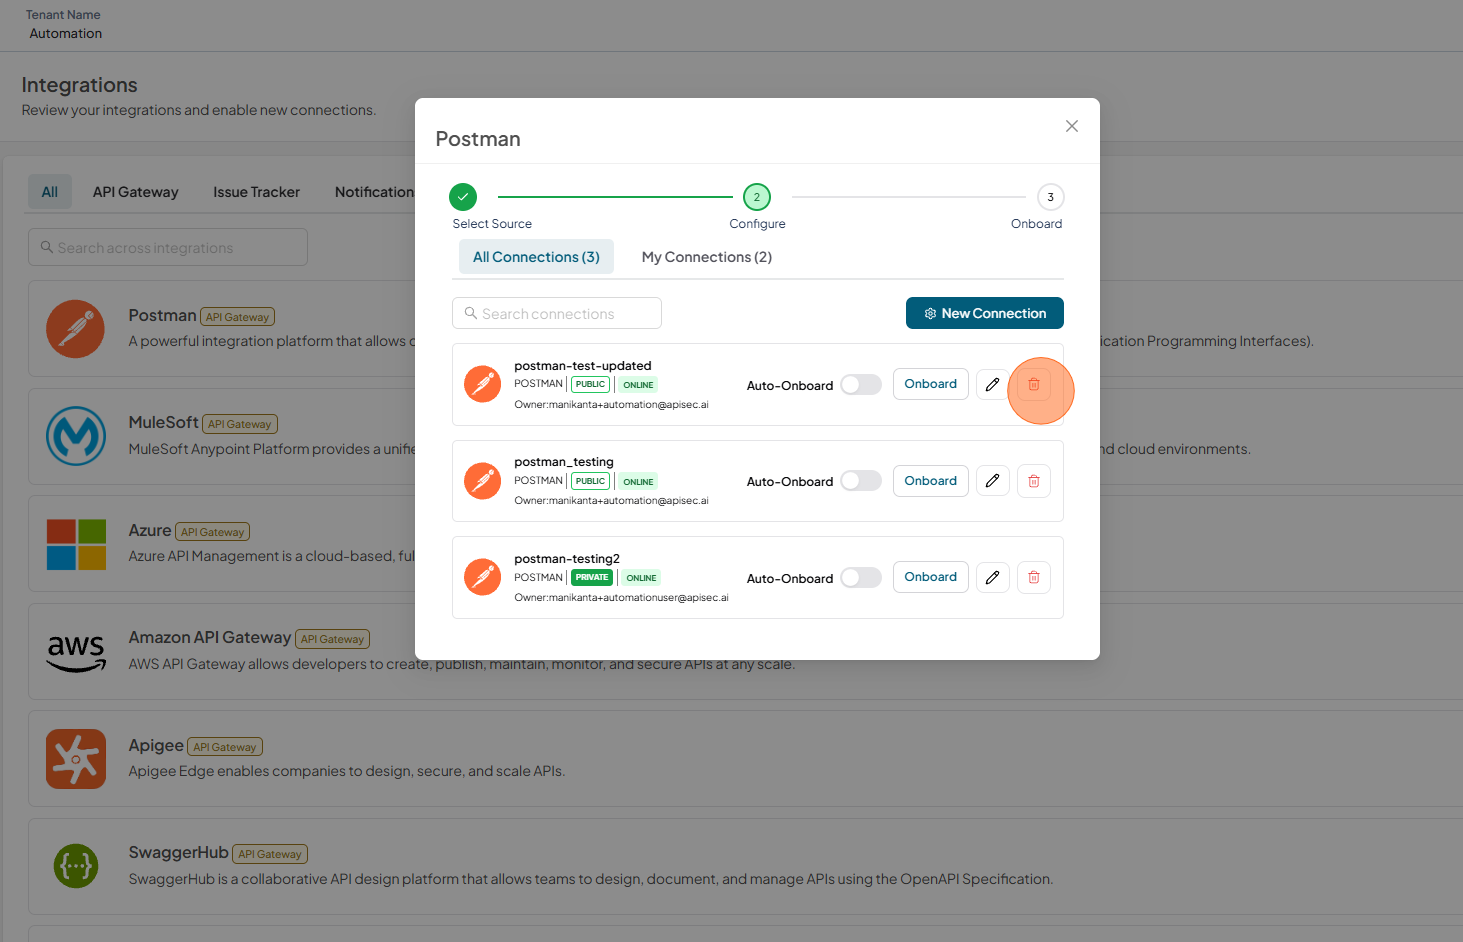
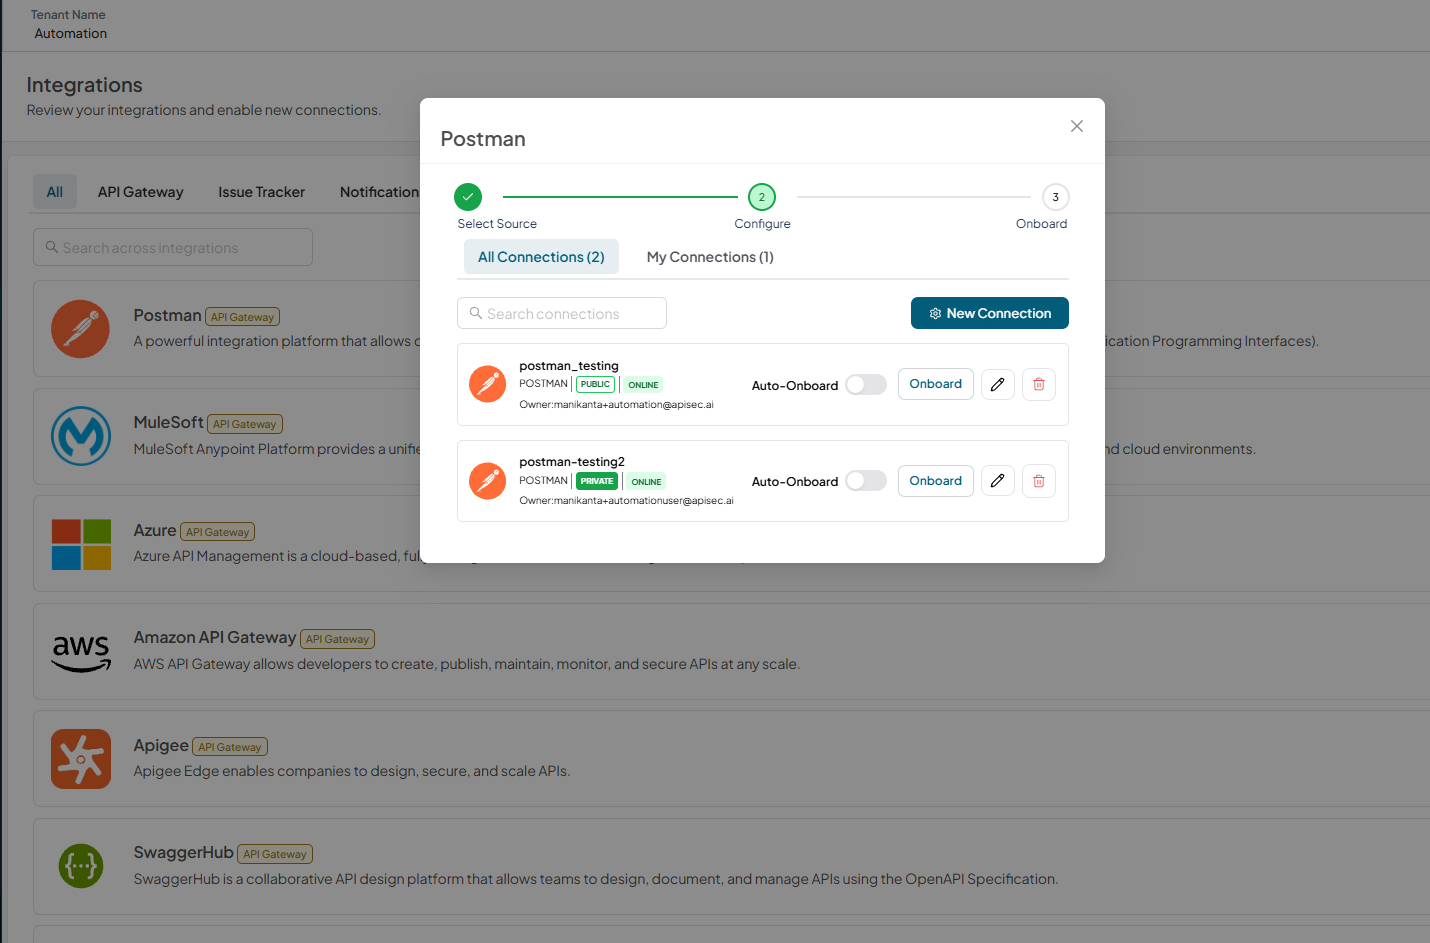
If existing connections are available, they will be displayed in the Connections list. To create a new connection, click New Connection.
-
If no connections exist, a connection form is displayed, allowing you to enter the required details and create a connection.
-
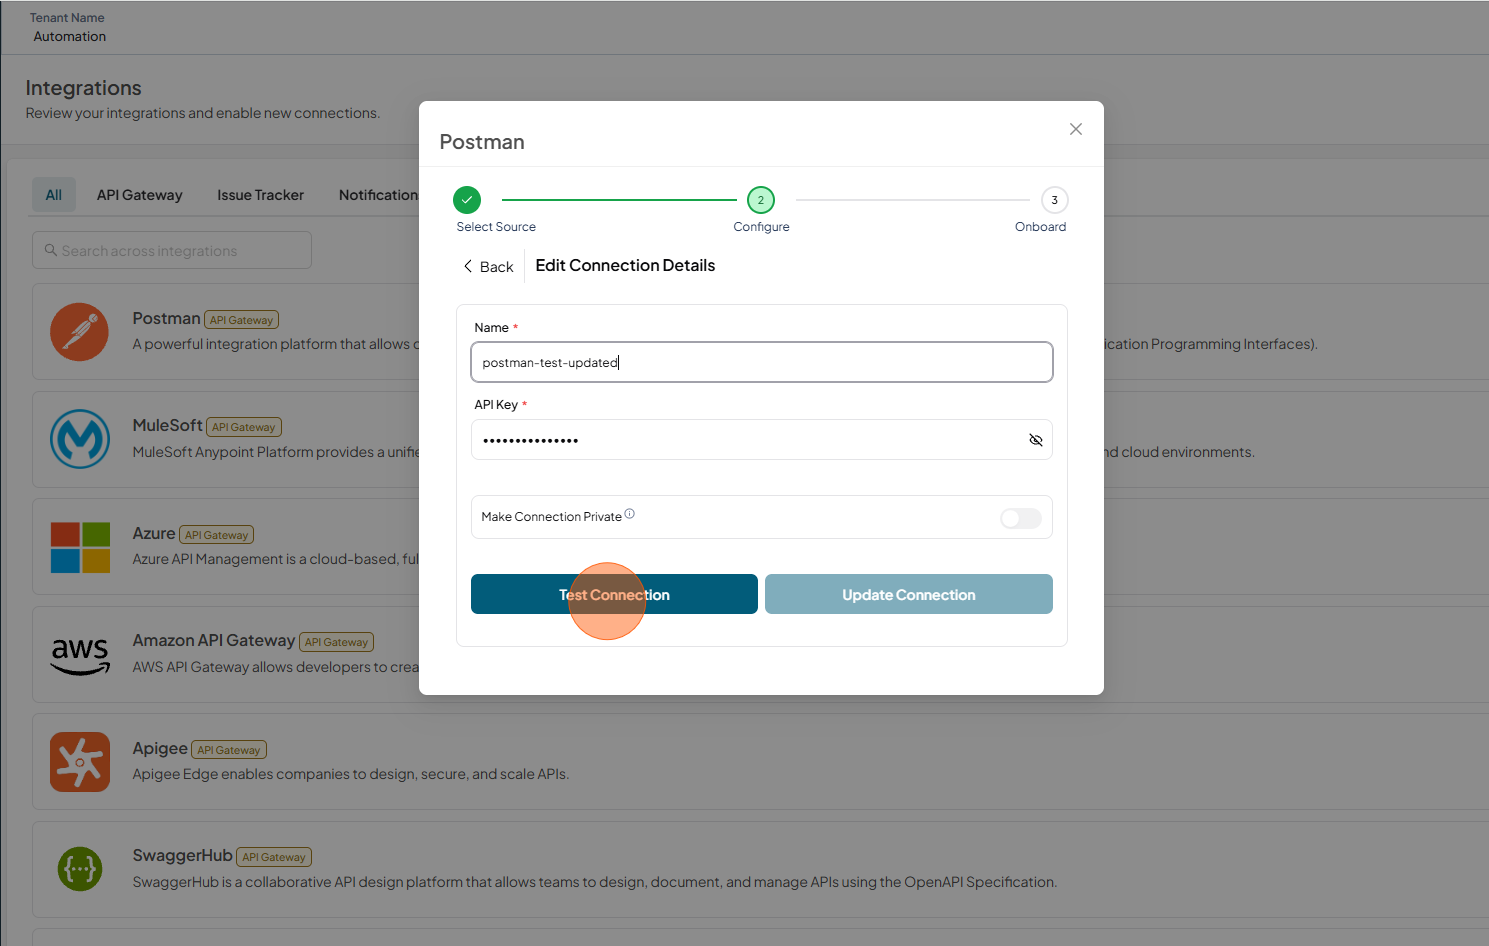
Fill the form, Name and API Key
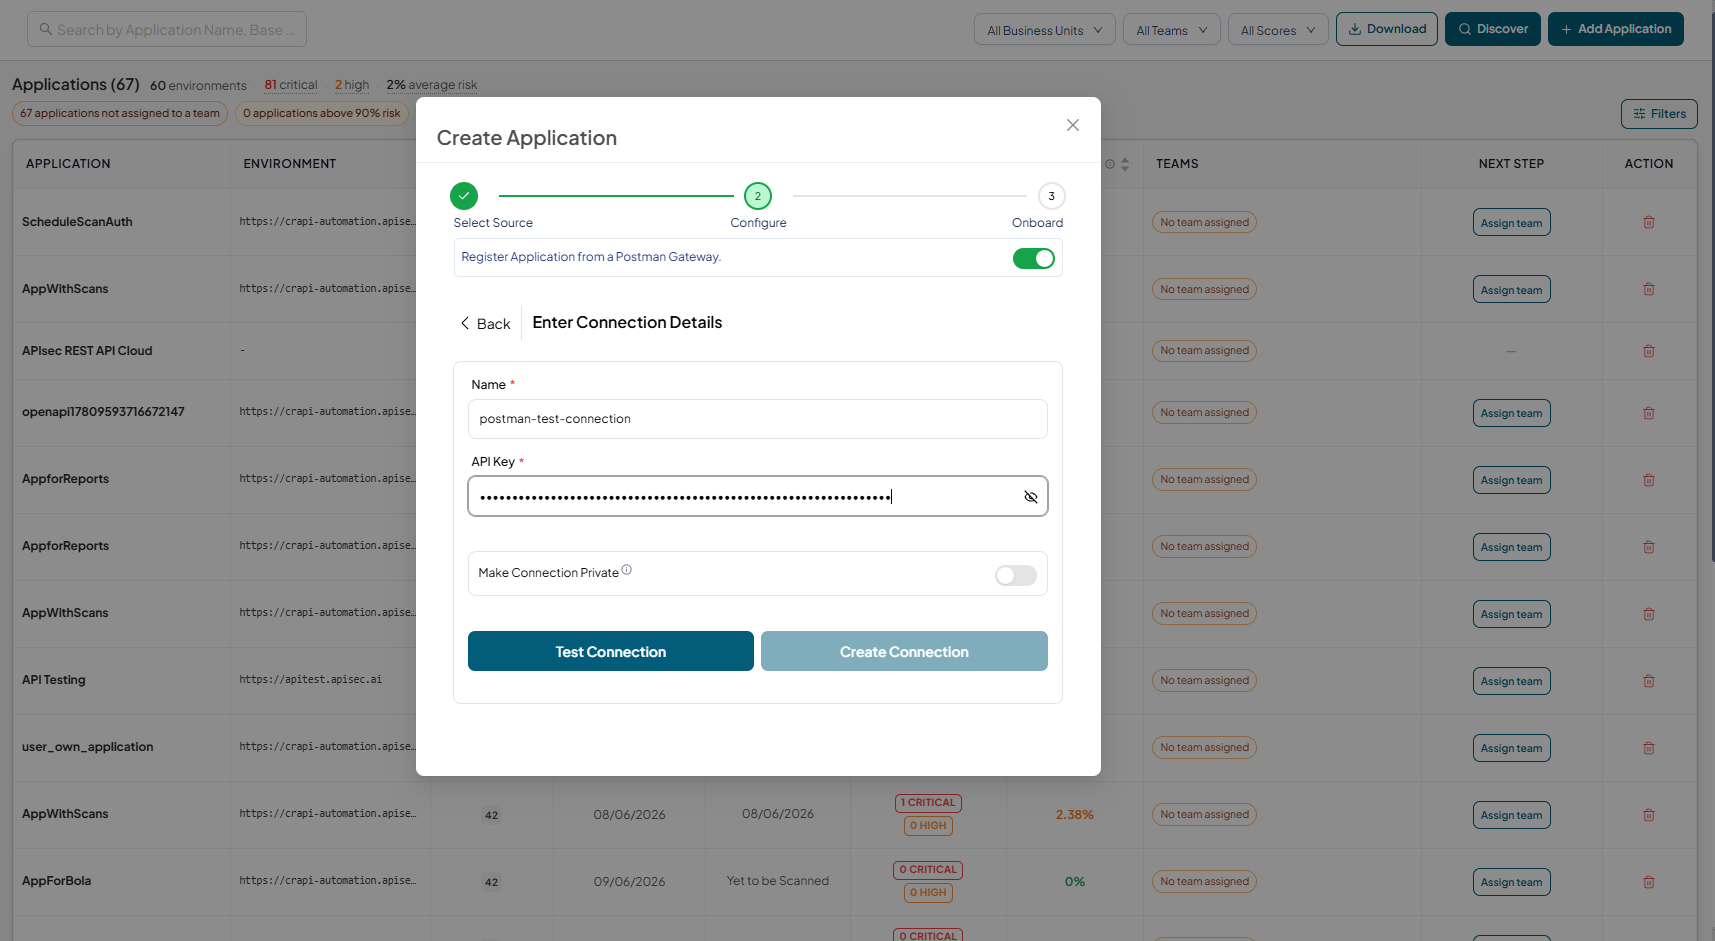
-
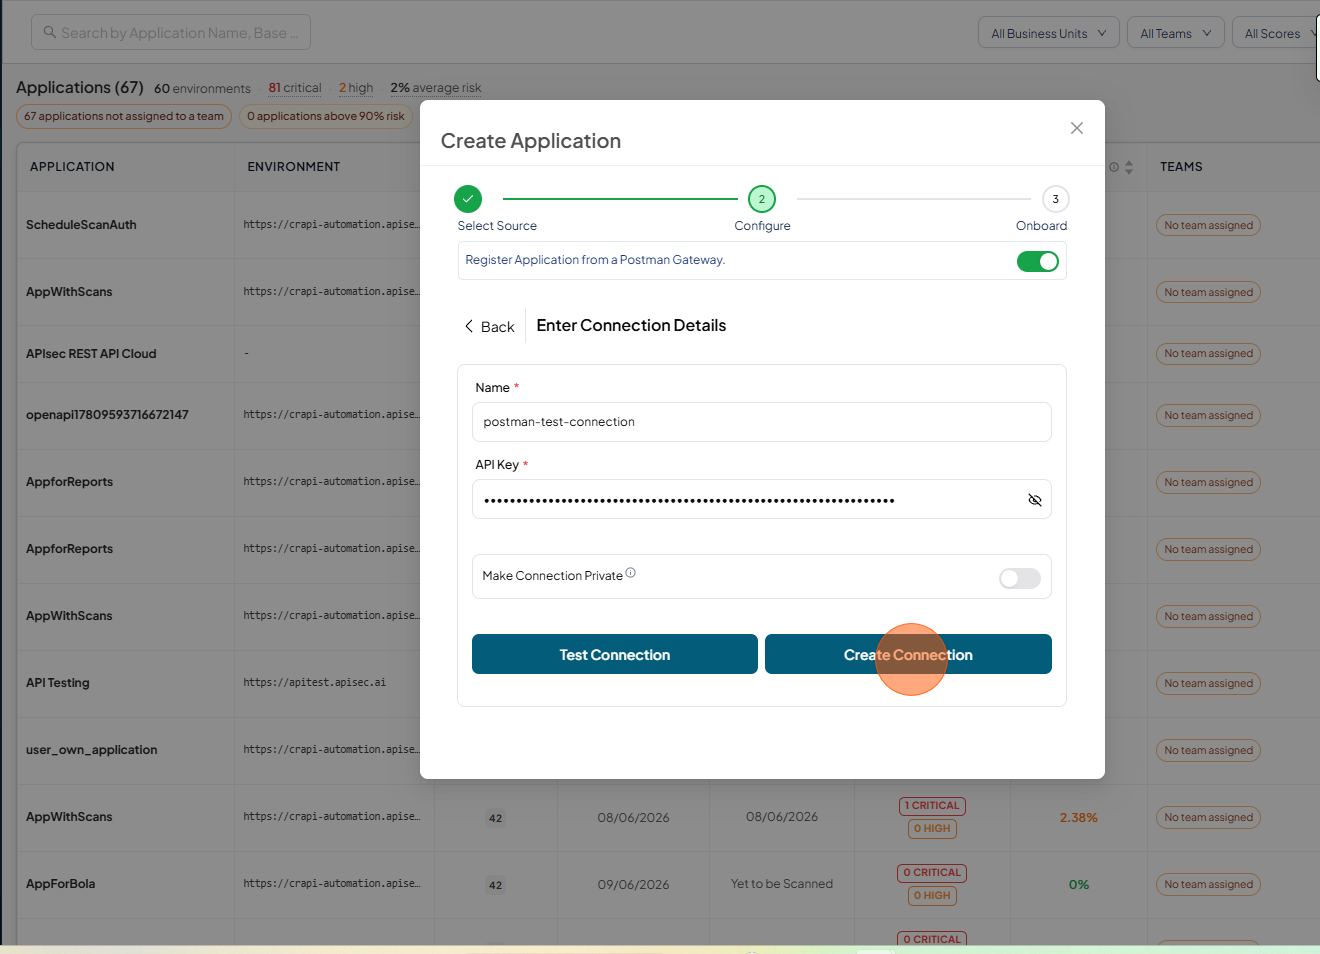
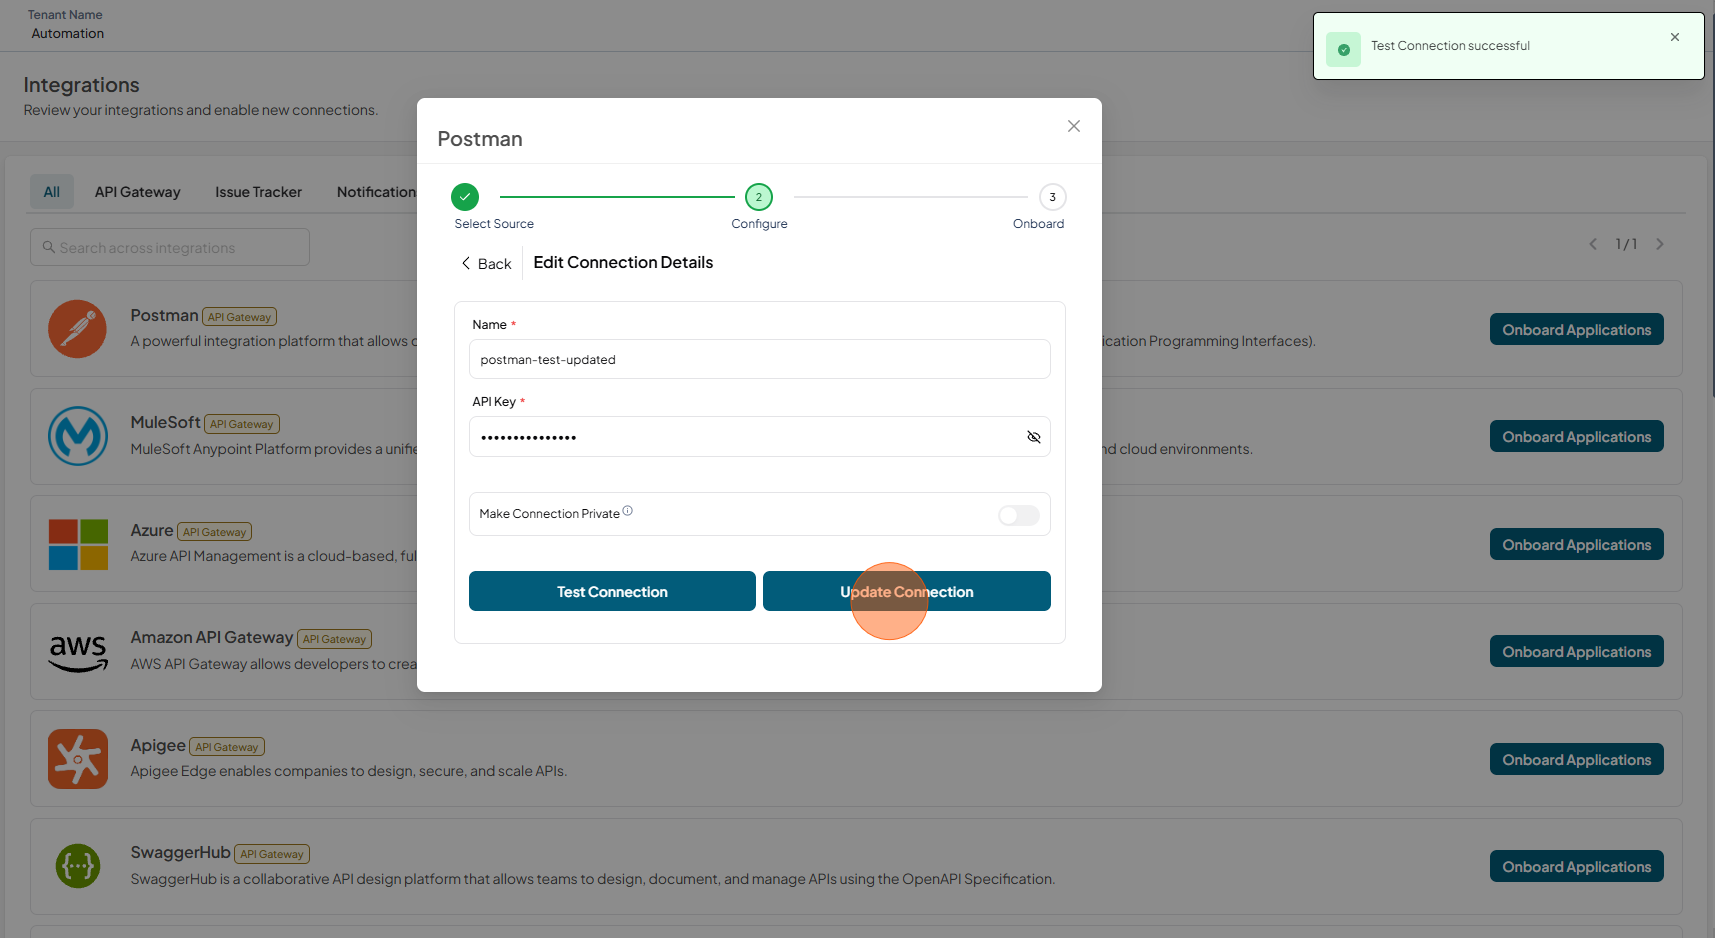
Click Test Connection
-
After Test connection successfull, Click Create Connection
-
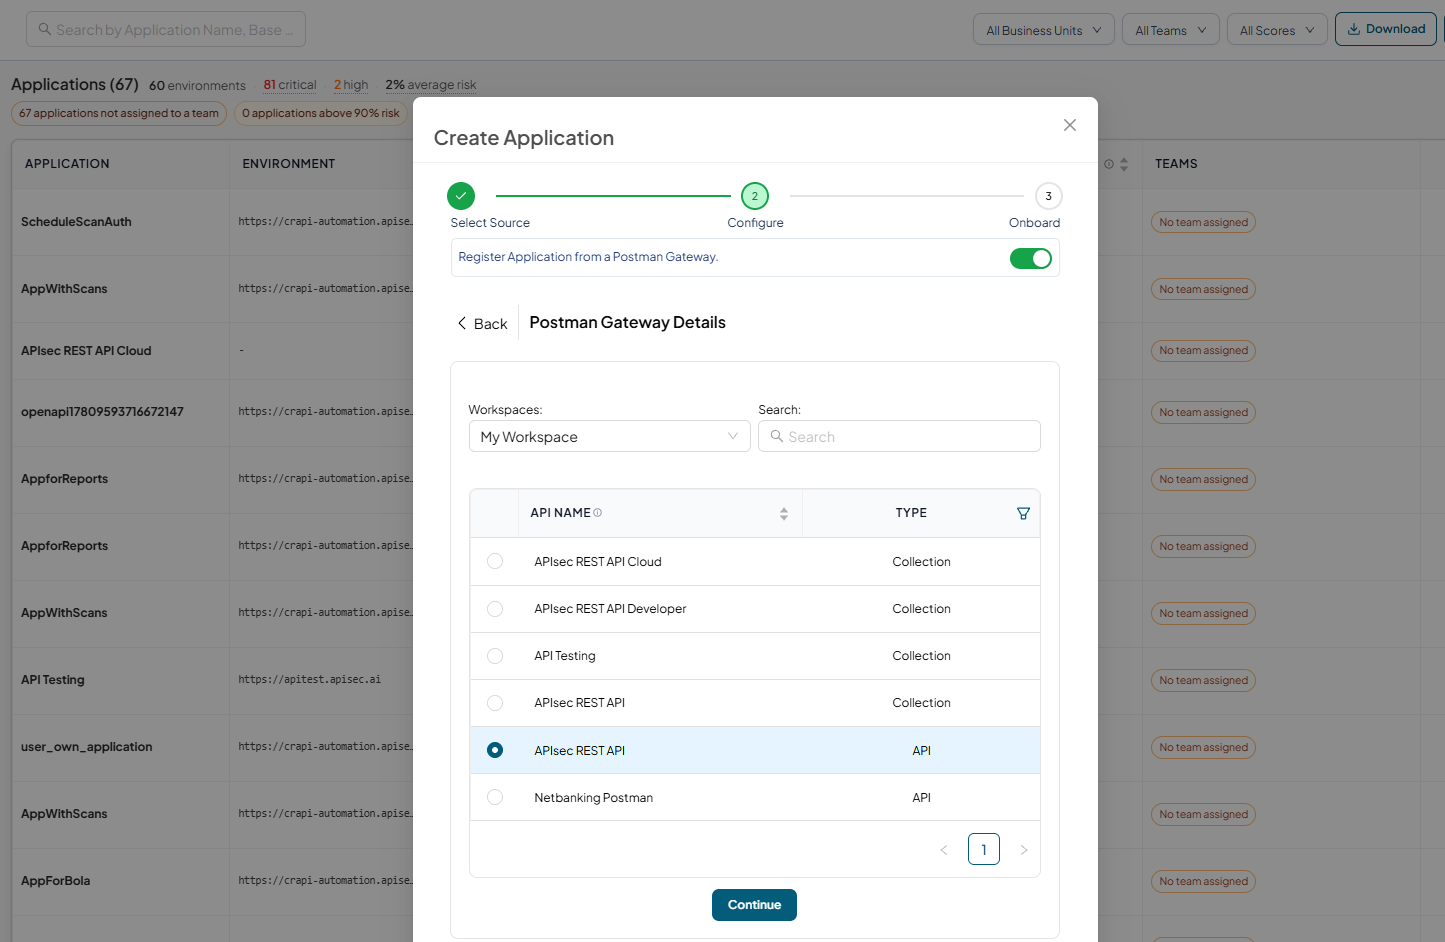
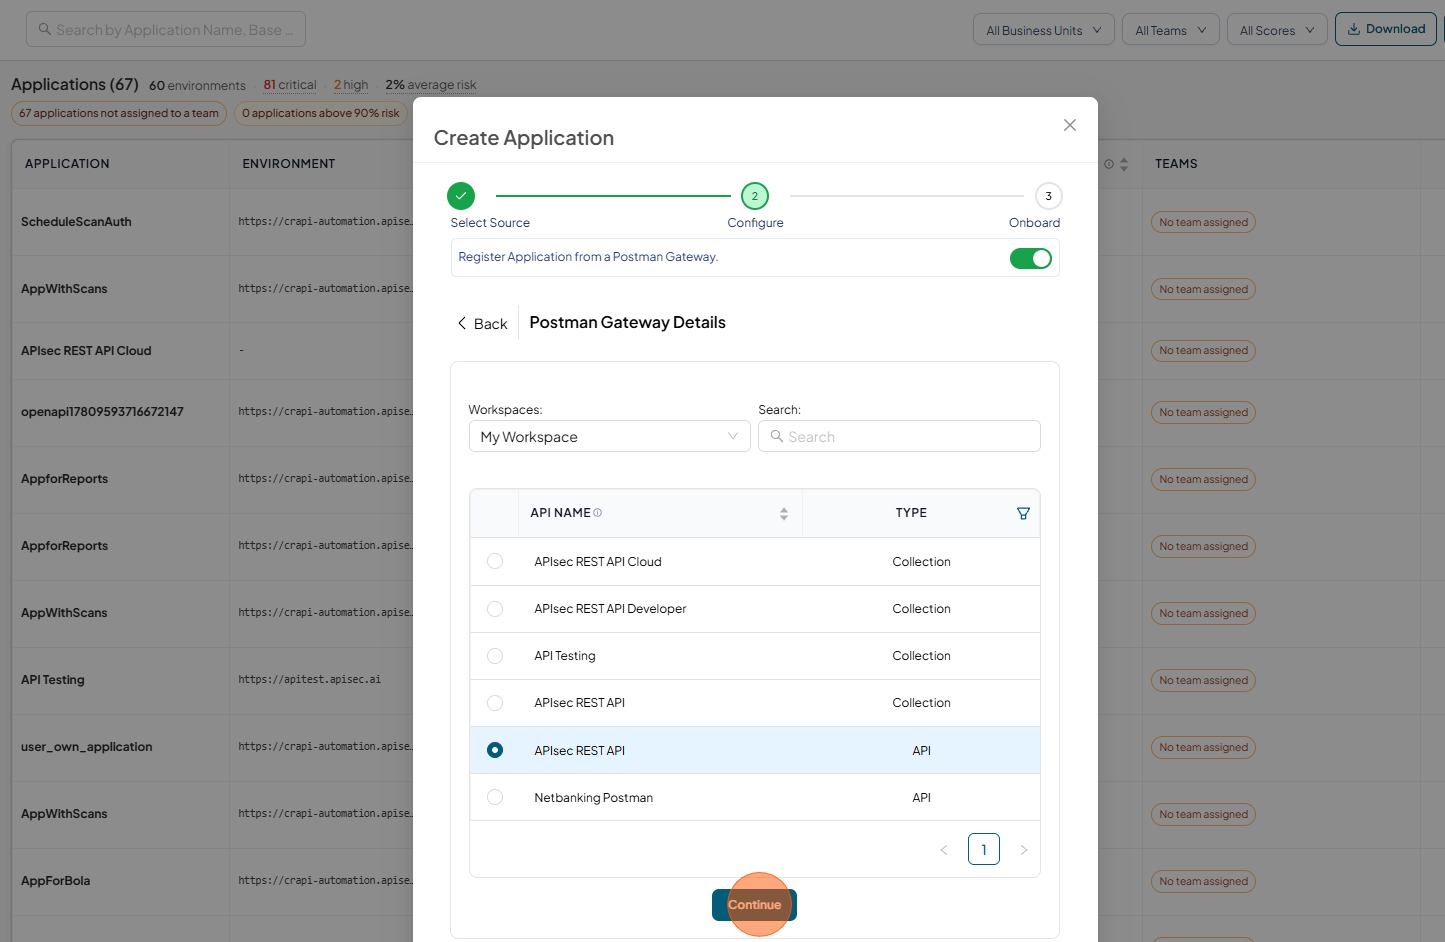
Select Workspace and Correct API from the API list
-
Click Continue
-
Click Onboard
-
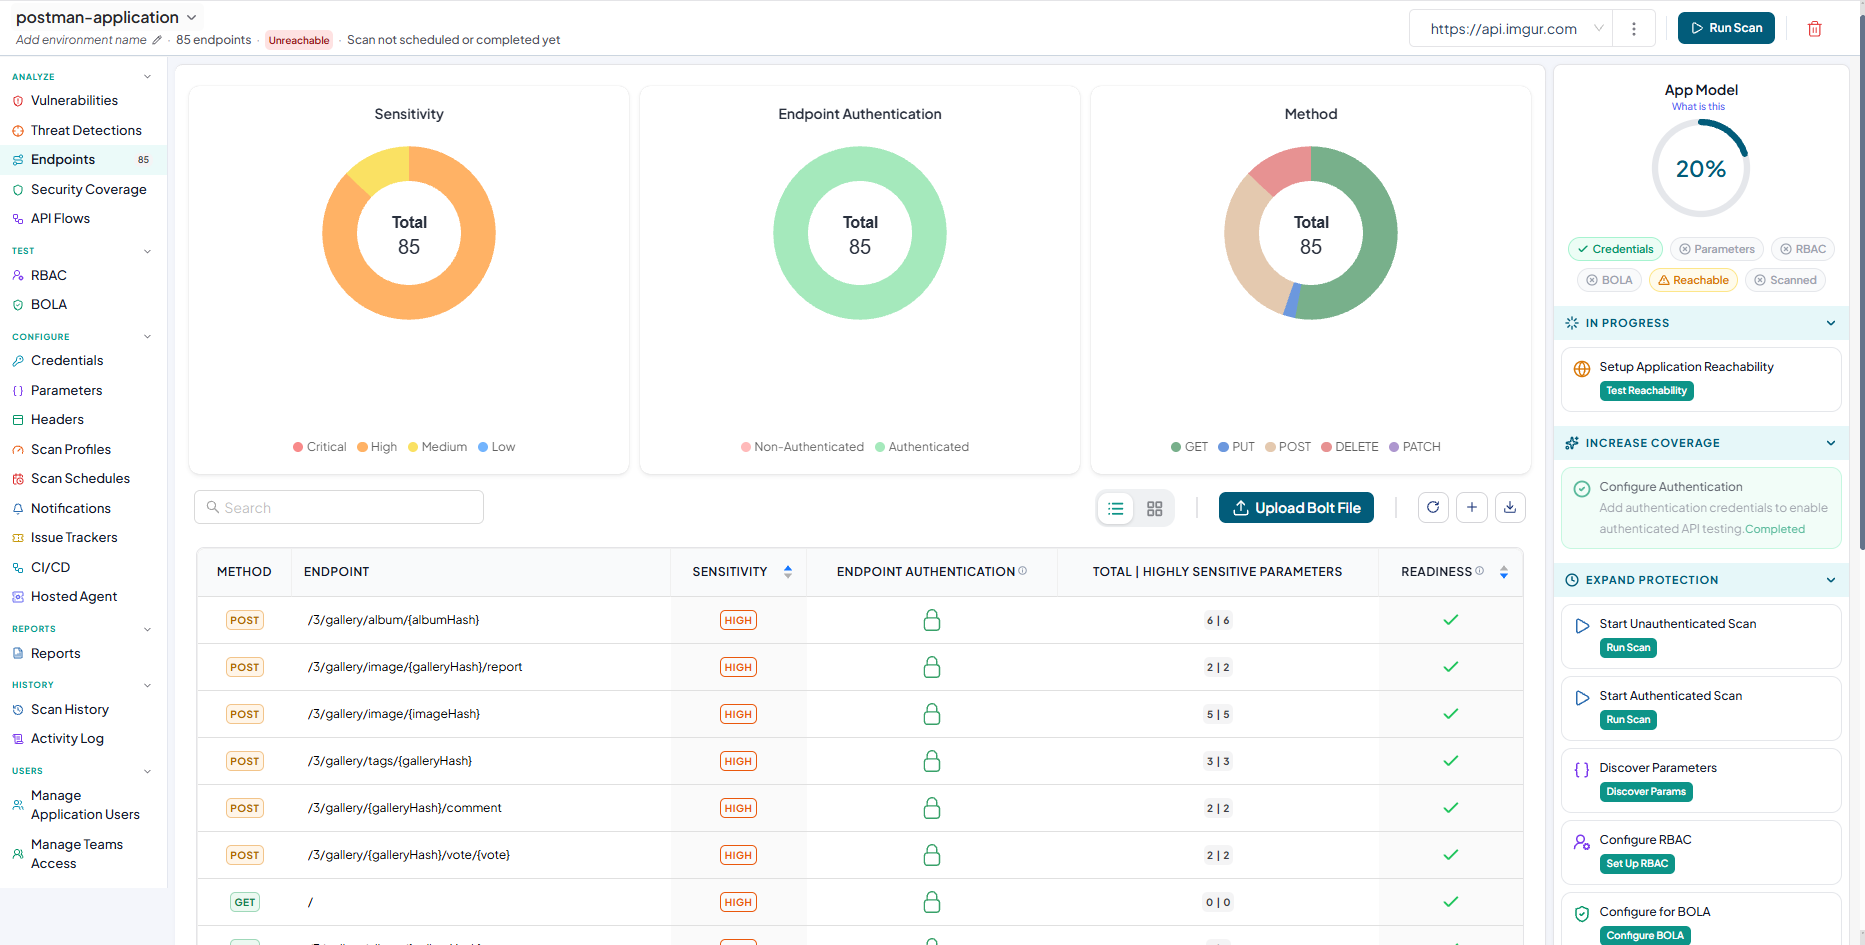
Application Dashboard
Auto-Onboard
The Auto-Onboard feature streamlines API onboarding by automatically detecting and registering unregistered APIs from Postman Gateway. This ensures that all APIs, including newly published ones, are consistently onboarded and tested for vulnerabilities with minimal manual effort.
Enable Auto-onboard
-
Open your browser and visit: https://<your-tenant>.apisecapps.com
-
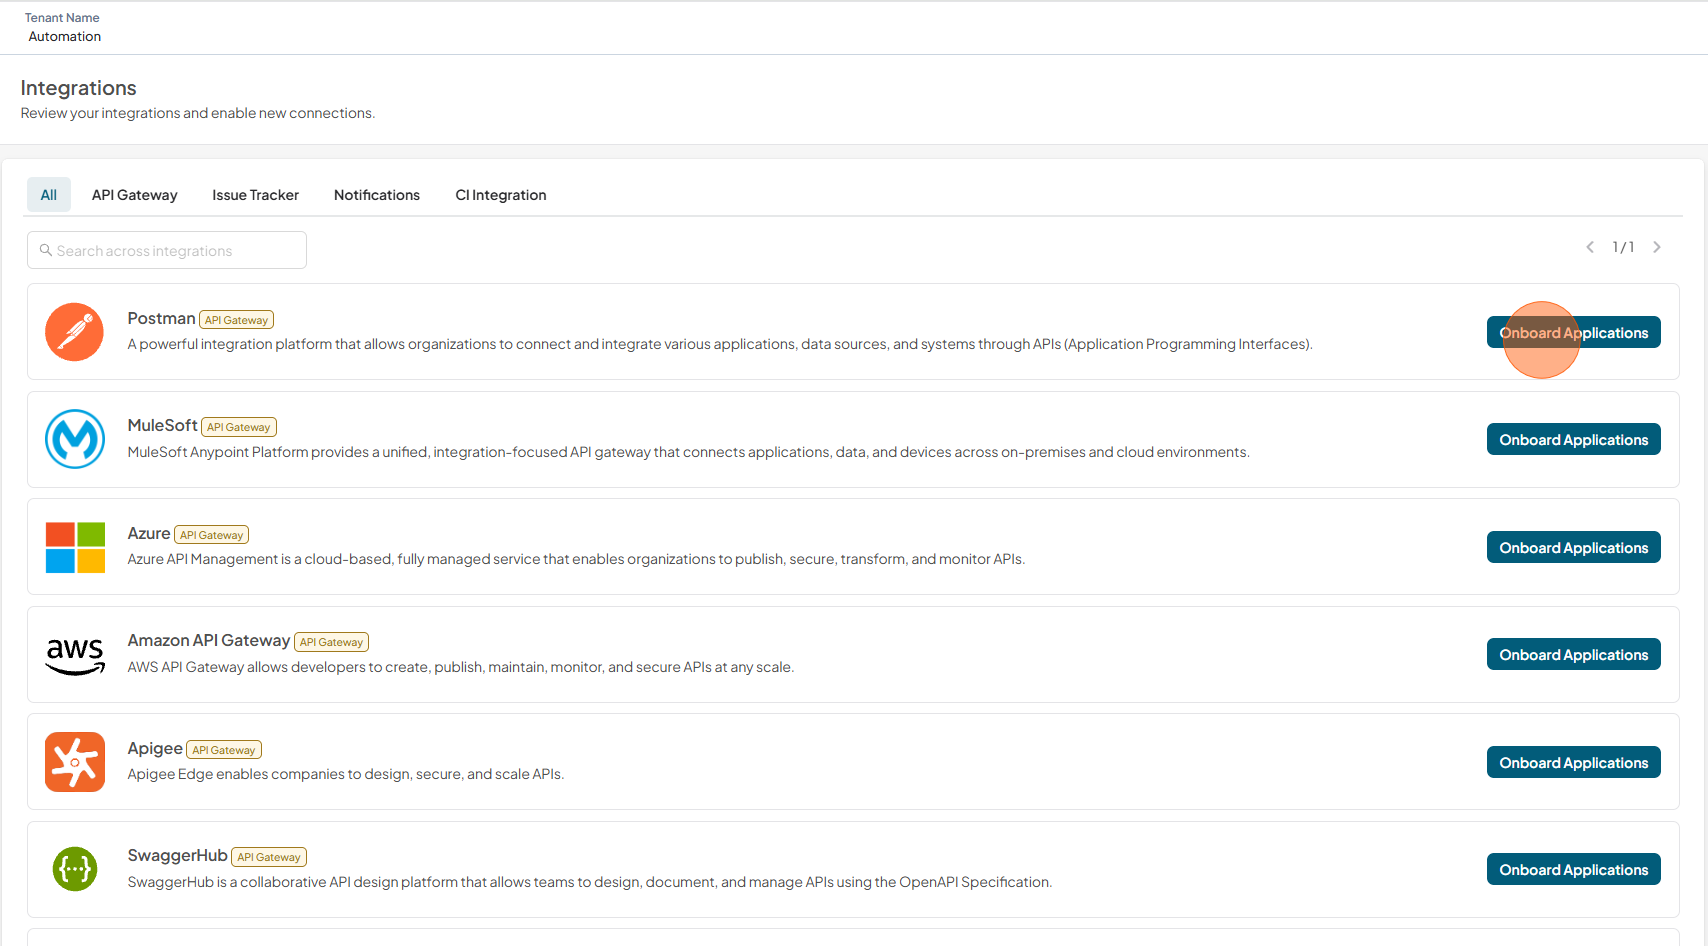
Click Integrations tab
-
Click Onboard Applications adjacent to the Postman Gateway
-
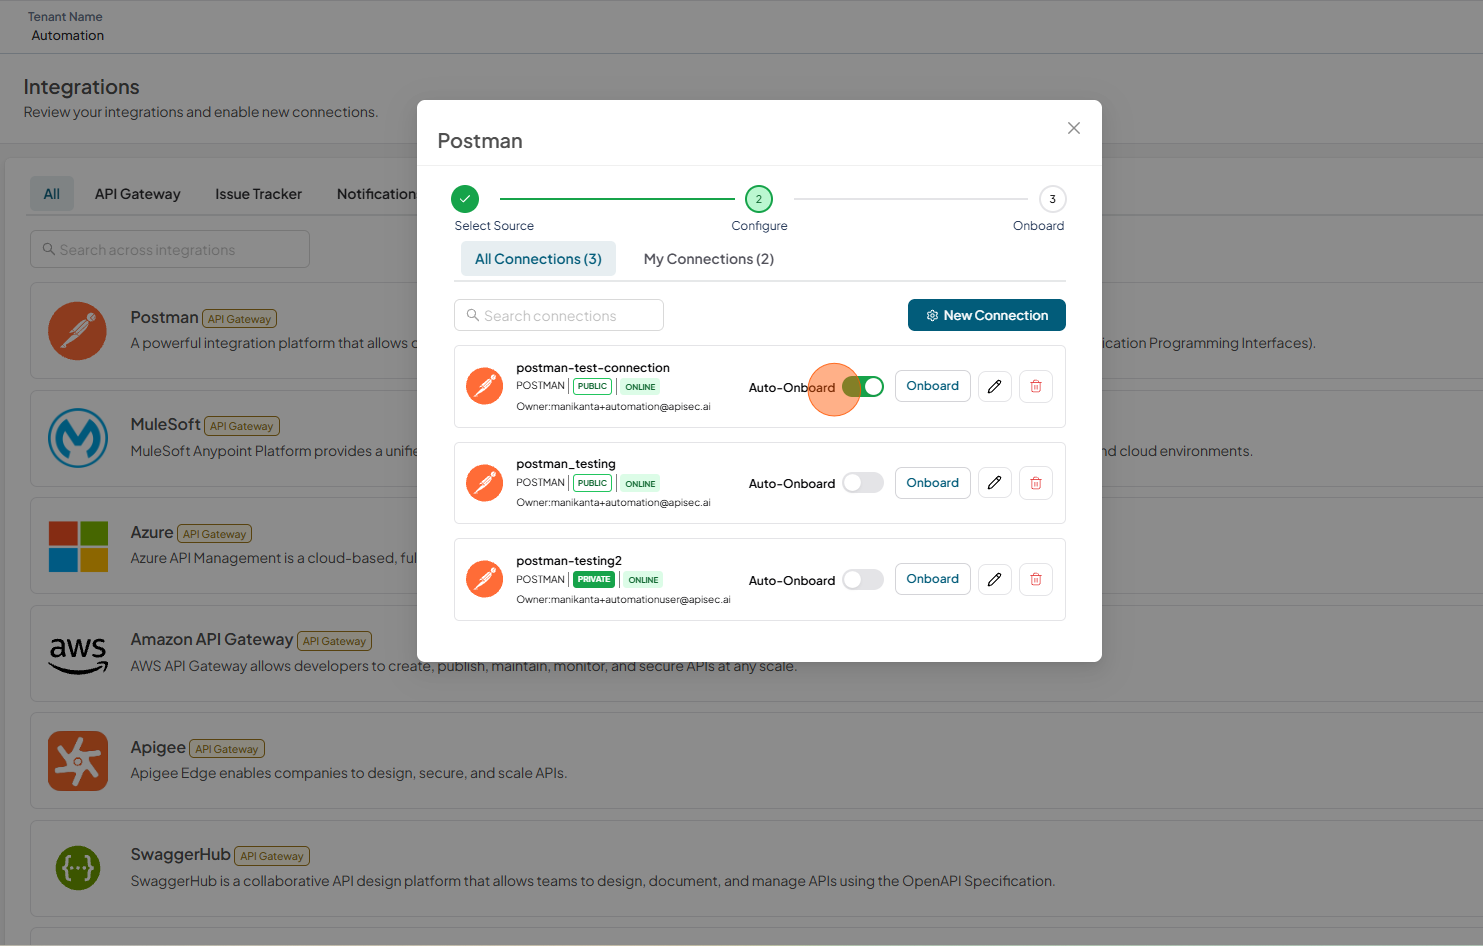
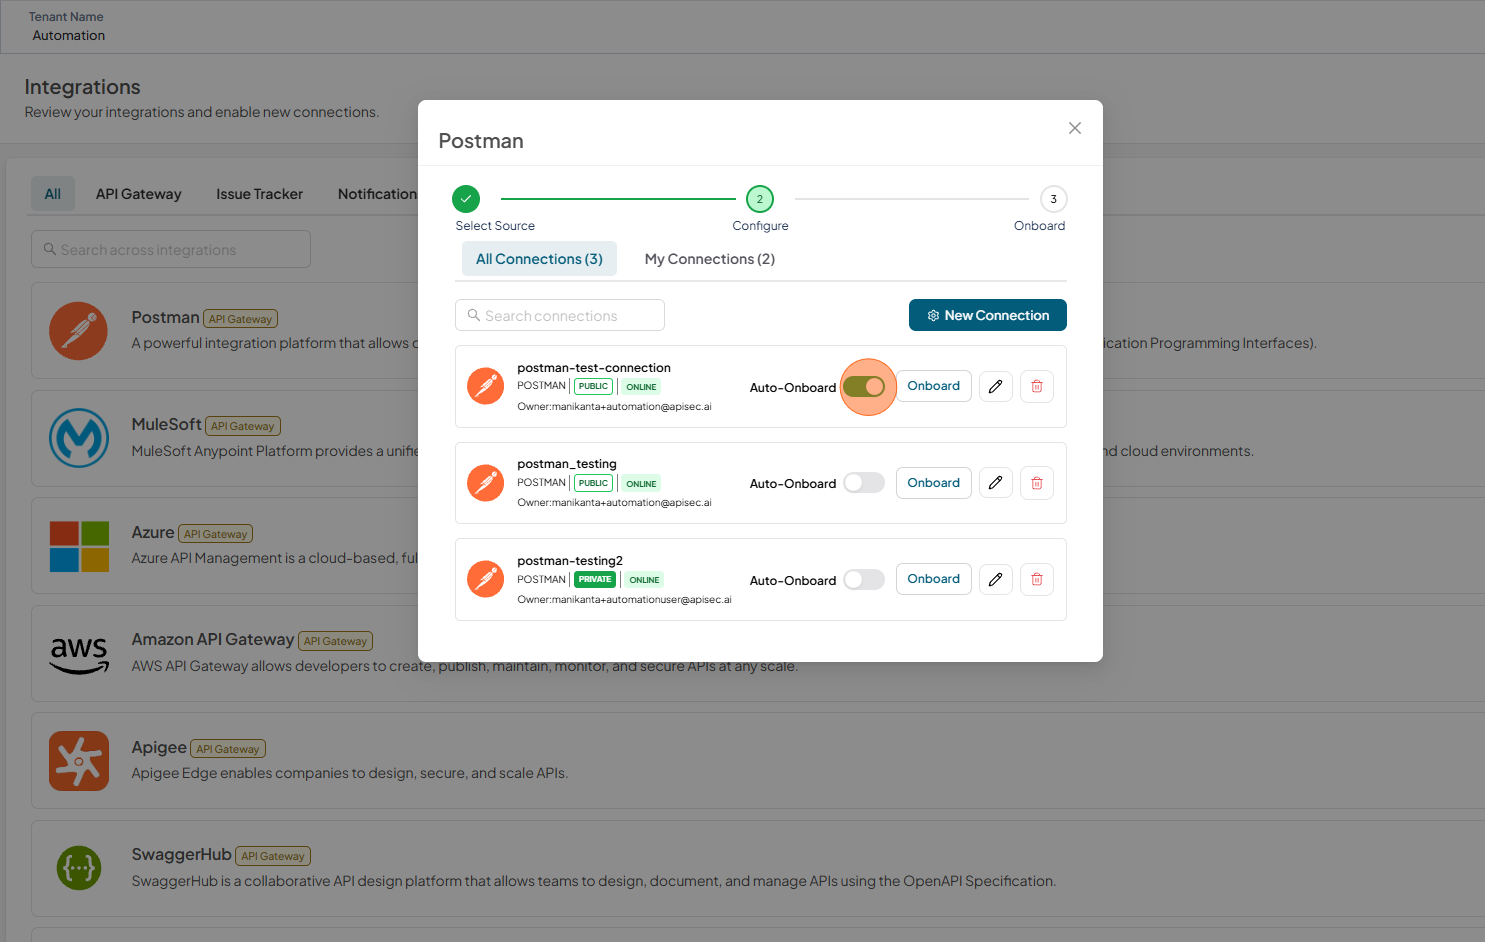
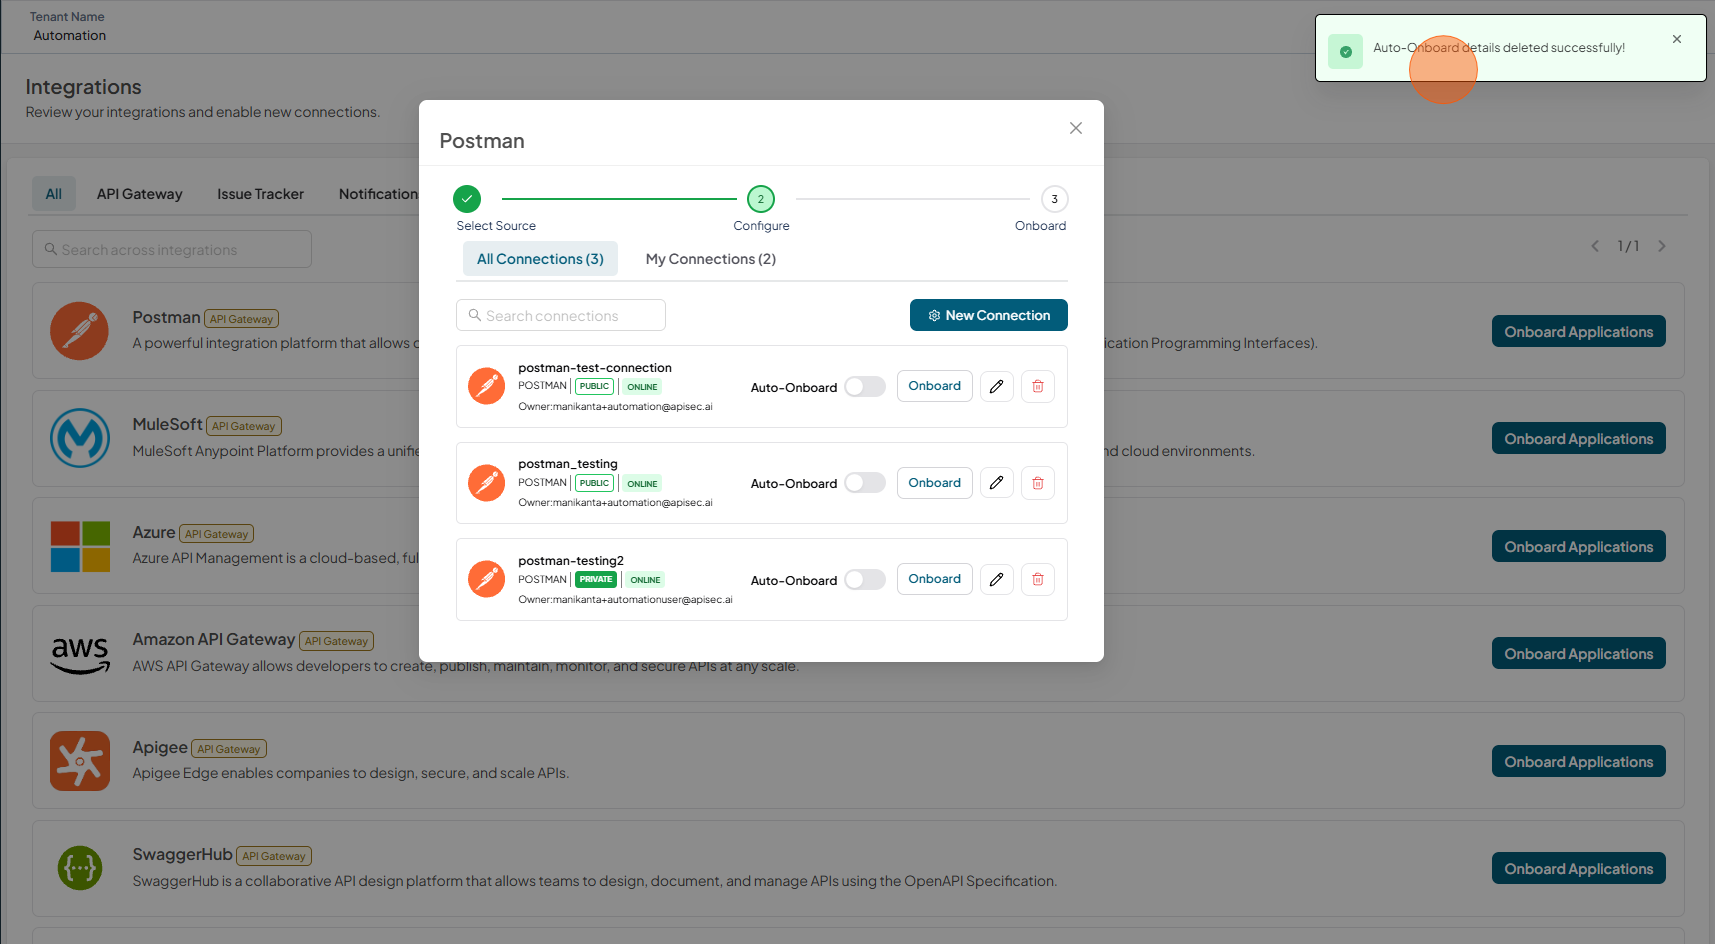
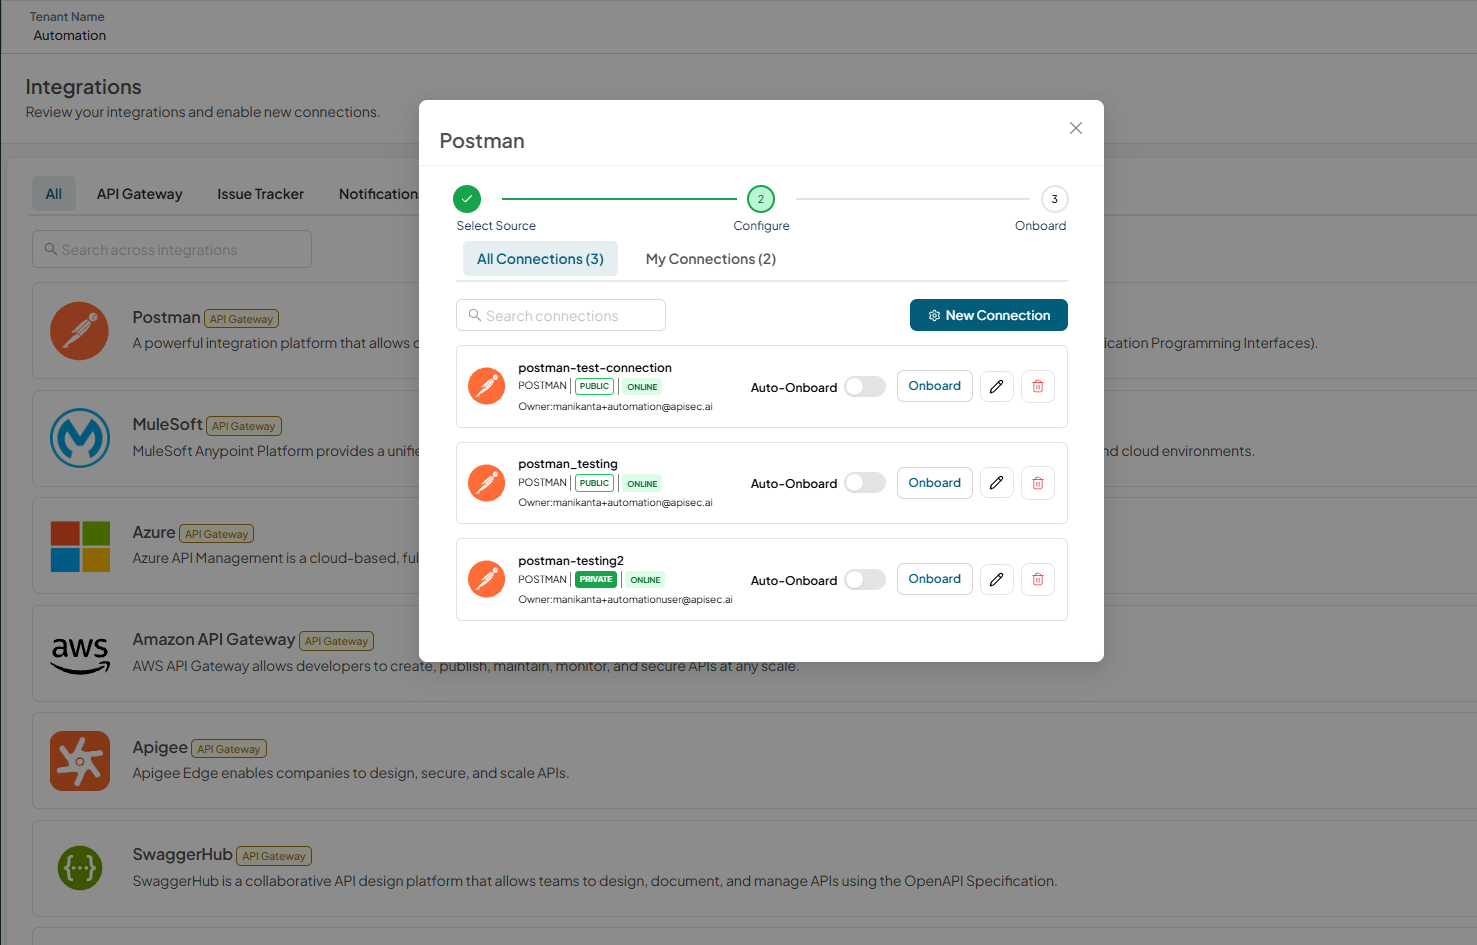
Enable Auto-Onboard of any existing Postman connection.
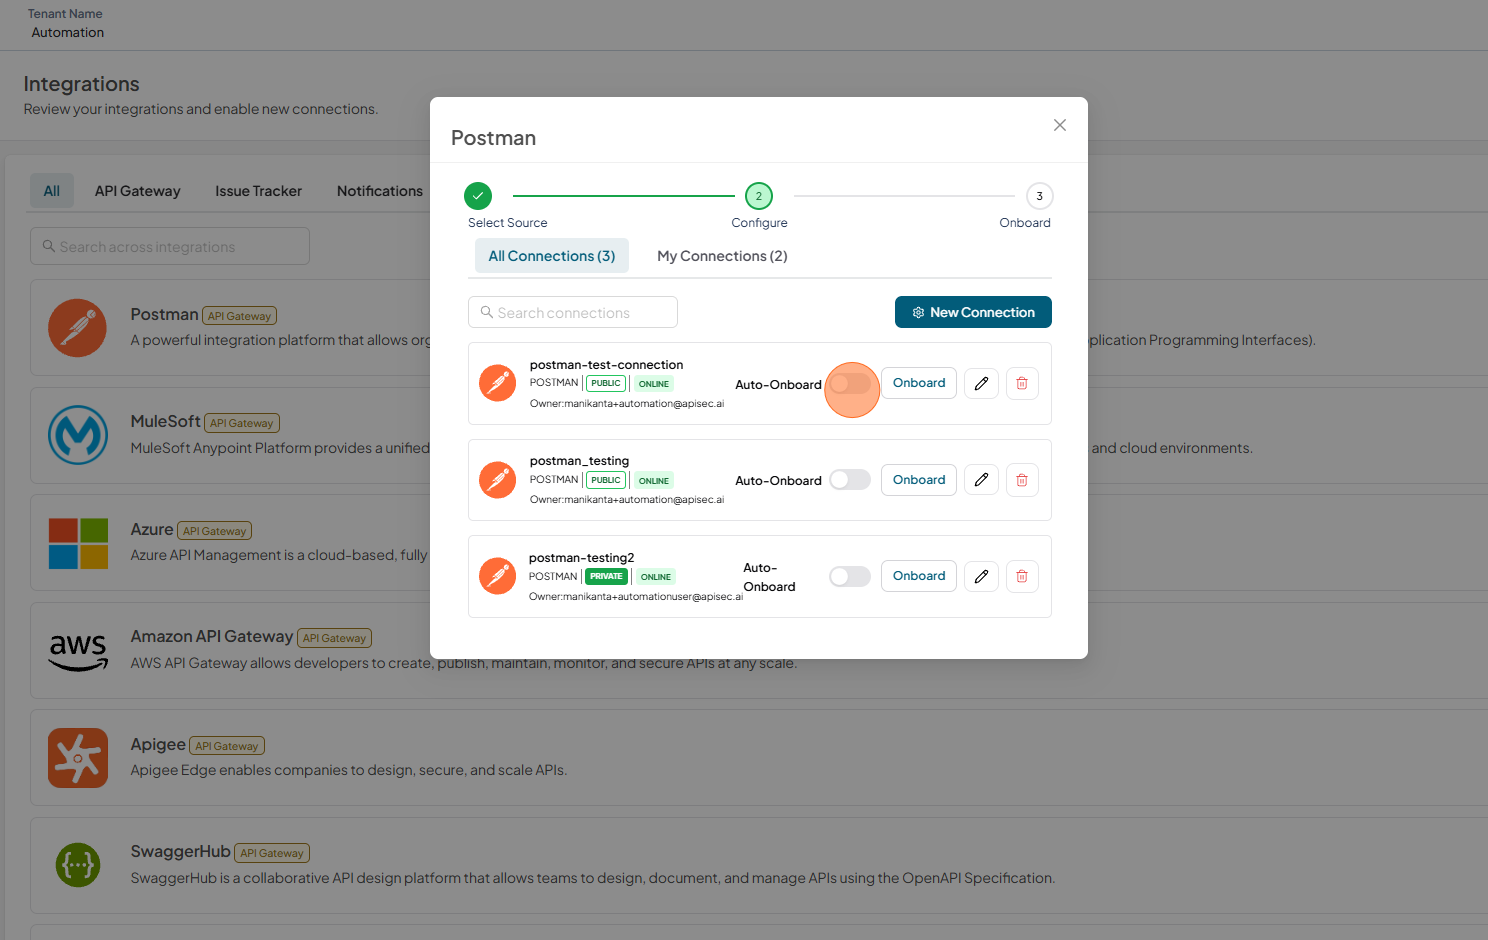
-
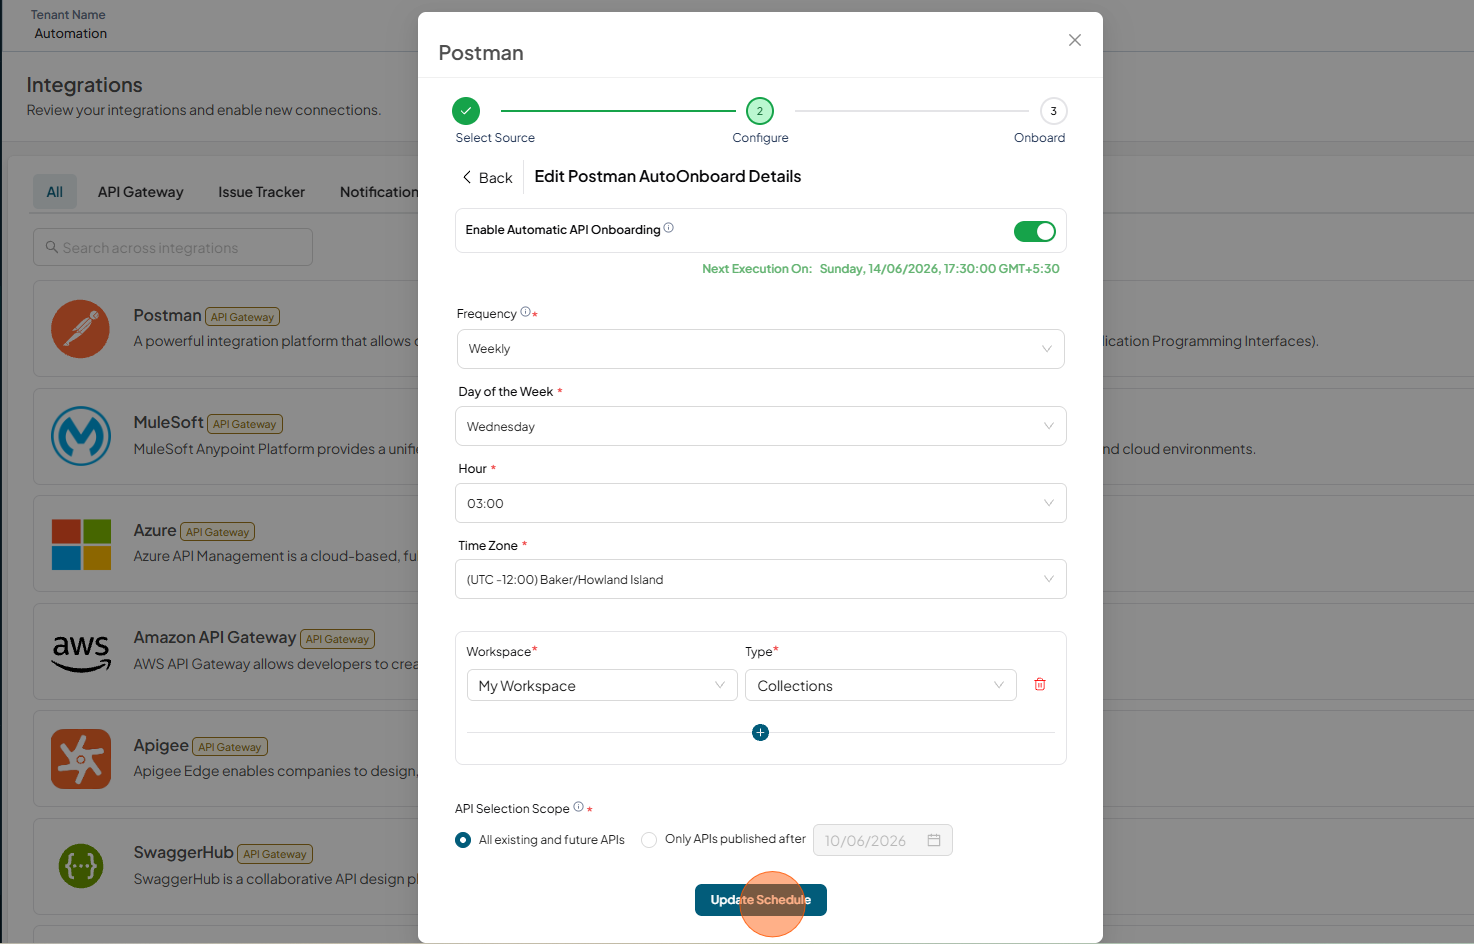
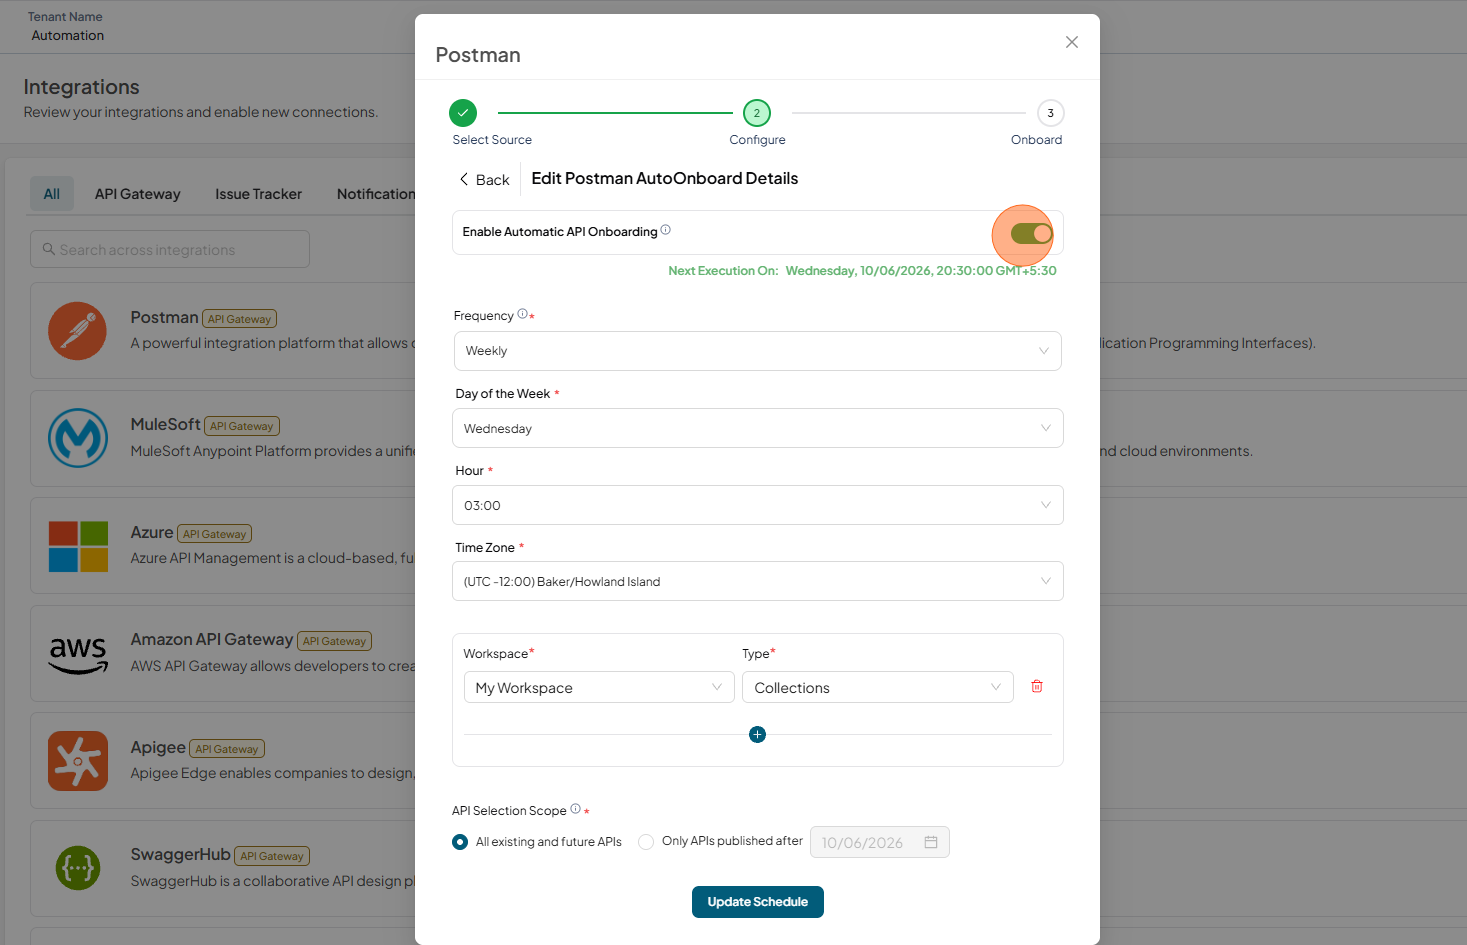
Fill the Postman AutoOnboard Details and click on Save Schedule
- Frequency – How often the onboarding should occur. By default it is weekly.
- Day of the Week – Select the specific day for onboarding.
- Hour – The exact time (in hours and minutes) when the onboarding should start.
- Timezone – The timezone in which the schedule should be applied
- Workspace – Select the workspace you want to onboard from the Workspace dropdown.
- Type - Choose the corresponding Type (Collections/APIs/All) for the selected workspaces.
- API Selection Scope - Select whether to auto-onboard all available APIs or limit onboarding to only those published after the specified date.

-
Successfully saved auto-onboard details.
Update Schedule
-
Open your browser and visit: https://<your-tenant>.apisecapps.com
-
Click Integrations tab
-
Click Onboard Applications adjacent to the Postman Gateway
-
Click Auto-Onboard enabled toggle.
-
Update the details and Click on Update Schedule
Disable Auto-Onboard
-
Open your browser and visit: https://<your-tenant>.apisecapps.com
-
Click Integrations tab
-
Click Onboard Applications adjacent to the Postman Gateway
-
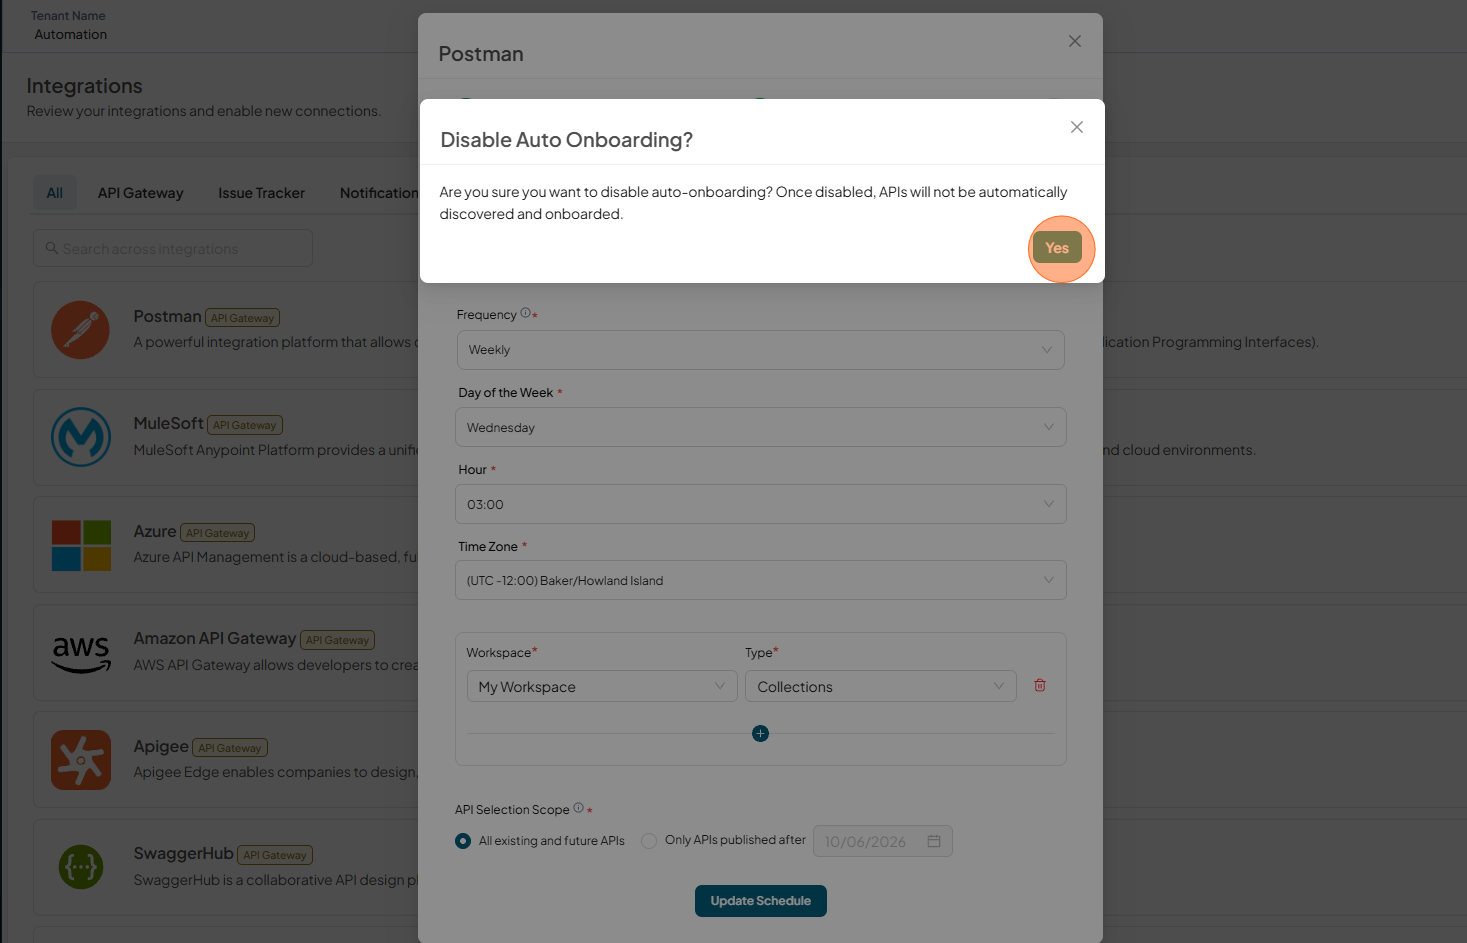
Click Auto-Onboard enabled toggle.
-
In Edit Postman AutoOnboard Details, disable the Enable Automatic API Onboarding.
-
Click Yes to confirm
-
Auto-Onboard details deleted successfully!
Edit Postman Connection
To Edit Postman connection
-
Open your browser and visit: https://<your-tenant>.apisecapps.com
-
Click Integrations tab
-
Click Onboard Applications adjacent to the Postman Gateway
-
A list of existing Postman connections is displayed.
-
Select the Pencil icon next to the connection you want to edit.
-
Update the required details and Click on Test Connection
-
once Test connection successfull then Click on Update Connection
-
The updated connection is now displayed in the connections list.

Delete Postman Connection
-
Open your browser and visit: https://<your-tenant>.apisecapps.com
-
Click Integrations tab
-
Click Onboard Applications adjacent to the Postman Gateway
-
A list of existing Postman connections is displayed.
-
Select the Delete icon next to the connection you want to delete.
-
Click Delete to confirm
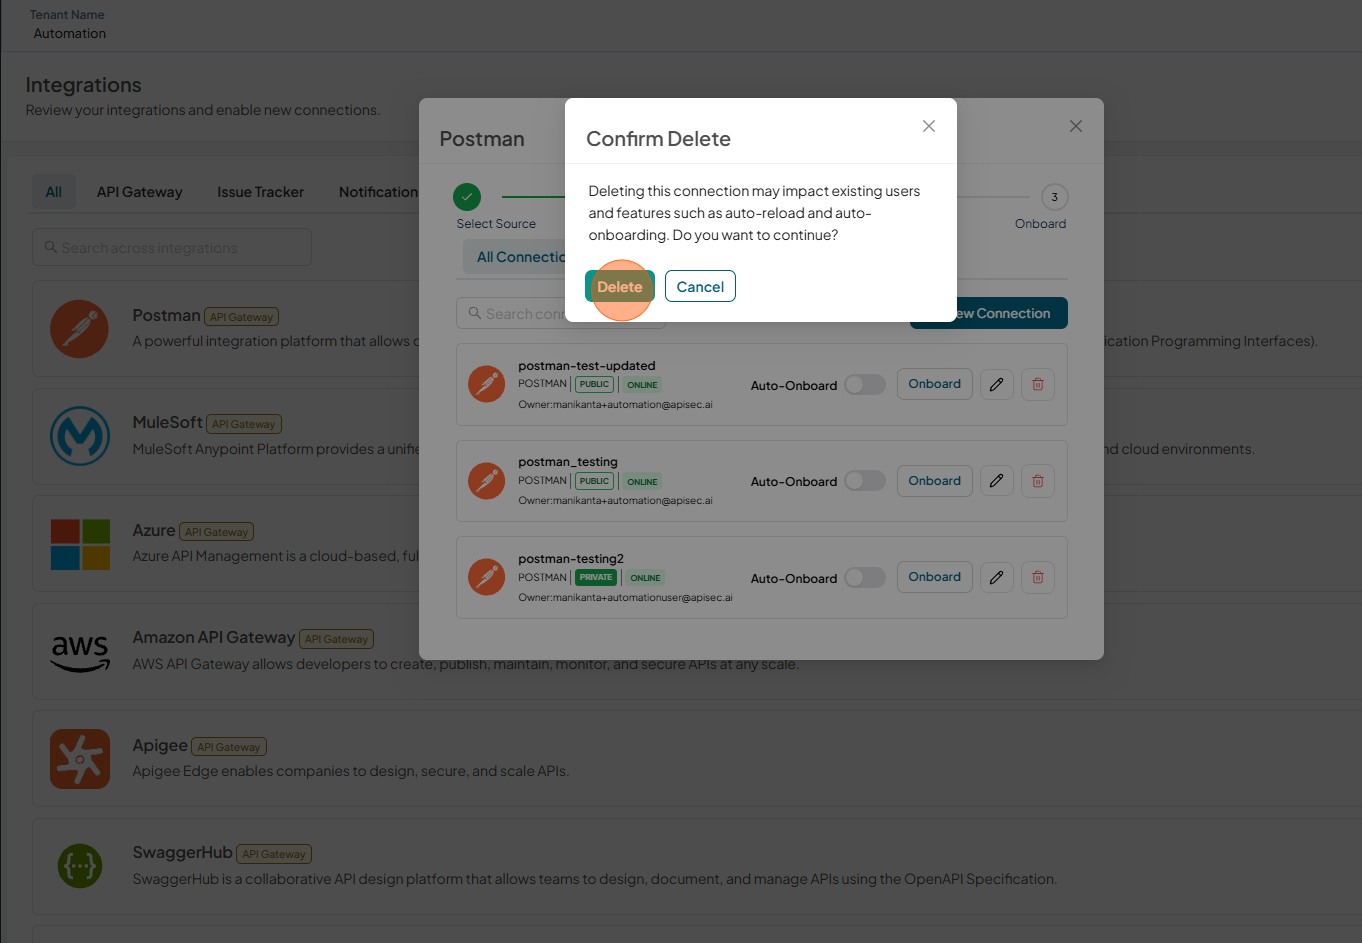
-
The deleted connection is no longer displayed in the connections list.
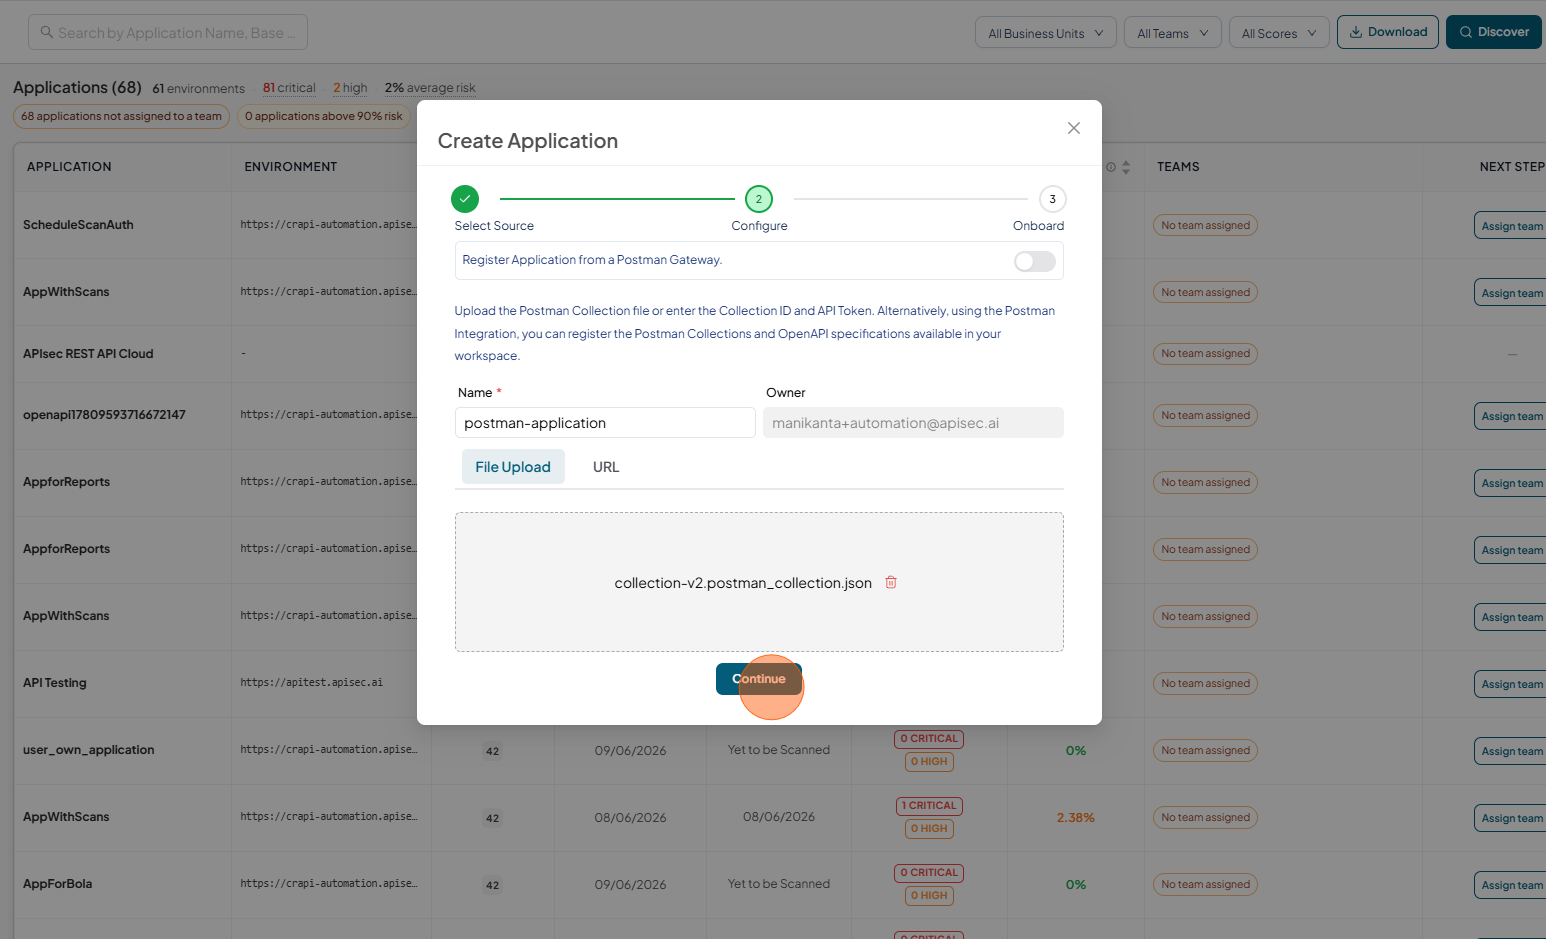
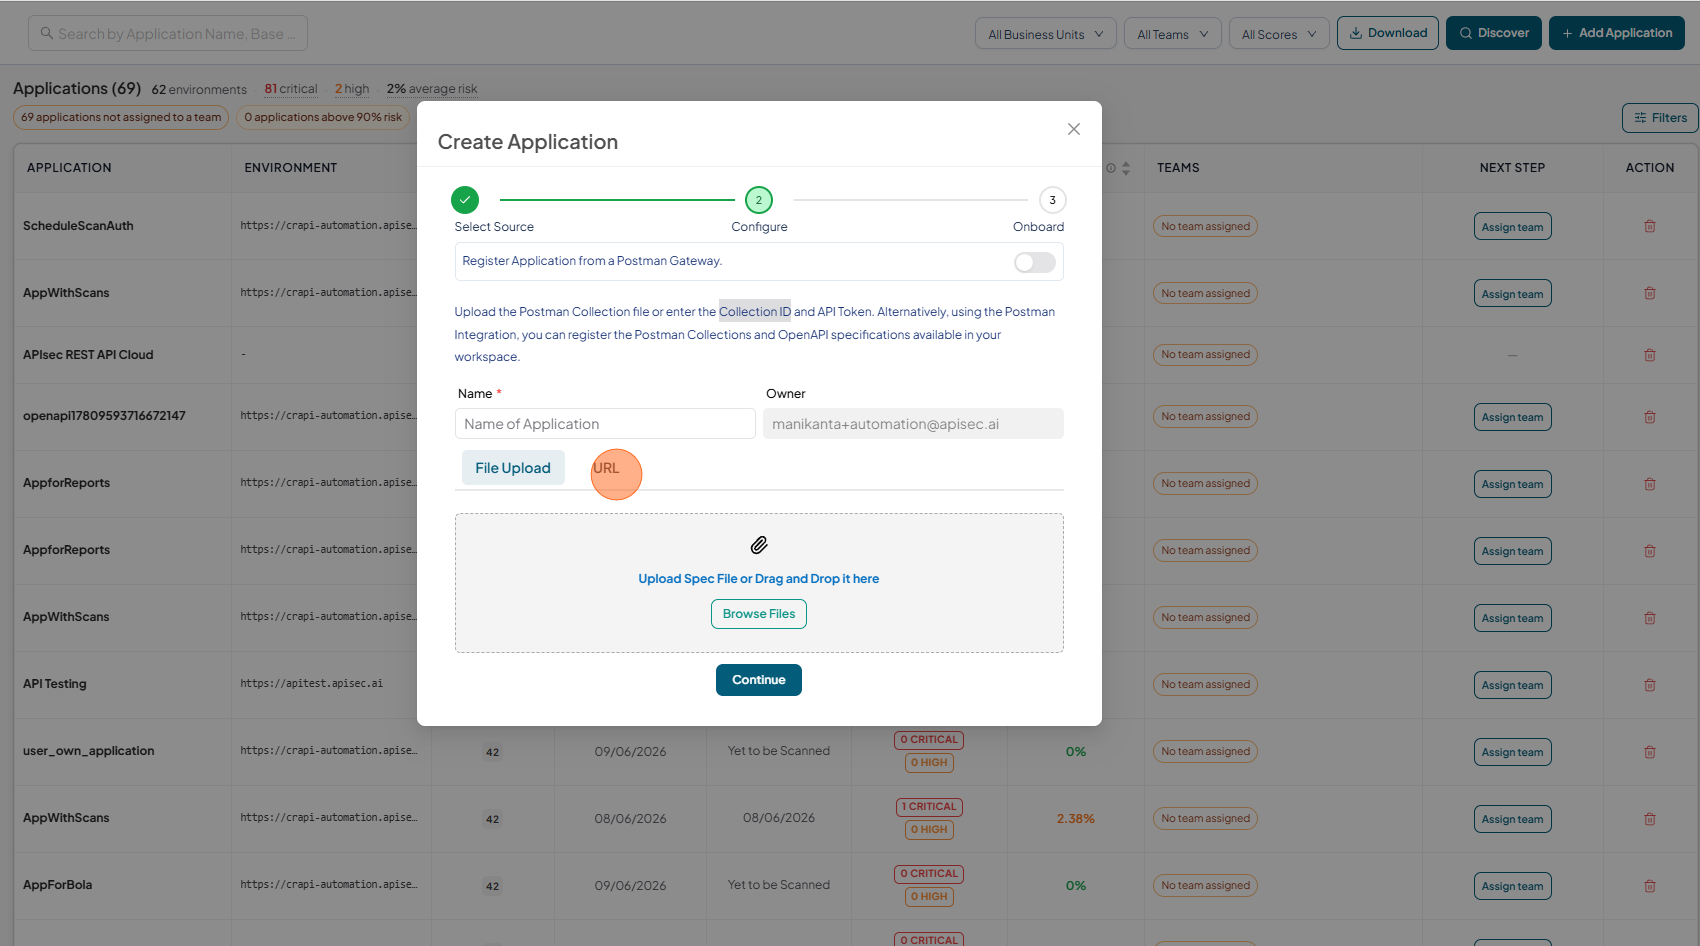
Application Onboarding Using a Postman Collection
-
Open your browser and visit: https://<your-tenant>.apisecapps.com
-
Click on the "Add Application" button.
-
Choose the Postman Gateway option.
-
Enter Name of the Application and upload Postman Collection file and Click Continue
-
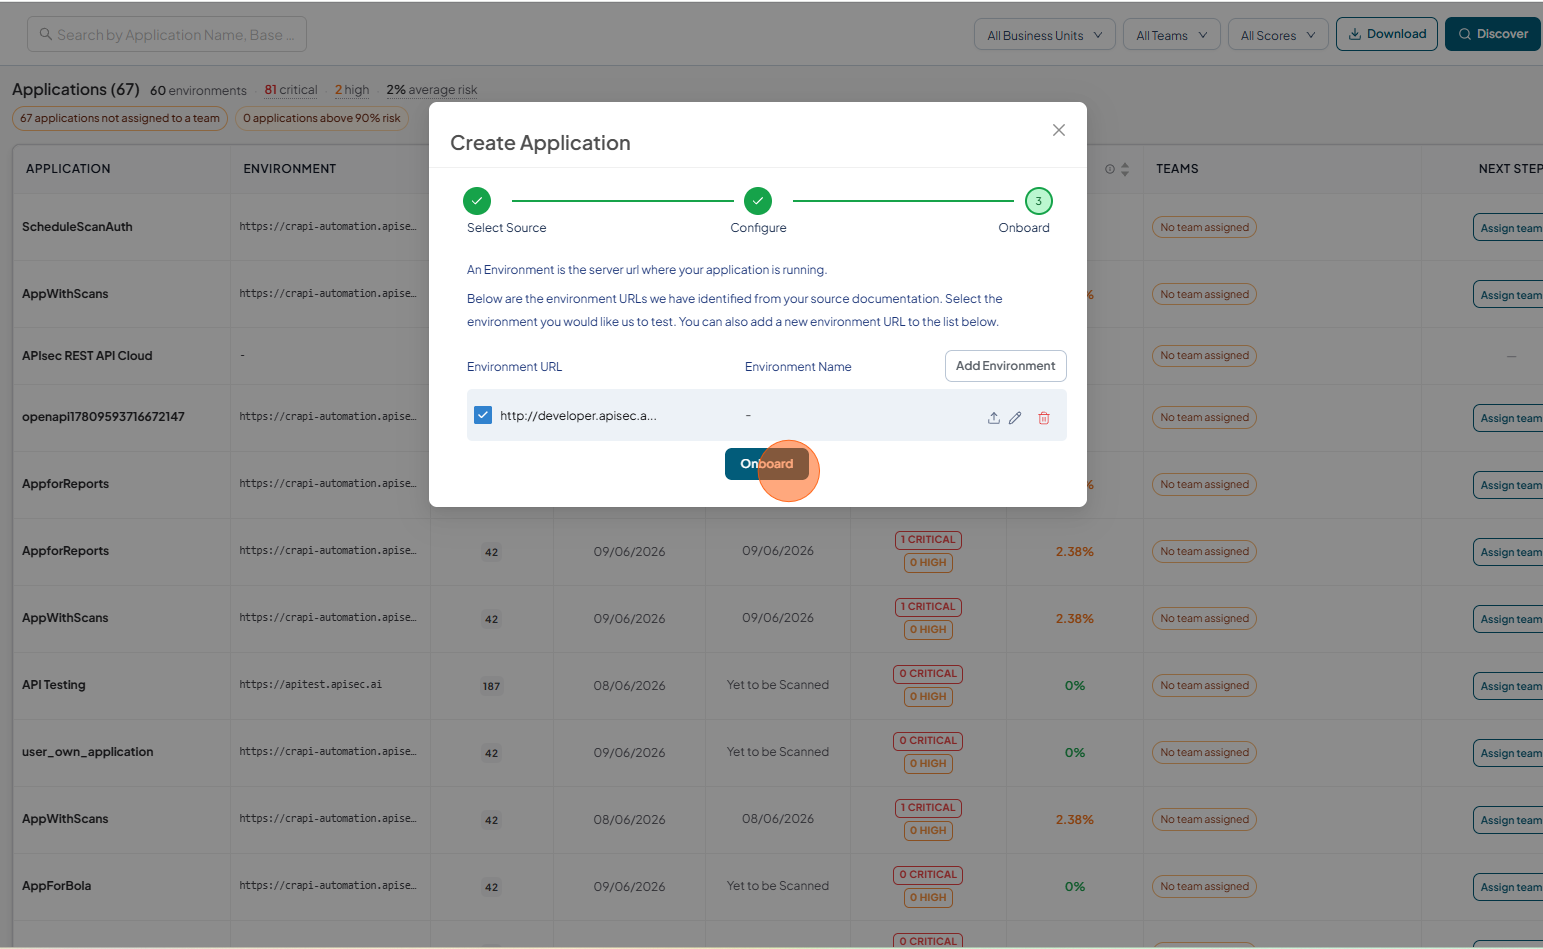
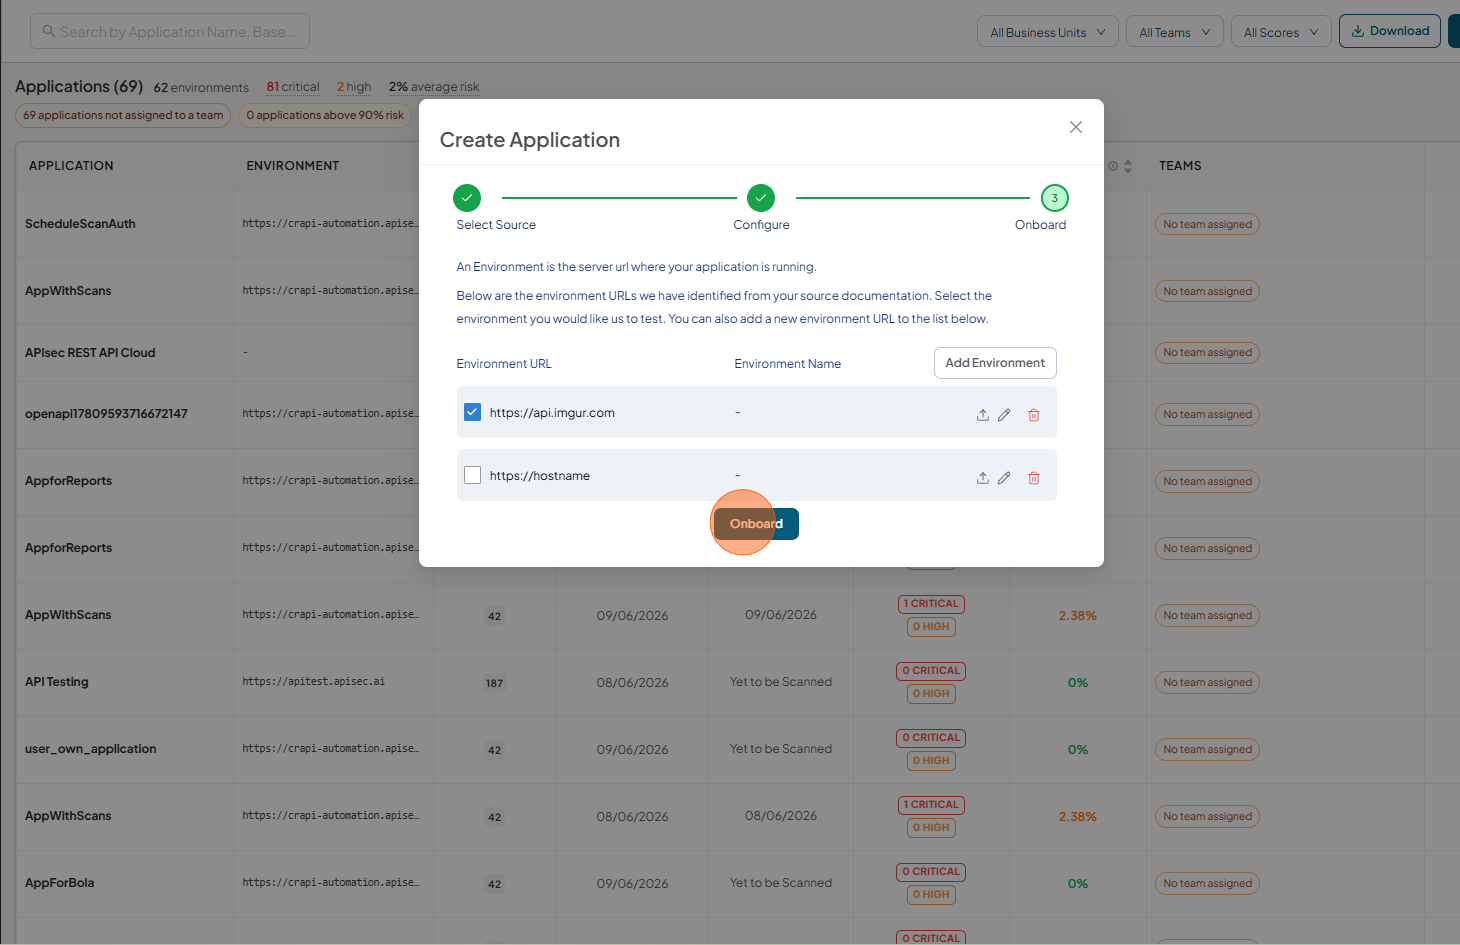
Add or update the required Environment URL
-
To upload a Postman Environment file for an environment, click the File Upload icon next to the corresponding Environment URL.

-
-
Click Onboard.
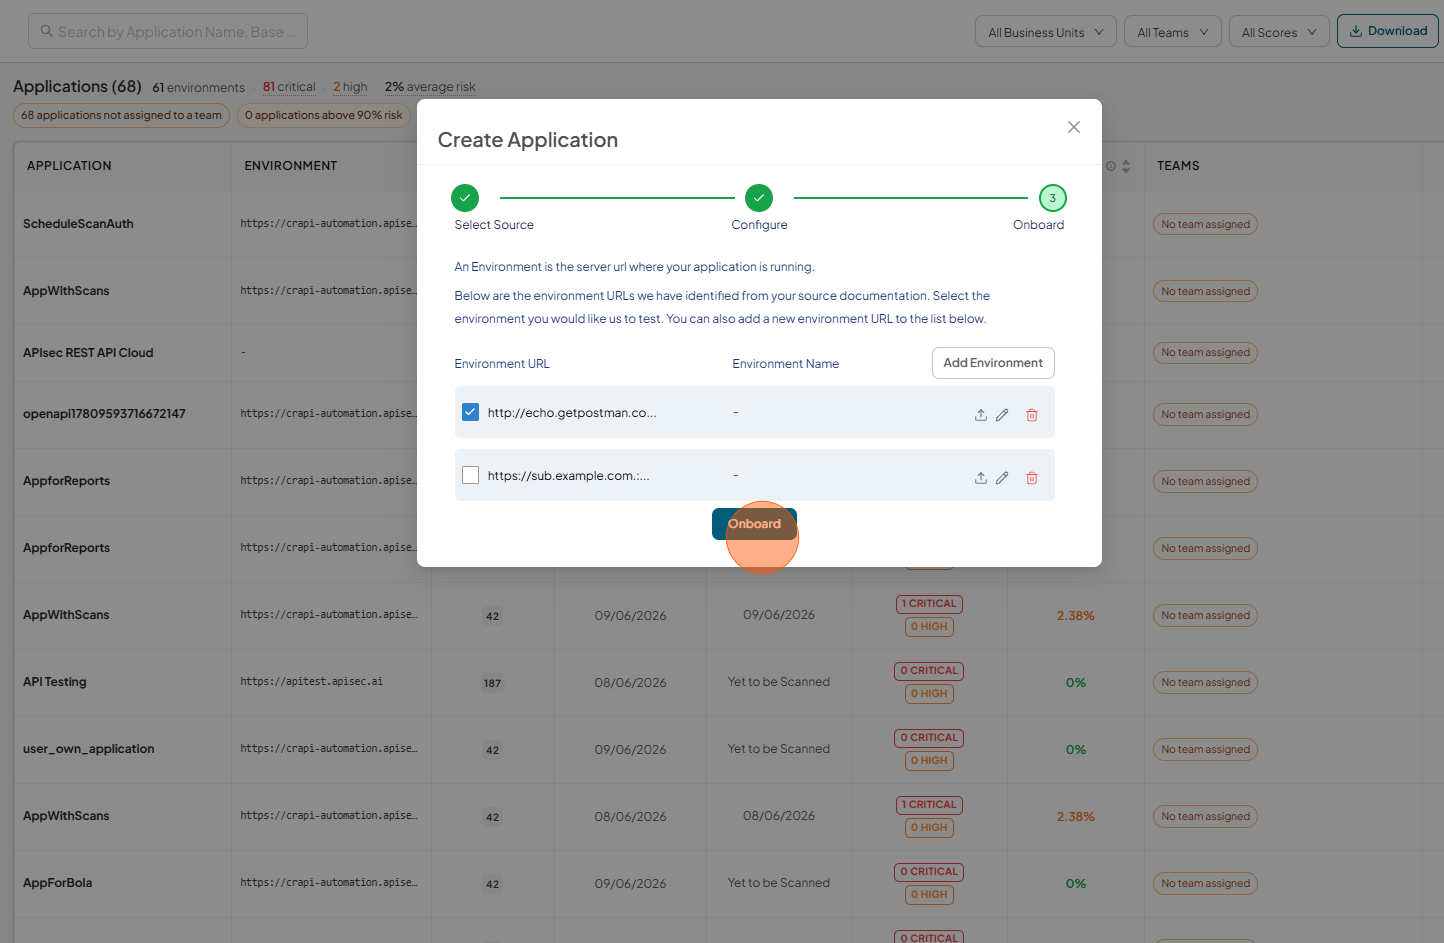
-
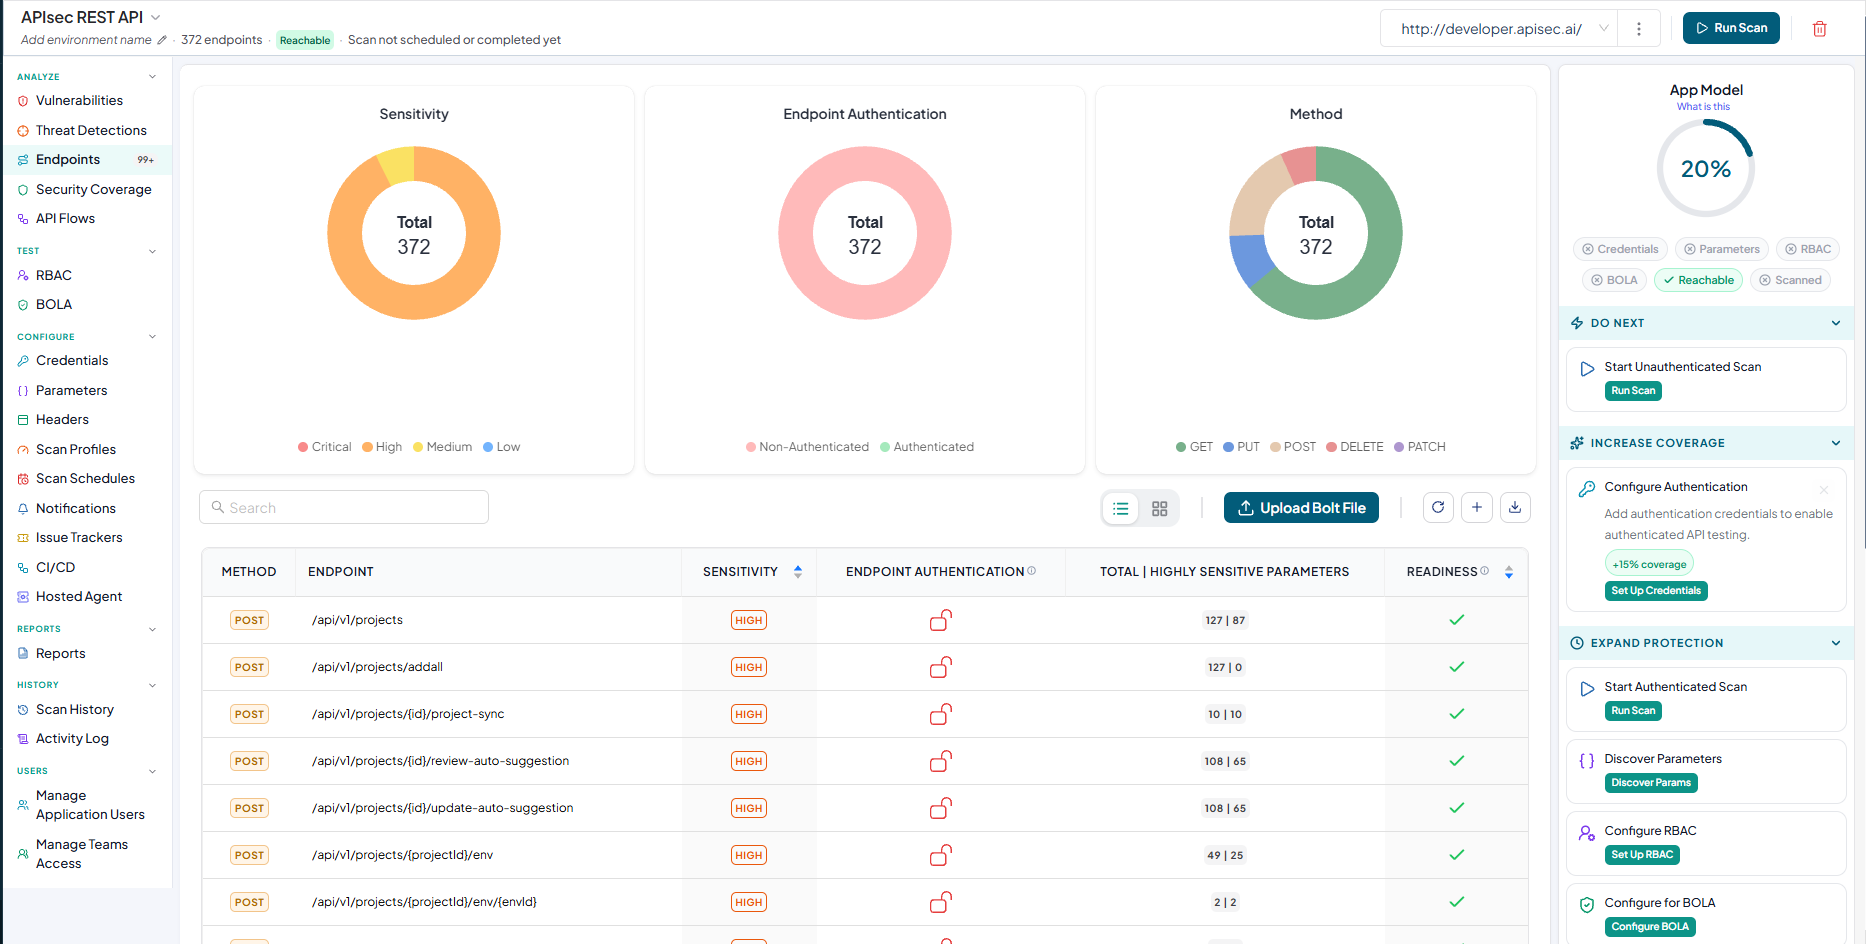
Application Dashboard
Application Onboarding Using a Postman Collection ID
-
Open your browser and visit: https://<your-tenant>.apisecapps.com
-
Click on the "Add Application" button.
-
Choose the Postman Gateway option.
-
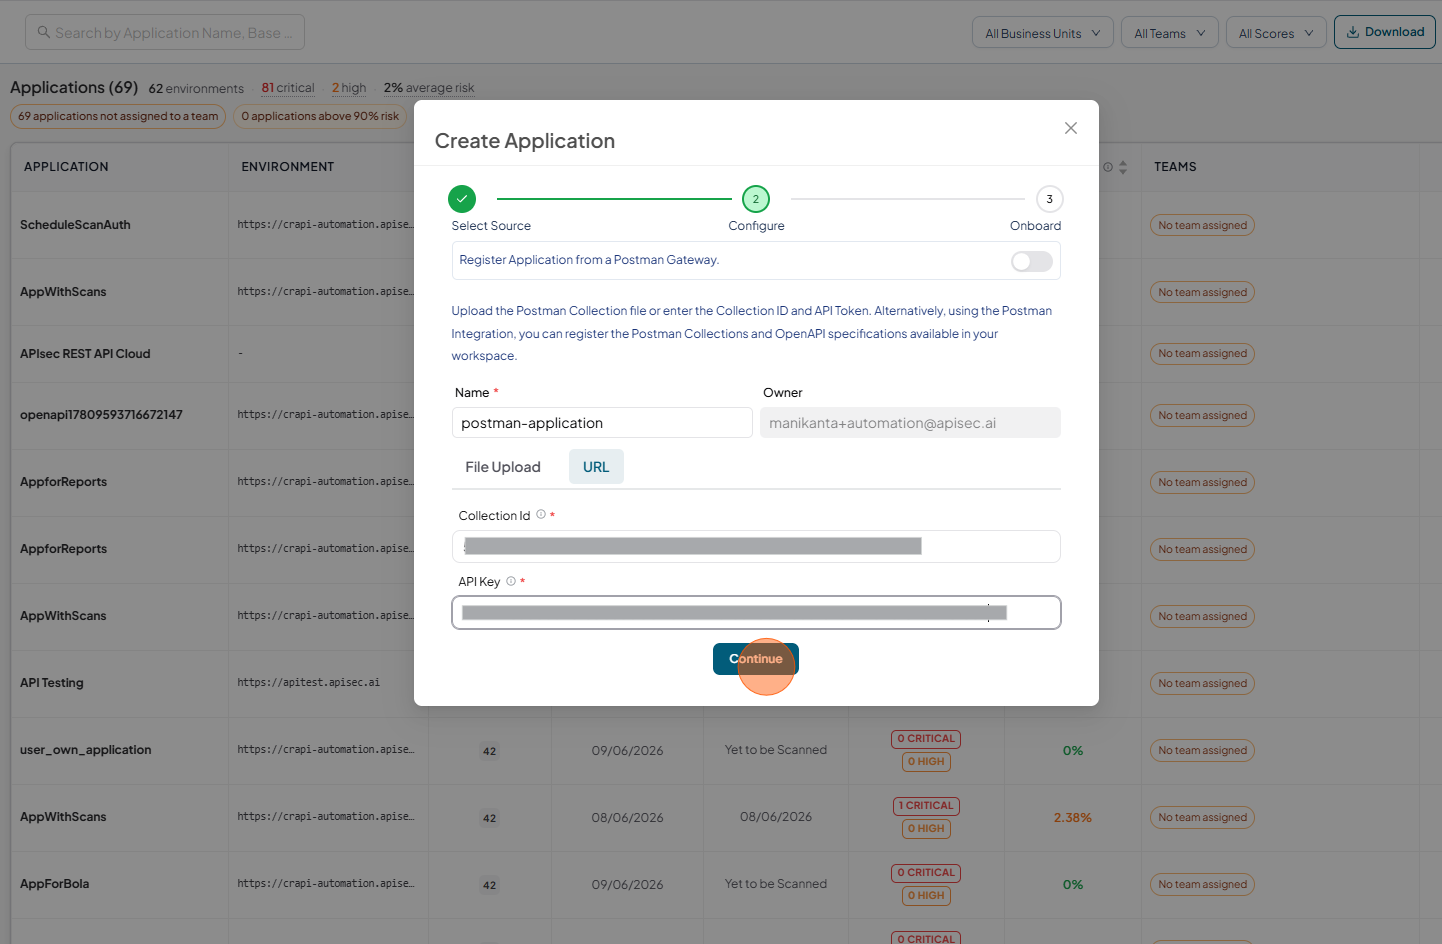
Click URL
-
Enter Name of Application, Collection Id and API Key and Click Continue
-
Add or update the required Environment URL and Click Onboard
-
Application Dashboard